eSIM

eSIM

Blog

Best eSIM for International Travel (20...

Best eSIM for International Travel (2025): Simology vs Airalo vs Holafly vs Nomad

30 Oct 2025

Best eSIM for International Travel (2025): Simology vs Airalo vs Holafly vs Nomad

Planning data for a multi-country trip shouldn’t be a gamble. The best eSIM for international travel in 2025 blends wide coverage, predictable pricing, and hassle-free switching when a local network gets congested or weak. That’s why our top criterion this year is multi‑network switching: the ability for your eSIM to use more than one carrier in the same country and automatically move to a stronger signal. It’s the biggest reliability upgrade for travellers since eSIMs arrived.

In this guide, we compare Simology, Airalo, Holafly, and Nomad against criteria that matter on the road: real-world coverage, speed access (4G/5G), hotspot support, regional roaming, plan flexibility, and support. We’ll flag where each provider fits best, give you practical checklists, and link straight to destination pages so you can price up your route in minutes. If you’re heading to Europe, North America, or a single country like the US, France, Italy or Spain, you’ll find specific plan pointers below and via our Destinations.

How we compared (criteria that matter in 2025)

  • Coverage redundancy: Does the eSIM use multiple local networks in-country and switch automatically?
  • Speed access: Consistent 4G/5G access; realistic speeds at peak times; fair use policies.
  • Plan design: Single-country vs regional/global; data allowances; durations; top-ups.
  • Tethering: Hotspot/hotspot limits; restrictions that can trip you up.
  • Transparency: Clear fair-use and throttling; no surprise overages.
  • App and support: Installation, diagnostics, 24/7 help, offline instructions.
  • Price per GB: Value relative to local prepaid and other eSIMs (not just headline “unlimited”).

Quick verdict

  • Simology: Best overall for reliability and multi-country trips thanks to multi‑network switching and strong regional bundles. Great balance of speed, flexibility, and support.
  • Airalo: Best for bargain hunters on single-country light/medium data, if you’re okay with typically using one local network per country.
  • Holafly: Best for simple “unlimited”-style plans if you accept fair‑use throttling and hotspot caveats; ideal for heavy daily social/maps use.
  • Nomad: Strong all-rounder with flexible plan sizes and a good app; coverage varies by destination, often single-network per country.

Jump to regions: Esim Western Europe | Esim North America | Esim United States | Esim France | Esim Italy | Esim Spain

Deep dive: Simology vs Airalo vs Holafly vs Nomad

Simology — multi‑network reliability and regional freedom

What stands out - Multi‑network switching in many countries: your eSIM connects to more than one local carrier and can move when signal or capacity drops. This is crucial in rural areas, basements, stadiums, and busy city centres. - 4G/5G where available, with clear fair‑use terms. Hotspot/tethering supported on most plans. - Regional passes that “just work” across borders (great for train trips and road trips). See Esim Western Europe and Esim North America. - Transparent pricing, easy top‑ups, and traveller‑friendly setup. Business features and consolidated billing via For Business.

Best for - Travellers prioritising reliability over shaving the last dollar off per‑GB. - Multi‑country itineraries where you want one eSIM to roam across borders without manual switching. - Remote workers who need dependable hotspotting and consistent speeds.

Considerations - Absolute rock-bottom pricing may exist on marketplace apps for light users. If you rarely leave a major city and don’t need redundancy, a cheaper single‑network plan might suffice.

Helpful links to price up trips: - United States: Esim United States - Europe: Esim Western Europe, or country‑specific pages like Esim France, Esim Italy, Esim Spain - North America multi‑country: Esim North America

Airalo — broad marketplace, budget-friendly basics

What stands out - Huge catalogue of country eSIMs with varying plan sizes and durations; competitive pricing for light/moderate use. - Simple top‑ups and installation flows in-app.

Best for - Single-country trips where you’ll stay mostly in cities and don’t need multi‑network redundancy. - Travellers who want the lowest entry price and are comfortable checking network notes for each country.

Considerations - In many destinations, plans connect to a single local network; if coverage dips, you can’t switch. Speeds and 5G access vary by plan and country. - Read tethering terms — most allow hotspot, but not all.

Holafly — unlimited-style convenience with trade-offs

What stands out - “Unlimited data” plans in many countries and regions; good for heavy daily users who value simplicity. - Straightforward installation and support.

Best for - Travellers who stream, map, and message heavily and prefer not to manage data balances.

Considerations - Unlimited typically involves fair‑use policies that may throttle speeds after sustained high usage; exact thresholds vary by destination. - Hotspot/tethering may be limited or not included on some unlimited plans — check destination specifics before relying on it. - Pricing is higher than metered alternatives for light users.

Nomad — flexible plans and a solid app

What stands out - Good mix of plan sizes and durations, with competitive pricing in several popular destinations. - Smooth app experience and straightforward top‑ups.

Best for - Travellers who want a balance between price and simplicity and are comfortable selecting by country.

Considerations - Coverage and speed depend on the underlying partner network(s); often single-network per country. Review destination notes for 5G and hotspot support.

Which plan should you pick? Real-world scenarios

  • One country, light data (maps, messages, rides)
  • Airalo or Nomad can be the cheapest route if you’re mostly urban and don’t need redundancy.
  • Prefer reliability across cities and countryside? Choose Simology’s single‑country options, e.g. Esim United States or Esim France, for multi‑network coverage where available.
  • Two to six countries in Europe (train trips, road trips)
  • Use a regional pass to avoid juggling eSIMs. Simology’s Esim Western Europe keeps service live as you cross borders, with multi‑network switching in many countries including Esim Italy and Esim Spain.
  • Heavy user who prefers “unlimited”? Holafly’s Europe options may fit, if you’re fine with fair‑use throttling and potential hotspot limits.
  • US/Canada/Mexico loop or North America business travel
  • Go regional. Simology’s Esim North America covers typical NA routes with multi‑network redundancy in key areas.
  • If visiting only one country and mainly urban, a low‑cost Airalo/Nomad plan may suffice for light users.
  • Remote work and tethering
  • Prioritise providers that allow hotspot and offer redundancy. Simology plans generally include tethering and multi‑network switching for steadier connections during calls and uploads.
  • Avoid “unlimited” plans where hotspot is restricted if you must tether.
  • Teams and frequent flyers
  • Centralise purchasing and support with Simology For Business and manage destinations across staff via the portal. If you run a travel brand or community, see our Partner Hub.

Setup checklist: get it right first time

Before you fly 1. Check device compatibility: your phone must be eSIM‑capable and network‑unlocked. 2. Pick the right scope: single-country vs regional. If crossing borders, a regional pass reduces admin. 3. Download the provider app on Wi‑Fi; have your QR or installation instructions offline (screenshots work). 4. Know the APN: most eSIMs auto‑configure; if not, note the APN from your plan page. 5. Decide your line settings: keep your physical SIM for calls/SMS if needed; set the eSIM for mobile data.

On arrival 1. Toggle on the eSIM line and enable Data Roaming for that line. 2. Set the eSIM as your Mobile Data line (and default for iMessage/FaceTime if desired). 3. Check you’re on 4G/5G. If speeds seem off, toggle airplane mode or manually reselect a network. 4. If prompted, add the APN and restart your device. 5. Test maps/web; then enable hotspot if you plan to tether.

Pro tips - Save your boarding pass and eSIM QR offline; airport Wi‑Fi can be patchy. - If you rely on ride‑hailing on arrival, pre-install and test your eSIM before take‑off. - In weak-signal areas, providers with multi‑network switching (e.g., Simology) reduce dead zones and congestion pain. - “Unlimited” isn’t infinite speed: fair‑use can slow you at peak times. If you must upload large files, schedule off‑peak or use Wi‑Fi.

Why multi‑network switching matters

  • Fewer dead spots: If Carrier A has a weak cell in a rural valley or crowded station, your eSIM can move to Carrier B.
  • Smoother 5G handoffs: Access to multiple 5G footprints increases the chance of staying on high‑speed data.
  • Real reliability for business use: Hotspotting on calls or pushing large files benefits from redundant routes.

Simology prioritises this capability in many destinations and regional bundles, which is why it leads our 2025 pick for the best eSIM for international travel.

FAQs

  • Which eSIM is best for multi‑country trips?
  • Simology’s regional passes like Esim Western Europe and Esim North America are designed for border‑hopping with multi‑network reliability. If you prefer “unlimited”, compare with Holafly but check hotspot and fair‑use details.
  • Is “unlimited data” truly unlimited?
  • Typically not. Most “unlimited” plans apply fair‑use policies that may throttle speeds after sustained heavy use. If you need consistently fast data, consider a high‑allowance metered plan instead of relying on “unlimited.”
  • Will I get 5G everywhere?
  • 5G availability depends on the local networks and the plan. Many destinations offer 5G in major cities, with 4G elsewhere. Simology exposes 5G where partners support it; check your specific country page via Destinations.
  • Can I use my phone as a hotspot?
  • Often yes, but not always. Simology plans generally support tethering. Some unlimited‑style plans (e.g., certain Holafly destinations) may restrict it. Check your plan’s terms before relying on hotspot for work.
  • Do I need to complete identity checks (eKYC)?
  • Some countries require ID for mobile service. Many tourist eSIMs avoid this, but regulations can change. If eKYC is required, your provider will prompt you in‑app with simple steps.
  • What if my phone is locked?
  • Network‑locked phones can’t use most travel eSIMs. Contact your carrier to unlock before you fly. You can still use Wi‑Fi only, but mobile data via eSIM requires an unlocked device.

The bottom line

If you want the best eSIM for international travel in 2025, prioritise multi‑network switching, regional coverage, clear hotspot rules, and transparent fair‑use. Simology leads on reliability and cross‑border simplicity, with straightforward options for single countries like the Esim United States and Europe staples (Esim France, Esim Italy, Esim Spain), plus regional passes across Esim Western Europe and Esim North America.

Next step: Compare plans and coverage for your route via our Destinations.

Read more blogs

Andes Highlights (3 Weeks): Peru–Bolivia–Chile–Argentina Connectivity

Andes Highlights (3 Weeks): Peru–Bolivia–Chile–Argentina Connectivity

Planning a south america itinerary 3 weeks through the high Andes? This route stitches together Peru’s Sacred Valley, Bolivia’s La Paz and Salar de Uyuni, Chile’s Atacama Desert, and northern Argentina’s quebradas or Mendoza wine country—often by long-distance bus and a couple of short flights. Connectivity is different at altitude: coverage is strong in cities but drops in high passes and salt flats; bus Wi‑Fi is patchy; border towns can be blackspots. The smart move is an eSIM with multi‑country coverage, backed by offline maps, offline translations, and a simple routine for crossing borders by bus without losing service. Below you’ll find a practical, connectivity-first itinerary; checklists to prep your phone, apps and documents; and on-the-ground tips for staying online where it matters: booking transport, hailing taxis, backing up photos, and navigating when the signal disappears.If you’re transiting via Europe or North America, you can also add a layover eSIM to stay connected door-to-door. Start with our country list on Destinations, then follow the steps, and you won’t waste time chasing SIM shops at 3,500 metres.The 3‑week Andes route at a glanceWeek 1: Peru (Cusco, Sacred Valley, Machu Picchu) - Fly into Cusco (or Lima then connect). - Base in Cusco; day trips to Pisac/Chinchero/Maras–Moray. - Train to Aguas Calientes; Machu Picchu visit; return to Cusco or continue to Puno/Lake Titicaca.Week 2: Bolivia and Chile (La Paz, Uyuni, San Pedro de Atacama) - Bus/collectivo via Copacabana to La Paz. - Fly or overnight bus to Uyuni. - 3‑day Uyuni–altiplano tour ending in San Pedro de Atacama (Chile).Week 3: Chile and Argentina (Atacama to Salta or Mendoza/Buenos Aires) - Choose: - North: San Pedro to Salta/Jujuy by bus; fly to Buenos Aires. - Or South: San Pedro–Calama flight to Santiago; bus or flight to Mendoza; onward to Buenos Aires.Connectivity notes (quick): - Cities: generally strong 4G/4G+; 5G in major hubs (Santiago, Buenos Aires). - Altitude/rural: expect long no‑signal stretches (Uyuni, altiplano passes, Paso Jama). - Bus Wi‑Fi: often advertised, rarely reliable. Plan to be offline onboard. - Border regions: networks switch; a multi‑country eSIM avoids sudden loss.eSIM vs local SIMs for a 4‑country tripFor a route with multiple borders and remote legs, eSIM wins on time and reliability.What a multi‑country eSIM gets you: - One plan across Peru, Bolivia, Chile, Argentina (check coverage per country on Destinations). - No passport/SIM registration queues at kiosks. - Keep your home number active on the physical SIM for calls/SMS codes. - Instant top‑ups if you burn data on photos or navigation.When a local SIM still helps: - Long stay in one country with heavy data use (e.g., a month in Buenos Aires). - Dead zones where a different local network performs better (rarely worth the hassle on a 3‑week pace).Practical approach: - Use an eSIM as your primary data line across all four countries. - If you find a specific local network far better in one region, add a cheap local SIM and keep the eSIM as backup.Device readiness checklist (before you fly)1) Check eSIM compatibility and SIM‑lock status on your phone.2) Buy and install your eSIM while on home Wi‑Fi. Keep a PDF/printed copy of the QR code.3) Label lines clearly (e.g., “eSIM Andes Data”, “Home SIM”).4) Turn on data roaming for the eSIM; leave roaming off for your home SIM to avoid charges.5) Set up dual‑SIM rules: data on eSIM; calls/SMS default to home SIM if needed.6) Download offline: Google Maps/Organic Maps for all target regions; language packs (Spanish at minimum); bus/air tickets; hotel confirmations.7) Cloud backups: set to upload on Wi‑Fi only; pre‑create shared albums for travel companions.8) Test tethering/hotspot with your laptop/tablet.If you’re transiting popular hubs, consider a short layover eSIM: - USA connections: add an Esim United States or a broader Esim North America.- Europe connections: Madrid/Barcelona? Use an Esim Spain. Paris or Rome? See Esim France and Esim Italy. Multi‑country layovers? Try Esim Western Europe.City‑by‑city connectivity notesCusco & the Sacred Valley (Peru)Coverage: Good in Cusco city; variable in high villages (Maras/Moray) and along Inca Trail approaches.Tips: Download Sacred Valley maps offline; pin viewpoints and ruins. most taxis use WhatsApp—save your accommodation’s number.Machu Picchu/Aguas Calientes: Patchy to none at the citadel. Upload your photos later; don’t rely on live ticket retrieval.Lake Titicaca: Puno and CopacabanaPuno: Reasonable 4G; bus terminals crowded—screenshot QR tickets.Crossing to Copacabana: Expect a signal drop around the border; have directions saved offline.La Paz (Bolivia)Good urban 4G; the cable car network has decent signal but tunnels do not.Yungas/“Death Road” tours: Mountain valleys cause dead zones—share your emergency contacts with the operator, carry a charged power bank, and don’t plan remote calls.Uyuni and the Altiplano (Bolivia to Chile)Uyuni town: OK 4G; ATMs finicky—use Wi‑Fi for banking apps.Salt flats/lagunas: Assume offline for most of the 3‑day tour. Guides often carry satellite phones; agree a pickup time/place in San Pedro and preload your map route.San Pedro de Atacama (Chile)Town: Solid 4G; accommodations often have Wi‑Fi but speeds vary.Geysers, Valle de la Luna: Offline navigation essential; sunrise trips start before mobile networks wake up in some areas.Salta/Jujuy or Mendoza/Buenos Aires (Argentina)Salta/Jujuy: Good city coverage; quebradas have long no‑signal sections.Mendoza: City 4G/5G; vineyards outside town can be patchy.Buenos Aires: Strong 4G/5G; ideal for cloud backups and large downloads before you fly home.Border crossings by bus: step‑by‑stepThe big ones on this route: Peru–Bolivia (Puno/Copacabana), Bolivia–Chile (Uyuni–San Pedro via Hito Cajón), Chile–Argentina (Paso Jama to Salta or Los Libertadores to Mendoza).How to keep service and sanity:1) The day before:- Top up your eSIM data.- Confirm your plan includes both countries you’re entering/leaving.- Download offline maps for both sides of the border and your town of arrival.- Save bus company WhatsApp and terminal address offline.2) On departure morning:- Keep a paper copy or offline PDF of tickets, insurance, and accommodation proof.- Charge phone and power bank; pack a short cable in your daypack.3) On the bus:- Don’t count on bus Wi‑Fi. Keep your eSIM as primary, but expect drops near mountain passes.- If your phone supports it, enable “Wi‑Fi calling” for later when you reach accommodation Wi‑Fi.4) At the border posts:- Data may be unavailable. Keep QR codes and booking numbers offline.- After exiting one country and entering the next, toggle Airplane Mode off/on to re‑register on the new network.- If the eSIM doesn’t attach, manually select a network in Mobile Settings.5) Arrival:- Send your accommodation a quick WhatsApp when you’re back online.- Recheck your eSIM’s data roaming is on; confirm you’re on an in‑country network, not a weak roaming partner.Pro tips: - Dual profiles: If your eSIM allows, keep a secondary profile for a different network in the same country—helpful in border towns.- Cash buffer: Some border terminals don’t accept cards; download a currency converter for offline use.Offline survival kit (5‑minute setup)Maps: Download regions for Cusco, Sacred Valley, Puno, La Paz, Uyuni, San Pedro, Salta/Jujuy or Mendoza, and Buenos Aires.Translations: Download Spanish for offline use; add phrasebook favourites (bus tickets, directions, dietary needs).Documents: Save PDFs of passports, tickets, hotel addresses; star them for quick access.Rides: Screenshots of pickup points; pin bus terminals and hotel doors.Entertainment: Podcasts and playlists for long bus legs, set to download on Wi‑Fi only.Altitude and your tech: what changesCoverage gaps lengthen: Fewer towers at high altitude; valleys can block signal. Assume offline on remote excursions.Batteries drain faster in cold: Keep your phone warm and carry a power bank (10,000–20,000 mAh).Hotel Wi‑Fi may be congested: Schedule big uploads (photo backups, app updates) for big-city stays like Santiago or Buenos Aires.GPS still works offline: Your blue dot shows on offline maps without data—preload everything.Data budgeting for 3 weeksTypical traveller usage across this route: - Messaging/Maps/Bookings: 0.2–0.5 GB/day- Social and photo sharing: 0.3–0.7 GB/day- Occasional video calls/streaming: 0.5–1.0 GB/dayFor a mixed-use trip, plan 15–25 GB for 3 weeks. Heavy creators should double it and upload over hotel Wi‑Fi when possible. If you work remotely, consider a higher‑capacity plan and a backup eSIM; see our guidance on For Business.Practical route with transport and connectivity cuesDays 1–4 Cusco base: Strong city signal; day trips may be spotty—go offline-ready.Days 5–6 Machu Picchu: Expect no service at the ruins; sync tickets ahead.Days 7–8 Puno to La Paz via Copacabana: Border signal drop; re‑register networks after crossing.Days 9–11 Uyuni tour to San Pedro: Treat as offline; charge nightly; carry spare cables.Days 12–14 San Pedro: Stable in town; tours offline; top up data before Paso Jama.Days 15–17 Salta/Jujuy or Mendoza: Good urban 4G; rural patches are offline.Days 18–21 Buenos Aires: Strongest connectivity of the trip; clear your uploads and map downloads for the flight home.Partnering and stopover extrasHospitality and tour operators in the Andes: help your guests stay connected—explore co‑branded solutions via our Partner Hub.Transatlantic flyers: test your eSIM setup on a layover with an Esim United States or Esim Western Europe before hitting high-altitude blackspots.FAQs1) Do I need a local SIM in each country?No. A multi‑country eSIM covering Peru, Bolivia, Chile and Argentina is simpler and works well for a 3‑week pace. Consider a local SIM only if you’ll spend longer in one country and want the absolute best regional coverage.2) Will my WhatsApp number change with an eSIM?No. WhatsApp is tied to your registered number, not your data line. Keep your home SIM active for voice/SMS (roaming off if you wish), and use the eSIM for data—WhatsApp continues as normal.3) Can I hotspot to my laptop or camera?Yes. Enable tethering on your eSIM. Mind your data: cloud backups and OS updates can burn gigabytes—set them to Wi‑Fi only or schedule in big cities.4) What if there’s no signal on the Uyuni/Atacama legs?That’s expected. GPS still works offline. Pre-download maps and translations, carry a power bank, and sync plans with your tour operator before departure.5) Will I get roaming charges at borders?If you’re using a multi‑country eSIM with coverage in both countries, you won’t incur extra roaming fees from your home carrier. Keep roaming off on your home SIM to avoid accidental use.6) I’m connecting via Europe or the US—worth getting a layover eSIM?Yes. It’s an easy way to test your setup and stay reachable. Try Esim North America or country options like Esim Spain, Esim France, or Esim Italy for common hubs.Next step: Browse South America coverage options and build your plan on Destinations.

Dual SIM on iPhone with eSIM: Default Line, Data, iMessage/FaceTime

Dual SIM on iPhone with eSIM: Default Line, Data, iMessage/FaceTime

Travel is smoother when your iPhone uses a local data plan while your home number stays reachable. That’s exactly what Dual SIM with eSIM enables. In this guide we’ll show you, step by step, how to add and label lines, choose your default for calls and SMS, set the correct data line, and decide which number powers iMessage and FaceTime. We’ll also cover roaming-safe presets so you land, switch on, and avoid bill shock. Whether you’re heading to the US, Europe or further afield, a few minutes of set-up makes the difference between seamless connectivity and expensive mistakes. If you need an eSIM first, browse country and regional plans on our Destinations page, including regional bundles like Esim Western Europe and Esim North America, or country options such as Esim United States, Esim France, Esim Italy, and Esim Spain.What “Dual SIM with eSIM” means on iPhoneYou can have two mobile plans on one iPhone: typically your physical SIM (home number) plus an eSIM (travel data), or two eSIMs on newer models.You choose which line handles voice and SMS by default.You pick a single data line at any time, with optional “Allow Mobile Data Switching” to keep data alive for calls on the other line.iMessage and FaceTime can be tied to either number (or your Apple ID), and you can switch per-contact when needed.This guide focuses on practical, traveller-first settings to keep your home number reachable while your travel eSIM handles data securely and affordably.Check your iPhone supports Dual SIM with eSIMMost recent iPhones support Dual SIM. Quick checkpoints:iPhone XS/XR and later: Dual SIM (one physical SIM + one eSIM).iPhone 13 and later: can support two active eSIMs simultaneously (no physical card required).US-model iPhone 14 and newer: eSIM-only (no physical SIM slot).To confirm on your device: 1. Go to Settings > General > About. 2. Look for “Digital SIM” or “eSIM” entries. If you see IMEI entries for two eSIMs, your phone supports dual eSIM. 3. Ensure you’re on the latest iOS for best Dual SIM features.Step 1: Add your travel eSIM and label your linesBefore you fly, install and label your eSIM so switching is painless on arrival.Purchase the right plan for your trip: - North America: Esim North America - United States: Esim United States - Western Europe: Esim Western Europe - Popular countries: Esim France, Esim Italy, Esim Spain - Explore all options: DestinationsInstall the eSIM: - Settings > Mobile Data (Cellular) > Add eSIM. Follow the on‑screen steps to scan your QR code or use the activation code. - If offered, “Convert to eSIM” can move your physical SIM to eSIM on supported devices.Label each line clearly: - iOS prompts you to label the plans. Choose intuitive labels like “Home” and “Travel”. - You can rename later: Settings > Mobile Data > tap a plan > Label.Pro tips: - Label accuracy is crucial; it’s how you’ll pick the right line in call/message screens. - Install eSIM while you still have good Wi‑Fi and time to test.Step 2: Choose your default line for calls and SMSThis controls which number your iPhone uses when you tap a number or send an SMS from scratch.Go to Settings > Mobile Data > Default Voice Line.Pick “Home” (your primary) if you want all ordinary calls/SMS to continue from your usual number.If you prefer to make outbound calls from your travel number (e.g., local business calls abroad), choose “Travel”.Per-contact preference: - Open the Contacts app > select a contact > tap “Preferred Line” (or “Preferred Cellular Plan”) > choose Home or Travel. - iPhone learns your behaviour and can automatically use the last line you used for that contact.Pro tip: - Keep Default Voice Line = Home, then set exceptions (like hotels/restaurants) to Travel so you appear local.Step 3: Set your mobile data line and RoamingThis is the big one for bill safety: make the eSIM your data source and block roaming on your home line.Settings > Mobile Data > Mobile Data > select “Travel”.Tap your Home line > toggle Data Roaming OFF.Tap your Travel line > toggle Data Roaming ON (if you’re abroad) so data works when you land.Optional: under Mobile Data, enable “Allow Mobile Data Switching”. This lets iPhone temporarily use the data line for ongoing voice calls on the other line. If you want strict control (no surprises), keep this OFF.When to disable your Home line entirely: - If your carrier charges for incoming roaming calls, you may prefer to disable the Home line: Settings > Mobile Data > tap Home > Turn On This Line = OFF. - If you still need OTP texts or critical calls, leave the Home line ON but keep Data Roaming OFF (you can still receive SMS over the cellular network; check your carrier’s policies for any charges).Pro tips: - Test data before you fly: switch Mobile Data to Travel, toggle Data Roaming ON, then back to Home until you depart. - If your Travel plan includes Wi‑Fi calling, consider making calls over apps (WhatsApp, FaceTime, Teams) to avoid local call charges.Step 4: Set iMessage and FaceTime to the right numberYou can attach iMessage/FaceTime to your travel number or keep them linked to your home number while using the travel eSIM for data.iMessage: 1. Settings > Messages > iMessage = ON. 2. Tap Send & Receive. 3. Tick the phone numbers and/or Apple ID you want active. 4. Under “Start New Conversations From”, choose the number you want by default (Home or Travel).FaceTime: 1. Settings > FaceTime > FaceTime = ON. 2. Tick the addresses/numbers to receive calls at. 3. Set “Caller ID” (or similar option) to the number you want people to see when you call.Switch the line per conversation: - In Messages, open a conversation > tap the contact name/photo at the top > change the line if the option appears (or start a new message and tap the line label above the keyboard to choose Home/Travel before sending).Pro tips: - For continuity with family and friends, keep iMessage/FaceTime on your Home number and use the Travel number only for local contacts. - If verification codes arrive via iMessage instead of SMS, they’ll still work over your Travel data because iMessage uses the internet.Traveller presets: fast, safe switchingiOS doesn’t have one‑tap “profiles”, but you can mimic them with a simple routine.Before you fly (10‑minute checklist): - Install and label your eSIM: “Travel”. - Settings > Mobile Data: - Mobile Data = Home (for now). - Home line > Data Roaming = OFF. - Travel line > Data Roaming = ON. - Messages > Send & Receive: - Choose “Start New Conversations From” = Home (or Travel if you want a local sender ID). - FaceTime > Caller ID = preferred number. - Save a few key contacts with Preferred Line = Travel (hotel, taxi, local colleagues).On the plane/at the gate: - Settings > Mobile Data > Mobile Data = Travel. - Optional: Allow Mobile Data Switching = OFF for strict control.On arrival: - Toggle Airplane Mode OFF; wait 1–2 minutes for the Travel eSIM to register. - Confirm data works (open a lightweight website). - Make a quick test call/iMessage.During your stay: - Keep Home line ON with Data Roaming OFF to receive SMS when needed. - For local calls, set Preferred Line = Travel per contact or temporarily switch the Default Voice Line.Heading home: - Switch Mobile Data back to Home. - Turn off the Travel line if you won’t use it until your next trip, or leave it installed for future travel.Troubleshooting: quick fixes that workNo data on the Travel eSIM: - Check Settings > Mobile Data > Mobile Data = Travel. - Settings > Mobile Data > tap Travel > Data Roaming = ON. - Restart iPhone; toggle Airplane Mode for 10 seconds. - Settings > General > About: if prompted for a Carrier Settings Update, accept. - If your plan requires a specific APN, it should auto‑configure with eSIM; if not provided, contact support.Calls/SMS using the wrong number: - Settings > Mobile Data > Default Voice Line = intended line. - For specific contacts, set Preferred Line. - In the Messages conversation, change the line before sending.iMessage/FaceTime not activating: - Ensure you have data on the active line and can receive SMS on at least one line. - Toggle iMessage/FaceTime OFF and back ON. - Sign out/in of Apple ID in Messages/FaceTime settings as a last resort.Can’t see “Allow Mobile Data Switching”: - It shows only when both lines are active and one is selected for Mobile Data.Missing the option to assign “Preferred Line”: - Make sure both lines are turned ON (Settings > Mobile Data > tap each plan).Picking the right eSIM for your routeSingle country city-breaks: choose country plans such as Esim United States, Esim France, Esim Italy or Esim Spain.Multi-country tours: regional passes like Esim Western Europe reduce border friction, while Esim North America suits US/Canada/Mexico hops.Unsure? Start at Destinations to filter by region, data size and duration.For teams and frequent travellers: - Centralise budgets and provisioning via For Business. - Travel agencies, IT resellers and affiliates can explore our partner tools at the Partner Hub.Pro tips for power usersDual SIM iPhone eSIM pairing: on iPhone 13 and newer, you can keep two eSIMs active—useful if your “home” number is also an eSIM.Visual labelling: add emojis to line labels (e.g., “Home 🏠”, “Travel ✈️”) to avoid mistakes when switching lines in Messages or Phone.Battery and coverage: if coverage is weak on one line, disabling that line can improve standby time.Maps and ride‑hailing: test these apps on the Travel data line before leaving the airport to confirm routing and SMS verification work.Keep it simple: Default Voice Line = Home, Mobile Data = Travel is the safest starting point for most travellers.FAQ1) Can I keep my home SIM for calls/SMS but use the eSIM for data? - Yes. Set Default Voice Line = Home. Set Mobile Data = Travel. Turn Data Roaming OFF on Home. You can still receive SMS on Home while using data on Travel.2) Will I get roaming charges on my home line if it’s on? - Data roaming is prevented if you turn Data Roaming OFF on the Home line. Voice/SMS charges depend on your carrier and whether you answer/receive calls or send texts while abroad. For maximum control, you can turn the Home line OFF entirely.3) Can iMessage/FaceTime use my home number while data comes from the Travel eSIM? - Yes. iMessage/FaceTime work over the active data connection, regardless of which number you choose in Send & Receive/Caller ID. Pick “Start New Conversations From” = Home to keep continuity.4) How do I switch the sending line in a specific message thread? - Open the conversation, tap the header (contact name/photo), and choose the line, or start a new message, then tap the line label above the keyboard to switch before sending.5) Why don’t I see both lines at once? - Ensure your iPhone supports Dual SIM and both lines are turned ON: Settings > Mobile Data > tap each plan > Turn On This Line. Older models may support only one eSIM plus one physical SIM, while newer models support two eSIMs.6) Can I keep two eSIMs active, no physical SIM? - On iPhone 13 and newer, yes—two active eSIMs are supported. US-model iPhone 14+ are eSIM-only devices and handle multiple eSIMs easily.Next step: Choose the right travel plan for your route on Destinations, then follow the steps above to set Mobile Data = Travel and Default Voice Line = Home before you fly.

AirDrop & Nearby Share Safety: Prevent Drive‑By Transfers

AirDrop & Nearby Share Safety: Prevent Drive‑By Transfers

Stuck in a crowded airport, train carriage or festival queue with Bluetooth on? That’s exactly when “drive‑by” file shares happen: strangers pushing images, contact cards or links to any nearby device that’s accepting transfers. This guide gives you practical, traveller‑first settings to block nuisance and risky shares on iPhone, iPad, Mac, Android (Quick Share/Nearby Share), Windows and Chromebooks. You’ll learn how to limit discoverability, require approval, use school/work modes, and practise sensible Bluetooth hygiene in crowds. Keep your device quiet, your name private, and your day disruption‑free.Whether you’re city‑hopping across Esim Western Europe, heading to the US on Esim North America or planning a single‑country stay with Esim United States, Esim France, Esim Italy or Esim Spain, set these protections before you reach the crowd. It takes under two minutes and prevents nasty surprises, from obscene images to phishing links disguised as “helpful” travel info.What’s the risk with “drive‑by” sharing?Nuisance or harassment: Unsolicited photos or videos—often explicit—pushed to anyone discoverable.Social engineering: Link or contact cards that mimic transport alerts or venue info.Privacy leakage: Your full name and device name can appear to everyone nearby.Corporate exposure: Travellers on work devices may breach policy if they accept unknown files.Distraction risk: Prompts popping up as you navigate boarding gates or ride‑share pickups.The fix isn’t to switch everything off forever. It’s to keep your device non‑discoverable by default, require approvals, and temporarily enable “Everyone” only when you actively share—with a strict timeout.Core principles for airdrop safety travelStay non‑discoverable by default: “Receiving Off” (Apple) or “No one/Hidden” (Android/Windows/ChromeOS).Use Contacts Only or Your devices when you must be visible; avoid “Everyone” unless absolutely necessary.Require approvals for all shares except your own devices.Keep your device identity generic (name and profile photo).Practise Bluetooth/Wi‑Fi hygiene in crowds; disable passive scanning where possible.For kids and corporate travellers, use system restrictions or management profiles.How to lock down AirDrop on iPhone and iPad (iOS 16+)AirDrop is safe when tightly scoped. Set it once, and use the “Everyone for 10 Minutes” option only when you’re actively sharing.Step‑by‑step: Set AirDrop to Contacts Only or Receiving OffOpen Control Centre (swipe down from the top‑right).Press and hold the network tile (with Wi‑Fi/Bluetooth).Tap AirDrop.Choose: - Receiving Off (most private), or - Contacts Only (balanced default). - Only choose Everyone for 10 Minutes when sending to a non‑contact in front of you.Pro tip: After any “Everyone for 10 Minutes” session, AirDrop auto‑reverts. Still, check it reset before entering a crowd.Disable “Bringing Devices Together” (NameDrop)This proximity feature makes sharing easier—but can invite bumps in crowded queues.Go to Settings > General > AirDrop.Toggle off Bringing Devices Together.Make your device name genericYour name is often visible when others look for devices.Settings > General > About > Name.Use something nondescript, e.g., “iPhone‑12” instead of your full name.Restrict AirDrop for kids or loaner devicesSettings > Screen Time.Content & Privacy Restrictions > Allowed Apps > toggle off AirDrop.This blocks AirDrop system‑wide until you re‑enable it. Great for school trips.How to harden AirDrop on Mac (macOS)When you travel with a Mac, keep it non‑discoverable unless actively sharing.Open Finder > AirDrop (left sidebar).At the bottom, set “Allow me to be discovered by” to: - No One (most private), or - Contacts Only (balanced).Disable Bluetooth from the menu bar if you don’t need it.Pro tip: Shares to yourself (same Apple ID) auto‑accept—safe and silent. Avoid “Everyone” in public places.Android: Secure Nearby Share/Quick ShareGoogle and Samsung unified sharing under “Quick Share” (formerly “Nearby Share”). Settings vary slightly by device, but the principles are the same.Step‑by‑step: Limit visibility and approvalsOn most Android devices (Pixel/OnePlus and many others): 1. Settings > Google > Devices & sharing > Quick Share. 2. Set Device visibility to: - No one (Hidden) by default, or - Contacts (safer than Everyone), or - Your devices (for seamless self‑sharing). 3. Ensure “Allow your devices to share without approval” is enabled only for your own devices. Require approval from everyone else.On Samsung: 1. Settings > Connected devices > Quick Share (or directly in Quick Share app). 2. Who can share with you: Contacts only or No one. 3. Turn off “Show my phone to others” unless you’re actively sharing.Quick toggle: - Pull down Quick Settings > long‑press Quick Share > adjust visibility. - If you must use “Everyone”, set it and immediately long‑press again to confirm it will time out (typically 10 minutes).Make your device identity boringSettings > About phone > Device name: Use “Pixel‑7” or similar.Google Account profile picture/name can appear to contacts—choose neutral options while travelling, if you like.Work profile (Android Enterprise)If your phone has a Work profile, your IT admin can disable Quick Share in the work context. Keep personal sharing off in crowds, and use your corporate channel (email/Teams/Drive) for work files. Business travellers can learn more on For Business and share this with IT via our Partner Hub.Windows and Chromebooks: Nearby sharing/Quick Share basicsWindows 10/11: Nearby sharingSettings > System > Nearby sharing.Set to Off or My devices only.Choose your save location (e.g., Downloads) and avoid auto‑opening received files.Pro tip: Rename your PC to something generic (Settings > System > About > Rename this PC).ChromeOS: Quick ShareSettings > Connected devices > Quick Share.Device visibility: No one or Contacts only.Disable “Open received files automatically” if available.Bluetooth and Wi‑Fi hygiene in crowdsMost local sharing relies on Bluetooth and Wi‑Fi for discovery. Tidy these up before stepping into a crowd.Turn off Bluetooth if you don’t need headphones or a watch right then.If you must keep Bluetooth on, keep AirDrop/Quick Share non‑discoverable.On Android: Settings > Location > Location services > disable Wi‑Fi scanning and Bluetooth scanning to reduce passive discovery beacons.Avoid public Wi‑Fi at pinch points (stations, stadium gates). Use mobile data instead—an eSIM like Esim Western Europe or Esim North America keeps you connected without exposure to crowded hotspots.Pro tip: If you must join venue Wi‑Fi, use a separate email for sign‑ups and avoid installing “Wi‑Fi helper” apps.Quick checklists for busy travellers30‑second pre‑crowd check (iPhone/iPad/Mac)AirDrop: Contacts Only or Receiving Off.NameDrop/Bringing Devices Together: Off.Device name: Generic.Bluetooth: Off if not needed; otherwise keep AirDrop restricted.Mac: Finder > AirDrop > No One or Contacts Only.30‑second pre‑crowd check (Android/Windows/ChromeOS)Quick Share/Nearby Share: No one/Hidden (or Contacts only).Require approval from everyone except your own devices.Device name: Generic.Bluetooth scanning and Wi‑Fi scanning: Off on Android.Windows Nearby sharing: Off or My devices only.When you actually need to share with a strangerMove a few steps aside from the crowd.Enable “Everyone for 10 minutes” (iOS) or “Everyone” with a timeout (Android/ChromeOS).Confirm the recipient’s device name and photo in person.Send the file and immediately reset visibility to Contacts Only/No one.Families, schools and business tripsFamilies: Use Screen Time to disable AirDrop on kids’ iPhones/iPads during trips. Teach “never accept from strangers” and how to set Receiving Off.Schools: Managed devices can block AirDrop/Quick Share during school events and trips. Share these settings with your IT lead.Businesses: Enforce Contacts Only or disable local sharing on managed devices for travellers. Build a standard “pre‑travel device checklist” and distribute it through your MDM. See For Business and our Partner Hub for deployment guidance.Practical traveller tips that stickKeep shares to known contacts. If someone nearby asks you to accept “their boarding pass” or “ride receipt”, decline and ask them to show it on their screen.Don’t tap unknown links from local shares; navigate to the airline, rail, or venue site/app yourself.Clear your Downloads/Files after trips; remove anything you don’t recognise.Use mobile data where possible. Regional passes like Esim Western Europe or single‑country options such as Esim France, Esim Italy, Esim Spain and Esim United States keep you online without risky public Wi‑Fi.FAQIs AirDrop safe to leave on while travelling?Yes, if set to Contacts Only or Receiving Off. Avoid “Everyone” except during a deliberate, brief share.What’s the Android equivalent of AirDrop?Quick Share (formerly Nearby Share). Set visibility to No one/Contacts, require approvals, and only use “Everyone” briefly.Can I stop my name appearing to strangers?Yes. Change your device name to something generic. On iPhone, Settings > General > About > Name; on Android, Settings > About phone > Device name; on Windows, rename your PC. Also disable photo/profile sharing where offered.How do I stop kids receiving random photos?On iOS: Screen Time > Content & Privacy > Allowed Apps > disable AirDrop. On Android: set Quick Share to No one and lock Settings behind a parental control app or Family Link.Does turning off Bluetooth stop all drive‑bys?It prevents discovery but may disrupt your watch/headphones and in some cases car keys. If you must keep Bluetooth on, set sharing visibility to Hidden/Contacts only.Will eSIM help with sharing safety?Indirectly. An eSIM keeps you on mobile data so you can avoid crowded public Wi‑Fi, reducing other exposure risks while travelling. Explore coverage by country and region via Destinations and options like Esim North America.Next stepPlan your route and set up your device before you go. Explore local coverage and pick the right travel eSIM on Destinations, then run the 30‑second safety checks above before you enter a crowd.

Blog

eSIM vs Physical SIM vs Roaming: Which...

eSIM vs Physical SIM vs Roaming: Which Is Best in 2025?

29 Oct 2025

eSIM vs Physical SIM vs Roaming: Which Is Best in 2025?

Choosing how to stay connected abroad used to be simple: buy a local SIM, or let your network roam and hope for the best. In 2025, eSIM has changed the game. You can install a mobile data plan digitally in minutes, keep your home number active for calls, and avoid hunting for shops at the airport. But physical SIMs still have their place, and roaming can be convenient for short trips. The right choice depends on your itinerary, your device, and how much data you actually use.

This guide compares eSIM vs physical SIM vs roaming side‑by‑side on cost, coverage and convenience, with practical examples and a clear setup checklist. If you’re heading to Europe, North America or beyond, Simology’s regional plans mean one purchase can cover multiple countries. Check the latest options per country on Destinations, or jump straight to regional picks like Esim Western Europe and Esim North America. Let’s get you connected—without surprises on your bill.

Quick verdict: when to choose what

  • Choose eSIM if you want the best balance of cost and convenience, or need coverage across multiple countries without swapping SIMs.
  • Choose a physical SIM if your phone doesn’t support eSIM, or you’ll stay in one country for weeks and can visit a local carrier shop.
  • Choose roaming only for very short trips or when you must keep your home plan’s inclusive calls/texts and don’t mind the cost.

Side‑by‑side comparison: cost, coverage, convenience

Factor

eSIM

Physical SIM

Roaming (home network)

Typical cost

Often £2–£5 per GB, or £10–£25 for bundles; multi‑country packs available

Similar local rates once purchased, but time cost to find/buy

Day passes £5–£12/day; pay‑per‑MB can be costly; bill shock risk

Coverage

Choose per country or region (e.g., Esim Western Europe, Esim North America)

Strong in one country; no multi-country

Depends on your network’s partners; may exclude some areas

Convenience

Install via QR/app in minutes; keep home SIM active (dual‑SIM)

Requires store visit and SIM swap; need ID in some countries

No setup if enabled; may require opt‑in and plan check

Speed

4G/5G where supported by local networks

4G/5G on local networks

4G/5G possible but sometimes throttled

Number

Data‑only (keep your home number for calls/OTP via home SIM)

Usually includes a local number

Keep your home number for everything

Flexibility

Activate before or on arrival; top up remotely

Harder to manage or top up without local app/card

Simple for short trips; expensive for heavy data use

Explore country pages like Esim United States, Esim France, Esim Italy and Esim Spain to see current bundles and networks.

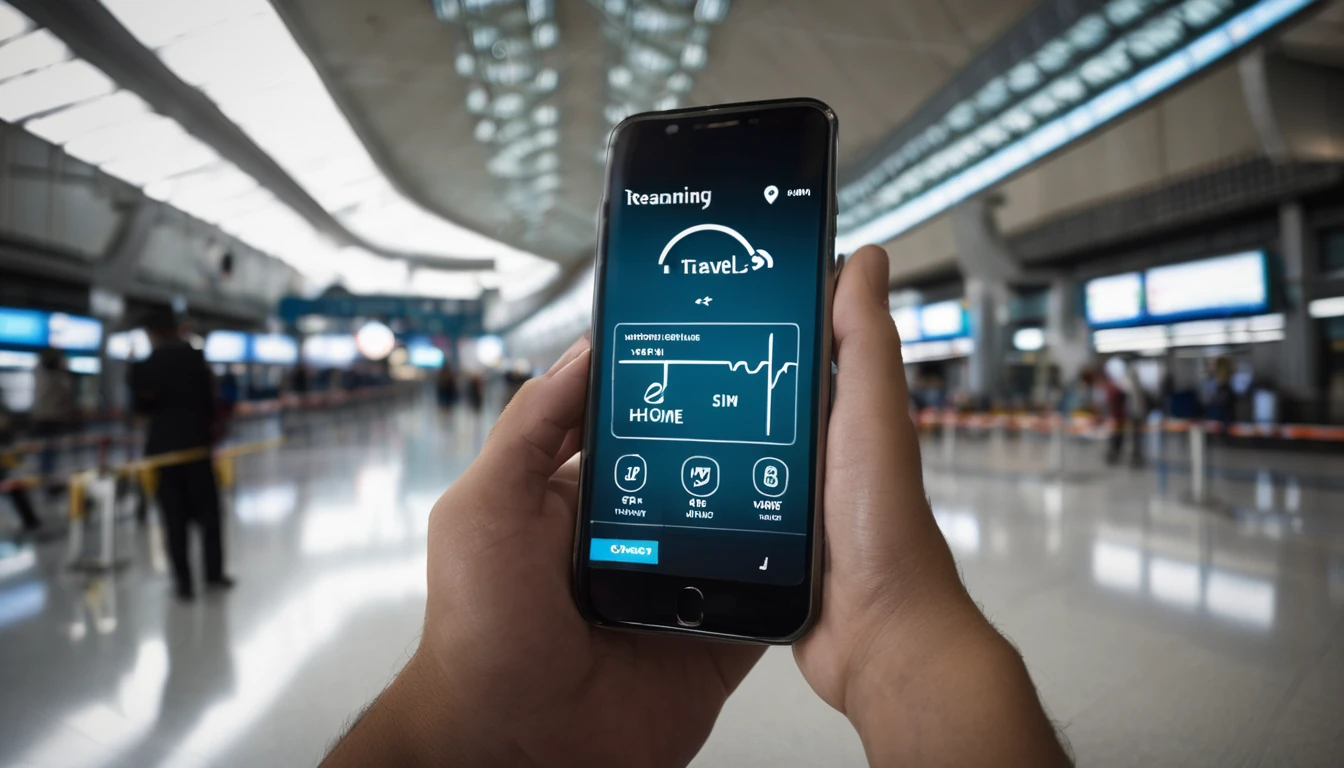
What exactly is an eSIM?

An eSIM is a digital SIM profile built into your device. Instead of inserting a plastic card, you download a plan to your phone or tablet using a QR code or app. Most recent iPhones, Google Pixels and many Samsung models support eSIM, and many can run two lines at once (your home SIM plus a travel eSIM). For most travellers, that means:

  • Data via your eSIM (maps, ride‑hailing, messages).
  • Your home number still receives calls and verification codes.

No queues, no tiny trays, and switching plans is software‑only.

Cost breakdown with real‑world examples

Prices vary by network and season. Use these as planning benchmarks:

  • Long weekend in Europe (4 days): Roaming day pass at £7/day costs ~£28 for light use; one Esim Western Europe 3–5 GB pack is often £10–£18—usually cheaper and enough for maps, chat, and some social media.
  • 10‑day Italy/France/Spain loop: Three roaming day passes at ~£7/day totals ~£70. A 10–15 GB regional eSIM bundle often runs £18–£30 and works across borders—see Esim Italy, Esim France and Esim Spain for country options, or use Esim Western Europe to keep it simple.
  • One‑week US trip: Many UK/EU carriers charge £6–£10/day for U.S. roaming; that’s £42–£70. A 5–10 GB pack on Esim United States often costs £10–£25.
  • Two‑week Canada/USA work travel: Roaming can exceed £100 with moderate data. A multi‑country Esim North America plan typically costs less than half.

Rule of thumb: If you’ll use more than 1 GB per day or travel across countries, eSIM is usually cheaper and more flexible than roaming.

Coverage and speed: what to expect in 2025

  • 5G is now common in cities and many tourist corridors. Rural areas may still be 4G. Your speed depends on local networks, device bands, and congestion.
  • eSIM plans connect to local partner networks—the same ones you’d use with a physical SIM—so performance is comparable.
  • Dual‑SIM management lets you route data via eSIM while keeping your home SIM for calls/SMS. Most phones allow you to choose which line handles calls, data and texts.
  • If you must have a local phone number for restaurant bookings, a physical SIM may still help. Otherwise, data‑only eSIM plus WhatsApp/VoIP covers most needs.

Check available networks and bundles per country on Destinations.

How to set up an eSIM with Simology (step‑by‑step)

Before you start: ensure your phone is unlocked and supports eSIM.

1) Pick your destination: - Single country page (e.g., Esim United States) or a regional plan like Esim Western Europe.

2) Choose your data allowance: - Estimate 1–2 GB per day if you stream and upload; 0.5–1 GB per day for maps, chat and light social.

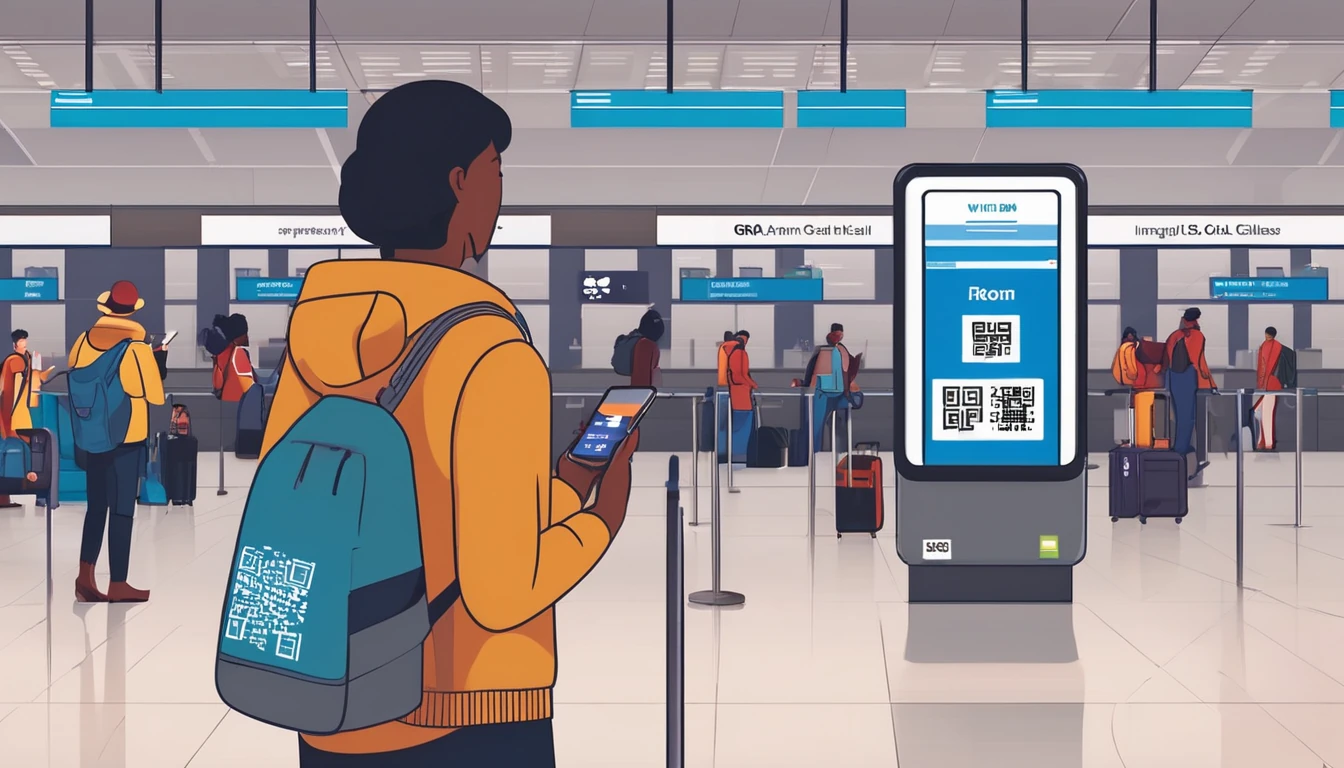
3) Buy and check your email: - You’ll receive an eSIM QR code and installation instructions. Keep them handy.

4) Install the eSIM: - iOS: Settings > Mobile Data > Add eSIM > Use QR code. - Android (varies): Settings > Network & Internet > SIMs > Download a SIM > Scan QR.

5) Set data line: - Set the eSIM as your mobile data line. - Keep your home SIM active for calls/texts if needed.

6) Turn on data roaming for the eSIM line: - This enables local connectivity with partner networks.

7) Test: - Toggle Airplane Mode off/on, load a web page, and confirm your APN is auto‑configured (usually it is).

Pro tips: - Install just before you fly or on arrival; activation windows start when you connect to the destination network. - Disable data on your home SIM to avoid accidental roaming charges. - Save the QR code and keep Wi‑Fi handy during setup. - For multi‑country trips, choose a regional bundle so you don’t have to switch plans at borders.

Explore available plans on Destinations.

Physical SIMs: pros, cons, and a quick checklist

Pros: - Can include a local number for voice calls. - Competitive local pricing for long stays. - Works with older, non‑eSIM devices.

Cons: - Requires a store visit; queues and potential ID requirements. - SIM swap hassle; risk of losing your home SIM. - Harder to manage/topping up without a local payment method.

Checklist for success: - Bring your passport; some countries mandate registration. - Know the APN settings and how to change SIM slots. - Keep your home SIM in a labelled case. - Ask the shop to test data and calls before you leave.

Roaming on your home plan: pros, cons, and hidden risks

Pros: - Zero setup if roaming is pre‑enabled. - Keep your number for everything. - Fine for very short trips with light use.

Cons: - Day passes add up quickly; pay‑per‑use can be eye‑watering. - Fair‑use caps and throttling are common. - Some plans exclude tethering or 5G abroad. - Misconfigured devices (cloud backups, auto‑updates) can burn through data unnoticed.

Minimise risk: - Turn off background app refresh and cloud photo backup before you travel. - Confirm daily caps, speed limits, and tethering rules with your carrier. - Use a travel eSIM for data and keep your home SIM for calls/SMS only.

Special cases: business travel and partners

FAQs

1) Will an eSIM give me a local phone number? - Most travel eSIMs are data‑only and do not include a local number. Use your home number for calls/SMS (dual‑SIM) or call via apps like WhatsApp. If you need a local number, consider a physical SIM or a VoIP number.

2) Can I use one eSIM across multiple countries? - Yes—choose a regional plan such as Esim Western Europe or Esim North America. Always check the list of covered countries before you buy.

3) Is eSIM activation instant? - Usually yes. You can install the profile in advance and it will activate when you first connect in‑country. Activation windows vary; check the plan details on Destinations.

4) What if my phone is locked? - Network‑locked phones may not accept non‑home plans (physical or eSIM). Ask your carrier to unlock before travel.

5) Can I hotspot/tether on an eSIM? - In most cases, yes, but it depends on the specific plan. Check the plan description—tethering is typically supported on Simology travel eSIMs.

6) How much data do I really need? - Light use (maps, chat, email): ~0.5 GB/day. Mixed use (social, short videos): 1–2 GB/day. Heavy use (HD streaming, uploads): 3+ GB/day. When in doubt, pick a plan with easy top‑ups.

The bottom line

  • eSIM is the best option for most travellers in 2025: low hassle, competitive pricing, and strong coverage—especially on regional plans.
  • Physical SIMs still make sense for long single‑country stays or if you need a local number.
  • Roaming is fine for short, light‑use trips—but watch the daily costs and fair‑use caps.

Next step: find the right plan for your route on Simology’s Destinations page, or go straight to a regional bundle like Esim Western Europe or Esim North America.

Read more blogs

Andes Highlights (3 Weeks): Peru–Bolivia–Chile–Argentina Connectivity

Andes Highlights (3 Weeks): Peru–Bolivia–Chile–Argentina Connectivity

Planning a south america itinerary 3 weeks through the high Andes? This route stitches together Peru’s Sacred Valley, Bolivia’s La Paz and Salar de Uyuni, Chile’s Atacama Desert, and northern Argentina’s quebradas or Mendoza wine country—often by long-distance bus and a couple of short flights. Connectivity is different at altitude: coverage is strong in cities but drops in high passes and salt flats; bus Wi‑Fi is patchy; border towns can be blackspots. The smart move is an eSIM with multi‑country coverage, backed by offline maps, offline translations, and a simple routine for crossing borders by bus without losing service. Below you’ll find a practical, connectivity-first itinerary; checklists to prep your phone, apps and documents; and on-the-ground tips for staying online where it matters: booking transport, hailing taxis, backing up photos, and navigating when the signal disappears.If you’re transiting via Europe or North America, you can also add a layover eSIM to stay connected door-to-door. Start with our country list on Destinations, then follow the steps, and you won’t waste time chasing SIM shops at 3,500 metres.The 3‑week Andes route at a glanceWeek 1: Peru (Cusco, Sacred Valley, Machu Picchu) - Fly into Cusco (or Lima then connect). - Base in Cusco; day trips to Pisac/Chinchero/Maras–Moray. - Train to Aguas Calientes; Machu Picchu visit; return to Cusco or continue to Puno/Lake Titicaca.Week 2: Bolivia and Chile (La Paz, Uyuni, San Pedro de Atacama) - Bus/collectivo via Copacabana to La Paz. - Fly or overnight bus to Uyuni. - 3‑day Uyuni–altiplano tour ending in San Pedro de Atacama (Chile).Week 3: Chile and Argentina (Atacama to Salta or Mendoza/Buenos Aires) - Choose: - North: San Pedro to Salta/Jujuy by bus; fly to Buenos Aires. - Or South: San Pedro–Calama flight to Santiago; bus or flight to Mendoza; onward to Buenos Aires.Connectivity notes (quick): - Cities: generally strong 4G/4G+; 5G in major hubs (Santiago, Buenos Aires). - Altitude/rural: expect long no‑signal stretches (Uyuni, altiplano passes, Paso Jama). - Bus Wi‑Fi: often advertised, rarely reliable. Plan to be offline onboard. - Border regions: networks switch; a multi‑country eSIM avoids sudden loss.eSIM vs local SIMs for a 4‑country tripFor a route with multiple borders and remote legs, eSIM wins on time and reliability.What a multi‑country eSIM gets you: - One plan across Peru, Bolivia, Chile, Argentina (check coverage per country on Destinations). - No passport/SIM registration queues at kiosks. - Keep your home number active on the physical SIM for calls/SMS codes. - Instant top‑ups if you burn data on photos or navigation.When a local SIM still helps: - Long stay in one country with heavy data use (e.g., a month in Buenos Aires). - Dead zones where a different local network performs better (rarely worth the hassle on a 3‑week pace).Practical approach: - Use an eSIM as your primary data line across all four countries. - If you find a specific local network far better in one region, add a cheap local SIM and keep the eSIM as backup.Device readiness checklist (before you fly)1) Check eSIM compatibility and SIM‑lock status on your phone.2) Buy and install your eSIM while on home Wi‑Fi. Keep a PDF/printed copy of the QR code.3) Label lines clearly (e.g., “eSIM Andes Data”, “Home SIM”).4) Turn on data roaming for the eSIM; leave roaming off for your home SIM to avoid charges.5) Set up dual‑SIM rules: data on eSIM; calls/SMS default to home SIM if needed.6) Download offline: Google Maps/Organic Maps for all target regions; language packs (Spanish at minimum); bus/air tickets; hotel confirmations.7) Cloud backups: set to upload on Wi‑Fi only; pre‑create shared albums for travel companions.8) Test tethering/hotspot with your laptop/tablet.If you’re transiting popular hubs, consider a short layover eSIM: - USA connections: add an Esim United States or a broader Esim North America.- Europe connections: Madrid/Barcelona? Use an Esim Spain. Paris or Rome? See Esim France and Esim Italy. Multi‑country layovers? Try Esim Western Europe.City‑by‑city connectivity notesCusco & the Sacred Valley (Peru)Coverage: Good in Cusco city; variable in high villages (Maras/Moray) and along Inca Trail approaches.Tips: Download Sacred Valley maps offline; pin viewpoints and ruins. most taxis use WhatsApp—save your accommodation’s number.Machu Picchu/Aguas Calientes: Patchy to none at the citadel. Upload your photos later; don’t rely on live ticket retrieval.Lake Titicaca: Puno and CopacabanaPuno: Reasonable 4G; bus terminals crowded—screenshot QR tickets.Crossing to Copacabana: Expect a signal drop around the border; have directions saved offline.La Paz (Bolivia)Good urban 4G; the cable car network has decent signal but tunnels do not.Yungas/“Death Road” tours: Mountain valleys cause dead zones—share your emergency contacts with the operator, carry a charged power bank, and don’t plan remote calls.Uyuni and the Altiplano (Bolivia to Chile)Uyuni town: OK 4G; ATMs finicky—use Wi‑Fi for banking apps.Salt flats/lagunas: Assume offline for most of the 3‑day tour. Guides often carry satellite phones; agree a pickup time/place in San Pedro and preload your map route.San Pedro de Atacama (Chile)Town: Solid 4G; accommodations often have Wi‑Fi but speeds vary.Geysers, Valle de la Luna: Offline navigation essential; sunrise trips start before mobile networks wake up in some areas.Salta/Jujuy or Mendoza/Buenos Aires (Argentina)Salta/Jujuy: Good city coverage; quebradas have long no‑signal sections.Mendoza: City 4G/5G; vineyards outside town can be patchy.Buenos Aires: Strong 4G/5G; ideal for cloud backups and large downloads before you fly home.Border crossings by bus: step‑by‑stepThe big ones on this route: Peru–Bolivia (Puno/Copacabana), Bolivia–Chile (Uyuni–San Pedro via Hito Cajón), Chile–Argentina (Paso Jama to Salta or Los Libertadores to Mendoza).How to keep service and sanity:1) The day before:- Top up your eSIM data.- Confirm your plan includes both countries you’re entering/leaving.- Download offline maps for both sides of the border and your town of arrival.- Save bus company WhatsApp and terminal address offline.2) On departure morning:- Keep a paper copy or offline PDF of tickets, insurance, and accommodation proof.- Charge phone and power bank; pack a short cable in your daypack.3) On the bus:- Don’t count on bus Wi‑Fi. Keep your eSIM as primary, but expect drops near mountain passes.- If your phone supports it, enable “Wi‑Fi calling” for later when you reach accommodation Wi‑Fi.4) At the border posts:- Data may be unavailable. Keep QR codes and booking numbers offline.- After exiting one country and entering the next, toggle Airplane Mode off/on to re‑register on the new network.- If the eSIM doesn’t attach, manually select a network in Mobile Settings.5) Arrival:- Send your accommodation a quick WhatsApp when you’re back online.- Recheck your eSIM’s data roaming is on; confirm you’re on an in‑country network, not a weak roaming partner.Pro tips: - Dual profiles: If your eSIM allows, keep a secondary profile for a different network in the same country—helpful in border towns.- Cash buffer: Some border terminals don’t accept cards; download a currency converter for offline use.Offline survival kit (5‑minute setup)Maps: Download regions for Cusco, Sacred Valley, Puno, La Paz, Uyuni, San Pedro, Salta/Jujuy or Mendoza, and Buenos Aires.Translations: Download Spanish for offline use; add phrasebook favourites (bus tickets, directions, dietary needs).Documents: Save PDFs of passports, tickets, hotel addresses; star them for quick access.Rides: Screenshots of pickup points; pin bus terminals and hotel doors.Entertainment: Podcasts and playlists for long bus legs, set to download on Wi‑Fi only.Altitude and your tech: what changesCoverage gaps lengthen: Fewer towers at high altitude; valleys can block signal. Assume offline on remote excursions.Batteries drain faster in cold: Keep your phone warm and carry a power bank (10,000–20,000 mAh).Hotel Wi‑Fi may be congested: Schedule big uploads (photo backups, app updates) for big-city stays like Santiago or Buenos Aires.GPS still works offline: Your blue dot shows on offline maps without data—preload everything.Data budgeting for 3 weeksTypical traveller usage across this route: - Messaging/Maps/Bookings: 0.2–0.5 GB/day- Social and photo sharing: 0.3–0.7 GB/day- Occasional video calls/streaming: 0.5–1.0 GB/dayFor a mixed-use trip, plan 15–25 GB for 3 weeks. Heavy creators should double it and upload over hotel Wi‑Fi when possible. If you work remotely, consider a higher‑capacity plan and a backup eSIM; see our guidance on For Business.Practical route with transport and connectivity cuesDays 1–4 Cusco base: Strong city signal; day trips may be spotty—go offline-ready.Days 5–6 Machu Picchu: Expect no service at the ruins; sync tickets ahead.Days 7–8 Puno to La Paz via Copacabana: Border signal drop; re‑register networks after crossing.Days 9–11 Uyuni tour to San Pedro: Treat as offline; charge nightly; carry spare cables.Days 12–14 San Pedro: Stable in town; tours offline; top up data before Paso Jama.Days 15–17 Salta/Jujuy or Mendoza: Good urban 4G; rural patches are offline.Days 18–21 Buenos Aires: Strongest connectivity of the trip; clear your uploads and map downloads for the flight home.Partnering and stopover extrasHospitality and tour operators in the Andes: help your guests stay connected—explore co‑branded solutions via our Partner Hub.Transatlantic flyers: test your eSIM setup on a layover with an Esim United States or Esim Western Europe before hitting high-altitude blackspots.FAQs1) Do I need a local SIM in each country?No. A multi‑country eSIM covering Peru, Bolivia, Chile and Argentina is simpler and works well for a 3‑week pace. Consider a local SIM only if you’ll spend longer in one country and want the absolute best regional coverage.2) Will my WhatsApp number change with an eSIM?No. WhatsApp is tied to your registered number, not your data line. Keep your home SIM active for voice/SMS (roaming off if you wish), and use the eSIM for data—WhatsApp continues as normal.3) Can I hotspot to my laptop or camera?Yes. Enable tethering on your eSIM. Mind your data: cloud backups and OS updates can burn gigabytes—set them to Wi‑Fi only or schedule in big cities.4) What if there’s no signal on the Uyuni/Atacama legs?That’s expected. GPS still works offline. Pre-download maps and translations, carry a power bank, and sync plans with your tour operator before departure.5) Will I get roaming charges at borders?If you’re using a multi‑country eSIM with coverage in both countries, you won’t incur extra roaming fees from your home carrier. Keep roaming off on your home SIM to avoid accidental use.6) I’m connecting via Europe or the US—worth getting a layover eSIM?Yes. It’s an easy way to test your setup and stay reachable. Try Esim North America or country options like Esim Spain, Esim France, or Esim Italy for common hubs.Next step: Browse South America coverage options and build your plan on Destinations.

Dual SIM on iPhone with eSIM: Default Line, Data, iMessage/FaceTime

Dual SIM on iPhone with eSIM: Default Line, Data, iMessage/FaceTime

Travel is smoother when your iPhone uses a local data plan while your home number stays reachable. That’s exactly what Dual SIM with eSIM enables. In this guide we’ll show you, step by step, how to add and label lines, choose your default for calls and SMS, set the correct data line, and decide which number powers iMessage and FaceTime. We’ll also cover roaming-safe presets so you land, switch on, and avoid bill shock. Whether you’re heading to the US, Europe or further afield, a few minutes of set-up makes the difference between seamless connectivity and expensive mistakes. If you need an eSIM first, browse country and regional plans on our Destinations page, including regional bundles like Esim Western Europe and Esim North America, or country options such as Esim United States, Esim France, Esim Italy, and Esim Spain.What “Dual SIM with eSIM” means on iPhoneYou can have two mobile plans on one iPhone: typically your physical SIM (home number) plus an eSIM (travel data), or two eSIMs on newer models.You choose which line handles voice and SMS by default.You pick a single data line at any time, with optional “Allow Mobile Data Switching” to keep data alive for calls on the other line.iMessage and FaceTime can be tied to either number (or your Apple ID), and you can switch per-contact when needed.This guide focuses on practical, traveller-first settings to keep your home number reachable while your travel eSIM handles data securely and affordably.Check your iPhone supports Dual SIM with eSIMMost recent iPhones support Dual SIM. Quick checkpoints:iPhone XS/XR and later: Dual SIM (one physical SIM + one eSIM).iPhone 13 and later: can support two active eSIMs simultaneously (no physical card required).US-model iPhone 14 and newer: eSIM-only (no physical SIM slot).To confirm on your device: 1. Go to Settings > General > About. 2. Look for “Digital SIM” or “eSIM” entries. If you see IMEI entries for two eSIMs, your phone supports dual eSIM. 3. Ensure you’re on the latest iOS for best Dual SIM features.Step 1: Add your travel eSIM and label your linesBefore you fly, install and label your eSIM so switching is painless on arrival.Purchase the right plan for your trip: - North America: Esim North America - United States: Esim United States - Western Europe: Esim Western Europe - Popular countries: Esim France, Esim Italy, Esim Spain - Explore all options: DestinationsInstall the eSIM: - Settings > Mobile Data (Cellular) > Add eSIM. Follow the on‑screen steps to scan your QR code or use the activation code. - If offered, “Convert to eSIM” can move your physical SIM to eSIM on supported devices.Label each line clearly: - iOS prompts you to label the plans. Choose intuitive labels like “Home” and “Travel”. - You can rename later: Settings > Mobile Data > tap a plan > Label.Pro tips: - Label accuracy is crucial; it’s how you’ll pick the right line in call/message screens. - Install eSIM while you still have good Wi‑Fi and time to test.Step 2: Choose your default line for calls and SMSThis controls which number your iPhone uses when you tap a number or send an SMS from scratch.Go to Settings > Mobile Data > Default Voice Line.Pick “Home” (your primary) if you want all ordinary calls/SMS to continue from your usual number.If you prefer to make outbound calls from your travel number (e.g., local business calls abroad), choose “Travel”.Per-contact preference: - Open the Contacts app > select a contact > tap “Preferred Line” (or “Preferred Cellular Plan”) > choose Home or Travel. - iPhone learns your behaviour and can automatically use the last line you used for that contact.Pro tip: - Keep Default Voice Line = Home, then set exceptions (like hotels/restaurants) to Travel so you appear local.Step 3: Set your mobile data line and RoamingThis is the big one for bill safety: make the eSIM your data source and block roaming on your home line.Settings > Mobile Data > Mobile Data > select “Travel”.Tap your Home line > toggle Data Roaming OFF.Tap your Travel line > toggle Data Roaming ON (if you’re abroad) so data works when you land.Optional: under Mobile Data, enable “Allow Mobile Data Switching”. This lets iPhone temporarily use the data line for ongoing voice calls on the other line. If you want strict control (no surprises), keep this OFF.When to disable your Home line entirely: - If your carrier charges for incoming roaming calls, you may prefer to disable the Home line: Settings > Mobile Data > tap Home > Turn On This Line = OFF. - If you still need OTP texts or critical calls, leave the Home line ON but keep Data Roaming OFF (you can still receive SMS over the cellular network; check your carrier’s policies for any charges).Pro tips: - Test data before you fly: switch Mobile Data to Travel, toggle Data Roaming ON, then back to Home until you depart. - If your Travel plan includes Wi‑Fi calling, consider making calls over apps (WhatsApp, FaceTime, Teams) to avoid local call charges.Step 4: Set iMessage and FaceTime to the right numberYou can attach iMessage/FaceTime to your travel number or keep them linked to your home number while using the travel eSIM for data.iMessage: 1. Settings > Messages > iMessage = ON. 2. Tap Send & Receive. 3. Tick the phone numbers and/or Apple ID you want active. 4. Under “Start New Conversations From”, choose the number you want by default (Home or Travel).FaceTime: 1. Settings > FaceTime > FaceTime = ON. 2. Tick the addresses/numbers to receive calls at. 3. Set “Caller ID” (or similar option) to the number you want people to see when you call.Switch the line per conversation: - In Messages, open a conversation > tap the contact name/photo at the top > change the line if the option appears (or start a new message and tap the line label above the keyboard to choose Home/Travel before sending).Pro tips: - For continuity with family and friends, keep iMessage/FaceTime on your Home number and use the Travel number only for local contacts. - If verification codes arrive via iMessage instead of SMS, they’ll still work over your Travel data because iMessage uses the internet.Traveller presets: fast, safe switchingiOS doesn’t have one‑tap “profiles”, but you can mimic them with a simple routine.Before you fly (10‑minute checklist): - Install and label your eSIM: “Travel”. - Settings > Mobile Data: - Mobile Data = Home (for now). - Home line > Data Roaming = OFF. - Travel line > Data Roaming = ON. - Messages > Send & Receive: - Choose “Start New Conversations From” = Home (or Travel if you want a local sender ID). - FaceTime > Caller ID = preferred number. - Save a few key contacts with Preferred Line = Travel (hotel, taxi, local colleagues).On the plane/at the gate: - Settings > Mobile Data > Mobile Data = Travel. - Optional: Allow Mobile Data Switching = OFF for strict control.On arrival: - Toggle Airplane Mode OFF; wait 1–2 minutes for the Travel eSIM to register. - Confirm data works (open a lightweight website). - Make a quick test call/iMessage.During your stay: - Keep Home line ON with Data Roaming OFF to receive SMS when needed. - For local calls, set Preferred Line = Travel per contact or temporarily switch the Default Voice Line.Heading home: - Switch Mobile Data back to Home. - Turn off the Travel line if you won’t use it until your next trip, or leave it installed for future travel.Troubleshooting: quick fixes that workNo data on the Travel eSIM: - Check Settings > Mobile Data > Mobile Data = Travel. - Settings > Mobile Data > tap Travel > Data Roaming = ON. - Restart iPhone; toggle Airplane Mode for 10 seconds. - Settings > General > About: if prompted for a Carrier Settings Update, accept. - If your plan requires a specific APN, it should auto‑configure with eSIM; if not provided, contact support.Calls/SMS using the wrong number: - Settings > Mobile Data > Default Voice Line = intended line. - For specific contacts, set Preferred Line. - In the Messages conversation, change the line before sending.iMessage/FaceTime not activating: - Ensure you have data on the active line and can receive SMS on at least one line. - Toggle iMessage/FaceTime OFF and back ON. - Sign out/in of Apple ID in Messages/FaceTime settings as a last resort.Can’t see “Allow Mobile Data Switching”: - It shows only when both lines are active and one is selected for Mobile Data.Missing the option to assign “Preferred Line”: - Make sure both lines are turned ON (Settings > Mobile Data > tap each plan).Picking the right eSIM for your routeSingle country city-breaks: choose country plans such as Esim United States, Esim France, Esim Italy or Esim Spain.Multi-country tours: regional passes like Esim Western Europe reduce border friction, while Esim North America suits US/Canada/Mexico hops.Unsure? Start at Destinations to filter by region, data size and duration.For teams and frequent travellers: - Centralise budgets and provisioning via For Business. - Travel agencies, IT resellers and affiliates can explore our partner tools at the Partner Hub.Pro tips for power usersDual SIM iPhone eSIM pairing: on iPhone 13 and newer, you can keep two eSIMs active—useful if your “home” number is also an eSIM.Visual labelling: add emojis to line labels (e.g., “Home 🏠”, “Travel ✈️”) to avoid mistakes when switching lines in Messages or Phone.Battery and coverage: if coverage is weak on one line, disabling that line can improve standby time.Maps and ride‑hailing: test these apps on the Travel data line before leaving the airport to confirm routing and SMS verification work.Keep it simple: Default Voice Line = Home, Mobile Data = Travel is the safest starting point for most travellers.FAQ1) Can I keep my home SIM for calls/SMS but use the eSIM for data? - Yes. Set Default Voice Line = Home. Set Mobile Data = Travel. Turn Data Roaming OFF on Home. You can still receive SMS on Home while using data on Travel.2) Will I get roaming charges on my home line if it’s on? - Data roaming is prevented if you turn Data Roaming OFF on the Home line. Voice/SMS charges depend on your carrier and whether you answer/receive calls or send texts while abroad. For maximum control, you can turn the Home line OFF entirely.3) Can iMessage/FaceTime use my home number while data comes from the Travel eSIM? - Yes. iMessage/FaceTime work over the active data connection, regardless of which number you choose in Send & Receive/Caller ID. Pick “Start New Conversations From” = Home to keep continuity.4) How do I switch the sending line in a specific message thread? - Open the conversation, tap the header (contact name/photo), and choose the line, or start a new message, then tap the line label above the keyboard to switch before sending.5) Why don’t I see both lines at once? - Ensure your iPhone supports Dual SIM and both lines are turned ON: Settings > Mobile Data > tap each plan > Turn On This Line. Older models may support only one eSIM plus one physical SIM, while newer models support two eSIMs.6) Can I keep two eSIMs active, no physical SIM? - On iPhone 13 and newer, yes—two active eSIMs are supported. US-model iPhone 14+ are eSIM-only devices and handle multiple eSIMs easily.Next step: Choose the right travel plan for your route on Destinations, then follow the steps above to set Mobile Data = Travel and Default Voice Line = Home before you fly.

AirDrop & Nearby Share Safety: Prevent Drive‑By Transfers

AirDrop & Nearby Share Safety: Prevent Drive‑By Transfers

Stuck in a crowded airport, train carriage or festival queue with Bluetooth on? That’s exactly when “drive‑by” file shares happen: strangers pushing images, contact cards or links to any nearby device that’s accepting transfers. This guide gives you practical, traveller‑first settings to block nuisance and risky shares on iPhone, iPad, Mac, Android (Quick Share/Nearby Share), Windows and Chromebooks. You’ll learn how to limit discoverability, require approval, use school/work modes, and practise sensible Bluetooth hygiene in crowds. Keep your device quiet, your name private, and your day disruption‑free.Whether you’re city‑hopping across Esim Western Europe, heading to the US on Esim North America or planning a single‑country stay with Esim United States, Esim France, Esim Italy or Esim Spain, set these protections before you reach the crowd. It takes under two minutes and prevents nasty surprises, from obscene images to phishing links disguised as “helpful” travel info.What’s the risk with “drive‑by” sharing?Nuisance or harassment: Unsolicited photos or videos—often explicit—pushed to anyone discoverable.Social engineering: Link or contact cards that mimic transport alerts or venue info.Privacy leakage: Your full name and device name can appear to everyone nearby.Corporate exposure: Travellers on work devices may breach policy if they accept unknown files.Distraction risk: Prompts popping up as you navigate boarding gates or ride‑share pickups.The fix isn’t to switch everything off forever. It’s to keep your device non‑discoverable by default, require approvals, and temporarily enable “Everyone” only when you actively share—with a strict timeout.Core principles for airdrop safety travelStay non‑discoverable by default: “Receiving Off” (Apple) or “No one/Hidden” (Android/Windows/ChromeOS).Use Contacts Only or Your devices when you must be visible; avoid “Everyone” unless absolutely necessary.Require approvals for all shares except your own devices.Keep your device identity generic (name and profile photo).Practise Bluetooth/Wi‑Fi hygiene in crowds; disable passive scanning where possible.For kids and corporate travellers, use system restrictions or management profiles.How to lock down AirDrop on iPhone and iPad (iOS 16+)AirDrop is safe when tightly scoped. Set it once, and use the “Everyone for 10 Minutes” option only when you’re actively sharing.Step‑by‑step: Set AirDrop to Contacts Only or Receiving OffOpen Control Centre (swipe down from the top‑right).Press and hold the network tile (with Wi‑Fi/Bluetooth).Tap AirDrop.Choose: - Receiving Off (most private), or - Contacts Only (balanced default). - Only choose Everyone for 10 Minutes when sending to a non‑contact in front of you.Pro tip: After any “Everyone for 10 Minutes” session, AirDrop auto‑reverts. Still, check it reset before entering a crowd.Disable “Bringing Devices Together” (NameDrop)This proximity feature makes sharing easier—but can invite bumps in crowded queues.Go to Settings > General > AirDrop.Toggle off Bringing Devices Together.Make your device name genericYour name is often visible when others look for devices.Settings > General > About > Name.Use something nondescript, e.g., “iPhone‑12” instead of your full name.Restrict AirDrop for kids or loaner devicesSettings > Screen Time.Content & Privacy Restrictions > Allowed Apps > toggle off AirDrop.This blocks AirDrop system‑wide until you re‑enable it. Great for school trips.How to harden AirDrop on Mac (macOS)When you travel with a Mac, keep it non‑discoverable unless actively sharing.Open Finder > AirDrop (left sidebar).At the bottom, set “Allow me to be discovered by” to: - No One (most private), or - Contacts Only (balanced).Disable Bluetooth from the menu bar if you don’t need it.Pro tip: Shares to yourself (same Apple ID) auto‑accept—safe and silent. Avoid “Everyone” in public places.Android: Secure Nearby Share/Quick ShareGoogle and Samsung unified sharing under “Quick Share” (formerly “Nearby Share”). Settings vary slightly by device, but the principles are the same.Step‑by‑step: Limit visibility and approvalsOn most Android devices (Pixel/OnePlus and many others): 1. Settings > Google > Devices & sharing > Quick Share. 2. Set Device visibility to: - No one (Hidden) by default, or - Contacts (safer than Everyone), or - Your devices (for seamless self‑sharing). 3. Ensure “Allow your devices to share without approval” is enabled only for your own devices. Require approval from everyone else.On Samsung: 1. Settings > Connected devices > Quick Share (or directly in Quick Share app). 2. Who can share with you: Contacts only or No one. 3. Turn off “Show my phone to others” unless you’re actively sharing.Quick toggle: - Pull down Quick Settings > long‑press Quick Share > adjust visibility. - If you must use “Everyone”, set it and immediately long‑press again to confirm it will time out (typically 10 minutes).Make your device identity boringSettings > About phone > Device name: Use “Pixel‑7” or similar.Google Account profile picture/name can appear to contacts—choose neutral options while travelling, if you like.Work profile (Android Enterprise)If your phone has a Work profile, your IT admin can disable Quick Share in the work context. Keep personal sharing off in crowds, and use your corporate channel (email/Teams/Drive) for work files. Business travellers can learn more on For Business and share this with IT via our Partner Hub.Windows and Chromebooks: Nearby sharing/Quick Share basicsWindows 10/11: Nearby sharingSettings > System > Nearby sharing.Set to Off or My devices only.Choose your save location (e.g., Downloads) and avoid auto‑opening received files.Pro tip: Rename your PC to something generic (Settings > System > About > Rename this PC).ChromeOS: Quick ShareSettings > Connected devices > Quick Share.Device visibility: No one or Contacts only.Disable “Open received files automatically” if available.Bluetooth and Wi‑Fi hygiene in crowdsMost local sharing relies on Bluetooth and Wi‑Fi for discovery. Tidy these up before stepping into a crowd.Turn off Bluetooth if you don’t need headphones or a watch right then.If you must keep Bluetooth on, keep AirDrop/Quick Share non‑discoverable.On Android: Settings > Location > Location services > disable Wi‑Fi scanning and Bluetooth scanning to reduce passive discovery beacons.Avoid public Wi‑Fi at pinch points (stations, stadium gates). Use mobile data instead—an eSIM like Esim Western Europe or Esim North America keeps you connected without exposure to crowded hotspots.Pro tip: If you must join venue Wi‑Fi, use a separate email for sign‑ups and avoid installing “Wi‑Fi helper” apps.Quick checklists for busy travellers30‑second pre‑crowd check (iPhone/iPad/Mac)AirDrop: Contacts Only or Receiving Off.NameDrop/Bringing Devices Together: Off.Device name: Generic.Bluetooth: Off if not needed; otherwise keep AirDrop restricted.Mac: Finder > AirDrop > No One or Contacts Only.30‑second pre‑crowd check (Android/Windows/ChromeOS)Quick Share/Nearby Share: No one/Hidden (or Contacts only).Require approval from everyone except your own devices.Device name: Generic.Bluetooth scanning and Wi‑Fi scanning: Off on Android.Windows Nearby sharing: Off or My devices only.When you actually need to share with a strangerMove a few steps aside from the crowd.Enable “Everyone for 10 minutes” (iOS) or “Everyone” with a timeout (Android/ChromeOS).Confirm the recipient’s device name and photo in person.Send the file and immediately reset visibility to Contacts Only/No one.Families, schools and business tripsFamilies: Use Screen Time to disable AirDrop on kids’ iPhones/iPads during trips. Teach “never accept from strangers” and how to set Receiving Off.Schools: Managed devices can block AirDrop/Quick Share during school events and trips. Share these settings with your IT lead.Businesses: Enforce Contacts Only or disable local sharing on managed devices for travellers. Build a standard “pre‑travel device checklist” and distribute it through your MDM. See For Business and our Partner Hub for deployment guidance.Practical traveller tips that stickKeep shares to known contacts. If someone nearby asks you to accept “their boarding pass” or “ride receipt”, decline and ask them to show it on their screen.Don’t tap unknown links from local shares; navigate to the airline, rail, or venue site/app yourself.Clear your Downloads/Files after trips; remove anything you don’t recognise.Use mobile data where possible. Regional passes like Esim Western Europe or single‑country options such as Esim France, Esim Italy, Esim Spain and Esim United States keep you online without risky public Wi‑Fi.FAQIs AirDrop safe to leave on while travelling?Yes, if set to Contacts Only or Receiving Off. Avoid “Everyone” except during a deliberate, brief share.What’s the Android equivalent of AirDrop?Quick Share (formerly Nearby Share). Set visibility to No one/Contacts, require approvals, and only use “Everyone” briefly.Can I stop my name appearing to strangers?Yes. Change your device name to something generic. On iPhone, Settings > General > About > Name; on Android, Settings > About phone > Device name; on Windows, rename your PC. Also disable photo/profile sharing where offered.How do I stop kids receiving random photos?On iOS: Screen Time > Content & Privacy > Allowed Apps > disable AirDrop. On Android: set Quick Share to No one and lock Settings behind a parental control app or Family Link.Does turning off Bluetooth stop all drive‑bys?It prevents discovery but may disrupt your watch/headphones and in some cases car keys. If you must keep Bluetooth on, set sharing visibility to Hidden/Contacts only.Will eSIM help with sharing safety?Indirectly. An eSIM keeps you on mobile data so you can avoid crowded public Wi‑Fi, reducing other exposure risks while travelling. Explore coverage by country and region via Destinations and options like Esim North America.Next stepPlan your route and set up your device before you go. Explore local coverage and pick the right travel eSIM on Destinations, then run the 30‑second safety checks above before you enter a crowd.

Blog

What Is an eSIM? How It Works in 2025 ...

What Is an eSIM? How It Works in 2025 (Plain English)

29 Oct 2025

What Is an eSIM? How It Works in 2025 (Plain English)

Travellers are ditching plastic SIM cards for something faster, easier and more secure: the eSIM. In plain English, an eSIM is a digital SIM built into your phone or tablet. Instead of inserting a tiny card, you download a mobile plan over Wi‑Fi and you’re online in minutes. In 2025, most recent iPhone, Samsung Galaxy, Google Pixel and many other Android models support eSIM out of the box, with dual‑SIM features that let you keep your home number while using local data abroad.

Here’s the appeal for travellers: no store visits, no waiting, no roaming bill shock. You buy an eSIM for your destination (or a region bundle), scan a QR code, and your device connects to local partner networks when you land. You can store multiple plans, switch as you cross borders, and top up on the go. This guide explains what an eSIM is, how it works in practice, what to check before you buy, and the quick steps to get set up—plus pro tips to avoid common pitfalls.

What is an eSIM?

An eSIM (embedded SIM) is a rewritable chip inside your phone that holds your mobile plan details digitally. Think of it as a secure profile stored on your device rather than a removable card. You can:

  • Add or remove plans over Wi‑Fi (no physical card needed)
  • Store multiple eSIM profiles on one device
  • Run dual lines (e.g., home number + travel data) at the same time

In 2025, eSIM is standard on most mid‑to‑high‑end smartphones and many tablets and wearables. It’s particularly useful for international travel: you can buy a country or regional plan before you fly—like Esim United States or Esim Western Europe—and activate it when you arrive.

Under the hood (plain English)

  • Your device’s eUICC chip stores “profiles” issued by mobile providers.
  • You download a profile using a QR/activation code. This securely loads your plan details (number, network authorisations).
  • When you land, your device registers on partner networks, just like a normal SIM—only it’s all digital.

How an eSIM works (in practice)

Here’s the typical travel flow:

  1. Choose a plan for your destination or region. Browse options by country on Destinations, or go regional with Esim North America or Esim Western Europe.
  2. Receive your eSIM details by email: usually a QR code plus manual activation codes.
  3. Connect your phone to Wi‑Fi and add the eSIM in Settings (scan the QR or enter the code).
  4. Label your lines (e.g., “Home” and “Travel Data”).
  5. Set the travel eSIM as your Mobile Data line. Leave your home line for calls/SMS if you wish.
  6. Turn Data Roaming on for the travel eSIM. Keep it off for your home SIM to avoid surprise charges.
  7. Land, switch off aeroplane mode, and you’re online.

That’s it—no shop queues, no paperwork.

Why travellers choose eSIM in 2025

  • Instant setup: Buy and activate in minutes over Wi‑Fi.
  • Keep your number: Run home line for calls/OTP, travel eSIM for data.
  • Better value: Local or regional rates often beat home roaming plans.
  • Flexible: Store multiple plans, swap as you cross borders.
  • Secure: Nothing to lose or damage; profiles can be remotely removed.
  • Sustainable: One less piece of plastic and packaging.

When a physical SIM still makes sense

  • Your phone doesn’t support eSIM (older/budget models).
  • You need a specific local voice plan with in‑person registration.
  • You’ll be in very remote areas with coverage from a niche local operator not included in regional eSIMs.

Is your phone compatible? Quick check

Most phones released since 2019 support eSIM, but models and regions vary. To check:

  • iPhone: Settings > Mobile Data > Add eSIM (or Mobile Service). If you see “Add eSIM,” you’re good.
  • Android (varies): Settings > Network & Internet > SIMs > Add eSIM (or Mobile Network > Advanced > Carrier). Look for “Download a SIM” or “Add eSIM.”

If you don’t see an “Add eSIM” option, your device may not be supported or it’s carrier‑locked. Also ensure your phone is unlocked before travelling.

Tip: Dual‑SIM behaviour differs by brand. Some devices support two active lines (DSDA), others let you switch data between lines quickly. Plan accordingly.

Step‑by‑step: installing a Simology eSIM

  1. Before you buy - Check compatibility in your device settings. - Ensure your phone is carrier‑unlocked. - Note your travel dates and coverage needs; pick a country or regional plan from Destinations.
  2. Pick the right plan - Single‑country: e.g., Esim France, Esim Italy, Esim Spain. - Multi‑country: e.g., Esim North America or Esim Western Europe. - City break in the US? See Esim United States.
  3. Prepare your device - Connect to stable Wi‑Fi. - Update iOS/Android to the latest version. - Have your eSIM email handy (QR + activation codes).
  4. Add the eSIM - iPhone: Settings > Mobile Data > Add eSIM > Use QR Code. If needed, choose “Enter Details Manually” to input the SM‑DP+ address and activation code from your email. - Android: Settings > Network & Internet > SIMs > Add eSIM > Download a SIM instead > Scan QR or enter code.
  5. Set defaults - Label lines clearly (e.g., “Home” and “Trip – Italy/Spain”). - Set the travel eSIM as “Mobile Data.” - Keep your preferred line for voice/SMS if you want to stay reachable.
  6. Configure roaming and APN (if prompted) - Turn Data Roaming ON for the travel eSIM. - If data doesn’t start, check APN settings (some plans need a specific APN—see plan instructions). Most Simology plans auto‑configure.
  7. Test and go - Toggle aeroplane mode off/on after landing. - Open a browser/map to confirm data. If no data, try manual network selection (see Pro Tips).

Pro tips for smoother trips and lower costs

  • Activate a day before you fly: Install the profile over Wi‑Fi at home; most plans start on first network use, not on install.
  • Avoid home roaming charges: Keep Data Roaming OFF on your home SIM while abroad.
  • Manual network selection: If speeds are slow, go to network settings and select another partner network manually (where available).
  • Prefer 4G if 5G is patchy: In some areas, forcing LTE/4G can be faster and more stable.
  • Hotspot use: Many plans allow tethering—handy for laptops. Check plan details on Destinations.
  • Keep a copy: Save your QR and activation codes securely in case you need to re‑install (some eSIMs are single‑use; don’t delete a working profile mid‑trip).
  • Battery and radio: If data drops, toggle aeroplane mode for 10 seconds or restart. It often resolves registration hiccups.

Common pitfalls and quick fixes

  • “No eligible line” or “Cannot add eSIM”: Your phone may be carrier‑locked or the region firmware disables eSIM. Verify unlock status with your home carrier.
  • QR code expired: Use the manual SM‑DP+/activation code from your email instead of scanning.
  • “Maximum eSIMs reached”: Delete an old, inactive eSIM profile (not your active home line) and try again.
  • Data but no apps loading: Check APN; flush with a quick aeroplane mode toggle; try manual network selection.
  • iMessage/WhatsApp confusion: If using a travel data line, ensure iMessage/FaceTime is set to your preferred number under Settings. WhatsApp typically stays linked to your original number regardless of data line.
  • No service after landing: Ensure Data Roaming is ON for the travel eSIM, OFF for the home SIM; confirm cellular is not limited to 3G/2G only.

Picking the right plan: country vs region

For business travellers and teams, pooled options and central billing can save time—see For Business. Travel agents, OTAs and resellers can explore partner pricing via the Partner Hub.

Security and privacy basics

  • eSIM profiles are encrypted and tied to your device’s eUICC.
  • Lose your phone? Your data line can be deactivated remotely by the provider; your profiles aren’t usable without your device.
  • Always use trusted Wi‑Fi when installing and keep your OS updated.

FAQ

Q1: What is eSIM, in one sentence?
A: A digital, downloadable SIM built into your phone that lets you add mobile plans without a physical card.

Q2: Is eSIM better than a physical SIM for travel?
A: In most cases, yes—setup is faster, you can keep your home number active, and you can switch plans without store visits. A physical SIM still helps if your phone lacks eSIM or you need a niche local voice plan.

Q3: Can I keep my WhatsApp/iMessage number while using an eSIM?
A: Yes. Use the travel eSIM for data and keep your home number for apps and calls/SMS. WhatsApp typically stays tied to your original number even if data comes from the travel eSIM.

Q4: Do I need internet to install an eSIM?
A: Yes, you need Wi‑Fi or existing mobile data to download the eSIM profile. After installation, the eSIM uses mobile networks as normal.

Q5: Can I move an eSIM to a new phone?
A: Many eSIMs are single‑use. Some providers support transfer via a new QR or in‑app migration. If you’re upgrading phones mid‑trip, don’t delete the old profile until you have confirmed transfer instructions.

Q6: Will eSIM cover me across multiple countries?
A: Yes if you choose a regional plan, such as Esim Western Europe or Esim North America. Country‑specific plans generally work only in that country.

The bottom line

An eSIM is the simplest way to get reliable mobile data abroad in 2025. It’s fast to set up, flexible across borders, and lets you keep your home number active. Check your device compatibility, choose the right country or regional plan, and install over Wi‑Fi before you travel.

Next step: pick your destination or region and compare plans on Destinations.

Read more blogs

Andes Highlights (3 Weeks): Peru–Bolivia–Chile–Argentina Connectivity

Andes Highlights (3 Weeks): Peru–Bolivia–Chile–Argentina Connectivity

Planning a south america itinerary 3 weeks through the high Andes? This route stitches together Peru’s Sacred Valley, Bolivia’s La Paz and Salar de Uyuni, Chile’s Atacama Desert, and northern Argentina’s quebradas or Mendoza wine country—often by long-distance bus and a couple of short flights. Connectivity is different at altitude: coverage is strong in cities but drops in high passes and salt flats; bus Wi‑Fi is patchy; border towns can be blackspots. The smart move is an eSIM with multi‑country coverage, backed by offline maps, offline translations, and a simple routine for crossing borders by bus without losing service. Below you’ll find a practical, connectivity-first itinerary; checklists to prep your phone, apps and documents; and on-the-ground tips for staying online where it matters: booking transport, hailing taxis, backing up photos, and navigating when the signal disappears.If you’re transiting via Europe or North America, you can also add a layover eSIM to stay connected door-to-door. Start with our country list on Destinations, then follow the steps, and you won’t waste time chasing SIM shops at 3,500 metres.The 3‑week Andes route at a glanceWeek 1: Peru (Cusco, Sacred Valley, Machu Picchu) - Fly into Cusco (or Lima then connect). - Base in Cusco; day trips to Pisac/Chinchero/Maras–Moray. - Train to Aguas Calientes; Machu Picchu visit; return to Cusco or continue to Puno/Lake Titicaca.Week 2: Bolivia and Chile (La Paz, Uyuni, San Pedro de Atacama) - Bus/collectivo via Copacabana to La Paz. - Fly or overnight bus to Uyuni. - 3‑day Uyuni–altiplano tour ending in San Pedro de Atacama (Chile).Week 3: Chile and Argentina (Atacama to Salta or Mendoza/Buenos Aires) - Choose: - North: San Pedro to Salta/Jujuy by bus; fly to Buenos Aires. - Or South: San Pedro–Calama flight to Santiago; bus or flight to Mendoza; onward to Buenos Aires.Connectivity notes (quick): - Cities: generally strong 4G/4G+; 5G in major hubs (Santiago, Buenos Aires). - Altitude/rural: expect long no‑signal stretches (Uyuni, altiplano passes, Paso Jama). - Bus Wi‑Fi: often advertised, rarely reliable. Plan to be offline onboard. - Border regions: networks switch; a multi‑country eSIM avoids sudden loss.eSIM vs local SIMs for a 4‑country tripFor a route with multiple borders and remote legs, eSIM wins on time and reliability.What a multi‑country eSIM gets you: - One plan across Peru, Bolivia, Chile, Argentina (check coverage per country on Destinations). - No passport/SIM registration queues at kiosks. - Keep your home number active on the physical SIM for calls/SMS codes. - Instant top‑ups if you burn data on photos or navigation.When a local SIM still helps: - Long stay in one country with heavy data use (e.g., a month in Buenos Aires). - Dead zones where a different local network performs better (rarely worth the hassle on a 3‑week pace).Practical approach: - Use an eSIM as your primary data line across all four countries. - If you find a specific local network far better in one region, add a cheap local SIM and keep the eSIM as backup.Device readiness checklist (before you fly)1) Check eSIM compatibility and SIM‑lock status on your phone.2) Buy and install your eSIM while on home Wi‑Fi. Keep a PDF/printed copy of the QR code.3) Label lines clearly (e.g., “eSIM Andes Data”, “Home SIM”).4) Turn on data roaming for the eSIM; leave roaming off for your home SIM to avoid charges.5) Set up dual‑SIM rules: data on eSIM; calls/SMS default to home SIM if needed.6) Download offline: Google Maps/Organic Maps for all target regions; language packs (Spanish at minimum); bus/air tickets; hotel confirmations.7) Cloud backups: set to upload on Wi‑Fi only; pre‑create shared albums for travel companions.8) Test tethering/hotspot with your laptop/tablet.If you’re transiting popular hubs, consider a short layover eSIM: - USA connections: add an Esim United States or a broader Esim North America.- Europe connections: Madrid/Barcelona? Use an Esim Spain. Paris or Rome? See Esim France and Esim Italy. Multi‑country layovers? Try Esim Western Europe.City‑by‑city connectivity notesCusco & the Sacred Valley (Peru)Coverage: Good in Cusco city; variable in high villages (Maras/Moray) and along Inca Trail approaches.Tips: Download Sacred Valley maps offline; pin viewpoints and ruins. most taxis use WhatsApp—save your accommodation’s number.Machu Picchu/Aguas Calientes: Patchy to none at the citadel. Upload your photos later; don’t rely on live ticket retrieval.Lake Titicaca: Puno and CopacabanaPuno: Reasonable 4G; bus terminals crowded—screenshot QR tickets.Crossing to Copacabana: Expect a signal drop around the border; have directions saved offline.La Paz (Bolivia)Good urban 4G; the cable car network has decent signal but tunnels do not.Yungas/“Death Road” tours: Mountain valleys cause dead zones—share your emergency contacts with the operator, carry a charged power bank, and don’t plan remote calls.Uyuni and the Altiplano (Bolivia to Chile)Uyuni town: OK 4G; ATMs finicky—use Wi‑Fi for banking apps.Salt flats/lagunas: Assume offline for most of the 3‑day tour. Guides often carry satellite phones; agree a pickup time/place in San Pedro and preload your map route.San Pedro de Atacama (Chile)Town: Solid 4G; accommodations often have Wi‑Fi but speeds vary.Geysers, Valle de la Luna: Offline navigation essential; sunrise trips start before mobile networks wake up in some areas.Salta/Jujuy or Mendoza/Buenos Aires (Argentina)Salta/Jujuy: Good city coverage; quebradas have long no‑signal sections.Mendoza: City 4G/5G; vineyards outside town can be patchy.Buenos Aires: Strong 4G/5G; ideal for cloud backups and large downloads before you fly home.Border crossings by bus: step‑by‑stepThe big ones on this route: Peru–Bolivia (Puno/Copacabana), Bolivia–Chile (Uyuni–San Pedro via Hito Cajón), Chile–Argentina (Paso Jama to Salta or Los Libertadores to Mendoza).How to keep service and sanity:1) The day before:- Top up your eSIM data.- Confirm your plan includes both countries you’re entering/leaving.- Download offline maps for both sides of the border and your town of arrival.- Save bus company WhatsApp and terminal address offline.2) On departure morning:- Keep a paper copy or offline PDF of tickets, insurance, and accommodation proof.- Charge phone and power bank; pack a short cable in your daypack.3) On the bus:- Don’t count on bus Wi‑Fi. Keep your eSIM as primary, but expect drops near mountain passes.- If your phone supports it, enable “Wi‑Fi calling” for later when you reach accommodation Wi‑Fi.4) At the border posts:- Data may be unavailable. Keep QR codes and booking numbers offline.- After exiting one country and entering the next, toggle Airplane Mode off/on to re‑register on the new network.- If the eSIM doesn’t attach, manually select a network in Mobile Settings.5) Arrival:- Send your accommodation a quick WhatsApp when you’re back online.- Recheck your eSIM’s data roaming is on; confirm you’re on an in‑country network, not a weak roaming partner.Pro tips: - Dual profiles: If your eSIM allows, keep a secondary profile for a different network in the same country—helpful in border towns.- Cash buffer: Some border terminals don’t accept cards; download a currency converter for offline use.Offline survival kit (5‑minute setup)Maps: Download regions for Cusco, Sacred Valley, Puno, La Paz, Uyuni, San Pedro, Salta/Jujuy or Mendoza, and Buenos Aires.Translations: Download Spanish for offline use; add phrasebook favourites (bus tickets, directions, dietary needs).Documents: Save PDFs of passports, tickets, hotel addresses; star them for quick access.Rides: Screenshots of pickup points; pin bus terminals and hotel doors.Entertainment: Podcasts and playlists for long bus legs, set to download on Wi‑Fi only.Altitude and your tech: what changesCoverage gaps lengthen: Fewer towers at high altitude; valleys can block signal. Assume offline on remote excursions.Batteries drain faster in cold: Keep your phone warm and carry a power bank (10,000–20,000 mAh).Hotel Wi‑Fi may be congested: Schedule big uploads (photo backups, app updates) for big-city stays like Santiago or Buenos Aires.GPS still works offline: Your blue dot shows on offline maps without data—preload everything.Data budgeting for 3 weeksTypical traveller usage across this route: - Messaging/Maps/Bookings: 0.2–0.5 GB/day- Social and photo sharing: 0.3–0.7 GB/day- Occasional video calls/streaming: 0.5–1.0 GB/dayFor a mixed-use trip, plan 15–25 GB for 3 weeks. Heavy creators should double it and upload over hotel Wi‑Fi when possible. If you work remotely, consider a higher‑capacity plan and a backup eSIM; see our guidance on For Business.Practical route with transport and connectivity cuesDays 1–4 Cusco base: Strong city signal; day trips may be spotty—go offline-ready.Days 5–6 Machu Picchu: Expect no service at the ruins; sync tickets ahead.Days 7–8 Puno to La Paz via Copacabana: Border signal drop; re‑register networks after crossing.Days 9–11 Uyuni tour to San Pedro: Treat as offline; charge nightly; carry spare cables.Days 12–14 San Pedro: Stable in town; tours offline; top up data before Paso Jama.Days 15–17 Salta/Jujuy or Mendoza: Good urban 4G; rural patches are offline.Days 18–21 Buenos Aires: Strongest connectivity of the trip; clear your uploads and map downloads for the flight home.Partnering and stopover extrasHospitality and tour operators in the Andes: help your guests stay connected—explore co‑branded solutions via our Partner Hub.Transatlantic flyers: test your eSIM setup on a layover with an Esim United States or Esim Western Europe before hitting high-altitude blackspots.FAQs1) Do I need a local SIM in each country?No. A multi‑country eSIM covering Peru, Bolivia, Chile and Argentina is simpler and works well for a 3‑week pace. Consider a local SIM only if you’ll spend longer in one country and want the absolute best regional coverage.2) Will my WhatsApp number change with an eSIM?No. WhatsApp is tied to your registered number, not your data line. Keep your home SIM active for voice/SMS (roaming off if you wish), and use the eSIM for data—WhatsApp continues as normal.3) Can I hotspot to my laptop or camera?Yes. Enable tethering on your eSIM. Mind your data: cloud backups and OS updates can burn gigabytes—set them to Wi‑Fi only or schedule in big cities.4) What if there’s no signal on the Uyuni/Atacama legs?That’s expected. GPS still works offline. Pre-download maps and translations, carry a power bank, and sync plans with your tour operator before departure.5) Will I get roaming charges at borders?If you’re using a multi‑country eSIM with coverage in both countries, you won’t incur extra roaming fees from your home carrier. Keep roaming off on your home SIM to avoid accidental use.6) I’m connecting via Europe or the US—worth getting a layover eSIM?Yes. It’s an easy way to test your setup and stay reachable. Try Esim North America or country options like Esim Spain, Esim France, or Esim Italy for common hubs.Next step: Browse South America coverage options and build your plan on Destinations.

Dual SIM on iPhone with eSIM: Default Line, Data, iMessage/FaceTime

Dual SIM on iPhone with eSIM: Default Line, Data, iMessage/FaceTime

Travel is smoother when your iPhone uses a local data plan while your home number stays reachable. That’s exactly what Dual SIM with eSIM enables. In this guide we’ll show you, step by step, how to add and label lines, choose your default for calls and SMS, set the correct data line, and decide which number powers iMessage and FaceTime. We’ll also cover roaming-safe presets so you land, switch on, and avoid bill shock. Whether you’re heading to the US, Europe or further afield, a few minutes of set-up makes the difference between seamless connectivity and expensive mistakes. If you need an eSIM first, browse country and regional plans on our Destinations page, including regional bundles like Esim Western Europe and Esim North America, or country options such as Esim United States, Esim France, Esim Italy, and Esim Spain.What “Dual SIM with eSIM” means on iPhoneYou can have two mobile plans on one iPhone: typically your physical SIM (home number) plus an eSIM (travel data), or two eSIMs on newer models.You choose which line handles voice and SMS by default.You pick a single data line at any time, with optional “Allow Mobile Data Switching” to keep data alive for calls on the other line.iMessage and FaceTime can be tied to either number (or your Apple ID), and you can switch per-contact when needed.This guide focuses on practical, traveller-first settings to keep your home number reachable while your travel eSIM handles data securely and affordably.Check your iPhone supports Dual SIM with eSIMMost recent iPhones support Dual SIM. Quick checkpoints:iPhone XS/XR and later: Dual SIM (one physical SIM + one eSIM).iPhone 13 and later: can support two active eSIMs simultaneously (no physical card required).US-model iPhone 14 and newer: eSIM-only (no physical SIM slot).To confirm on your device: 1. Go to Settings > General > About. 2. Look for “Digital SIM” or “eSIM” entries. If you see IMEI entries for two eSIMs, your phone supports dual eSIM. 3. Ensure you’re on the latest iOS for best Dual SIM features.Step 1: Add your travel eSIM and label your linesBefore you fly, install and label your eSIM so switching is painless on arrival.Purchase the right plan for your trip: - North America: Esim North America - United States: Esim United States - Western Europe: Esim Western Europe - Popular countries: Esim France, Esim Italy, Esim Spain - Explore all options: DestinationsInstall the eSIM: - Settings > Mobile Data (Cellular) > Add eSIM. Follow the on‑screen steps to scan your QR code or use the activation code. - If offered, “Convert to eSIM” can move your physical SIM to eSIM on supported devices.Label each line clearly: - iOS prompts you to label the plans. Choose intuitive labels like “Home” and “Travel”. - You can rename later: Settings > Mobile Data > tap a plan > Label.Pro tips: - Label accuracy is crucial; it’s how you’ll pick the right line in call/message screens. - Install eSIM while you still have good Wi‑Fi and time to test.Step 2: Choose your default line for calls and SMSThis controls which number your iPhone uses when you tap a number or send an SMS from scratch.Go to Settings > Mobile Data > Default Voice Line.Pick “Home” (your primary) if you want all ordinary calls/SMS to continue from your usual number.If you prefer to make outbound calls from your travel number (e.g., local business calls abroad), choose “Travel”.Per-contact preference: - Open the Contacts app > select a contact > tap “Preferred Line” (or “Preferred Cellular Plan”) > choose Home or Travel. - iPhone learns your behaviour and can automatically use the last line you used for that contact.Pro tip: - Keep Default Voice Line = Home, then set exceptions (like hotels/restaurants) to Travel so you appear local.Step 3: Set your mobile data line and RoamingThis is the big one for bill safety: make the eSIM your data source and block roaming on your home line.Settings > Mobile Data > Mobile Data > select “Travel”.Tap your Home line > toggle Data Roaming OFF.Tap your Travel line > toggle Data Roaming ON (if you’re abroad) so data works when you land.Optional: under Mobile Data, enable “Allow Mobile Data Switching”. This lets iPhone temporarily use the data line for ongoing voice calls on the other line. If you want strict control (no surprises), keep this OFF.When to disable your Home line entirely: - If your carrier charges for incoming roaming calls, you may prefer to disable the Home line: Settings > Mobile Data > tap Home > Turn On This Line = OFF. - If you still need OTP texts or critical calls, leave the Home line ON but keep Data Roaming OFF (you can still receive SMS over the cellular network; check your carrier’s policies for any charges).Pro tips: - Test data before you fly: switch Mobile Data to Travel, toggle Data Roaming ON, then back to Home until you depart. - If your Travel plan includes Wi‑Fi calling, consider making calls over apps (WhatsApp, FaceTime, Teams) to avoid local call charges.Step 4: Set iMessage and FaceTime to the right numberYou can attach iMessage/FaceTime to your travel number or keep them linked to your home number while using the travel eSIM for data.iMessage: 1. Settings > Messages > iMessage = ON. 2. Tap Send & Receive. 3. Tick the phone numbers and/or Apple ID you want active. 4. Under “Start New Conversations From”, choose the number you want by default (Home or Travel).FaceTime: 1. Settings > FaceTime > FaceTime = ON. 2. Tick the addresses/numbers to receive calls at. 3. Set “Caller ID” (or similar option) to the number you want people to see when you call.Switch the line per conversation: - In Messages, open a conversation > tap the contact name/photo at the top > change the line if the option appears (or start a new message and tap the line label above the keyboard to choose Home/Travel before sending).Pro tips: - For continuity with family and friends, keep iMessage/FaceTime on your Home number and use the Travel number only for local contacts. - If verification codes arrive via iMessage instead of SMS, they’ll still work over your Travel data because iMessage uses the internet.Traveller presets: fast, safe switchingiOS doesn’t have one‑tap “profiles”, but you can mimic them with a simple routine.Before you fly (10‑minute checklist): - Install and label your eSIM: “Travel”. - Settings > Mobile Data: - Mobile Data = Home (for now). - Home line > Data Roaming = OFF. - Travel line > Data Roaming = ON. - Messages > Send & Receive: - Choose “Start New Conversations From” = Home (or Travel if you want a local sender ID). - FaceTime > Caller ID = preferred number. - Save a few key contacts with Preferred Line = Travel (hotel, taxi, local colleagues).On the plane/at the gate: - Settings > Mobile Data > Mobile Data = Travel. - Optional: Allow Mobile Data Switching = OFF for strict control.On arrival: - Toggle Airplane Mode OFF; wait 1–2 minutes for the Travel eSIM to register. - Confirm data works (open a lightweight website). - Make a quick test call/iMessage.During your stay: - Keep Home line ON with Data Roaming OFF to receive SMS when needed. - For local calls, set Preferred Line = Travel per contact or temporarily switch the Default Voice Line.Heading home: - Switch Mobile Data back to Home. - Turn off the Travel line if you won’t use it until your next trip, or leave it installed for future travel.Troubleshooting: quick fixes that workNo data on the Travel eSIM: - Check Settings > Mobile Data > Mobile Data = Travel. - Settings > Mobile Data > tap Travel > Data Roaming = ON. - Restart iPhone; toggle Airplane Mode for 10 seconds. - Settings > General > About: if prompted for a Carrier Settings Update, accept. - If your plan requires a specific APN, it should auto‑configure with eSIM; if not provided, contact support.Calls/SMS using the wrong number: - Settings > Mobile Data > Default Voice Line = intended line. - For specific contacts, set Preferred Line. - In the Messages conversation, change the line before sending.iMessage/FaceTime not activating: - Ensure you have data on the active line and can receive SMS on at least one line. - Toggle iMessage/FaceTime OFF and back ON. - Sign out/in of Apple ID in Messages/FaceTime settings as a last resort.Can’t see “Allow Mobile Data Switching”: - It shows only when both lines are active and one is selected for Mobile Data.Missing the option to assign “Preferred Line”: - Make sure both lines are turned ON (Settings > Mobile Data > tap each plan).Picking the right eSIM for your routeSingle country city-breaks: choose country plans such as Esim United States, Esim France, Esim Italy or Esim Spain.Multi-country tours: regional passes like Esim Western Europe reduce border friction, while Esim North America suits US/Canada/Mexico hops.Unsure? Start at Destinations to filter by region, data size and duration.For teams and frequent travellers: - Centralise budgets and provisioning via For Business. - Travel agencies, IT resellers and affiliates can explore our partner tools at the Partner Hub.Pro tips for power usersDual SIM iPhone eSIM pairing: on iPhone 13 and newer, you can keep two eSIMs active—useful if your “home” number is also an eSIM.Visual labelling: add emojis to line labels (e.g., “Home 🏠”, “Travel ✈️”) to avoid mistakes when switching lines in Messages or Phone.Battery and coverage: if coverage is weak on one line, disabling that line can improve standby time.Maps and ride‑hailing: test these apps on the Travel data line before leaving the airport to confirm routing and SMS verification work.Keep it simple: Default Voice Line = Home, Mobile Data = Travel is the safest starting point for most travellers.FAQ1) Can I keep my home SIM for calls/SMS but use the eSIM for data? - Yes. Set Default Voice Line = Home. Set Mobile Data = Travel. Turn Data Roaming OFF on Home. You can still receive SMS on Home while using data on Travel.2) Will I get roaming charges on my home line if it’s on? - Data roaming is prevented if you turn Data Roaming OFF on the Home line. Voice/SMS charges depend on your carrier and whether you answer/receive calls or send texts while abroad. For maximum control, you can turn the Home line OFF entirely.3) Can iMessage/FaceTime use my home number while data comes from the Travel eSIM? - Yes. iMessage/FaceTime work over the active data connection, regardless of which number you choose in Send & Receive/Caller ID. Pick “Start New Conversations From” = Home to keep continuity.4) How do I switch the sending line in a specific message thread? - Open the conversation, tap the header (contact name/photo), and choose the line, or start a new message, then tap the line label above the keyboard to switch before sending.5) Why don’t I see both lines at once? - Ensure your iPhone supports Dual SIM and both lines are turned ON: Settings > Mobile Data > tap each plan > Turn On This Line. Older models may support only one eSIM plus one physical SIM, while newer models support two eSIMs.6) Can I keep two eSIMs active, no physical SIM? - On iPhone 13 and newer, yes—two active eSIMs are supported. US-model iPhone 14+ are eSIM-only devices and handle multiple eSIMs easily.Next step: Choose the right travel plan for your route on Destinations, then follow the steps above to set Mobile Data = Travel and Default Voice Line = Home before you fly.

AirDrop & Nearby Share Safety: Prevent Drive‑By Transfers

AirDrop & Nearby Share Safety: Prevent Drive‑By Transfers

Stuck in a crowded airport, train carriage or festival queue with Bluetooth on? That’s exactly when “drive‑by” file shares happen: strangers pushing images, contact cards or links to any nearby device that’s accepting transfers. This guide gives you practical, traveller‑first settings to block nuisance and risky shares on iPhone, iPad, Mac, Android (Quick Share/Nearby Share), Windows and Chromebooks. You’ll learn how to limit discoverability, require approval, use school/work modes, and practise sensible Bluetooth hygiene in crowds. Keep your device quiet, your name private, and your day disruption‑free.Whether you’re city‑hopping across Esim Western Europe, heading to the US on Esim North America or planning a single‑country stay with Esim United States, Esim France, Esim Italy or Esim Spain, set these protections before you reach the crowd. It takes under two minutes and prevents nasty surprises, from obscene images to phishing links disguised as “helpful” travel info.What’s the risk with “drive‑by” sharing?Nuisance or harassment: Unsolicited photos or videos—often explicit—pushed to anyone discoverable.Social engineering: Link or contact cards that mimic transport alerts or venue info.Privacy leakage: Your full name and device name can appear to everyone nearby.Corporate exposure: Travellers on work devices may breach policy if they accept unknown files.Distraction risk: Prompts popping up as you navigate boarding gates or ride‑share pickups.The fix isn’t to switch everything off forever. It’s to keep your device non‑discoverable by default, require approvals, and temporarily enable “Everyone” only when you actively share—with a strict timeout.Core principles for airdrop safety travelStay non‑discoverable by default: “Receiving Off” (Apple) or “No one/Hidden” (Android/Windows/ChromeOS).Use Contacts Only or Your devices when you must be visible; avoid “Everyone” unless absolutely necessary.Require approvals for all shares except your own devices.Keep your device identity generic (name and profile photo).Practise Bluetooth/Wi‑Fi hygiene in crowds; disable passive scanning where possible.For kids and corporate travellers, use system restrictions or management profiles.How to lock down AirDrop on iPhone and iPad (iOS 16+)AirDrop is safe when tightly scoped. Set it once, and use the “Everyone for 10 Minutes” option only when you’re actively sharing.Step‑by‑step: Set AirDrop to Contacts Only or Receiving OffOpen Control Centre (swipe down from the top‑right).Press and hold the network tile (with Wi‑Fi/Bluetooth).Tap AirDrop.Choose: - Receiving Off (most private), or - Contacts Only (balanced default). - Only choose Everyone for 10 Minutes when sending to a non‑contact in front of you.Pro tip: After any “Everyone for 10 Minutes” session, AirDrop auto‑reverts. Still, check it reset before entering a crowd.Disable “Bringing Devices Together” (NameDrop)This proximity feature makes sharing easier—but can invite bumps in crowded queues.Go to Settings > General > AirDrop.Toggle off Bringing Devices Together.Make your device name genericYour name is often visible when others look for devices.Settings > General > About > Name.Use something nondescript, e.g., “iPhone‑12” instead of your full name.Restrict AirDrop for kids or loaner devicesSettings > Screen Time.Content & Privacy Restrictions > Allowed Apps > toggle off AirDrop.This blocks AirDrop system‑wide until you re‑enable it. Great for school trips.How to harden AirDrop on Mac (macOS)When you travel with a Mac, keep it non‑discoverable unless actively sharing.Open Finder > AirDrop (left sidebar).At the bottom, set “Allow me to be discovered by” to: - No One (most private), or - Contacts Only (balanced).Disable Bluetooth from the menu bar if you don’t need it.Pro tip: Shares to yourself (same Apple ID) auto‑accept—safe and silent. Avoid “Everyone” in public places.Android: Secure Nearby Share/Quick ShareGoogle and Samsung unified sharing under “Quick Share” (formerly “Nearby Share”). Settings vary slightly by device, but the principles are the same.Step‑by‑step: Limit visibility and approvalsOn most Android devices (Pixel/OnePlus and many others): 1. Settings > Google > Devices & sharing > Quick Share. 2. Set Device visibility to: - No one (Hidden) by default, or - Contacts (safer than Everyone), or - Your devices (for seamless self‑sharing). 3. Ensure “Allow your devices to share without approval” is enabled only for your own devices. Require approval from everyone else.On Samsung: 1. Settings > Connected devices > Quick Share (or directly in Quick Share app). 2. Who can share with you: Contacts only or No one. 3. Turn off “Show my phone to others” unless you’re actively sharing.Quick toggle: - Pull down Quick Settings > long‑press Quick Share > adjust visibility. - If you must use “Everyone”, set it and immediately long‑press again to confirm it will time out (typically 10 minutes).Make your device identity boringSettings > About phone > Device name: Use “Pixel‑7” or similar.Google Account profile picture/name can appear to contacts—choose neutral options while travelling, if you like.Work profile (Android Enterprise)If your phone has a Work profile, your IT admin can disable Quick Share in the work context. Keep personal sharing off in crowds, and use your corporate channel (email/Teams/Drive) for work files. Business travellers can learn more on For Business and share this with IT via our Partner Hub.Windows and Chromebooks: Nearby sharing/Quick Share basicsWindows 10/11: Nearby sharingSettings > System > Nearby sharing.Set to Off or My devices only.Choose your save location (e.g., Downloads) and avoid auto‑opening received files.Pro tip: Rename your PC to something generic (Settings > System > About > Rename this PC).ChromeOS: Quick ShareSettings > Connected devices > Quick Share.Device visibility: No one or Contacts only.Disable “Open received files automatically” if available.Bluetooth and Wi‑Fi hygiene in crowdsMost local sharing relies on Bluetooth and Wi‑Fi for discovery. Tidy these up before stepping into a crowd.Turn off Bluetooth if you don’t need headphones or a watch right then.If you must keep Bluetooth on, keep AirDrop/Quick Share non‑discoverable.On Android: Settings > Location > Location services > disable Wi‑Fi scanning and Bluetooth scanning to reduce passive discovery beacons.Avoid public Wi‑Fi at pinch points (stations, stadium gates). Use mobile data instead—an eSIM like Esim Western Europe or Esim North America keeps you connected without exposure to crowded hotspots.Pro tip: If you must join venue Wi‑Fi, use a separate email for sign‑ups and avoid installing “Wi‑Fi helper” apps.Quick checklists for busy travellers30‑second pre‑crowd check (iPhone/iPad/Mac)AirDrop: Contacts Only or Receiving Off.NameDrop/Bringing Devices Together: Off.Device name: Generic.Bluetooth: Off if not needed; otherwise keep AirDrop restricted.Mac: Finder > AirDrop > No One or Contacts Only.30‑second pre‑crowd check (Android/Windows/ChromeOS)Quick Share/Nearby Share: No one/Hidden (or Contacts only).Require approval from everyone except your own devices.Device name: Generic.Bluetooth scanning and Wi‑Fi scanning: Off on Android.Windows Nearby sharing: Off or My devices only.When you actually need to share with a strangerMove a few steps aside from the crowd.Enable “Everyone for 10 minutes” (iOS) or “Everyone” with a timeout (Android/ChromeOS).Confirm the recipient’s device name and photo in person.Send the file and immediately reset visibility to Contacts Only/No one.Families, schools and business tripsFamilies: Use Screen Time to disable AirDrop on kids’ iPhones/iPads during trips. Teach “never accept from strangers” and how to set Receiving Off.Schools: Managed devices can block AirDrop/Quick Share during school events and trips. Share these settings with your IT lead.Businesses: Enforce Contacts Only or disable local sharing on managed devices for travellers. Build a standard “pre‑travel device checklist” and distribute it through your MDM. See For Business and our Partner Hub for deployment guidance.Practical traveller tips that stickKeep shares to known contacts. If someone nearby asks you to accept “their boarding pass” or “ride receipt”, decline and ask them to show it on their screen.Don’t tap unknown links from local shares; navigate to the airline, rail, or venue site/app yourself.Clear your Downloads/Files after trips; remove anything you don’t recognise.Use mobile data where possible. Regional passes like Esim Western Europe or single‑country options such as Esim France, Esim Italy, Esim Spain and Esim United States keep you online without risky public Wi‑Fi.FAQIs AirDrop safe to leave on while travelling?Yes, if set to Contacts Only or Receiving Off. Avoid “Everyone” except during a deliberate, brief share.What’s the Android equivalent of AirDrop?Quick Share (formerly Nearby Share). Set visibility to No one/Contacts, require approvals, and only use “Everyone” briefly.Can I stop my name appearing to strangers?Yes. Change your device name to something generic. On iPhone, Settings > General > About > Name; on Android, Settings > About phone > Device name; on Windows, rename your PC. Also disable photo/profile sharing where offered.How do I stop kids receiving random photos?On iOS: Screen Time > Content & Privacy > Allowed Apps > disable AirDrop. On Android: set Quick Share to No one and lock Settings behind a parental control app or Family Link.Does turning off Bluetooth stop all drive‑bys?It prevents discovery but may disrupt your watch/headphones and in some cases car keys. If you must keep Bluetooth on, set sharing visibility to Hidden/Contacts only.Will eSIM help with sharing safety?Indirectly. An eSIM keeps you on mobile data so you can avoid crowded public Wi‑Fi, reducing other exposure risks while travelling. Explore coverage by country and region via Destinations and options like Esim North America.Next stepPlan your route and set up your device before you go. Explore local coverage and pick the right travel eSIM on Destinations, then run the 30‑second safety checks above before you enter a crowd.