Why Should You Worry About Drive-By Transfers?
Crowded airports, busy metro stations, and packed tourist attractions are exactly the places where drive-by file transfers thrive. AirDrop on Apple devices and Nearby Share (now called Quick Share on newer Android) on Android phones both use a combination of Bluetooth Low Energy and Wi-Fi Direct to push files to nearby devices — no internet connection required. That's incredibly convenient when you want to share a photo with a friend, but it becomes a security liability the moment a stranger can silently ping your phone with unsolicited content.
The threat is real and documented. In 2023, Apple was forced to quietly roll out a patch for a Bluetooth-based AirDrop vulnerability that could expose users' phone numbers and email addresses to anyone nearby — a flaw first reported by researchers at TU Darmstadt as far back as 2019. Meanwhile, Statista estimates that over 1.5 billion active Apple devices were in use globally by 2025, meaning AirDrop's attack surface is enormous. On the Android side, Google's Quick Share (formerly Nearby Share) is pre-installed on hundreds of millions of devices worldwide.
Quotable stat: A 2023 TU Darmstadt study found that AirDrop's contact-discovery protocol could leak hashed phone numbers and email addresses to any attacker within Bluetooth range — without the target ever accepting a file.
This guide walks you through exactly how to lock down both platforms, explains the real risks, and gives you a practical checklist for staying safe whether you're traveling through Tokyo, navigating Europe's busy transit hubs, or sitting in a coffee shop anywhere in the world.
How Does AirDrop Actually Work — and Where Does It Go Wrong?
AirDrop works by broadcasting a short Bluetooth signal that announces your device's presence to other Apple devices nearby. When a sender initiates a transfer, your iPhone or Mac checks whether the sender is in your contacts (using a partial hash of phone numbers and emails) before deciding whether to show you a prompt. The problem: that contact-discovery handshake leaks partial hashes that can be cracked offline with a basic dictionary attack, as the TU Darmstadt researchers demonstrated.
There are three AirDrop visibility modes:
- Receiving Off — your device is invisible to all AirDrop senders
- Contacts Only — only people in your contacts list can see your device
- Everyone (10 Minutes) — any nearby Apple device can see you for a limited window (Apple changed "Everyone" to a timed 10-minute window in iOS 16.2 as a direct response to misuse on public transit)
The "Everyone" setting was the root cause of a wave of incidents on the Tokyo subway system in 2021–2022, where commuters received unsolicited explicit images — a practice dubbed "cyber-flashing." Japan's experience was a wake-up call that led Apple to implement the 10-minute limit globally.
What Can an Attacker Actually Do?
An attacker within roughly 30 feet (9 meters) can:
- Send unsolicited files — images, PDFs, or even malicious links disguised as contact cards
- Harvest contact metadata — if you're on an unpatched iOS version, partial hashes of your email/phone can be exposed
- Profile your device — repeated AirDrop broadcasts can fingerprint your device over time
Accepting a file from an unknown sender is the bigger risk. A malicious PDF or image can exploit unpatched rendering vulnerabilities, and a vCard (.vcf) file can silently add a contact with a spoofed caller-ID name to your address book.
How Do You Turn Off or Restrict AirDrop on iPhone and iPad?
Locking down AirDrop on iOS takes under 30 seconds. The correct setting depends on your situation: traveling solo in a crowded city calls for a different posture than sitting at a work conference where you need to share files.
Step-by-Step: iPhone & iPad (iOS 16 and Later)
- Open Settings → General → AirDrop
- Choose one of three options:
- Receiving Off — best for commuting, airports, and any time you don't need to receive files
- Contacts Only — good default for everyday use
- Everyone for 10 Minutes — use only when you actively need to receive from a stranger, then it auto-reverts
Quick-access shortcut: Swipe into Control Center, long-press the network tile (top-left cluster), then long-press the AirDrop icon to cycle through settings without opening the Settings app.
Step-by-Step: Mac (macOS Ventura and Later)
- Open Finder → AirDrop (or press Shift + Cmd + R)
- At the bottom of the AirDrop window, click the "Allow me to be discovered by:" dropdown
- Select No One or Contacts Only
Alternatively: System Settings → General → AirDrop & Handoff → set AirDrop to Contacts Only or Off.
What About Older iOS Versions?
If you're running iOS 15 or earlier, the "Everyone" setting has no time limit — meaning your device is permanently visible until you manually change it. This is a strong reason to keep iOS updated. According to Apple's security release notes, the timed "Everyone" mode was introduced specifically in iOS 16.2 to address misuse. Updating is free and takes minutes.
How Do You Secure Nearby Share (Quick Share) on Android?
Google rebranded Nearby Share as Quick Share in early 2024 following a collaboration with Samsung, which had its own version of the feature. On most Android phones running Android 6.0 or later, you'll find it under Quick Share or Nearby Share depending on your device manufacturer and Android version. The security settings are equivalent across both names.
Step-by-Step: Android (Quick Share / Nearby Share)
-
Open Settings → Connected Devices → Connection Preferences → Nearby Share or Quick Share
-
Under Device Visibility, choose:
- Hidden — no one can see your device (best for public spaces)
- Your Devices — only devices signed into your Google account can see you
- Contacts — only people in your Google Contacts
- Everyone — anyone nearby; avoid this in public
-
Toggle Show Notification on so you're alerted if someone attempts a transfer even when visibility is restricted.
Samsung-Specific Quick Share Settings
Samsung devices running One UI 6 or later have Quick Share built into the notification shade. Tap Quick Share in the quick-settings panel, then tap the gear icon to access visibility options. Samsung also adds a "Temporarily share with nearby contacts" toggle — useful for one-off transfers without permanently opening your visibility.
A Note on Android's Bluetooth Scanning
Even with Nearby Share/Quick Share set to Hidden, Android continues to use Bluetooth for other services (headphones, smartwatches, etc.). Turning off Bluetooth entirely is the nuclear option, but it breaks a lot of legitimate functionality. The smarter approach: keep Bluetooth on but set Quick Share to Hidden or Your Devices — this way, Bluetooth works normally but your device won't respond to unsolicited file-transfer requests.
AirDrop vs. Quick Share: How Do the Security Settings Compare?
Both platforms have converged on similar security models, but there are meaningful differences in defaults and transparency. Here's a side-by-side look:
| Feature | AirDrop (iOS/macOS) | Quick Share (Android) |
|---|---|---|
| Default visibility | Contacts Only (iOS 16+) | Hidden (most OEMs) |
| "Everyone" time limit | 10 minutes (iOS 16.2+) | No auto-revert; manual only |
| Contact-hash vulnerability | Patched in iOS 16.1.1 (Nov 2022) | Not applicable (different protocol) |
| Notification on blocked attempt | No native alert | Yes (optional toggle) |
| Works without internet | Yes (Bluetooth + Wi-Fi Direct) | Yes (Bluetooth + Wi-Fi Direct) |
| Range | ~30 ft / 9 m | ~20 ft / 6 m |
| File size limit | No hard limit | 200 MB per transfer (Wi-Fi Direct) |
| Cross-platform | Apple only | Android + Windows (via Google) |
Key takeaway: AirDrop's default "Contacts Only" on modern iOS is safer out-of-the-box than older Android defaults, but Android's optional "Show Notification" for blocked attempts gives you better visibility into who's trying to reach you. Neither platform is inherently safer — configuration is what matters.
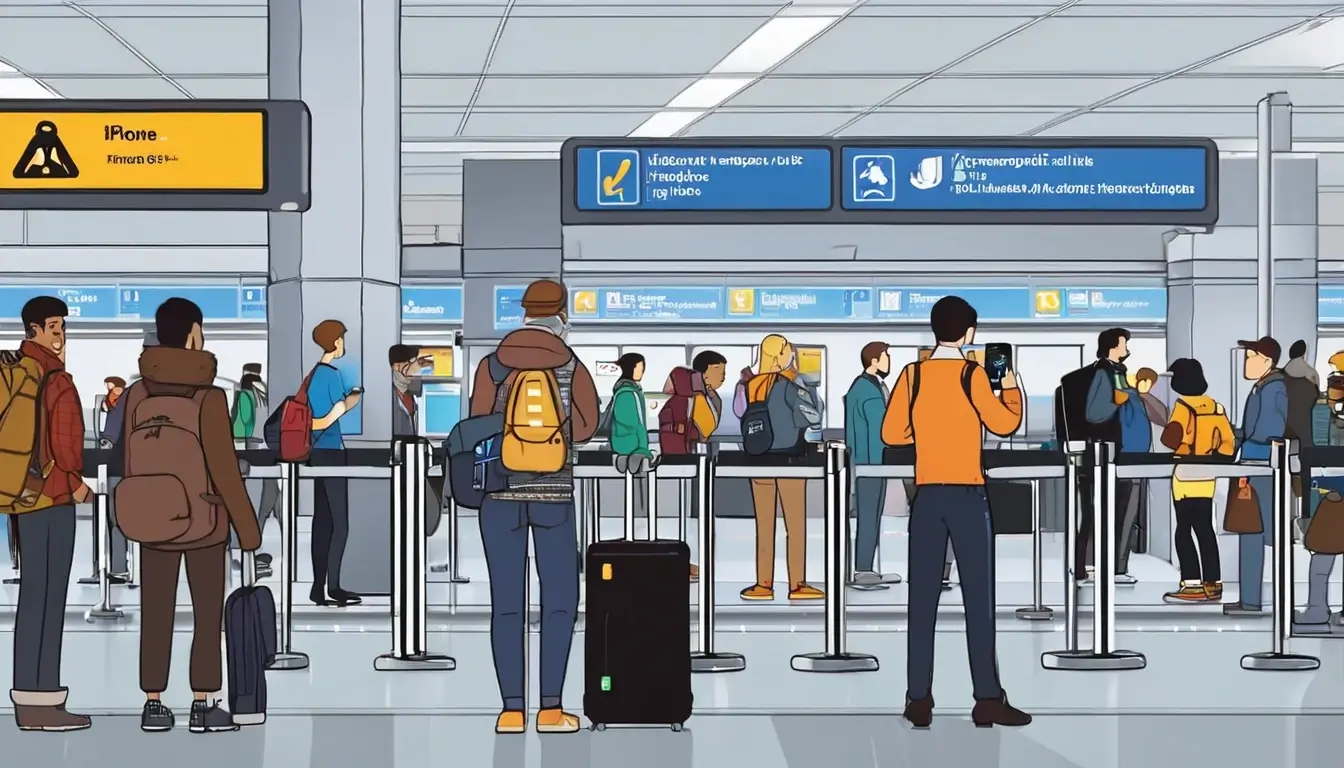
What Are the Riskiest Places for Drive-By Transfer Attacks?
Drive-by transfer attacks aren't random — they cluster in high-density, high-anonymity environments where attackers can blend into crowds. Knowing where the risk spikes helps you decide when to tighten your settings.
Highest-risk environments:
- International airports — especially departure lounges and gate areas, where you're stationary for extended periods and surrounded by strangers
- Public transit — subway cars, buses, and train stations, particularly in major cities
- Music festivals and large events — dense crowds, low accountability
- Hotel lobbies and co-working spaces — semi-public spaces where people assume a degree of trust
- Tourist hotspots — pickpocketing and digital nuisance attacks often co-occur in the same locations
If you're traveling internationally — say, exploring Japan's transit network or navigating Southeast Asia's busy cities — setting AirDrop to "Contacts Only" or "Off" before you land is a smart pre-departure habit, right alongside enabling airplane mode and switching to a travel eSIM.
Lower-risk environments:
- Your own home or office
- Small gatherings with known people
- Rural or low-density areas
Does Turning Off AirDrop Affect Other iPhone Features?
Disabling AirDrop or setting it to "Contacts Only" has no effect on any other iPhone feature. It doesn't disable Bluetooth, Wi-Fi, Handoff, Universal Clipboard, or iMessage. The only thing that changes is whether your device appears in other people's AirDrop sender lists.
Some travelers worry that turning off AirDrop will prevent them from receiving eSIM QR codes or activation links — it won't. eSIM QR codes are typically delivered via email, SMS, or a provider's app, not through AirDrop. Whether you're setting up a UK eSIM or a US eSIM, the activation process happens entirely through your device's cellular settings, not peer-to-peer file transfer.
What Other Wireless Attack Vectors Should Travelers Know About?
AirDrop and Nearby Share are the most consumer-visible wireless transfer risks, but they're not the only ones. A security-conscious traveler should have a broader picture.
Bluetooth Sniffing and Bluejacking
Classic Bluetooth attacks — like Bluejacking (sending unsolicited messages) and Bluesnarfing (unauthorized data access) — are largely mitigated on modern devices, but they're not extinct. The GSMA's device security guidelines recommend keeping Bluetooth in non-discoverable mode when not actively pairing, which is the default on both iOS and Android.
Rogue Wi-Fi Hotspots
A fake "Free Airport Wi-Fi" network can intercept unencrypted traffic. Always use a VPN on public Wi-Fi, or better yet, rely on your own cellular data. Traveling with a dedicated travel eSIM means you always have a secure, private data connection without depending on public hotspots — a practical benefit that goes well beyond avoiding roaming fees.
NFC Tap Attacks
Near-field communication (NFC) requires physical proximity (under 4 cm), making it harder to exploit than Bluetooth. Still, "NFC bumping" — briefly touching a malicious NFC tag or device to your phone — can trigger actions on some Android phones if NFC is enabled and the screen is unlocked. Turn off NFC when you're not actively using it (Google Pay, contactless payments) in crowded environments.
USB Charging Stations ("Juice Jacking")
The FBI and CISA (Cybersecurity and Infrastructure Security Agency) have both issued public warnings about "juice jacking" — malicious USB charging stations that can install malware or exfiltrate data while your phone charges. Always use your own charger and a power outlet, or carry a USB data-blocker if you must use a public USB port.
How Do You Build a Complete Travel Device Security Checklist?
Good travel security is layered — no single setting protects you from everything. Here's a practical pre-departure checklist that combines AirDrop/Nearby Share hardening with broader device hygiene.
Before You Leave Home
- Update iOS/Android to the latest version — patches close known vulnerabilities
- Set AirDrop to "Contacts Only" (or Off for high-risk destinations)
- Set Quick Share/Nearby Share to "Hidden" on Android
- Disable NFC if you won't be using contactless payments
- Enable Find My (iPhone) or Find My Device (Android)
- Set a strong 6-digit PIN or alphanumeric passcode — avoid Face ID as the sole unlock method in some jurisdictions
- Back up your device — cloud backup via iCloud or Google Photos, or locally via a computer (see our guide to photo backup options for travelers)
- Install a VPN and test it before departure
- Download offline maps for your destination (our 2026 offline maps guide covers the best options)
- Activate your travel eSIM so you have cellular data from the moment you land, reducing reliance on public Wi-Fi
At Your Destination
- Keep AirDrop/Nearby Share restricted in public spaces
- Avoid accepting unsolicited file transfers — even from apparent "friends" (social engineering is real)
- Use cellular data over public Wi-Fi for sensitive tasks (banking, email)
- Lock your screen whenever you set your phone down
- Be aware of shoulder-surfers when entering PINs or passwords
Managing Data Usage on the Road
Staying secure often means staying on cellular rather than public Wi-Fi — but that can eat through your data plan quickly. Pair your security settings with smart data-saving habits: our guide to cutting mobile data usage by 50% while traveling covers the iOS and Android settings that make a real difference without sacrificing connectivity.
Are There Any Legitimate Uses for "Everyone" Mode in Public?
Yes — and it's worth acknowledging them rather than reflexively saying "never use Everyone mode."
Legitimate use cases for "Everyone for 10 Minutes" (AirDrop) or "Everyone" (Quick Share):
- Receiving files from a new colleague whose number isn't in your contacts yet
- Getting photos from a stranger you just met at a hostel or on a tour
- Sharing files at a conference where you're meeting people for the first time
- Tech support scenarios — a Genius Bar technician or IT helpdesk might need to send you a file
The key is intentionality: open up "Everyone" mode only when you have a specific transfer in mind, stay alert during those 10 minutes, and close it immediately afterward. On Android, remember there's no auto-revert — you have to manually switch back to Hidden or Contacts.
FAQ
Can someone hack my phone through AirDrop without me accepting anything?
Yes, partially. The TU Darmstadt research published in 2021 demonstrated that AirDrop's contact-discovery protocol leaks partial hashes of your phone number and email address to anyone who initiates a transfer request — even if you decline or don't respond. This metadata exposure happens before any file is accepted. Apple patched the most critical version of this vulnerability in iOS 16.1.1 (November 2022), so keeping your device updated is essential.
What's the difference between AirDrop and Nearby Share / Quick Share?
AirDrop is Apple's peer-to-peer file-transfer system, available on iPhone, iPad, and Mac. Nearby Share (rebranded Quick Share in 2024) is Google's equivalent for Android devices, also available on Windows via a Google app. Both use Bluetooth for discovery and Wi-Fi Direct for the actual file transfer. The security settings are similar, but AirDrop has a built-in 10-minute auto-revert from "Everyone" mode on iOS 16.2+, while Quick Share requires manual switching.
Does disabling AirDrop drain my battery faster or slower?
Disabling AirDrop (setting it to "Receiving Off") actually saves a tiny amount of battery because your device stops broadcasting Bluetooth discovery signals for AirDrop. The difference is negligible in practice — we're talking minutes over a full day's use — but it's a net positive, not a negative.
Is it safe to use AirDrop on a plane?
On a plane in airplane mode, AirDrop still works between devices on the same aircraft because it uses Bluetooth and Wi-Fi Direct (local radio, no cellular). The risk is low — you're in a contained environment with a fixed group of people — but you're still broadcasting to everyone onboard. "Contacts Only" is a sensible setting for flights, especially on long-haul routes where you're surrounded by strangers for many hours.
Can I use AirDrop to receive my eSIM QR code?
No — eSIM QR codes are not typically delivered via AirDrop. Providers send QR codes by email, SMS, or within their app. You scan the QR code through Settings → Cellular → Add eSIM on iPhone, or Settings → Network & Internet → SIMs → Add eSIM on Android. AirDrop settings have no bearing on the eSIM activation process.
What should I do if I receive an unsolicited AirDrop file?
Decline it immediately by tapping "Decline" on the transfer prompt. Do not tap "Accept" out of curiosity. If you're repeatedly receiving unsolicited transfers in the same location, switch AirDrop to "Receiving Off" immediately. There's no way to report the sender through AirDrop itself, but if the content is illegal (e.g., explicit images sent to minors), report it to local law enforcement with as much detail as possible about the time and location.
Does Quick Share on Android work with iPhone?
No — Quick Share/Nearby Share is Android-to-Android (and Android-to-Windows via Google's app). It doesn't work with Apple devices. For cross-platform sharing between iPhone and Android, you'd need a different method: email, a messaging app, a cloud service like Google Drive or iCloud, or a third-party app. AirDrop is similarly Apple-only.
How do I know if someone is trying to send me a file when Nearby Share is set to Hidden?
If you've enabled the "Show Notification" toggle in Quick Share settings on Android, you'll receive a notification when someone nearby attempts to send you a file, even if your device is set to Hidden. This is a useful security feature — it lets you know someone is trying to reach you without actually accepting the transfer. AirDrop doesn't have an equivalent notification for blocked attempts on iOS.
Staying Secure Is a Habit, Not a One-Time Fix
The settings covered in this guide take less than two minutes to configure, but their value compounds every time you travel. Setting AirDrop to "Contacts Only" before boarding a flight, toggling Quick Share to "Hidden" when you arrive at a busy train station, and staying alert to unsolicited transfer prompts are small habits that add up to meaningful protection.
Think of device security the same way you think about travel connectivity: a bit of preparation before you leave makes everything smoother once you're on the road. Just as switching to a travel eSIM eliminates the stress of finding a local SIM shop or paying surprise roaming charges, locking down your wireless transfer settings eliminates an entire category of digital risk before it can materialize.
The threat landscape evolves — Apple and Google both continue to patch vulnerabilities and tighten defaults — but the core principle stays constant: the less your device broadcasts to strangers, the safer you are. Keep your software updated, use the most restrictive AirDrop/Quick Share setting that still lets you do what you need to do, and stay aware of your surroundings in high-density public spaces. Your phone is worth protecting.