Family Travel Data: Kids’ Phones, Parental Controls & Data Budgets

Blog

Family Travel Data: Kids’ Phones, Pare...

Family Travel Data: Kids’ Phones, Parental Controls & Data Budgets

30 Oct 2025

Family Travel Data: Kids’ Phones, Parental Controls & Data Budgets

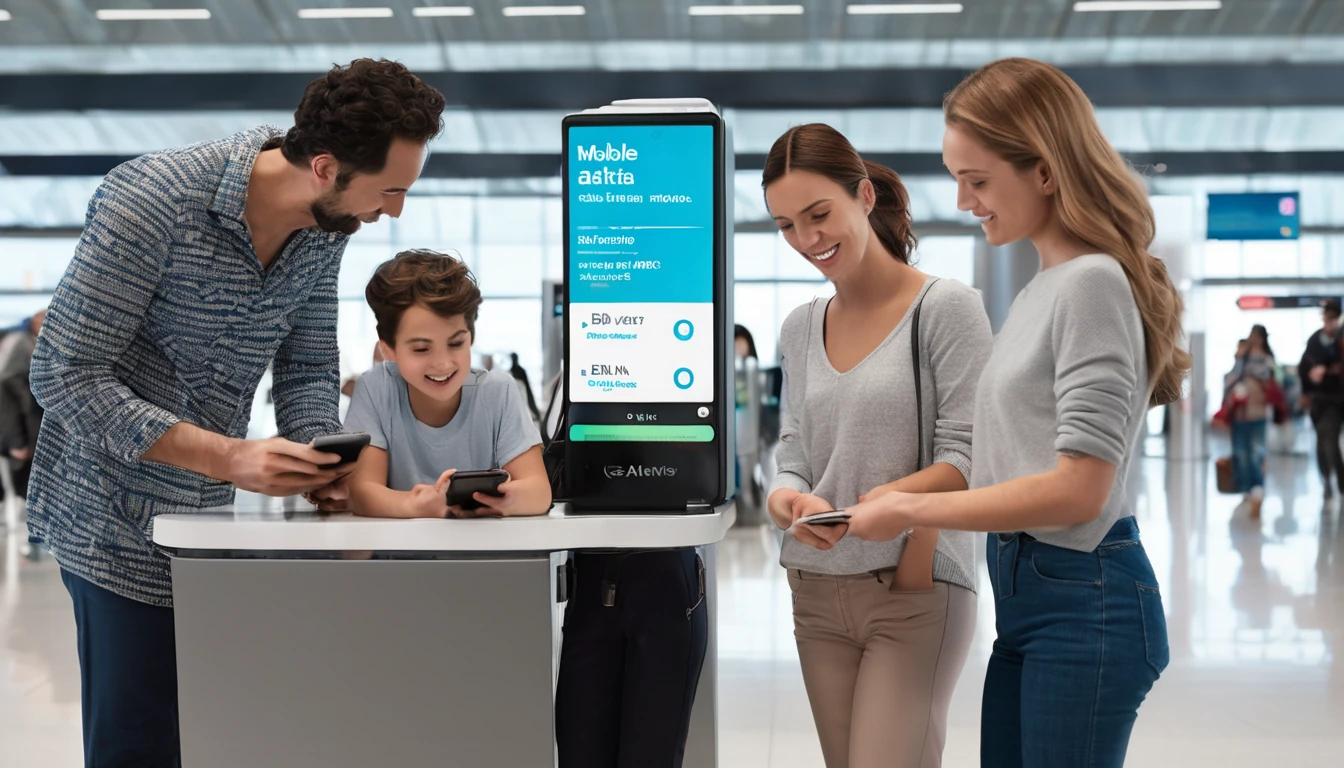
Planning a family trip is challenging enough without worrying about runaway roaming bills or kids disappearing into YouTube the minute you land. A family travel eSIM setup gives each child their own data line you can control, budget and pause on demand—while your home SIM stays safe from bill shock. In this guide, you’ll set up child lines in minutes, apply iOS and Android parental controls that actually work abroad, and put firm data budgets in place. We’ll cover roaming limits that prevent surprises, smart shared data strategies, and how to choose the right country or regional plan. Whether you’re heading to one country or crossing borders, you’ll find clear, time-saving steps and checklists. Browse regional and country options via Destinations, including multi-country passes like Esim Western Europe and Esim North America, or single-country plans such as Esim United States, Esim France, Esim Italy and Esim Spain.

What a family travel eSIM setup looks like

  • Each child has a prepaid travel eSIM on their phone for data abroad.
  • The home SIM stays in the phone with “Data Roaming” OFF (so the bill stays safe).
  • The parent has an eSIM too, to test settings and share tethering in a pinch.
  • Parental controls limit app installs, screen time, explicit content and in-app purchases.
  • OS-level data controls cap usage, block background data and keep video from eating the bundle.

This approach keeps your home numbers available for Wi‑Fi calling or messages, but all mobile data goes through a fixed-cost travel eSIM you can top up if needed.

How to set up child travel eSIMs (15–30 minutes)

1) Confirm device compatibility
- iPhone XS/XR or newer support eSIM. For Android, check Settings > About phone or the maker’s site.
- If the device is carrier-locked, it may still accept eSIM profiles from roaming partners, but many plans require an unlocked phone. Verify before purchase.

2) Pick the right plan
- One country only? Pick the relevant page: Esim United States, Esim France, Esim Italy, Esim Spain.
- Multi-country trip? Choose a regional pass: Esim Western Europe or Esim North America.
- Not sure? Explore all options under Destinations.

3) Size the data budget per child
- Light use (messaging, maps, light browsing): 1–2 GB per week.
- Moderate (add some short videos, social): 3–5 GB per week.
- Heavy (streaming, gaming on mobile data): 7–10+ GB per week.
Pro tip: kids often underestimate usage; buy slightly more than the plan math suggests, or choose a plan that’s easy to top up.

4) Install the eSIM before you fly
- After purchase, follow the QR code or activation link instructions.
- Label the line with your child’s name for clarity.
- Set the travel eSIM as the “Mobile Data” line. Keep your home SIM for calls/text if needed, but set Data Roaming OFF on the home SIM.

5) Configure data and roaming correctly
- On iPhone: Settings > Mobile Data > Data Roaming ON for the travel eSIM; OFF for the home SIM. Enable “Low Data Mode” on the travel eSIM.
- On Android: Settings > Network & Internet > SIMs > enable Roaming on the travel eSIM only. Turn on “Data Saver.”

6) Test it
- If the plan supports early activation, test on Wi‑Fi to confirm installation.
- On arrival, toggle Airplane Mode off, ensure the travel eSIM is selected for data, and wait up to a few minutes for the network to register.

Lock it down on iPhone: Family Sharing and Screen Time

Set up Family Sharing first so you can manage your child’s device remotely:

  • Settings > Family > Add Member (create child account if needed).
  • Enable “Share Purchases” and “Ask to Buy” to approve downloads.

Apply Screen Time controls:

  • Settings > Screen Time > Turn On Screen Time (for your child via Family).
  • Downtime: set hours for sleep/quiet time.
  • App Limits: cap categories like Social or Games.
  • Communication Limits: restrict who they can contact during allowed time.
  • Content & Privacy Restrictions: block explicit content, web content, and location changes.
  • iTunes & App Store Purchases: require approval for installs and in‑app purchases.

Tighten data usage:

  • Settings > Mobile Data > select the travel eSIM > Low Data Mode ON.
  • Settings > App Store > App Downloads > Ask If Over 200 MB or Wi‑Fi Only.
  • Settings > Photos > Mobile Data OFF (disable cellular syncing/backups).
  • Settings > General > Background App Refresh > Off or Wi‑Fi only.
  • Settings > Mobile Data > Wi‑Fi Assist OFF.

Pro tips for iPhone
- Reset usage counters on day 1: Settings > Mobile Data > Reset Statistics. Check daily.
- In video apps, set streaming to SD. YouTube: tap profile > Settings > Data saving.
- Turn Personal Hotspot OFF by default; allow case-by-case.

Set up supervision:

  • Install Google Family Link on the parent phone.
  • Create or add your child’s Google Account and link their device.
  • Approve app installs, set daily screen time, and enforce bedtime.

Control data usage:

  • Settings > Network & Internet > Data Saver ON.
  • Settings > Network & Internet > SIMs > Data warning & limit: set a usage warning and hard limit for the travel eSIM.
  • Per‑app background data: Settings > Network & Internet > Mobile network > App data usage > toggle Background data OFF for heavy apps.
  • Play Store > Settings > Network preferences > Auto‑update apps > Over Wi‑Fi only.
  • Google Photos > Backup > Mobile data usage OFF.

Pro tips for Android
- Rename the eSIM to your child’s name: Settings > SIMs > edit/rename.
- Some Android builds support a true data limit that disables data at the threshold—use it.
- Disable tethering by default: Settings > Hotspot & tethering OFF.

Data budgets that actually work

Start with realistic usage numbers (approximate):

  • Messaging (text/images), navigation, browsing: 0.1–0.3 GB/day.
  • Short social videos: 0.5–1 GB/hour.
  • HD streaming (1080p): 2–3 GB/hour; SD (480p): ~0.7 GB/hour.
  • Cloud backups and photo sync: can exceed 1 GB/day if left on.

Simple budgeting approach:

  • Choose per‑child bundles rather than relying on one shared hotspot; it’s easier to track and control.
  • Set daily or trip‑long targets. Example: 4 GB for a one‑week trip = ~0.5 GB/day.
  • Enforce “Wi‑Fi first” for big downloads (maps, playlists, app updates).
  • Reset OS data counters on arrival; review nightly.

When someone hits their cap:

  • Temporarily disable their mobile data line (iOS: Settings > Mobile Data > turn off; Android: toggle the eSIM line off).
  • Top up or upgrade plan if needed; otherwise keep them on hotel/café Wi‑Fi only.

Roaming limits that prevent bill shock

  • Keep the home SIM’s Data Roaming OFF. All mobile data should route via the travel eSIM.
  • Disable auto‑updates and cloud backups over mobile.
  • Turn on Low Data Mode/Data Saver and block background data for heavy apps.
  • Turn off Wi‑Fi Assist (iOS) so the phone doesn’t silently switch to mobile data.
  • Set video apps to SD quality.
  • Download offline maps (Google Maps/Apple Maps) for cities on your route.
  • Use messaging apps’ data saver modes (WhatsApp: Settings > Storage and data > Use less data for calls).

Shared data strategies on the road

  • Establish “Wi‑Fi windows”: hotel mornings/evenings for big syncs, zero mobile streaming during transit.
  • Use parent‑approved downloads: Spotify/Netflix offline at the hotel, not on 4G/5G.
  • Keep Personal Hotspot OFF by default; if used, set a timer and watch the parent’s usage meter.
  • Have a “no new apps on mobile data” rule—approve installs only on Wi‑Fi via Family Sharing/Family Link.
  • If travelling in multiple countries, prefer a regional plan like Esim Western Europe or Esim North America so you don’t lose service at borders.

Country and region examples

  • United States city hopping: pick Esim United States per device. Heavier users (maps + socials + short videos) often need 5–10 GB/week.
  • France road trip: Esim France for single-country travel.
  • Italy family holiday: Esim Italy with offline maps for cities and national parks.
  • Spain beach and city mix: Esim Spain and lock streaming to SD.
  • Multi-country Europe (France–Italy–Spain and beyond): one Esim Western Europe keeps data live at borders—no re‑installing.
  • USA + Canada (and sometimes Mexico): choose Esim North America to stay covered across the region.

Quick pre‑departure checklist

  • Devices are eSIM‑capable and (ideally) unlocked.
  • Travel eSIMs purchased, installed, and labelled per child.
  • Home SIM Data Roaming OFF; travel eSIM Data Roaming ON.
  • iOS Screen Time or Android Family Link set up; app installs require approval.
  • Low Data Mode/Data Saver ON; background data restricted for heavy apps.
  • App Store/Play Store updates set to Wi‑Fi only; cloud photo backup on Wi‑Fi only.
  • Offline maps and playlists downloaded on Wi‑Fi.
  • Personal Hotspot OFF by default.

Pro tips for smooth family data

  • Keep QR codes and eSIM activation details in a shared family note for easy reinstallation if a device is reset.
  • Name lines clearly (“Mia – Travel Data”) to avoid mistakes.
  • If you need work-ready controls for larger groups or school trips, explore management options via For Business. Travel agencies and organisers can collaborate through our Partner Hub.
  • When crossing borders, reboot devices after you enter a new country to speed up network registration.
  • If speeds dip, try toggling 5G/4G or manually selecting a different network in Mobile Network settings.

FAQ

Q: What is a family travel eSIM and do kids need their own?
A: It’s a prepaid mobile data plan delivered digitally to a phone’s eSIM. Most plans are per device; giving each child their own eSIM keeps budgets clear and controls simple.

Q: Can I just share my data via hotspot from one parent phone?
A: You can, but it’s hard to track usage and easy to blow through the bundle. Separate eSIMs per child make limits enforceable and reduce arguments.

Q: How do I cap my child’s data?
A: Use OS data warnings/limits (Android), Low Data Mode/Data Saver, and app‑level restrictions. On iPhone you can’t set a hard cap, but you can monitor usage daily and disable the line or top up when it hits your threshold.

Q: Will calls and SMS work with a data‑only eSIM?
A: Yes—over-the-top services like iMessage, WhatsApp, FaceTime and Wi‑Fi calling work with data. Your home SIM can still receive regular calls/SMS over Wi‑Fi with roaming off.

Q: Do parental controls still work abroad?
A: Yes. iOS Screen Time and Google Family Link are account‑based and apply anywhere you have data or Wi‑Fi. Set them up before travel.

Q: What if my child’s phone is carrier‑locked?
A: Check with your carrier about unlocking before you buy a travel eSIM. Some locked devices accept only the home carrier’s profiles, which can limit options.

Next step

Plan your family travel eSIM by country or region now: browse Destinations and pick per‑child plans before you fly.

Read more blogs

Andes Highlights (3 Weeks): Peru–Bolivia–Chile–Argentina Connectivity

Andes Highlights (3 Weeks): Peru–Bolivia–Chile–Argentina Connectivity

Planning a south america itinerary 3 weeks through the high Andes? This route stitches together Peru’s Sacred Valley, Bolivia’s La Paz and Salar de Uyuni, Chile’s Atacama Desert, and northern Argentina’s quebradas or Mendoza wine country—often by long-distance bus and a couple of short flights. Connectivity is different at altitude: coverage is strong in cities but drops in high passes and salt flats; bus Wi‑Fi is patchy; border towns can be blackspots. The smart move is an eSIM with multi‑country coverage, backed by offline maps, offline translations, and a simple routine for crossing borders by bus without losing service. Below you’ll find a practical, connectivity-first itinerary; checklists to prep your phone, apps and documents; and on-the-ground tips for staying online where it matters: booking transport, hailing taxis, backing up photos, and navigating when the signal disappears.If you’re transiting via Europe or North America, you can also add a layover eSIM to stay connected door-to-door. Start with our country list on Destinations, then follow the steps, and you won’t waste time chasing SIM shops at 3,500 metres.The 3‑week Andes route at a glanceWeek 1: Peru (Cusco, Sacred Valley, Machu Picchu) - Fly into Cusco (or Lima then connect). - Base in Cusco; day trips to Pisac/Chinchero/Maras–Moray. - Train to Aguas Calientes; Machu Picchu visit; return to Cusco or continue to Puno/Lake Titicaca.Week 2: Bolivia and Chile (La Paz, Uyuni, San Pedro de Atacama) - Bus/collectivo via Copacabana to La Paz. - Fly or overnight bus to Uyuni. - 3‑day Uyuni–altiplano tour ending in San Pedro de Atacama (Chile).Week 3: Chile and Argentina (Atacama to Salta or Mendoza/Buenos Aires) - Choose: - North: San Pedro to Salta/Jujuy by bus; fly to Buenos Aires. - Or South: San Pedro–Calama flight to Santiago; bus or flight to Mendoza; onward to Buenos Aires.Connectivity notes (quick): - Cities: generally strong 4G/4G+; 5G in major hubs (Santiago, Buenos Aires). - Altitude/rural: expect long no‑signal stretches (Uyuni, altiplano passes, Paso Jama). - Bus Wi‑Fi: often advertised, rarely reliable. Plan to be offline onboard. - Border regions: networks switch; a multi‑country eSIM avoids sudden loss.eSIM vs local SIMs for a 4‑country tripFor a route with multiple borders and remote legs, eSIM wins on time and reliability.What a multi‑country eSIM gets you: - One plan across Peru, Bolivia, Chile, Argentina (check coverage per country on Destinations). - No passport/SIM registration queues at kiosks. - Keep your home number active on the physical SIM for calls/SMS codes. - Instant top‑ups if you burn data on photos or navigation.When a local SIM still helps: - Long stay in one country with heavy data use (e.g., a month in Buenos Aires). - Dead zones where a different local network performs better (rarely worth the hassle on a 3‑week pace).Practical approach: - Use an eSIM as your primary data line across all four countries. - If you find a specific local network far better in one region, add a cheap local SIM and keep the eSIM as backup.Device readiness checklist (before you fly)1) Check eSIM compatibility and SIM‑lock status on your phone.2) Buy and install your eSIM while on home Wi‑Fi. Keep a PDF/printed copy of the QR code.3) Label lines clearly (e.g., “eSIM Andes Data”, “Home SIM”).4) Turn on data roaming for the eSIM; leave roaming off for your home SIM to avoid charges.5) Set up dual‑SIM rules: data on eSIM; calls/SMS default to home SIM if needed.6) Download offline: Google Maps/Organic Maps for all target regions; language packs (Spanish at minimum); bus/air tickets; hotel confirmations.7) Cloud backups: set to upload on Wi‑Fi only; pre‑create shared albums for travel companions.8) Test tethering/hotspot with your laptop/tablet.If you’re transiting popular hubs, consider a short layover eSIM: - USA connections: add an Esim United States or a broader Esim North America.- Europe connections: Madrid/Barcelona? Use an Esim Spain. Paris or Rome? See Esim France and Esim Italy. Multi‑country layovers? Try Esim Western Europe.City‑by‑city connectivity notesCusco & the Sacred Valley (Peru)Coverage: Good in Cusco city; variable in high villages (Maras/Moray) and along Inca Trail approaches.Tips: Download Sacred Valley maps offline; pin viewpoints and ruins. most taxis use WhatsApp—save your accommodation’s number.Machu Picchu/Aguas Calientes: Patchy to none at the citadel. Upload your photos later; don’t rely on live ticket retrieval.Lake Titicaca: Puno and CopacabanaPuno: Reasonable 4G; bus terminals crowded—screenshot QR tickets.Crossing to Copacabana: Expect a signal drop around the border; have directions saved offline.La Paz (Bolivia)Good urban 4G; the cable car network has decent signal but tunnels do not.Yungas/“Death Road” tours: Mountain valleys cause dead zones—share your emergency contacts with the operator, carry a charged power bank, and don’t plan remote calls.Uyuni and the Altiplano (Bolivia to Chile)Uyuni town: OK 4G; ATMs finicky—use Wi‑Fi for banking apps.Salt flats/lagunas: Assume offline for most of the 3‑day tour. Guides often carry satellite phones; agree a pickup time/place in San Pedro and preload your map route.San Pedro de Atacama (Chile)Town: Solid 4G; accommodations often have Wi‑Fi but speeds vary.Geysers, Valle de la Luna: Offline navigation essential; sunrise trips start before mobile networks wake up in some areas.Salta/Jujuy or Mendoza/Buenos Aires (Argentina)Salta/Jujuy: Good city coverage; quebradas have long no‑signal sections.Mendoza: City 4G/5G; vineyards outside town can be patchy.Buenos Aires: Strong 4G/5G; ideal for cloud backups and large downloads before you fly home.Border crossings by bus: step‑by‑stepThe big ones on this route: Peru–Bolivia (Puno/Copacabana), Bolivia–Chile (Uyuni–San Pedro via Hito Cajón), Chile–Argentina (Paso Jama to Salta or Los Libertadores to Mendoza).How to keep service and sanity:1) The day before:- Top up your eSIM data.- Confirm your plan includes both countries you’re entering/leaving.- Download offline maps for both sides of the border and your town of arrival.- Save bus company WhatsApp and terminal address offline.2) On departure morning:- Keep a paper copy or offline PDF of tickets, insurance, and accommodation proof.- Charge phone and power bank; pack a short cable in your daypack.3) On the bus:- Don’t count on bus Wi‑Fi. Keep your eSIM as primary, but expect drops near mountain passes.- If your phone supports it, enable “Wi‑Fi calling” for later when you reach accommodation Wi‑Fi.4) At the border posts:- Data may be unavailable. Keep QR codes and booking numbers offline.- After exiting one country and entering the next, toggle Airplane Mode off/on to re‑register on the new network.- If the eSIM doesn’t attach, manually select a network in Mobile Settings.5) Arrival:- Send your accommodation a quick WhatsApp when you’re back online.- Recheck your eSIM’s data roaming is on; confirm you’re on an in‑country network, not a weak roaming partner.Pro tips: - Dual profiles: If your eSIM allows, keep a secondary profile for a different network in the same country—helpful in border towns.- Cash buffer: Some border terminals don’t accept cards; download a currency converter for offline use.Offline survival kit (5‑minute setup)Maps: Download regions for Cusco, Sacred Valley, Puno, La Paz, Uyuni, San Pedro, Salta/Jujuy or Mendoza, and Buenos Aires.Translations: Download Spanish for offline use; add phrasebook favourites (bus tickets, directions, dietary needs).Documents: Save PDFs of passports, tickets, hotel addresses; star them for quick access.Rides: Screenshots of pickup points; pin bus terminals and hotel doors.Entertainment: Podcasts and playlists for long bus legs, set to download on Wi‑Fi only.Altitude and your tech: what changesCoverage gaps lengthen: Fewer towers at high altitude; valleys can block signal. Assume offline on remote excursions.Batteries drain faster in cold: Keep your phone warm and carry a power bank (10,000–20,000 mAh).Hotel Wi‑Fi may be congested: Schedule big uploads (photo backups, app updates) for big-city stays like Santiago or Buenos Aires.GPS still works offline: Your blue dot shows on offline maps without data—preload everything.Data budgeting for 3 weeksTypical traveller usage across this route: - Messaging/Maps/Bookings: 0.2–0.5 GB/day- Social and photo sharing: 0.3–0.7 GB/day- Occasional video calls/streaming: 0.5–1.0 GB/dayFor a mixed-use trip, plan 15–25 GB for 3 weeks. Heavy creators should double it and upload over hotel Wi‑Fi when possible. If you work remotely, consider a higher‑capacity plan and a backup eSIM; see our guidance on For Business.Practical route with transport and connectivity cuesDays 1–4 Cusco base: Strong city signal; day trips may be spotty—go offline-ready.Days 5–6 Machu Picchu: Expect no service at the ruins; sync tickets ahead.Days 7–8 Puno to La Paz via Copacabana: Border signal drop; re‑register networks after crossing.Days 9–11 Uyuni tour to San Pedro: Treat as offline; charge nightly; carry spare cables.Days 12–14 San Pedro: Stable in town; tours offline; top up data before Paso Jama.Days 15–17 Salta/Jujuy or Mendoza: Good urban 4G; rural patches are offline.Days 18–21 Buenos Aires: Strongest connectivity of the trip; clear your uploads and map downloads for the flight home.Partnering and stopover extrasHospitality and tour operators in the Andes: help your guests stay connected—explore co‑branded solutions via our Partner Hub.Transatlantic flyers: test your eSIM setup on a layover with an Esim United States or Esim Western Europe before hitting high-altitude blackspots.FAQs1) Do I need a local SIM in each country?No. A multi‑country eSIM covering Peru, Bolivia, Chile and Argentina is simpler and works well for a 3‑week pace. Consider a local SIM only if you’ll spend longer in one country and want the absolute best regional coverage.2) Will my WhatsApp number change with an eSIM?No. WhatsApp is tied to your registered number, not your data line. Keep your home SIM active for voice/SMS (roaming off if you wish), and use the eSIM for data—WhatsApp continues as normal.3) Can I hotspot to my laptop or camera?Yes. Enable tethering on your eSIM. Mind your data: cloud backups and OS updates can burn gigabytes—set them to Wi‑Fi only or schedule in big cities.4) What if there’s no signal on the Uyuni/Atacama legs?That’s expected. GPS still works offline. Pre-download maps and translations, carry a power bank, and sync plans with your tour operator before departure.5) Will I get roaming charges at borders?If you’re using a multi‑country eSIM with coverage in both countries, you won’t incur extra roaming fees from your home carrier. Keep roaming off on your home SIM to avoid accidental use.6) I’m connecting via Europe or the US—worth getting a layover eSIM?Yes. It’s an easy way to test your setup and stay reachable. Try Esim North America or country options like Esim Spain, Esim France, or Esim Italy for common hubs.Next step: Browse South America coverage options and build your plan on Destinations.

Build Shareable Maps & Lists: Google/Apple Maps for Itinerary Planning

Build Shareable Maps & Lists: Google/Apple Maps for Itinerary Planning

Planning a trip gets messy fast: screenshots, pins, links, and messages scattered across apps. The most reliable fix is to centralise everything into shareable, offline-capable maps and lists you can access on the road. This guide shows you how to plan day-by-day in Google Maps and Apple Maps, collaborate with your travel group, label by day, and export a KML master map for backup or sharing with tour guides and hotels. You’ll also learn how to download maps for offline use so navigation works without data, plus smart naming and colour conventions to keep long trips tidy. Whether you’re plotting a weekend in Rome or a coast-to-coast in the US, these steps keep planning simple and your itinerary in sync. For destination inspiration while you plan, browse our hand-picked Destinations and pair your maps with the right eSIM so everything loads fast when you need it.What you can plan with Maps listsDay-by-day schedules that are easy to followMust-eats, must-sees, and reservations in one placeLive navigation (online) and reliable routing (offline)Group decision-making with shared lists and commentsA single KML/KMZ file for printing, sharing, or archivingIf you searched for “google maps lists travel”, you’re in the right place—below are the exact workflows that work on the road.Google Maps: plan your trip with Lists and My MapsGoogle Maps gives you two powerful tools: - Saved Lists (fast, great for collaboration and mobile) - My Maps (advanced, layered maps with export to KML/KMZ)Use Saved Lists for quick planning and sharing; use My Maps for day layers, colours, and exports.How to create day-by-day lists (Google Maps app)Open Google Maps → tap Saved → New list.Name it clearly: “D1 – Paris Left Bank”, “D2 – Louvre + Marais”.Add places: search a place → Save → choose your Day list.Add notes: in the list, tap a place → Add a note (e.g., “11:30 booking #1234”).Reorder stops: open the list → three dots → Edit list → drag to reorder.Set privacy: list → Share → choose Private, Shared link, or Public.Pro tips - Prefix with day numbers (D1, D2, D3) to sort correctly. - Add emojis for categories: “🍝”, “🏛️”, “🌅”. - Use the built-in “Favourites”, “Want to go”, “Starred places” for rough triage, then drag confirmed spots into Day lists.How to share with your group (collaborative)In Google Maps, open the list → Share.Turn on “Let others edit”.Send the link via your group’s chat.Ask everyone to add their musts and notes (time windows, budgets).Pro tips - Add “Decision” tags in notes: “pick 1 of 3”. - Lock the list 48 hours before travel (toggle off editing) to reduce last-minute churn.How to download offline areas (Google Maps)Tap your profile photo → Offline maps → Select your own map.Drag to cover your whole route (add extra for airport transfers).Download over Wi‑Fi; enable auto‑update.Repeat per city/region (e.g., “Paris”, “Lyon”, “Nice”).Notes - Offline includes search, place info, and routing for driving/walking; live traffic and transit require data. - Keep storage free; large areas can be several GB.How to build a master map and export KML (Google My Maps on desktop)Use My Maps for layered, colour-coded days and exports.On desktop, go to maps.google.com → Menu → Your places → Maps → Create Map.Add layers per day: “Day 1”, “Day 2”, etc.Add places: search and “Add to map”, or “Import” a CSV/Google Sheet with name, address, notes.Style icons: colour-code by day or category (food/sights/transport).Draw routes: use the “Directions” tool to sketch key segments (for visual planning; live routing happens in the regular app).Share: “Share” button → link share or specific emails. You can allow collaborators to edit.Export KML/KMZ 1. In My Maps, click the three dots next to the map name → Export to KML/KMZ. 2. Choose “Entire map” or specific layers (days) → Download. 3. Share the file with guides/hotels or import into other map apps.Pro tips - Keep layers to 10–15 pins each for readability. - Add reservation codes and opening hours in the description field. - Back up your KML to cloud storage and attach it to your trip folder.Apple Maps: plan with Guides and shared listsApple’s Guides are curated lists that sync across iPhone, iPad, Mac and Apple Watch, and since iOS 17, Apple Maps supports offline areas.How to create day-by-day Guides (iPhone/iPad)Apple Maps → tap your profile icon → Guides → New Guide.Name: “D1 – Kyoto East”, “D2 – Arashiyama + Gion”.Add places: search a place → swipe up → Save to Guide.Add notes: open the Guide → tap a place → Add notes (“8:00—temple opens; buy combo ticket”).Reorder: open the Guide → Edit → drag the items.Pro tips - Use separate Guides per city, then sub-Guides per day for long trips. - Add contact numbers in notes; useful when calling offline from hotel Wi‑Fi.How to share with your group (Apple Maps)Open the Guide → Share.Send the link via Messages, Mail, or copy link.Important - Recipients can view and save a copy; Apple Maps does not currently offer real-time co-editing of a Guide. For true collaboration, use Google Maps lists or maintain a shared note/document alongside your Apple Guide.How to download offline maps (Apple Maps, iOS 17+)Apple Maps → your profile → Offline Maps → Download New Map.Pan/zoom to include all neighbourhoods and airports you’ll cross.Toggle “Optimise Storage” if space is tight; keep location services on while travelling.Notes - Offline routing supports driving, walking and cycling with estimated times. Public transport directions require data in most cities.Apple limitations and workaroundsNo native export (KML/GPX) of Guides. Workaround: keep a parallel Google My Maps for export, or save key places as Contacts/Notes for long-term backup.Fewer icon/colour options than My Maps. Use concise naming and emoji to visually differentiate categories.Collaboration is view/share only. If your group insists on Apple-only, nominate one editor and share periodic updates.Organise and label smarter (works for both apps)Naming conventions - Prefix days with D1, D2, D3, … to sort naturally. - Add a short theme: “D3 – Montmartre + Canal”. - Use a two-letter city code for multi-country trips: “IT-RM D1 – Trastevere”.Category emojis - Food 🍝, Coffee ☕, Sights 🏛️, Viewpoints 🌅, Bars 🍸, Shopping 🛍️, Transport 🚉. - Put the emoji first for quick scanning: “🍝 Roscioli”.Notes structure (copy/paste template) - Time window: 10:00–11:30 - Booking/ref: ABC123 - Price/budget: €12 pp - Must-try: carbonara - Backup option: Da Enzo, 5 min walkDay labelling approaches - Minimalist: one list/guide per day with 6–12 items max. - Layered (Google My Maps): one map with layers per day; colours by category.Share, print, and back up your itineraryShare for edits (Google): turn on “Let others edit” for your Day lists, then lock 48 hours before departure.Share for view (Apple): share Guide links; ask your group to “Save to My Guides” so they have an offline copy.Print/PDF: open Google My Maps on desktop → print each layer/day; or export KML/KMZ and use a KML viewer to print.Back up: save your Google My Maps KML to cloud storage; export a CSV of your places list if you built from a spreadsheet.For team offsites or client roadshows, see our connectivity and logistics advice For Business. Travel planners and creators can also explore collaboration options in our Partner Hub.Connectivity matters: offline versus real-time on the roadOffline maps are a safety net; they don’t replace live data for traffic, transit arrivals, and last-minute opening hours. If you’re heading to the US national parks or road-tripping Route 66, pair your maps with an Esim United States or regional Esim North America plan so everything syncs in real time. For Europe, pick a city-specific eSIM—Esim France, Esim Italy, Esim Spain—or go wider with Esim Western Europe to cover multi-country itineraries without SIM swaps. Strong data means: - Faster place search and reviews - Reliable live traffic and ETAs - Up-to-date transit routes and disruptions - Quicker group collaboration in shared listsQuick checklist: build a shareable, offline-ready itineraryDecide your tool: Google for collaboration/export; Apple for tight iOS/macOS integration.Create Day 1–N lists (Google) or Guides (Apple) with clear names.Add places with notes, times, booking references, and backups.Share with your group; set editing rules and a cut-off time.Download offline areas for every city and the intercity routes.For advanced planning/export, build a Google My Maps with per-day layers and export KML/KMZ.Back up your files and keep a PDF or screenshot set in your trip folder.FAQsQ1: What’s the quickest way to build a day-by-day itinerary in Google Maps? - Create “D1/D2/…” Saved Lists in the mobile app, add places with notes and times, then share with “Let others edit.” For advanced styling or export, use Google My Maps with per-day layers.Q2: Can I export my itinerary as KML/GPX? - Google My Maps can export KML/KMZ by map or layer. Standard Google Saved Lists don’t export individually. Apple Maps Guides don’t export to KML/GPX; use Google My Maps for exports.Q3: Do offline maps include transit directions? - Generally no. Google and Apple offline maps cover place info and turn-by-turn for driving/walking. Transit data typically needs a data connection.Q4: How do I label by day without clutter? - Use concise names like “D2 – Louvre AM, Marais PM”, limit each list/layer to 6–12 items, and use emojis for quick scanning. In Google My Maps, colour by category; in Apple Guides, rely on order and naming.Q5: Is Google or Apple better for group trips? - Google Maps: better collaboration (editable shared lists) and KML export. Apple Maps: best for Apple-only travellers who want tight device integration and simple, offline Guides, but collaboration is view/share rather than co-edit.Q6: Can I navigate a multi-stop route from my list? - Google Maps lets you add multiple stops to a route on the fly; lists are for planning, routing still happens in the main app. Apple Maps also supports multi-stop routes, but not from Guides in one tap—you’ll add stops as you go.Next step: add reliable data to your plan. If you’re crossing borders in Europe, pick an Esim Western Europe so your shared maps, lists and live directions work everywhere you roam.

US–Canada West Coast Road Trip: Seattle–Vancouver–Banff–Calgary

US–Canada West Coast Road Trip: Seattle–Vancouver–Banff–Calgary

This us canada road trip itinerary stitches together Pacific city vibes, alpine highways and big-mountain national parks in one neat arc from Seattle to Vancouver, then inland to Banff and Calgary. Expect three border environments in a single trip: urban 5G cores, forested highways with spotty service, and mountain passes where your phone will drop to “No Service” between towns. The key to a stress-free drive is planning your connectivity as carefully as your fuel stops: set up a cross‑border eSIM before you start, know when to toggle roaming, and configure a reliable in‑car hotspot so everyone stays connected even when one phone loses signal. Below you’ll find a practical route, realistic drive times, the best windows to go, and hands‑on telecom tips (including mountain coverage workarounds) tailored to this exact corridor. If you’re travelling as a pair, family, or convoy, we’ve added steps and checklists to make hand‑offs at the border and in the Rockies simple.Who this itinerary suits and when to goBest for: First‑time visitors, photographers, hikers, road‑trippers who want cities + mountains without backtracking.Ideal season: Late May to early October for clear roads and long daylight. Winter is beautiful but brings snow/ice and intermittent closures; confirm vehicle/tyre requirements in WA/BC/AB.Pace: 7–12 days. Add nights in Vancouver and Banff if hiking or detouring to Whistler or the Icefields Parkway.Connectivity snapshot: - Cities (Seattle, Vancouver, Calgary): fast 5G is common. - Main corridors (I‑5, Hwy 1/5, Trans‑Canada): mostly LTE/5G with brief dead zones. - Parks and passes (Yoho/Banff, Rogers Pass, Kicking Horse): service is sparse; plan for offline maps.For SIM options by country, browse Destinations.Route at a glance (7–12 days)1) Seattle (1–2 nights) - Explore: Pike Place, Ballard, ferry to Bainbridge. - Connectivity: Set up your plan before you land. If you’re starting stateside, a local Esim United States plan works well for day one. - Drive to Vancouver: 230 km / 145 miles (2.5–3.5 hrs). Add time for the Peace Arch border.2) Vancouver (2–3 nights) - Explore: Stanley Park seawall, Granville Island, North Shore hikes. - Connectivity: If you want seamless data across the border without SIM swapping, activate Esim North America before you leave Seattle. It covers both the US and Canada and handles the hand‑off on arrival.3) Optional detour: Sea‑to‑Sky to Whistler (add 1 night) - Drive: Vancouver to Whistler 120 km / 75 miles (1.5–2 hrs). Stunning views; spotty stretches near Britannia and between bays. - Return to Vancouver or continue inland via Highway 99/97 to rejoin the Trans‑Canada (adds time).4) Vancouver to Kamloops or Salmon Arm (1 night) - Drive: 350–470 km / 220–290 miles (3.5–5.5 hrs) via Hwy 1 or Coquihalla (Hwy 5). - Tip: Coquihalla is faster but higher elevation; Hwy 1 is scenic through Hope and the Fraser Canyon.5) Kamloops/Salmon Arm to Lake Louise/Banff (2–3 nights) - Drive: 420–500 km / 260–310 miles (4.5–6 hrs). - Explore: Lake Louise early morning, Moraine Lake shuttle, Banff Avenue, Bow Valley Parkway.6) Banff to Calgary (1 night or fly out) - Drive: 125 km / 78 miles (1.25–1.75 hrs). - Explore: Inglewood eateries, Peace Bridge, National Music Centre. - Fly out of YYC or return car.Planning more regions later in the year? Check our regional eSIMs for Europe, including Esim Western Europe, Esim France, Esim Italy, and Esim Spain.Connectivity that “just works” across the borderThe simplest choice: one plan for both countriesUse Esim North America to cover the US and Canada in a single profile. It removes border‑day SIM swaps and auto‑selects partner networks on both sides.If you’ve already purchased a Esim United States plan for earlier legs, you can keep it active in Seattle and switch to a North America plan the night before you cross.Pro tip: - Download and install your eSIM over Wi‑Fi before you travel. Most eSIM QR codes expire once scanned; install but keep mobile data “off” until you need it.Roaming toggles and network selection: exactly what to tapCrossing USA → Canada (Peace Arch or Pacific Highway): 1) Before you reach the border, open your phone’s mobile settings. 2) iPhone: Settings > Mobile Service > tap your North America eSIM > turn on Data Roaming. Android (Pixel/Samsung): Settings > Network & Internet / Connections > SIMs > toggle Roaming on for the eSIM. 3) Turn on Automatic network selection. 4) After you enter Canada, wait up to 2 minutes. Your status bar should show a Canadian partner network and data will resume.Crossing Canada → USA (Banff/Calgary to Seattle return): 1) Keep Data Roaming on for the North America plan. 2) Toggle Airplane Mode on for 10 seconds then off after crossing; your device will reacquire a US network faster. 3) If signal sticks, manually select a network, then switch back to Automatic.Avoid bill shock: - If you carry a physical SIM from home, set it to “Data Off/No Roaming” for the entire trip. Use only your eSIM for data.Mountain coverage: what to expect and how to beat dead zonesExpect “no service” pockets along the Coquihalla, Rogers Pass, Kicking Horse Canyon, and between Lake Louise and Banff on backroads.Multi‑carrier coverage helps: North America plans typically roam onto major networks in both countries, improving your odds of signal at the edge of coverage.In parks, even the best network can’t fill every valley. Rely on offline maps and downloaded media. Don’t plan critical uploads in the mountains; batch them for towns (Revelstoke, Golden, Canmore).Practical workarounds: - Download Google Maps offline areas for WA, Lower Mainland BC, and Banff/Yoho. - Pre‑cache AllTrails routes, and take screenshots of shuttle times. - Queue photo backups for hotel Wi‑Fi to save data.Set up a reliable car hotspotOption A: Use your phone’s hotspot 1) Name your hotspot uniquely (avoid “iPhone”/“Galaxy”) and set a strong password. 2) Enable “Maximise Compatibility” (iOS) or 2.4 GHz sharing if other devices struggle to connect. 3) Plug your phone into the car’s USB to avoid battery drain; hotspots use more power than normal browsing. 4) Keep the hotspot device by a window for better signal; your passengers can tether to it.Option B: Dedicated LTE router in the car 1) Insert an eSIM‑capable router or MiFi with your North America plan. 2) Mount it high on the window or dash; consider a small external antenna for mountainous stretches. 3) Share the SSID with travel companions so navigation, music and laptops connect automatically.For families and small teams travelling in convoy, centralising connectivity through one plan can save money and admin; see For Business for pooled data options.Practicalities: border, rentals, navigation and park passesBorder documents: Carry passport and, if driving a rental, the rental agreement. Allow extra time at weekends and holidays; Peace Arch queues can add 30–90 minutes.Car rental across the border: Confirm US–Canada travel is permitted and add the free cross‑border note to your contract. Ensure roadside assistance covers both countries.Fuel and charging: Fuel is readily available on main routes; in remote stretches, top up by half‑tank. EVs can complete this route but plan fast‑charging stops (Vancouver, Hope, Merritt, Kamloops, Golden, Canmore, Calgary).Tolls: Seattle has selective toll facilities; Vancouver and Trans‑Canada segments on this route are toll‑free. No toll roads inside Banff, but you must display a valid Parks Canada pass when in the park.Navigation: Use a blend—online maps in cities and offline maps in parks. Save hotel addresses and emergency contacts to your notes app.Money: Tap‑to‑pay is universal in both countries. Dynamic currency conversion can be poor value; opt to pay in local currency.If you’re a hotel, rental, or tour operator along this corridor and want to offer travellers pre‑loaded eSIMs or in‑car Wi‑Fi, our Partner Hub has integration options.Day‑by‑day: a practical us canada road trip itineraryDay 1–2: Seattle - Morning: Pike Place, waterfront loop. - Afternoon: Kerry Park viewpoint, Fremont/Wallingford. - Evening: Catch sunset at Alki Beach; pre‑install your eSIM and test hotspot on hotel Wi‑Fi. - Connectivity check: Verify your Esim United States or Esim North America plan, enable hotspot, download offline maps for WA and BC.Day 3–5: Vancouver - Morning: Cycle Stanley Park seawall. - Afternoon: Capilano or Lynn Canyon; book timed entries if needed. - Evening: Sunset at Kitsilano or English Bay. - Connectivity check: Before border day, toggle roaming on (see steps above). In Vancouver, expect strong 5G—good time for backups and app updates.Day 6: Vancouver to Kamloops/Salmon Arm - Stop: Hope for coffee, Bridal Veil Falls short walk. - Note: Expect patchy service on the Coquihalla; let travel companions know you may be offline for stretches. Keep the hotspot phone by the window.Day 7–9: Lake Louise & Banff - Early start: Lake Louise before 7am to secure parking or shuttle. - Midday: Moraine Lake via official shuttle; offline tickets/screenshots help when coverage drops. - Evening: Banff town, Bow Falls, Vermilion Lakes. - Connectivity check: Download next‑day trail maps the night before. Signal improves around Lake Louise village and Canmore.Day 10–11: Calgary - Morning: Check out from Banff, stop at Canmore for coffee. - Afternoon: Calgary sights (East Village Riverwalk, Studio Bell). - Departure: YYC has good airport Wi‑Fi; top up or extend your eSIM if returning via the US.Budget and time‑saving tipsTravel shoulder season (June or September) for easier parking in Banff and lower rates.Combine city groceries with park days; food costs rise in resort towns.Book accommodations with parking included in Seattle and Vancouver to avoid daily fees.Data plan sizing: Expect 1–2 GB/day if you stream maps, social, and music. With a hotspot for multiple devices, budget 3–5 GB/day. Download playlists and maps on Wi‑Fi to cut this in half.Pre‑trip checklistDocuments and vehicle - Passport, driving licence, rental agreement with cross‑border permission. - Parks Canada pass (buy online to save time). - Tyre and weather check for mountain passes in season.Connectivity - Install Esim North America and test on Wi‑Fi. - Set home SIM to “data off” for the trip. - Download offline maps for WA, BC, and Banff/Yoho. - Name and secure your hotspot SSID/password.Safety and comfort - Power: 12V adaptor, cables for each device, portable battery. - Essentials: Water, snacks, paper map backup, basic first‑aid, headlamp. - Winter add‑ons: Warm layers, scraper, gloves, blanket.FAQ1) Do I need separate eSIMs for the USA and Canada? - No. For this route, a single Esim North America plan is the simplest option. If you already have a Esim United States plan, you can switch to a North America plan for Canada days.2) Will I have data in the mountains? - Expect gaps. Major highways have good LTE/5G, but parks and passes have dead zones. Use multi‑network eSIMs, keep roaming on, and rely on offline maps between towns.3) How do I avoid roaming charges on my home SIM? - Turn off Mobile Data and Data Roaming on your physical/home SIM, and use only your eSIM for data. Keep your home SIM enabled for calls/texts if needed, but ensure mobile data is off.4) Can I work remotely on this trip? - In cities: yes, speeds are excellent. On the road and in parks: schedule around patchy coverage. Use a car hotspot and batch uploads in Vancouver, Kamloops, Canmore, and Calgary. Teams should consider shared data via For Business.5) What data speed should I expect? - Cities: 100–500+ Mbps on 5G. Highways: 10–100 Mbps on LTE/5G. Mountains: variable, sometimes none. Plan critical calls for town stops.6) I’m continuing to Europe after Calgary—what’s the easiest SIM plan? - For multi‑country coverage, see Esim Western Europe, or country plans like Esim France, Esim Italy and Esim Spain. Browse all options by region on Destinations.Next step: Set up seamless coverage before you go. Grab your cross‑border plan here: Esim North America.