AirDrop & Nearby Share Safety: Prevent Drive‑By Transfers

Blog

AirDrop & Nearby Share Safety: Prevent...

AirDrop & Nearby Share Safety: Prevent Drive‑By Transfers

31 Oct 2025

AirDrop & Nearby Share Safety: Prevent Drive‑By Transfers

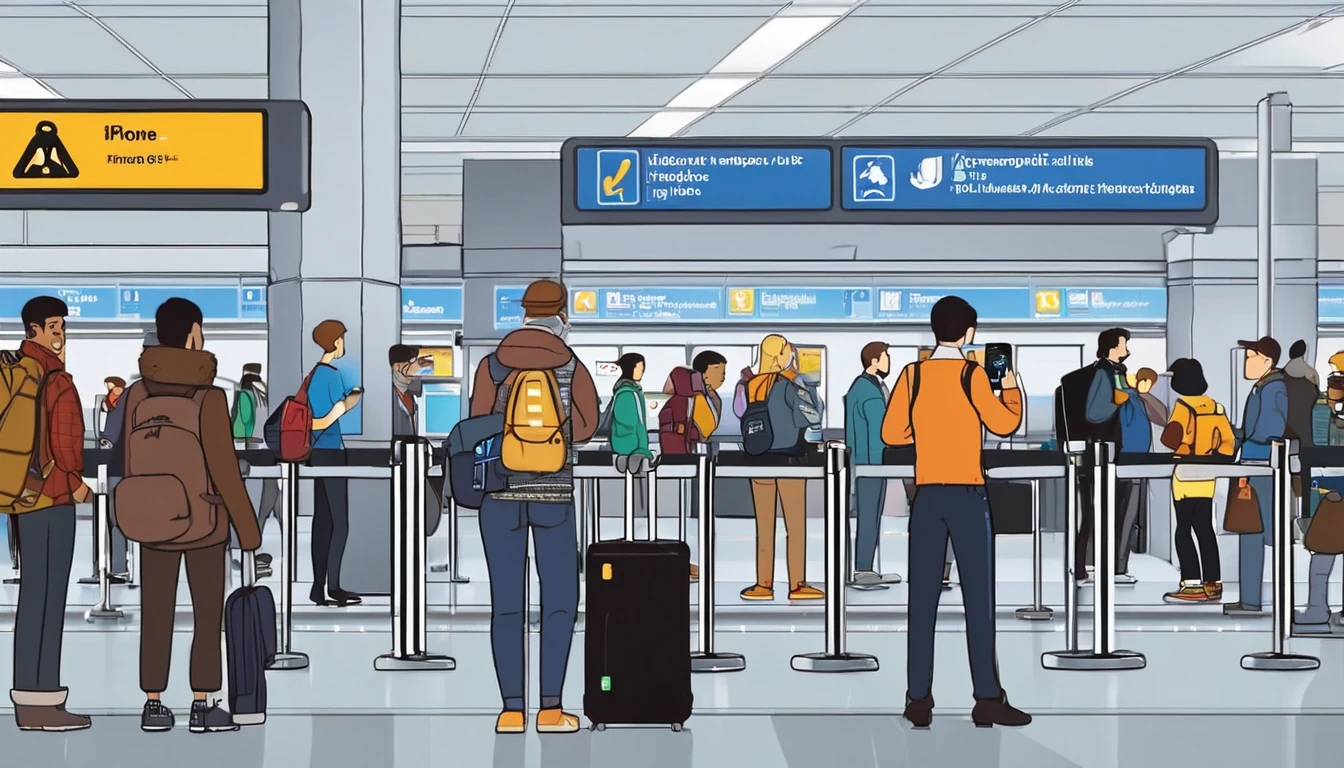
Stuck in a crowded airport, train carriage or festival queue with Bluetooth on? That’s exactly when “drive‑by” file shares happen: strangers pushing images, contact cards or links to any nearby device that’s accepting transfers. This guide gives you practical, traveller‑first settings to block nuisance and risky shares on iPhone, iPad, Mac, Android (Quick Share/Nearby Share), Windows and Chromebooks. You’ll learn how to limit discoverability, require approval, use school/work modes, and practise sensible Bluetooth hygiene in crowds. Keep your device quiet, your name private, and your day disruption‑free.

Whether you’re city‑hopping across Esim Western Europe, heading to the US on Esim North America or planning a single‑country stay with Esim United States, Esim France, Esim Italy or Esim Spain, set these protections before you reach the crowd. It takes under two minutes and prevents nasty surprises, from obscene images to phishing links disguised as “helpful” travel info.

What’s the risk with “drive‑by” sharing?

  • Nuisance or harassment: Unsolicited photos or videos—often explicit—pushed to anyone discoverable.
  • Social engineering: Link or contact cards that mimic transport alerts or venue info.
  • Privacy leakage: Your full name and device name can appear to everyone nearby.
  • Corporate exposure: Travellers on work devices may breach policy if they accept unknown files.
  • Distraction risk: Prompts popping up as you navigate boarding gates or ride‑share pickups.

The fix isn’t to switch everything off forever. It’s to keep your device non‑discoverable by default, require approvals, and temporarily enable “Everyone” only when you actively share—with a strict timeout.

Core principles for airdrop safety travel

  • Stay non‑discoverable by default: “Receiving Off” (Apple) or “No one/Hidden” (Android/Windows/ChromeOS).
  • Use Contacts Only or Your devices when you must be visible; avoid “Everyone” unless absolutely necessary.
  • Require approvals for all shares except your own devices.
  • Keep your device identity generic (name and profile photo).
  • Practise Bluetooth/Wi‑Fi hygiene in crowds; disable passive scanning where possible.
  • For kids and corporate travellers, use system restrictions or management profiles.

How to lock down AirDrop on iPhone and iPad (iOS 16+)

AirDrop is safe when tightly scoped. Set it once, and use the “Everyone for 10 Minutes” option only when you’re actively sharing.

Step‑by‑step: Set AirDrop to Contacts Only or Receiving Off

  1. Open Control Centre (swipe down from the top‑right).
  2. Press and hold the network tile (with Wi‑Fi/Bluetooth).
  3. Tap AirDrop.
  4. Choose: - Receiving Off (most private), or - Contacts Only (balanced default). - Only choose Everyone for 10 Minutes when sending to a non‑contact in front of you.

Pro tip: After any “Everyone for 10 Minutes” session, AirDrop auto‑reverts. Still, check it reset before entering a crowd.

Disable “Bringing Devices Together” (NameDrop)

This proximity feature makes sharing easier—but can invite bumps in crowded queues.

  • Go to Settings > General > AirDrop.
  • Toggle off Bringing Devices Together.

Make your device name generic

Your name is often visible when others look for devices.

  • Settings > General > About > Name.
  • Use something nondescript, e.g., “iPhone‑12” instead of your full name.

Restrict AirDrop for kids or loaner devices

  • Settings > Screen Time.
  • Content & Privacy Restrictions > Allowed Apps > toggle off AirDrop.

This blocks AirDrop system‑wide until you re‑enable it. Great for school trips.

How to harden AirDrop on Mac (macOS)

When you travel with a Mac, keep it non‑discoverable unless actively sharing.

  1. Open Finder > AirDrop (left sidebar).
  2. At the bottom, set “Allow me to be discovered by” to: - No One (most private), or - Contacts Only (balanced).
  3. Disable Bluetooth from the menu bar if you don’t need it.

Pro tip: Shares to yourself (same Apple ID) auto‑accept—safe and silent. Avoid “Everyone” in public places.

Android: Secure Nearby Share/Quick Share

Google and Samsung unified sharing under “Quick Share” (formerly “Nearby Share”). Settings vary slightly by device, but the principles are the same.

Step‑by‑step: Limit visibility and approvals

On most Android devices (Pixel/OnePlus and many others): 1. Settings > Google > Devices & sharing > Quick Share. 2. Set Device visibility to: - No one (Hidden) by default, or - Contacts (safer than Everyone), or - Your devices (for seamless self‑sharing). 3. Ensure “Allow your devices to share without approval” is enabled only for your own devices. Require approval from everyone else.

On Samsung: 1. Settings > Connected devices > Quick Share (or directly in Quick Share app). 2. Who can share with you: Contacts only or No one. 3. Turn off “Show my phone to others” unless you’re actively sharing.

Quick toggle: - Pull down Quick Settings > long‑press Quick Share > adjust visibility. - If you must use “Everyone”, set it and immediately long‑press again to confirm it will time out (typically 10 minutes).

Make your device identity boring

  • Settings > About phone > Device name: Use “Pixel‑7” or similar.
  • Google Account profile picture/name can appear to contacts—choose neutral options while travelling, if you like.

Work profile (Android Enterprise)

If your phone has a Work profile, your IT admin can disable Quick Share in the work context. Keep personal sharing off in crowds, and use your corporate channel (email/Teams/Drive) for work files. Business travellers can learn more on For Business and share this with IT via our Partner Hub.

Windows and Chromebooks: Nearby sharing/Quick Share basics

Windows 10/11: Nearby sharing

  1. Settings > System > Nearby sharing.
  2. Set to Off or My devices only.
  3. Choose your save location (e.g., Downloads) and avoid auto‑opening received files.

Pro tip: Rename your PC to something generic (Settings > System > About > Rename this PC).

ChromeOS: Quick Share

  1. Settings > Connected devices > Quick Share.
  2. Device visibility: No one or Contacts only.
  3. Disable “Open received files automatically” if available.

Bluetooth and Wi‑Fi hygiene in crowds

Most local sharing relies on Bluetooth and Wi‑Fi for discovery. Tidy these up before stepping into a crowd.

  • Turn off Bluetooth if you don’t need headphones or a watch right then.
  • If you must keep Bluetooth on, keep AirDrop/Quick Share non‑discoverable.
  • On Android: Settings > Location > Location services > disable Wi‑Fi scanning and Bluetooth scanning to reduce passive discovery beacons.
  • Avoid public Wi‑Fi at pinch points (stations, stadium gates). Use mobile data instead—an eSIM like Esim Western Europe or Esim North America keeps you connected without exposure to crowded hotspots.

Pro tip: If you must join venue Wi‑Fi, use a separate email for sign‑ups and avoid installing “Wi‑Fi helper” apps.

Quick checklists for busy travellers

30‑second pre‑crowd check (iPhone/iPad/Mac)

  • AirDrop: Contacts Only or Receiving Off.
  • NameDrop/Bringing Devices Together: Off.
  • Device name: Generic.
  • Bluetooth: Off if not needed; otherwise keep AirDrop restricted.
  • Mac: Finder > AirDrop > No One or Contacts Only.

30‑second pre‑crowd check (Android/Windows/ChromeOS)

  • Quick Share/Nearby Share: No one/Hidden (or Contacts only).
  • Require approval from everyone except your own devices.
  • Device name: Generic.
  • Bluetooth scanning and Wi‑Fi scanning: Off on Android.
  • Windows Nearby sharing: Off or My devices only.

When you actually need to share with a stranger

  • Move a few steps aside from the crowd.
  • Enable “Everyone for 10 minutes” (iOS) or “Everyone” with a timeout (Android/ChromeOS).
  • Confirm the recipient’s device name and photo in person.
  • Send the file and immediately reset visibility to Contacts Only/No one.

Families, schools and business trips

  • Families: Use Screen Time to disable AirDrop on kids’ iPhones/iPads during trips. Teach “never accept from strangers” and how to set Receiving Off.
  • Schools: Managed devices can block AirDrop/Quick Share during school events and trips. Share these settings with your IT lead.
  • Businesses: Enforce Contacts Only or disable local sharing on managed devices for travellers. Build a standard “pre‑travel device checklist” and distribute it through your MDM. See For Business and our Partner Hub for deployment guidance.

Practical traveller tips that stick

  • Keep shares to known contacts. If someone nearby asks you to accept “their boarding pass” or “ride receipt”, decline and ask them to show it on their screen.
  • Don’t tap unknown links from local shares; navigate to the airline, rail, or venue site/app yourself.
  • Clear your Downloads/Files after trips; remove anything you don’t recognise.
  • Use mobile data where possible. Regional passes like Esim Western Europe or single‑country options such as Esim France, Esim Italy, Esim Spain and Esim United States keep you online without risky public Wi‑Fi.

FAQ

  • Is AirDrop safe to leave on while travelling?
  • Yes, if set to Contacts Only or Receiving Off. Avoid “Everyone” except during a deliberate, brief share.
  • What’s the Android equivalent of AirDrop?
  • Quick Share (formerly Nearby Share). Set visibility to No one/Contacts, require approvals, and only use “Everyone” briefly.
  • Can I stop my name appearing to strangers?
  • Yes. Change your device name to something generic. On iPhone, Settings > General > About > Name; on Android, Settings > About phone > Device name; on Windows, rename your PC. Also disable photo/profile sharing where offered.
  • How do I stop kids receiving random photos?
  • On iOS: Screen Time > Content & Privacy > Allowed Apps > disable AirDrop. On Android: set Quick Share to No one and lock Settings behind a parental control app or Family Link.
  • Does turning off Bluetooth stop all drive‑bys?
  • It prevents discovery but may disrupt your watch/headphones and in some cases car keys. If you must keep Bluetooth on, set sharing visibility to Hidden/Contacts only.
  • Will eSIM help with sharing safety?
  • Indirectly. An eSIM keeps you on mobile data so you can avoid crowded public Wi‑Fi, reducing other exposure risks while travelling. Explore coverage by country and region via Destinations and options like Esim North America.

Next step

Plan your route and set up your device before you go. Explore local coverage and pick the right travel eSIM on Destinations, then run the 30‑second safety checks above before you enter a crowd.

Read more blogs

Andes Highlights (3 Weeks): Peru–Bolivia–Chile–Argentina Connectivity

Andes Highlights (3 Weeks): Peru–Bolivia–Chile–Argentina Connectivity

Planning a south america itinerary 3 weeks through the high Andes? This route stitches together Peru’s Sacred Valley, Bolivia’s La Paz and Salar de Uyuni, Chile’s Atacama Desert, and northern Argentina’s quebradas or Mendoza wine country—often by long-distance bus and a couple of short flights. Connectivity is different at altitude: coverage is strong in cities but drops in high passes and salt flats; bus Wi‑Fi is patchy; border towns can be blackspots. The smart move is an eSIM with multi‑country coverage, backed by offline maps, offline translations, and a simple routine for crossing borders by bus without losing service. Below you’ll find a practical, connectivity-first itinerary; checklists to prep your phone, apps and documents; and on-the-ground tips for staying online where it matters: booking transport, hailing taxis, backing up photos, and navigating when the signal disappears.If you’re transiting via Europe or North America, you can also add a layover eSIM to stay connected door-to-door. Start with our country list on Destinations, then follow the steps, and you won’t waste time chasing SIM shops at 3,500 metres.The 3‑week Andes route at a glanceWeek 1: Peru (Cusco, Sacred Valley, Machu Picchu) - Fly into Cusco (or Lima then connect). - Base in Cusco; day trips to Pisac/Chinchero/Maras–Moray. - Train to Aguas Calientes; Machu Picchu visit; return to Cusco or continue to Puno/Lake Titicaca.Week 2: Bolivia and Chile (La Paz, Uyuni, San Pedro de Atacama) - Bus/collectivo via Copacabana to La Paz. - Fly or overnight bus to Uyuni. - 3‑day Uyuni–altiplano tour ending in San Pedro de Atacama (Chile).Week 3: Chile and Argentina (Atacama to Salta or Mendoza/Buenos Aires) - Choose: - North: San Pedro to Salta/Jujuy by bus; fly to Buenos Aires. - Or South: San Pedro–Calama flight to Santiago; bus or flight to Mendoza; onward to Buenos Aires.Connectivity notes (quick): - Cities: generally strong 4G/4G+; 5G in major hubs (Santiago, Buenos Aires). - Altitude/rural: expect long no‑signal stretches (Uyuni, altiplano passes, Paso Jama). - Bus Wi‑Fi: often advertised, rarely reliable. Plan to be offline onboard. - Border regions: networks switch; a multi‑country eSIM avoids sudden loss.eSIM vs local SIMs for a 4‑country tripFor a route with multiple borders and remote legs, eSIM wins on time and reliability.What a multi‑country eSIM gets you: - One plan across Peru, Bolivia, Chile, Argentina (check coverage per country on Destinations). - No passport/SIM registration queues at kiosks. - Keep your home number active on the physical SIM for calls/SMS codes. - Instant top‑ups if you burn data on photos or navigation.When a local SIM still helps: - Long stay in one country with heavy data use (e.g., a month in Buenos Aires). - Dead zones where a different local network performs better (rarely worth the hassle on a 3‑week pace).Practical approach: - Use an eSIM as your primary data line across all four countries. - If you find a specific local network far better in one region, add a cheap local SIM and keep the eSIM as backup.Device readiness checklist (before you fly)1) Check eSIM compatibility and SIM‑lock status on your phone.2) Buy and install your eSIM while on home Wi‑Fi. Keep a PDF/printed copy of the QR code.3) Label lines clearly (e.g., “eSIM Andes Data”, “Home SIM”).4) Turn on data roaming for the eSIM; leave roaming off for your home SIM to avoid charges.5) Set up dual‑SIM rules: data on eSIM; calls/SMS default to home SIM if needed.6) Download offline: Google Maps/Organic Maps for all target regions; language packs (Spanish at minimum); bus/air tickets; hotel confirmations.7) Cloud backups: set to upload on Wi‑Fi only; pre‑create shared albums for travel companions.8) Test tethering/hotspot with your laptop/tablet.If you’re transiting popular hubs, consider a short layover eSIM: - USA connections: add an Esim United States or a broader Esim North America.- Europe connections: Madrid/Barcelona? Use an Esim Spain. Paris or Rome? See Esim France and Esim Italy. Multi‑country layovers? Try Esim Western Europe.City‑by‑city connectivity notesCusco & the Sacred Valley (Peru)Coverage: Good in Cusco city; variable in high villages (Maras/Moray) and along Inca Trail approaches.Tips: Download Sacred Valley maps offline; pin viewpoints and ruins. most taxis use WhatsApp—save your accommodation’s number.Machu Picchu/Aguas Calientes: Patchy to none at the citadel. Upload your photos later; don’t rely on live ticket retrieval.Lake Titicaca: Puno and CopacabanaPuno: Reasonable 4G; bus terminals crowded—screenshot QR tickets.Crossing to Copacabana: Expect a signal drop around the border; have directions saved offline.La Paz (Bolivia)Good urban 4G; the cable car network has decent signal but tunnels do not.Yungas/“Death Road” tours: Mountain valleys cause dead zones—share your emergency contacts with the operator, carry a charged power bank, and don’t plan remote calls.Uyuni and the Altiplano (Bolivia to Chile)Uyuni town: OK 4G; ATMs finicky—use Wi‑Fi for banking apps.Salt flats/lagunas: Assume offline for most of the 3‑day tour. Guides often carry satellite phones; agree a pickup time/place in San Pedro and preload your map route.San Pedro de Atacama (Chile)Town: Solid 4G; accommodations often have Wi‑Fi but speeds vary.Geysers, Valle de la Luna: Offline navigation essential; sunrise trips start before mobile networks wake up in some areas.Salta/Jujuy or Mendoza/Buenos Aires (Argentina)Salta/Jujuy: Good city coverage; quebradas have long no‑signal sections.Mendoza: City 4G/5G; vineyards outside town can be patchy.Buenos Aires: Strong 4G/5G; ideal for cloud backups and large downloads before you fly home.Border crossings by bus: step‑by‑stepThe big ones on this route: Peru–Bolivia (Puno/Copacabana), Bolivia–Chile (Uyuni–San Pedro via Hito Cajón), Chile–Argentina (Paso Jama to Salta or Los Libertadores to Mendoza).How to keep service and sanity:1) The day before:- Top up your eSIM data.- Confirm your plan includes both countries you’re entering/leaving.- Download offline maps for both sides of the border and your town of arrival.- Save bus company WhatsApp and terminal address offline.2) On departure morning:- Keep a paper copy or offline PDF of tickets, insurance, and accommodation proof.- Charge phone and power bank; pack a short cable in your daypack.3) On the bus:- Don’t count on bus Wi‑Fi. Keep your eSIM as primary, but expect drops near mountain passes.- If your phone supports it, enable “Wi‑Fi calling” for later when you reach accommodation Wi‑Fi.4) At the border posts:- Data may be unavailable. Keep QR codes and booking numbers offline.- After exiting one country and entering the next, toggle Airplane Mode off/on to re‑register on the new network.- If the eSIM doesn’t attach, manually select a network in Mobile Settings.5) Arrival:- Send your accommodation a quick WhatsApp when you’re back online.- Recheck your eSIM’s data roaming is on; confirm you’re on an in‑country network, not a weak roaming partner.Pro tips: - Dual profiles: If your eSIM allows, keep a secondary profile for a different network in the same country—helpful in border towns.- Cash buffer: Some border terminals don’t accept cards; download a currency converter for offline use.Offline survival kit (5‑minute setup)Maps: Download regions for Cusco, Sacred Valley, Puno, La Paz, Uyuni, San Pedro, Salta/Jujuy or Mendoza, and Buenos Aires.Translations: Download Spanish for offline use; add phrasebook favourites (bus tickets, directions, dietary needs).Documents: Save PDFs of passports, tickets, hotel addresses; star them for quick access.Rides: Screenshots of pickup points; pin bus terminals and hotel doors.Entertainment: Podcasts and playlists for long bus legs, set to download on Wi‑Fi only.Altitude and your tech: what changesCoverage gaps lengthen: Fewer towers at high altitude; valleys can block signal. Assume offline on remote excursions.Batteries drain faster in cold: Keep your phone warm and carry a power bank (10,000–20,000 mAh).Hotel Wi‑Fi may be congested: Schedule big uploads (photo backups, app updates) for big-city stays like Santiago or Buenos Aires.GPS still works offline: Your blue dot shows on offline maps without data—preload everything.Data budgeting for 3 weeksTypical traveller usage across this route: - Messaging/Maps/Bookings: 0.2–0.5 GB/day- Social and photo sharing: 0.3–0.7 GB/day- Occasional video calls/streaming: 0.5–1.0 GB/dayFor a mixed-use trip, plan 15–25 GB for 3 weeks. Heavy creators should double it and upload over hotel Wi‑Fi when possible. If you work remotely, consider a higher‑capacity plan and a backup eSIM; see our guidance on For Business.Practical route with transport and connectivity cuesDays 1–4 Cusco base: Strong city signal; day trips may be spotty—go offline-ready.Days 5–6 Machu Picchu: Expect no service at the ruins; sync tickets ahead.Days 7–8 Puno to La Paz via Copacabana: Border signal drop; re‑register networks after crossing.Days 9–11 Uyuni tour to San Pedro: Treat as offline; charge nightly; carry spare cables.Days 12–14 San Pedro: Stable in town; tours offline; top up data before Paso Jama.Days 15–17 Salta/Jujuy or Mendoza: Good urban 4G; rural patches are offline.Days 18–21 Buenos Aires: Strongest connectivity of the trip; clear your uploads and map downloads for the flight home.Partnering and stopover extrasHospitality and tour operators in the Andes: help your guests stay connected—explore co‑branded solutions via our Partner Hub.Transatlantic flyers: test your eSIM setup on a layover with an Esim United States or Esim Western Europe before hitting high-altitude blackspots.FAQs1) Do I need a local SIM in each country?No. A multi‑country eSIM covering Peru, Bolivia, Chile and Argentina is simpler and works well for a 3‑week pace. Consider a local SIM only if you’ll spend longer in one country and want the absolute best regional coverage.2) Will my WhatsApp number change with an eSIM?No. WhatsApp is tied to your registered number, not your data line. Keep your home SIM active for voice/SMS (roaming off if you wish), and use the eSIM for data—WhatsApp continues as normal.3) Can I hotspot to my laptop or camera?Yes. Enable tethering on your eSIM. Mind your data: cloud backups and OS updates can burn gigabytes—set them to Wi‑Fi only or schedule in big cities.4) What if there’s no signal on the Uyuni/Atacama legs?That’s expected. GPS still works offline. Pre-download maps and translations, carry a power bank, and sync plans with your tour operator before departure.5) Will I get roaming charges at borders?If you’re using a multi‑country eSIM with coverage in both countries, you won’t incur extra roaming fees from your home carrier. Keep roaming off on your home SIM to avoid accidental use.6) I’m connecting via Europe or the US—worth getting a layover eSIM?Yes. It’s an easy way to test your setup and stay reachable. Try Esim North America or country options like Esim Spain, Esim France, or Esim Italy for common hubs.Next step: Browse South America coverage options and build your plan on Destinations.

Winter 2025 Ski Season: Alps & Rockies Data Bundles

Winter 2025 Ski Season: Alps & Rockies Data Bundles

Planning the slopes this winter? Stay connected from summit to chalet with Simology’s ski season eSIM bundles for the Alps and Rockies. We’ve tuned our multi-country and single-country data passes for real-world ski trips: morning powder checks, live avalanche bulletins, lift-queue messages, and cabin hotspotting when lodge Wi‑Fi falters. Coverage prioritises the valleys, resorts and transit routes skiers actually use, with intelligent network selection to hold a signal as you move between villages and lifts.This guide covers what’s new for Winter 2025, how to choose the right bundle, the best coverage options across France, Italy, Spain, Switzerland, Austria, the United States and Canada, and practical hotspot tips for chalets and cabins. You’ll also find a step-by-step eSIM setup checklist, on-mountain data-saving tactics, and options for groups, teams and hosts. Limited-time bundle pricing for the season is live now; check your destination pages at checkout for current offers.What’s new for Winter 2025Multi-country passes tailored for ski routes:Alps: pick a Western Europe pass if you’re hopping France–Italy–Switzerland–Austria during one trip.Rockies: single-country (US or Canada) or a continental North America pass if you’re splitting time across borders.Network steering updates to favour the strongest available partner in ski valleys and resort towns.Hotspot-friendly allowances across most bundles to keep your cabin online when Wi‑Fi isn’t reliable.Limited-time ski season bundle pricing during peak months. Final prices and promos appear in your cart for each region and allowance.Explore your options by country via Destinations, or jump straight into multi-country passes with Esim Western Europe and Esim North America. For single-country trips, see Esim France, Esim Italy, Esim Spain and Esim United States.Coverage tips: Alps and RockiesMountains create signal shadows and microclimates. Expect strongest service in towns, along access roads and at mid-stations; ridge lines and back bowls can vary by wind and aspect. Download offline maps and passes as backup.Alps: pick by country and crossingFrance (Three Valleys, Espace Killy, Paradiski, Chamonix):Use Esim France for single-country trips.If you plan side trips into Italy or Switzerland (La Rosière–La Thuile, Portes du Soleil, Mont Blanc), choose Esim Western Europe to avoid borders cutting data.Italy (Dolomiti Superski, Cervinia/Zermatt, Livigno):Esim Italy covers Italian-only itineraries.For Cervinia/Zermatt or Sella Ronda road trips touching Austria/Switzerland, again prefer Esim Western Europe.Spain (Baqueira-Beret, Formigal, Sierra Nevada):Choose Esim Spain for Pyrenees or Sierra Nevada. Crossings into Andorra/France are best handled with Esim Western Europe.Austria/Switzerland:Not listed individually here; multi-country travellers commonly select Esim Western Europe to cover cross-border circuits and transfers.Pro tips for the Alps: - Keep data roaming ON within Western Europe passes; your phone will switch partners as you move between valleys. - In big resorts with shared lift infrastructure (e.g., Portes du Soleil), multi-network coverage is helpful when one operator is congested at peak.Rockies: US and CanadaUnited States (Colorado, Utah, Wyoming, Montana):Use Esim United States for US-only itineraries: Aspen/Snowmass, Vail/Beaver Creek, Breckenridge, Park City, Jackson Hole, Big Sky.Canada (BC/Alberta: Whistler, Banff/Lake Louise, Revelstoke, Kicking Horse):If splitting days across the US border (e.g., Schweitzer + Red Mountain), consider Esim North America for seamless coverage.Pro tips for the Rockies: - Valleys can be deep and sparsely populated. Expect stronger data in towns and at base areas; some bowls may drop to 3G or no service. Pre-download trail maps and avalanche bulletins. - For road trips on I‑70 (Colorado) or the Trans‑Canada, a larger allowance helps with music, maps and weather.Choosing the right ski season eSIM bundleA quick way to match your trip profile to the right pass.Quick selector by trip typeLong weekend in one resort (solo or couple):Single-country pass (France, Italy, Spain, US). Choose 3–5 GB for light use with offline maps.One-week family ski holiday in a single country:Single-country pass, 10–20 GB. Add hotspot if your chalet Wi‑Fi is unreliable.Two-week European road trip (France–Switzerland–Italy/Austria):Esim Western Europe, 15–30 GB depending on streaming use.Rockies sampler (Utah + Colorado, or US + Canada):Esim North America. Pick 15–25 GB for maps, messaging, and some streaming.Workcation in resort:Larger allowances (30 GB+) and explicit hotspot support. Consider a backup line if you’re taking meetings.How much data do you actually need?Approximate guide per person for a 7‑day trip: - Messaging and maps: 2–3 GB - Snow reports, email, app updates: 2 GB - Social media posts and short clips: 3–5 GB - Hotspotting a laptop for light work: 4–8 GB - 1080p video streaming: 3 GB/hour (avoid or use lodge Wi‑Fi)Tip: combine offline tools (Google Maps offline areas, resort apps with offline trail maps) and auto-downloads only on Wi‑Fi to reduce cellular usage.Set up before you fly: step-by-stepInstall your ski season eSIM at home with Wi‑Fi so you’re ready on arrival.1) Check device compatibility and SIM lock status in your phone settings. 2) Buy your pass for the right region: single-country via Destinations, or multi-country via Esim Western Europe / Esim North America. 3) Install the eSIM: - Scan the QR or add manually in Mobile/Cellular settings. - Label it “Ski Data” to avoid confusion. 4) Set it as the Mobile Data line. Keep your home SIM active for calls/SMS if needed (Dual SIM). 5) Toggle Data Roaming ON for multi-country passes. 6) Restart your device. 7) On arrival, wait for automatic network attachment. If needed, pick the recommended local partner in Network Selection. 8) Test: open maps, message your group, and load a trail map before you head up.Troubleshooting quick wins: - Airplane mode toggle; then wait 60 seconds. - Manual network switch to another listed partner. - Check APN is set to default from the profile (usually automatic).Hotspotting in cabins and chaletsMountain Wi‑Fi can be patchy, oversubscribed at après-ski, or down during storms. Most mainstream phones and most Simology data plans allow personal hotspot for reasonable use.iPhone hotspot (iOS)1) Settings > Personal Hotspot > Allow Others to Join. 2) Set a strong Wi‑Fi password. 3) Under Mobile Data, confirm “Ski Data” is the active data line. 4) Connect laptops/tablets via the shown Wi‑Fi name.Android hotspot (stock)1) Settings > Network & Internet > Hotspot & tethering > Wi‑Fi hotspot. 2) Turn on, set SSID and WPA2 password. 3) Verify the eSIM is the active data SIM. 4) Connect devices.Hotspot pro tips: - Place the phone near a window for better signal; avoid thick stone walls. - Use 5 GHz hotspot for speed if devices are nearby; switch to 2.4 GHz for range in larger chalets. - Conserve data: disable cloud backups, auto‑updates and HD streaming on connected devices. - Power: keep the phone on charge; hotspots drain batteries quickly.On-mountain connectivity: practical tacticsSave offline resort maps and emergency info before first lift.Location sharing: set up low-frequency location sharing in your group chat to coordinate without spamming data.Camera uploads: pause auto‑uploads until you’re back on Wi‑Fi.Weather and avalanche: refresh morning forecasts on Wi‑Fi, then use minimal updates midday.Battery and cold: keep your phone warm; cold reduces battery life and can cause sudden shutdowns.Safety: do not rely solely on live data for navigation. Carry a paper piste map and follow resort signage.Limited-time ski season bundle pricingWe’re running seasonal pricing on popular Alps and Rockies bundles during Winter 2025. Discounts apply to selected allowances on multi-country passes and single-country options in peak ski regions. Availability and final price depend on destination, duration and data size, and will be shown at checkout on each destination page.Where to see it now: - Multi-country: Esim Western Europe and Esim North America - Country-specific: Esim France, Esim Italy, Esim Spain, Esim United StatesTip: Buy a larger allowance if you plan to hotspot; it’s usually better value than topping up midweek.For groups, teams and hostsFamilies and friends: one person can run a hotspot for tablets and a smart TV, but spread usage across two phones to prevent a single-device bottleneck.University clubs and race teams: coordinate allowances and spend centrally with Simology’s business tools. See For Business for consolidated billing and device management.Chalet operators, travel agents, and DMCs: keep guests online even when fixed lines are down. Bulk and affiliate options are available via our Partner Hub.Ski week connectivity checklistInstall eSIM at home and label it clearly.Download offline maps (area + resort app).Enable data roaming for multi-country passes.Test hotspot and set strong passwords.Bring a high-capacity power bank and spare cable.Turn off auto‑updates and HD auto‑play on all devices.FAQQ: What’s the difference between single-country and multi-country ski passes? A: Single-country passes are ideal if you stay in one nation. Multi-country passes like Esim Western Europe and Esim North America prevent service interruptions and roaming fees when you cross borders during a trip.Q: Will my phone support hotspotting on a Simology eSIM? A: Most recent iOS and Android devices support personal hotspot, and most Simology data plans allow it. Check your specific plan details at checkout and verify hotspot works before travelling.Q: How do I keep my home number for calls while using data on the eSIM? A: Use Dual SIM. Set the eSIM as the Mobile Data line and keep your physical/home SIM active for calls and SMS. In iOS and Android, you can choose which line handles calls per contact.Q: What if coverage is weak in my chalet? A: Place the phone by a window, use 2.4 GHz hotspot for better range, and try a manual network switch in settings. In deep valleys, signal can vary by room; moving the device a few metres can help.Q: How much data should I buy for a week? A: Light users with offline maps can manage on 5–8 GB. Social sharers and hotspot users should consider 15–25 GB. If you stream video or work from the chalet, go 30 GB+.Q: Can I top up if I run out? A: Yes. You can purchase additional data for the same region. For the best value during ski season, it’s usually cheaper to choose a slightly larger bundle upfront.Next step: Choose your region and allowance on Destinations and lock in your Winter 2025 ski season eSIM before you fly.

Set Up eSIM on Samsung Galaxy S24/S25: Step-by-Step + Dual SIM Tips

Set Up eSIM on Samsung Galaxy S24/S25: Step-by-Step + Dual SIM Tips

Travellers love Samsung’s S-series for good reason: excellent radios, robust Dual SIM, and a clean SIM manager in One UI. If you’re switching to a travel eSIM, this guide walks you through samsung esim setup on the Galaxy S24 and S25 series — from scanning your QR code to enabling 5G and roaming, plus practical Dual SIM tips so you can keep your home number active while using local data. We’ll use One UI terms you’ll see on-device, explain the SIM Manager screens, and include a quick troubleshooting section for the most common snags (QR code errors, “profile failed,” no data, or missing 5G). Whether you’re heading to the US, Western Europe, or hopping across North America, you’ll be set up in minutes and ready to go.Short on time? Install over Wi‑Fi before you fly, keep your home SIM’s data roaming off, and make your new eSIM the data SIM on landing. The steps below show you exactly how.Check your Galaxy S24/S25 is readyBefore you start, run through this fast checklist:Confirm eSIM support: On your phone go to Settings > Connections > SIM manager (or SIM card manager). If you see “Add eSIM,” you’re good.Ensure the device is unlocked: Carrier-locked phones may only accept the carrier’s own eSIMs. If unsure, check with your original carrier.Update software: Settings > Software update > Download and install. One UI updates often improve eSIM compatibility and roaming.Stable internet for installation: Use reliable Wi‑Fi. Avoid VPN during installation.Battery: Aim for 30%+ or plug in.Have your eSIM details ready: QR code, or the manual activation details (SM-DP+ address and Activation code) from your provider.Pro tip: Install the eSIM at home on Wi‑Fi, but only enable data roaming when you land to avoid accidental charges.Samsung eSIM setup: Install an eSIM on Galaxy S24/S25 (One UI)Follow these steps on One UI (S24 ships with One UI 6.1; S25 may ship with a newer version. Labels may vary slightly by region):Open Settings.Tap Connections.Tap SIM manager (or SIM card manager).Tap Add eSIM.Choose how you’ll add it: - Scan QR code - Enter activation code - Transfer from another device (if supported by your carrier)Follow the on-screen prompts to download and install the eSIM profile.When prompted, name the line (e.g., “Travel Data”).Set your preferences when asked: - Mobile data: choose your new eSIM. - Calls and messages: keep your home SIM or choose “Ask always.”Finish and wait for activation. You’ll see a signal indicator for the new line.Restart your phone if you’re not seeing service after a minute or two.If you don’t see “Add eSIM,” your device may be region-locked, carrier-locked, or missing an update.Option A: Scan a QR codeTap Scan QR code, grant camera access, and point at the QR code from your provider.If your provider gave a QR image/PDF, you can choose “Use QR code from gallery.”Confirm the download. Don’t leave the screen or lock the phone until installation completes.Option B: Enter activation code manuallyTap Enter activation code.Enter the SM-DP+ address and Activation code exactly as provided (case-sensitive).Confirm download and wait for installation. If there’s a “confirmation code” (LPA code), enter it when prompted.Option C: Transfer from another phoneTap Transfer from another device (if available).Follow the on-screen instructions. Both phones usually need to be nearby, unlocked, and on Wi‑Fi.Note: Many carriers don’t allow transferring eSIMs. You may need to request a fresh eSIM instead.Activate 5G and confirm data is workingOnce your eSIM is installed, make sure mobile data and 5G are properly set:Go to Settings > Connections > SIM manager.Under Preferred SIMs, set Mobile data to your travel eSIM.Tap Mobile networks (you’ll see options per SIM).For your travel eSIM, set: - Network mode: 5G/LTE/3G/2G (auto connect), if available. - Data roaming: On (when you’re abroad).Back out, then check the status bar for 5G/4G/LTE. Open a browser to test.If data doesn’t work immediately: - Toggle Flight mode on/off once. - Restart the device. - Check APN: Settings > Connections > Mobile networks > Access Point Names. Most eSIMs auto-configure. If not, enter the APN your provider supplied. - Turn Wi‑Fi off temporarily to test cellular data.Pro tip: Some networks offer 5G only in select cities. You might see LTE/4G most of the time — that’s normal.Configure Dual SIM the right way (travel-friendly)Samsung’s Dual SIM tools are excellent for travellers. Here’s how to avoid bill shock and still receive calls/messages on your home number.Set defaults - Settings > Connections > SIM manager. - Preferred SIMs:Mobile data: Travel eSIM.Calls: Home SIM (or Ask always).Text messages: Home SIM (or Ask always).Keep your home number reachable without using data - Keep Data roaming OFF on your home SIM: Settings > Connections > Mobile networks > select your home SIM > toggle Data roaming off. - Leave call roaming on if you want to receive calls (charges may apply from your home carrier).Control when each SIM is used - Toggle individual SIMs on/off in SIM manager. - Name your SIMs clearly (e.g., “Home UK” / “USA Data”).Switch data quickly - Settings > Connections > SIM manager > Mobile data > choose SIM. - You can also long-press the Mobile data tile in Quick Panel to jump into SIM settings.Avoid unexpected call charges - In the Phone app > Settings, enable “Ask always” for calling if offered, so you pick the SIM per call. - If calls fail while roaming, try toggling VoLTE/Wi‑Fi Calling in Settings > Connections.Pro tip: Many messaging apps (WhatsApp, Signal, Telegram) keep your account tied to your original number even if your data comes from a different SIM — perfect for travel.Roaming settings that actually matterUse these toggles to stay connected abroad:Data roaming: On for your travel eSIM; Off for your home SIM to avoid data charges.Settings > Connections > Mobile networks > select SIM > Data roaming.Network mode (the 5G toggle): Ensure 5G/LTE/3G/2G (auto connect) on your travel eSIM.Settings > Connections > Mobile networks > Network mode.Network operators: If you have weak signal, manually select a partner network.Settings > Connections > Mobile networks > Network operators > Search networks.VoLTE and Wi‑Fi Calling:If calls don’t connect on a roaming network, toggle VoLTE calls and Wi‑Fi Calling on/off to test.Settings > Connections > Mobile networks (VoLTE) and Settings > Connections > Wi‑Fi Calling.APN:If data won’t start, check Access Point Names for your travel eSIM and add the APN from your provider if it’s missing.Pro tip: Install your eSIM before departure, but only enable Data roaming on landing. This avoids background data using your new plan early.Troubleshooting: common eSIM issues on S24/S25“Add eSIM” is missing in SIM managerUpdate One UI, restart, and check again.The phone may be carrier-locked or a regional variant without eSIM. Confirm with your seller/carrier.QR code won’t scan or “This code has already been used”Try “Use QR code from gallery” if the camera struggles.If the code is flagged as used, contact your provider to reissue a new eSIM.Profile installation failedEnsure strong Wi‑Fi, turn off VPN, and keep the screen awake during download.Try manual entry (SM-DP+ address + Activation code).Restart and retry.No data after successful installSet Mobile data to the eSIM in SIM manager.Enable Data roaming for the eSIM.Set Network mode to 5G/LTE/3G/2G (auto).Add/verify APN.Toggle Flight mode or reboot.5G missingNot all plans/roaming partners offer 5G in all areas; you may see LTE.Ensure your plan includes 5G and you’re on a 5G-capable band with your current network.Calls/SMS not working on home SIM while using eSIM dataIn SIM manager, set Calls and Text messages to your home SIM.Check roaming permissions with your home carrier and try toggling VoLTE/Wi‑Fi Calling.Advanced reset (last resort): - Settings > General management > Reset > Reset mobile network settings. Then recheck APN and SIM preferences.Pick the right travel plan (quick matches)Choose a regional or country plan that fits your route:Visiting the US? See Esim United States.Paris to Provence? Try Esim France.Rome, Florence, Amalfi? Go with Esim Italy.Barcelona or Madrid city-break? Pick Esim Spain.Multi-country trip? See Esim Western Europe or cross-border Esim North America.Not sure yet? Browse all Destinations to compare coverage and data sizes.Tip: If you’re travelling across multiple countries in one trip, regional plans simplify roaming and keep you on one profile.For teams and partnersEquipping a team on the road? Centralise purchasing and management with For Business.Are you a travel brand, OTA, or reseller? Explore integration options in our Partner Hub.FAQHow many eSIMs can I use on a Galaxy S24/S25?You can store multiple eSIM profiles (varies by region/model; commonly up to 8). You can keep two lines active at the same time (any combination of one physical + one eSIM or two eSIMs), subject to your carrier and device variant.Do I need internet to install the eSIM?Yes. You need Wi‑Fi or mobile data to download the eSIM profile. After install, you can use the eSIM’s mobile data.Will 5G work on an eSIM?Yes, if your plan and the local network support 5G on the bands your device uses. Set Network mode to 5G/LTE/3G/2G (auto).Can I keep WhatsApp on my home number while using a travel eSIM for data?Yes. Messaging apps remain linked to your registered number even if your mobile data comes from another SIM.Can I move my eSIM to another phone later?Usually you need a new eSIM from your provider. Some carriers allow a transfer flow, but many require reissuing for security.How do I stop my home SIM using data abroad?Settings > Connections > Mobile networks > select your home SIM > toggle Data roaming off. Keep Calls/SMS on your home SIM in SIM manager if you still want to be reachable.Next step: Choose your plan by country or region on Destinations, then follow the steps above to install before you fly.