Simology Adds 25 New Destinations (Q4 2025): Coverage & Intro Pricing

Blog

Simology Adds 25 New Destinations (Q4 ...

Simology Adds 25 New Destinations (Q4 2025): Coverage & Intro Pricing

29 Oct 2025

Simology Adds 25 New Destinations (Q4 2025): Coverage & Intro Pricing

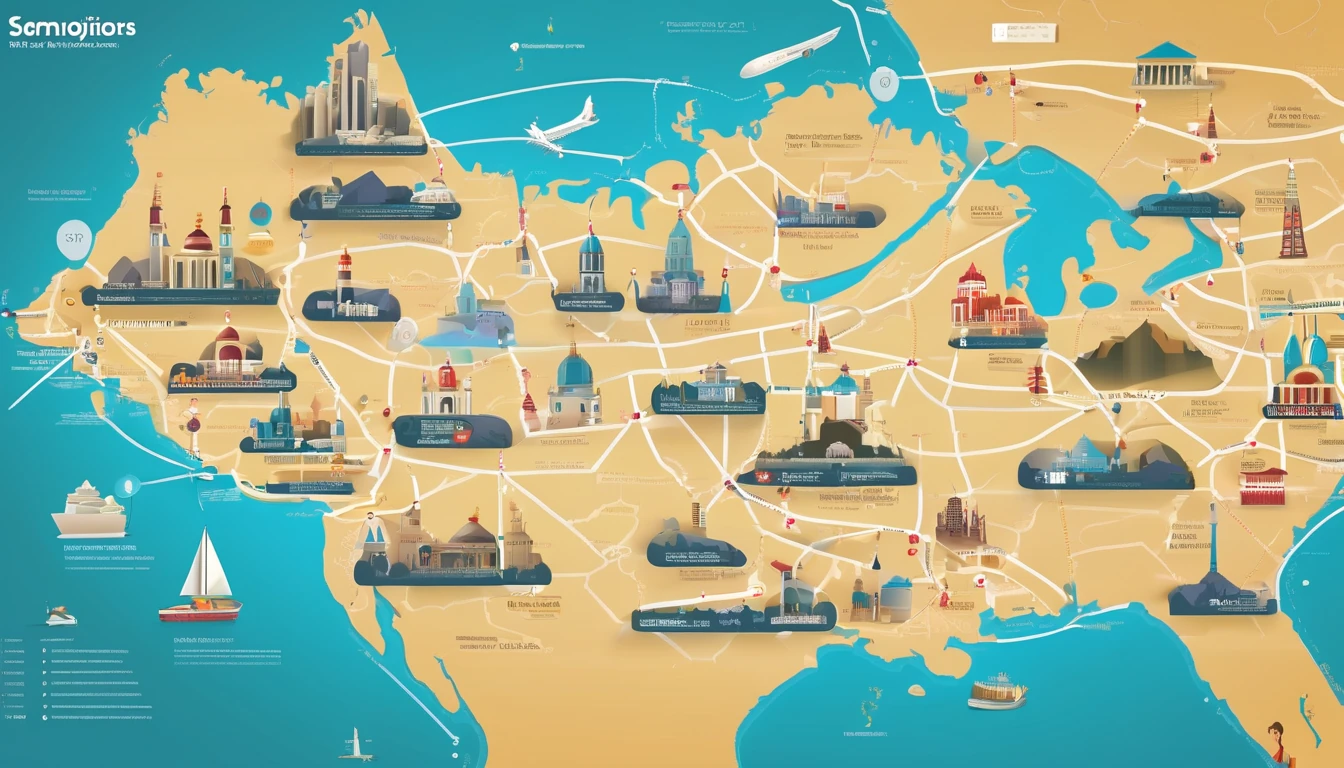
Simology is closing out the year with more places you can land, scan a QR code, and be online in minutes. Today we’re adding 25 new eSIM destinations across Africa, Asia–Pacific, the Middle East, the Balkans and the Caribbean/Central America. Expect fast 4G/5G where available, straightforward plans, and the same traveller‑first setup flow you know. Our interactive coverage map and per‑country pages are now live on Destinations. To mark the launch, we’re offering introductory pricing on all 25 additions through the end of the year. If you’ve been searching for “simology new destinations” to plan Q4 getaways or early‑2026 trips, this is your one‑stop update.

Below you’ll find the full country list, the launch pricing window, how to get connected step‑by‑step, and quick links to our most‑booked regions. There’s also a concise FAQ covering device support, dual‑SIM use, hotspotting and 5G.

What’s new in Q4 2025

  • 25 new countries added to the Simology network
  • Wider coverage in East Africa, the Balkans and mainland Southeast Asia
  • Fresh island coverage in the Caribbean and the South Pacific
  • 4G/5G on major local networks (5G where available)
  • Interactive map and per‑country details live on Destinations

The 25 new destinations (by region)

Use the list below to jump‑start planning, then check per‑country plan sizes, supported bands and activation notes on Destinations.

Africa (8)

  • Egypt
  • Ghana
  • Kenya
  • Morocco
  • Nigeria
  • Rwanda
  • Tanzania
  • Uganda

Coverage at a glance: Urban 4G in all; 5G live or rolling out in select cities (e.g., Cairo, Nairobi, Casablanca, Lagos).

Middle East (5)

  • Bahrain
  • Jordan
  • Kuwait
  • Lebanon
  • Oman

Coverage at a glance: Strong urban 4G; 5G live in major hubs like Manama, Amman and Muscat.

Asia–Pacific (7)

  • Cambodia
  • Fiji
  • Laos
  • Mongolia
  • Nepal
  • Sri Lanka
  • Vietnam

Coverage at a glance: Broad 4G in capitals and key tourist routes; 5G available or piloting in Vietnam and Sri Lanka.

Balkans/Eastern Europe (5)

  • Albania
  • Bosnia and Herzegovina
  • Montenegro
  • North Macedonia
  • Serbia

Coverage at a glance: Solid 4G on primary corridors and city centres; emerging 5G in Belgrade and Tirana.

Caribbean & Central America (5)

  • Bahamas
  • Barbados
  • Costa Rica
  • Dominican Republic
  • Jamaica

Coverage at a glance: 4G in resort areas and cities; 5G in select urban zones.

Pro tip: Travelling across multiple countries on one trip? Browse our regional products like Esim Western Europe and Esim North America for multi‑country simplicity, then add any of the new single‑country eSIMs as needed.

Introductory pricing: what to expect and when to buy

We’re marking this rollout with a simple, time‑boxed launch offer.

  • Launch window: Purchases made between 21 October and 31 December 2025
  • Activation grace: Activate anytime within 60 days of purchase (perfect for early‑2026 travel)
  • Typical launch bundles:
  • Light use (maps, messaging): from US$4.50–US$7 for 1 GB / 7 days in select destinations
  • Balanced (navigation + social + ride‑hailing): from US$9–US$14 for 3–5 GB / 10–15 days
  • Heavy (video + cloud + tethering): from US$18–US$29 for 10–15 GB / 15–30 days
  • Top‑ups: Available in‑app at the same intro rates during the window

Notes: - Exact pricing varies by country and local taxes.
- 5G access is included where supported by local networks and device bands.
- Buy before 31 December 2025 to lock in intro pricing; you’ll still have 60 days to activate.

How to lock it in: 1) Decide on your destination(s) and data needs.
2) Buy the eSIM during the launch window.
3) Install now or later; activate on first network attach in‑country within 60 days.

How to get connected in the new destinations

Here’s the fastest route from “wheels down” to “online”.

Step‑by‑step setup

1) Check device compatibility before you book - iPhone XS/XR or newer, Google Pixel 3 or newer, recent Samsung Galaxy/Flip/Fold, and many mid‑range Androids support eSIM. - Dual‑SIM users: You can keep your primary number active for calls/SMS while using Simology for data.

2) Buy the plan - Go to Destinations and select your country. - Pick a bundle that matches your trip length and data habits (see “Typical launch bundles” above).

3) Install the eSIM - Scan the QR code or use the install link on the device. - Name the line (e.g., “Simology Kenya”) so you can spot it later.

4) Configure data settings - Set Simology as the “Mobile Data” line.
- Toggle “Data Roaming” ON for the Simology line.
- Leave your personal line as “Calls & SMS” if you still want your home number reachable.

5) Land and connect - On arrival, switch off Airplane Mode and wait up to 2 minutes.
- You’ll attach to a top‑tier local network automatically; APN is configured for you.

6) Test and optimise - Open a browser to confirm data.
- If speeds seem slow indoors, toggle 5G/4G or move near a window.
- Enable Wi‑Fi Calling on your home line if you need to place voice calls using Wi‑Fi.

Pre‑travel checklist

  • Update iOS/Android to the latest version.
  • Ensure your device is not SIM‑locked by your carrier.
  • Charge above 50% and keep a charger in hand for QR scanning at the airport.
  • Download offline maps as a backup (just in case).
  • Save the eSIM QR code to a second device or print it.

Pro tips from frequent travellers

  • Keep your personal number for WhatsApp/iMessage: Set Simology as “Data Only” and your home SIM as the default for voice/SMS. Your chat identity won’t change.
  • Tethering: Most of the new destinations allow hotspot use; if you rely on it for a laptop, pick a larger bundle (10 GB or more).
  • 5G vs 4G: 5G is brilliant for large downloads and hotspots; for maps and rides, 4G is usually indistinguishable. Don’t chase 5G bars—chase reliability.
  • Border hoppers: If you’re crossing multiple Balkan borders in a day, toggle data OFF during crossings to avoid brief attach to the wrong country. Re‑enable once you’ve arrived.
  • Staying longer? It’s often cheaper to top up the same eSIM than to buy a second one; use in‑app top‑ups at launch rates during the window.

Planning beyond the new additions? These popular products cover major multi‑country trips and core city breaks:

Not sure which product is best? Start on Destinations and filter by country, region, and plan length.

For teams and partners

  • Travelling for work or moving a team? Centralise purchases, set usage policies and get consolidated billing with For Business. It’s ideal for short‑notice trips, events, and distributed teams.
  • Travel brands, TMCs and fintechs: Integrate eSIMs natively or co‑market destination bundles via our Partner Hub.

FAQ: devices, dual‑SIM and practicalities

1) Will my phone work with Simology in the new destinations?
Most modern iPhones (XS/XR and newer), Google Pixels (3 and newer), Samsung S/Note/Z series, and many recent Androids support eSIM. On Destinations, each country page lists compatible bands and any device caveats. If your handset is carrier‑locked, ask your provider to unlock it before travel.

2) Can I keep my home number for calls while using Simology for data?
Yes. Set Simology as the “Mobile Data” line and keep your physical SIM (or second eSIM) as the default for voice/SMS. Your WhatsApp, Signal and iMessage identity stays tied to your home number unless you change it in‑app.

3) Do you support tethering/hotspot?
Yes in most countries, including the new additions. If tethering is essential, choose a larger data bundle and test hotspot after you land. Some networks may manage speed during heavy tethering sessions to preserve capacity.

4) Will I get 5G?
Where the local partner network offers 5G and your device/bands support it, you’ll see 5G. Otherwise you’ll attach to the fastest available 4G. In many destinations, the real‑world difference for maps and messaging is minimal; 5G shines for large downloads and hotspotting.

5) How long do I have to activate after purchase?
For the Q4 launch offer, you have 60 days to activate from the purchase date. Buy before 31 December 2025 to lock in intro pricing, even if your trip is early 2026.

6) Can I use one eSIM across multiple new countries?
These are single‑country products. If you’ll move across borders, combine them with regional products such as Esim Western Europe or Esim North America, then add single‑country eSIMs in destinations not covered by a regional pass.

The bottom line

With 25 new destinations now live, Simology covers more of the trips you actually take—from Nairobi safaris and Vietnamese food tours to Balkan rail loops and Caribbean island‑hops. The launch window runs through 31 December 2025, with 60 days to activate—ideal for locking in value now and travelling later.

Next step: Explore country‑by‑country plans and our live coverage map on Destinations.

Read more blogs

Andes Highlights (3 Weeks): Peru–Bolivia–Chile–Argentina Connectivity

Andes Highlights (3 Weeks): Peru–Bolivia–Chile–Argentina Connectivity

Planning a south america itinerary 3 weeks through the high Andes? This route stitches together Peru’s Sacred Valley, Bolivia’s La Paz and Salar de Uyuni, Chile’s Atacama Desert, and northern Argentina’s quebradas or Mendoza wine country—often by long-distance bus and a couple of short flights. Connectivity is different at altitude: coverage is strong in cities but drops in high passes and salt flats; bus Wi‑Fi is patchy; border towns can be blackspots. The smart move is an eSIM with multi‑country coverage, backed by offline maps, offline translations, and a simple routine for crossing borders by bus without losing service. Below you’ll find a practical, connectivity-first itinerary; checklists to prep your phone, apps and documents; and on-the-ground tips for staying online where it matters: booking transport, hailing taxis, backing up photos, and navigating when the signal disappears.If you’re transiting via Europe or North America, you can also add a layover eSIM to stay connected door-to-door. Start with our country list on Destinations, then follow the steps, and you won’t waste time chasing SIM shops at 3,500 metres.The 3‑week Andes route at a glanceWeek 1: Peru (Cusco, Sacred Valley, Machu Picchu) - Fly into Cusco (or Lima then connect). - Base in Cusco; day trips to Pisac/Chinchero/Maras–Moray. - Train to Aguas Calientes; Machu Picchu visit; return to Cusco or continue to Puno/Lake Titicaca.Week 2: Bolivia and Chile (La Paz, Uyuni, San Pedro de Atacama) - Bus/collectivo via Copacabana to La Paz. - Fly or overnight bus to Uyuni. - 3‑day Uyuni–altiplano tour ending in San Pedro de Atacama (Chile).Week 3: Chile and Argentina (Atacama to Salta or Mendoza/Buenos Aires) - Choose: - North: San Pedro to Salta/Jujuy by bus; fly to Buenos Aires. - Or South: San Pedro–Calama flight to Santiago; bus or flight to Mendoza; onward to Buenos Aires.Connectivity notes (quick): - Cities: generally strong 4G/4G+; 5G in major hubs (Santiago, Buenos Aires). - Altitude/rural: expect long no‑signal stretches (Uyuni, altiplano passes, Paso Jama). - Bus Wi‑Fi: often advertised, rarely reliable. Plan to be offline onboard. - Border regions: networks switch; a multi‑country eSIM avoids sudden loss.eSIM vs local SIMs for a 4‑country tripFor a route with multiple borders and remote legs, eSIM wins on time and reliability.What a multi‑country eSIM gets you: - One plan across Peru, Bolivia, Chile, Argentina (check coverage per country on Destinations). - No passport/SIM registration queues at kiosks. - Keep your home number active on the physical SIM for calls/SMS codes. - Instant top‑ups if you burn data on photos or navigation.When a local SIM still helps: - Long stay in one country with heavy data use (e.g., a month in Buenos Aires). - Dead zones where a different local network performs better (rarely worth the hassle on a 3‑week pace).Practical approach: - Use an eSIM as your primary data line across all four countries. - If you find a specific local network far better in one region, add a cheap local SIM and keep the eSIM as backup.Device readiness checklist (before you fly)1) Check eSIM compatibility and SIM‑lock status on your phone.2) Buy and install your eSIM while on home Wi‑Fi. Keep a PDF/printed copy of the QR code.3) Label lines clearly (e.g., “eSIM Andes Data”, “Home SIM”).4) Turn on data roaming for the eSIM; leave roaming off for your home SIM to avoid charges.5) Set up dual‑SIM rules: data on eSIM; calls/SMS default to home SIM if needed.6) Download offline: Google Maps/Organic Maps for all target regions; language packs (Spanish at minimum); bus/air tickets; hotel confirmations.7) Cloud backups: set to upload on Wi‑Fi only; pre‑create shared albums for travel companions.8) Test tethering/hotspot with your laptop/tablet.If you’re transiting popular hubs, consider a short layover eSIM: - USA connections: add an Esim United States or a broader Esim North America.- Europe connections: Madrid/Barcelona? Use an Esim Spain. Paris or Rome? See Esim France and Esim Italy. Multi‑country layovers? Try Esim Western Europe.City‑by‑city connectivity notesCusco & the Sacred Valley (Peru)Coverage: Good in Cusco city; variable in high villages (Maras/Moray) and along Inca Trail approaches.Tips: Download Sacred Valley maps offline; pin viewpoints and ruins. most taxis use WhatsApp—save your accommodation’s number.Machu Picchu/Aguas Calientes: Patchy to none at the citadel. Upload your photos later; don’t rely on live ticket retrieval.Lake Titicaca: Puno and CopacabanaPuno: Reasonable 4G; bus terminals crowded—screenshot QR tickets.Crossing to Copacabana: Expect a signal drop around the border; have directions saved offline.La Paz (Bolivia)Good urban 4G; the cable car network has decent signal but tunnels do not.Yungas/“Death Road” tours: Mountain valleys cause dead zones—share your emergency contacts with the operator, carry a charged power bank, and don’t plan remote calls.Uyuni and the Altiplano (Bolivia to Chile)Uyuni town: OK 4G; ATMs finicky—use Wi‑Fi for banking apps.Salt flats/lagunas: Assume offline for most of the 3‑day tour. Guides often carry satellite phones; agree a pickup time/place in San Pedro and preload your map route.San Pedro de Atacama (Chile)Town: Solid 4G; accommodations often have Wi‑Fi but speeds vary.Geysers, Valle de la Luna: Offline navigation essential; sunrise trips start before mobile networks wake up in some areas.Salta/Jujuy or Mendoza/Buenos Aires (Argentina)Salta/Jujuy: Good city coverage; quebradas have long no‑signal sections.Mendoza: City 4G/5G; vineyards outside town can be patchy.Buenos Aires: Strong 4G/5G; ideal for cloud backups and large downloads before you fly home.Border crossings by bus: step‑by‑stepThe big ones on this route: Peru–Bolivia (Puno/Copacabana), Bolivia–Chile (Uyuni–San Pedro via Hito Cajón), Chile–Argentina (Paso Jama to Salta or Los Libertadores to Mendoza).How to keep service and sanity:1) The day before:- Top up your eSIM data.- Confirm your plan includes both countries you’re entering/leaving.- Download offline maps for both sides of the border and your town of arrival.- Save bus company WhatsApp and terminal address offline.2) On departure morning:- Keep a paper copy or offline PDF of tickets, insurance, and accommodation proof.- Charge phone and power bank; pack a short cable in your daypack.3) On the bus:- Don’t count on bus Wi‑Fi. Keep your eSIM as primary, but expect drops near mountain passes.- If your phone supports it, enable “Wi‑Fi calling” for later when you reach accommodation Wi‑Fi.4) At the border posts:- Data may be unavailable. Keep QR codes and booking numbers offline.- After exiting one country and entering the next, toggle Airplane Mode off/on to re‑register on the new network.- If the eSIM doesn’t attach, manually select a network in Mobile Settings.5) Arrival:- Send your accommodation a quick WhatsApp when you’re back online.- Recheck your eSIM’s data roaming is on; confirm you’re on an in‑country network, not a weak roaming partner.Pro tips: - Dual profiles: If your eSIM allows, keep a secondary profile for a different network in the same country—helpful in border towns.- Cash buffer: Some border terminals don’t accept cards; download a currency converter for offline use.Offline survival kit (5‑minute setup)Maps: Download regions for Cusco, Sacred Valley, Puno, La Paz, Uyuni, San Pedro, Salta/Jujuy or Mendoza, and Buenos Aires.Translations: Download Spanish for offline use; add phrasebook favourites (bus tickets, directions, dietary needs).Documents: Save PDFs of passports, tickets, hotel addresses; star them for quick access.Rides: Screenshots of pickup points; pin bus terminals and hotel doors.Entertainment: Podcasts and playlists for long bus legs, set to download on Wi‑Fi only.Altitude and your tech: what changesCoverage gaps lengthen: Fewer towers at high altitude; valleys can block signal. Assume offline on remote excursions.Batteries drain faster in cold: Keep your phone warm and carry a power bank (10,000–20,000 mAh).Hotel Wi‑Fi may be congested: Schedule big uploads (photo backups, app updates) for big-city stays like Santiago or Buenos Aires.GPS still works offline: Your blue dot shows on offline maps without data—preload everything.Data budgeting for 3 weeksTypical traveller usage across this route: - Messaging/Maps/Bookings: 0.2–0.5 GB/day- Social and photo sharing: 0.3–0.7 GB/day- Occasional video calls/streaming: 0.5–1.0 GB/dayFor a mixed-use trip, plan 15–25 GB for 3 weeks. Heavy creators should double it and upload over hotel Wi‑Fi when possible. If you work remotely, consider a higher‑capacity plan and a backup eSIM; see our guidance on For Business.Practical route with transport and connectivity cuesDays 1–4 Cusco base: Strong city signal; day trips may be spotty—go offline-ready.Days 5–6 Machu Picchu: Expect no service at the ruins; sync tickets ahead.Days 7–8 Puno to La Paz via Copacabana: Border signal drop; re‑register networks after crossing.Days 9–11 Uyuni tour to San Pedro: Treat as offline; charge nightly; carry spare cables.Days 12–14 San Pedro: Stable in town; tours offline; top up data before Paso Jama.Days 15–17 Salta/Jujuy or Mendoza: Good urban 4G; rural patches are offline.Days 18–21 Buenos Aires: Strongest connectivity of the trip; clear your uploads and map downloads for the flight home.Partnering and stopover extrasHospitality and tour operators in the Andes: help your guests stay connected—explore co‑branded solutions via our Partner Hub.Transatlantic flyers: test your eSIM setup on a layover with an Esim United States or Esim Western Europe before hitting high-altitude blackspots.FAQs1) Do I need a local SIM in each country?No. A multi‑country eSIM covering Peru, Bolivia, Chile and Argentina is simpler and works well for a 3‑week pace. Consider a local SIM only if you’ll spend longer in one country and want the absolute best regional coverage.2) Will my WhatsApp number change with an eSIM?No. WhatsApp is tied to your registered number, not your data line. Keep your home SIM active for voice/SMS (roaming off if you wish), and use the eSIM for data—WhatsApp continues as normal.3) Can I hotspot to my laptop or camera?Yes. Enable tethering on your eSIM. Mind your data: cloud backups and OS updates can burn gigabytes—set them to Wi‑Fi only or schedule in big cities.4) What if there’s no signal on the Uyuni/Atacama legs?That’s expected. GPS still works offline. Pre-download maps and translations, carry a power bank, and sync plans with your tour operator before departure.5) Will I get roaming charges at borders?If you’re using a multi‑country eSIM with coverage in both countries, you won’t incur extra roaming fees from your home carrier. Keep roaming off on your home SIM to avoid accidental use.6) I’m connecting via Europe or the US—worth getting a layover eSIM?Yes. It’s an easy way to test your setup and stay reachable. Try Esim North America or country options like Esim Spain, Esim France, or Esim Italy for common hubs.Next step: Browse South America coverage options and build your plan on Destinations.

APN Settings for eSIM Data (iOS & Android): Find, Edit, Verify

APN Settings for eSIM Data (iOS & Android): Find, Edit, Verify

Travelling with an eSIM should be as simple as scanning a QR code and going online. Most of the time it is. When it isn’t, the culprit is often the APN (Access Point Name) — the tiny configuration that tells your device how to reach the mobile data network. This guide shows you exactly where to find APN settings on iOS and Android (including popular vendor skins), what to fill in, and how to verify it’s working with quick tests. We’ll also cover DNS tweaks that can help on the road and a clean troubleshooting flow to get you connected fast.Whether you’re heading to the US, France, Italy, Spain or hopping around Esim Western Europe and Esim North America, correct APN settings are the difference between smooth streaming and a blank browser. Keep your provider’s APN values handy, follow the steps below, and you’ll be back online in minutes. For plan options by country, see our Destinations.What is an APN and why it matters for eSIM dataAPN (Access Point Name) defines the gateway your device uses to access mobile internet.With eSIMs, APN is often auto‑provisioned. Sometimes you must enter it manually.If the APN is missing or wrong, you’ll have signal bars but no data.You’ll typically only need to enter: - APN: a short string (e.g., “internet” or provider‑specific) - Username/Password: usually blank - APN Type: “default,supl” - Protocol: IPv4/IPv6MMS and voice settings are not required for data‑only eSIMs.Before you start: quick checklisteSIM installed and activated on your deviceMobile Data turned onThe eSIM set as the active line for Mobile DataData Roaming on (required when abroad, and sometimes even domestically with certain carriers/MVNOs)Wi‑Fi off while testing (to ensure you’re using mobile data)APN values from your eSIM provider readyTravelling soon? Explore country packs such as Esim United States, Esim France, Esim Italy and Esim Spain.iOS: Find and edit APN settings (iPhone/iPad)Note: On many carriers, iOS hides APN fields because settings are auto‑installed. If you don’t see the menu below, your carrier may not allow manual changes. In that case, re‑installing the eSIM or applying a carrier settings update usually fixes it.Step‑by‑step: 1. Open Settings. 2. Tap Mobile Data (or Cellular). 3. Tap your eSIM line (labelled with the plan name). 4. Tap Mobile Data Network (or Cellular Data Network). - If this menu is missing, APN is likely auto‑configured. Try a carrier settings update: Settings > General > About (wait for an update prompt). 5. Under Mobile Data, fill in: - APN: enter exactly as provided - Username/Password: leave blank unless specified 6. Personal Hotspot section (if present, may mirror the data APN): - APN: same as Mobile Data (only if instructed by your provider) 7. Go back; iOS saves automatically. Toggle Airplane Mode off/on to refresh.Pro tips (iOS): - Correct APN spelling matters. Avoid extra spaces. - If you changed APN and nothing happens, restart the phone. - To verify connectivity, open Safari and visit: - http://neverssl.com (loads plain HTTP if you truly have data) - http://captive.apple.com (should show “Success”) - Dual SIM? Ensure your travel eSIM is selected under Mobile Data > Mobile Data.Android: Find and edit APN settings (by brand)The path is similar across Android, but menu names vary. After adding a new APN, always save and select it.Google Pixel / Android (near‑stock)Settings > Network & Internet > SIMs.Choose your eSIM.Access Point Names.Tap + (Add) or the plus icon.Fill: - Name: any label (e.g., “Travel eSIM”) - APN: as provided - Username/Password: blank unless specified - APN type: default,supl - APN protocol: IPv4/IPv6 - MCC/MNC: leave as‑is (auto from the SIM)Save (⋮ menu > Save).Tap the new APN to select it.Toggle Airplane Mode off/on.Samsung Galaxy (One UI)Settings > Connections > Mobile networks > Access Point Names.Select your eSIM if prompted.Tap Add.Enter APN details (as above).Tap ⋮ > Save, then select the new APN.Toggle Airplane Mode or restart.Xiaomi/Redmi/POCO (MIUI/HyperOS)Settings > SIM cards & mobile networks.Choose your eSIM.Access Point Names.New APN (+).Fill in details, Save, then select it.Reconnect mobile data.OPPO/realme/OnePlus (ColorOS/OxygenOS)Settings > Mobile network (or SIM & network).Choose the eSIM > Access Point Names.Add APN, fill details, Save, select it.Toggle Airplane Mode.Huawei (EMUI)Settings > Mobile network > Mobile data.SIM management > select eSIM.Access Point Names > Add.Fill details, Save, select, and reconnect.Pro tips (Android): - If you don’t see APN, ensure the eSIM is enabled and set as the data SIM. - Use “Reset to default” (⋮ menu) if you’ve tried multiple APNs. - Data Saver or Battery Saver can block background data; disable while testing. - Private DNS can affect captive portals; set to Off/Automatic while activating, then re‑enable.The exact fields to fill (and what to leave alone)APN: Required. Enter exactly as provided.Username/Password: Leave blank unless specified.APN Type: Use default,supl. Only add dun if instructed (for tethering on certain carriers).APN Protocol / Roaming Protocol: IPv4/IPv6 is ideal. Switch to IPv4 if you see IPv6‑related issues (rare).MMSC/MMS Proxy/MMS Port: Not needed for data‑only plans.Bearer: Unspecified.MVNO Type/Value: Leave as‑is unless your provider specifies.MCC/MNC: Auto‑filled from the SIM. Do not change.Formatting gotchas: - Case is usually not sensitive, but use the exact case provided. - Avoid trailing spaces before/after the APN string.Verify your APN works: simple, reliable testsDo this with Wi‑Fi off.Check the status bar: you should see 3G/4G/LTE/5G with data arrows blinking.Open a non‑HTTPS test page: - http://neverssl.com or http://example.com - If you’re behind a captive portal (hotel/airport Wi‑Fi style, unusual for mobile), you’ll be redirected.Try https sites: - https://1.1.1.1/help — loads Cloudflare’s connectivity page - A map app (tiles should load quickly)Optionally run a speed test after basics work.If still no data: - Toggle Airplane Mode - Restart the device - Re‑select your APN - Ensure Data Roaming is enabledDNS tips for travellersMost eSIMs work best with the carrier’s DNS. However, if browsing feels slow or certain sites won’t resolve:Android Private DNS:Settings > Network & Internet > Private DNSTry dns.cloudflare.com (Cloudflare) or dns.google (Google). If it breaks captive portals, switch back to Automatic.iOS:iOS does not offer per‑cellular DNS changes in Settings. For mobile data, you typically use the carrier’s DNS. If you must override, a configuration profile or third‑party app is required — not recommended while roaming.APN DNS fields (if visible): Leave blank unless your provider specifies values.If switching DNS worsens connectivity, revert to Automatic/Off and retest.Common errors and fast fixesAPN menu missing (iOS):The carrier locks APN edits. Update carrier settings (Settings > General > About), restart, or re‑install the eSIM.APN won’t save or won’t stay selected (Android):Delete other APNs, save yours, then select it. Reboot.Signal but no data:Wrong APN or APN type; re‑enter carefully.Data Roaming off; turn it on.Low Data Mode/Data Saver on; disable temporarily.Dual SIM conflict; set the correct SIM for Mobile Data and turn off “Allow Mobile Data Switching” until stable.Stuck on 3G/edge speeds:Network mode forced to 3G; set to 4G/5G Auto.Weak local coverage; try moving near a window or outdoors, or switch network operator manually if allowed.After long flights:Toggle Airplane Mode.Check date/time set automatically — incorrect time can affect auth with some networks.Region-specific notes for roaming eSIMsMany roaming profiles require Data Roaming enabled, even if you’re physically in your home country.Some MVNOs in Europe connect via partner networks; keep network selection on Automatic for best results.For multi‑country trips, consider bundles like Esim Western Europe or Esim North America to avoid reconfiguring APNs between borders.For country‑specific plans, see Esim United States, Esim France, Esim Italy, and Esim Spain. Plan pages include any APN notes unique to that destination.For teams and partnersSetting up dozens of devices for a trip or event? Our business team can pre‑stage eSIMs and provide APN guidance per route and device fleet.Explore solutions For Business.Existing resellers and travel partners can access technical collateral in the Partner Hub.FAQ: APN settings for eSIM1) What APN should I use with my Simology eSIM? - Use the APN shown during activation or in your confirmation email/portal. If none is shown, your device should auto‑provision it.2) I can’t see the APN menu on iPhone. What now? - Some carriers lock APN edits on iOS. Update carrier settings (Settings > General > About), restart, or re‑install the eSIM. If it’s still hidden, the APN is managed automatically.3) Do I need MMS settings for a data‑only eSIM? - No. MMS fields (MMSC, proxy, port) are not required for data‑only plans. Only set them if your plan explicitly includes MMS.4) Should APN type include “dun” for hotspot? - Usually no. Start with default,supl. Add dun only if your provider instructs you and tethering fails.5) IPv4 or IPv6? - Choose IPv4/IPv6 (dual‑stack) where possible. If you encounter connectivity issues with certain apps, try IPv4 only on Android.6) Will changing APN affect my primary (home) SIM? - No, APNs are set per SIM profile. Just be sure you’re editing the eSIM line used for travel.Next step: Choose your destination and get the right eSIM with clear APN guidance on the plan page. Start at Destinations.

Secure Messaging Abroad: iMessage, WhatsApp, Signal — Best Practices

Secure Messaging Abroad: iMessage, WhatsApp, Signal — Best Practices

Travelling adds friction to your private chats: new SIMs, patchy roaming, sketchy Wi‑Fi and the constant risk of loss or theft. This guide distils what actually matters for secure messaging travel across iMessage, WhatsApp and Signal. You’ll learn how to keep end-to-end encryption intact while changing networks and devices, how to avoid account takeovers during SIM swaps, how to set up encrypted backups you can actually restore, and when to use disappearing messages. We’ll also cover dual‑SIM/eSIM roaming so you can keep your home number for authentication while using a local data plan without bill shock.If you only do three things before you fly: lock your accounts with registration/2‑step verification, enable encrypted backups (or turn backups off if you can’t encrypt), and keep your primary number reachable for re‑activation codes using a travel eSIM for data. Everything below shows you exactly how.Browse regional eSIM options at Destinations or go straight to Esim Western Europe, Esim United States and Esim North America to keep mobile data secure on the move.The essentials: how secure are iMessage, WhatsApp and Signal?End-to-end encryption (E2EE): All three encrypt message content in transit and on servers.Backups are the weak link:iMessage: On-device is E2EE. If you sync with iCloud, enable Apple’s Advanced Data Protection (ADP) to keep iCloud Messages end‑to‑end encrypted; otherwise Apple holds keys.WhatsApp: Chats are E2EE, but you must turn on E2EE backups to protect iCloud/Google Drive backups.Signal: No cloud backups. You can create local encrypted backups (Android) with a passphrase.Metadata: Who you talk to and when is more exposed than message content (highest protection on Signal; WhatsApp and iMessage retain more metadata).Device security matters: A strong device passcode/biometrics and encrypted storage are non‑negotiable.SMS fallback is not secure: Avoid sending SMS/MMS when data is spotty; ensure apps don’t silently fall back.Pro tip: Keep mobile data via a travel eSIM to maintain E2EE reliably instead of hunting for risky public Wi‑Fi. See Esim France, Esim Spain or Esim Italy if you’re heading to Europe.Before you fly: secure messaging travel checklistDo these at home on a stable connection with access to your primary number.iMessage/FaceTime (Apple)Update iOS/iPadOS/macOS to the latest version.Settings > Your Name > Password & Security: - Turn on two‑factor authentication for your Apple ID. - Consider Advanced Data Protection for end‑to‑end encrypted iCloud data (store recovery key or set a recovery contact).Settings > Messages: - Ensure iMessage is On. - Send & Receive: Add your Apple ID and your phone number. Prefer using your Apple ID for reachability while travelling.Settings > Messages > Send as SMS: Leave On for emergencies, but note SMS isn’t encrypted; watch for green bubbles.Optional for high‑risk users: iMessage Contact Key Verification (iOS 17.2+). Verify contacts and receive alerts if keys change.Pro tips: - On dual‑SIM, choose which number iMessage uses in Settings > Messages > Send & Receive. Keep your home number linked but use data on your travel eSIM. - Avoid signing out of Apple ID while abroad; it can trigger re‑verification you may not receive if your home SIM is offline.WhatsAppUpdate WhatsApp.Settings > Account > Two‑step verification: - Turn on and set a unique PIN. Add an email for recovery. This is your shield against SIM‑swap takeovers.Settings > Chats > Chat backup: - Turn on End‑to‑end encrypted backup. - Set a strong backup password or store the 64‑digit key securely. Lose it and your backup is irrecoverable.Settings > Account > Security alerts: - Turn on Security notifications to be alerted when contacts’ security codes change.Multi‑device: - Consider linking a secondary device before travel (Linked devices). If your primary is lost, you can still access chats on companions.Pro tips: - Never share your WhatsApp 6‑digit code. WhatsApp support will never ask for it. - If connectivity is unreliable, disable automatic media downloads to reduce data use.SignalUpdate Signal.Profile > Settings > Account: - Registration lock/PIN: Enable. This prevents someone registering your number on another device without the PIN.Backups: - iOS: No cloud backups. Transfers require device‑to‑device or QR migration. - Android: Settings > Chats > Chat backups: Create an encrypted local backup; write down the 30‑digit passphrase and store it offline.Safety numbers: - Open each critical contact > Verify safety number (scan QR or compare digits). Re‑verify after device changes.Privacy: - Enable Sealed Sender and always‑relay calls if you want to reduce metadata exposure. - Turn on disappearing messages by default for travel chats.Pro tips: - Signal doesn’t store your chats in the cloud. Test your restore process before you go. - Use a screen lock inside Signal for an extra layer (Settings > Privacy > Screen lock).Device and carrier hygieneSet a strong device passcode, enable biometrics, and turn on “Erase data after 10 failed attempts” if available.Enable Find My (Apple/Google) and test remote lock/wipe.Ask your carrier to add a SIM‑swap/port‑out lock before travel.Photograph and securely store your SIM/eSIM details and QR codes.Dual‑SIM and eSIM: roam smart, keep your number safeTravellers increasingly use dual‑SIM phones with a physical home SIM for identity/OTP and a travel eSIM for data. Done right, you get cheap data without breaking your secure messaging.Keep the home number active for SMS re‑verification while avoiding data roaming fees:iPhone: Settings > Mobile Data:Set your travel eSIM as “Mobile Data”.Turn off “Data Roaming” on the home line.Leave Calls/SMS enabled on the home line so you can still receive OTPs.Android: Settings > Network & Internet > SIMs:Use the travel eSIM for data; disable data on the home SIM; keep SMS on.iMessage:In Send & Receive, ensure your Apple ID is selected so messages can continue over data even if your phone number changes status.WhatsApp and Signal:Both tie identity to your phone number. Keeping the home SIM reachable prevents account reactivation headaches.Pro tip: Use regional data plans so you don’t swap eSIMs at each border. For example, Esim Western Europe covers multiple countries; for transatlantic trips, pair it with Esim North America.For destination‑specific coverage and pricing, see Destinations or pick plan pages like Esim United States, Esim France, Esim Spain or Esim Italy.Account transfer and device loss: minimise riskIf your phone is lost or stolen:General steps (immediately)Use Find My/Find My Device to lock or erase.Contact your carrier to suspend the line to block OTP interception.Move your number to an eSIM or replacement SIM as soon as possible.WhatsAppGet a new SIM with the same number and install WhatsApp to re‑register; this logs out the old device.If you cannot get a SIM quickly, email support@whatsapp.com with the subject “Lost/Stolen: Please deactivate my account” including your number in full international format.Restore from your end‑to‑end encrypted backup using your password/key.SignalOnce you have your number back, install Signal and register; Registration Lock will require your PIN (good).On Android, restore from your local encrypted backup with your passphrase.Ask contacts to verify safety numbers again.iMessageRemove the device from your Apple ID at appleid.apple.com.If necessary, deregister your phone number from iMessage at Apple’s deregistration page so new SMS/messages reach you once you switch devices.Pro tips: - Don’t publish your travel dates and number changes publicly; it aids social‑engineering. - Store your backup passwords/keys offline (paper or a secure password manager with offline access).Backups, sync and what to encryptiMessageBest security: Enable Advanced Data Protection so Messages in iCloud stay end‑to‑end encrypted. Keep your recovery key/contact safe.If you can’t use ADP, consider turning off Messages in iCloud during sensitive travel to reduce exposure, but you’ll lose cross‑device message sync.WhatsAppAlways enable end‑to‑end encrypted backups with a strong password or 64‑digit key.Test a restore before you leave so you know the password works.Avoid third‑party “transfer” tools that may break security.SignaliOS: Use Signal’s device‑to‑device transfer when replacing phones; it’s encrypted and local.Android: Use the built‑in encrypted local backup only; keep the passphrase offline.General rule: If a backup isn’t end‑to‑end encrypted with a key only you know, assume your chat content could be exposed.Disappearing messages and minimising metadataTurn on disappearing messages for travel chats:WhatsApp: Per chat > Disappearing messages > set a short timer (e.g., 24 hours) and “Default message timer” for new chats.Signal: Per chat or global default; add “View‑once” for sensitive media.iMessage: No true disappearing messages. Consider sending via Notes collaboration or avoid persistent media; delete threads you no longer need.Limit message previews on lock screen:Show “Only when unlocked” to prevent shoulder‑surfing.Reduce metadata:Prefer Signal for highly sensitive contacts.In WhatsApp, keep “Last seen/Online” limited to “Nobody” or “My contacts”.Avoid large group chats that leak membership and activity patterns.Pro tip: Disappearing messages don’t prevent screenshots or backups by your contacts. Share only what you’re comfortable losing control of.Public Wi‑Fi vs mobile dataPrefer mobile data for secure messaging. E2EE protects content on any network, but captive portals and rogue hotspots can still trick you into risky behaviour and leak metadata.If you must use Wi‑Fi:Validate the network name with staff.Use a reputable VPN, especially on shared or open networks.Disable auto‑join for public SSIDs and forget networks after use.Travel eSIM data is usually the simplest, safest path. Choose regional plans like Esim Western Europe or country plans such as Esim United States. Teams and frequent travellers can streamline provisioning via For Business or explore partnership options in our Partner Hub.How to set up secure messaging for travel: a quick startUpdate your phone OS and all messaging apps.Lock your accounts: - iMessage: Turn on two‑factor; consider ADP. - WhatsApp: Enable two‑step verification and security notifications. - Signal: Enable Registration Lock (PIN).Secure your backups: - WhatsApp: Turn on E2EE backups and record the password/key. - Signal (Android): Create and store the encrypted backup + passphrase. - iMessage: Enable ADP or turn off Messages in iCloud if you can’t.Configure dual‑SIM: - Set travel eSIM for data; keep home SIM for SMS; disable home data roaming.Set privacy defaults: - Disappearing messages on (Signal/WhatsApp). - Lock‑screen previews off or “When unlocked”.Test the recovery path: - Restore a WhatsApp backup on a spare device. - Verify Signal safety numbers with a trusted contact. - Confirm you can receive an SMS on the home line while data uses eSIM.FAQQ: Will iMessage work abroad without SMS? A: Yes, iMessage uses data. However, re‑activation can require an SMS. Keep your home SIM able to receive texts while using a travel eSIM for data.Q: Is WhatsApp secure enough for travel? A: With two‑step verification and end‑to‑end encrypted backups enabled, yes for most travellers. For maximum privacy (less metadata), prefer Signal.Q: Can I switch phone numbers while travelling? A: Avoid changing the number tied to WhatsApp/Signal mid‑trip; it triggers re‑registration. If you must, use the in‑app “Change Number” (WhatsApp) and notify contacts; re‑verify safety numbers on Signal.Q: Can I use WhatsApp on two phones? A: Yes. You can link a second phone as a companion device. For resilience, link it before travel so you’re not locked out if your primary is lost.Q: Do disappearing messages make me bulletproof? A: No. They reduce residual data but don’t stop screenshots or photos. Treat them as cleanup, not a guarantee.Q: Does a VPN make messaging more secure? A: It doesn’t add encryption to E2EE chats, but it protects against rogue Wi‑Fi and hides traffic from local networks. Still prefer mobile data when possible.Next step: Pick a regional eSIM to keep your secure messaging online without roaming fees. Start with Destinations or choose a bundle like Esim Western Europe.