Saudi Arabia SIM/eSIM Registration (2025): What Travelers Need to Know

Blog

Saudi Arabia SIM/eSIM Registration (20...

Saudi Arabia SIM/eSIM Registration (2025): What Travelers Need to Know

30 Oct 2025

Saudi Arabia SIM/eSIM Registration (2025): What Travelers Need to Know

Saudi Arabia requires real-name registration for all mobile lines, including prepaid tourist SIMs and eSIMs. That means you’ll be asked for your ID and your line will be tied to you within the national database run by the regulator (CST). The process is straightforward if you buy at an airport kiosk or an official operator store, but it can trip up travellers who arrive late, who only try smaller convenience shops, or who expect to activate via app without local ID. This guide explains exactly where to register, the IDs you’ll need, how eSIM works for visitors, and what to expect with VoIP and messaging. We also flag common pitfalls (border number confusion, app sign-ins that require Saudi credentials, and tourist SIM limits), plus practical steps to get online quickly during Umrah/Hajj or peak events. For a broader country view and alternatives for multi-country itineraries, see our travel hub at Destinations.

Quick take

  • Registration is mandatory: your passport and entry “border number” (issued on arrival) are used for tourist SIM/eSIM activation.
  • Buy at the airport or official operator stores for the smoothest experience; staff can retrieve your border number if needed.
  • eSIM is widely available from major networks (stc, Mobily, Zain). App-only activation often requires Saudi ID—stick to in-person purchase as a visitor.
  • Most mainstream VoIP (WhatsApp, FaceTime, Skype) generally works, but expect occasional restrictions and variable quality, especially during peak pilgrim seasons.
  • Limits apply to how many prepaid lines a visitor can register; plan for 1–2 active lines per traveller.

Who needs to register, and with what ID?

You must register if you:

  • Buy a local prepaid SIM or eSIM (tourist or standard).
  • Activate a physical SIM picked up from a reseller, kiosk, or vending machine.
  • Replace or reissue (SIM swap) a Saudi number.

Roaming on your home SIM does not require local registration.

Acceptable IDs and numbers

  • Tourists/visitors: Passport + Saudi entry “border number” (assigned at immigration). The border number is often on your visa sticker or can be looked up by staff using your passport details.
  • GCC citizens: National ID/GCC ID is commonly accepted.
  • Residents (iqama holders): Resident ID (iqama). App-based activations may require Absher/Nafath verification.

Pro tip: If you arrived on an eVisa, your border number is generated at entry. If you don’t have it to hand, ask the store staff to retrieve it against your passport. Don’t waste time chasing it yourself.

Where to register and buy a Saudi SIM/eSIM

Best places (fastest and most reliable)

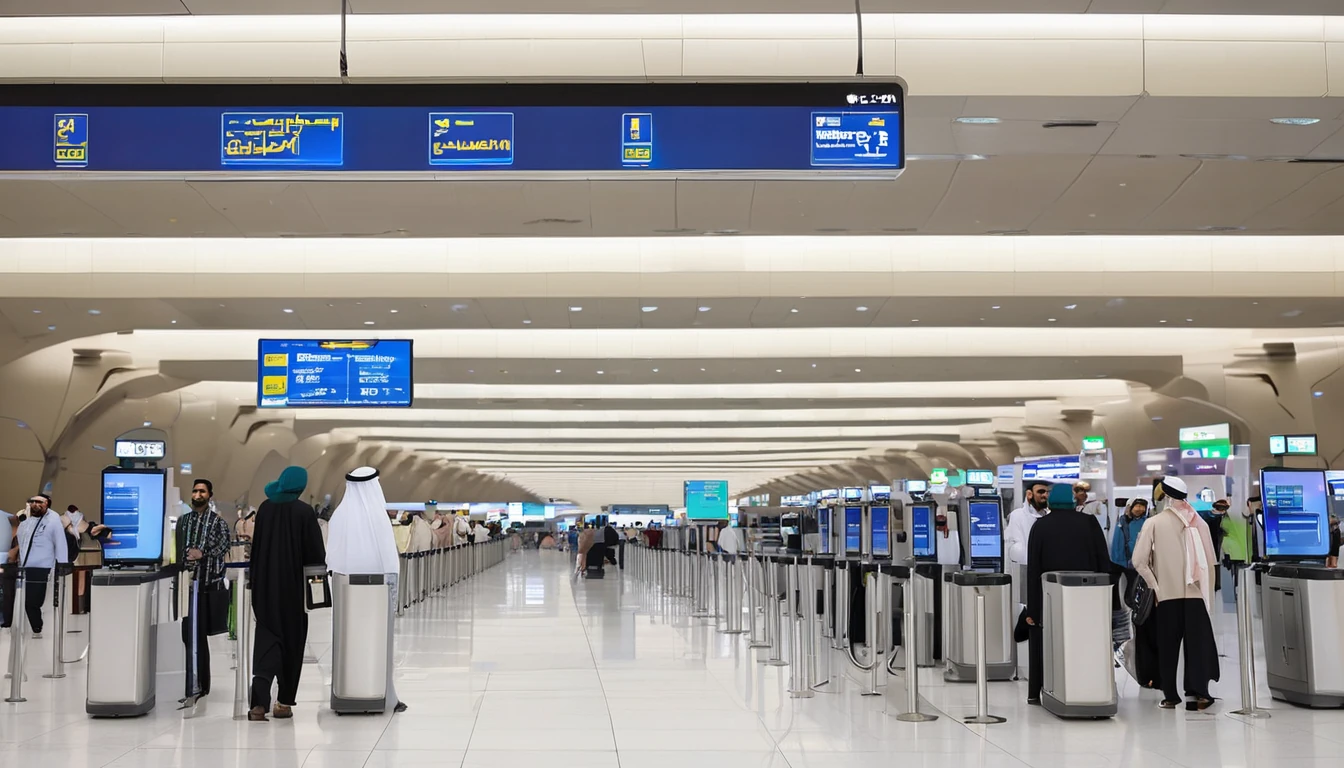
  • Airport kiosks: Riyadh (RUH), Jeddah (JED), Dammam (DMM), Madinah (MED) terminals have counters for stc, Mobily, and Zain. Staff handle registration in minutes, including eSIM.
  • Official operator stores: In major malls, high streets, and business districts. Look for stc, Mobily, Zain, Virgin Mobile, or Lebara branded stores.
  • Pop-up booths during peak seasons: Additional counters appear during Umrah/Hajj and large events.

Places to avoid (unless you must)

  • Small convenience shops: Many can sell top-ups but not complete biometric/ID registration. You risk rejection or delays.
  • App-only sign-up: Tourist flows are often blocked by an in-app ID check that expects Saudi credentials (residents). Use in-person activation.

Pro tip: During peak pilgrim periods, airport queues build fast. If you land late, consider a quick roaming day-pass or a backup travel eSIM just for the first night.

eSIM in Saudi Arabia: what visitors need to know

  • Availability: stc, Mobily, and Zain all issue eSIMs at staffed points of sale. You’ll scan a QR code after ID verification.
  • Device compatibility: iPhone XR/XS and newer, most current Google Pixel and Samsung Galaxy flagships, and select other models. Confirm before you queue.
  • In-app eSIM: Some operator apps let you “buy and activate” — but they typically require Saudi ID for verification. Tourists should assume in-person activation is needed.
  • Reinstalling: eSIM QR codes are usually one-time use. If you delete your eSIM, you’ll likely need to visit a store for a reissue with your ID.

Checklist before you go: - Ensure your phone is unlocked. - Update iOS/Android to the latest version. - Know how to add an eSIM (Settings > Mobile/Cellular > Add eSIM). - Keep stable Wi‑Fi for the QR scan at the store (staff can help). - Bring your passport and have your entry details ready.

Step-by-step: buying and registering a Saudi tourist SIM/eSIM

1) Choose where to buy
- Airport kiosk is fastest; otherwise, an official operator store.

2) Pick your operator and plan
- Ask for tourist/visitor plans (often 7–30 days, with data-first bundles). Clarify if local minutes or international minutes are included.

3) Provide ID
- Hand over your passport. Staff will use it and your border number to register. A fingerprint scan may be requested.

4) SIM or eSIM issuance
- Physical SIM: inserted and activated in-store.
- eSIM: you’ll receive a QR to scan. Keep the device handy and unlocked.

5) Activation and test
- Staff will complete CST registration. Test data and calls before you leave the counter.

6) Top-up and manage
- Use official apps or USSD codes to check balance and add data. App logins may require a one-time SMS OTP; keep the line active during setup.

Pro tip: Ask the agent to label your number and plan details on the receipt (or take a photo of the POS screen). It helps with top-ups and support later.

What it costs (typical ranges)

  • Tourist eSIM/SIM plans commonly bundle 5–50+ GB with local minutes for 7–30 days. Larger packages add unlimited social data or international minutes. Prices are competitive with other Gulf markets, with good 4G and expanding 5G coverage in cities and pilgrimage routes.
  • SIM card/eSIM issuance may carry a small fee; tourist packages sometimes include it.

Note: We avoid listing exact prices because they change frequently and vary by channel (airport promo vs city store). Airport deals are often the most transparent for visitors.

VoIP, messaging, and calling in Saudi Arabia

  • VoIP apps: WhatsApp, FaceTime, Skype and similar services generally work for messaging and calls, though periodic disruptions or quality variance can occur.
  • Wi‑Fi Calling: Support depends on your home carrier and the Saudi network. It may be blocked or inconsistent for foreign numbers.
  • Business conferencing: Most platforms (Zoom, Teams, Meet) work. Corporate VPNs can improve stability but check your company policy and local rules before use.
  • Local voice calls: Good to have if you need to speak to hotels, drivers, or local services who prefer a Saudi number.

Pro tip: If voice call quality dips during crowded events or in dense pilgrim zones, switch to text or try another VoIP app. Late evenings and early mornings are usually less congested.

Common pitfalls (and how to avoid them)

  • “No Saudi ID” app wall: As a tourist, skip app-only purchases. Go to a staffed kiosk/store for manual registration with passport + border number.
  • Border number mismatch: If your visa and entry stamp differ, let staff look up your active border number against your passport.
  • eSIM deleted by mistake: Don’t remove your eSIM unless you’re sure you’re done. Reprovisioning usually requires returning to a store with your ID.
  • Line limits: Visitors are typically limited to a small number of active prepaid lines (commonly up to two). Plan device sharing or hotspots accordingly.
  • Peak season crowding: During Umrah/Hajj, buy at the airport as soon as you land to beat queues and ensure stock.
  • Reseller issues: Avoid unbranded stalls selling pre-registered SIMs; they can be deactivated during audits.

Multi-country itineraries and transit stops

If you’re transiting or combining Saudi with other regions, consider a separate travel eSIM to cover your stopovers, then switch to a local Saudi SIM/eSIM on arrival:

This approach keeps you connected door-to-door while keeping Saudi registration clean and local once you land.

For teams, events, and corporate travel

Coordinating dozens of arrivals for conferences, construction projects, or pilgrim support teams? Pre-plan device compatibility, line limits, and pickup locations:

  • Centralise device checks (unlock status, eSIM support) and allocate SIMs by arrival wave.
  • Use airport kiosks for fast throughput, with a backup city store for late arrivals.
  • Keep a roster of numbers and plan end-dates to manage renewals.

Explore our enterprise options at For Business. Travel partners and resellers can coordinate fulfilment via the Partner Hub.

FAQ: Saudi SIM/eSIM Registration for Tourists

1) Can I buy and activate a Saudi eSIM entirely online as a tourist?
Usually no. Operator apps commonly require Saudi ID for digital verification. Tourists should use airport kiosks or official stores for passport-based registration and eSIM issuance.

2) What if I don’t know my border number?
Staff can look it up with your passport details. It’s generated on entry and is used for SIM registration. Don’t worry if it’s not visible on your eVisa printout.

3) Are there limits to how many SIMs I can register as a visitor?
Yes. The regulator limits the number of prepaid lines per identity. For visitors, assume one or two lines; exact limits can vary. Plan tethering/hotspot use if you carry multiple devices.

4) Do WhatsApp and FaceTime calls work in Saudi Arabia?
In general, yes. Most mainstream VoIP apps work, but you may experience occasional restrictions or quality issues, especially at peak times or in crowded areas.

5) Can I keep my eSIM for a future trip?
If your line remains active and you don’t delete the eSIM, you may be able to recharge later. However, tourist plans often expire after 30 days, and inactive lines can be deactivated. If an eSIM is removed, you’ll likely need a new QR at a store with your ID.

6) What if my phone is carrier-locked?
You’ll need to unlock it before using a Saudi SIM/eSIM. Contact your home carrier in advance; unlocking in-country is rarely possible on short notice.

Pro tips to finish strong

  • Keep both SIMs active (dual-SIM/eSIM) so you can receive bank/OTP texts from home while using Saudi data.
  • Label your Saudi line in your phone settings to avoid confusion.
  • Take photos of the receipt, plan details, and any QR code you’re given.
  • For hotel check-ins or ride-hailing, a local number speeds callbacks and delivery.

For destination specifics, plan options, and regional coverage that pairs well with your itinerary, start at Destinations.

Next step: Compare regional eSIMs for your stopovers, then plan your Saudi activation on arrival via airport kiosks. Begin with Destinations.

Read more blogs

Andes Highlights (3 Weeks): Peru–Bolivia–Chile–Argentina Connectivity

Andes Highlights (3 Weeks): Peru–Bolivia–Chile–Argentina Connectivity

Planning a south america itinerary 3 weeks through the high Andes? This route stitches together Peru’s Sacred Valley, Bolivia’s La Paz and Salar de Uyuni, Chile’s Atacama Desert, and northern Argentina’s quebradas or Mendoza wine country—often by long-distance bus and a couple of short flights. Connectivity is different at altitude: coverage is strong in cities but drops in high passes and salt flats; bus Wi‑Fi is patchy; border towns can be blackspots. The smart move is an eSIM with multi‑country coverage, backed by offline maps, offline translations, and a simple routine for crossing borders by bus without losing service. Below you’ll find a practical, connectivity-first itinerary; checklists to prep your phone, apps and documents; and on-the-ground tips for staying online where it matters: booking transport, hailing taxis, backing up photos, and navigating when the signal disappears.If you’re transiting via Europe or North America, you can also add a layover eSIM to stay connected door-to-door. Start with our country list on Destinations, then follow the steps, and you won’t waste time chasing SIM shops at 3,500 metres.The 3‑week Andes route at a glanceWeek 1: Peru (Cusco, Sacred Valley, Machu Picchu) - Fly into Cusco (or Lima then connect). - Base in Cusco; day trips to Pisac/Chinchero/Maras–Moray. - Train to Aguas Calientes; Machu Picchu visit; return to Cusco or continue to Puno/Lake Titicaca.Week 2: Bolivia and Chile (La Paz, Uyuni, San Pedro de Atacama) - Bus/collectivo via Copacabana to La Paz. - Fly or overnight bus to Uyuni. - 3‑day Uyuni–altiplano tour ending in San Pedro de Atacama (Chile).Week 3: Chile and Argentina (Atacama to Salta or Mendoza/Buenos Aires) - Choose: - North: San Pedro to Salta/Jujuy by bus; fly to Buenos Aires. - Or South: San Pedro–Calama flight to Santiago; bus or flight to Mendoza; onward to Buenos Aires.Connectivity notes (quick): - Cities: generally strong 4G/4G+; 5G in major hubs (Santiago, Buenos Aires). - Altitude/rural: expect long no‑signal stretches (Uyuni, altiplano passes, Paso Jama). - Bus Wi‑Fi: often advertised, rarely reliable. Plan to be offline onboard. - Border regions: networks switch; a multi‑country eSIM avoids sudden loss.eSIM vs local SIMs for a 4‑country tripFor a route with multiple borders and remote legs, eSIM wins on time and reliability.What a multi‑country eSIM gets you: - One plan across Peru, Bolivia, Chile, Argentina (check coverage per country on Destinations). - No passport/SIM registration queues at kiosks. - Keep your home number active on the physical SIM for calls/SMS codes. - Instant top‑ups if you burn data on photos or navigation.When a local SIM still helps: - Long stay in one country with heavy data use (e.g., a month in Buenos Aires). - Dead zones where a different local network performs better (rarely worth the hassle on a 3‑week pace).Practical approach: - Use an eSIM as your primary data line across all four countries. - If you find a specific local network far better in one region, add a cheap local SIM and keep the eSIM as backup.Device readiness checklist (before you fly)1) Check eSIM compatibility and SIM‑lock status on your phone.2) Buy and install your eSIM while on home Wi‑Fi. Keep a PDF/printed copy of the QR code.3) Label lines clearly (e.g., “eSIM Andes Data”, “Home SIM”).4) Turn on data roaming for the eSIM; leave roaming off for your home SIM to avoid charges.5) Set up dual‑SIM rules: data on eSIM; calls/SMS default to home SIM if needed.6) Download offline: Google Maps/Organic Maps for all target regions; language packs (Spanish at minimum); bus/air tickets; hotel confirmations.7) Cloud backups: set to upload on Wi‑Fi only; pre‑create shared albums for travel companions.8) Test tethering/hotspot with your laptop/tablet.If you’re transiting popular hubs, consider a short layover eSIM: - USA connections: add an Esim United States or a broader Esim North America.- Europe connections: Madrid/Barcelona? Use an Esim Spain. Paris or Rome? See Esim France and Esim Italy. Multi‑country layovers? Try Esim Western Europe.City‑by‑city connectivity notesCusco & the Sacred Valley (Peru)Coverage: Good in Cusco city; variable in high villages (Maras/Moray) and along Inca Trail approaches.Tips: Download Sacred Valley maps offline; pin viewpoints and ruins. most taxis use WhatsApp—save your accommodation’s number.Machu Picchu/Aguas Calientes: Patchy to none at the citadel. Upload your photos later; don’t rely on live ticket retrieval.Lake Titicaca: Puno and CopacabanaPuno: Reasonable 4G; bus terminals crowded—screenshot QR tickets.Crossing to Copacabana: Expect a signal drop around the border; have directions saved offline.La Paz (Bolivia)Good urban 4G; the cable car network has decent signal but tunnels do not.Yungas/“Death Road” tours: Mountain valleys cause dead zones—share your emergency contacts with the operator, carry a charged power bank, and don’t plan remote calls.Uyuni and the Altiplano (Bolivia to Chile)Uyuni town: OK 4G; ATMs finicky—use Wi‑Fi for banking apps.Salt flats/lagunas: Assume offline for most of the 3‑day tour. Guides often carry satellite phones; agree a pickup time/place in San Pedro and preload your map route.San Pedro de Atacama (Chile)Town: Solid 4G; accommodations often have Wi‑Fi but speeds vary.Geysers, Valle de la Luna: Offline navigation essential; sunrise trips start before mobile networks wake up in some areas.Salta/Jujuy or Mendoza/Buenos Aires (Argentina)Salta/Jujuy: Good city coverage; quebradas have long no‑signal sections.Mendoza: City 4G/5G; vineyards outside town can be patchy.Buenos Aires: Strong 4G/5G; ideal for cloud backups and large downloads before you fly home.Border crossings by bus: step‑by‑stepThe big ones on this route: Peru–Bolivia (Puno/Copacabana), Bolivia–Chile (Uyuni–San Pedro via Hito Cajón), Chile–Argentina (Paso Jama to Salta or Los Libertadores to Mendoza).How to keep service and sanity:1) The day before:- Top up your eSIM data.- Confirm your plan includes both countries you’re entering/leaving.- Download offline maps for both sides of the border and your town of arrival.- Save bus company WhatsApp and terminal address offline.2) On departure morning:- Keep a paper copy or offline PDF of tickets, insurance, and accommodation proof.- Charge phone and power bank; pack a short cable in your daypack.3) On the bus:- Don’t count on bus Wi‑Fi. Keep your eSIM as primary, but expect drops near mountain passes.- If your phone supports it, enable “Wi‑Fi calling” for later when you reach accommodation Wi‑Fi.4) At the border posts:- Data may be unavailable. Keep QR codes and booking numbers offline.- After exiting one country and entering the next, toggle Airplane Mode off/on to re‑register on the new network.- If the eSIM doesn’t attach, manually select a network in Mobile Settings.5) Arrival:- Send your accommodation a quick WhatsApp when you’re back online.- Recheck your eSIM’s data roaming is on; confirm you’re on an in‑country network, not a weak roaming partner.Pro tips: - Dual profiles: If your eSIM allows, keep a secondary profile for a different network in the same country—helpful in border towns.- Cash buffer: Some border terminals don’t accept cards; download a currency converter for offline use.Offline survival kit (5‑minute setup)Maps: Download regions for Cusco, Sacred Valley, Puno, La Paz, Uyuni, San Pedro, Salta/Jujuy or Mendoza, and Buenos Aires.Translations: Download Spanish for offline use; add phrasebook favourites (bus tickets, directions, dietary needs).Documents: Save PDFs of passports, tickets, hotel addresses; star them for quick access.Rides: Screenshots of pickup points; pin bus terminals and hotel doors.Entertainment: Podcasts and playlists for long bus legs, set to download on Wi‑Fi only.Altitude and your tech: what changesCoverage gaps lengthen: Fewer towers at high altitude; valleys can block signal. Assume offline on remote excursions.Batteries drain faster in cold: Keep your phone warm and carry a power bank (10,000–20,000 mAh).Hotel Wi‑Fi may be congested: Schedule big uploads (photo backups, app updates) for big-city stays like Santiago or Buenos Aires.GPS still works offline: Your blue dot shows on offline maps without data—preload everything.Data budgeting for 3 weeksTypical traveller usage across this route: - Messaging/Maps/Bookings: 0.2–0.5 GB/day- Social and photo sharing: 0.3–0.7 GB/day- Occasional video calls/streaming: 0.5–1.0 GB/dayFor a mixed-use trip, plan 15–25 GB for 3 weeks. Heavy creators should double it and upload over hotel Wi‑Fi when possible. If you work remotely, consider a higher‑capacity plan and a backup eSIM; see our guidance on For Business.Practical route with transport and connectivity cuesDays 1–4 Cusco base: Strong city signal; day trips may be spotty—go offline-ready.Days 5–6 Machu Picchu: Expect no service at the ruins; sync tickets ahead.Days 7–8 Puno to La Paz via Copacabana: Border signal drop; re‑register networks after crossing.Days 9–11 Uyuni tour to San Pedro: Treat as offline; charge nightly; carry spare cables.Days 12–14 San Pedro: Stable in town; tours offline; top up data before Paso Jama.Days 15–17 Salta/Jujuy or Mendoza: Good urban 4G; rural patches are offline.Days 18–21 Buenos Aires: Strongest connectivity of the trip; clear your uploads and map downloads for the flight home.Partnering and stopover extrasHospitality and tour operators in the Andes: help your guests stay connected—explore co‑branded solutions via our Partner Hub.Transatlantic flyers: test your eSIM setup on a layover with an Esim United States or Esim Western Europe before hitting high-altitude blackspots.FAQs1) Do I need a local SIM in each country?No. A multi‑country eSIM covering Peru, Bolivia, Chile and Argentina is simpler and works well for a 3‑week pace. Consider a local SIM only if you’ll spend longer in one country and want the absolute best regional coverage.2) Will my WhatsApp number change with an eSIM?No. WhatsApp is tied to your registered number, not your data line. Keep your home SIM active for voice/SMS (roaming off if you wish), and use the eSIM for data—WhatsApp continues as normal.3) Can I hotspot to my laptop or camera?Yes. Enable tethering on your eSIM. Mind your data: cloud backups and OS updates can burn gigabytes—set them to Wi‑Fi only or schedule in big cities.4) What if there’s no signal on the Uyuni/Atacama legs?That’s expected. GPS still works offline. Pre-download maps and translations, carry a power bank, and sync plans with your tour operator before departure.5) Will I get roaming charges at borders?If you’re using a multi‑country eSIM with coverage in both countries, you won’t incur extra roaming fees from your home carrier. Keep roaming off on your home SIM to avoid accidental use.6) I’m connecting via Europe or the US—worth getting a layover eSIM?Yes. It’s an easy way to test your setup and stay reachable. Try Esim North America or country options like Esim Spain, Esim France, or Esim Italy for common hubs.Next step: Browse South America coverage options and build your plan on Destinations.

Press Roundup: Simology in the News (Q4 2025)

Press Roundup: Simology in the News (Q4 2025)

Q4 2025 was a busy season for Simology. Reporters, reviewers and travel editors zeroed in on two things: how quickly travellers can get connected with an eSIM before landing, and how to keep costs predictable during multi-country trips. This roundup summarises the themes in Simology press coverage from October to December, the product updates journalists highlighted, and a few quote snippets from our spokespersons that you may have seen. If you’re a writer on deadline, you’ll also find a practical media kit checklist and useful links to our most-requested pages, including Destinations, regional plan overviews such as Esim United States and Esim Western Europe, and our Partner Hub for assets and brand guidance. For business travel desks and ops teams, we’ve included pointers to For Business with team features, invoicing and centralised spend controls. Let’s get into what the media asked, what we shipped, and where to find the details fast.Where Simology showed up this quarterThe quarter’s coverage clustered around three practical use cases: short US trips, city breaks in Western Europe, and multi-stop itineraries across North America.North America: predictable connectivity for short staysEditors focussed on simple activation flows and predictable costs for domestic and cross-border travel.Useful links readers bookmarked:Esim United StatesEsim North AmericaCommon angles:“Install before you fly; switch on after landing.”“No surprise roaming add-ons from home carriers.”“Coverage that follows you across borders on one plan.”Western Europe: one plan, many countriesTravel desks emphasised the practicality of using a single eSIM for multiple countries, particularly over long weekends and rail itineraries.Popular pages cited:Esim Western EuropeEsim FranceEsim ItalyEsim SpainCommon angles:“No queueing for physical SIMs on arrival.”“Keep your primary number active for calls; use data on the eSIM.”“Clear allowances, easy top-ups mid-trip.”What journalists asked (and how we answered)Below are concise, on-record snippets from Simology spokespeople that appeared in Q4 pieces. Use them if you’re looking for fast, accurate phrasing.“An eSIM is simply a digital SIM. You scan a QR code, download the plan, and your phone adds a second data line in minutes.”“Our traveller-first approach is: show the networks up front, show the speeds you can expect, and make the total price obvious.”“For multi-country trips, a regional eSIM avoids the airport SIM shuffle. One plan, one dashboard, one top-up.”“Business teams want control without micromanaging devices. That’s why our admin console adds spend caps, shared wallets and consolidated invoices.”“We design for ‘install at home, switch on on arrival.’ That’s the easiest path to a smooth landing with maps, ride-hailing and messaging live.”Product updates the press highlighted in Q4Q4 saw a series of upgrades designed to make purchase, activation and management quieter and simpler. Here are the updates media tended to showcase:Cleaner activation flowQR code and install code both supported.Live preflight checks confirm device compatibility and OS settings before you pay.Smarter regional plan selectionDestination pages now recommend single-country vs regional bundles based on itinerary length.Regional plans cover border areas more reliably, helpful on rail and road trips.Business featuresTeam workspaces with central billing and one-click assignment.Exportable usage reports for finance.Policy tools to set data limits per user or per trip. See For Business.Partner resourcesUpdated logo suite, app screenshots and messaging guidelines. See the Partner Hub.Faster affiliate approvals and clearer deep-link parameters.Quick start checklist: install a Simology eSIM in under 2 minutesCheck your device supports eSIM and is carrier-unlocked.Choose your destination:Single country: e.g., Esim United States, Esim France, Esim Italy, Esim Spain.Multi-country: Esim Western Europe or Esim North America.Buy the plan; keep the QR code or activation code handy.On iPhone: Settings > Mobile Data > Add eSIM > Use QR/Activation code.On Android (may vary): Settings > Network & Internet > SIMs > Add eSIM > Use QR/Activation code.Label the new line “Travel Data,” set it as the data line, and leave your primary line for calls.Toggle “Data Roaming” on for the eSIM line. Leave primary line roaming off to avoid home-carrier charges.Land, switch airplane mode off, and your data should be live. If not, restart once.Pro tip: Install before you fly. Activation doesn’t start the clock; first network use does.The themes that drove coverageJournalists anchored their stories around a handful of practicality-first questions. Here’s how those mapped to what travellers care about.Can I keep my WhatsApp number? Yes. Your primary SIM/number remains. The eSIM supplies data only. Messaging apps continue as usual.Will I get 5G? Where available on the local network. Destination pages note expected network types. See Destinations for specifics.Is a regional pass worth it? If your itinerary crosses borders, one regional eSIM (e.g., Esim Western Europe) avoids per-country setup, with a single allowance to manage.What about business travel? Centralised control, per-trip budgets and consolidated billing save time versus expensing ad hoc SIMs. Details on For Business.What we shared with the press: practical guidance, not hypeRather than splashy claims, we emphasised the basics that save travellers time and money.Transparent pricing: all-in plan prices shown before checkout.Network disclosure: named networks where permitted, or capability bands where not.Predictable activation: installation at home; activation on arrival.Account portability: you can store multiple eSIMs and switch as you move between regions.Pro tip: If you’re comparing offers, look beyond headline GB. Check the fair use policy, tethering rules, and whether top-ups stack or reset.How to cover Simology: a mini media kit checklistIf you’re writing or filming a Simology piece, this checklist keeps assets and facts straight.Grab updated brand assets and device screenshots from the Partner Hub.Verify device support and OS flows using our live preflight check on any destination page, e.g., Destinations.Illustrate single-country vs regional with concrete examples:City break: Esim France or Esim Italy.Multi-country rail trip: Esim Western Europe.US + Canada itinerary: Esim North America.For B2B angles, request a demo account via For Business to explore admin controls.Need quotes or a technical explainer? Contact us via the Partner Hub with your deadline and focus; we’ll respond with verified details.Pro tip: Screenshare the install flow. Readers engage well with a 30-second “scan, install, label line, toggle data” segment—they can replicate it on their own devices.Traveller checklists the media lovedCoverage often embedded simple checklists. Here are two you can reuse.Pre-trip device checklistIs your phone carrier-unlocked?Does it support eSIM? (Most recent iPhone and Android flagships do.)Have you updated to the latest OS?Have you added a payment method to your app store or card-ready wallet?Did you save the QR code/activation code somewhere you can reach offline?First-hour on the groundDisable data roaming on your primary line (to avoid home-carrier roaming).Enable data roaming on the eSIM line.Open maps, ride-hailing and messaging to confirm everything is live.If you need tethering, check the plan’s hotspot allowance on your destination page.For teams: what editors flagged for business travellersBusiness travel coverage highlighted the trade-off between control and convenience.Central purchase, local experience: Ops buys plans in bulk; travellers self-install in minutes.Budget certainty: Shared wallets and caps prevent overspend.Compliance-friendly: Single monthly invoice with per-user breakdown.Global-ready: Mix regional passes across teams travelling to the US, Canada and Western Europe without juggling multiple vendors.Start here: For Business.Pro tip: Set policy at profile level (e.g., Sales 10 GB per week; Engineering 20 GB with hotspot) to cut manual approvals.Frequently asked questionsWhere can I see which countries and networks are supported?Head to Destinations for an A–Z view plus network details. For common trips, see Esim United States, Esim Western Europe and Esim North America.Do I need to wait until I land to install the eSIM?No—install at home so you’re set. Activation starts when the eSIM first connects to the local network.Can I keep my primary number active for calls and texts?Yes. Keep your primary line for calls/SMS; set the eSIM as your data line. Messaging apps continue to use your existing number.What happens if I run out of data mid-trip?You can top up from your account. Top-ups apply to the same eSIM profile and usually take effect within seconds.Is eSIM good for multi-country travel in Europe?Yes. A regional plan like Esim Western Europe covers multiple countries on one allowance and one install, so you avoid per-country SIM swaps.Do you support teams and company billing?Yes. Our business console offers centralised purchasing, allocations, spend controls and invoicing. See For Business.What’s nextIf you’re planning a trip or writing a guide, the fastest way to sense-check coverage, networks and allowances is to browse Destinations and pick your route. You’ll see plan options, setup steps and what to expect on the ground—no surprises.

Dual‑SIM Data Steering: Best Practices for iOS & Android

Dual‑SIM Data Steering: Best Practices for iOS & Android

Travellers often juggle two priorities: staying reachable on their usual number and getting affordable, fast data abroad. Dual‑SIM (physical + eSIM or dual eSIM) makes that easy—if you set it up right. This guide shows you how to control which SIM handles voice, SMS and data, how to avoid accidental roaming charges, and how to keep apps like WhatsApp and banking OTPs working smoothly. We’ll cover iOS and Android step‑by‑step, explain default line rules, and share practical roaming presets you can apply in seconds. You’ll also find app‑specific tips and troubleshooting for common snags.If you’re new to travel eSIMs, browse country and regional options on Destinations, including ready‑to‑go packs such as Esim United States, Esim France, Esim Italy, Esim Spain, Esim Western Europe and Esim North America. Then use the dual sim data switching best practices below to keep costs down and coverage up.What “data steering” means on your phoneDual‑SIM data steering refers to how your device chooses a SIM for internet access, calls and messages, and whether it can switch between SIMs automatically. Key concepts:Default voice line: which SIM handles outgoing calls by default.Default SMS line: which SIM sends texts by default.Default data line: the only SIM that carries mobile data at any one time.“Allow mobile data switching” (iOS) / “Auto data switch” (Android): optionally lets the phone use the non‑data SIM for data during a call or when signal is poor.Data roaming per SIM: separate toggles to allow data outside your home network.Wi‑Fi assist / smart network switch: uses mobile data when Wi‑Fi is weak—useful, but can burn through data if you’re not careful.Your goal as a traveller is usually to keep your home SIM active for calls/SMS, and use a local/eSIM for data—without letting the phone sneak data onto the wrong SIM.Quick presets for travellersApply these simple presets to avoid bill shock and keep everything working:Pre‑trip 1. Install and label your travel eSIM. 2. Update apps and download offline maps on Wi‑Fi. 3. Confirm roaming SMS/call rates on your home SIM; disable data roaming on it.On landing 1. Set the travel eSIM as your default data line. 2. Leave your home SIM as the default for calls and SMS. 3. Turn OFF any auto data switching features to lock data to the travel eSIM. 4. Turn ON data roaming on the travel eSIM only.While travellingKeep Wi‑Fi Assist/Smart switch OFF unless you intentionally want mobile data to supplement weak Wi‑Fi.Use Low Data/Data Saver modes to reduce background usage.If you need tethering, enable Personal Hotspot on the travel eSIM.Flying homeSwitch default data back to your home SIM.Turn OFF data roaming on the travel eSIM (or disable the eSIM profile).iOS: step‑by‑step dual sim data switchingApplies to iPhone XS and newer with Dual SIM (physical + eSIM or dual eSIM).1) Install and label your eSIM - Settings > Mobile Data > Add eSIM. - Label each plan (e.g., “Home” and “Travel”). Accurate labels reduce mistakes later.2) Set default voice and SMS lines - Settings > Mobile Data > Default Voice Line: choose “Home”. - Settings > Messages > Send & Receive: ensure your home number is ticked. If you also use your Apple ID email, you can send/receive iMessages without relying on SMS activation.3) Choose your default data line - Settings > Mobile Data > Mobile Data: select “Travel”. - Mobile Data Options > Data Roaming: ON for Travel; OFF for Home.4) Control automatic data switching - Settings > Mobile Data > Allow Mobile Data Switching: - OFF if you want to lock data to the Travel eSIM and avoid accidental home‑SIM data. - ON only if you need data continuity during voice calls on the home SIM and you’re comfortable with potential switching. If you enable it, double‑check that data roaming stays OFF on the home SIM.5) Optimise data usage - Settings > Mobile Data > Mobile Data Options: - Data Mode: Low Data Mode to reduce background tasks. - Voice & Data: 5G Auto or LTE; switch to LTE if 5G is patchy or draining battery. - Settings > Mobile Data > Wi‑Fi Assist: OFF to prevent surprise usage when Wi‑Fi is weak.6) Hotspot and tethering - Settings > Personal Hotspot: enable if your travel plan supports it. Hotspot uses the current default data line.7) If data doesn’t work - Check APN: Settings > Mobile Data > your Travel plan > Mobile Data Network. Enter APN provided by your eSIM supplier if not auto‑filled. - Toggle Airplane Mode, then back. - Manually select a network: Settings > Mobile Data > Network Selection (turn off Automatic if needed and try another partner).Recommended iOS roaming preset - Default Voice Line: Home - SMS/iMessage: Home (plus Apple ID email if you like) - Mobile Data: Travel - Data Roaming: ON (Travel), OFF (Home) - Allow Mobile Data Switching: OFF - Wi‑Fi Assist: OFF - Data Mode: Low Data ModeAndroid: step‑by‑step dual sim data switchingAndroid menus vary. Below are common paths for Google Pixel (stock Android) and Samsung; other brands are similar.Pixel (Android 13+) 1) Install eSIM - Settings > Network & internet > SIMs > + Add SIM.2) Labels and defaults - Settings > Network & internet > SIMs: - Calls: set “Home” as preferred for calls. - SMS: set “Home” as preferred for texts. - Mobile data: set “Travel” as preferred.3) Roaming and switching - Tap each SIM > Roaming: - Travel: ON; Home: OFF. - Look for “Auto data switching” or similar. If present, set OFF to avoid the phone using your home SIM for data.4) Data controls - Settings > Network & internet > Internet > Data Saver: ON. - Turn off features like “Switch to mobile data automatically” if offered by your OEM.Samsung (One UI 5+) 1) Install eSIM - Settings > Connections > SIM manager > Add eSIM.2) Defaults - Settings > Connections > SIM manager: - Preferred SIMs: Calls = Home; Text messages = Home; Mobile data = Travel.3) Roaming and switching - Tap each SIM > Data roaming: Travel ON; Home OFF. - “Switch data during calls” or “Auto data switch”: set OFF to prevent unintended use of home data. - “Dual SIM always on” handles call reachability via call forwarding; it can add costs and doesn’t affect data. Use only if you understand your operator’s charges.4) Data controls - Settings > Connections > Data usage > Data saver: ON. - “Switch to mobile data/Wi‑Fi assist” under Wi‑Fi Advanced: consider OFF to avoid surprise usage.Recommended Android roaming preset - Calls/SMS: Home - Mobile data: Travel - Data roaming: ON (Travel), OFF (Home) - Auto data switching: OFF - Data Saver: ONApp‑specific tips: WhatsApp, OTPs and moreWhatsApp - Your WhatsApp account is tied to your phone number, not the data SIM. You can keep WhatsApp registered to your home number while using data from your travel eSIM. - If WhatsApp needs re‑verification while abroad, you’ll need access to your home number via SMS or voice call. Keep your home SIM active for SMS (data roaming can remain OFF). - Don’t tap “Change Number” unless you truly want to move your account to a new number.Banking OTPs and 2FA - Many banks send OTPs via SMS to your home number. Keep the home SIM active with data roaming OFF so SMS can still arrive. - If your bank supports app‑based codes or a token, set that up before travel to reduce SMS dependence.iMessage and FaceTime - iMessage can use your Apple ID email as well as your number. In Settings > Messages > Send & Receive, tick your email to keep iMessage working even if your number can’t re‑activate. - If iMessage/FaceTime tries to re‑activate using SMS, ensure your home SIM can receive SMS.Android RCS (Chat features) - Google Messages’ RCS is associated with a specific number/SIM. You can keep RCS on your home number while mobile data comes from the travel eSIM—just ensure the home SIM remains active, and RCS is registered before you go.One‑time passwords from services - Expect some OTPs to arrive via SMS with delays when roaming. Have backup methods (authenticator app, email, or app approval) where available.Troubleshooting and pro tipsLock data to the correct SIM: Turn OFF “Allow Mobile Data Switching” (iOS) or “Auto data switch” (Android) during travel.Check APN settings: If data connects but is slow or drops, verify APN is auto‑filled per your eSIM instructions.Manually change networks: In some countries, one partner network is faster. Try manual network selection on the travel eSIM.Prefer LTE when 5G is patchy: Switching to LTE can improve stability and battery life.Only one data SIM at a time: Dual‑SIM Dual Standby means two lines are active for calls/SMS, but only one can carry mobile data.Background data control: Use Low Data Mode (iOS) or Data Saver (Android). Consider restricting heavy apps to Wi‑Fi.Hotspot with care: Tethering uses your default data SIM; verify your plan allows it.Frequent flyers: Keep a “Travel” profile ready to toggle—data to Travel, data roaming OFF on Home, auto switching OFF.Regional eSIMs: Multi‑country options like Esim Western Europe or Esim North America reduce mid‑trip SIM shuffling. For single‑country trips, pick Esim United States, Esim France, Esim Italy or Esim Spain.For teams and frequent travellersIf you manage staff on the road, set a standard preset: home SIM for calls/SMS, travel eSIM for data, roaming OFF on home SIM, and auto data switching disabled. Provide a simple runbook for iOS and Android.Centralise procurement and control with pooled eSIMs and usage reporting via For Business.If you’re a reseller or travel partner, explore co‑branded solutions through our Partner Hub.FAQWill changing the data SIM affect my phone number for calls or WhatsApp?No. Your phone number for calls/SMS stays on the SIM you set for voice. WhatsApp remains tied to the number it was registered with, regardless of which SIM provides data.Can I receive SMS on my home SIM with data roaming off?Yes. SMS uses the signalling channel, not mobile data. Keep the home SIM active and data roaming OFF to receive texts without using mobile data.Should I enable “Allow Mobile Data Switching” on iPhone while abroad?Usually no. Keep it OFF to prevent accidental data usage on your home SIM. Enable only if you need uninterrupted data during calls and you’re confident your home SIM won’t incur data charges.My travel eSIM shows signal but no data. What now?Toggle Airplane Mode, check APN, and ensure Data Roaming is ON for the travel eSIM. Try manual network selection to pick an alternative partner.Can I hotspot from my travel eSIM and still receive calls on my home number?Yes. Personal Hotspot uses the current default data line (travel eSIM), while your home SIM remains active for calls and SMS.Does my phone auto‑switch data to the “better” SIM when signal is poor?Only if you enable features like “Allow Mobile Data Switching” (iOS) or “Auto data switch” (Android). For cost control while roaming, keep these OFF.Next step: Pick your destination and get a travel eSIM that fits your trip on Destinations, then apply the presets above before you fly.