App Update (vX.Y): eSIM Compatibility Checker 2.0 + APN Finder

Blog

App Update (vX.Y): eSIM Compatibility ...

App Update (vX.Y): eSIM Compatibility Checker 2.0 + APN Finder

30 Oct 2025

App Update (vX.Y): eSIM Compatibility Checker 2.0 + APN Finder

Travellers want one thing from mobile connectivity: it should just work. This simology app update focuses on removing the guesswork. In vX.Y, we’re introducing eSIM Compatibility Checker 2.0 and a new APN Finder to make sure your phone is genuinely eSIM-ready for your destination, and your data comes up first time. The upgraded checker runs a deeper device scan (on-device, privacy-first) to assess eSIM support, 4G/5G and VoLTE readiness, dual SIM limitations, and region quirks. The APN Finder pairs your device and destination with the correct Access Point Name settings and can apply them automatically on many Android devices. iPhone users get clear, per-carrier instructions.

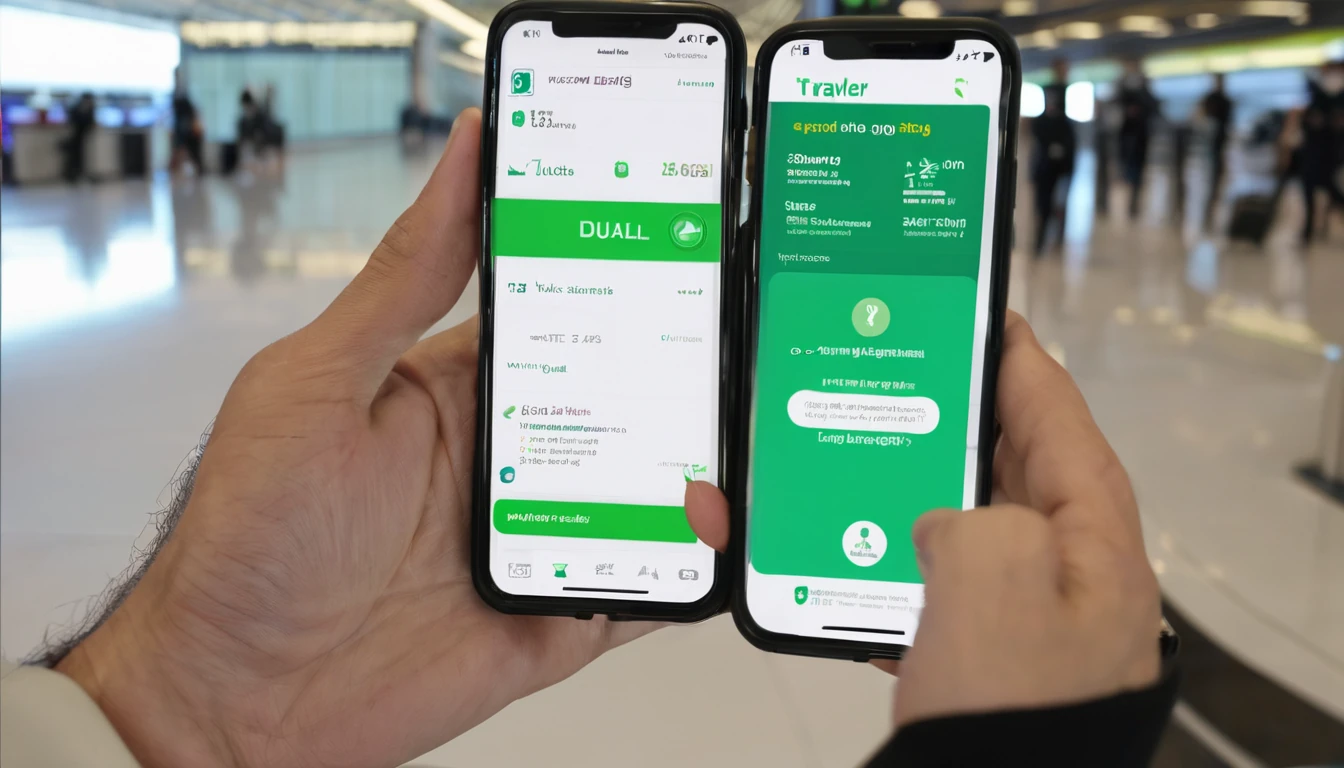
You’ll also find faster QR installs, clearer status messages, and more help built in. Where relevant, we’ve added labelled screenshots in the app’s Help and on the store listing to guide you through each step. If you’re heading to multiple countries, our regional guides—like Esim Western Europe and Esim North America—work hand-in-hand with this update for a smoother trip.

What’s new in this simology app update

Here’s what’s in vX.Y:

  • eSIM Compatibility Checker 2.0
  • Deeper device scan for eSIM hardware/firmware support
  • Region-aware 4G/5G/VoLTE readiness checks
  • Dual SIM and travel profile conflict detection
  • Clear “Good to go / Works with caveats / Not supported” outcomes
  • APN Finder (new)
  • Curated APN library for major travel carriers, refreshed daily
  • Auto-apply APN on many Android devices (no reboot needed)
  • Guided APN steps for iOS with exact field values
  • Offline cache for recent destinations
  • Faster eSIM install
  • Improved QR and activation code parsing
  • Better error explanations and retry prompts
  • Smarter destination matching
  • Plan hints based on your device’s 5G capability by region
  • Warnings for country-specific restrictions (e.g., VoLTE requirements)
  • Privacy-first diagnostics
  • On-device checks by default; optional, consented logs for support

Pro tip: Combine the checker with our country pages—Esim United States, Esim France, Esim Italy, and Esim Spain—to choose the right plan for your itinerary.

How eSIM Compatibility Checker 2.0 works

The new checker verifies more than “does my phone support eSIM?” It also looks at what will work where you’re going.

Step-by-step: run the checker

  1. Open the simology app and tap Compatibility Checker.
  2. Allow the app to read device and network capabilities (no personal data collected).
  3. Select your destination(s) or pick a regional bundle like Esim Western Europe or Esim North America.
  4. Tap Run Check.
  5. Review the results screen, which includes: - eSIM support status (hardware + OS) - 4G/5G capability and likely regional band fit - VoLTE readiness (important in countries phasing out 3G) - Dual SIM nuances (e.g., 5G may be limited to one SIM) - Recommended next steps and a link to suitable plans

Understanding your result

  • Good to go
  • Your device supports eSIM, the destination’s bands, and VoLTE/5G where applicable.
  • Proceed to purchase and install. Expect immediate data after activation.
  • Works with caveats
  • Examples: 5G not guaranteed in rural areas; VoLTE required on certain carriers; dual SIM may restrict 5G to one line.
  • We’ll show clear notes and the best plan fit.
  • Not supported
  • Your device or OS doesn’t support eSIM, or regional compatibility is too limited.
  • We’ll suggest alternatives or upgrades.

Pro tips: - Update your OS first. eSIM features often improve with the latest iOS/Android build. - If you run dual SIM, keep your primary line set to “Calls/SMS only” to prioritise data on the travel eSIM. - For multi-country trips, re-run the check for each country to catch band differences (e.g., 5G n78 in parts of Europe vs n71/n41 in North America).

APN Finder: get data working first time

APN (Access Point Name) settings tell your phone how to connect to a carrier’s data network. Many eSIMs auto-configure APNs; some don’t. APN Finder removes the guesswork.

Step-by-step: apply APN with one tap (Android)

  1. In the simology app, go to APN Finder.
  2. Choose your destination and selected plan/carrier.
  3. Tap Apply APN.
  4. Confirm the change when prompted.
  5. Toggle Airplane mode off/on once; data should come up within 30 seconds.

Note: Auto-apply works on most stock Android and recent Samsung/Pixel devices. If your OEM skin blocks APN edits (seen on some carrier-locked models), the app will guide you to manual entry.

Step-by-step: guided APN on iPhone

  1. Open APN Finder in the app and select your destination.
  2. Tap View Settings to see the exact fields.
  3. On your iPhone, go to Settings > Mobile Data > your eSIM > Mobile Data Network.
  4. Enter the APN, Username, and Password exactly as shown (other fields can stay blank unless specified).
  5. Return to the main screen and toggle Mobile Data off/on.

If you don’t see “Mobile Data Network,” your carrier profile may manage APNs automatically; give it a minute after activation or reboot your device.

Manual APN fallback (quick checklist)

  • Turn off Wi‑Fi while testing mobile data.
  • Ensure Mobile Data and Data Roaming are enabled for the eSIM line.
  • Reset network settings only if needed (this clears saved Wi‑Fi/Bluetooth).
  • As a final step, remove and re-add the eSIM profile if activation stalled.

Planning a trip? Match plan to device and region

Use the checker to align your device with the right plan. Some examples:

  • United States: 3G shutdowns make VoLTE essential. Check your device’s VoLTE readiness and see our Esim United States guide for carrier options and 5G notes.
  • France, Italy, Spain: Many urban areas have strong n78 5G. Rural coverage can be 4G-focused. Compare notes in Esim France, Esim Italy, and Esim Spain.
  • Multi-country Europe: If you’ll cross borders, consider Esim Western Europe to avoid APN resets at every border.
  • USA + Canada + Mexico: See regional options in Esim North America and run the checker for each country to confirm 5G band fit.

Shortcut: Browse all supported locations in Destinations, then use the checker to validate your device before you buy.

Known issues and current workarounds

We test widely, but some OEM and OS behaviours vary. Here’s what we’re tracking:

  • iOS manual APN visibility
  • Some carriers lock APN fields on iPhone. If APN fields are missing, wait 2–3 minutes after activation or reboot; the profile often autoloads. If not, our guide will confirm whether manual entry is supported.
  • Samsung dual SIM + 5G priority
  • On certain models, 5G works on only one SIM at a time. Set your travel eSIM as the “Primary SIM for mobile data” in SIM Manager. Toggle Airplane mode after switching.
  • MIUI/ColorOS APN edit restrictions
  • A few builds restrict APN editing. Our APN Finder will show a manual path if available. If not, use the auto-config QR from the plan screen or contact support via in‑app Help & Feedback.
  • Pixel VoLTE toggle location
  • On some Pixels, VoLTE/4G Calling toggles are under Network & Internet > SIMs > Preferred network type. Ensure VoLTE is on in the destination country.
  • Older Android versions (pre-11)
  • eSIM management can be less stable. We recommend upgrading if possible before travel for smoother activation.

We’ll keep this list updated as OEM updates roll out. Most hiccups are resolved by toggling Airplane mode, switching the data SIM to your travel eSIM, or re-applying APN settings.

For teams and partners

Managing multiple travellers?

  • For travel managers: bulk activation guidance, device readiness reports, and invoicing are available in For Business.
  • For distributors and affiliates: access co-branded resources, plan catalogues, and onboarding via the Partner Hub.

The checker can be used during device onboarding to pre-qualify travellers before they depart.

Privacy and data handling

  • On-device first: device capability checks run locally.
  • No personal data: we don’t collect contacts, messages, or browsing data.
  • Optional diagnostics: if you opt in while seeking support, we collect anonymised device model/OS/build and error codes to improve the tool. You can opt out any time.

How to share feedback

We build from real travel scenarios. To help us prioritise:

  • In the app: Settings > Help & Feedback > Send feedback (attach logs if you consent).
  • Feature requests: tag “APN Finder” or “Compatibility Checker” to route it quickly.
  • Partners: submit requests via the Partner Hub.

We review feedback weekly and publish release notes with fixes and improvements.

FAQ

  • Will the checker guarantee 5G in every city?
    No tool can guarantee 5G everywhere. The checker validates your device’s capability and the region’s typical bands. Coverage depends on local towers and your location (e.g., indoor vs outdoor). We’ll always show when 5G is unlikely so you can set expectations.
  • Do I need to run the checker for each country on a multi-stop trip?
    Yes. Bands and VoLTE policies differ by country. Run it per stop, or select a regional plan like Esim Western Europe or Esim North America and review the per-country notes.
  • Can the APN Finder change my iPhone settings automatically?
    iOS typically requires manual APN entry unless the carrier profile auto-loads. The app provides exact values and a short checklist. On many Android devices, we can apply APNs with one tap.
  • What if my device says “Not supported” but other sites claim it’s eSIM-ready?
    Some models have regional variants. Our check looks at your exact hardware/firmware, which may differ from the general spec sheet. If you believe it’s an error, send feedback with your model number; we’ll verify.
  • Does the app use mobile data during checks?
    Checks run locally and are lightweight. If you’re fully offline, you’ll still get device-capability results; regional hints and APN lists use a cached snapshot when available.
  • Will this update help with voice and SMS?
    The checker flags VoLTE readiness (critical for voice where 3G is retired). SMS behaviour depends on the plan and local network. Data connectivity remains our primary focus.

Next step

Plan your route, then validate your device before you buy. Start with our full list of supported locations in Destinations, run the Compatibility Checker for each stop, and use APN Finder to bring data up on arrival.

Read more blogs

Andes Highlights (3 Weeks): Peru–Bolivia–Chile–Argentina Connectivity

Andes Highlights (3 Weeks): Peru–Bolivia–Chile–Argentina Connectivity

Planning a south america itinerary 3 weeks through the high Andes? This route stitches together Peru’s Sacred Valley, Bolivia’s La Paz and Salar de Uyuni, Chile’s Atacama Desert, and northern Argentina’s quebradas or Mendoza wine country—often by long-distance bus and a couple of short flights. Connectivity is different at altitude: coverage is strong in cities but drops in high passes and salt flats; bus Wi‑Fi is patchy; border towns can be blackspots. The smart move is an eSIM with multi‑country coverage, backed by offline maps, offline translations, and a simple routine for crossing borders by bus without losing service. Below you’ll find a practical, connectivity-first itinerary; checklists to prep your phone, apps and documents; and on-the-ground tips for staying online where it matters: booking transport, hailing taxis, backing up photos, and navigating when the signal disappears.If you’re transiting via Europe or North America, you can also add a layover eSIM to stay connected door-to-door. Start with our country list on Destinations, then follow the steps, and you won’t waste time chasing SIM shops at 3,500 metres.The 3‑week Andes route at a glanceWeek 1: Peru (Cusco, Sacred Valley, Machu Picchu) - Fly into Cusco (or Lima then connect). - Base in Cusco; day trips to Pisac/Chinchero/Maras–Moray. - Train to Aguas Calientes; Machu Picchu visit; return to Cusco or continue to Puno/Lake Titicaca.Week 2: Bolivia and Chile (La Paz, Uyuni, San Pedro de Atacama) - Bus/collectivo via Copacabana to La Paz. - Fly or overnight bus to Uyuni. - 3‑day Uyuni–altiplano tour ending in San Pedro de Atacama (Chile).Week 3: Chile and Argentina (Atacama to Salta or Mendoza/Buenos Aires) - Choose: - North: San Pedro to Salta/Jujuy by bus; fly to Buenos Aires. - Or South: San Pedro–Calama flight to Santiago; bus or flight to Mendoza; onward to Buenos Aires.Connectivity notes (quick): - Cities: generally strong 4G/4G+; 5G in major hubs (Santiago, Buenos Aires). - Altitude/rural: expect long no‑signal stretches (Uyuni, altiplano passes, Paso Jama). - Bus Wi‑Fi: often advertised, rarely reliable. Plan to be offline onboard. - Border regions: networks switch; a multi‑country eSIM avoids sudden loss.eSIM vs local SIMs for a 4‑country tripFor a route with multiple borders and remote legs, eSIM wins on time and reliability.What a multi‑country eSIM gets you: - One plan across Peru, Bolivia, Chile, Argentina (check coverage per country on Destinations). - No passport/SIM registration queues at kiosks. - Keep your home number active on the physical SIM for calls/SMS codes. - Instant top‑ups if you burn data on photos or navigation.When a local SIM still helps: - Long stay in one country with heavy data use (e.g., a month in Buenos Aires). - Dead zones where a different local network performs better (rarely worth the hassle on a 3‑week pace).Practical approach: - Use an eSIM as your primary data line across all four countries. - If you find a specific local network far better in one region, add a cheap local SIM and keep the eSIM as backup.Device readiness checklist (before you fly)1) Check eSIM compatibility and SIM‑lock status on your phone.2) Buy and install your eSIM while on home Wi‑Fi. Keep a PDF/printed copy of the QR code.3) Label lines clearly (e.g., “eSIM Andes Data”, “Home SIM”).4) Turn on data roaming for the eSIM; leave roaming off for your home SIM to avoid charges.5) Set up dual‑SIM rules: data on eSIM; calls/SMS default to home SIM if needed.6) Download offline: Google Maps/Organic Maps for all target regions; language packs (Spanish at minimum); bus/air tickets; hotel confirmations.7) Cloud backups: set to upload on Wi‑Fi only; pre‑create shared albums for travel companions.8) Test tethering/hotspot with your laptop/tablet.If you’re transiting popular hubs, consider a short layover eSIM: - USA connections: add an Esim United States or a broader Esim North America.- Europe connections: Madrid/Barcelona? Use an Esim Spain. Paris or Rome? See Esim France and Esim Italy. Multi‑country layovers? Try Esim Western Europe.City‑by‑city connectivity notesCusco & the Sacred Valley (Peru)Coverage: Good in Cusco city; variable in high villages (Maras/Moray) and along Inca Trail approaches.Tips: Download Sacred Valley maps offline; pin viewpoints and ruins. most taxis use WhatsApp—save your accommodation’s number.Machu Picchu/Aguas Calientes: Patchy to none at the citadel. Upload your photos later; don’t rely on live ticket retrieval.Lake Titicaca: Puno and CopacabanaPuno: Reasonable 4G; bus terminals crowded—screenshot QR tickets.Crossing to Copacabana: Expect a signal drop around the border; have directions saved offline.La Paz (Bolivia)Good urban 4G; the cable car network has decent signal but tunnels do not.Yungas/“Death Road” tours: Mountain valleys cause dead zones—share your emergency contacts with the operator, carry a charged power bank, and don’t plan remote calls.Uyuni and the Altiplano (Bolivia to Chile)Uyuni town: OK 4G; ATMs finicky—use Wi‑Fi for banking apps.Salt flats/lagunas: Assume offline for most of the 3‑day tour. Guides often carry satellite phones; agree a pickup time/place in San Pedro and preload your map route.San Pedro de Atacama (Chile)Town: Solid 4G; accommodations often have Wi‑Fi but speeds vary.Geysers, Valle de la Luna: Offline navigation essential; sunrise trips start before mobile networks wake up in some areas.Salta/Jujuy or Mendoza/Buenos Aires (Argentina)Salta/Jujuy: Good city coverage; quebradas have long no‑signal sections.Mendoza: City 4G/5G; vineyards outside town can be patchy.Buenos Aires: Strong 4G/5G; ideal for cloud backups and large downloads before you fly home.Border crossings by bus: step‑by‑stepThe big ones on this route: Peru–Bolivia (Puno/Copacabana), Bolivia–Chile (Uyuni–San Pedro via Hito Cajón), Chile–Argentina (Paso Jama to Salta or Los Libertadores to Mendoza).How to keep service and sanity:1) The day before:- Top up your eSIM data.- Confirm your plan includes both countries you’re entering/leaving.- Download offline maps for both sides of the border and your town of arrival.- Save bus company WhatsApp and terminal address offline.2) On departure morning:- Keep a paper copy or offline PDF of tickets, insurance, and accommodation proof.- Charge phone and power bank; pack a short cable in your daypack.3) On the bus:- Don’t count on bus Wi‑Fi. Keep your eSIM as primary, but expect drops near mountain passes.- If your phone supports it, enable “Wi‑Fi calling” for later when you reach accommodation Wi‑Fi.4) At the border posts:- Data may be unavailable. Keep QR codes and booking numbers offline.- After exiting one country and entering the next, toggle Airplane Mode off/on to re‑register on the new network.- If the eSIM doesn’t attach, manually select a network in Mobile Settings.5) Arrival:- Send your accommodation a quick WhatsApp when you’re back online.- Recheck your eSIM’s data roaming is on; confirm you’re on an in‑country network, not a weak roaming partner.Pro tips: - Dual profiles: If your eSIM allows, keep a secondary profile for a different network in the same country—helpful in border towns.- Cash buffer: Some border terminals don’t accept cards; download a currency converter for offline use.Offline survival kit (5‑minute setup)Maps: Download regions for Cusco, Sacred Valley, Puno, La Paz, Uyuni, San Pedro, Salta/Jujuy or Mendoza, and Buenos Aires.Translations: Download Spanish for offline use; add phrasebook favourites (bus tickets, directions, dietary needs).Documents: Save PDFs of passports, tickets, hotel addresses; star them for quick access.Rides: Screenshots of pickup points; pin bus terminals and hotel doors.Entertainment: Podcasts and playlists for long bus legs, set to download on Wi‑Fi only.Altitude and your tech: what changesCoverage gaps lengthen: Fewer towers at high altitude; valleys can block signal. Assume offline on remote excursions.Batteries drain faster in cold: Keep your phone warm and carry a power bank (10,000–20,000 mAh).Hotel Wi‑Fi may be congested: Schedule big uploads (photo backups, app updates) for big-city stays like Santiago or Buenos Aires.GPS still works offline: Your blue dot shows on offline maps without data—preload everything.Data budgeting for 3 weeksTypical traveller usage across this route: - Messaging/Maps/Bookings: 0.2–0.5 GB/day- Social and photo sharing: 0.3–0.7 GB/day- Occasional video calls/streaming: 0.5–1.0 GB/dayFor a mixed-use trip, plan 15–25 GB for 3 weeks. Heavy creators should double it and upload over hotel Wi‑Fi when possible. If you work remotely, consider a higher‑capacity plan and a backup eSIM; see our guidance on For Business.Practical route with transport and connectivity cuesDays 1–4 Cusco base: Strong city signal; day trips may be spotty—go offline-ready.Days 5–6 Machu Picchu: Expect no service at the ruins; sync tickets ahead.Days 7–8 Puno to La Paz via Copacabana: Border signal drop; re‑register networks after crossing.Days 9–11 Uyuni tour to San Pedro: Treat as offline; charge nightly; carry spare cables.Days 12–14 San Pedro: Stable in town; tours offline; top up data before Paso Jama.Days 15–17 Salta/Jujuy or Mendoza: Good urban 4G; rural patches are offline.Days 18–21 Buenos Aires: Strongest connectivity of the trip; clear your uploads and map downloads for the flight home.Partnering and stopover extrasHospitality and tour operators in the Andes: help your guests stay connected—explore co‑branded solutions via our Partner Hub.Transatlantic flyers: test your eSIM setup on a layover with an Esim United States or Esim Western Europe before hitting high-altitude blackspots.FAQs1) Do I need a local SIM in each country?No. A multi‑country eSIM covering Peru, Bolivia, Chile and Argentina is simpler and works well for a 3‑week pace. Consider a local SIM only if you’ll spend longer in one country and want the absolute best regional coverage.2) Will my WhatsApp number change with an eSIM?No. WhatsApp is tied to your registered number, not your data line. Keep your home SIM active for voice/SMS (roaming off if you wish), and use the eSIM for data—WhatsApp continues as normal.3) Can I hotspot to my laptop or camera?Yes. Enable tethering on your eSIM. Mind your data: cloud backups and OS updates can burn gigabytes—set them to Wi‑Fi only or schedule in big cities.4) What if there’s no signal on the Uyuni/Atacama legs?That’s expected. GPS still works offline. Pre-download maps and translations, carry a power bank, and sync plans with your tour operator before departure.5) Will I get roaming charges at borders?If you’re using a multi‑country eSIM with coverage in both countries, you won’t incur extra roaming fees from your home carrier. Keep roaming off on your home SIM to avoid accidental use.6) I’m connecting via Europe or the US—worth getting a layover eSIM?Yes. It’s an easy way to test your setup and stay reachable. Try Esim North America or country options like Esim Spain, Esim France, or Esim Italy for common hubs.Next step: Browse South America coverage options and build your plan on Destinations.

How to Set Up an eSIM on iPhone 15/16: Step-by-Step with Fixes

How to Set Up an eSIM on iPhone 15/16: Step-by-Step with Fixes

Travelling with an iPhone 15 or 16? Good news: Apple’s eSIM experience is now fast, reliable and ideal for travellers who want local data without juggling plastic SIMs. This guide walks you through a clean, repeatable iPhone eSIM setup, including QR code install, manual activation details (SM‑DP+), carrier app installs and Quick Transfer. You’ll also find practical APN tips, a fixes section for the most common errors, and pro traveller settings so data just works the moment you land. If you hit a snag at any point, jump straight to Troubleshooting below.If you’re still shopping for a plan, browse country and regional options on Destinations — from single-country picks like Esim United States, Esim France, Esim Italy or Esim Spain to multi-country passes like Esim Western Europe and Esim North America.Before you start: what you needEstimated time: 5–10 minutesCost: Free to install (plan cost varies)An iPhone 15 or iPhone 16 running current iOS (Settings > General > Software Update).Reliable Wi‑Fi (strongly recommended during activation).Your eSIM details:Either a QR code, orManual activation details: SM‑DP+ address, Activation Code, and (if provided) Confirmation Code.If transferring from another iPhone: both phones on iOS 16+ and signed into iCloud with Bluetooth on.Quick checks: - Remove any old VPN profiles (Settings > General > VPN & Device Management) if they may interfere. - Backup screenshots or a PDF of your QR code so you have it offline on arrival.Compatibility note: - iPhone 15/16 models sold in the United States are eSIM‑only. International variants generally still include a physical SIM tray. All support multiple eSIMs with up to two lines active at the same time.Step-by-step iPhone eSIM setupYou can add an eSIM in four ways. Use the method your provider supports.Tip: If your provider instructs you to activate only after you land, you can still pre‑install the eSIM over Wi‑Fi and toggle it on later.Option 1: Install via QR code (fastest)Connect to Wi‑Fi.On your iPhone: Settings > Mobile Data (Cellular) > Add eSIM.Tap Use QR Code and point the camera at your code.When prompted, tap Continue. If asked, choose to Add eSIM.Wait for “Activating” to complete. This can take 1–3 minutes.Label the line (e.g., “Japan data”).Set as your Mobile Data line if it’s your travel plan. Keep your home line for calls/SMS if needed.Leave Data Roaming off until you arrive, unless your plan requires activation at purchase.If you see “Invalid QR Code” or “Plan Cannot Be Added”, see Troubleshooting.Option 2: Enter details manually (SM‑DP+ and Activation Code)Settings > Mobile Data > Add eSIM > Use QR Code > Enter Details Manually.Enter: - SM‑DP+ Address: e.g., “xyz.smdp.com” (exactly as provided) - Activation Code: long string (case‑sensitive) - Confirmation Code: only if your provider lists oneTap Next and wait for activation.Label and assign the line for data as needed.Tip: Typo‑sensitive. Copy/paste carefully. Double‑check dots and dashes.Option 3: Install via carrier/appInstall your provider’s app from the App Store.Create/log in to your account and purchase/assign the eSIM to your device.In the app, select “Install eSIM” and follow the prompts.When iOS prompts to add the plan, confirm and wait for activation.Option 4: eSIM Quick Transfer (moving from your old iPhone)Put both iPhones side by side with Bluetooth on and signed into iCloud.On your new iPhone: Settings > Mobile Data > Add eSIM > Transfer From Nearby iPhone.On your old iPhone, approve the transfer and choose the line.Wait for activation on the new device and confirm the line is working.Decide whether to keep the eSIM active on the old phone (usually off for travel).After activation: configure for travelThese post‑install settings make the difference between “it works” and “it works every time”.Label lines: Settings > Mobile Data > tap the new plan > Label.Default line:Mobile Data: choose your travel eSIM.Voice: choose your home line if you want your usual number active.iMessage & FaceTime: Settings > Messages/FaceTime > Send & Receive > pick the appropriate number/email.Data Roaming: Toggle on when you land in your destination.Network Selection: If auto fails, try manual. Settings > Mobile Data > Network Selection > turn off Automatic and choose a listed partner network.5G/LTE: Settings > Mobile Data > Mobile Data Options > Voice & Data > try 5G Auto/On or LTE per provider guidance.Low Data Mode: Turn off if speeds seem throttled unnecessarily.APN and data settings (only if needed)Most eSIMs auto‑configure APN. If data connects but webpages won’t load, set APN manually.Go to Settings > Mobile Data > your eSIM plan > Mobile Data Network (Cellular Data Network).Under Mobile Data (Cellular Data):APN: enter the exact APN value provided (e.g., “internet”, “fast.t-mobile.com” — this will vary).Username/Password: leave blank unless specified.MMS/Personal Hotspot APNs: set only if you’ve been given values.Return one level and reboot the iPhone if the change doesn’t apply immediately.Pro tips: - If the APN field is missing or greyed out, your profile is locked by the carrier; contact support to push correct settings. - “Could not activate mobile data network” usually means incorrect APN or temporary network registration delay. Recheck APN and toggle Airplane Mode for 20 seconds.Troubleshooting: top errors and fast fixesIf activation fails, work methodically. Most issues resolve in under 5 minutes.1) “Invalid QR code” / “This code is no longer valid” - Cause: Code already redeemed, expired, or scanned incorrectly. - Fix: - Confirm you’re scanning the most recent QR from your provider. - Try Enter Details Manually (SM‑DP+, Activation Code). - Ask the provider to reissue the eSIM.2) “Activation unsuccessful” / Stuck on “Activating” - Cause: Wi‑Fi glitch or temporary carrier server timeout. - Fix: - Force‑quit Settings, toggle Airplane Mode on for 20 seconds, then off. - Reboot iPhone. - Switch to a different Wi‑Fi or use a known‑good hotspot. - Try again after 10–15 minutes.3) “No Service” after install - Cause: Roaming off, wrong network selected, unsupported band, or not yet in the coverage area. - Fix: - Toggle Data Roaming on (when in destination). - Settings > Mobile Data > Network Selection: try manual selection of a partner network. - Settings > Mobile Data Options > Voice & Data: switch between 5G Auto, 5G On, and LTE. - Restart the iPhone.4) Data doesn’t work; calls/SMS do (or vice‑versa) - Cause: APN not set, wrong default data line, or plan is data‑only. - Fix: - Confirm your eSIM is selected as the Mobile Data line. - Set APN manually as provided by the carrier. - If your plan is data‑only, use OTT apps for calls/messages.5) “Plan cannot be added” / “Unable to complete cellular plan change” - Cause: Region/IMEI/EID mismatch or unsupported device profile. - Fix: - Ensure you’re on the latest iOS. - Provide your device EID to the provider (Settings > General > About). - Ask the provider to reprovision the eSIM.6) “Could not activate mobile data network” - Cause: APN or temporary network block. - Fix: - Reenter APN, then reboot. - Toggle Airplane Mode, then test again. - Try manual network selection.Still stuck? Delete and reinstall the eSIM: - Settings > Mobile Data > tap the plan > Remove eSIM. Re‑add via QR/manual details. Ensure Wi‑Fi is stable during reactivation.Managing multiple eSIMs on iPhone 15/16Store many, use two: iPhone 15/16 can store multiple eSIMs and keep up to two lines active at once.Switch data line quickly: Settings > Mobile Data > Mobile Data > select the plan you need.Pause a line (don’t delete): Toggle “Turn On This Line” off to keep the profile for later.Delete when finished: Remove eSIM to tidy your list. Keep a copy of the QR/manual details in case you need to reinstall.Pro tips for travellersPre‑install on Wi‑Fi before you fly, then toggle the line on when you land.Keep your home line on for SMS codes, but set the travel eSIM as the Mobile Data line.Save the QR code and manual details offline (Files app/Notes) for airport re‑installs.If speed dips in crowds, try manual network selection or switch between 5G and LTE.Hotspot/tethering: Check your plan allows it; if not working, set the APN for Personal Hotspot if provided.Plan your eSIM by destinationChoose a country or a multi‑country pass based on your route: - Single countries: Esim United States, Esim France, Esim Italy, Esim Spain - Multi‑country: Esim Western Europe, Esim North AmericaSee the full list on Destinations.Travelling as a team? Explore pooled and managed plans For Business. Partners and resellers can access assets and tools via the Partner Hub.FAQ1) Can I use two eSIMs at the same time on iPhone 15/16?Yes. You can have multiple eSIMs stored and keep two lines active simultaneously. Assign one for Mobile Data and choose how to handle voice and iMessage/FaceTime.2) Do iPhone 15/16 models support physical SIMs?US‑market iPhone 15/16 models are eSIM‑only. Many international variants also support a physical nano‑SIM alongside eSIM. Regardless, eSIM is supported across the range.3) When should I install my travel eSIM?If allowed by your provider, install over Wi‑Fi before departure, then switch Data Roaming on when you land. If your plan starts counting from activation, install at the airport on arrival.4) How do I move my eSIM to a new iPhone 16?Use Add eSIM > Transfer From Nearby iPhone (Quick Transfer) with both phones on iOS 16+. Some providers require issuing a new eSIM—contact them with your new device’s EID if Quick Transfer isn’t offered.5) My data works but some apps are slow. What can I check?- Disable Low Data Mode.- Try switching 5G Auto ↔ LTE.- Set APN manually if your provider supplies one.- Toggle Private Relay/VPN off temporarily.- Try manual network selection to a different roaming partner.6) What if my QR code has expired?Ask your provider to reissue the eSIM or use the manual SM‑DP+ and Activation Code path if those details are still valid.Next stepPick your plan now and be ready to connect on landing: browse Destinations.

MDM + eSIM at Scale: Jamf, Intune, and Knox Deployment Patterns

MDM + eSIM at Scale: Jamf, Intune, and Knox Deployment Patterns

Enterprises want travel-ready devices that “just work” the moment staff land. The trick is marrying modern eSIM provisioning with your MDM so you can control cost, security, and user effort. This guide shows practical mdm esim deployment patterns that scale across Jamf (Apple), Intune (iOS and Android), and Samsung Knox. We’ll cover enrolment flows that minimise user taps, profile locking to stop accidental deletions, dual‑SIM policies that split work vs personal usage, and roaming presets for fleets moving between regions. You’ll also find checklists and pro tips that reduce support tickets and bill shock.We assume your organisation provides work devices for travel, or supports COPE/CYOD where personal lines coexist with corporate data. Use this as a blueprint to pilot, then operationalise. For region planning, see our coverage library across Destinations, including ready-to-deploy options for Esim United States, Esim France, Esim Italy, Esim Spain, Esim Western Europe, and Esim North America.What you can and can’t automate todayBefore designing flows, acknowledge current platform realities:Silent eSIM install is limited. On iOS and standard Android Enterprise, fully silent eSIM download/activation is generally not available to third‑party MDMs. Users usually scan a QR or paste an activation code (SM‑DP+ address and code).MDM excels at governance. You can lock who can add/remove plans, steer which SIM handles data, and preconfigure roaming behaviours (especially on Samsung via Knox).Multiple eSIM profiles can be stored. Most recent iPhones and Androids can hold several eSIMs, with one active for data at a time. This enables preloading per-region profiles.The right pre-provisioning removes friction. If you deliver the code securely, guide the user at enrolment, and then lock settings, day‑one travel becomes smooth.Core building blocks for mdm esim deploymentActivation methods:QR code scan (most common, fastest for users).SM‑DP+ server and activation code entered manually.Carrier/eSIM app deep-link (opens to a prefilled code; still user-confirmed).Ownership and enrolment models:COBO (corporate-owned, business-only): strongest control, ideal for travel pools.COPE/CYOD: align dual‑SIM policies to separate work data (eSIM) and personal voice (physical SIM).Automated Device Enrolment (Apple) / Zero-touch (Android) for day‑0 governance.Lifecycle states:Download, enable for data, set data roaming, lock modifications, suspend or remove post‑trip.Policy pillars:Profile locking (prevent removal/changes).Dual‑SIM defaults (data on eSIM; personal SIM voice only).Roaming presets (country/region-based switching and controls).Cross‑platform baseline policy pack (start here)Apply these controls in Jamf, Intune, and Knox (where supported):1) Restrictions and lock‑down - iOS/iPadOS: Disable “Modify eSIM/cellular plan” in Restrictions payload (Jamf and Intune support this). This prevents deleting or adding plans after deployment. - Android Enterprise (fully managed): Disallow mobile network configuration changes. Use OEMConfig/Knox to enhance this on Samsung. - Optionally disable hotspot if you fund only device use, not tethering.2) Secure delivery of activation details - Store and distribute SM‑DP+ and activation codes via: - Jamf Self Service item or Intune Company Portal page. - A managed app with AppConfig (codes scoped per user/group). - Conditional access for off-network users via VPN or Microsoft Tunnel.3) Dual‑SIM governance - Communicate the standard: “eSIM = work data; physical SIM = personal voice/text.” - Enforce default data SIM and block data on the personal SIM where the platform allows (Knox can enforce; iOS typically requires user confirmation guided by Self Service).4) Roaming controls - iOS: you cannot programmatically toggle Data Roaming on/off; provide in-app guidance and compliance notifications. - Samsung via Knox: set data roaming per region profile; lock the user toggle if you need strict cost control.5) Observability and support - Use a managed data-usage app or network analytics to alert at thresholds. - Create device groups per destination; push correct eSIM profile and instructions before travel.Pro tip: Pre-provision multiple regional eSIMs (e.g., Esim Western Europe plus Esim United States) on eligible devices; switch the active data line just before travel.Jamf patterns for iOS/iPadOSRecommended enrolment flow (ADE)Use Apple Business Manager with Automated Device Enrolment to drop users into Jamf out of the box.During Setup Assistant, restrict “Cellular Plan” modifications via a configuration profile pushed immediately after enrolment.Day‑0 “self‑serve” eSIM installation1) Scope a Jamf Self Service item named “Activate Work Travel eSIM”. 2) Present country/region options mapped to your travel catalogue (e.g., Esim France, Esim Italy, Esim Spain, or broader Esim North America). 3) On selection, reveal the QR or invoke a deeplink to your eSIM provider’s install URL (still user‑approved). 4) After installation, prompt the user to: - Set the eSIM as “Mobile Data” line. - Keep personal SIM for “Default Voice Line” (if COPE). - Enable Data Roaming if travelling out of their home network.5) Post‑install, Jamf immediately re‑applies the restriction to prevent further eSIM changes.Pro tips: - Use Jamf Smart Groups based on upcoming travel to target the correct instructions and codes. - Embed a 30‑second video or step‑by‑step within Self Service; it reduces support tickets dramatically.Pre‑travel top‑ups and seasonal switchesCreate Self Service policies “Enable EU Data” and “Enable US Data”.Each policy reveals the relevant QR/code and a short checklist for the user to switch the Mobile Data line.Re-lock eSIM modifications after the switch.Dual‑SIM policy on iOSYou cannot currently force default data line via MDM on iOS; instead:Provide a one-screen Self Service guide with screenshots.Use an in-app confirmation (“I’ve set eSIM for data”) to mark the device compliant and suppress reminders.Restrict eSIM modification to keep the work plan intact.Microsoft Intune patterns (iOS and Android)Enrolment and scopingiOS/iPadOS: Enrol through Company Portal or ADE; apply the iOS device restriction to block eSIM modifications post‑install.Android Enterprise:COBO: Fully Managed is best for travel pools.COPE: Work Profile on company‑owned gives balance but fewer network controls; consider Samsung + KSP for more power.Delivering eSIM details securelyUse Intune to publish a Company Portal resource “Install Work eSIM” scoped by Azure AD groups (e.g., “Travel_EU_Q4”).Optionally deliver codes via a managed app using AppConfig so they never appear in email or chat.For high-risk destinations, require VPN before revealing the code.Enforcing dual‑SIM and roaming (Android)With Samsung devices, deploy the Knox Service Plugin (KSP) via Intune’s OEMConfig:Set preferred SIM for mobile data to eSIM.Disable data on physical SIM (voice/text unaffected).Toggle and lock Data Roaming per region profile (e.g., allow in EU, block elsewhere).For non‑Samsung Android, use available Android restrictions to limit user changes; depth varies by OEM.Pro tip: Maintain device groups per region and travel window. When a user is added to “Travel_US_Nov,” Intune auto-publishes the Esim United States resource, applies KSP roaming settings (if Samsung), and sends a single push prompting installation.Samsung Knox deployment patterns (Knox Manage or Intune + KSP)Samsung offers the deepest cellular controls for Android Enterprise:Preferred data SIM: Force eSIM as the data line and keep personal SIM for voice/SMS.Data Roaming control: Allow/block and optionally hide the toggle from users to prevent drift.Mobile networks UI restrictions: Prevent users from adding/removing profiles or altering APNs.APN fine‑tuning: Rarely needed with eSIM, but useful for private APN cases.Typical flow (COBO travel handset): 1) Zero‑touch enrol into Knox Manage or Intune DO. 2) Push KSP with a “Home” profile (roaming off, data on eSIM, tethering off). 3) Before travel, switch to a “Destination” profile (roaming on, data on eSIM, usage alerts). 4) Distribute the eSIM activation QR via Knox E-FOTA notification or Intune Company Portal. 5) Lock network settings post‑install.Pro tip: Pair KSP roaming policies with a data-usage app that shows per‑SIM consumption. Users understand what’s going on, and you stay ahead of overages.Roaming presets for fleetsBuild a small library of policy + plan bundles:Western Europe bundle:eSIM: Esim Western EuropePolicy: Data roaming on; personal SIM data off; hotspot allowed for field teams if needed.Guidance: Remind users to choose eSIM for data on arrival.North America bundle:eSIM: Esim North America or country‑specific Esim United StatesPolicy: Roaming on; push time‑zone and dialling tips; enable Wi‑Fi Assist guidance if required.Country‑specific bundles:France/Italy/Spain with Esim France, Esim Italy, Esim SpainPolicy: Standard dual‑SIM rules; translate quick-start steps for local teams if necessary.Preload multiple profiles (where devices support it) so frequent travellers only switch the active data line in Settings. Reference coverage and plan validity on Destinations when planning trips.Operational playbooksCOBO travel pool devicesDevice state: Fully managed (Jamf ADE / Intune DO / Knox Manage).Install method: QR in a managed portal with a 60‑second guide.Lockdown: Block eSIM modifications; hide roaming toggles (Samsung).Offboarding: Remove or disable the travel profile after return (user‑assisted).COPE (personal SIM + corporate eSIM)Device state: Jamf or Intune with clear Self Service instructions.Policy: eSIM for data; personal SIM voice/SMS. Restrict personal SIM data (Samsung) or provide guidance (iOS).Privacy: Communicate what is and isn’t monitored; keep trust high.Frequent-flyer executivesPreload EU + US eSIMs; give a one‑tap Self Service checklist “Switch Data to EU/US”.Provide a wallet card or offline PDF with steps for when they land without data.Troubleshooting quick checks (field-proven)eSIM not downloading? Confirm device is unlocked, on Wi‑Fi, and date/time is automatic.No data after install? Ensure the eSIM is selected as the Mobile Data line and Data Roaming is on outside the home network.Dual‑SIM confusion? Rename lines (e.g., “Work eSIM” and “Personal SIM”) in Settings to reduce mistakes.Poor performance? Toggle Airplane Mode for 10 seconds; then check network selection is automatic.Stuck policy? Force an MDM sync (Jamf: Self Service “Update Inventory”; Intune: Company Portal “Check status”).FAQsCan MDM silently install an eSIM profile?Generally no on iOS and standard Android. Expect a user‑confirmed QR scan or code entry. Build your flow to make that step quick and clear.How do I stop users deleting the work eSIM?iOS/iPadOS: Disable eSIM/cellular plan modifications via MDM Restrictions.Android: Use Device Owner restrictions; on Samsung, enforce additional SIM/network policies via Knox.Can I enforce that work data uses the eSIM and personal SIM is voice only?Yes on Samsung via Knox (preferred data SIM, disable personal SIM data).On iOS, you’ll guide users to set eSIM as the data line and then lock plan modifications.Can I turn Data Roaming on/off with MDM?Samsung via Knox: yes, including hiding the toggle.iOS: not programmatically; provide clear user prompts at install and arrival.How many eSIMs can a device store?Modern iPhones and Androids can store multiple eSIM profiles, with one active for data. Exact limits vary by model. Preload frequent destinations and switch as needed.What’s the best way to support travellers landing without data?Provide QR codes that work over hotel/airport Wi‑Fi, offline quick-start steps in Self Service, and a short SMS template they can send from their personal SIM to get help.Next stepReady to pilot mdm esim deployment with proper policy controls? Share your route map and device mix with our enterprise team via For Business. We’ll help you design enrolment flows, locking, dual‑SIM policies, and region bundles that scale.