Alps Circuit (10 Days): France–Switzerland–Italy–Austria Ski Connectivity

Blog

Alps Circuit (10 Days): France–Switzer...

Alps Circuit (10 Days): France–Switzerland–Italy–Austria Ski Connectivity

30 Oct 2025

Alps Circuit (10 Days): France–Switzerland–Italy–Austria Ski Connectivity

Planning an alps itinerary 10 days that hops between France, Switzerland, Italy and Austria? This route prioritises snow, scenery and strong mobile connectivity so you can navigate lifts, coordinate groups, work on the go and stay safety-aware. Expect solid 4G/5G in towns and valleys, with patchier coverage at altitude depending on aspect and network. A multi-country eSIM with hotspot capability beats resort Wi‑Fi for reliability, especially on transfer days or when you need laptop-grade data. Below you’ll find a practical 10‑day route, network tips by country, and a simple setup checklist to keep you online from Chamonix to St. Anton. We’ll also cover border handovers, safety alerts, and how to budget data for calls, maps and work. If you’re travelling as a team, there’s guidance on shared hotspots and business controls too. You’ll finish with a clear next step to choose the right eSIM plan before you clip in.

Route at a glance (10 days, connectivity-first)

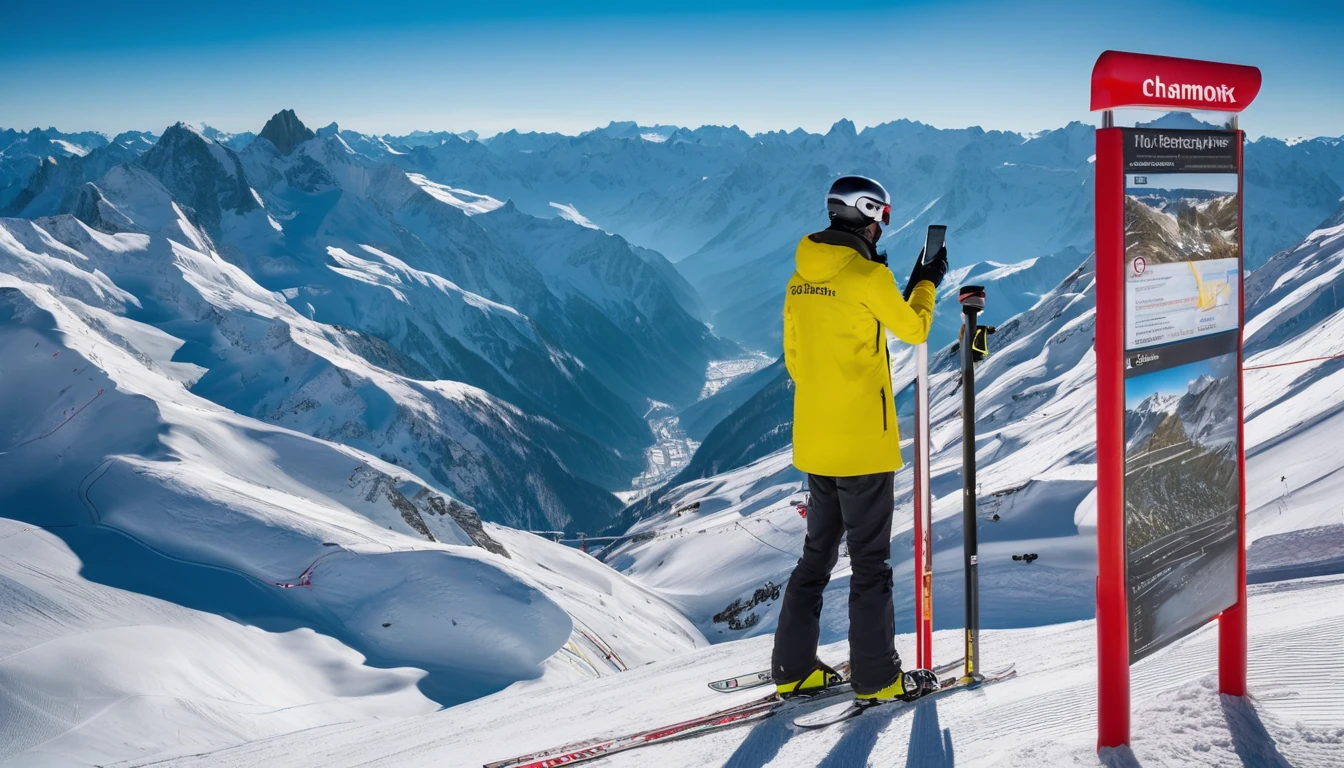
1) Day 1–2: Chamonix, France
Base in Chamonix town for dependable 4G/5G and quick access to Les Houches/Brévent. Mountain coverage varies by aspect; expect solid signal near lifts and mid‑stations, weaker on north-facing bowls. Good for early testing your eSIM and hotspot.

2) Day 3: Vallorcine/Le Tour and transfer to Verbier (Switzerland)
Ski the sunny Le Tour area (generally better line of sight to valley towers). Afternoon transfer via Col de la Forclaz to Verbier. Expect brief blackspots in gorges; cache maps and playlists.

3) Day 4–5: Verbier/4 Vallées, Switzerland
Swiss networks are strong in valleys; mountain coverage is best on ridgelines above Verbier and Siviez. Great for navigation, group chats and booking restaurants on the fly. Two days lets you test remote work windows with your hotspot.

4) Day 6: Transfer to Italy via Grand St. Bernard or Mont Blanc tunnel; ski Courmayeur (Aosta Valley)
Coverage is robust in Courmayeur town and on main lift lines; drops in tree-lined gullies. Afternoon espresso and a video call from a café via your hotspot is very doable.

5) Day 7: Cervinia–Zermatt cross-border ski (Italy–Switzerland)
Big open terrain with decent ridge coverage. Signal dips in leeward bowls. Ensure your plan covers both countries or enable data only on the side you prefer to roam in; offline maps help on Plateau Rosa.

6) Day 8: Transfer to Austria (St. Anton am Arlberg)
Transit via the Mont Blanc/Great St Bernard route back to the Swiss/Austrian corridor. Long tunnels can cut connectivity entirely; download tickets and passes to your wallet app.

7) Day 9–10: St. Anton/Lech–Zürs, Austria
Excellent town coverage; mountain signal is best near lift corridors and ridge traverses between Lech and Zürs. Good base for final remote work blocks, backups and trip admin before departure.

Pro tip
- If you’re tight on transfers, swap Cervinia for La Thuile (Italy) for a shorter hop; or Verbier for Zermatt if you want iconic scenery but expect more shadow zones behind the Matterhorn.

eSIM setup for a 10‑day Alps circuit (How to)

1) Check device compatibility
- Confirm your phone supports eSIM and personal hotspot.
- If you need to keep your home number for 2FA/SMS, ensure dual SIM/eSIM capability.

2) Choose your plan
- Pick a regional plan that lists all four countries. See Destinations and consider Esim Western Europe for France/Italy/Austria, adding Switzerland coverage where shown.
- Prefer country packs? Line up Esim France and Esim Italy for deeper data in those stops.

3) Install before you fly
- Activate via QR or in‑app on Wi‑Fi at home. Keep your physical/SIM line set to “Calls & SMS” and eSIM to “Mobile data”.

4) Enable data roaming
- For multi-country eSIMs, switch Data Roaming ON.
- Set Network Selection to Automatic; keep an eye on handovers at borders.

5) Configure hotspot
- Name your hotspot and set a strong password.
- Test a laptop/tablet connection and a quick video call.

6) Optimise battery and offline tools
- Download offline maps for Chamonix, Verbier, Aosta Valley and Arlberg.
- Enable Wi‑Fi calling on your home SIM if supported. Carry a 20,000 mAh power bank.

7) Safety and alerts
- Enable emergency alerts/cell broadcast. Install local apps (e.g., Alertswiss) and allow notifications.

8) Budget data
- Maps/navigation: 150–300 MB/day with live layers.
- Video calls: ~600–900 MB/hour (SD) via hotspot; plan your work blocks near towns.

Mountain vs valley coverage: what to expect

France (Chamonix and surrounds)
- Generally strongest: Orange on mountain corridors; SFR and Bouygues solid in town/valley. Free Mobile can be patchy at altitude.
- Expect dropouts in deep bowls (Grands Montets) and forested gullies near Les Houches.

Switzerland (Verbier/Zermatt)
- Swisscom typically best overall; Sunrise strong in resorts; Salt fine in towns.
- In 4 Vallées, ridgelines and major liftlines have good LTE/5G; low north-facing couloirs may lose data.

Italy (Courmayeur/Cervinia)
- TIM often best mountain reach; Vodafone good balance; WINDTRE stronger in towns.
- Cervinia’s open plateaus have better line of sight; Courmayeur’s wooded aspects can shadow coverage.

Austria (St. Anton/Arlberg)
- A1 widely regarded as the strongest; Magenta (T‑Mobile) very good; Drei (3) reliable in towns.
- Traverses between Lech and Zürs have decent signal; inner bowls can fade.

Connectivity rules of thumb
- Valleys and towns = consistent 4G/5G.
- Lift corridors and ridgelines = moderate to strong.
- Leeward bowls, forests, narrow gorges = weakest.
- Bad weather can attenuate marginal signals—download before storms.

Hotspot vs resort Wi‑Fi: what actually works

Why eSIM + hotspot wins
- Coverage where you need it: on buses, in lift lines, cafés between runs. Resort Wi‑Fi rarely reaches slopes and is overloaded at 09:00 and 16:00.
- Fewer captive portals: many lodge networks force re-logins; hotspots keep your laptop authenticated.
- Stability for calls: 4G/5G data is steadier than shared Wi‑Fi for 30–45 minute meetings.

How to run a smooth work block
- Schedule calls from town between 07:30–09:00 or 15:00–17:00 for best capacity.
- Use your phone as a hotspot on a windowside table; cap video at 480p to save ~40% data.
- Plug in: tethered phones drain quickly in cold; use a power bank.
- Keep a backup: preload files to offline folders in case you hit a coverage dip.

Data budgeting for 10 days
- Light user (maps, messaging, bookings): 4–6 GB.
- Mixed (plus a few video calls): 10–14 GB.
- Remote work daily (2 hours calls + uploads): 20–30 GB.

Tip for teams
- If you’re coordinating staff, guides or media crews across resorts, pooled data and usage controls via For Business can cut overages and simplify support.

Safety, SMS and alerts on the mountain

  • Emergency numbers: 112 works across the EU and Switzerland. If any network is available, your phone will attempt the call—even if your data plan is out.
  • Enable cell broadcast/emergency alerts:
  • France: FR‑Alert (no app needed; ensure alerts are on).
  • Switzerland: use the Alertswiss app and enable notifications.
  • Italy: IT‑Alert cell broadcasts active in most regions.
  • Austria: national cell broadcast is active; ensure alerts are allowed in settings.
  • Keep SMS reachable: if your bank uses SMS 2FA, leave your home SIM active for Calls & SMS while routing data through your eSIM.
  • Share location smartly: create a small group (Family/Find My/Google Maps) and share for the trip duration. It helps if someone loses signal in a bowl.
  • Battery is safety: cold kills phones. Use an inner pocket, low‑power mode on lifts, and a compact cable to charge during coffee stops.

Border crossings: keep data seamless

  • Before a border: reopen your carrier app to check balance; screenshot your QR/eSIM details.
  • Crossing CH–EU boundaries: Switzerland is outside the EU. Confirm your plan’s Switzerland inclusion; if not, disable data at the border and switch to a Swiss‑enabled eSIM.
  • APN and network selection: leave on Automatic unless your provider recommends a specific network. If speeds tank, toggle Airplane Mode for 10 seconds to force a fresh attach.
  • Tunnels and passes: download tickets, boarding passes and offline maps before you set off; some long tunnels still have no coverage.

Picking the right Simology eSIM

  • One and done: Esim Western Europe is the simplest for France/Italy/Austria; check its country list for Switzerland coverage.
  • Country depth: stack Esim France and Esim Italy if you’ll use more data there (photo/video backups, frequent calls).
  • Coming from North America? Activate before you depart using Esim United States or prep with Esim North America for the outbound leg, then switch to Europe on arrival.
  • Not sure? Browse coverage notes by country on Destinations.
  • Operators, hotels or guides: explore co‑branded connectivity for guests via Partner Hub.

Optional extension
- Swing west to Spain’s Pyrenees on a longer circuit? See Esim Spain and check train/flight options from Geneva or Zurich.

Packing checklist: connectivity edition

  • eSIM installed and tested on home Wi‑Fi
  • Power bank (20,000 mAh) + short USB‑C/Lightning cables
  • Phone case with lanyard or zipper pocket to prevent drops from lifts
  • Offline maps for all four regions
  • Spare wall adapter with dual USB ports (EU plug)
  • Laptop offline work folders synced for meetings
  • Printed pass QR or saved to wallet app

FAQ

Q: Will one eSIM cover France, Switzerland, Italy and Austria?
A: Many regional eSIMs do; Switzerland is sometimes excluded. Check the country list on your chosen plan and top up or add a Switzerland‑enabled eSIM if needed.

Q: Is resort Wi‑Fi enough for remote work?
A: It’s fine for casual browsing but unreliable for video calls at peak times. A phone hotspot on 4G/5G is more stable and available where Wi‑Fi isn’t (buses, cafés, lift lines).

Q: Can I keep my home number for bank codes while using an eSIM?
A: Yes. Set your physical SIM to Calls & SMS and your eSIM to Mobile Data. You’ll receive SMS/2FA on your home number while using data on the eSIM.

Q: How much data do I need for this 10‑day circuit?
A: Most travellers use 6–12 GB. Add more if you’ll run daily video calls (estimate 1 GB per hour in SD) or upload media.

Q: What if I lose signal on the mountain?
A: Move toward ridgelines or lift stations for better line of sight. Use offline maps and pre‑agreed meeting points. For emergencies, dial 112—your phone will try any available network.

Q: Will my hotspot drain the battery too fast in the cold?
A: Hotspots do use power. Keep the phone warm in an inner pocket, lower screen brightness, and plug into a power bank during longer work sessions.

Next step
Choose your plan and check country coverage for your route: start with Esim Western Europe and confirm inclusions on Destinations.

Read more blogs

Andes Highlights (3 Weeks): Peru–Bolivia–Chile–Argentina Connectivity

Andes Highlights (3 Weeks): Peru–Bolivia–Chile–Argentina Connectivity

Planning a south america itinerary 3 weeks through the high Andes? This route stitches together Peru’s Sacred Valley, Bolivia’s La Paz and Salar de Uyuni, Chile’s Atacama Desert, and northern Argentina’s quebradas or Mendoza wine country—often by long-distance bus and a couple of short flights. Connectivity is different at altitude: coverage is strong in cities but drops in high passes and salt flats; bus Wi‑Fi is patchy; border towns can be blackspots. The smart move is an eSIM with multi‑country coverage, backed by offline maps, offline translations, and a simple routine for crossing borders by bus without losing service. Below you’ll find a practical, connectivity-first itinerary; checklists to prep your phone, apps and documents; and on-the-ground tips for staying online where it matters: booking transport, hailing taxis, backing up photos, and navigating when the signal disappears.If you’re transiting via Europe or North America, you can also add a layover eSIM to stay connected door-to-door. Start with our country list on Destinations, then follow the steps, and you won’t waste time chasing SIM shops at 3,500 metres.The 3‑week Andes route at a glanceWeek 1: Peru (Cusco, Sacred Valley, Machu Picchu) - Fly into Cusco (or Lima then connect). - Base in Cusco; day trips to Pisac/Chinchero/Maras–Moray. - Train to Aguas Calientes; Machu Picchu visit; return to Cusco or continue to Puno/Lake Titicaca.Week 2: Bolivia and Chile (La Paz, Uyuni, San Pedro de Atacama) - Bus/collectivo via Copacabana to La Paz. - Fly or overnight bus to Uyuni. - 3‑day Uyuni–altiplano tour ending in San Pedro de Atacama (Chile).Week 3: Chile and Argentina (Atacama to Salta or Mendoza/Buenos Aires) - Choose: - North: San Pedro to Salta/Jujuy by bus; fly to Buenos Aires. - Or South: San Pedro–Calama flight to Santiago; bus or flight to Mendoza; onward to Buenos Aires.Connectivity notes (quick): - Cities: generally strong 4G/4G+; 5G in major hubs (Santiago, Buenos Aires). - Altitude/rural: expect long no‑signal stretches (Uyuni, altiplano passes, Paso Jama). - Bus Wi‑Fi: often advertised, rarely reliable. Plan to be offline onboard. - Border regions: networks switch; a multi‑country eSIM avoids sudden loss.eSIM vs local SIMs for a 4‑country tripFor a route with multiple borders and remote legs, eSIM wins on time and reliability.What a multi‑country eSIM gets you: - One plan across Peru, Bolivia, Chile, Argentina (check coverage per country on Destinations). - No passport/SIM registration queues at kiosks. - Keep your home number active on the physical SIM for calls/SMS codes. - Instant top‑ups if you burn data on photos or navigation.When a local SIM still helps: - Long stay in one country with heavy data use (e.g., a month in Buenos Aires). - Dead zones where a different local network performs better (rarely worth the hassle on a 3‑week pace).Practical approach: - Use an eSIM as your primary data line across all four countries. - If you find a specific local network far better in one region, add a cheap local SIM and keep the eSIM as backup.Device readiness checklist (before you fly)1) Check eSIM compatibility and SIM‑lock status on your phone.2) Buy and install your eSIM while on home Wi‑Fi. Keep a PDF/printed copy of the QR code.3) Label lines clearly (e.g., “eSIM Andes Data”, “Home SIM”).4) Turn on data roaming for the eSIM; leave roaming off for your home SIM to avoid charges.5) Set up dual‑SIM rules: data on eSIM; calls/SMS default to home SIM if needed.6) Download offline: Google Maps/Organic Maps for all target regions; language packs (Spanish at minimum); bus/air tickets; hotel confirmations.7) Cloud backups: set to upload on Wi‑Fi only; pre‑create shared albums for travel companions.8) Test tethering/hotspot with your laptop/tablet.If you’re transiting popular hubs, consider a short layover eSIM: - USA connections: add an Esim United States or a broader Esim North America.- Europe connections: Madrid/Barcelona? Use an Esim Spain. Paris or Rome? See Esim France and Esim Italy. Multi‑country layovers? Try Esim Western Europe.City‑by‑city connectivity notesCusco & the Sacred Valley (Peru)Coverage: Good in Cusco city; variable in high villages (Maras/Moray) and along Inca Trail approaches.Tips: Download Sacred Valley maps offline; pin viewpoints and ruins. most taxis use WhatsApp—save your accommodation’s number.Machu Picchu/Aguas Calientes: Patchy to none at the citadel. Upload your photos later; don’t rely on live ticket retrieval.Lake Titicaca: Puno and CopacabanaPuno: Reasonable 4G; bus terminals crowded—screenshot QR tickets.Crossing to Copacabana: Expect a signal drop around the border; have directions saved offline.La Paz (Bolivia)Good urban 4G; the cable car network has decent signal but tunnels do not.Yungas/“Death Road” tours: Mountain valleys cause dead zones—share your emergency contacts with the operator, carry a charged power bank, and don’t plan remote calls.Uyuni and the Altiplano (Bolivia to Chile)Uyuni town: OK 4G; ATMs finicky—use Wi‑Fi for banking apps.Salt flats/lagunas: Assume offline for most of the 3‑day tour. Guides often carry satellite phones; agree a pickup time/place in San Pedro and preload your map route.San Pedro de Atacama (Chile)Town: Solid 4G; accommodations often have Wi‑Fi but speeds vary.Geysers, Valle de la Luna: Offline navigation essential; sunrise trips start before mobile networks wake up in some areas.Salta/Jujuy or Mendoza/Buenos Aires (Argentina)Salta/Jujuy: Good city coverage; quebradas have long no‑signal sections.Mendoza: City 4G/5G; vineyards outside town can be patchy.Buenos Aires: Strong 4G/5G; ideal for cloud backups and large downloads before you fly home.Border crossings by bus: step‑by‑stepThe big ones on this route: Peru–Bolivia (Puno/Copacabana), Bolivia–Chile (Uyuni–San Pedro via Hito Cajón), Chile–Argentina (Paso Jama to Salta or Los Libertadores to Mendoza).How to keep service and sanity:1) The day before:- Top up your eSIM data.- Confirm your plan includes both countries you’re entering/leaving.- Download offline maps for both sides of the border and your town of arrival.- Save bus company WhatsApp and terminal address offline.2) On departure morning:- Keep a paper copy or offline PDF of tickets, insurance, and accommodation proof.- Charge phone and power bank; pack a short cable in your daypack.3) On the bus:- Don’t count on bus Wi‑Fi. Keep your eSIM as primary, but expect drops near mountain passes.- If your phone supports it, enable “Wi‑Fi calling” for later when you reach accommodation Wi‑Fi.4) At the border posts:- Data may be unavailable. Keep QR codes and booking numbers offline.- After exiting one country and entering the next, toggle Airplane Mode off/on to re‑register on the new network.- If the eSIM doesn’t attach, manually select a network in Mobile Settings.5) Arrival:- Send your accommodation a quick WhatsApp when you’re back online.- Recheck your eSIM’s data roaming is on; confirm you’re on an in‑country network, not a weak roaming partner.Pro tips: - Dual profiles: If your eSIM allows, keep a secondary profile for a different network in the same country—helpful in border towns.- Cash buffer: Some border terminals don’t accept cards; download a currency converter for offline use.Offline survival kit (5‑minute setup)Maps: Download regions for Cusco, Sacred Valley, Puno, La Paz, Uyuni, San Pedro, Salta/Jujuy or Mendoza, and Buenos Aires.Translations: Download Spanish for offline use; add phrasebook favourites (bus tickets, directions, dietary needs).Documents: Save PDFs of passports, tickets, hotel addresses; star them for quick access.Rides: Screenshots of pickup points; pin bus terminals and hotel doors.Entertainment: Podcasts and playlists for long bus legs, set to download on Wi‑Fi only.Altitude and your tech: what changesCoverage gaps lengthen: Fewer towers at high altitude; valleys can block signal. Assume offline on remote excursions.Batteries drain faster in cold: Keep your phone warm and carry a power bank (10,000–20,000 mAh).Hotel Wi‑Fi may be congested: Schedule big uploads (photo backups, app updates) for big-city stays like Santiago or Buenos Aires.GPS still works offline: Your blue dot shows on offline maps without data—preload everything.Data budgeting for 3 weeksTypical traveller usage across this route: - Messaging/Maps/Bookings: 0.2–0.5 GB/day- Social and photo sharing: 0.3–0.7 GB/day- Occasional video calls/streaming: 0.5–1.0 GB/dayFor a mixed-use trip, plan 15–25 GB for 3 weeks. Heavy creators should double it and upload over hotel Wi‑Fi when possible. If you work remotely, consider a higher‑capacity plan and a backup eSIM; see our guidance on For Business.Practical route with transport and connectivity cuesDays 1–4 Cusco base: Strong city signal; day trips may be spotty—go offline-ready.Days 5–6 Machu Picchu: Expect no service at the ruins; sync tickets ahead.Days 7–8 Puno to La Paz via Copacabana: Border signal drop; re‑register networks after crossing.Days 9–11 Uyuni tour to San Pedro: Treat as offline; charge nightly; carry spare cables.Days 12–14 San Pedro: Stable in town; tours offline; top up data before Paso Jama.Days 15–17 Salta/Jujuy or Mendoza: Good urban 4G; rural patches are offline.Days 18–21 Buenos Aires: Strongest connectivity of the trip; clear your uploads and map downloads for the flight home.Partnering and stopover extrasHospitality and tour operators in the Andes: help your guests stay connected—explore co‑branded solutions via our Partner Hub.Transatlantic flyers: test your eSIM setup on a layover with an Esim United States or Esim Western Europe before hitting high-altitude blackspots.FAQs1) Do I need a local SIM in each country?No. A multi‑country eSIM covering Peru, Bolivia, Chile and Argentina is simpler and works well for a 3‑week pace. Consider a local SIM only if you’ll spend longer in one country and want the absolute best regional coverage.2) Will my WhatsApp number change with an eSIM?No. WhatsApp is tied to your registered number, not your data line. Keep your home SIM active for voice/SMS (roaming off if you wish), and use the eSIM for data—WhatsApp continues as normal.3) Can I hotspot to my laptop or camera?Yes. Enable tethering on your eSIM. Mind your data: cloud backups and OS updates can burn gigabytes—set them to Wi‑Fi only or schedule in big cities.4) What if there’s no signal on the Uyuni/Atacama legs?That’s expected. GPS still works offline. Pre-download maps and translations, carry a power bank, and sync plans with your tour operator before departure.5) Will I get roaming charges at borders?If you’re using a multi‑country eSIM with coverage in both countries, you won’t incur extra roaming fees from your home carrier. Keep roaming off on your home SIM to avoid accidental use.6) I’m connecting via Europe or the US—worth getting a layover eSIM?Yes. It’s an easy way to test your setup and stay reachable. Try Esim North America or country options like Esim Spain, Esim France, or Esim Italy for common hubs.Next step: Browse South America coverage options and build your plan on Destinations.

Thailand eSIM & Mobile Internet Guide (2025): Speeds, Island Coverage, eKYC

Thailand eSIM & Mobile Internet Guide (2025): Speeds, Island Coverage, eKYC

Planning Thailand for 2025? An eSIM is the easiest way to land connected, whether you’re hopping BTS/MRT in Bangkok or island‑hopping from Phuket to Koh Samui. Coverage across Thailand’s tourist corridors is strong, 5G is widespread in cities, and 4G LTE reaches most coastlines. The main gotcha is eKYC (electronic identity verification): Thai regulations require SIM registration, and many Thailand eSIMs ask for a quick passport selfie check before they activate. Get that done ahead of arrival and you’ll switch on data at the airport.This guide covers real‑world speeds (including on the BTS/MRT), how signal holds up on popular islands, eKYC steps and pitfalls, and the best way to set up your phone for a smooth trip. If you’re choosing between plans, we’ll also help you size your data, understand tethering rules, and avoid post‑cap throttling surprises. Ready to pick a plan? Browse Thailand options on Destinations.Quick take: Should you get an eSIM for Thailand?Yes—if your phone supports eSIM, it’s the most convenient and typically cheapest way to get Thai data on arrival.5G is robust in Bangkok, Chiang Mai, and Phuket Town; 4G is strong across most beach areas and intercity routes.On islands, expect solid coverage in towns and popular beaches, with patchy service in dense jungle, headlands, and marine parks.Bangkok’s BTS/MRT corridors are well covered, including underground sections; short dropouts can happen between stations.Complete eKYC before you fly if your provider requires it; activation is usually minutes once verified.Coverage and speeds in 2025: what to expectThe networks at a glanceAIS and True (True/dtac combined under True Corp) operate the largest mobile networks.5G primarily uses mid‑band (n41/2600 MHz) for speed and low‑band (n28/700 MHz) for reach; 4G LTE runs across common bands (1/3/8/28).Any modern iPhone (XR or newer) and most recent Android flagships support these bands. Avoid China‑only variants without eSIM.Real‑world speeds by locationActual speeds depend on time of day, crowding, and your exact spot:Bangkok core (Siam, Silom, Asok, Ari, riverside): 5G typically 120–300 Mbps, bursts higher; 4G 25–80 Mbps.Airports (BKK/DMK): 50–150 Mbps with busy‑hour variability.Phuket (Patong, Karon, Kata, Phuket Town): 4G/5G 50–200 Mbps; headlands and lesser‑visited bays can dip to 5–20 Mbps.Phi Phi & Railay: town areas 10–60 Mbps, midday congestion common; trails and cliffs can drop to fringe 4G or 3G‑like speeds.Koh Samui (Chaweng, Lamai, Bophut): 60–180 Mbps in town/beach zones; interior hills 2–15 Mbps.Koh Phangan (Thong Sala, Haad Rin): 20–90 Mbps around towns; east‑coast coves patchier.Koh Tao: variable 5–50 Mbps near Mae Haad/Sairee; remote bays may be marginal.Intercity highways (Bangkok–Ayutthaya, Chiang Mai surroundings): generally stable 4G with pockets of 5G near towns.These ranges reflect recent traveller tests and public network reports; weather and maintenance can affect results.BTS/MRT coverage explainedBTS Skytrain (Sukhumvit/Silom lines): excellent 4G/5G on platforms and trains; brief handover dips between stations.MRT Blue & Purple (underground): strong 4G/5G within stations and most tunnels; occasional short dead zones in deeper sections.Airport Rail Link: consistent 4G; 5G appears in denser areas. Pro tip: If 5G feels “sticky” in tunnels (high ping/packet loss), lock your device to 4G/LTE for the ride, then re‑enable 5G later.Islands and ferry routesPhuket–Phi Phi–Krabi ferries: signal fluctuates offshore; expect 0–20 Mbps mid‑channel, then recovery near land.Surat Thani–Koh Samui/Phangan ferries: coverage improves near Don Sak pier and the islands; plan offline content for the crossing.Marine parks (Similan, Ang Thong): minimal to no service—download maps and tickets in advance.Buying and activating a Thailand eSIM (with eKYC)Follow this once and you’re set.1) Check compatibility - Confirm your device supports eSIM and is unlocked. - Dual‑SIM users: decide which SIM handles data during the trip.2) Choose your plan - Pick a Thailand eSIM on Destinations with enough data for your dates. - Look for “hotspot/tethering allowed” if you intend to share data. - If you need regional coverage beyond Thailand (e.g., onward to the US), also see Esim North America or Esim United States for separate legs.3) Complete eKYC (if required) - Upload a passport photo page and a live selfie. - Ensure name/spelling matches your booking exactly (no nicknames).4) Install the eSIM - Scan the QR or use the install code; label it “Thailand”. - Keep your home SIM on for iMessage/WhatsApp continuity if needed.5) Configure data - Set the Thailand eSIM as “Mobile Data”. - Turn “Data Roaming” ON for the Thailand eSIM profile (this is required even though you’re in Thailand). - APN usually auto‑fills; if not provided, enter the APN from your plan instructions.6) Test before travel (recommended) - If your plan allows pre‑activation, do the install over home Wi‑Fi to avoid airport scrambling.eKYC quirks and how to avoid delaysLighting and framing matter: photograph the entire passport page, MRZ visible, no glare.Remove hats/glasses for the selfie. Match your look to your passport photo where possible.Non‑Latin names: use the Latin transcription exactly as on your MRZ/passport data line.Processing times: automated checks often approve in minutes; manual reviews can take longer outside Thai business hours—do it a day before departure.Until eKYC is approved, some plans won’t attach to the network. Don’t leave it to the arrival queue.Plan selection: data, hotspot, and throttlingTypical tourist use: 3–5 GB/week for maps, ride‑hailing, chat, casual socials; 8–12 GB/week if you stream video, reels, or hotspot a laptop.“Unlimited” often means high‑speed to a cap (e.g., 2–10 GB/day) then throttled to 1–10 Mbps. This is fine for maps and chat, not for HD video.Tethering: most data‑only Thailand eSIMs allow hotspot, but some “unlimited” tiers restrict it. Check plan details.Local number: many travel eSIMs are data‑only (no Thai number). Apps like Grab, LINE, WhatsApp work fine without a local number.Trip chaining: if you’re continuing to Europe later, consider separate regional plans like Esim Western Europe, Esim France, Esim Italy, or Esim Spain.Device setup checklist (iPhone and Android)iPhone (iOS 16+) - Settings > Mobile Data > Add eSIM > Use QR or Enter Details. - Label the line “Thailand”. - Mobile Data: Thailand eSIM. Default Voice: your home SIM (optional). - Data Roaming: ON for Thailand eSIM. - iMessage & FaceTime: keep tied to your primary number/email. - If APN is required: Mobile Data Network > enter APN from instructions.Android (Pixel/Samsung recent) - Settings > Network & Internet > SIMs > Add eSIM. - Mobile data: Thailand eSIM. Data roaming: ON (for the Thailand eSIM). - Preferred network type: 5G/4G (or LTE only for stability on ferries/tunnels). - Enter APN if prompted.Dual‑SIM hygiene - Disable “Allow Mobile Data Switching” if your phone keeps jumping back to your home SIM. - Prioritise the Thailand eSIM for data to avoid roaming charges on your primary line.Troubleshooting in 60 secondsNo connection after install: toggle Airplane Mode for 10 seconds; ensure Data Roaming is ON for the Thailand eSIM.Still no data: manually select the recommended network in your SIM’s instructions; try forcing LTE/4G temporarily.APN empty: enter the APN exactly as supplied; save and reboot.eKYC pending: you won’t attach until verified—recheck the passport/selfie quality and resubmit.Slow in crowds: lock to 4G/LTE for lower latency, or move a few metres for a different sector.iMessage/WhatsApp not receiving: keep your home line active for services linked to your number; data stays on the Thailand eSIM.Pro tips for travellersDownload offline Google Maps for Bangkok, Phuket, Samui, and any national parks you’ll visit.For BTS/MRT, 4G is often the smoothest in tunnels; switch back to 5G for big downloads.On islands, higher ground isn’t always better—turn a corner along the beach to change cell sectors.Ferry days: preload podcasts and boarding passes; expect dead zones mid‑channel.If you rely on hotspot, avoid “unlimited” plans with hotspot limits; pick a clear data‑bucket plan.Business trip or team travel? Centralise procurement and compliance via For Business. Need referral tools? See Partner Hub.Planning more trips?After Thailand, keep it simple with region‑ready options: - North American leg? Check Esim North America or single‑country Esim United States. - Europe coming up? Start with Esim Western Europe or country picks like Esim France, Esim Italy, and Esim Spain.FAQ1) Do I really need to complete eKYC for a Thailand eSIM? - In most cases, yes. Thai regulations require SIM registration. Many providers handle this remotely with a passport scan and selfie. Without eKYC, activation may be delayed or restricted.2) Will my eSIM work on Bangkok’s BTS and MRT? - Yes. Coverage on platforms, trains, and tunnels is generally strong. If you notice lag on 5G underground, switch to 4G for the ride.3) Can I hotspot my laptop from a Thailand eSIM? - Usually. Many plans allow tethering, but some “unlimited” tiers cap or block hotspot. Check your plan’s hotspot policy before purchase.4) How much data should I buy for 10–14 days? - Light users: 6–10 GB. Typical travellers: 12–20 GB. Heavy streamers or hotspot users: 25–40 GB. If in doubt, choose a plan with easy top‑ups.5) Will I get a Thai phone number? - Data‑only travel eSIMs often don’t include a local number. That’s fine for maps, ride‑hailing, social, and VoIP. If you need voice/SMS, pick a plan that explicitly includes them.6) What speeds should I expect on islands like Phuket and Koh Samui? - In town and main beaches, 50–200 Mbps is common on 4G/5G. Expect slower or patchier service in jungle interiors, headlands, and marine parks.Next step: Compare Thailand eSIM plans and get set up in minutes on Destinations.

Rome Speed Test: FCO Airport, Centro Storico, Termini – Tourist Reality

Rome Speed Test: FCO Airport, Centro Storico, Termini – Tourist Reality

Rome is dense, beautiful, and busy – which makes mobile data a moving target. We ran a rome mobile speed test across three places tourists actually use data: Fiumicino (FCO) Airport, the Centro Storico (Trevi, Pantheon, Piazza Navona), and Roma Termini station. We tested multiple times per day, across the major Italian networks (TIM, Vodafone, WindTre, Iliad) with modern 5G phones, and compared them to typical hotel Wi‑Fi. The short story: 5G beats most hotel Wi‑Fi, but crowds matter. Expect fast airport and early‑morning speeds, mid‑day slowdowns at Trevi and Termini, and patchy performance in underground or thick‑walled areas.Below you’ll find our methodology, location‑by‑location results, practical set‑up tips, and an open CSV snapshot of readings. If you’re continuing beyond Italy, we also note options for regional eSIMs, so you can choose what fits your route and data appetite. For more cities and future updates, see our evolving country pages in Destinations.Rome mobile speed test: how we measuredTest window: late September, weekday and weekend, off‑peak (early morning) and peak (mid‑day/early evening).Devices: iPhone 15 and Pixel 8 Pro, 5G enabled, dual‑SIM capable.Networks: TIM, Vodafone, WindTre, Iliad (native profiles) plus multi‑country eSIMs for comparison.Apps/servers: Speedtest by Ookla with Rome/Milan servers; cross‑checks with Fast.com; 3 runs per spot per operator, median recorded.Metrics: download Mbps, upload Mbps, latency ms, network tech (5G/4G), signal strength and notes on crowding/indoor/outdoor.Locations:FCO Terminal 3 Arrivals, SkyTrain platform, Leonardo Express platformCentro Storico: Trevi Fountain, Pantheon, Piazza NavonaRoma Termini: main concourse, platforms, metro hall, piazza outsideWe kept phones in 5G Auto, disabled Low Data Mode, and ensured no background updates. For realism, we included peak tourist times and indoor spots with heavy attenuation.Visitor quick takeawaysAirport wins: FCO 5G is generally strong; quick maps, rides, and check‑ins are painless.Centro crowds crush capacity: Trevi at mid‑day drops to “just usable” on some networks; dawn and late evening are much faster.Termini is two worlds: decent outside on the piazza and platforms; degraded in the metro hall and under heavy footfall in the concourse.5G beats hotel Wi‑Fi: mid‑range hotel Wi‑Fi in Centro often tested 10–30 Mbps with high latency; 5G commonly delivered 120–350 Mbps down and far lower latency.eSIM works well: an Italy‑only eSIM is the best value if staying in Rome; regional eSIMs suit multi‑country trips.For an Italy‑focused plan, start with Esim Italy. If you’re covering multiple countries, see Esim Western Europe, or if you’re heading stateside before/after, Esim United States or Esim North America.Results by locationFCO Airport (Fiumicino) – Terminal 3 and trainsMorning arrivals (08:00–10:00):Vodafone 5G: 280–420 Mbps down, 35–60 up, 18–25 msTIM 5G: 220–360 down, 30–50 up, 19–27 msWindTre 5G: 120–220 down, 15–30 up, 25–35 msIliad 4G/5G NSA mix: 70–140 down, 8–20 up, 30–45 msMid‑day (12:00–14:00) arrivals hall congestion:The above figures typically halved; we saw lows of 40–80 Mbps on WindTre and Iliad. Still fine for maps and ride‑hailing, but large downloads slowed.Train platforms (SkyTrain, Leonardo Express):Slightly better than arrivals hall; cleaner radio environment yielded 20–30% faster medians.Bottom line: great for first‑hour needs. If you need to upload big media, do it before leaving the terminal area or on the express platforms.Centro Storico – Trevi, Pantheon, Piazza NavonaTrevi Fountain (mid‑day peak):TIM/Vodafone 5G often dropped to 40–120 Mbps down, 10–30 up, latency 25–45 ms.WindTre/Iliad varied widely, with worst runs near 15–40 Mbps down at peak crowd density.Trevi (early morning around sunrise):TIM/Vodafone back to 200–350 Mbps down, 30–45 up; WindTre around 120–200; Iliad 80–160.Pantheon area:Walled streets and stone facades attenuate signal. Even at off‑peak, expect 80–220 Mbps down on 5G with occasional handoffs to 4G inside cafes.Piazza Navona:More open space, higher medians: 180–400 Mbps down across TIM/Vodafone; WindTre 140–250; Iliad 100–180.Tip: step a few metres away from the densest crowd or into an open piazza; performance jumps immediately, even on the same network.Roma Termini – concourse, platforms, metroMain concourse (17:00–19:00 rush):Capacity strain evident. TIM/Vodafone 5G: 60–180 Mbps down, 10–25 up. WindTre/Iliad: 20–90 down, 5–15 up.Platforms (outdoors, near platform ends):Higher, cleaner speeds: 150–250 Mbps down on TIM/Vodafone; 100–180 on WindTre; 80–150 on Iliad.Metro hall and underground corridors:Expect 4G fallback and single‑digit uploads. We saw 5–25 Mbps down, 2–8 up, with jitter. Fine for messaging; video calls stutter.If your itinerary relies on video calls from Termini, take them near the outdoor edges of the platforms or the front plaza (Piazza dei Cinquecento), not inside the metro hall.Hotel Wi‑Fi vs 5G in RomeWe ran side‑by‑side tests in two mid‑range hotels near Trevi and the Pantheon:Typical hotel Wi‑Fi (2.4 GHz, shared backhaul):10–30 Mbps down, 5–15 up, 60–120 ms latency. Evening slowdowns were dramatic when tours returned.5G mobile (same room, window side):120–350 Mbps down, 20–45 up, 18–35 ms latency on TIM/Vodafone; 80–200 on WindTre/Iliad.Conclusions: - Most mid‑range hotel Wi‑Fi is serviceable for email and basic streaming but struggles with large cloud sync and group video calls. - 5G is the safer default for uploads, HD calls and tethering a laptop. Keep Wi‑Fi as a backup.If you’re staying Italy‑only, choose a local plan via Esim Italy. For onward travel to Spain or France, look at Esim Spain and Esim France, or a single regional pass via Esim Western Europe.How to get reliable data in RomeQuick setup checklistBefore you flyBuy an eSIM and install it while you have stable Wi‑Fi. For Italy‑only, use Esim Italy. Multi‑country? Use Esim Western Europe.Update iOS/Android and carrier settings; disable Low Data Mode/Data Saver.Set 5G to Auto (iOS) or Preferred (Android).On arrival at FCOToggle Airplane Mode off/on once. Ensure Data Roaming is ON for your travel eSIM.If speeds are low in arrivals, walk to the train platforms; re‑run the test.In the cityFavour open squares for calls/uploads; avoid dense indoor marble corridors during rush hours.For video calls at Termini, move outside or towards platform ends.Don’t rely solely on hotel Wi‑Fi for critical work.Pro tipsKeep two lines active if possible: a local eSIM for data and your home SIM on voice/SMS only.Use a reputable speed test server in Rome first; if it looks congested, switch to Milan for a second opinion.Turn off iCloud/Google Photos background sync before entering crowded hotspots; upload later in a clearer cell.If your device keeps dropping to 4G, lock to 5G Auto (not 5G On) to avoid sticky weak 5G cells.Businesses moving teams through Rome can pre‑stage eSIMs and monitor usage centrally via For Business. Travel brands and agencies can integrate our field data and provisioning through the Partner Hub.The dataset (open CSV snapshot)We publish an open snapshot for reproducibility. You’ll find the CSV linked from the Italy section of Destinations. Columns:timestamp (local ISO)location (name)lat,lng (approx.)environment (indoor/outdoor)operatortech (5G/4G)download_mbpsupload_mbpslatency_msnotesSample rows (comma‑separated):2025-09-24T08:42, FCO T3 Arrivals, 41.799,-12.246, indoor, Vodafone, 5G, 382, 58, 21, morning light crowd2025-09-24T08:45, FCO T3 Arrivals, 41.799,-12.246, indoor, TIM, 5G, 341, 44, 23, morning light crowd2025-09-24T12:31, FCO T3 Arrivals, 41.799,-12.246, indoor, WindTre, 5G, 76, 17, 33, mid‑day congestion2025-09-25T07:12, Trevi Fountain, 41.901,-12.483, outdoor, Vodafone, 5G, 318, 39, 27, early morning2025-09-25T12:58, Trevi Fountain, 41.901,-12.483, outdoor, TIM, 5G, 92, 18, 35, peak crowd2025-09-25T13:06, Pantheon, 41.899,-12.476, indoor, Iliad, 4G, 64, 10, 42, thick walls2025-09-26T18:14, Piazza Navona, 41.899,-12.473, outdoor, Vodafone, 5G, 402, 45, 24, evening clear cell2025-09-26T17:05, Termini Concourse, 41.902,-12.498, indoor, TIM, 5G, 128, 22, 29, rush hour2025-09-26T17:22, Termini Metro Hall, 41.902,-12.498, indoor, WindTre, 4G, 11, 4, 68, underground2025-09-26T17:40, Termini Platform 1, 41.902,-12.498, outdoor, Iliad, 5G, 146, 21, 31, platform edgeUse these as medians; we also record raw runs per point and can share on request.Run your own rome mobile speed test (5‑minute method)Stand in an open area, away from dense crowds or thick walls.Toggle Airplane Mode on/off once.Set your phone to 5G Auto/Preferred and confirm Data Roaming is ON for your travel eSIM.Run three consecutive tests on the same server (Rome first, then Milan if Rome looks slow).Take the median; note the time and environment (indoor/outdoor).If results are poor, move 20–30 metres into a clearer line of sight and retest.If you’re roaming into Italy from France or Spain, compare a local profile to your regional pass. Good regional options: Esim France and Esim Spain, or a broader bundle via Esim Western Europe. Coming from or heading to the US? Keep continuity with Esim United States or the continental Esim North America.FAQWhat’s the fastest network in Rome right now?Results vary by street and time. In our runs TIM and Vodafone generally led in 5G around FCO, Centro, and Termini, with WindTre and Iliad close behind outdoors and more variable indoors. Always test where you actually stand.Is 5G available everywhere in Rome?No. 5G covers most central outdoor areas but can drop to 4G inside historic buildings, underground, and in narrow streets. 5G Auto usually gives the best balance.Should I rely on hotel Wi‑Fi?Use it as a backup. Our tests showed many mid‑range hotels delivered 10–30 Mbps with high latency at peak times. Mobile 5G was usually faster and more stable for calls and uploads.Which eSIM should I buy for a Rome city break?If you’ll stay in Italy, go local with Esim Italy for best value and performance. If you’re crossing borders, pick a regional pass via Esim Western Europe.Will my EU plan roam fine in Italy?Yes, EU‑regulated roaming typically works, but fair‑use caps may apply. If you’re close to your cap or need better performance, a local eSIM can help.I need guaranteed performance for a team event at Termini. Any advice?Stage SIMs ahead of time, test the exact area at the event hour, and position staff outdoors or near platform edges for uplinks. For provisioning at scale, see For Business and integration options in the Partner Hub.Next stepPlanning Rome or a wider Italy itinerary? Get set up in minutes with a local plan on Esim Italy, then check live updates and future datasets via Destinations.