Why Does Phone Connectivity Matter So Much on an Alps Ski Circuit?
Staying connected on a multi-country Alps ski circuit isn't a luxury — it's a safety essential. Navigation apps guide you between resorts, weather alerts warn of incoming storms, and emergency services in remote mountain terrain depend on a working mobile signal. According to the GSMA's 2025 Mobile Economy Europe report, 4G LTE coverage now reaches over 96% of the European population, but mountain valleys and high-altitude pistes are a very different story — signal can drop to 2G or disappear entirely above 2,000 m.
The Alps ski circuit — typically looping through Chamonix (France), Zermatt or Verbier (Switzerland), Courmayeur (Italy), and Innsbruck or St. Anton (Austria) over 10 days — crosses four distinct regulatory environments. Three of those countries (France, Italy, Austria) fall under EU roaming rules; Switzerland sits outside the EU and outside the European Economic Area for roaming purposes. That single fact changes everything about how you should plan your connectivity.
Quotable stat: EU roaming rules cap wholesale data rates at €2.00 per GB in 2026 (European Commission, roaming regulation), but those caps apply only within the EU/EEA — Switzerland is exempt, which is why standard "Europe" plans often fail Swiss skiers.
Here's what this guide covers: the best eSIM strategy for all four countries, resort-by-resort signal realities, how to set up your device before you leave home, and a comparison of plan types so you can choose the right one for your trip.
What's the Best eSIM Strategy for a 4-Country Alps Circuit?
The best strategy for a France–Switzerland–Italy–Austria ski circuit is a regional European eSIM that explicitly lists all four countries in its coverage, activated before departure. This avoids the single biggest pitfall — plans that cover EU countries but exclude Switzerland — and gives you one data pool to manage across the entire trip rather than juggling four separate SIMs or plans.
There are three realistic approaches, each with trade-offs:
Option 1: A Single Multi-Country European eSIM (Recommended)
A regional eSIM covering 30–40+ European countries, Switzerland included, is the cleanest solution. You install one eSIM profile, and your phone automatically connects to the strongest available network in each country. No manual switching, no border panic, no hunting for a SIM shop in a ski resort village.
What to look for:
- Switzerland explicitly listed in the coverage map (not just "EU countries")
- At least 10 GB of data for a 10-day trip (more on data budgeting below)
- Validity of 15–30 days so activation flexibility isn't an issue
- Hotspot/tethering support if you're traveling with a tablet or laptop
Simology's Western Europe eSIM covers France, Switzerland, Italy, and Austria in a single plan — exactly the four countries on this circuit.
Option 2: Country-Specific eSIMs for Each Destination
Buying separate eSIMs for France, Switzerland, Italy, and Austria gives you maximum data per country but requires switching profiles at each border — which means knowing exactly when you cross, and remembering to do it while navigating mountain roads. It's also typically more expensive in total.
This approach makes sense only if you're spending 3+ nights in each country and want a large data allocation for a specific leg (say, a remote work week in Zermatt).
Option 3: Your Home Carrier's International Roaming
For EU countries, your home carrier's roaming add-on may be cost-effective — especially if you're from the UK (post-Brexit roaming rules vary by carrier) or the US with a carrier that offers flat-rate international plans. The catch: Switzerland will almost certainly be either excluded or priced at a premium day-rate. Check your carrier's Switzerland rate card before relying on this.
How Much Data Do You Actually Need for 10 Days of Skiing?
For a 10-day Alps ski circuit, plan for a minimum of 10–15 GB of data — roughly 1–1.5 GB per day. Heavy users who stream music on the lifts, use video navigation, or video call home daily should budget 20 GB or more.
Here's a realistic daily data breakdown for a ski trip:
| Activity | Estimated Data Use |
|---|---|
| Navigation (Google Maps / ski app) | 150–300 MB/day |
| Weather apps + resort conditions | 50–100 MB/day |
| Messaging (WhatsApp, iMessage) | 50–100 MB/day |
| Social media (browsing, posting photos) | 200–400 MB/day |
| Streaming music (Spotify offline = 0) | 100–200 MB/day |
| Video calls (30 min) | 200–400 MB/day |
| Total (moderate user) | 750 MB – 1.5 GB/day |
One thing that catches skiers off guard: resort apps. Ski apps like Fatmap, Slopes, or resort-specific apps (used for live trail maps, avalanche bulletins, and lift wait times) can burn through 100–300 MB per session if they're not caching data over WiFi first. Download offline maps at your hotel each morning to cut this dramatically.
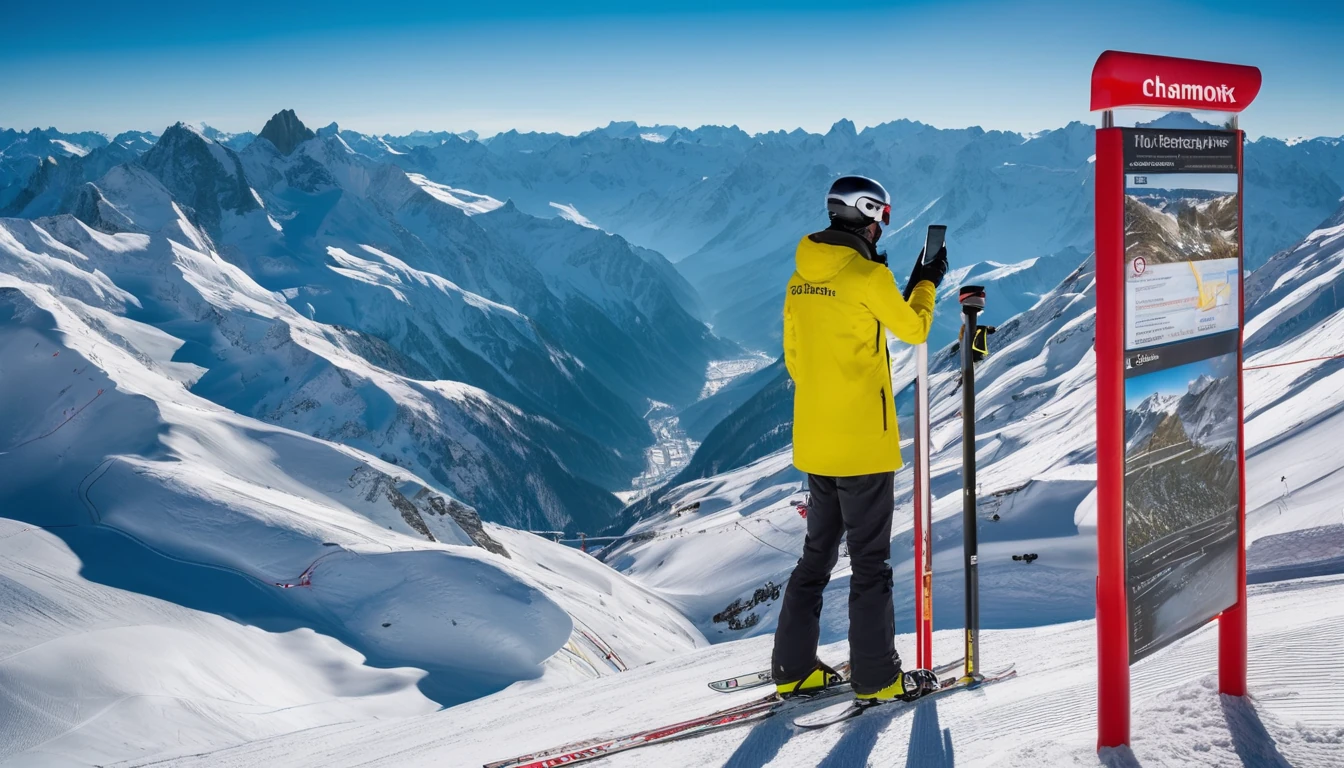
What Is the Mobile Signal Actually Like on Alpine Ski Resorts?
Signal quality on Alpine ski resorts varies enormously — from strong 4G LTE in resort villages to complete dead zones on high-altitude runs and inside mountain restaurants. Understanding the pattern helps you plan rather than be frustrated.
France: Chamonix and the Grands Montets
Chamonix town has solid 4G coverage. On the Aiguille du Midi cable car route and the Grands Montets glacier runs, signal drops to 2G or zero above approximately 2,800 m (9,200 ft). The Vallée Blanche off-piste route — one of the world's great ski descents — has almost no signal for most of its 22 km length. Download your maps offline before you go.
Switzerland: Zermatt, Verbier, and Saas-Fee
Switzerland's mountain infrastructure is world-class, and mobile coverage reflects that. Zermatt's Matterhorn glacier runs have surprisingly good 4G coverage thanks to dedicated antenna installations on the gondola pylons. Verbier's Four Valleys network is patchier above 3,000 m. Note that Switzerland uses its own national network — your eSIM must include Swiss coverage, not just EU roaming.
Italy: Courmayeur and the Aosta Valley
Courmayeur, connected to Chamonix via the Mont Blanc Tunnel, has reasonable 4G in the village and on the main Checrouit plateau. The Aosta Valley resorts (Cervinia, La Thuile) have decent mid-mountain coverage but expect gaps on the highest runs approaching the Swiss border at Cervinia/Zermatt.
Austria: Innsbruck, St. Anton, and the Arlberg
Austria consistently ranks among Europe's best for 4G coverage density. The Arlberg region (St. Anton, Lech, Zürs) has strong 4G across most of the ski area, including on-mountain restaurants and gondola stations. Innsbruck's Nordkette is well-covered. Austria's BEREC 2024 report on EU mobile coverage confirms Austria among the top three EU states for 4G rural coverage — a genuine advantage for skiers.
Does a European eSIM Work in Switzerland?
This is the most common — and most costly — misunderstanding among Alps circuit skiers. Switzerland is not an EU or EEA member, so EU roaming regulations do not apply there. Many "Europe" eSIM plans cover 30+ EU/EEA countries but silently exclude Switzerland, or include it with a separate, higher-rate data bucket.
Before purchasing any plan for this circuit, verify:
- Switzerland is explicitly listed in the country coverage table (not just implied by "Europe")
- Switzerland data comes from the same shared pool as the other countries — not a separate, capped allocation
- The plan connects to the major local networks in Switzerland (not just a single partner network with limited reach)
If your plan fails the Switzerland test, you have two fallback options: buy a Swiss-specific eSIM add-on before crossing the border, or pick up a local prepaid SIM in Geneva or Zurich. The latter requires an unlocked phone and a physical nano-SIM slot — not ideal if you're traveling light.
How Do You Set Up and Activate an eSIM Before Your Ski Trip?
Setting up an eSIM for your Alps circuit takes about five minutes and should be done at home, on WiFi, at least 24 hours before departure. The process is the same across iPhone, Google Pixel, and Samsung Galaxy devices.
Step-by-Step Activation
- Purchase your plan — choose a Western Europe or multi-country plan that covers all four countries on your circuit.
- Receive your QR code — delivered instantly to your email or accessible in the provider's app.
- Go to Settings → Mobile Data (or Cellular) → Add eSIM on your device.
- Scan the QR code — your phone downloads the eSIM profile in under 30 seconds.
- Label the eSIM — name it "Alps Trip" or similar so you can easily identify it in your settings.
- Set data routing — set your travel eSIM as the default data line; keep your home SIM active for calls and texts.
- Enable Data Roaming on the travel eSIM line — this is the step most people forget, and it's what actually allows the eSIM to connect abroad.
- Test it — toggle airplane mode off and confirm the eSIM connects to a network (you can do this at home; it won't use data until you arrive).
Device Compatibility: What to Check
Not every phone supports eSIM, and not every eSIM-capable phone supports multiple eSIM profiles simultaneously. Here's a quick reference:
| Device | eSIM Support | Dual eSIM (2 active) | Notes |
|---|---|---|---|
| iPhone 15 / 16 series | ✅ Yes | ✅ Yes (2 active) | US models: eSIM-only (no physical SIM slot) |
| iPhone 13 / 14 series | ✅ Yes | ⚠️ 1 active at a time | Can store multiple, switch manually |
| Samsung Galaxy S24/S25 | ✅ Yes | ✅ Yes | Check regional variant — some lack eSIM |
| Google Pixel 7/8/9 | ✅ Yes | ✅ Yes | Full eSIM support across all variants |
| Older Android (pre-2022) | ⚠️ Varies | ❌ Usually no | Check manufacturer specs |
Important: If you have a carrier-locked phone, contact your home carrier before your trip to confirm eSIM unlocking. Most carriers unlock devices after 12 months of service, but policies vary.
Country-by-Country Connectivity Snapshot
A quick reference for what to expect in each leg of your Alps circuit, covering network generation, typical speeds, and any quirks worth knowing.
France
France's major networks provide 4G LTE across all major ski resort towns. 5G is rolling out in larger Alpine cities (Grenoble, Annecy) but is largely absent from high-altitude resort areas as of 2026. Expect 4G in Chamonix village and 2G/no signal on the highest runs. France is an EU member — standard EU roaming rules apply.
Switzerland
Switzerland's networks are among Europe's most reliable, with high-altitude coverage infrastructure that rivals any country on the circuit. 5G is available in Zermatt and Verbier villages. Switzerland is not in the EU/EEA — your eSIM must explicitly cover Swiss networks. Data speeds in resort villages typically reach 50–150 Mbps on 4G LTE.
Italy
Italy has strong 4G coverage in resort villages across the Aosta Valley and Dolomites. The border areas between Italy and Switzerland (Cervinia/Zermatt corridor) can produce network hand-off issues — your phone may briefly connect to a Swiss network while technically in Italy, consuming data from a different pool if your plan separates them. A unified multi-country plan eliminates this headache. Browse Italy eSIM options for country-specific plans if needed.
Austria
Austria is the strongest performer on this circuit for consistent on-mountain 4G coverage. The Arlberg region in particular has seen significant network investment since 2023. Austria is an EU member, and 5G is available in Innsbruck and St. Anton village centers. Check out Austria eSIM options if you want a dedicated Austrian plan for a longer stay.
What Are the Best Ski Apps to Use — and How Much Data Do They Need?
The right apps can transform your ski trip, but they need to be configured correctly to avoid burning through your data allowance on the mountain.
Essential Apps for the Alps Circuit
Navigation & Trail Maps
- Fatmap (now Outdooractive): The gold standard for 3D ski trail mapping across all four countries. Download resort maps over WiFi the night before. Offline mode uses near-zero data.
- Ski Tracks: GPS-based run tracker. Records speed, vertical, and distance. Uses GPS only — no data required once the app is open.
- Resort-specific apps: Most major resorts (Chamonix, Zermatt, Courmayeur, St. Anton) have official apps with live lift status. These require a small data connection for updates — typically 5–20 MB per session.
Safety & Weather
- MeteoBlue Mountain: Highly accurate Alpine weather forecasting. Download the day's forecast over WiFi; updates use minimal data.
- Avalanche.report: Free pan-Alpine avalanche bulletin covering all four countries. Essential reading every morning. Very low data use.
- What3words: Emergency location sharing using a three-word address system. Used by Alpine rescue services across all four countries. Tiny data footprint, potentially life-saving.
Translation & Payments
- Google Translate offline packs: Download French, German, and Italian packs over WiFi. Zero data needed on-mountain.
- Google Maps offline areas: Download each resort region before you go. Saves hundreds of MB of navigation data.
How Do You Handle Connectivity in Mountain Huts and Remote Refuges?
Mountain huts (refuges in French, rifugi in Italian, Hütten in German/Austrian) are a beloved part of Alps skiing culture — but their WiFi is notoriously unreliable. Plan accordingly.
Most high-altitude mountain restaurants and refuges have WiFi, but it's typically satellite-based, shared among dozens of guests, and painfully slow during lunch rush. Treat it as a bonus, not a backup plan.
Practical tips for hut connectivity:
- Download everything you need (maps, weather, trail conditions) at your hotel before heading up the mountain each morning.
- Use your eSIM data for quick checks — avalanche bulletin, a WhatsApp message, a photo upload — rather than streaming or large downloads.
- If you're doing a multi-day hut-to-hut ski touring route (common in the Haute Route between Chamonix and Zermatt), carry a personal locator beacon (PLB) or satellite communicator (Garmin inReach) as a primary emergency device. Mobile signal cannot be relied upon for rescue in remote terrain.
Alps Circuit Connectivity: Country Comparison Table
| Country | EU Roaming Rules | Typical Resort Signal | 5G in Resort Villages | eSIM Required Coverage |
|---|---|---|---|---|
| France 🇫🇷 | ✅ Yes | 4G in village, 2G/none high-alt | ❌ Not yet (2026) | EU/EEA plan sufficient |
| Switzerland 🇨🇭 | ❌ No | 4G–5G excellent | ✅ Yes (Zermatt, Verbier) | Must be explicitly listed |
| Italy 🇮🇹 | ✅ Yes | 4G in village, gaps at borders | ❌ Limited (2026) | EU/EEA plan sufficient |
| Austria 🇦🇹 | ✅ Yes | 4G–5G strong, best on circuit | ✅ Yes (Innsbruck, St. Anton) | EU/EEA plan sufficient |
What Should You Do If Your eSIM Loses Signal on the Mountain?
Losing signal on a ski mountain is common and usually temporary — but knowing the difference between a coverage gap and a genuine eSIM problem saves you from unnecessary stress.
Step 1: Don't panic. High-altitude signal gaps are normal. Ski down to a lower elevation or into the resort village, and signal will typically return automatically.
Step 2: Toggle airplane mode. Turning airplane mode on for 10 seconds and then off forces your phone to re-scan for available networks. This resolves most "stuck on 2G" or "no service" situations at the boundary of coverage zones.
Step 3: Check your APN settings. If you've crossed into a new country and your data has stopped working entirely, check that Data Roaming is still enabled on your travel eSIM line. Some phones reset this setting after a reboot.
Step 4: Manually select a network. Go to Settings → Mobile Data → Network Selection → Manual, and choose from available networks. This is useful at the Italy–Switzerland border near Cervinia, where your phone may be confused about which network to use.
Step 5: Contact your eSIM provider. If data has stopped working and the above steps haven't helped, most eSIM providers offer live chat support. Keep your provider's support link bookmarked — accessible over hotel WiFi if mobile data is down.
FAQ
Do I need separate eSIMs for each country on an Alps ski circuit?
No — a single regional European eSIM that explicitly covers France, Switzerland, Italy, and Austria is all you need. The key is confirming Switzerland is included, since it's not an EU member and is often excluded from "Europe" plans. A Western Europe eSIM covering all four countries is the most convenient and usually the most cost-effective option.
Why doesn't my "Europe" eSIM work in Switzerland?
Switzerland is not a member of the EU or the European Economic Area, so EU roaming regulations don't apply there. Many "Europe" eSIM plans cover EU and EEA countries only, silently excluding Switzerland. Always check the plan's country list before purchasing — Switzerland must be explicitly named, not just implied.
How much data do I need for 10 days of skiing in the Alps?
Plan for 10–15 GB for moderate use (navigation, messaging, social media, weather apps) over 10 days. Heavy users who stream music, video call daily, or use data-intensive apps should budget 20 GB or more. Downloading offline maps and resort apps over hotel WiFi each morning can cut your daily data use by 30–50%.
Will my eSIM work on the ski slopes, or only in resort villages?
Your eSIM will work wherever a mobile signal exists — which in the Alps means good coverage in resort villages and valley floors, patchy 4G on mid-mountain runs, and often no signal above 2,500–3,000 m (8,200–9,800 ft). This is a network infrastructure limitation, not an eSIM issue. Download offline maps before heading up the mountain each day.
Can I use my eSIM for emergency calls on the mountain?
Yes — in an emergency, your phone will attempt to connect to any available network regardless of your eSIM plan, including making emergency calls (112 in all four countries) even without a data connection. However, for serious backcountry or off-piste skiing, a dedicated personal locator beacon or satellite communicator is strongly recommended as a primary emergency device.
Is it safe to activate my eSIM at the airport or should I do it before I leave?
Always activate your eSIM at home, on WiFi, at least 24 hours before departure. Airport WiFi is unreliable, and QR code scanning requires a stable connection. Activating in advance also lets you troubleshoot any issues — wrong device settings, compatibility problems — while you still have time to fix them.
What happens to my eSIM data when I cross from Italy into Switzerland near Cervinia?
At the Italy–Switzerland border near Cervinia/Zermatt, your phone may briefly connect to a Swiss network even while you're technically still in Italy. If your plan treats Swiss data separately from EU data, this can cause unexpected data deductions from your Swiss allocation. A unified multi-country plan with a single shared data pool eliminates this border-crossing issue entirely.
Which countries on the Alps circuit have the best mobile coverage for skiing?
Austria consistently has the best on-mountain 4G coverage of the four countries, with strong signal across most of the Arlberg ski area. Switzerland is excellent in resort villages and has invested heavily in gondola-pylon antenna infrastructure. France and Italy have solid village coverage but more frequent signal gaps on high-altitude runs above 2,500 m.
Your Alps Circuit Connectivity Checklist
Before you pack your ski boots and board your flight, run through this quick checklist to make sure you're fully prepared:
- eSIM plan confirmed — covers France, Switzerland, Italy, and Austria explicitly
- Data allowance checked — at least 10 GB for moderate use, 20 GB for heavy use
- eSIM activated at home — QR code scanned, profile installed, data roaming enabled
- Offline maps downloaded — each resort region saved in Google Maps or Fatmap
- Avalanche.report bookmarked — check every morning before heading out
- What3words installed — emergency location sharing in all four countries
- Emergency number saved — 112 works across all four countries
- Hotel WiFi plan — download resort apps, weather, and maps each morning to conserve data
A 10-day Alps ski circuit is one of the great travel experiences in Europe — four countries, four ski cultures, and hundreds of kilometers of terrain. Don't let a connectivity gap turn a powder day into a stressful one. Get your eSIM sorted before you leave, download your maps the night before, and focus on the skiing.
For country-specific plans if you're extending your trip, explore France eSIM options and Switzerland eSIM options for dedicated coverage on those legs of your journey.