UK eSIM & Mobile Internet Guide (2025): Best Plans, 5G, Fair‑Use

Blog

UK eSIM & Mobile Internet Guide (2025)...

UK eSIM & Mobile Internet Guide (2025): Best Plans, 5G, Fair‑Use

30 Oct 2025

UK eSIM & Mobile Internet Guide (2025): Best Plans, 5G, Fair‑Use

Planning a UK trip in 2025? An eSIM is the fastest, most reliable way to get online the moment you land at Heathrow (LHR) or Gatwick (LGW). This guide cuts through the noise: what to buy, how to activate in minutes, where 5G actually works, and fair‑use rules that can catch travellers out. UK operators have largely switched off 3G, so you’ll rely on 4G/5G for data and VoLTE for calls. With a travel eSIM, you’ll keep your home SIM for texts and banking codes while using local‑rate data for maps, ride‑hailing and streaming. If you’re also heading into Europe, there are multi‑country options that save you swapping plans at every border.

Below, you’ll find best‑fit plan advice, airport steps that just work, and practical tips to avoid bill shock. When you’re ready to pick a plan, browse UK options via Destinations or choose a regional pass such as Esim Western Europe if you’ll cross into the EU.

Quick take: Should you use an eSIM in the UK in 2025?

  • It’s the fastest way to connect at LHR/LGW—no kiosks, no queues.
  • 5G is widely available in cities and major towns; 4G covers most of the country.
  • 3G is being turned off; make sure your phone supports VoLTE and eSIM.
  • Fair‑use on “unlimited” plans often means speed caps after a threshold.
  • Data‑only eSIMs pair well with WhatsApp/FaceTime for calls and messages.
  • Multi‑country trips? Use Esim Western Europe instead of juggling multiple eSIMs.

Pro tip: Keep your home SIM active for OTPs/SMS, but disable its data roaming to avoid accidental charges.

Best UK eSIM plans for travellers in 2025

Every itinerary is different, but these profiles usually fit:

  • Long weekend (3–5 days): 3–5 GB data. Enough for maps, socials, rides and light streaming.
  • One week: 10–15 GB. Adds headroom for navigation, video calls and hotspotting.
  • Two weeks: 20–30 GB. Good for frequent tethering and HD streaming.
  • A month or remote work: 40–50 GB or “unlimited” (with a fair‑use threshold). Check hotspot allowance.

What to look for:

  • 5G access: Not all plans include 5G. If speeds matter, choose a plan that explicitly supports 5G.
  • Hotspot/tethering: Allowed on most travel eSIMs, but sometimes capped. Verify in the plan details.
  • Validity and top‑ups: Make sure the plan’s validity covers your full trip. Prefer plans that allow in‑app top‑ups.
  • Coverage partners: UK networks vary by region (see coverage section). If you’ll be outside big cities, 4G reach matters more than peak 5G speed.

Browse UK options via Destinations. If your trip includes France, Italy or Spain, compare regional coverage on Esim Western Europe or country‑specific pages such as Esim France, Esim Italy and Esim Spain.

For teams, pooled data and centralised billing are available via For Business.

5G, coverage and speeds: what to expect

UK networks (EE, O2, Vodafone, Three) offer strong urban coverage and improving 5G outside cities.

  • Cities and large towns: Expect reliable 5G in central London, Birmingham, Manchester, Glasgow, Edinburgh, Leeds, Bristol, Liverpool and Belfast. Typical 5G speeds range 100–300 Mbps in busy areas, often higher off‑peak.
  • Motorways and rail: 4G is common; 5G along main corridors is growing but can fluctuate at speed and in tunnels.
  • Rural and coastal: 4G dominates; 5G spotty but expanding. Prioritise plans with robust 4G partners.
  • Indoors: Older buildings can attenuate signal. Wi‑Fi calling (via apps) is your friend.

Technology notes for 2025:

  • 3G shutdown: Largely complete across the UK. You’ll rely on 4G/5G for data and VoLTE for voice. Data‑only eSIMs work fine for app‑based calling.
  • 2G fallback: Not relevant for data; some networks retain 2G for legacy voice. Don’t depend on it.
  • Device support: Most recent iPhone, Google Pixel and Samsung Galaxy models support eSIM + 5G in the UK.

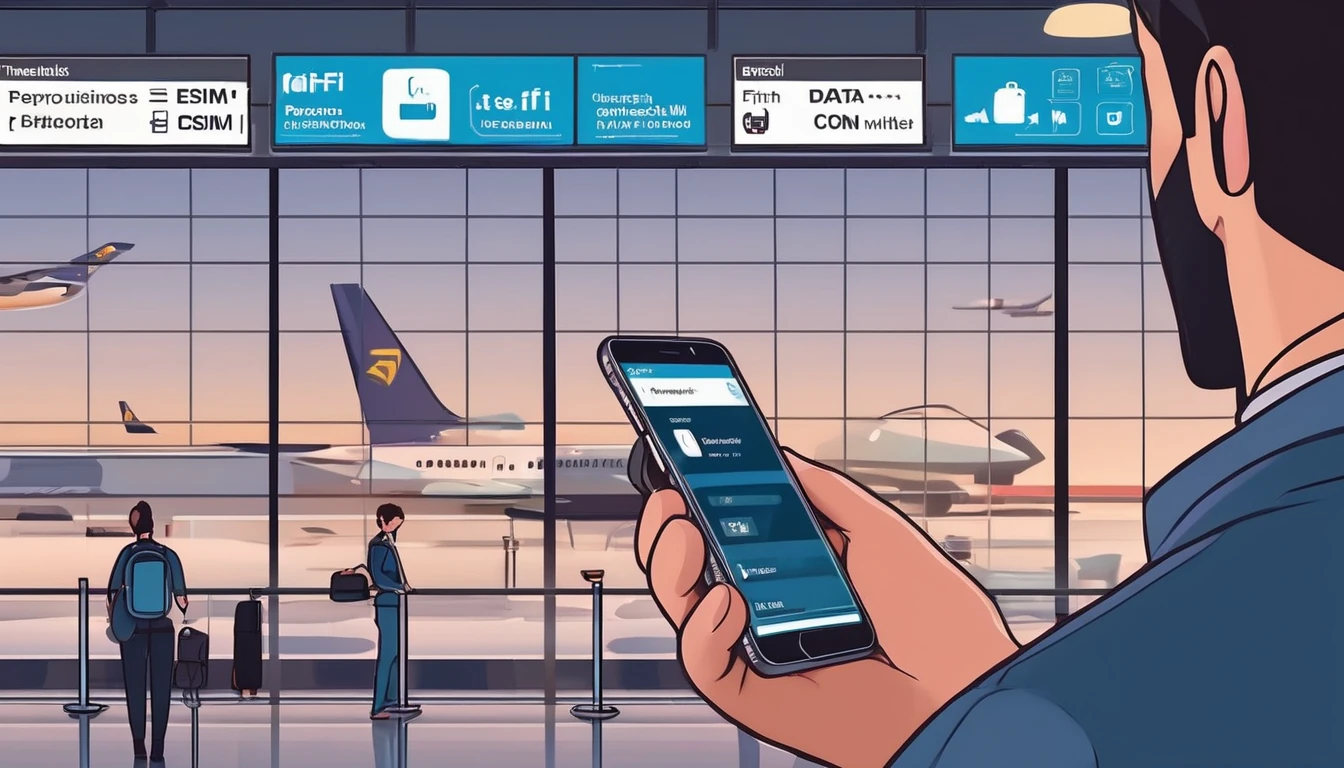
Heathrow (LHR) and Gatwick (LGW): connect in minutes

Before you fly (5‑minute prep)

  • Buy and install your eSIM profile while you have reliable Wi‑Fi.
  • Name it “UK eSIM” so you can recognise it later.
  • Turn off data roaming on your home SIM. Leave it on for calls/SMS if needed.
  • Download offline maps for the UK area you’ll visit.
  • Screenshot your eSIM QR and plan details in case you need to re‑install.

After landing: step‑by‑step

  1. Disable Airplane Mode once you’re clear of the jet bridge.
  2. Turn on your “UK eSIM” line and enable data roaming for that line.
  3. Set “UK eSIM” as your Mobile Data line; keep your home SIM as Calls/SMS if you need incoming texts.
  4. Wait up to 2 minutes for network registration. Move towards the concourse for better signal if needed.
  5. Open a browser to test a page. If no data: - Check APN settings in the eSIM plan instructions. - Toggle 5G Auto/4G in Mobile Data Options. - Reboot your phone.

Heathrow and Gatwick provide free terminal Wi‑Fi if you need it to complete installation. Connect to the airport network, complete any quick sign‑in, then activate your eSIM.

Troubleshooting at LHR/LGW

  • “No Service” on eSIM: Ensure the eSIM is set as the data line and data roaming is on for that line only.
  • Stuck on 3G/No 5G: With 3G being retired, you should see 4G or 5G. If not, toggle Network Selection to Automatic; try rebooting.
  • Slow speeds in arrivals hall: Large crowds can congest cells. Walk a minute toward baggage claim or landside for a stronger signal.

Pro tip: If you’re transiting straight to the EU after a UK stopover, consider a regional plan like Esim Western Europe to avoid swapping eSIMs mid‑trip.

Fair‑use, throttling and roaming nuance

Fair‑use policies matter in the UK, especially post‑Brexit:

  • “Unlimited” often isn’t truly unlimited. Many plans apply a high‑speed data threshold per day or per plan. After that, speed may be throttled until the next day or until you top up.
  • Tethering may be capped. Some plans allow hotspotting but at reduced speeds or with a separate allowance. Check the plan notes.
  • UK vs EU roaming: The UK is outside the EU. EU operators can set their own UK roaming rules and may charge or cap usage. If you’re relying on an EU eSIM in the UK, verify UK coverage and fair‑use before you fly.
  • Multi‑country plans: Some regional eSIMs include both UK and EU. If your route spans the UK, France, Spain or Italy, a single regional pass (e.g., Esim Western Europe) simplifies travel.

Tip for business travellers: To avoid surprises across multiple users, use pooled allowances and policy controls via For Business.

How to set up and manage your UK eSIM

Most travellers will install via QR. If you’re already at the airport, use the terminal Wi‑Fi for a smooth setup.

iPhone (iOS 16+)

  1. Settings > Mobile Data > Add eSIM.
  2. Scan QR or enter details manually.
  3. Label the plan “UK eSIM”.
  4. Set as Mobile Data line; leave your home SIM for Calls/SMS if needed.
  5. Enable Data Roaming for the “UK eSIM”.
  6. In Mobile Data Options, set Voice & Data to 5G Auto (or 4G if coverage is better).
  7. Test data; apply APN if instructed.

Android (Pixel/Samsung)

  1. Settings > Network & Internet > SIMs > + Add eSIM.
  2. Use QR or activation code.
  3. Set the eSIM as the Preferred SIM for Mobile Data.
  4. Turn on Data Roaming for that eSIM.
  5. Preferred network type: 5G/4G (Auto).
  6. Add APN if required, then toggle Mobile Data off/on to register.

Managing during your trip:

  • Prioritise the eSIM for data only. Keep home SIM data off.
  • Monitor usage in Settings and the eSIM app/portal.
  • Need more data? Top up the same eSIM rather than installing a new one.

Alternatives: physical SIM, roaming and hotspots

  • Physical UK SIM: Works, but you’ll queue at a kiosk, show ID, and swap cards. eSIM is faster and keeps your number active.
  • Roaming on your home carrier: Convenient but expensive, with strict fair‑use and daily caps in many cases.
  • Portable hotspot/MiFi: Good for groups, but another battery to charge and carry. A phone eSIM with tethering is simpler for most.

Pro tips to avoid bill shock and keep service working

  • Turn off data roaming on your home SIM. Only the UK eSIM should have data roaming enabled.
  • Disable Wi‑Fi Assist/Adaptive Connectivity if it triggers unintended mobile data use when Wi‑Fi is weak.
  • Pre‑download offline maps and playlists to reduce mobile data load.
  • Use a browser with data saver enabled for routine browsing.
  • Keep your eSIM QR/activation code saved offline for emergencies.
  • For multi‑country trips, use a regional eSIM like Esim Western Europe rather than stacking single‑country plans.
  • For US stopovers en route, compare Esim United States or wider Esim North America.

Partners and travel pros: Explore co‑branded solutions and affiliate tools via the Partner Hub.

Planning a multi‑country itinerary?

Avoid SIM‑swapping. If your route includes the UK and EU:

FAQ: UK eSIM essentials

  • Do I need an unlocked phone?
  • Yes. Your device must be carrier‑unlocked and eSIM‑capable to use a UK travel eSIM.
  • Will I get a UK phone number?
  • Most travel eSIMs are data‑only and do not issue a local number. Use WhatsApp, FaceTime, Telegram or a VoIP app (e.g., Skype) for calls and texts.
  • Does 5G work with all eSIMs and phones?
  • You need three things: a 5G‑capable phone, a plan that includes 5G, and 5G coverage where you are. If any link is missing, you’ll fall back to 4G.
  • Is tethering/hotspot allowed?
  • Usually yes, but some plans cap hotspot speeds or usage. Check the plan details before purchase.
  • How’s coverage in rural areas and on trains?
  • 4G is widespread; 5G is expanding but patchier outside cities. Expect variable service in deep countryside, valleys and tunnels.
  • Can I keep my WhatsApp with my home number?
  • Yes. WhatsApp and similar apps are tied to your account, not your active SIM. Your home SIM can stay in the phone for SMS while your eSIM handles data.

Next step: Compare UK and regional eSIM plans and pick the right fit for your trip via Destinations.

Read more blogs

Andes Highlights (3 Weeks): Peru–Bolivia–Chile–Argentina Connectivity

Andes Highlights (3 Weeks): Peru–Bolivia–Chile–Argentina Connectivity

Planning a south america itinerary 3 weeks through the high Andes? This route stitches together Peru’s Sacred Valley, Bolivia’s La Paz and Salar de Uyuni, Chile’s Atacama Desert, and northern Argentina’s quebradas or Mendoza wine country—often by long-distance bus and a couple of short flights. Connectivity is different at altitude: coverage is strong in cities but drops in high passes and salt flats; bus Wi‑Fi is patchy; border towns can be blackspots. The smart move is an eSIM with multi‑country coverage, backed by offline maps, offline translations, and a simple routine for crossing borders by bus without losing service. Below you’ll find a practical, connectivity-first itinerary; checklists to prep your phone, apps and documents; and on-the-ground tips for staying online where it matters: booking transport, hailing taxis, backing up photos, and navigating when the signal disappears.If you’re transiting via Europe or North America, you can also add a layover eSIM to stay connected door-to-door. Start with our country list on Destinations, then follow the steps, and you won’t waste time chasing SIM shops at 3,500 metres.The 3‑week Andes route at a glanceWeek 1: Peru (Cusco, Sacred Valley, Machu Picchu) - Fly into Cusco (or Lima then connect). - Base in Cusco; day trips to Pisac/Chinchero/Maras–Moray. - Train to Aguas Calientes; Machu Picchu visit; return to Cusco or continue to Puno/Lake Titicaca.Week 2: Bolivia and Chile (La Paz, Uyuni, San Pedro de Atacama) - Bus/collectivo via Copacabana to La Paz. - Fly or overnight bus to Uyuni. - 3‑day Uyuni–altiplano tour ending in San Pedro de Atacama (Chile).Week 3: Chile and Argentina (Atacama to Salta or Mendoza/Buenos Aires) - Choose: - North: San Pedro to Salta/Jujuy by bus; fly to Buenos Aires. - Or South: San Pedro–Calama flight to Santiago; bus or flight to Mendoza; onward to Buenos Aires.Connectivity notes (quick): - Cities: generally strong 4G/4G+; 5G in major hubs (Santiago, Buenos Aires). - Altitude/rural: expect long no‑signal stretches (Uyuni, altiplano passes, Paso Jama). - Bus Wi‑Fi: often advertised, rarely reliable. Plan to be offline onboard. - Border regions: networks switch; a multi‑country eSIM avoids sudden loss.eSIM vs local SIMs for a 4‑country tripFor a route with multiple borders and remote legs, eSIM wins on time and reliability.What a multi‑country eSIM gets you: - One plan across Peru, Bolivia, Chile, Argentina (check coverage per country on Destinations). - No passport/SIM registration queues at kiosks. - Keep your home number active on the physical SIM for calls/SMS codes. - Instant top‑ups if you burn data on photos or navigation.When a local SIM still helps: - Long stay in one country with heavy data use (e.g., a month in Buenos Aires). - Dead zones where a different local network performs better (rarely worth the hassle on a 3‑week pace).Practical approach: - Use an eSIM as your primary data line across all four countries. - If you find a specific local network far better in one region, add a cheap local SIM and keep the eSIM as backup.Device readiness checklist (before you fly)1) Check eSIM compatibility and SIM‑lock status on your phone.2) Buy and install your eSIM while on home Wi‑Fi. Keep a PDF/printed copy of the QR code.3) Label lines clearly (e.g., “eSIM Andes Data”, “Home SIM”).4) Turn on data roaming for the eSIM; leave roaming off for your home SIM to avoid charges.5) Set up dual‑SIM rules: data on eSIM; calls/SMS default to home SIM if needed.6) Download offline: Google Maps/Organic Maps for all target regions; language packs (Spanish at minimum); bus/air tickets; hotel confirmations.7) Cloud backups: set to upload on Wi‑Fi only; pre‑create shared albums for travel companions.8) Test tethering/hotspot with your laptop/tablet.If you’re transiting popular hubs, consider a short layover eSIM: - USA connections: add an Esim United States or a broader Esim North America.- Europe connections: Madrid/Barcelona? Use an Esim Spain. Paris or Rome? See Esim France and Esim Italy. Multi‑country layovers? Try Esim Western Europe.City‑by‑city connectivity notesCusco & the Sacred Valley (Peru)Coverage: Good in Cusco city; variable in high villages (Maras/Moray) and along Inca Trail approaches.Tips: Download Sacred Valley maps offline; pin viewpoints and ruins. most taxis use WhatsApp—save your accommodation’s number.Machu Picchu/Aguas Calientes: Patchy to none at the citadel. Upload your photos later; don’t rely on live ticket retrieval.Lake Titicaca: Puno and CopacabanaPuno: Reasonable 4G; bus terminals crowded—screenshot QR tickets.Crossing to Copacabana: Expect a signal drop around the border; have directions saved offline.La Paz (Bolivia)Good urban 4G; the cable car network has decent signal but tunnels do not.Yungas/“Death Road” tours: Mountain valleys cause dead zones—share your emergency contacts with the operator, carry a charged power bank, and don’t plan remote calls.Uyuni and the Altiplano (Bolivia to Chile)Uyuni town: OK 4G; ATMs finicky—use Wi‑Fi for banking apps.Salt flats/lagunas: Assume offline for most of the 3‑day tour. Guides often carry satellite phones; agree a pickup time/place in San Pedro and preload your map route.San Pedro de Atacama (Chile)Town: Solid 4G; accommodations often have Wi‑Fi but speeds vary.Geysers, Valle de la Luna: Offline navigation essential; sunrise trips start before mobile networks wake up in some areas.Salta/Jujuy or Mendoza/Buenos Aires (Argentina)Salta/Jujuy: Good city coverage; quebradas have long no‑signal sections.Mendoza: City 4G/5G; vineyards outside town can be patchy.Buenos Aires: Strong 4G/5G; ideal for cloud backups and large downloads before you fly home.Border crossings by bus: step‑by‑stepThe big ones on this route: Peru–Bolivia (Puno/Copacabana), Bolivia–Chile (Uyuni–San Pedro via Hito Cajón), Chile–Argentina (Paso Jama to Salta or Los Libertadores to Mendoza).How to keep service and sanity:1) The day before:- Top up your eSIM data.- Confirm your plan includes both countries you’re entering/leaving.- Download offline maps for both sides of the border and your town of arrival.- Save bus company WhatsApp and terminal address offline.2) On departure morning:- Keep a paper copy or offline PDF of tickets, insurance, and accommodation proof.- Charge phone and power bank; pack a short cable in your daypack.3) On the bus:- Don’t count on bus Wi‑Fi. Keep your eSIM as primary, but expect drops near mountain passes.- If your phone supports it, enable “Wi‑Fi calling” for later when you reach accommodation Wi‑Fi.4) At the border posts:- Data may be unavailable. Keep QR codes and booking numbers offline.- After exiting one country and entering the next, toggle Airplane Mode off/on to re‑register on the new network.- If the eSIM doesn’t attach, manually select a network in Mobile Settings.5) Arrival:- Send your accommodation a quick WhatsApp when you’re back online.- Recheck your eSIM’s data roaming is on; confirm you’re on an in‑country network, not a weak roaming partner.Pro tips: - Dual profiles: If your eSIM allows, keep a secondary profile for a different network in the same country—helpful in border towns.- Cash buffer: Some border terminals don’t accept cards; download a currency converter for offline use.Offline survival kit (5‑minute setup)Maps: Download regions for Cusco, Sacred Valley, Puno, La Paz, Uyuni, San Pedro, Salta/Jujuy or Mendoza, and Buenos Aires.Translations: Download Spanish for offline use; add phrasebook favourites (bus tickets, directions, dietary needs).Documents: Save PDFs of passports, tickets, hotel addresses; star them for quick access.Rides: Screenshots of pickup points; pin bus terminals and hotel doors.Entertainment: Podcasts and playlists for long bus legs, set to download on Wi‑Fi only.Altitude and your tech: what changesCoverage gaps lengthen: Fewer towers at high altitude; valleys can block signal. Assume offline on remote excursions.Batteries drain faster in cold: Keep your phone warm and carry a power bank (10,000–20,000 mAh).Hotel Wi‑Fi may be congested: Schedule big uploads (photo backups, app updates) for big-city stays like Santiago or Buenos Aires.GPS still works offline: Your blue dot shows on offline maps without data—preload everything.Data budgeting for 3 weeksTypical traveller usage across this route: - Messaging/Maps/Bookings: 0.2–0.5 GB/day- Social and photo sharing: 0.3–0.7 GB/day- Occasional video calls/streaming: 0.5–1.0 GB/dayFor a mixed-use trip, plan 15–25 GB for 3 weeks. Heavy creators should double it and upload over hotel Wi‑Fi when possible. If you work remotely, consider a higher‑capacity plan and a backup eSIM; see our guidance on For Business.Practical route with transport and connectivity cuesDays 1–4 Cusco base: Strong city signal; day trips may be spotty—go offline-ready.Days 5–6 Machu Picchu: Expect no service at the ruins; sync tickets ahead.Days 7–8 Puno to La Paz via Copacabana: Border signal drop; re‑register networks after crossing.Days 9–11 Uyuni tour to San Pedro: Treat as offline; charge nightly; carry spare cables.Days 12–14 San Pedro: Stable in town; tours offline; top up data before Paso Jama.Days 15–17 Salta/Jujuy or Mendoza: Good urban 4G; rural patches are offline.Days 18–21 Buenos Aires: Strongest connectivity of the trip; clear your uploads and map downloads for the flight home.Partnering and stopover extrasHospitality and tour operators in the Andes: help your guests stay connected—explore co‑branded solutions via our Partner Hub.Transatlantic flyers: test your eSIM setup on a layover with an Esim United States or Esim Western Europe before hitting high-altitude blackspots.FAQs1) Do I need a local SIM in each country?No. A multi‑country eSIM covering Peru, Bolivia, Chile and Argentina is simpler and works well for a 3‑week pace. Consider a local SIM only if you’ll spend longer in one country and want the absolute best regional coverage.2) Will my WhatsApp number change with an eSIM?No. WhatsApp is tied to your registered number, not your data line. Keep your home SIM active for voice/SMS (roaming off if you wish), and use the eSIM for data—WhatsApp continues as normal.3) Can I hotspot to my laptop or camera?Yes. Enable tethering on your eSIM. Mind your data: cloud backups and OS updates can burn gigabytes—set them to Wi‑Fi only or schedule in big cities.4) What if there’s no signal on the Uyuni/Atacama legs?That’s expected. GPS still works offline. Pre-download maps and translations, carry a power bank, and sync plans with your tour operator before departure.5) Will I get roaming charges at borders?If you’re using a multi‑country eSIM with coverage in both countries, you won’t incur extra roaming fees from your home carrier. Keep roaming off on your home SIM to avoid accidental use.6) I’m connecting via Europe or the US—worth getting a layover eSIM?Yes. It’s an easy way to test your setup and stay reachable. Try Esim North America or country options like Esim Spain, Esim France, or Esim Italy for common hubs.Next step: Browse South America coverage options and build your plan on Destinations.

Apple Watch Cellular with eSIM: Add a Plan & Fix Common Errors

Apple Watch Cellular with eSIM: Add a Plan & Fix Common Errors

Apple Watch with Cellular keeps you connected when your iPhone stays in the hotel safe or runs out of battery. The catch: Apple Watch uses an embedded eSIM that must be provisioned by a compatible carrier, and it’s not the same process as scanning a travel eSIM QR code on your phone. This guide walks you through a reliable apple watch esim setup, including prerequisites most people miss, watchOS steps for adding a plan, how to fix common pairing and activation errors, and battery-saving tweaks for travellers. We also cover roaming realities so you know what works abroad and what doesn’t. If you’re heading to the US, Europe, or anywhere in between, we’ve included regional pointers and links to help you plan coverage alongside your iPhone’s travel eSIM.Before you start: what you needCheck these requirements first. Most Apple Watch activation issues trace back to one of these points.A Cellular-capable Apple Watch model (GPS + Cellular).Examples include Apple Watch Series (GPS + Cellular), SE (GPS + Cellular), and Ultra/Ultra 2.An iPhone running the latest iOS, paired with your watch, signed into iCloud with two‑factor authentication enabled.A mobile plan with a carrier that supports Apple Watch cellular service in your country.Notes:In most regions, the watch must use the same carrier as your iPhone (NumberShare/OneNumber-style plans).Many carriers only support postpaid accounts; prepaid support varies.Family Setup (watch line independent from the iPhone’s carrier) is supported in select countries and on specific carriers.An eligible plan feature for Apple Watch (ask your carrier for “Apple Watch cellular add‑on”).Strong Wi‑Fi or mobile data during setup.Traveller notes:International roaming on Apple Watch is supported on select carriers and watchOS versions. Even then, it’s not universal. Confirm roaming eligibility for the watch add‑on specifically—not just your phone plan.Switching your iPhone to a travel eSIM does not automatically transfer service to the watch unless that travel eSIM carrier supports Apple Watch plans in your destination.Planning a trip? Compare regional coverage and data options for your iPhone via: - Destinations - Esim North America and Esim United States - Esim Western Europe, Esim France, Esim Italy, and Esim SpainHow to set up Apple Watch Cellular (standard pairing)This is the most common apple watch esim setup when your watch shares your iPhone’s number.1) Update everything- On iPhone: Settings > General > Software Update.- On Watch: Watch app > General > Software Update.- Install any “Carrier Settings Update” if prompted.2) Confirm iCloud and two‑factor authentication- iPhone: Settings > [Your Name] > iCloud (signed in) and Password & Security (2FA On).3) Open the Watch app on iPhone- Tap My Watch tab > Mobile Data (or Cellular).4) Tap Set Up Mobile Data- Follow your carrier’s flow. You’ll log in to your carrier or confirm the plan add‑on.- Approve any charges and complete identity checks.5) Wait for activation- The Watch app will show “Activating” or “In Progress”. This may take a few minutes. Keep iPhone and Watch nearby on Wi‑Fi.6) Verify on the Watch- On Watch: Settings > Mobile Data (or Cellular). Status should show “Connected” or “On” once activation completes.7) Test calls/data- Turn off Bluetooth on iPhone to force the watch to use its own connection.- Make a call from the Watch or send an iMessage.- Re‑enable Bluetooth afterwards.Pro tips: - If you’re asked for the watch EID, find it on Watch: Settings > General > About > EID.- Some carriers require you to be on the latest bill cycle or have no account restrictions (e.g., spending caps). Clear those first.How to set up Family Setup (watch uses its own number)Use this when the watch will be used by a family member without their own iPhone, or when your carrier supports a separate watch line.1) Reset or unpair the watch if previously paired.2) On iPhone: Open Watch app > All Watches > Pair New Watch > Set Up for a Family Member.3) Follow on‑screen steps to create/manage the family member’s Apple ID.4) When prompted, set up Mobile Data for the watch and choose the carrier plan.5) Complete activation and test calls/data from the watch.Limitations: Not all features are available in Family Setup (e.g., some health data). Roaming availability may differ from standard pairing.Verify connection and status iconsGreen antenna icon on the watch face/control centre: Cellular active.White antenna icon: Connected but not currently in use (e.g., using Wi‑Fi or Bluetooth link to iPhone).Red X: No connection.SOS: Emergency services only.On Watch: Settings > Mobile Data shows the connected network and data usage.Common pairing and activation errors (and fixes)Below are the errors travellers see most often, plus the quickest fixes. Work through them in order.1) “Unable to add plan” or “No eligible account”- What it means: Your carrier account or plan doesn’t support Apple Watch, or a billing restriction is blocking activation.- Fix: - Confirm your carrier supports Apple Watch on your specific plan type (postpaid vs prepaid, business/corporate lines).- Remove spending caps or data bars.- If you’re on a corporate plan, ask your admin to enable watch add‑ons. Business travellers can share requirements using For Business.2) Plan stuck on “Activating”- Fix: - Leave iPhone and Watch on Wi‑Fi with chargers for 10–15 minutes.- Restart both devices.- On iPhone: Settings > General > About (wait for a carrier settings prompt).- In Watch app: Mobile Data > Remove your plan, then add again.- If it persists, ask your carrier to reprovision the eSIM for your watch (they may need the watch EID).3) “Plan not in use” or no bars on the watch- Fix: - On Watch: Settings > Mobile Data > ensure Mobile Data is On.- Toggle Airplane Mode off/on.- Move to an area with good coverage for your carrier.- If travelling, check Data Roaming setting (watchOS 9+): Settings > Mobile Data > Data Roaming On, and confirm roaming is enabled on your watch add‑on with the carrier.4) Calls or SMS fail when the iPhone is off- What it means: NumberSync/OneNumber isn’t fully activated, or your plan doesn’t support standalone calling.- Fix: - Re‑check with carrier that “Apple Watch number sharing” is active and provisioned for voice/SMS.- Try unpairing/re‑pairing the watch, then add Mobile Data again.5) Switching iPhone to a travel eSIM breaks watch service- What it means: The travel eSIM carrier on your iPhone doesn’t support Apple Watch.- Fix: - Keep your home carrier line active for the watch, and use the travel eSIM for data on the iPhone.- Or rely on Wi‑Fi and Bluetooth (leave Mobile Data off on the watch to save battery).- Consider carriers in your destination that support watch add‑ons if long‑stay (check local options via Destinations).6) Business/corporate line restrictions- Symptoms: Won’t add a plan; portal login required.- Fix: Contact your company telecom admin. Share this guide and point them to For Business for traveller policies and approvals. Partners can also coordinate via the Partner Hub.If all else fails:- Unpair and re‑pair the watch (Watch app > All Watches > Info > Unpair Apple Watch). Set up again and add Mobile Data.- On iPhone: Settings > General > Transfer or Reset > Reset > Reset Network Settings (you’ll re‑enter Wi‑Fi passwords).- Ask the carrier to remove and re‑add the Apple Watch add‑on, then re‑activate.Travelling with Apple Watch Cellular: what actually worksSet expectations before you fly:Roaming support varies. Even with watchOS 9+, your carrier must support Apple Watch roaming on your specific plan. Without it, the watch falls back to your iPhone connection (Bluetooth/Wi‑Fi).Dual SIM on iPhone does not equal dual SIM on Apple Watch. The watch typically mirrors one line and can store multiple plans in some markets, but only one is active and you’re limited to carriers that support Apple Watch.Travel eSIM QR codes for your iPhone won’t provision the watch. Apple Watch activation goes through the Watch app’s carrier flow only.Recommended approach for most travellers: - Put a travel eSIM on your iPhone for data and local rates (see Esim North America, Esim Western Europe, Esim United States, Esim France, Esim Italy, Esim Spain). - Keep your home line active on the iPhone if you rely on watch number-sharing.- On the watch, leave Mobile Data off unless you know your carrier supports roaming for the watch. Use Bluetooth/Wi‑Fi tethering from the iPhone instead.How to enable/disable roaming on Apple Watch: - On Watch: Settings > Mobile Data > Data Roaming. Turn On only if your carrier confirms support and you understand the charges.Battery-saving tips for travellersCellular on a watch is power‑hungry, especially when roaming. Use these to extend life on the go:Use Low Power Mode during travel days: Watch Settings > Battery > Low Power Mode.Disable Mobile Data when you don’t need standalone connectivity: Watch Settings > Mobile Data > Off.Turn off Data Roaming unless actively required.Reduce notifications and Background App Refresh: Watch app on iPhone > Notifications; General > Background App Refresh.Turn off Always On display (if supported): Settings > Display & Brightness > Always On.During workouts, enable Workout Power Saving Mode: Watch app > Workout > Low Power Mode.Keep the iPhone nearby and connected via Bluetooth—watch will use less power than LTE.Quick checklist (print/screenshot for your trip)Latest iOS/watchOS installed; carrier settings updated.Same carrier for iPhone and watch, or Family Setup with a supported carrier.Apple Watch plan add‑on active; roaming confirmed (if needed).Travel eSIM installed on iPhone for local data; home line left active if you rely on watch number-sharing.On watch: Mobile Data Off by default; toggle On only when needed.Battery saver settings configured before departure.FAQ1) Can I install a travel eSIM QR code directly on my Apple Watch?No. Apple Watch cellular is provisioned only through the Watch app’s Mobile Data/Cellular setup with carriers that support Apple Watch. QR code travel eSIMs for phones won’t work on the watch.2) Do I need the same carrier on my iPhone and watch?In most countries, yes—the watch shares your phone number using the same carrier. Family Setup allows a separate plan with supported carriers, but it’s not available everywhere.3) Will my Apple Watch roam internationally?Sometimes. It requires a carrier and watch plan that explicitly support Apple Watch roaming. Even if your iPhone roams, the watch may not. Confirm with your carrier before travel, and keep Data Roaming off unless approved.4) I switched my iPhone to a travel eSIM and now the watch won’t connect—why?Your new travel eSIM likely doesn’t support Apple Watch add‑ons. Keep your home line active for number-sharing, or use the watch via Bluetooth/Wi‑Fi without Mobile Data. For iPhone travel data, browse options via Destinations.5) Can business accounts add Apple Watch plans?Yes, if the company’s carrier and policy allow it. Ask your telecom admin to enable the watch add‑on. For guidance, see For Business and share the Partner Hub with your provider.6) How do I move my watch plan to a new iPhone?First pair your watch to the new iPhone, then open the Watch app > Mobile Data and follow your carrier’s instructions. You may need to remove and re‑add the plan. Keep both devices updated and signed into the same Apple ID.Next stepPlan your iPhone’s travel data first, then decide whether you need watch roaming at all. Start with regional options on Destinations, and keep your watch connected via Bluetooth/Wi‑Fi unless your carrier confirms Apple Watch roaming support.

App Permissions Abroad: Camera, Mic, Location — What to Allow?

App Permissions Abroad: Camera, Mic, Location — What to Allow?

Travelling amplifies the stakes of your phone’s privacy settings. New apps, roaming networks, and unfamiliar environments can pressure you into tapping “Allow” just to get moving. But the wrong permission at the wrong time can expose your location, microphone, camera, contacts or photos more widely than you intend. This guide gives clear, situation-based advice for app permissions travel: which permissions to grant, when to grant them temporarily, and how to audit them before, during and after your trip. We’ll walk through common travel scenarios (maps, ride‑hail, banking, airports) and outline the least‑privilege settings that keep everything working without oversharing. If you’re using mobile data via an eSIM — whether you’re hopping between cities in Esim Western Europe or heading stateside with Esim United States — you’ll also reduce risk by avoiding unknown Wi‑Fi networks. Let’s make your phone useful, not chatty.Why permissions matter more when you travelNew apps in new countries often ask for broad permissions by default. Approve only what’s essential for the task.Location data is especially valuable abroad — GPS traces can reveal hotel addresses, daily routes and spending patterns.Mobile OSs now offer granular controls: “Allow once”, “While using the app”, “Approximate” location, “Selected photos”, “Notifications: Time‑Sensitive only”. Use them.Connectivity choices affect how much data apps can siphon in the background. A secure mobile data connection (e.g., via Esim France, Esim Spain or Esim North America) gives you more predictable behaviour than random public Wi‑Fi.Quick rules of thumb (use this checklist on the road)Location: Allow “While using the app”. Turn off “Precise” unless you need door‑to‑door navigation or ride pickup.Camera: Allow only when actively scanning (QR/boarding passes/ID verification). Revoke afterwards.Microphone: Allow only for calls/voice search/translation. Otherwise deny.Photos/Media: Prefer “Selected photos” (iOS) or “Photos and videos” without “Manage all files” (Android). Avoid full library access.Contacts: Deny by default. Share specific contacts via the share sheet if needed.Calendar: Allow temporarily for flight or booking apps if they auto‑add events; otherwise deny.Bluetooth/Nearby devices: Allow only for trackers (AirTag/Tile) or wearables you’re using. Deny for random apps.Notifications: Allow but limit to Time‑Sensitive for airlines, banking and ride‑hail. Disable promotional alerts.Background refresh: Disable for data‑hungry apps you don’t need updating silently while travelling.Permission-by-permission guidanceLocationWhen to allow: - Maps and navigation: “While using the app”. Enable “Precise” for walking/driving directions and offline maps. - Ride‑hail (Uber/Bolt/Grab): “While using”. Precise location improves pickup accuracy; you can turn precise off after your ride. - Weather, airport apps, bike/scooter hire: “While using”. Approximate is usually enough. - Banking: Some banks use location to help detect fraud. Start with “While using” and deny “Always”.Temporary vs permanent: - iOS: Prefer “Allow Once” or “While Using the App”. Avoid “Always”. - Android 12+: Choose “Only this time” or “While app is in use”. Avoid “Allow all the time”.How to set it: - iOS: Settings > Privacy & Security > Location Services > [App] > set “While Using the App” and toggle Precise Location as needed. - Android: Settings > Location > App location permissions > [App] > choose “Allow only while using the app” and consider turning off “Use precise location”.Pro tips: - Download offline maps over Wi‑Fi before departure to reduce live location checks. - Disable photo geotagging in the Camera app if you’ll be sharing images publicly. - Turn off “Background App Refresh” for apps that don’t need continuous location.CameraWhen to allow: - QR code boarding passes, train tickets, payment codes. - ID/passport verification for airline, accommodation or car hire apps. - Depositing cheques or scanning documents into travel wallets.How to set it: - iOS: Settings > Privacy & Security > Camera > toggle per app. - Android: Settings > Privacy > Permission manager > Camera > [App] > Allow only when using the app.Pro tips: - Many apps now support in‑app scanners without needing perpetual camera access. Grant “While using” and review monthly. - Cover your phone’s lens isn’t necessary; just keep permissions tight and revoke after the task.MicrophoneWhen to allow: - Voice calls, VoIP, voice notes. - Voice search in maps. - Real‑time translation apps.How to set it: - iOS: Settings > Privacy & Security > Microphone > toggle per app. - Android: Settings > Privacy > Permission manager > Microphone > [App] > Allow only while using.Pro tips: - If you rarely use in‑app voice features, deny by default and respond to prompts case‑by‑case. - Disable “Hey Siri/Ok Google” if battery is tight or if you’re uncomfortable with always‑listening triggers.Photos/Media/StorageWhen to allow: - Messaging or social apps when you want to upload specific images. - Travel wallet apps that store scanned documents.Best practice: - iOS: Use “Selected Photos” or “Add Photos Only” instead of “Full Access”. - Android: Grant “Photos and videos” and avoid “Allow management of all files” unless it’s a trusted file manager.Pro tips: - Create a “Travel” album and grant access only to that album (iOS). - Export sensitive docs as password‑protected PDFs and keep them in a secure notes app rather than your camera roll.Contacts and CalendarWhen to allow: - Contacts: Only for messaging apps you genuinely use; otherwise share contacts ad‑hoc via the share sheet. - Calendar: Allow temporarily for airlines/hotels that auto‑add bookings; revoke after the trip.Pro tips: - Keep work and travel calendars separate. If you manage trips for a team, see For Business for coordinated connectivity while maintaining individual privacy controls.Bluetooth and Nearby DevicesWhen to allow: - AirTag/Tile, headphones, wearables, digital car keys, or hotel locks that explicitly require it.Risks: - Bluetooth can be used to infer location or track devices. Keep it off when not needed and deny app access unless essential.NotificationsWhen to allow: - Airline, rail and ride‑hail: Allow Time‑Sensitive/Critical alerts for gate changes and pickups. - Banking: Enable security/OTP notifications; disable marketing. - Social apps: Disable or set to “Deliver quietly” for focus and battery life.How to tune: - iOS: Settings > Notifications > [App] > choose Time‑Sensitive, banners and sounds. - Android: Long‑press a notification > turn off promotional categories; keep security alerts.Common travel scenarios: what to allowMaps and navigationAllow location “While using the app”.Enable “Precise” only when navigating turn‑by‑turn, then switch to Approximate.Deny microphone unless you use voice search.Optional notifications for saved places or transit alerts.Pro tip: Download offline maps over your Destinations before you go. With an eSIM like Esim Italy or Esim France, you can minimise risky Wi‑Fi use.Ride‑hailing (Uber, Bolt, Grab, Lyft)Location: “While using” + Precise for pickup. No need for “Always”.Camera: Allow when scanning payment or ID if prompted, then revoke.Microphone: Usually not required; allow only if you use in‑app calling.Notifications: Allow Time‑Sensitive for driver arrival and trip updates.Pro tip: Set pickup to a well‑lit public spot. Avoid sharing trip status to public feeds.Banking and money transferLocation: “While using” is often enough for fraud checks. Avoid “Always”.Camera: Allow only if depositing cheques or scanning IDs/documents.Microphone: Not usually needed; deny.Notifications: Enable security and transaction alerts; disable marketing.Biometrics: Keep Face ID/Touch ID on for faster, safer logins (not a permission per se, but good practice).Pro tip: Never install banking apps from links in messages abroad. Use your store’s official listing and a secure mobile connection via Esim United States or Esim North America when travelling across the region.Airline and airport appsLocation: “While using” for airport maps and lounge finders.Camera: Allow briefly for passport/ID scan if needed.Photos: “Selected Photos” if you upload vaccine cards or travel docs.Notifications: Allow Time‑Sensitive for boarding, gate changes and delays.Pro tip: Screenshot boarding passes so you’re not dependent on live access permissions at the gate.Messaging and socialPhotos: “Selected Photos”. Share one‑offs via the share sheet.Camera/Microphone: Allow “While using” when recording stories/voice notes, then review regularly.Contacts: Only if you truly need contact syncing; many apps work fine without it.Location: Avoid sharing precise location in posts; strip geotags if you’re posting in real‑time.Translation appsMicrophone: “While using” for live translation.Camera: “While using” for sign/menus OCR.Offline packs: Download in advance to reduce permission prompts and data usage.Temporary vs permanent access: use the OS featuresiOS: - Options: Allow Once, While Using the App, Always. - Prefer Allow Once for one‑off tasks (scanning a QR code at a museum). - Use While Using for navigation, ride‑hail and weather. - Toggle Precise Location per app. Keep a close eye on “Always” and remove it after the specific need ends.Android (12+): - Options: Only this time, While app is in use, Allow all the time (avoid). - Additional toggles: Precise/Approximate location; Photos and videos vs All files. - Use the Privacy Dashboard (Settings > Privacy > Privacy Dashboard) to see which apps accessed location, camera and mic in the last 24 hours and revoke anything suspicious.How to audit and reset permissions around your tripPre‑trip (10 minutes): 1. iOS: Settings > Privacy & Security > Location Services. Set most apps to “While Using”; disable Precise for social apps. 2. Android: Settings > Privacy > Permission manager. Review Location, Camera, Microphone, Photos/Media, Contacts. 3. Remove dormant apps you won’t need. 4. Download offline maps and translation packs on Wi‑Fi.On the road (2 minutes every few days): 1. Check the privacy indicators (green/orange dots on iOS; status bar icons on Android) for unexpected camera/mic use. 2. Open Privacy Dashboard (Android) or App Privacy Report (iOS) to spot background access. 3. Tighten anything noisy or unexpected.Post‑trip (5 minutes): 1. Revoke any “Always” or “Allow all files” permissions granted temporarily. 2. Delete travel‑specific apps you won’t use again. 3. Clear boarding passes and travel docs from shared albums; move sensitive copies to a secure notes app.Pro tip: If you manage a travelling team, standardise these settings across devices and use regional data plans, such as Esim Western Europe for multi‑country trips, to keep everyone on secure mobile data. See For Business.Connectivity choices reduce risky promptsMany intrusive permission prompts happen when apps struggle on flaky Wi‑Fi and push you to enable extra features “for reliability”. Using a reputable eSIM keeps things stable and reduces the need to over‑authorise: - City breaks: Esim France, Esim Italy, Esim Spain - Multi‑country: Esim Western Europe - Long‑haul: Esim United States, Esim North AmericaFAQ1) Do I need to allow precise location for maps abroad? - Only while actively navigating. For searching or browsing nearby places, approximate location is fine. Switch Precise on for the journey, then off.2) Will denying “Always allow” break ride‑hail pickup? - No. “While using the app” is enough. Keep Precise on during pickup for accuracy, then you can turn it off.3) Can apps track me via Bluetooth? - Some apps use Bluetooth beacons to infer location. Deny Bluetooth for apps that don’t need it and keep Bluetooth off when not using wearables or trackers.4) My airline app wants camera access — safe to allow? - Yes, if it’s for scanning passports or documents, but set it to “While using the app” and revoke after use. Avoid granting permanent access.5) How do I stop apps seeing my entire photo library? - On iOS, choose “Selected Photos” or “Add Photos Only”. On Android, grant “Photos and videos” and avoid “Manage all files”. Share files via the system share sheet when possible.6) Does my eSIM require special app permissions? - No. eSIM activation is handled by your device settings or a trusted carrier app. It doesn’t need camera/mic/location except when you scan a QR during setup. For reliable data on the move, choose a plan that covers your route via Destinations.Next step: Choose a secure, country‑ready data plan to cut risky Wi‑Fi and reduce intrusive prompts. Start with Destinations or go straight to a regional pack like Esim Western Europe.