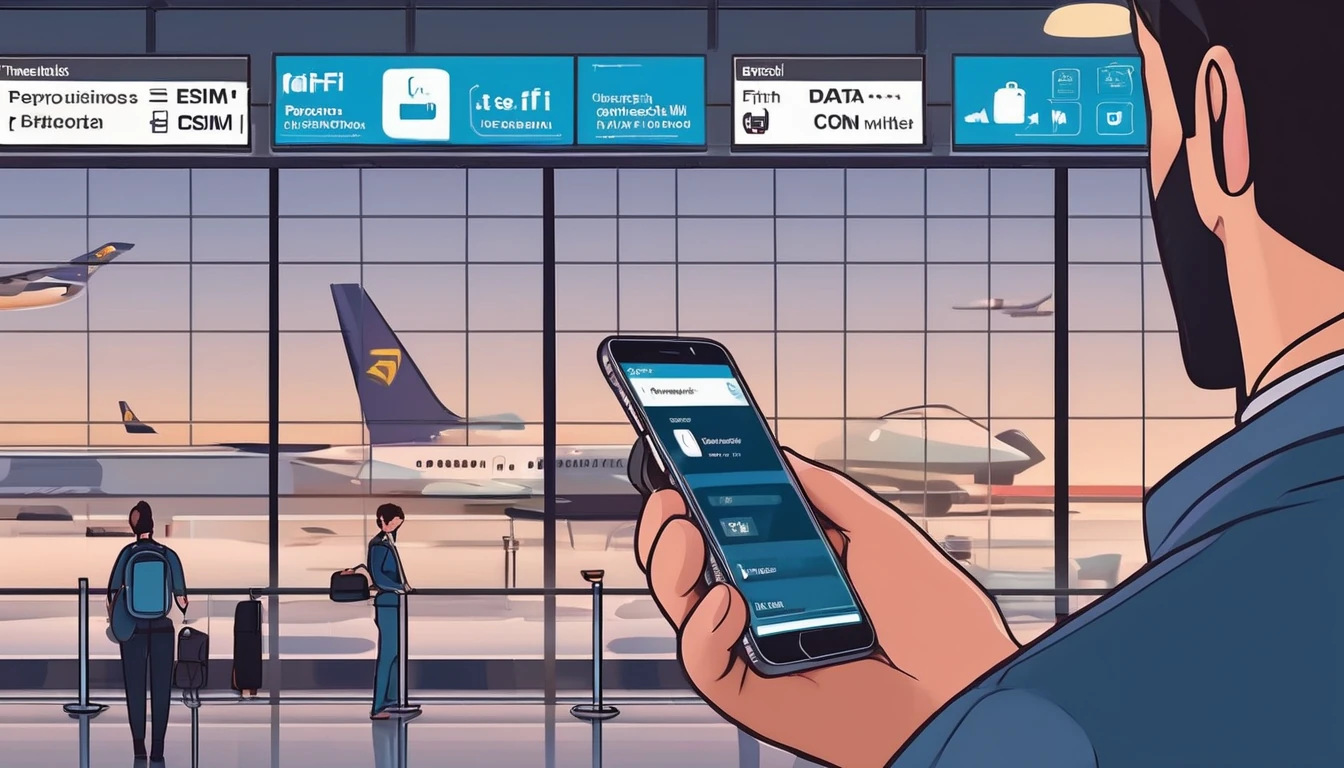
App Permissions Abroad: Camera, Mic, Location — What to Allow?

Blog

App Permissions Abroad: Camera, Mic, L...

App Permissions Abroad: Camera, Mic, Location — What to Allow?

30 Oct 2025

App Permissions Abroad: Camera, Mic, Location — What to Allow?

Travelling amplifies the stakes of your phone’s privacy settings. New apps, roaming networks, and unfamiliar environments can pressure you into tapping “Allow” just to get moving. But the wrong permission at the wrong time can expose your location, microphone, camera, contacts or photos more widely than you intend. This guide gives clear, situation-based advice for app permissions travel: which permissions to grant, when to grant them temporarily, and how to audit them before, during and after your trip. We’ll walk through common travel scenarios (maps, ride‑hail, banking, airports) and outline the least‑privilege settings that keep everything working without oversharing. If you’re using mobile data via an eSIM — whether you’re hopping between cities in Esim Western Europe or heading stateside with Esim United States — you’ll also reduce risk by avoiding unknown Wi‑Fi networks. Let’s make your phone useful, not chatty.

Why permissions matter more when you travel

  • New apps in new countries often ask for broad permissions by default. Approve only what’s essential for the task.
  • Location data is especially valuable abroad — GPS traces can reveal hotel addresses, daily routes and spending patterns.
  • Mobile OSs now offer granular controls: “Allow once”, “While using the app”, “Approximate” location, “Selected photos”, “Notifications: Time‑Sensitive only”. Use them.
  • Connectivity choices affect how much data apps can siphon in the background. A secure mobile data connection (e.g., via Esim France, Esim Spain or Esim North America) gives you more predictable behaviour than random public Wi‑Fi.

Quick rules of thumb (use this checklist on the road)

  • Location: Allow “While using the app”. Turn off “Precise” unless you need door‑to‑door navigation or ride pickup.
  • Camera: Allow only when actively scanning (QR/boarding passes/ID verification). Revoke afterwards.
  • Microphone: Allow only for calls/voice search/translation. Otherwise deny.
  • Photos/Media: Prefer “Selected photos” (iOS) or “Photos and videos” without “Manage all files” (Android). Avoid full library access.
  • Contacts: Deny by default. Share specific contacts via the share sheet if needed.
  • Calendar: Allow temporarily for flight or booking apps if they auto‑add events; otherwise deny.
  • Bluetooth/Nearby devices: Allow only for trackers (AirTag/Tile) or wearables you’re using. Deny for random apps.
  • Notifications: Allow but limit to Time‑Sensitive for airlines, banking and ride‑hail. Disable promotional alerts.
  • Background refresh: Disable for data‑hungry apps you don’t need updating silently while travelling.

Permission-by-permission guidance

Location

When to allow: - Maps and navigation: “While using the app”. Enable “Precise” for walking/driving directions and offline maps. - Ride‑hail (Uber/Bolt/Grab): “While using”. Precise location improves pickup accuracy; you can turn precise off after your ride. - Weather, airport apps, bike/scooter hire: “While using”. Approximate is usually enough. - Banking: Some banks use location to help detect fraud. Start with “While using” and deny “Always”.

Temporary vs permanent: - iOS: Prefer “Allow Once” or “While Using the App”. Avoid “Always”. - Android 12+: Choose “Only this time” or “While app is in use”. Avoid “Allow all the time”.

How to set it: - iOS: Settings > Privacy & Security > Location Services > [App] > set “While Using the App” and toggle Precise Location as needed. - Android: Settings > Location > App location permissions > [App] > choose “Allow only while using the app” and consider turning off “Use precise location”.

Pro tips: - Download offline maps over Wi‑Fi before departure to reduce live location checks. - Disable photo geotagging in the Camera app if you’ll be sharing images publicly. - Turn off “Background App Refresh” for apps that don’t need continuous location.

Camera

When to allow: - QR code boarding passes, train tickets, payment codes. - ID/passport verification for airline, accommodation or car hire apps. - Depositing cheques or scanning documents into travel wallets.

How to set it: - iOS: Settings > Privacy & Security > Camera > toggle per app. - Android: Settings > Privacy > Permission manager > Camera > [App] > Allow only when using the app.

Pro tips: - Many apps now support in‑app scanners without needing perpetual camera access. Grant “While using” and review monthly. - Cover your phone’s lens isn’t necessary; just keep permissions tight and revoke after the task.

Microphone

When to allow: - Voice calls, VoIP, voice notes. - Voice search in maps. - Real‑time translation apps.

How to set it: - iOS: Settings > Privacy & Security > Microphone > toggle per app. - Android: Settings > Privacy > Permission manager > Microphone > [App] > Allow only while using.

Pro tips: - If you rarely use in‑app voice features, deny by default and respond to prompts case‑by‑case. - Disable “Hey Siri/Ok Google” if battery is tight or if you’re uncomfortable with always‑listening triggers.

Photos/Media/Storage

When to allow: - Messaging or social apps when you want to upload specific images. - Travel wallet apps that store scanned documents.

Best practice: - iOS: Use “Selected Photos” or “Add Photos Only” instead of “Full Access”. - Android: Grant “Photos and videos” and avoid “Allow management of all files” unless it’s a trusted file manager.

Pro tips: - Create a “Travel” album and grant access only to that album (iOS). - Export sensitive docs as password‑protected PDFs and keep them in a secure notes app rather than your camera roll.

Contacts and Calendar

When to allow: - Contacts: Only for messaging apps you genuinely use; otherwise share contacts ad‑hoc via the share sheet. - Calendar: Allow temporarily for airlines/hotels that auto‑add bookings; revoke after the trip.

Pro tips: - Keep work and travel calendars separate. If you manage trips for a team, see For Business for coordinated connectivity while maintaining individual privacy controls.

Bluetooth and Nearby Devices

When to allow: - AirTag/Tile, headphones, wearables, digital car keys, or hotel locks that explicitly require it.

Risks: - Bluetooth can be used to infer location or track devices. Keep it off when not needed and deny app access unless essential.

Notifications

When to allow: - Airline, rail and ride‑hail: Allow Time‑Sensitive/Critical alerts for gate changes and pickups. - Banking: Enable security/OTP notifications; disable marketing. - Social apps: Disable or set to “Deliver quietly” for focus and battery life.

How to tune: - iOS: Settings > Notifications > [App] > choose Time‑Sensitive, banners and sounds. - Android: Long‑press a notification > turn off promotional categories; keep security alerts.

Common travel scenarios: what to allow

Maps and navigation

  • Allow location “While using the app”.
  • Enable “Precise” only when navigating turn‑by‑turn, then switch to Approximate.
  • Deny microphone unless you use voice search.
  • Optional notifications for saved places or transit alerts.

Pro tip: Download offline maps over your Destinations before you go. With an eSIM like Esim Italy or Esim France, you can minimise risky Wi‑Fi use.

Ride‑hailing (Uber, Bolt, Grab, Lyft)

  • Location: “While using” + Precise for pickup. No need for “Always”.
  • Camera: Allow when scanning payment or ID if prompted, then revoke.
  • Microphone: Usually not required; allow only if you use in‑app calling.
  • Notifications: Allow Time‑Sensitive for driver arrival and trip updates.

Pro tip: Set pickup to a well‑lit public spot. Avoid sharing trip status to public feeds.

Banking and money transfer

  • Location: “While using” is often enough for fraud checks. Avoid “Always”.
  • Camera: Allow only if depositing cheques or scanning IDs/documents.
  • Microphone: Not usually needed; deny.
  • Notifications: Enable security and transaction alerts; disable marketing.
  • Biometrics: Keep Face ID/Touch ID on for faster, safer logins (not a permission per se, but good practice).

Pro tip: Never install banking apps from links in messages abroad. Use your store’s official listing and a secure mobile connection via Esim United States or Esim North America when travelling across the region.

Airline and airport apps

  • Location: “While using” for airport maps and lounge finders.
  • Camera: Allow briefly for passport/ID scan if needed.
  • Photos: “Selected Photos” if you upload vaccine cards or travel docs.
  • Notifications: Allow Time‑Sensitive for boarding, gate changes and delays.

Pro tip: Screenshot boarding passes so you’re not dependent on live access permissions at the gate.

Messaging and social

  • Photos: “Selected Photos”. Share one‑offs via the share sheet.
  • Camera/Microphone: Allow “While using” when recording stories/voice notes, then review regularly.
  • Contacts: Only if you truly need contact syncing; many apps work fine without it.
  • Location: Avoid sharing precise location in posts; strip geotags if you’re posting in real‑time.

Translation apps

  • Microphone: “While using” for live translation.
  • Camera: “While using” for sign/menus OCR.
  • Offline packs: Download in advance to reduce permission prompts and data usage.

Temporary vs permanent access: use the OS features

iOS: - Options: Allow Once, While Using the App, Always. - Prefer Allow Once for one‑off tasks (scanning a QR code at a museum). - Use While Using for navigation, ride‑hail and weather. - Toggle Precise Location per app. Keep a close eye on “Always” and remove it after the specific need ends.

Android (12+): - Options: Only this time, While app is in use, Allow all the time (avoid). - Additional toggles: Precise/Approximate location; Photos and videos vs All files. - Use the Privacy Dashboard (Settings > Privacy > Privacy Dashboard) to see which apps accessed location, camera and mic in the last 24 hours and revoke anything suspicious.

How to audit and reset permissions around your trip

Pre‑trip (10 minutes): 1. iOS: Settings > Privacy & Security > Location Services. Set most apps to “While Using”; disable Precise for social apps. 2. Android: Settings > Privacy > Permission manager. Review Location, Camera, Microphone, Photos/Media, Contacts. 3. Remove dormant apps you won’t need. 4. Download offline maps and translation packs on Wi‑Fi.

On the road (2 minutes every few days): 1. Check the privacy indicators (green/orange dots on iOS; status bar icons on Android) for unexpected camera/mic use. 2. Open Privacy Dashboard (Android) or App Privacy Report (iOS) to spot background access. 3. Tighten anything noisy or unexpected.

Post‑trip (5 minutes): 1. Revoke any “Always” or “Allow all files” permissions granted temporarily. 2. Delete travel‑specific apps you won’t use again. 3. Clear boarding passes and travel docs from shared albums; move sensitive copies to a secure notes app.

Pro tip: If you manage a travelling team, standardise these settings across devices and use regional data plans, such as Esim Western Europe for multi‑country trips, to keep everyone on secure mobile data. See For Business.

Connectivity choices reduce risky prompts

Many intrusive permission prompts happen when apps struggle on flaky Wi‑Fi and push you to enable extra features “for reliability”. Using a reputable eSIM keeps things stable and reduces the need to over‑authorise: - City breaks: Esim France, Esim Italy, Esim Spain - Multi‑country: Esim Western Europe - Long‑haul: Esim United States, Esim North America

FAQ

1) Do I need to allow precise location for maps abroad? - Only while actively navigating. For searching or browsing nearby places, approximate location is fine. Switch Precise on for the journey, then off.

2) Will denying “Always allow” break ride‑hail pickup? - No. “While using the app” is enough. Keep Precise on during pickup for accuracy, then you can turn it off.

3) Can apps track me via Bluetooth? - Some apps use Bluetooth beacons to infer location. Deny Bluetooth for apps that don’t need it and keep Bluetooth off when not using wearables or trackers.

4) My airline app wants camera access — safe to allow? - Yes, if it’s for scanning passports or documents, but set it to “While using the app” and revoke after use. Avoid granting permanent access.

5) How do I stop apps seeing my entire photo library? - On iOS, choose “Selected Photos” or “Add Photos Only”. On Android, grant “Photos and videos” and avoid “Manage all files”. Share files via the system share sheet when possible.

6) Does my eSIM require special app permissions? - No. eSIM activation is handled by your device settings or a trusted carrier app. It doesn’t need camera/mic/location except when you scan a QR during setup. For reliable data on the move, choose a plan that covers your route via Destinations.

Next step: Choose a secure, country‑ready data plan to cut risky Wi‑Fi and reduce intrusive prompts. Start with Destinations or go straight to a regional pack like Esim Western Europe.

Read more blogs

EU Long Stays: Fair‑Use for Nomads & Students (90/180‑Day Rule)

EU Long Stays: Fair‑Use for Nomads & Students (90/180‑Day Rule)

Planning a long stretch around Europe? Here’s the traveller‑first guide to EU fair use on long stays. Confusion often comes from mixing two different systems: immigration rules (the Schengen 90/180‑day stay limit) and telecom rules (EU roaming fair use). They are not the same. Immigration limits how long you can stay. Telecom fair use limits how long you can roam on an EU plan before surcharges kick in. If you’re a student with local residency, you’re treated differently to a roaming nomad bouncing between countries. And regional eSIMs add a third option that avoids most “home vs abroad” checks altogether. This guide cuts through the jargon with plain‑English explanations, examples you can copy, and practical checklists to keep your connectivity clean and cost‑predictable. If you just want a solution: country eSIMs are best when you settle in one place; regional EU eSIMs shine for multi‑country hops. Keep reading for the details and how to choose.The quick version: Fair‑use vs 90/18090/180 rule: Immigration. Most visa‑exempt visitors can stay in the Schengen Area up to 90 days in any 180‑day period. Nothing to do with mobile plans.EU roaming fair use: Telecom. EU/EEA operators let their customers “roam like at home” across the EU. To stop permanent roaming, they can apply fair‑use checks over a four‑month window and, if triggered, add regulated surcharges after warning you.Regional travel eSIMs: These are made for roaming. They don’t rely on EU “roam like at home” privileges, so the home‑vs‑abroad test usually doesn’t apply. Instead, your limit is the plan’s validity and data allowance.For country coverage quirks (e.g., Switzerland, UK post‑Brexit), see Destinations.What the EU fair‑use policy actually says (for travellers)EU “Roam Like at Home” (RLAH) protects EU/EEA subscribers using their home mobile plan around the bloc. It applies primarily if you hold an EU plan with an EU operator.The home‑presence and usage test (4‑month window)Your EU operator can watch usage over at least four months. If both are true, they may flag permanent roaming:1) You’ve been more time “abroad” than “at home,” and2) You used more data while roaming than you did at home.If they detect this, they must warn you and give at least 14 days to change your pattern (e.g., use the line domestically or reduce roaming). If nothing changes, they can add small, regulated surcharges on roaming usage. Your service isn’t cut off, but costs rise.Data caps on “unlimited” plans while roamingIf your domestic plan is unlimited or very cheap per GB, your operator can set a specific fair‑use roaming data allowance, calculated from your plan price and EU wholesale caps. The allowance and any out‑of‑bundle surcharge must be clearly communicated. Always read the roaming section of your tariff.Residency or “stable links”Operators can ask for proof of residency or stable links (study, work) when you buy or keep a domestic plan. This isn’t immigration control; it’s to ensure domestic plans aren’t used as permanent roaming products.Warnings and surchargesYou’ll receive a warning before any fair‑use surcharge applies.Surcharges are capped by EU rules and reviewed periodically.Paying a surcharge doesn’t fix the root cause. If your lifestyle is long‑term roaming, reconsider your setup (see below).Note: RLAH covers EU/EEA. It does not automatically include Switzerland or the UK. Check Destinations before you go.Residency vs roaming: which bucket are you in?Students with a local contract (resident or stable link)If you study in, say, France and sign up for a French mobile plan using local documentation, France becomes your “home” for that line. Your everyday use in France typically outweighs your time abroad, so your weekend trips to Spain or a fortnight in Italy sit comfortably within fair use. For deeper country fit, see Esim France, Esim Spain and Esim Italy.Digital nomads and long‑stay visitors (non‑resident)If you don’t have EU residency and you rely on a single EU domestic SIM while rarely returning to its home country, you’re likely to trip the fair‑use test after a few months. Two cleaner options:Use country eSIMs in each country you stay in for a month or two; orUse a regional travel eSIM designed for roaming around Europe.How regional eSIMs fit into long staysRegional travel eSIMs are built for cross‑border use. Instead of offering a domestic plan with RLAH, they provide roaming access in multiple countries from day one. This sidesteps the “domestic vs roaming” test entirely.Multi‑country coverage: A single profile that works across much of the EU. See Esim Western Europe for a practical one‑SIM solve when you’re rotating through EU hubs.Validity and data: Plans come with defined validity (e.g., 15–90 days) and data buckets. If you run out, top up or add another plan—no residency checks.Outside the EU: Heading to or from North America? Pair your Europe plan with Esim North America or set up before you fly with Esim United States.When you’re staying a whole term in one country, a local eSIM can be cheaper for heavy data. For multi‑country months, regional usually wins on simplicity.When to choose a country eSIM vs a regional EU eSIMChoose a country eSIM when:You’ll spend 30+ days in one country and use lots of data.You need local rates for domestic calls or long‑term top‑ups.Example pages: Esim France, Esim Italy, Esim Spain.Choose a regional EU eSIM when:You’ll cross borders frequently (e.g., 3–6 countries over 2–4 months).You prefer one number/data plan to manage across the trip.See: Esim Western Europe.Use dual‑SIM: keep your primary line for authentication calls/SMS, and set the travel eSIM as your data line.Step‑by‑step: Students (semester or year abroad)1) Get a local plan in your host country- Sign up with local ID/student proof. Your host country becomes “home” for that plan.2) Read the roaming section of your tariff- Note any roaming data caps and the four‑month fair‑use window.3) Use your host‑country SIM domestically most of the time- Weekend trips are fine. Long multi‑month trips outside your host country might trigger warnings.4) Add a regional eSIM for holiday stretches- If you’ll travel for several weeks, switch your data line to Esim Western Europe to avoid breaching your domestic plan’s fair‑use pattern.5) Keep alerts on- Don’t ignore SMS warnings. You usually get at least 14 days to adjust your usage before surcharges apply.6) Check non‑EU neighbours- UK/Switzerland often sit outside inclusive roaming. Verify on Destinations before you go.Step‑by‑step: Digital nomads (90–180 days across EU)1) Decide your pattern- Many short stays in multiple countries? Start with a regional plan. One or two long stops? Mix in country eSIMs for each stop.2) Set up before you move- Install the eSIM profile while you have reliable Wi‑Fi. Test with a small top‑up.3) Use dual‑SIM smartly- Keep your home SIM active for 2FA/texts. Set the travel eSIM as the default for data.4) Rotate plans, not penalties- Regional eSIMs like Esim Western Europe are priced for roaming and won’t run into EU “permanent roaming” tests. When staying put, switch to the local country plan (e.g., Esim Spain).5) Avoid long‑term reliance on a single EU domestic plan- If you don’t live there, the four‑month fair‑use pattern will likely catch up and add surcharges.6) Leaving or arriving via the US/Canada?- Bridge the gap with Esim North America or sort stateside coverage with Esim United States.Worked examplesStudent in France, 9 months, frequent tripsYou take a French plan as your main line. You spend most days in France, with occasional weekends in Spain/Italy. You remain well within fair use. For a four‑week summer rail trip, you add Esim Western Europe for data and keep the French SIM for calls/SMS.Nomad, 5 months, 5 countriesMonth in Portugal, then Spain, France, Belgium, Netherlands. You use a regional plan for months 1–3. For months 4–5, because you’re stationary and need more data, you add Esim Spain and Esim France during those longer stays. No EU domestic fair‑use checks apply to your regional eSIM; the country eSIMs are priced for local use when you’re settled.US visitor, 2 months in Italy with side tripsYou keep your US number active for banking but avoid pricey long‑term roaming on your domestic US plan. You install Esim Italy for the base month and add a short regional top‑up for a two‑week loop through neighbouring countries.Pro tips to stay compliant and connectedTrack days and data: set a calendar reminder every time you cross a border and use your phone’s data counter per SIM.Respect SMS warnings: they are your early‑warning system before surcharges.Prefer Wi‑Fi calling and messaging apps for cross‑border calls.Use hotspot sparingly if your plan restricts tethering.Check country exceptions on Destinations before visiting microstates or non‑EU neighbours.Business travellers: corporate pools can smooth roaming costs—see For Business or partner with us via the Partner Hub.FAQQ1: Does the Schengen 90/180‑day rule limit my mobile usage?A: No. 90/180 is immigration. EU telecom fair use is separate. You could be within your visa limit yet still trigger a roaming fair‑use surcharge—or vice versa.Q2: How long can I roam on an EU domestic plan before fair‑use kicks in?A: Operators check at least a four‑month window. If, in that period, you spend more time and use more data abroad than at home, they can warn you and later add regulated surcharges.Q3: I have an “unlimited” EU plan. Is roaming unlimited too?A: Not necessarily. Operators can set a specific fair‑use roaming data cap for unlimited/low‑cost plans and must tell you the allowance and any surcharge once you hit it.Q4: Do regional travel eSIMs have fair‑use limits?A: They’re built for roaming, so the EU “home vs abroad” test doesn’t apply. You’re bound by the plan’s validity and data bucket, plus any reasonable‑use terms (e.g., hotspot limits). For multi‑country trips, see Esim Western Europe.Q5: If I buy a French SIM, can I spend the summer in Italy on it?A: Yes, but extended, heavier use outside France could trigger the four‑month fair‑use test. For a long Italy stay, switch to Esim Italy or add a regional eSIM for the travel leg.Q6: I’m a US traveller. Should I rely on my US plan’s roaming?A: For short trips, maybe. For long stays, many US plans throttle or cap roaming after a few weeks. It’s usually better value to keep your US number for SMS and run EU data on a regional or country eSIM. Start here: Esim United States and Esim Western Europe.Next stepPlan your route, pick your coverage: explore country and regional options on Esim Western Europe, then check country specifics via Destinations.

Saudi Arabia SIM/eSIM Registration (2025): What Travelers Need to Know

Saudi Arabia SIM/eSIM Registration (2025): What Travelers Need to Know

Saudi Arabia requires real-name registration for all mobile lines, including prepaid tourist SIMs and eSIMs. That means you’ll be asked for your ID and your line will be tied to you within the national database run by the regulator (CST). The process is straightforward if you buy at an airport kiosk or an official operator store, but it can trip up travellers who arrive late, who only try smaller convenience shops, or who expect to activate via app without local ID. This guide explains exactly where to register, the IDs you’ll need, how eSIM works for visitors, and what to expect with VoIP and messaging. We also flag common pitfalls (border number confusion, app sign-ins that require Saudi credentials, and tourist SIM limits), plus practical steps to get online quickly during Umrah/Hajj or peak events. For a broader country view and alternatives for multi-country itineraries, see our travel hub at Destinations.Quick takeRegistration is mandatory: your passport and entry “border number” (issued on arrival) are used for tourist SIM/eSIM activation.Buy at the airport or official operator stores for the smoothest experience; staff can retrieve your border number if needed.eSIM is widely available from major networks (stc, Mobily, Zain). App-only activation often requires Saudi ID—stick to in-person purchase as a visitor.Most mainstream VoIP (WhatsApp, FaceTime, Skype) generally works, but expect occasional restrictions and variable quality, especially during peak pilgrim seasons.Limits apply to how many prepaid lines a visitor can register; plan for 1–2 active lines per traveller.Who needs to register, and with what ID?You must register if you:Buy a local prepaid SIM or eSIM (tourist or standard).Activate a physical SIM picked up from a reseller, kiosk, or vending machine.Replace or reissue (SIM swap) a Saudi number.Roaming on your home SIM does not require local registration.Acceptable IDs and numbersTourists/visitors: Passport + Saudi entry “border number” (assigned at immigration). The border number is often on your visa sticker or can be looked up by staff using your passport details.GCC citizens: National ID/GCC ID is commonly accepted.Residents (iqama holders): Resident ID (iqama). App-based activations may require Absher/Nafath verification.Pro tip: If you arrived on an eVisa, your border number is generated at entry. If you don’t have it to hand, ask the store staff to retrieve it against your passport. Don’t waste time chasing it yourself.Where to register and buy a Saudi SIM/eSIMBest places (fastest and most reliable)Airport kiosks: Riyadh (RUH), Jeddah (JED), Dammam (DMM), Madinah (MED) terminals have counters for stc, Mobily, and Zain. Staff handle registration in minutes, including eSIM.Official operator stores: In major malls, high streets, and business districts. Look for stc, Mobily, Zain, Virgin Mobile, or Lebara branded stores.Pop-up booths during peak seasons: Additional counters appear during Umrah/Hajj and large events.Places to avoid (unless you must)Small convenience shops: Many can sell top-ups but not complete biometric/ID registration. You risk rejection or delays.App-only sign-up: Tourist flows are often blocked by an in-app ID check that expects Saudi credentials (residents). Use in-person activation.Pro tip: During peak pilgrim periods, airport queues build fast. If you land late, consider a quick roaming day-pass or a backup travel eSIM just for the first night.eSIM in Saudi Arabia: what visitors need to knowAvailability: stc, Mobily, and Zain all issue eSIMs at staffed points of sale. You’ll scan a QR code after ID verification.Device compatibility: iPhone XR/XS and newer, most current Google Pixel and Samsung Galaxy flagships, and select other models. Confirm before you queue.In-app eSIM: Some operator apps let you “buy and activate” — but they typically require Saudi ID for verification. Tourists should assume in-person activation is needed.Reinstalling: eSIM QR codes are usually one-time use. If you delete your eSIM, you’ll likely need to visit a store for a reissue with your ID.Checklist before you go: - Ensure your phone is unlocked. - Update iOS/Android to the latest version. - Know how to add an eSIM (Settings > Mobile/Cellular > Add eSIM). - Keep stable Wi‑Fi for the QR scan at the store (staff can help). - Bring your passport and have your entry details ready.Step-by-step: buying and registering a Saudi tourist SIM/eSIM1) Choose where to buy- Airport kiosk is fastest; otherwise, an official operator store.2) Pick your operator and plan- Ask for tourist/visitor plans (often 7–30 days, with data-first bundles). Clarify if local minutes or international minutes are included.3) Provide ID- Hand over your passport. Staff will use it and your border number to register. A fingerprint scan may be requested.4) SIM or eSIM issuance- Physical SIM: inserted and activated in-store.- eSIM: you’ll receive a QR to scan. Keep the device handy and unlocked.5) Activation and test- Staff will complete CST registration. Test data and calls before you leave the counter.6) Top-up and manage- Use official apps or USSD codes to check balance and add data. App logins may require a one-time SMS OTP; keep the line active during setup.Pro tip: Ask the agent to label your number and plan details on the receipt (or take a photo of the POS screen). It helps with top-ups and support later.What it costs (typical ranges)Tourist eSIM/SIM plans commonly bundle 5–50+ GB with local minutes for 7–30 days. Larger packages add unlimited social data or international minutes. Prices are competitive with other Gulf markets, with good 4G and expanding 5G coverage in cities and pilgrimage routes.SIM card/eSIM issuance may carry a small fee; tourist packages sometimes include it.Note: We avoid listing exact prices because they change frequently and vary by channel (airport promo vs city store). Airport deals are often the most transparent for visitors.VoIP, messaging, and calling in Saudi ArabiaVoIP apps: WhatsApp, FaceTime, Skype and similar services generally work for messaging and calls, though periodic disruptions or quality variance can occur.Wi‑Fi Calling: Support depends on your home carrier and the Saudi network. It may be blocked or inconsistent for foreign numbers.Business conferencing: Most platforms (Zoom, Teams, Meet) work. Corporate VPNs can improve stability but check your company policy and local rules before use.Local voice calls: Good to have if you need to speak to hotels, drivers, or local services who prefer a Saudi number.Pro tip: If voice call quality dips during crowded events or in dense pilgrim zones, switch to text or try another VoIP app. Late evenings and early mornings are usually less congested.Common pitfalls (and how to avoid them)“No Saudi ID” app wall: As a tourist, skip app-only purchases. Go to a staffed kiosk/store for manual registration with passport + border number.Border number mismatch: If your visa and entry stamp differ, let staff look up your active border number against your passport.eSIM deleted by mistake: Don’t remove your eSIM unless you’re sure you’re done. Reprovisioning usually requires returning to a store with your ID.Line limits: Visitors are typically limited to a small number of active prepaid lines (commonly up to two). Plan device sharing or hotspots accordingly.Peak season crowding: During Umrah/Hajj, buy at the airport as soon as you land to beat queues and ensure stock.Reseller issues: Avoid unbranded stalls selling pre-registered SIMs; they can be deactivated during audits.Multi-country itineraries and transit stopsIf you’re transiting or combining Saudi with other regions, consider a separate travel eSIM to cover your stopovers, then switch to a local Saudi SIM/eSIM on arrival:North America trips: See Esim North America or country-specific options like Esim United States.Western Europe or Schengen layovers: Esim Western Europe is handy; for single-country stops, see Esim France, Esim Italy, or Esim Spain.This approach keeps you connected door-to-door while keeping Saudi registration clean and local once you land.For teams, events, and corporate travelCoordinating dozens of arrivals for conferences, construction projects, or pilgrim support teams? Pre-plan device compatibility, line limits, and pickup locations:Centralise device checks (unlock status, eSIM support) and allocate SIMs by arrival wave.Use airport kiosks for fast throughput, with a backup city store for late arrivals.Keep a roster of numbers and plan end-dates to manage renewals.Explore our enterprise options at For Business. Travel partners and resellers can coordinate fulfilment via the Partner Hub.FAQ: Saudi SIM/eSIM Registration for Tourists1) Can I buy and activate a Saudi eSIM entirely online as a tourist?Usually no. Operator apps commonly require Saudi ID for digital verification. Tourists should use airport kiosks or official stores for passport-based registration and eSIM issuance.2) What if I don’t know my border number?Staff can look it up with your passport details. It’s generated on entry and is used for SIM registration. Don’t worry if it’s not visible on your eVisa printout.3) Are there limits to how many SIMs I can register as a visitor?Yes. The regulator limits the number of prepaid lines per identity. For visitors, assume one or two lines; exact limits can vary. Plan tethering/hotspot use if you carry multiple devices.4) Do WhatsApp and FaceTime calls work in Saudi Arabia?In general, yes. Most mainstream VoIP apps work, but you may experience occasional restrictions or quality issues, especially at peak times or in crowded areas.5) Can I keep my eSIM for a future trip?If your line remains active and you don’t delete the eSIM, you may be able to recharge later. However, tourist plans often expire after 30 days, and inactive lines can be deactivated. If an eSIM is removed, you’ll likely need a new QR at a store with your ID.6) What if my phone is carrier-locked?You’ll need to unlock it before using a Saudi SIM/eSIM. Contact your home carrier in advance; unlocking in-country is rarely possible on short notice.Pro tips to finish strongKeep both SIMs active (dual-SIM/eSIM) so you can receive bank/OTP texts from home while using Saudi data.Label your Saudi line in your phone settings to avoid confusion.Take photos of the receipt, plan details, and any QR code you’re given.For hotel check-ins or ride-hailing, a local number speeds callbacks and delivery.For destination specifics, plan options, and regional coverage that pairs well with your itinerary, start at Destinations.Next step: Compare regional eSIMs for your stopovers, then plan your Saudi activation on arrival via airport kiosks. Begin with Destinations.

Keep WhatsApp & iMessage While Using a Data eSIM Abroad

Keep WhatsApp & iMessage While Using a Data eSIM Abroad

Travelling with a local data eSIM is the cheapest way to stay online. The worry: losing your WhatsApp or iMessage identity, missing OTPs, or triggering costly SMS activations. The good news is you can keep your home phone number on WhatsApp and iMessage while using a travel eSIM purely for data. The trick is line assignment: leave your home line for calls/SMS, set the eSIM as your data line, and avoid unnecessary reactivation prompts.This guide shows you exactly how to do it on iPhone and Android, with step-by-step settings, what to tap when apps say “SIM changed”, and how to prepare backup codes so you’re never locked out. You’ll also find dual‑SIM examples for common trips and a quick troubleshooting section. If you’re heading to the US, Europe or beyond, pick an eSIM from Destinations and follow this playbook to keep your number, cut roaming costs, and stay reachable.The simple rule: keep your number, switch your dataKeep your home SIM/eSIM active for calls and SMS (don’t remove it unless you’re certain you won’t need OTPs or calls).Add a travel eSIM and assign it as the “Mobile Data”/“Preferred data” line.Turn off data roaming on your home line to prevent surprise charges.WhatsApp and iMessage will continue to use your home number over the travel eSIM’s internet connection.Why this works: - WhatsApp is tied to the number you registered with, not the SIM providing data. As long as the app stays logged in and your device has internet, your WhatsApp identity stays the same. - iMessage and FaceTime can send/receive via your phone number and/or Apple ID email. Once activated on your number, iMessage continues to work over any internet connection.Pre‑trip checklist (10 minutes now, hours saved later)Confirm your phone is unlocked and supports eSIM/dual‑SIM.Install critical updates for iOS/Android, WhatsApp, and Messages before you go.Activate iMessage/FaceTime on your home number while still at home. Do not toggle iMessage off/on while abroad (it can trigger a paid international SMS).WhatsApp:Confirm you’re registered on your home number.Enable two‑step verification and set your 6‑digit PIN with a recovery email.Trigger a fresh chat backup (iCloud on iPhone, Google Drive on Android).Two‑factor authentication:Add an extra trusted number to your Apple ID, and note how to “Get Verification Code” from Settings offline.For Android/Google services, generate and print/save your Google backup codes offline.Add recovery methods for banks and key apps that send OTPs.Decide your eSIM plan: single‑country or regional.US trip: see Esim United States.Western Europe: see Esim Western Europe or country packs like Esim France, Esim Italy, Esim Spain.Multi‑country across US/Canada/Mexico: Esim North America.Save your eSIM QR/activation details offline (PDF/screenshot in a secure note).Label your lines clearly in your phone (Home vs Travel) to avoid slip‑ups.Pro tip: Keep mobile data off on your home line. SMS usually works without data; you’ll still receive OTPs if your home number has roaming enabled for SMS. Check costs with your operator.Set up on iPhone (dual‑SIM/eSIM)1) Install and label your eSIMSettings > Mobile Service (or Cellular) > Add eSIM.Scan your eSIM QR or use the provider app.When asked to label, name them clearly: - Primary or Home = your home number - Travel = your eSIM data plan2) Assign lines for data, calls and SMSSettings > Mobile Service: - Default Voice Line: Primary/Home (so your calls show your home number). - iMessage & FaceTime Line: Choose Primary/Home.Mobile Data: - Set Mobile Data = Travel (eSIM). - Turn off Allow Mobile Data Switching (keeps data strictly on the eSIM).For the Primary/Home line: - Turn off Data Roaming. - Leave the line enabled so SMS and calls can reach you.Pro tip: For contacts who must always use your home number, set their per‑contact “Preferred Line” to Primary in the Contacts app.3) iMessage and FaceTime settings that stickSettings > Messages: - iMessage: ON (already activated on your home number before travel). - Send & Receive: Tick your phone number and Apple ID email. Set “Start New Conversations From” to your phone number if you want continuity, or your Apple ID email if your number can’t activate while abroad.Settings > FaceTime: - Tick your phone number and Apple ID. Ensure your home number is active here too.Avoid toggling iMessage or FaceTime OFF/ON while abroad. It can trigger a fresh activation SMS charged at international rates by your carrier.4) WhatsApp: keep the same numberOpen WhatsApp > Settings > Account > Two‑step verification: ensure it’s ON.Do not use “Change Number” unless you are permanently changing numbers.If WhatsApp shows “Did you change your number?” after it detects a SIM change, tap “No”.If asked to re‑verify, only proceed if you can receive the SMS/voice call to your home number. Otherwise, force‑quit and reopen when you have signal for your home line or Wi‑Fi Calling.Pro tip: Link WhatsApp Web/Companion on your laptop or tablet before you fly so you can keep chatting even if your phone is briefly offline.Set up on Android (dual‑SIM/eSIM)Android menus vary by brand, but the flow is similar.1) Install and label your eSIMSettings > Network & Internet > SIMs (or Connections > SIM Manager) > Add eSIM.Label clearly: SIM 1 = Home, eSIM/SIM 2 = Travel.2) Assign data, calls and SMSPreferred SIM for:Mobile data: Travel.Calls: Home.SMS: Home.Turn off Data Roaming on the Home SIM.Keep the Home SIM enabled so you can receive SMS/OTP.Pro tip: Some Android phones let you choose SIM per contact in the dialler/Contacts. Set important contacts to always use your Home line.3) Messages, RCS and Google account sanity checksGoogle Messages (RCS chat features) may try to verify your number via SMS when re‑enabled. If prompted abroad, choose “Not now” to avoid a charge, or connect to Wi‑Fi with the Home SIM able to send one activation SMS.Generate and save Google backup codes before you go, and add a recovery email/phone.4) WhatsApp: same number, new dataConfirm WhatsApp is registered to your Home number.Keep two‑step verification ON with your 6‑digit PIN.If you see a SIM‑change prompt, choose “No” unless you’re truly changing numbers.Re‑verification requires SMS/voice to your Home number; do this only when you have coverage and are comfortable with any roaming SMS cost.Common prompts and how to respondWhatsApp “Change number?” detected:Choose “No”. You’re only using a different data connection, not changing identity.iMessage wants to reactivate:Don’t toggle iMessage/FaceTime while abroad.If it deactivates unexpectedly, you can temporarily use your Apple ID email for send/receive, or reactivate knowing one international SMS may be charged by your carrier.Google Messages RCS activation:Select “Not now” and activate later on Wi‑Fi, or accept that one SMS may be sent.SIM change notifications:These are informational. As long as you don’t re‑register WhatsApp with a new number, your account stays tied to your Home number.Pro tip: If you absolutely must remove your Home SIM, ensure every critical account has alternative 2FA (backup codes, authenticator app, recovery contacts) and that iMessage is set to send/receive via your Apple ID email.Troubleshooting quick fixesiMessage shows email instead of number:Settings > Messages > Send & Receive: select your phone number. If it won’t tick, your Home line may lack coverage for activation. Use your Apple ID email temporarily and try activation later when the Home line has signal.Not receiving WhatsApp codes:Ensure the Home line is enabled and can receive SMS. Try voice call verification. If you can’t get the code, use WhatsApp Web on a linked device to stay connected until you can re‑verify.Calls/SMS going out on the wrong line:iPhone: Edit contact > Preferred Line, or long‑press the SIM label on the call screen.Android: Set default SIM in the dialler or choose per call/SMS if prompted.Data still draining on Home SIM:iPhone: Settings > Mobile Data > turn off “Allow Mobile Data Switching”.Android: Ensure Preferred Data SIM = Travel and Data Roaming is off on Home.Can’t install eSIM:Confirm your phone is carrier‑unlocked and eSIM‑capable. Reboot and retry. If travelling to the US, check compatibility with Esim United States guidance; for Europe, see Esim Western Europe.Real‑world setupsOne country, maximum simplicity:Example: Weekend in Paris. Install a France data plan, set it as Mobile Data, keep your UK SIM for calls/SMS only. See Esim France.Multi‑city Euro trip:Example: Italy–Spain–France in one week. Use a regional plan so you don’t juggle multiple profiles. See Esim Western Europe or country packs like Esim Italy and Esim Spain.North America loop:Example: US and Canada. Use Esim North America and keep your home line for OTPs and inbound calls. If only the US, see Esim United States.Business travellers:Centralise policy and support so staff don’t toggle iMessage abroad or re‑register WhatsApp. Volume options are available For Business, and partners can access enablement via the Partner Hub.Browse full coverage and plans on Destinations.FAQWill people still see my usual number on WhatsApp?Yes. WhatsApp identity stays tied to the number you registered. Using a travel eSIM only changes your data connection, not your WhatsApp number.Do I need to use “Change Number” in WhatsApp when I travel?No. Only use “Change Number” if you are permanently moving to a new number. For travel, keep your existing registration.Can I remove my home SIM entirely?You can, but you may lose access to SMS/OTP and iMessage number activation. It’s safer to keep the home line inserted and disable its data roaming. If you must remove it, set up backup codes, an authenticator app, and Apple/Google recovery options first.Will iMessage charge me abroad?iMessage itself uses data. However, (re)activating iMessage on a phone number can send one international SMS charged by your carrier. Activate before departure and avoid toggling while abroad.Can I still receive SMS/OTP if data roaming is off on my home SIM?Usually yes; SMS does not require data. Whether receiving SMS while roaming is charged depends on your carrier. Check your plan before you go.WhatsApp asked me to verify again – what now?Proceed only if your home number can receive the SMS/voice code. If not, wait until you have coverage or Wi‑Fi Calling, or use linked devices temporarily. Ensure two‑step verification is enabled to protect against SIM‑swap attacks.Next step: Choose your travel eSIM and stay connected without losing your number. Start with Destinations.