Students Studying Abroad: eSIM Setup, Budget Plans & Keeping Your Number

Blog

Students Studying Abroad: eSIM Setup, ...

Students Studying Abroad: eSIM Setup, Budget Plans & Keeping Your Number

30 Oct 2025

Students Studying Abroad: eSIM Setup, Budget Plans & Keeping Your Number

Heading abroad for a semester or a full degree? Staying connected is the backbone of a smooth start: maps for orientation week, group chats with classmates, OTPs from your bank, timetables, and calls home. An eSIM gives you local-rate data without the shock of roaming bills, keeps WhatsApp running on your usual number, and can be topped up remotely by parents or sponsors. This guide shows you how to set up an eSIM for students, pick the cheapest sensible plan for your study destination, and keep your home number active for security codes. You’ll also get safety tips and troubleshooting that work in the real world. Whether you’re off to Paris, Milan, Madrid, or New York, we’ll help you choose a regional or country plan now and switch on data the moment you land. Browse coverage by country on Destinations, or jump straight to Esim Western Europe or Esim North America.

Why eSIM beats roaming for study abroad

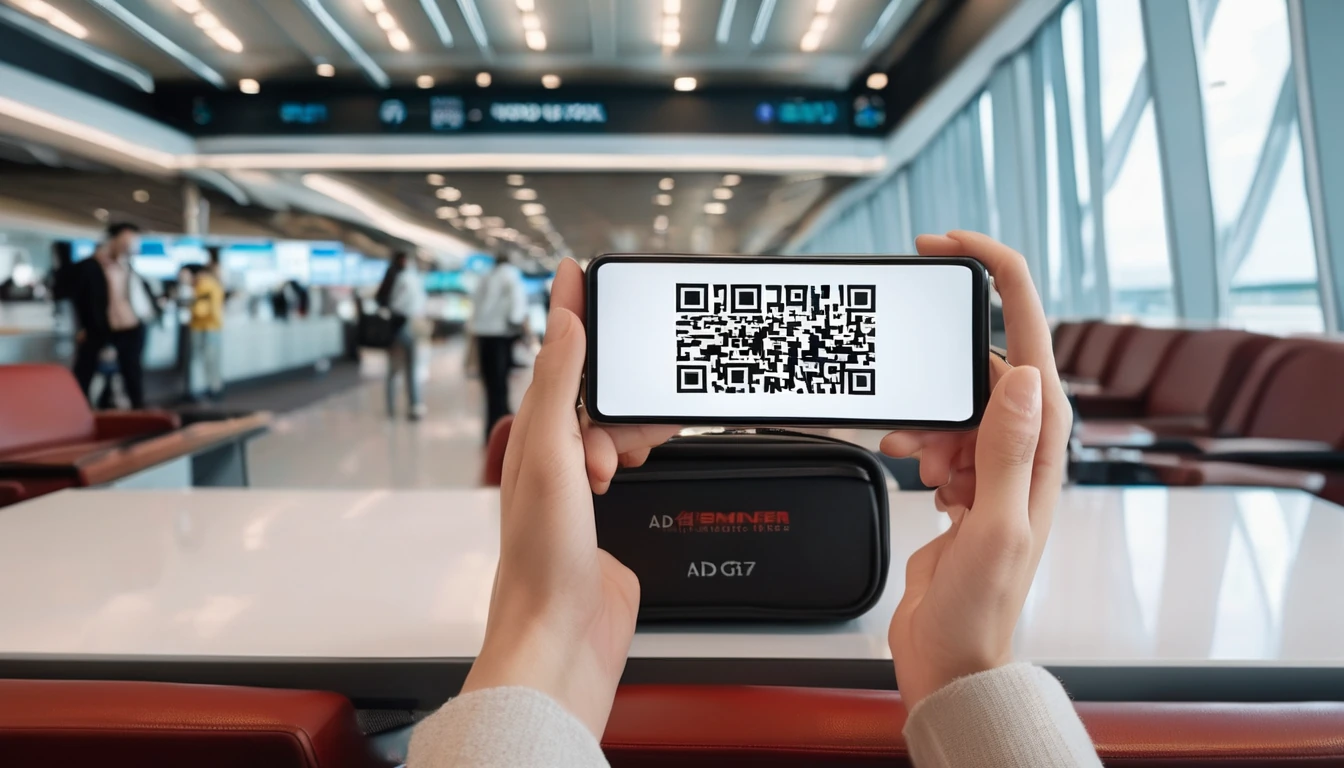
An eSIM is a digital SIM you install via QR code. It’s ideal for students:

  • Low cost: Local and regional eSIMs usually beat home-network roaming by a large margin.
  • Instant activation: Install before you fly; switch it on at the airport.
  • Dual lines, one phone: Keep your home SIM for OTP banking and WhatsApp; use the eSIM for cheap data.
  • Flexible durations: 7, 15, 30‑day and multi-month options, plus easy top-ups.
  • Regional cover: One plan can cover multiple countries during weekend trips.

Pro tip: If you’ll travel widely across the EU, choose a regional plan like Esim Western Europe. For Canada/USA travel, look at Esim North America. If you’re staying in one country, a country-specific plan (e.g., Esim France, Esim Italy, Esim Spain or Esim United States) is often cheapest.

Pre-departure checklist for students

Run through this before you fly.

1) Confirm your phone supports eSIM and is unlocked
- iPhone XR/XS or newer, most recent Google Pixel, Samsung Galaxy S20+ and above support eSIM.
- Check your device settings: Search “eSIM” or “Add mobile plan”.
- Ask your home carrier to unlock your handset if it’s locked.

2) Decide your setup
- Keep your physical/home SIM inserted to receive OTP texts and calls.
- Use a local/regional data eSIM for affordable internet.
- Turn off Data Roaming on your home SIM to avoid accidental charges.

3) Pick the right plan and duration
- Short programmes or orientation? 10–15 GB for 2–4 weeks is usually enough.
- A semester? 20–40 GB per month is a good baseline if you have campus Wi‑Fi.
- Frequent city breaks in Europe? Choose Esim Western Europe.
- US/Canada semester? Choose Esim North America or Esim United States.

4) Share your plan details with family
- Let parents/sponsors know your chosen plan so they can top up or resend a QR if you lose yours.
- Store the QR/email in cloud notes.

5) Back up and update
- Update iOS/Android before travel.
- Back up contacts, photos, and authenticator codes.

Step-by-step: Installing and activating your eSIM

You can install at home over Wi‑Fi and activate on arrival, or install/activate at the airport after landing.

1) Buy your plan
- Choose your destination on Destinations and select a country or regional plan.
- Complete purchase; you’ll receive a QR code or activation link.

2) Add the eSIM to your phone
- iPhone: Settings > Mobile Data > Add eSIM or Add Mobile Plan > scan QR.
- Android (varies): Settings > Network & Internet > SIMs > Add eSIM > scan QR.
If you only have the activation code, select “Enter details manually”.

3) Label your lines
- Name the eSIM “Study Data” and your home SIM “Home OTP”.

4) Set defaults and roaming
- Set Mobile Data to use “Study Data” (the eSIM).
- Turn OFF Data Roaming on the “Home OTP” line.
- Leave Voice/SMS on “Home OTP” if you need to receive calls/SMS, but place most calls over WhatsApp/FaceTime.

5) Activate on arrival
- After landing, switch on the eSIM line and ensure Data Roaming is ON for that line (it’s local roaming within the plan’s coverage).
- Wait for signal; if no data, toggle Airplane Mode or reboot.

6) Test
- Load a map and a web page.
- Send yourself a WhatsApp message.
- Ask your bank to send a test OTP if possible.

Pro tips:
- APN usually configures automatically. If data won’t start, check the eSIM’s APN settings in your plan email and enter them manually.
- Keep the QR and plan email safe; you might need them if you switch phones.

Budget-friendly plan sizing for students

Use these guide rails to avoid overpaying.

  • Light user (messages, maps, email, ride-hailing, occasional video): 5–10 GB/month.
  • Typical student (classes, social media, light streaming on Wi‑Fi first): 15–25 GB/month.
  • Heavy user (lots of video/Hotspot, off-campus housing with weak Wi‑Fi): 30–50 GB/month.

Regional picks:
- EU/Schengen semester with weekend trips: Esim Western Europe saves money compared with buying separate country plans.
- North American campuses and cross-border trips: Esim North America.
- Country stays: choose Esim France for Paris or Lyon, Esim Italy for Rome or Milan, Esim Spain for Barcelona or Madrid, or Esim United States for US campuses.

Ways to save:
- Use campus and accommodation Wi‑Fi for updates and video calls.
- Download lectures and playlists over Wi‑Fi.
- Turn off auto-play in social feeds.
- Enable Low Data Mode/Data Saver in your phone settings.
- Share a single, larger regional plan across trips rather than buying multiple short plans.

Keeping your number for OTPs and WhatsApp continuity

Banks, government portals, and university systems often send one-time passwords (OTPs) to your home number. Here’s how to keep that working while using a local data eSIM.

  • Keep your home SIM in the phone and active for calls/SMS, but with Data Roaming OFF to avoid fees.
  • Set your iPhone/Android to use the eSIM for mobile data, keeping the home SIM for calls/SMS.
  • WhatsApp: You can continue using your existing WhatsApp account tied to your home number even if data comes from the eSIM. Do not change your WhatsApp number unless you intend to move permanently.
  • If your bank supports app-based authentication or email OTPs, enable them before you travel as a backup.
  • If your home carrier offers Wi‑Fi calling at no extra cost, enable it to receive calls over Wi‑Fi when available.

Pro tip: If you must put your home SIM in a safe place (e.g., you’re using a single‑SIM phone), move critical services to app‑based authentication first and update recovery options before you leave.

Parental top-ups and remote support

Parents or sponsors can keep you connected without you sharing card details.

  • They can purchase a new plan or top-up and forward the QR/activation email to you.
  • Share your plan choice and timing so they buy the right validity window.
  • Keep a shared note with your chosen eSIM product link (e.g., Esim Western Europe or Esim United States) to avoid mistakes.
  • If you’re in a larger cohort, study-abroad offices can coordinate connectivity via For Business, and student organisations can explore benefits via the Partner Hub.

Safety and sensible settings for students abroad

A few settings and habits go a long way.

  • Save local emergency numbers and your university’s 24/7 support line.
  • Enable “Send Last Location” in Find My/Find My Device. Share your location with a trusted friend.
  • Download offline maps for your host city and campus.
  • Turn on data alerts and caps to avoid accidental overuse.
  • Add campus security and programme coordinators as phone contacts.
  • Keep a small balance on your home SIM for incoming SMS in case your carrier charges for it.

Troubleshooting: quick fixes

If things don’t work first time, try this sequence.

1) No data after landing
- Toggle Airplane Mode for 10 seconds.
- Ensure Mobile Data is set to the eSIM line.
- Turn Data Roaming ON for the eSIM line only.
- Manually select a network (Settings > Network Operators).

2) APN issues
- Check your plan email for APN details and enter them in the eSIM’s Access Point Name field.

3) iMessage/FaceTime not activating
- Temporarily set the eSIM line as your default for both data and iMessage activation; wait a few minutes, then switch defaults back.

4) Can’t receive bank OTPs
- Confirm the home SIM has signal.
- Turn off Do Not Disturb/Focus.
- Ask your bank to resend as SMS, not voice call.
- If your home SIM is out of balance for inbound SMS, top it up.

5) Battery drain
- Disable Background App Refresh on cellular for heavy apps.
- Use Low Power Mode and Low Data Mode.

6) Hotspot not working
- Check the plan allows tethering; if allowed, set the eSIM line as the data source, then enable Personal Hotspot.

Use-case snapshots by region

  • United States semesters: Choose Esim United States for campus life, with Esim North America if you’ll visit Canada or Mexico on breaks. Data usage is higher stateside—size up your plan if you rely less on campus Wi‑Fi.
  • France, Italy, Spain: City campuses mean strong public Wi‑Fi, so 15–20 GB often suffices. Country-specific plans like Esim France, Esim Italy or Esim Spain are cost‑effective if you mostly stay put.
  • Wider European travel: Weekend trips across borders? Pick Esim Western Europe to avoid switching plans at every border.
  • Mixed continent exchange: Starting in the US then heading to Europe? Combine a month of Esim United States with a follow‑on Esim Western Europe.

FAQ: eSIM for students

1) Should I buy my eSIM before or after I fly?
Buy before you fly if you can. Install over home Wi‑Fi and activate data on arrival. If you forget, airport Wi‑Fi is usually fine for purchase and installation.

2) Can I keep my WhatsApp number while using a data-only eSIM?
Yes. WhatsApp remains tied to your existing number. Use the eSIM for data and do not change your WhatsApp number unless you want to migrate permanently.

3) How do I receive bank OTPs abroad?
Keep your home SIM active for calls/SMS with Data Roaming OFF. Your phone will still receive SMS on that line. Where possible, enable app-based authentication as a backup before travel.

4) How much data do students typically need per month?
Most students manage on 15–25 GB with regular Wi‑Fi. If you stream a lot on the go or hotspot a laptop, consider 30–40 GB.

5) Can I hotspot from an eSIM?
Often yes, but it depends on the plan. Check your plan details. If allowed, set the eSIM as the active data line and enable Personal Hotspot.

6) My phone is locked to my home carrier. Can I still use an eSIM?
No. You’ll need an unlocked device to use a third‑party eSIM. Ask your carrier about unlocking before you travel.

Next step: Browse your study destination and pick a plan on Destinations. Install at home, land connected, and keep your home number live for OTPs and WhatsApp.

Read more blogs

Andes Highlights (3 Weeks): Peru–Bolivia–Chile–Argentina Connectivity

Andes Highlights (3 Weeks): Peru–Bolivia–Chile–Argentina Connectivity

Planning a south america itinerary 3 weeks through the high Andes? This route stitches together Peru’s Sacred Valley, Bolivia’s La Paz and Salar de Uyuni, Chile’s Atacama Desert, and northern Argentina’s quebradas or Mendoza wine country—often by long-distance bus and a couple of short flights. Connectivity is different at altitude: coverage is strong in cities but drops in high passes and salt flats; bus Wi‑Fi is patchy; border towns can be blackspots. The smart move is an eSIM with multi‑country coverage, backed by offline maps, offline translations, and a simple routine for crossing borders by bus without losing service. Below you’ll find a practical, connectivity-first itinerary; checklists to prep your phone, apps and documents; and on-the-ground tips for staying online where it matters: booking transport, hailing taxis, backing up photos, and navigating when the signal disappears.If you’re transiting via Europe or North America, you can also add a layover eSIM to stay connected door-to-door. Start with our country list on Destinations, then follow the steps, and you won’t waste time chasing SIM shops at 3,500 metres.The 3‑week Andes route at a glanceWeek 1: Peru (Cusco, Sacred Valley, Machu Picchu) - Fly into Cusco (or Lima then connect). - Base in Cusco; day trips to Pisac/Chinchero/Maras–Moray. - Train to Aguas Calientes; Machu Picchu visit; return to Cusco or continue to Puno/Lake Titicaca.Week 2: Bolivia and Chile (La Paz, Uyuni, San Pedro de Atacama) - Bus/collectivo via Copacabana to La Paz. - Fly or overnight bus to Uyuni. - 3‑day Uyuni–altiplano tour ending in San Pedro de Atacama (Chile).Week 3: Chile and Argentina (Atacama to Salta or Mendoza/Buenos Aires) - Choose: - North: San Pedro to Salta/Jujuy by bus; fly to Buenos Aires. - Or South: San Pedro–Calama flight to Santiago; bus or flight to Mendoza; onward to Buenos Aires.Connectivity notes (quick): - Cities: generally strong 4G/4G+; 5G in major hubs (Santiago, Buenos Aires). - Altitude/rural: expect long no‑signal stretches (Uyuni, altiplano passes, Paso Jama). - Bus Wi‑Fi: often advertised, rarely reliable. Plan to be offline onboard. - Border regions: networks switch; a multi‑country eSIM avoids sudden loss.eSIM vs local SIMs for a 4‑country tripFor a route with multiple borders and remote legs, eSIM wins on time and reliability.What a multi‑country eSIM gets you: - One plan across Peru, Bolivia, Chile, Argentina (check coverage per country on Destinations). - No passport/SIM registration queues at kiosks. - Keep your home number active on the physical SIM for calls/SMS codes. - Instant top‑ups if you burn data on photos or navigation.When a local SIM still helps: - Long stay in one country with heavy data use (e.g., a month in Buenos Aires). - Dead zones where a different local network performs better (rarely worth the hassle on a 3‑week pace).Practical approach: - Use an eSIM as your primary data line across all four countries. - If you find a specific local network far better in one region, add a cheap local SIM and keep the eSIM as backup.Device readiness checklist (before you fly)1) Check eSIM compatibility and SIM‑lock status on your phone.2) Buy and install your eSIM while on home Wi‑Fi. Keep a PDF/printed copy of the QR code.3) Label lines clearly (e.g., “eSIM Andes Data”, “Home SIM”).4) Turn on data roaming for the eSIM; leave roaming off for your home SIM to avoid charges.5) Set up dual‑SIM rules: data on eSIM; calls/SMS default to home SIM if needed.6) Download offline: Google Maps/Organic Maps for all target regions; language packs (Spanish at minimum); bus/air tickets; hotel confirmations.7) Cloud backups: set to upload on Wi‑Fi only; pre‑create shared albums for travel companions.8) Test tethering/hotspot with your laptop/tablet.If you’re transiting popular hubs, consider a short layover eSIM: - USA connections: add an Esim United States or a broader Esim North America.- Europe connections: Madrid/Barcelona? Use an Esim Spain. Paris or Rome? See Esim France and Esim Italy. Multi‑country layovers? Try Esim Western Europe.City‑by‑city connectivity notesCusco & the Sacred Valley (Peru)Coverage: Good in Cusco city; variable in high villages (Maras/Moray) and along Inca Trail approaches.Tips: Download Sacred Valley maps offline; pin viewpoints and ruins. most taxis use WhatsApp—save your accommodation’s number.Machu Picchu/Aguas Calientes: Patchy to none at the citadel. Upload your photos later; don’t rely on live ticket retrieval.Lake Titicaca: Puno and CopacabanaPuno: Reasonable 4G; bus terminals crowded—screenshot QR tickets.Crossing to Copacabana: Expect a signal drop around the border; have directions saved offline.La Paz (Bolivia)Good urban 4G; the cable car network has decent signal but tunnels do not.Yungas/“Death Road” tours: Mountain valleys cause dead zones—share your emergency contacts with the operator, carry a charged power bank, and don’t plan remote calls.Uyuni and the Altiplano (Bolivia to Chile)Uyuni town: OK 4G; ATMs finicky—use Wi‑Fi for banking apps.Salt flats/lagunas: Assume offline for most of the 3‑day tour. Guides often carry satellite phones; agree a pickup time/place in San Pedro and preload your map route.San Pedro de Atacama (Chile)Town: Solid 4G; accommodations often have Wi‑Fi but speeds vary.Geysers, Valle de la Luna: Offline navigation essential; sunrise trips start before mobile networks wake up in some areas.Salta/Jujuy or Mendoza/Buenos Aires (Argentina)Salta/Jujuy: Good city coverage; quebradas have long no‑signal sections.Mendoza: City 4G/5G; vineyards outside town can be patchy.Buenos Aires: Strong 4G/5G; ideal for cloud backups and large downloads before you fly home.Border crossings by bus: step‑by‑stepThe big ones on this route: Peru–Bolivia (Puno/Copacabana), Bolivia–Chile (Uyuni–San Pedro via Hito Cajón), Chile–Argentina (Paso Jama to Salta or Los Libertadores to Mendoza).How to keep service and sanity:1) The day before:- Top up your eSIM data.- Confirm your plan includes both countries you’re entering/leaving.- Download offline maps for both sides of the border and your town of arrival.- Save bus company WhatsApp and terminal address offline.2) On departure morning:- Keep a paper copy or offline PDF of tickets, insurance, and accommodation proof.- Charge phone and power bank; pack a short cable in your daypack.3) On the bus:- Don’t count on bus Wi‑Fi. Keep your eSIM as primary, but expect drops near mountain passes.- If your phone supports it, enable “Wi‑Fi calling” for later when you reach accommodation Wi‑Fi.4) At the border posts:- Data may be unavailable. Keep QR codes and booking numbers offline.- After exiting one country and entering the next, toggle Airplane Mode off/on to re‑register on the new network.- If the eSIM doesn’t attach, manually select a network in Mobile Settings.5) Arrival:- Send your accommodation a quick WhatsApp when you’re back online.- Recheck your eSIM’s data roaming is on; confirm you’re on an in‑country network, not a weak roaming partner.Pro tips: - Dual profiles: If your eSIM allows, keep a secondary profile for a different network in the same country—helpful in border towns.- Cash buffer: Some border terminals don’t accept cards; download a currency converter for offline use.Offline survival kit (5‑minute setup)Maps: Download regions for Cusco, Sacred Valley, Puno, La Paz, Uyuni, San Pedro, Salta/Jujuy or Mendoza, and Buenos Aires.Translations: Download Spanish for offline use; add phrasebook favourites (bus tickets, directions, dietary needs).Documents: Save PDFs of passports, tickets, hotel addresses; star them for quick access.Rides: Screenshots of pickup points; pin bus terminals and hotel doors.Entertainment: Podcasts and playlists for long bus legs, set to download on Wi‑Fi only.Altitude and your tech: what changesCoverage gaps lengthen: Fewer towers at high altitude; valleys can block signal. Assume offline on remote excursions.Batteries drain faster in cold: Keep your phone warm and carry a power bank (10,000–20,000 mAh).Hotel Wi‑Fi may be congested: Schedule big uploads (photo backups, app updates) for big-city stays like Santiago or Buenos Aires.GPS still works offline: Your blue dot shows on offline maps without data—preload everything.Data budgeting for 3 weeksTypical traveller usage across this route: - Messaging/Maps/Bookings: 0.2–0.5 GB/day- Social and photo sharing: 0.3–0.7 GB/day- Occasional video calls/streaming: 0.5–1.0 GB/dayFor a mixed-use trip, plan 15–25 GB for 3 weeks. Heavy creators should double it and upload over hotel Wi‑Fi when possible. If you work remotely, consider a higher‑capacity plan and a backup eSIM; see our guidance on For Business.Practical route with transport and connectivity cuesDays 1–4 Cusco base: Strong city signal; day trips may be spotty—go offline-ready.Days 5–6 Machu Picchu: Expect no service at the ruins; sync tickets ahead.Days 7–8 Puno to La Paz via Copacabana: Border signal drop; re‑register networks after crossing.Days 9–11 Uyuni tour to San Pedro: Treat as offline; charge nightly; carry spare cables.Days 12–14 San Pedro: Stable in town; tours offline; top up data before Paso Jama.Days 15–17 Salta/Jujuy or Mendoza: Good urban 4G; rural patches are offline.Days 18–21 Buenos Aires: Strongest connectivity of the trip; clear your uploads and map downloads for the flight home.Partnering and stopover extrasHospitality and tour operators in the Andes: help your guests stay connected—explore co‑branded solutions via our Partner Hub.Transatlantic flyers: test your eSIM setup on a layover with an Esim United States or Esim Western Europe before hitting high-altitude blackspots.FAQs1) Do I need a local SIM in each country?No. A multi‑country eSIM covering Peru, Bolivia, Chile and Argentina is simpler and works well for a 3‑week pace. Consider a local SIM only if you’ll spend longer in one country and want the absolute best regional coverage.2) Will my WhatsApp number change with an eSIM?No. WhatsApp is tied to your registered number, not your data line. Keep your home SIM active for voice/SMS (roaming off if you wish), and use the eSIM for data—WhatsApp continues as normal.3) Can I hotspot to my laptop or camera?Yes. Enable tethering on your eSIM. Mind your data: cloud backups and OS updates can burn gigabytes—set them to Wi‑Fi only or schedule in big cities.4) What if there’s no signal on the Uyuni/Atacama legs?That’s expected. GPS still works offline. Pre-download maps and translations, carry a power bank, and sync plans with your tour operator before departure.5) Will I get roaming charges at borders?If you’re using a multi‑country eSIM with coverage in both countries, you won’t incur extra roaming fees from your home carrier. Keep roaming off on your home SIM to avoid accidental use.6) I’m connecting via Europe or the US—worth getting a layover eSIM?Yes. It’s an easy way to test your setup and stay reachable. Try Esim North America or country options like Esim Spain, Esim France, or Esim Italy for common hubs.Next step: Browse South America coverage options and build your plan on Destinations.

Set Up eSIM on Google Pixel 9/10: Quick Guide + Troubleshooting

Set Up eSIM on Google Pixel 9/10: Quick Guide + Troubleshooting

Travelling with a Google Pixel 9 or Pixel 10 and want fast, reliable data without hunting for a local SIM? Good news: with Android 15, adding and managing eSIMs is quicker than ever. This guide shows exactly what to tap to install an eSIM on your Pixel 9/10, whether you’re scanning a QR code, entering an SM-DP+ address manually, or attempting an eSIM transfer from another device. We’ll also help you check if your phone is carrier-locked, set the right data/roaming preferences for travel, and fix common activation or connectivity issues.If you’re still planning your trip, pick a plan by country or region from Simology’s Destinations – for example, Esim United States for the USA, Esim Western Europe for multiple EU countries, or country-specific options like Esim France, Esim Italy, and Esim Spain. Heading across borders? Esim North America covers the US, Canada, and more with one plan.Before you begin: compatibility, lock status and prepUpdate first: Settings > System > System update. Android 15 (or the latest available) improves eSIM reliability.Check carrier lock:If your Pixel 9/10 was bought from a carrier, it may be locked. The simplest test is to insert a SIM from another carrier and see if calls/data work. Or contact your carrier to confirm it’s unlocked for international use.If locked, eSIM activation from other providers may fail until it’s unlocked.Find your EID (sometimes needed by support): Settings > About phone > EID.Have a stable internet connection (Wi‑Fi recommended) and at least 30% battery.Know your plan’s activation timing. Some travel eSIMs should be installed just before departure or on arrival; others can be installed early and activated later.Pro tip: Save a copy of your QR code and/or SM-DP+ details in an offline note. If Wi‑Fi is patchy at the airport, you’ll still have the info handy.Install an eSIM on Pixel 9/10 (Android 15)There are three common methods. Start here: - Open Settings > Network & internet > SIMs. - Tap Add SIM. - Choose the option that matches your situation below.Method A: Scan a QR code (most common)On Add SIM, choose Scan QR code (or Use a downloaded SIM > Scan QR code).Point the camera at the QR your provider supplied. If it’s on the same phone, open it on another device or print it.When prompted, confirm Download SIM or Add.Name the SIM (e.g., “Simology EU”) for easy identification.If asked, choose a SIM for mobile data, calls and SMS (you can change this later).Toggle on Roaming for that eSIM if you’re travelling internationally.Method B: Enter SM-DP+ details manually (no QR)If your provider gave you an SM-DP+ address and activation code: 1. On Add SIM, tap Need help? or Can’t scan? Enter code manually (wording varies). 2. Enter: - SM-DP+ address (exactly as given) - Activation code (case-sensitive) - Confirmation code (only if requested) 3. Proceed to Download SIM, then set your data/call/SMS preferences.What is SM-DP+? It’s the server that delivers your eSIM profile. Manual entry is handy if you can’t scan or if your provider supplies codes instead of QR.Method C: Transfer your number from another device (carrier numbers)For postpaid carrier numbers (not typical for travel eSIMs), some carriers support eSIM transfer: 1. On Add SIM, select Transfer SIM from another device (if shown). 2. Keep both phones unlocked, nearby and on Wi‑Fi. 3. Follow the on‑screen prompts on both devices to move the eSIM. 4. Note: Moving an eSIM usually deactivates it on the old phone. Not all carriers support this, and it rarely applies to roaming/travel eSIMs.Set your data and dual‑SIM preferences (important for travel)After installing the eSIM: - Choose data SIM: Settings > Network & internet > SIMs > Preferred SIM for mobile data > select your travel eSIM. - Turn on data roaming on the travel eSIM: SIMs > [your travel eSIM] > Roaming. - Calls and SMS: - Keep your home SIM for calls/SMS if you need to receive OTPs from banks. - Set call/SMS preference to “Ask every time” if you want control per call. - Avoid bill shock: - Disable data on your home SIM (SIMs > [home SIM] > Mobile data off). - Turn off roaming on the home SIM. - APN and 5G settings: - Most eSIMs auto‑configure APN and network mode. If data doesn’t work, check SIMs > [your travel eSIM] > Access Point Names. Add the APN provided by your eSIM supplier if none shows. - Try toggling 5G/4G (LTE): SIMs > [your travel eSIM] > Preferred network type. - Hotspot/tethering: - Settings > Network & internet > Hotspot & tethering. Ensure your plan allows hotspot use.Pro tip: Give each SIM a clear label (SIMs > [SIM] > Edit) like “Home” and “Simology EU” to avoid using the wrong line.Troubleshooting: Pixel eSIM won’t activate or connect1) Can’t download/activate the eSIM profileCommon causes: - No or unstable Wi‑Fi/mobile data during download. - Wrong SM-DP+ or activation code; extra spaces or case errors. - Carrier lock still active. - eSIM has already been installed on another device or exceeded download limits. - Date/time not set to automatic, causing certificate errors.Fixes to try: - Use a strong Wi‑Fi network. Turn off VPN during activation. - Double‑check the SM-DP+ address, activation code and confirmation code. Type carefully. - Restart your Pixel. - Set date/time to automatic: Settings > System > Date & time > Use network-provided time. - If your eSIM is EID‑locked by the provider, confirm the EID in Settings > About phone > EID matches what you supplied. - If you suspect a carrier lock, contact your original carrier to unlock the device for use with other carriers. - Remove any partially downloaded eSIM (SIMs > [problem eSIM] > Delete) and try again.2) eSIM installed but no signal or “No service”Ensure the line is turned on: SIMs > [your travel eSIM] > Use SIM = On.Data SIM set correctly: Preferred SIM for mobile data > your travel eSIM.Turn on data roaming for the travel eSIM.Toggle airplane mode on, wait 10 seconds, then off.Try network mode changes: 5G > 4G (LTE) > 3G if available.Disable “Automatically switch data” if the phone keeps flipping to your home SIM.3) Data issues: connected to network but no internetCheck APN: SIMs > [your travel eSIM] > Access Point Names. Add or select the APN given by your provider.Reset network settings: Settings > System > Reset options > Reset Wi‑Fi, mobile & Bluetooth. Then reboot and re‑enable the eSIM.Turn off VPN, Private DNS (Settings > Network & internet > Private DNS > Off), and any firewall apps temporarily.Wait a few minutes after landing; roaming registration can take time.4) Calls/SMS not working as expected (dual‑SIM)Ensure calls/SMS are assigned to the correct SIM: SIMs > Preferred SIMs > Calls/SMS.If RCS/Chat messages misbehave, disable and re‑enable RCS in Messages > Settings > RCS chats.Some travel eSIMs are data‑only. Use apps (WhatsApp, FaceTime audio, etc.) for calls/messages, or keep your home SIM active for SMS/OTP.5) Still stuck?Power cycle: fully power off, wait 20 seconds, power on.Try the install again via the alternate method (QR vs SM-DP+ manual).Contact your eSIM provider with your order number, EID, IMEI (Settings > About phone), and screenshots of any error messages.Pro tips for travellers using Pixel eSIMInstall before you fly: Download the eSIM profile at home on strong Wi‑Fi, but switch data to it only when you land (if your plan timing allows).Keep your home SIM for SMS only: Turn off data and roaming on your home SIM to avoid surprise charges, but receive OTPs if needed.Offline copies: Save QR/SM-DP+ details and support contacts in an offline note or PDF.Use hotspot wisely: Pixel hotspot works well; check your plan’s tethering allowance.Battery and radios: If speeds dip, toggle airplane mode or 5G/4G, or move to clearer coverage (indoors can reduce 5G performance).Choosing the right Simology eSIMNot sure where to start? Browse by region or country on Destinations.USA trip: pick Esim United States.Multi‑country Europe: go with Esim Western Europe.For single‑country plans: Esim France, Esim Italy, Esim Spain.North America hops (US, Canada, Mexico): choose Esim North America.Managing teams on the road? Centralised purchasing and billing are available For Business.Building travel products or bundles? Partner with us via the Partner Hub.FAQCan Pixel 9/10 use more than one eSIM? Yes. You can store multiple eSIM profiles and switch between them. Only one line can be active for mobile data at a time, and voice/SMS options depend on your device/carrier features.Do I need Wi‑Fi to install an eSIM? Strong Wi‑Fi is recommended for the initial download and activation. Some activations work on mobile data, but Wi‑Fi avoids dropouts and captive portals.What’s the difference between QR and SM‑DP+ manual entry? Both install the same eSIM profile. The QR simply encodes the SM-DP+ address and activation code. Manual entry is useful if you can’t scan.How do I know if my Pixel is carrier‑locked? If you bought from a carrier, it may be locked. Test with a SIM from another carrier or contact your carrier to confirm/unlock. A lock can block third‑party eSIM activation.Can I move my travel eSIM to another phone? Usually not. For security, many eSIMs are single‑device. Ask your provider about a reissue if you change devices. Carrier number eSIMs may support official transfer.My eSIM shows “Connected” but no internet. What now? Set the travel eSIM as your data SIM, enable data roaming, verify APN, toggle 5G/4G, disable VPN/Private DNS, and reboot. If still failing, reset network settings and re‑add the eSIM.Next step: pick your plan by country or region on Simology’s Destinations, then follow the steps above to install on your Pixel 9/10. Safe travels.

Travel Privacy Checklist (2025): iOS & Android Settings to Toggle Before You Fly

Travel Privacy Checklist (2025): iOS & Android Settings to Toggle Before You Fly

Travelling with a smartphone means carrying your identity, payment cards, and digital life through unfamiliar networks, borders and busy spaces. Good news: you don’t need new gadgets to stay private. A few targeted settings on iOS and Android drastically reduce tracking, lock down physical access, and prepare you for loss or theft. This guide focuses on toggle-level actions you can complete in 20 minutes, plus on-the-road habits that actually stick. It’s designed for everyday travellers and teams on the move.What you’ll get: - Exact menus/toggles for iOS and Android (2025-ready) - Screenshot callouts so you can verify each setting - A downloadable one‑page PDF checklist you can save offline - Practical tips for eSIM use, roaming, and public Wi‑FiIf you’re heading to the US, Europe, or beyond, pair these steps with a local eSIM from our Destinations library, including quick picks like Esim United States, Esim Western Europe, Esim France, Esim Italy, Esim Spain, and Esim North America.How to use this checklistSet aside 20–30 minutes and work through iOS/Android sections below.Screenshot callouts: after changing a setting, take a quick screenshot; keep them in an album “Travel Privacy” to re-check later.Download the one‑page PDF cheat‑sheet (linked on this article’s page) and save it to your device Files app for offline access.Teams: standardise these steps for staff via your MDM and see For Business. Partners can access rollout assets in the Partner Hub.Before you pack: account and backup hygieneThese steps reduce damage if your phone is lost, stolen, or inspected. Not legal advice—just practical hygiene.Update OS and appsiOS: Settings > General > Software Update.Android: Settings > System > System update (and OEM updates e.g., Samsung Settings > Software update).Strengthen your phone passcodeiOS: Settings > Face ID & Passcode > Change Passcode > Passcode Options > Custom Alphanumeric or 6+ digit numeric.Android: Settings > Security & privacy > Device lock > Screen lock > PIN/Password (avoid patterns).Enable SIM PIN (protects your mobile line if the SIM/eSIM is moved)iOS: Settings > Mobile Service > SIM PIN > On (set a unique PIN; store it securely).Android: Settings > Security & privacy (or Security) > More security & privacy > SIM card lock > Lock SIM card.Prepare recoveryiOS: Settings > Your Name > Sign‑In & Security > Account Recovery > Add Recovery Contacts. Ensure Find My is on (details below).Android/Google: myaccount.google.com > Security > 2‑Step Verification > add backup codes and passkeys.Backup with encryptioniOS: Settings > Your Name > iCloud > iCloud Backup > Back Up Now; consider Advanced Data Protection for end‑to‑end encrypted iCloud categories.Android: Settings > Google > Backup > Back up now; if offered, set backup encryption passphrase.Password manager “travel mode”Enable vault restrictions/hide sensitive vaults. Export emergency codes and store offline.Turn off “Developer options” if previously enabled (Android): Settings > System > Developer options > Off.Pro tip: Print or store offline copies of 2FA backup codes and key phone details (IMEI, SIM ICCID). Keep separate from your device.iOS: privacy toggles to switch before you flyLock screen and physical accessStolen Device ProtectionSettings > Face ID & Passcode > Stolen Device Protection > On.Tighten what shows on the Lock ScreenSettings > Notifications > Show Previews > When Unlocked.Settings > Face ID & Passcode > allow changes only when unlocked:Disable “Control Centre”, “USB Accessories”, “Wallet”, “Return Missed Calls” on Lock Screen if you can live without them.AirDrop and NameDrop disciplineSettings > General > AirDrop:Bringing Devices Together > Off (prevents NameDrop pop-ups).Start Sharing by > Contacts Only. Avoid “Everyone for 10 Minutes” in crowded places.SIM PIN confirmationSettings > Mobile Service > SIM PIN > On. Test by restarting the device to ensure you’re prompted.Pro tip: Add “Lockdown Mode” if you’re a high‑risk traveller: Settings > Privacy & Security > Lockdown Mode > Turn On (expect reduced features).Location, tracking, and radiosApp Tracking TransparencySettings > Privacy & Security > Tracking > Off (deny future requests). Review existing apps.Location Services tune‑upSettings > Privacy & Security > Location Services > On.For each sensitive app (social, camera, airline): set to “While Using” and toggle Precise Location Off where possible.System Services (bottom):Significant Locations > Off.iPhone Analytics/Improve Maps > Off.Location‑Based Alerts/Suggestions/Ads > Off if not needed.Wi‑Fi and Bluetooth hygieneSettings > Wi‑Fi > Auto‑Join Hotspot > Never.Tap your current Wi‑Fi > Private Wi‑Fi Address > On; Limit IP Address Tracking > On.Control Centre: keep Bluetooth and Wi‑Fi off when not in use (note: toggles here disconnect temporarily; use Settings to fully turn off if needed).Network and browsingSafari hardeningSettings > Safari:Prevent Cross‑Site Tracking > On.Hide IP Address > From Trackers (or From Trackers and Websites if available).Clear History and Website Data before travel.iCloud Private Relay (iCloud+): Settings > Your Name > iCloud > Private Relay > On for a quick privacy boost on public Wi‑Fi.VPNIf you use a VPN, set to connect on demand on untrusted networks.Find My and recoverySettings > Your Name > Find My > Find My iPhone > On.Enable Find My network and Send Last Location.Add a recovery contact (see “Before you pack”).Test: Sign in to icloud.com/find and confirm your device appears.Payments and passesWallet & Apple PaySettings > Wallet & Apple Pay > Require Face ID > On. Consider disabling double‑click Side Button if it invites accidental triggers.Hide sensitive card notifications on Lock Screen: Settings > Notifications > Wallet > Show Previews > When Unlocked.Clean up boarding passes after travel.Android: privacy toggles to switch before you flyNote: Menu names vary by device (Pixel/Android One vs Samsung/others). Search within Settings if you don’t see an exact label.Lock screen and physical accessStrong screen lockSettings > Security & privacy (or Lock screen) > Screen lock > PIN/Password (avoid patterns; 6+ digits or passphrase).Lockdown modeSettings > Security & privacy > More security & privacy > Lockdown > Enable; add to power menu for quick use (disables biometrics until next unlock).Hide sensitive lock screen contentSettings > Notifications > Lock screen > Hide sensitive content (or “Don’t show notifications”).Disable Smart Lock conveniencesSettings > Security & privacy > More security & privacy > Smart Lock/Trust Agents:Turn off On‑body detection, Trusted places, Trusted devices.SIM PINSettings > Security & privacy > More security & privacy > SIM card lock > Lock SIM card > set/change SIM PIN.Turn off USB debuggingSettings > System > Developer options > USB debugging > Off; or disable Developer options entirely.Samsung extras: - Settings > Lock screen > Secure lock settings > Lock network and security > On; Show lockdown option > On.Location, permissions, and radiosPermission Manager sweepSettings > Privacy > Permission manager: set Location/Camera/Microphone to “Only while app is in use” or “Ask every time”; revoke unused.Auto‑reset permissions: Settings > Apps > Special app access > Remove permissions if app isn’t used > On.Precise vs approximate locationFor non‑navigation apps, set to Approximate.Delete/limit Advertising IDSettings > Privacy > Ads > Delete advertising ID (or “Opt out of Ads Personalisation”).Disable passive scanningSettings > Location > Wi‑Fi scanning > Off; Bluetooth scanning > Off (prevents background probing).Nearby Share/NFC disciplineSettings > Google > Devices & sharing > Nearby Share > Contacts only or Off.Settings > Connected devices > Connection preferences > NFC > Off when not needed.Wi‑Fi auto‑connect and hotspotSettings > Network & Internet > Internet > Network preferences:Turn off “Connect to open networks”.Personal hotspot: use a strong password; WPA3 if available.Find My Device and backupsFind My DeviceSettings > Security & privacy > Find My Device > On.Offline finding (if available in your region) > On.Google backupsSettings > Google > Backup > On > Back up now.Save 2FA backup codes to a secure offline place.Browsing and trackingChrome (or your browser) privacyChrome > Settings > Privacy and security:Safe Browsing > Enhanced protection.Always use secure connections (HTTPS) > On.Clear browsing data (history, cookies, cached images) > clear before travel.Third‑party cookies > Block (if available) or at least restrict in Incognito.DNS over HTTPS: Chrome > Settings > Privacy and security > Use secure DNS > On.Work profile and secure container (optional)Android Enterprise Work Profile: create separation between work and personal apps.Samsung Secure Folder: store sensitive apps/data behind a second lock.Pro tip: Keep Nearby Share and Bluetooth off by default; turn them on intentionally when you actually need to share.On‑the‑road habits (quick wins)Prefer mobile data over public Wi‑Fi. Get a local eSIM from Destinations (e.g., Esim Western Europe, Esim North America, Esim United States, Esim France, Esim Italy, Esim Spain).If you must use public Wi‑Fi, avoid sensitive logins; use a reputable VPN and Private Relay (iOS) where possible.Don’t plug into unknown USB ports. Use your own charger or a USB data blocker.Keep Bluetooth and NFC off in crowded areas; enable only for the duration you need.Be cautious with QR codes; open in your browser, not unknown apps.Install apps only from official stores; avoid sideloading whilst travelling.After your trip, review and revert any temporary settings you changed.One‑page PDF and screenshot calloutsDownload: “Travel Privacy Checklist (2025) – One‑Pager PDF” from this article’s page and save it to Files/Drive for offline access on the plane.Screenshot callouts to capture after toggling:iOS: Stolen Device Protection On; AirDrop set to Contacts Only; Location Services System Services with Significant Locations Off; Safari “Hide IP Address”.Android: SIM card lock On; Lockdown in power menu; Wi‑Fi scanning Off; Find My Device On.Create an album “Travel Privacy” to keep all proof‑of‑settings in one place.Quick checklist (tick as you go)Update OS and apps; strong passcode/PIN (6+ digits or passphrase).Turn on SIM PIN; store the PIN securely.iOS: Stolen Device Protection On; Android: Lockdown available in power menu.Lock screen: hide previews; limit control centre/quick settings from lock screen.AirDrop/Nearby Share restricted (Contacts Only or Off).Location: “While Using”; Precise Off where possible; Significant Locations Off.Wi‑Fi: Private Address On (iOS); auto‑connect to open networks Off (Android).Bluetooth/NFC Off by default.Safari/Chrome hardened; Private Relay/VPN configured.Find My iPhone / Find My Device On with offline finding; test from web.Backups completed; 2FA backup codes saved offline.Password manager “travel mode” enabled.Public USB charging avoided; use your own charger.eSIM ready for destination; avoid unknown Wi‑Fi where possible.FAQ1) Is Airplane Mode enough to protect my privacy? - No. It disables radios temporarily but doesn’t change app permissions, tracking, or lock‑screen exposure. Use the toggles above regardless of flight mode.2) Should I carry a “travel phone”? - If you’re high‑risk, a minimal “travel build” (fresh device or factory‑reset with only essential apps) reduces exposure. For most travellers, the checklist here plus good habits is a solid balance.3) Does using an eSIM help with privacy? - Yes, eSIMs reduce SIM‑swap risk from physical theft and let you avoid insecure public Wi‑Fi by relying on mobile data. Choose a plan for your region via Destinations or direct picks like Esim United States and Esim Western Europe.4) What about device inspections at borders? - Rules vary by country. Minimise on‑device data, use strong screen locks, and keep backups. Consider a travel‑only profile. This is not legal advice—research your route and requirements before departure.5) Will Stolen Device Protection or Lockdown Mode make my phone unusable? - Day to day, no. Stolen Device Protection adds extra verification for sensitive changes when away from familiar locations. Lockdown is optional and can be toggled when you need maximum protection.6) My phone is lost abroad—what now? - Immediately: use Find My (Apple/Google) to mark as lost, attempt locate, and remotely erase if needed. Change critical passwords. For connectivity, activate a replacement eSIM from Destinations or region pages like Esim North America to stay online while resolving logistics.Next stepPick your secure, local data plan before you fly. Browse all travel‑ready options on Destinations, including quick picks for Esim United States, Esim Western Europe, and more.