QR Code Scams at Airports & Cafés: How to Spot and Avoid Them

Blog

QR Code Scams at Airports & Cafés: How...

QR Code Scams at Airports & Cafés: How to Spot and Avoid Them

30 Oct 2025

QR Code Scams at Airports & Cafés: How to Spot and Avoid Them

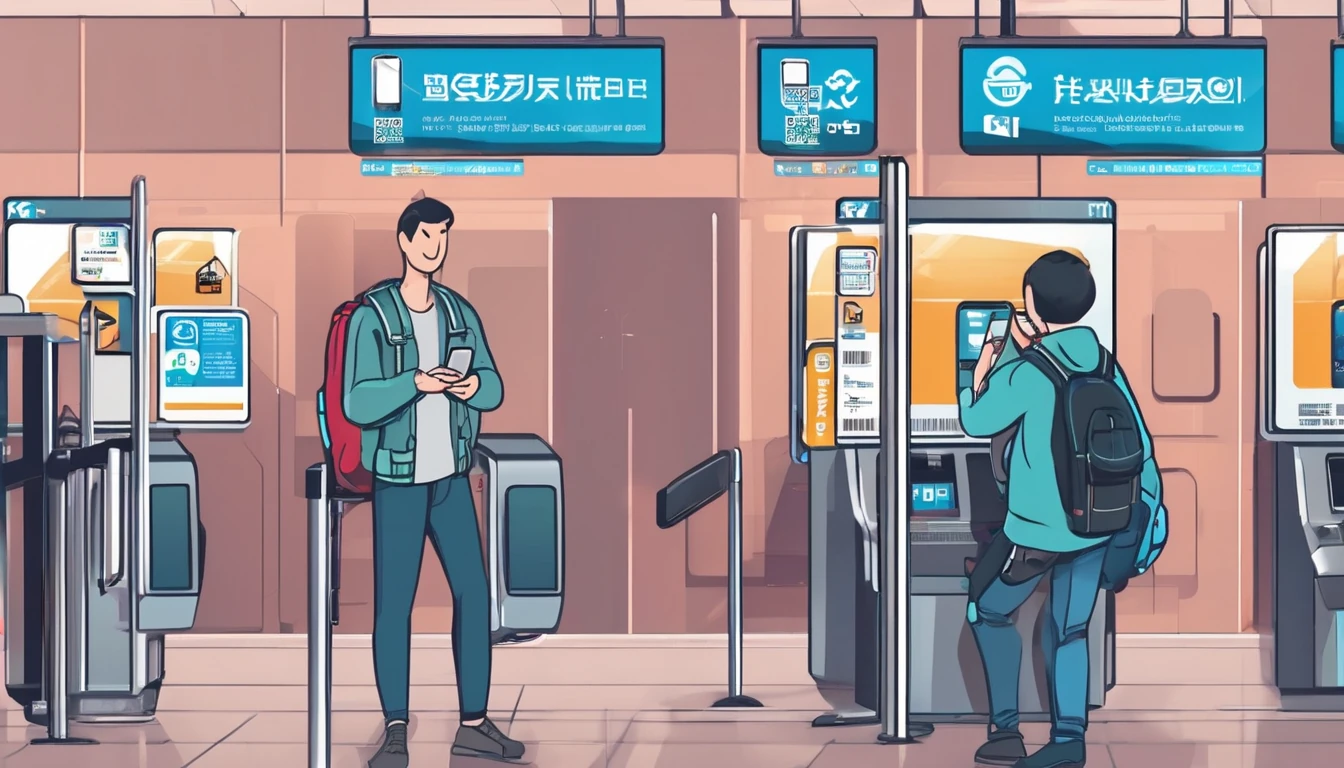
Travellers love QR codes because they are fast, contactless and language‑agnostic. Airports, lounges and cafés use them for menus, Wi‑Fi portals, boarding info and payments. Criminals love them for the same reasons. A tampered or fake code can silently redirect you to a malicious site that steals card details, hijacks messaging apps, installs spyware, or tricks you into paying the wrong person. The risk spikes on the road: you are rushed, tired, on public Wi‑Fi and less likely to scrutinise small details. This guide explains exactly how the scams work, what to check before you scan, safer ways to pay and connect, and what to do if you slip up. Whether you are hopping between terminals in the United States, ordering a cortado in Spain, or heading across Western Europe, a few habits will block most attacks. Keep this page handy for your next trip and share it with your travel companions or team.

Why travellers are targeted with QR code scams

  • High turnover environments. Airports and busy cafés see constant footfall; a swapped sticker can harvest hundreds of scans quickly.
  • Trust in signage. Branded posters and table tents create false credibility; a neat sticker overlay looks “official”.
  • Time pressure. Boarding calls, queues and language barriers push you to scan first and think later.
  • BYO devices. Attackers can exploit out‑of‑date phones or permissive browser settings.
  • Payment normalisation. Scan‑to‑pay is normal in many countries, so fake payment QR codes blend in.

If you are planning routes and connectivity, cross‑check local adoption of QR payments and Wi‑Fi portals via our Destinations guides.

How QR code scams work (in plain English)

  • Malicious redirects. A code sends you to a fake version of a brand’s site (Wi‑Fi login, airline check‑in, café menu). The URL looks convincing but collects passwords, card details or passport data.
  • Payment swaps. A code takes you to a genuine payment app but with an attacker’s payee or invoice pre‑filled; you approve and funds go to the wrong account.
  • App sideload prompts. A page urges you to install an “airport app” or “menu viewer” via an APK or profile—common on Android and iOS respectively—opening the door to malware or mobile device management abuse.
  • Messaging takeovers. A landing page requests excessive permissions (SMS, notifications, accessibility) to read 2FA codes or control taps.
  • Dynamic content masking. Short links or URL shorteners hide the destination, making quick checks harder.
  • Sticker overlays. Real posters/menus are fine; the small QR square is replaced with a tampered sticker.

Before you scan: a traveller’s 10‑point checklist

  1. Inspect the QR physically. Is it a sticker on top of another? Misaligned? Bubbling? Smudged print or off‑brand colours are red flags.
  2. Cross‑verify source. Does the code appear on an official screen, laminated menu, or embedded signage—or a loose card left on tables?
  3. Read the URL preview. Most phones show a domain preview. If your phone does not, long‑press the QR or disable auto‑open in your camera settings.
  4. Check the domain, not the title. “airline‑checkin.com.example.ru” is not “example.com”. Watch for misspellings, extra words and unfamiliar TLDs.
  5. Look for HTTPS and a padlock. Not sufficient alone, but the absence is a deal‑breaker. Never enter credentials on non‑HTTPS pages.
  6. Avoid short links when possible. Be wary of bit.ly, t.co, tinyurl unless you can expand them first.
  7. Never install apps from a QR. Go to the official app store manually and search by name.
  8. Don’t grant extra permissions. A menu or Wi‑Fi portal never needs SMS, contacts, accessibility or device admin rights.
  9. Confirm with staff. For payments and Wi‑Fi, ask: “Is this your current QR?” Staff know if codes recently changed.
  10. Use mobile data for sensitive actions. Avoid public Wi‑Fi for logins and payments. An eSIM is safer and faster in busy terminals.

Pro tips: - Make “Show URL preview” and “Ask before downloading” mandatory in your browser settings. - Save official airline and café URLs in bookmarks; open from bookmarks instead of scanning signage.

For regional travel data that lets you bypass risky Wi‑Fi entirely, see Esim North America, Esim Western Europe, or country packs like Esim United States, Esim France, Esim Italy and Esim Spain.

Spotting fakes at airports and cafés

  • Inconsistent branding. Fonts, colours and logos slightly “off” compared with nearby official materials.
  • Suspicious placement. QR on a separate sticker placed over or near the original, or in odd spots (toilet doors, lifts) without context.
  • Too‑good promos. “Free lounge access, scan to claim” or “50% off all coffee now.” Limited‑time bait is a classic trick.
  • Requests for card upfront. A café menu QR that demands card details before showing items is almost certainly fake.
  • Language mismatch. In an official airline zone, the scan page appears in another language with no localisation options.
  • Staff surprise. If staff hesitate or look confused when you ask about a code, don’t scan it.

Safer ways to access menus, Wi‑Fi and boarding info

Menus: - Ask for a printed menu or read items on the physical board. - If the venue insists on digital, type the domain stated on the receipt or napkin ring into your browser manually.

Wi‑Fi: - Ask staff to tell you the network name and portal URL verbally. - Prefer your own mobile data for any account logins, payments or bookings while travelling.

Airline and gate info: - Use your airline’s app and airport’s official app you installed before travel. Open them directly—do not reinstall via QR at the gate.

Pro tips: - Bookmark your airline, airport, hotel and favourite coffee chain URLs pre‑trip. - Enable “Private DNS”/“Encrypted DNS” and use a reputable browser with anti‑phishing protections.

Payment safety tips on the road

  • Verify the payee. If a QR opens your payment app, check the recipient name and amount before approving.
  • Use contactless cards or wallet. Tap‑to‑pay on terminal beats scan‑to‑pay from a random poster.
  • Don’t save cards on pop‑up portals. Use guest checkout or wallets that tokenise your card.
  • Turn on payment notifications. Real‑time alerts let you catch and report fraud quickly.
  • Separate cards. Keep a low‑limit card for travel micro‑payments; reserve your main card for larger, trusted spends.
  • Reconcile daily. Review transactions each evening while details are fresh.

If you manage company travellers, centralise guidance and reimbursement via For Business. Travel partners can access co‑branded safety kits in our Partner Hub.

Protect your phone before you fly

  • Update OS and apps, especially browser and wallet apps.
  • Disable “Install unknown apps” (Android) and ignore profile install prompts (iOS).
  • Turn off “Open links in installed app” for unknown domains to reduce automatic handoffs.
  • Use a password manager; it won’t auto‑fill on fake domains.
  • Enable two‑factor authentication using an authenticator app rather than SMS when possible.
  • Set your camera to ask before opening QR links automatically.

What to do if you already scanned a bad QR

Act quickly. You can often limit damage within minutes.

  1. Disconnect. Turn on flight mode and disable Wi‑Fi/Bluetooth.
  2. Close the page. Do not tap any further prompts. Force‑quit the browser.
  3. Clear browsing data. Remove recent cookies/history for the last hour.
  4. Change passwords. For any accounts you entered after scanning, change passwords from a clean device and sign out of all sessions.
  5. Cancel suspect payments. Contact your bank via the number on the card. Explain you may have paid a fraudulent recipient.
  6. Remove profiles/apps. Uninstall any app you installed from the QR and remove any unfamiliar device profiles.
  7. Run a security scan. Use your phone’s built‑in scanner or a reputable mobile security app.
  8. Monitor accounts. Enable alerts and watch for new charges or login attempts over the next week.
  9. Report locally. Tell the venue/airport so they can pull the fake code and warn others.

If you’re mid‑trip without safe Wi‑Fi, switch to mobile data—an eSIM pack like Esim Western Europe or Esim North America lets you secure accounts without touching public networks.

Regional note: using eSIM to avoid risky Wi‑Fi

Most QR cons strike when you’re offline and hunting for Wi‑Fi. With travel eSIMs you can: - Skip captive portals entirely. - Use your banking and airline apps on mobile data. - Hotspot a companion device securely.

Pick a regional plan like Esim Western Europe for multi‑country trips or a local bundle such as Esim United States, Esim France, Esim Italy or Esim Spain.

FAQ

Q: Are QR code scams really common for travellers? A: Yes. High‑traffic, low‑attention areas like gates, lounges and café tables are ideal for attackers. Even a simple sticker swap can net hundreds of scans daily.

Q: How do I tell a safe URL from a fake one quickly? A: Focus on the registered domain (the part before the last dot and TLD). “example.com” is safe if expected; “example‑support.com‑secure.info” is not. Avoid taking page titles or logos at face value.

Q: Is scanning a QR automatically dangerous? A: Scanning itself is not harmful. Risk begins when you open the link, install something, or enter data. Use URL preview, verify domains, and never install apps from a QR.

Q: What about QR menus that ask for my card before showing items? A: Treat that as a red flag. A menu should not require payment details up front. Ask for a printed menu or pay at the counter.

Q: Should I use airport Wi‑Fi to download airline apps? A: Prefer mobile data. Install official apps before travel or search the app store directly. Avoid QR prompts on posters or tray tables.

Q: Does a padlock (HTTPS) mean the site is safe? A: It means the connection is encrypted, not that the site is trustworthy. Combine HTTPS with domain checks, context and staff verification.

The bottom line

QR codes are handy, but trust the source not the square. Verify before you scan, avoid installing anything via QR, pay only through confirmed channels, and keep your phone locked down. With basic checks and reliable mobile data, you can sidestep nearly every qr code scam travel threat on your itinerary.

Next step: Plan secure connectivity for your route with our regional and country eSIMs on Destinations.

Read more blogs

Andes Highlights (3 Weeks): Peru–Bolivia–Chile–Argentina Connectivity

Andes Highlights (3 Weeks): Peru–Bolivia–Chile–Argentina Connectivity

Planning a south america itinerary 3 weeks through the high Andes? This route stitches together Peru’s Sacred Valley, Bolivia’s La Paz and Salar de Uyuni, Chile’s Atacama Desert, and northern Argentina’s quebradas or Mendoza wine country—often by long-distance bus and a couple of short flights. Connectivity is different at altitude: coverage is strong in cities but drops in high passes and salt flats; bus Wi‑Fi is patchy; border towns can be blackspots. The smart move is an eSIM with multi‑country coverage, backed by offline maps, offline translations, and a simple routine for crossing borders by bus without losing service. Below you’ll find a practical, connectivity-first itinerary; checklists to prep your phone, apps and documents; and on-the-ground tips for staying online where it matters: booking transport, hailing taxis, backing up photos, and navigating when the signal disappears.If you’re transiting via Europe or North America, you can also add a layover eSIM to stay connected door-to-door. Start with our country list on Destinations, then follow the steps, and you won’t waste time chasing SIM shops at 3,500 metres.The 3‑week Andes route at a glanceWeek 1: Peru (Cusco, Sacred Valley, Machu Picchu) - Fly into Cusco (or Lima then connect). - Base in Cusco; day trips to Pisac/Chinchero/Maras–Moray. - Train to Aguas Calientes; Machu Picchu visit; return to Cusco or continue to Puno/Lake Titicaca.Week 2: Bolivia and Chile (La Paz, Uyuni, San Pedro de Atacama) - Bus/collectivo via Copacabana to La Paz. - Fly or overnight bus to Uyuni. - 3‑day Uyuni–altiplano tour ending in San Pedro de Atacama (Chile).Week 3: Chile and Argentina (Atacama to Salta or Mendoza/Buenos Aires) - Choose: - North: San Pedro to Salta/Jujuy by bus; fly to Buenos Aires. - Or South: San Pedro–Calama flight to Santiago; bus or flight to Mendoza; onward to Buenos Aires.Connectivity notes (quick): - Cities: generally strong 4G/4G+; 5G in major hubs (Santiago, Buenos Aires). - Altitude/rural: expect long no‑signal stretches (Uyuni, altiplano passes, Paso Jama). - Bus Wi‑Fi: often advertised, rarely reliable. Plan to be offline onboard. - Border regions: networks switch; a multi‑country eSIM avoids sudden loss.eSIM vs local SIMs for a 4‑country tripFor a route with multiple borders and remote legs, eSIM wins on time and reliability.What a multi‑country eSIM gets you: - One plan across Peru, Bolivia, Chile, Argentina (check coverage per country on Destinations). - No passport/SIM registration queues at kiosks. - Keep your home number active on the physical SIM for calls/SMS codes. - Instant top‑ups if you burn data on photos or navigation.When a local SIM still helps: - Long stay in one country with heavy data use (e.g., a month in Buenos Aires). - Dead zones where a different local network performs better (rarely worth the hassle on a 3‑week pace).Practical approach: - Use an eSIM as your primary data line across all four countries. - If you find a specific local network far better in one region, add a cheap local SIM and keep the eSIM as backup.Device readiness checklist (before you fly)1) Check eSIM compatibility and SIM‑lock status on your phone.2) Buy and install your eSIM while on home Wi‑Fi. Keep a PDF/printed copy of the QR code.3) Label lines clearly (e.g., “eSIM Andes Data”, “Home SIM”).4) Turn on data roaming for the eSIM; leave roaming off for your home SIM to avoid charges.5) Set up dual‑SIM rules: data on eSIM; calls/SMS default to home SIM if needed.6) Download offline: Google Maps/Organic Maps for all target regions; language packs (Spanish at minimum); bus/air tickets; hotel confirmations.7) Cloud backups: set to upload on Wi‑Fi only; pre‑create shared albums for travel companions.8) Test tethering/hotspot with your laptop/tablet.If you’re transiting popular hubs, consider a short layover eSIM: - USA connections: add an Esim United States or a broader Esim North America.- Europe connections: Madrid/Barcelona? Use an Esim Spain. Paris or Rome? See Esim France and Esim Italy. Multi‑country layovers? Try Esim Western Europe.City‑by‑city connectivity notesCusco & the Sacred Valley (Peru)Coverage: Good in Cusco city; variable in high villages (Maras/Moray) and along Inca Trail approaches.Tips: Download Sacred Valley maps offline; pin viewpoints and ruins. most taxis use WhatsApp—save your accommodation’s number.Machu Picchu/Aguas Calientes: Patchy to none at the citadel. Upload your photos later; don’t rely on live ticket retrieval.Lake Titicaca: Puno and CopacabanaPuno: Reasonable 4G; bus terminals crowded—screenshot QR tickets.Crossing to Copacabana: Expect a signal drop around the border; have directions saved offline.La Paz (Bolivia)Good urban 4G; the cable car network has decent signal but tunnels do not.Yungas/“Death Road” tours: Mountain valleys cause dead zones—share your emergency contacts with the operator, carry a charged power bank, and don’t plan remote calls.Uyuni and the Altiplano (Bolivia to Chile)Uyuni town: OK 4G; ATMs finicky—use Wi‑Fi for banking apps.Salt flats/lagunas: Assume offline for most of the 3‑day tour. Guides often carry satellite phones; agree a pickup time/place in San Pedro and preload your map route.San Pedro de Atacama (Chile)Town: Solid 4G; accommodations often have Wi‑Fi but speeds vary.Geysers, Valle de la Luna: Offline navigation essential; sunrise trips start before mobile networks wake up in some areas.Salta/Jujuy or Mendoza/Buenos Aires (Argentina)Salta/Jujuy: Good city coverage; quebradas have long no‑signal sections.Mendoza: City 4G/5G; vineyards outside town can be patchy.Buenos Aires: Strong 4G/5G; ideal for cloud backups and large downloads before you fly home.Border crossings by bus: step‑by‑stepThe big ones on this route: Peru–Bolivia (Puno/Copacabana), Bolivia–Chile (Uyuni–San Pedro via Hito Cajón), Chile–Argentina (Paso Jama to Salta or Los Libertadores to Mendoza).How to keep service and sanity:1) The day before:- Top up your eSIM data.- Confirm your plan includes both countries you’re entering/leaving.- Download offline maps for both sides of the border and your town of arrival.- Save bus company WhatsApp and terminal address offline.2) On departure morning:- Keep a paper copy or offline PDF of tickets, insurance, and accommodation proof.- Charge phone and power bank; pack a short cable in your daypack.3) On the bus:- Don’t count on bus Wi‑Fi. Keep your eSIM as primary, but expect drops near mountain passes.- If your phone supports it, enable “Wi‑Fi calling” for later when you reach accommodation Wi‑Fi.4) At the border posts:- Data may be unavailable. Keep QR codes and booking numbers offline.- After exiting one country and entering the next, toggle Airplane Mode off/on to re‑register on the new network.- If the eSIM doesn’t attach, manually select a network in Mobile Settings.5) Arrival:- Send your accommodation a quick WhatsApp when you’re back online.- Recheck your eSIM’s data roaming is on; confirm you’re on an in‑country network, not a weak roaming partner.Pro tips: - Dual profiles: If your eSIM allows, keep a secondary profile for a different network in the same country—helpful in border towns.- Cash buffer: Some border terminals don’t accept cards; download a currency converter for offline use.Offline survival kit (5‑minute setup)Maps: Download regions for Cusco, Sacred Valley, Puno, La Paz, Uyuni, San Pedro, Salta/Jujuy or Mendoza, and Buenos Aires.Translations: Download Spanish for offline use; add phrasebook favourites (bus tickets, directions, dietary needs).Documents: Save PDFs of passports, tickets, hotel addresses; star them for quick access.Rides: Screenshots of pickup points; pin bus terminals and hotel doors.Entertainment: Podcasts and playlists for long bus legs, set to download on Wi‑Fi only.Altitude and your tech: what changesCoverage gaps lengthen: Fewer towers at high altitude; valleys can block signal. Assume offline on remote excursions.Batteries drain faster in cold: Keep your phone warm and carry a power bank (10,000–20,000 mAh).Hotel Wi‑Fi may be congested: Schedule big uploads (photo backups, app updates) for big-city stays like Santiago or Buenos Aires.GPS still works offline: Your blue dot shows on offline maps without data—preload everything.Data budgeting for 3 weeksTypical traveller usage across this route: - Messaging/Maps/Bookings: 0.2–0.5 GB/day- Social and photo sharing: 0.3–0.7 GB/day- Occasional video calls/streaming: 0.5–1.0 GB/dayFor a mixed-use trip, plan 15–25 GB for 3 weeks. Heavy creators should double it and upload over hotel Wi‑Fi when possible. If you work remotely, consider a higher‑capacity plan and a backup eSIM; see our guidance on For Business.Practical route with transport and connectivity cuesDays 1–4 Cusco base: Strong city signal; day trips may be spotty—go offline-ready.Days 5–6 Machu Picchu: Expect no service at the ruins; sync tickets ahead.Days 7–8 Puno to La Paz via Copacabana: Border signal drop; re‑register networks after crossing.Days 9–11 Uyuni tour to San Pedro: Treat as offline; charge nightly; carry spare cables.Days 12–14 San Pedro: Stable in town; tours offline; top up data before Paso Jama.Days 15–17 Salta/Jujuy or Mendoza: Good urban 4G; rural patches are offline.Days 18–21 Buenos Aires: Strongest connectivity of the trip; clear your uploads and map downloads for the flight home.Partnering and stopover extrasHospitality and tour operators in the Andes: help your guests stay connected—explore co‑branded solutions via our Partner Hub.Transatlantic flyers: test your eSIM setup on a layover with an Esim United States or Esim Western Europe before hitting high-altitude blackspots.FAQs1) Do I need a local SIM in each country?No. A multi‑country eSIM covering Peru, Bolivia, Chile and Argentina is simpler and works well for a 3‑week pace. Consider a local SIM only if you’ll spend longer in one country and want the absolute best regional coverage.2) Will my WhatsApp number change with an eSIM?No. WhatsApp is tied to your registered number, not your data line. Keep your home SIM active for voice/SMS (roaming off if you wish), and use the eSIM for data—WhatsApp continues as normal.3) Can I hotspot to my laptop or camera?Yes. Enable tethering on your eSIM. Mind your data: cloud backups and OS updates can burn gigabytes—set them to Wi‑Fi only or schedule in big cities.4) What if there’s no signal on the Uyuni/Atacama legs?That’s expected. GPS still works offline. Pre-download maps and translations, carry a power bank, and sync plans with your tour operator before departure.5) Will I get roaming charges at borders?If you’re using a multi‑country eSIM with coverage in both countries, you won’t incur extra roaming fees from your home carrier. Keep roaming off on your home SIM to avoid accidental use.6) I’m connecting via Europe or the US—worth getting a layover eSIM?Yes. It’s an easy way to test your setup and stay reachable. Try Esim North America or country options like Esim Spain, Esim France, or Esim Italy for common hubs.Next step: Browse South America coverage options and build your plan on Destinations.

New Europe Regional Plans: 30 Countries, One eSIM (Fair-Use Explained)

New Europe Regional Plans: 30 Countries, One eSIM (Fair-Use Explained)

If you’ve been waiting for real europe esim plan news that actually helps you travel smarter, this update is for you. Simology’s new Europe regional eSIM plans let you roam across 30 countries with a single installation, one wallet of data, and no SIM swapping. Expect multi‑network access per country, solid 4G/LTE coverage with 5G in major cities, and straightforward fair‑use rules designed to keep speeds consistent for everyone. Pick a tier for a weekend city hop, a two‑week rail trip, or a month of remote work across borders—and top up anytime if you need more.This post covers what’s new, the full country list, how fair‑use works (with an at‑a‑glance caps table), plan tiers, and step‑by‑step install tips. We also compare Europe regional plans with single‑country options like Esim France, Esim Italy, and Esim Spain, and regional alternatives such as Esim Western Europe or Esim North America.What’s new in our Europe regional eSIMs (2025)One eSIM profile works across 30 European countries—no reinstall when you cross a border.Multi‑network connectivity in most countries for better signal redundancy.5G access where available; 4G/LTE as baseline.Tethering/hotspot supported (see fair‑use caps below).Data‑only plans designed for travellers; use your favourite apps for calls and messages.Simple top‑ups that keep the same eSIM active on the road.Clear fair‑use policy to prevent surprises and ensure consistent performance for all users.Pro tip: - If you primarily visit a single country, a local plan (e.g., Esim France) can be more cost‑effective. For multi‑country trips, the Europe regional plan saves time and avoids SIM juggling. Compare options on Destinations.Coverage: 30 countries, one eSIMRoam freely across these countries on one eSIM and one data balance:AustriaBelgiumBulgariaCroatiaCyprusCzechiaDenmarkEstoniaFinlandFranceGermanyGreeceHungaryIrelandItalyLatviaLithuaniaLuxembourgMaltaNetherlandsNorwayPolandPortugalRomaniaSlovakiaSloveniaSpainSwedenSwitzerlandUnited KingdomWhat to expect: - Urban areas: typically strong 4G/5G. - Intercity and rural: reliable 4G; speeds can vary in remote regions and mountain routes. - Network selection: your device will auto‑select the best available partner network; you can manually switch if needed.Check country‑specific notes and city coverage on Destinations.Plan tiers: pick by trip length and usageChoose a tier based on how you travel and how much data you actually use.Lite: 3 GB, 7 days – ideal for long weekends, maps, ride‑hailing, light socials.Standard: 10 GB, 15 days – great for two‑week itineraries with moderate streaming.Plus: 20 GB, 30 days – comfortable for multi‑country rail trips and hybrid work.Max: 50 GB, 30 days – built for heavy users, hotspotting, and longer stays.Top‑ups: add 5–20 GB anytime; your eSIM stays active.Note: Availability and exact allowances may vary by market currency and inventory. You’ll see current options at checkout on Destinations.Fair‑use policy explainedOur fair‑use policy keeps the experience stable for everyone, especially in crowded tourist spots or during big events. It focuses on daily soft caps (to balance peak demand) and reasonable hotspot use (so one device doesn’t degrade a whole cell).Key points: - Daily soft cap: after a certain amount of data in a day, speeds may be deprioritised for the rest of that day, then reset the next day. - Hotspot allowed: share safely with your laptop/tablet; see allowances per tier below. - Video streaming: full speed within your plan; after the daily soft cap, video may play at SD quality. - Top‑ups: if you hit your overall plan allowance before the end of validity, add more data instantly—no reinstallation.Fair‑use caps at a glanceThese are typical caps at launch. Local network conditions can influence exact thresholds.TierTotal dataValidityDaily soft cap before deprioritisationHotspot allowance (share of total)Post-cap typical speedsVideo guidanceLite3 GB7 days1 GB/dayUp to 50%1–3 MbpsSD after capStandard10 GB15 days2 GB/dayUp to 70%1–5 MbpsSD after capPlus20 GB30 days3 GB/dayUp to 80%2–10 MbpsSD after capMax50 GB30 days5 GB/dayUp to 100%2–10 MbpsSD after capNotes: - “Daily” resets each calendar day based on local network time. - Deprioritisation means your traffic may be temporarily slower when the network is busy; it is not a hard block. - There’s no limit on how many countries you can pass through in a day. Keep data roaming enabled.Pro tips: - Heavy maps and photo backup can eat data—turn off auto‑upload on cellular. - Download offline maps/playlists over Wi‑Fi before travel. - Set streaming apps to “Data Saver” or 720p for better mileage on Standard and Plus tiers.Installation and activation: step‑by‑stepBefore you start: - Make sure your phone is unlocked and eSIM‑compatible. - Have a stable Wi‑Fi connection for installation. - Keep your physical SIM active if you need your home number for calls/SMS.iOS (iPhone): 1. Purchase a Europe regional plan on Destinations. 2. Open the install email or in‑app eSIM card and tap “Add eSIM”. 3. Follow prompts: Settings > Mobile Data > Add eSIM. 4. Set “Simology” as Data Only; retain your primary SIM for voice if needed. 5. Turn on Data Roaming for the new eSIM. 6. APN config is automatic; if prompted, accept default settings. 7. Test with a quick web page. You’re ready to roam.Android (Pixel/Samsung and similar): 1. Buy your plan on Destinations. 2. Go to Settings > Network & Internet > SIMs > Add eSIM (wording varies). 3. Scan the QR or add via activation code. 4. Set the Simology eSIM as the data SIM. 5. Enable Data Roaming. 6. Confirm APN is auto‑filled; if not, use the values provided at checkout. 7. Test connectivity.Common checks: - If you don’t see a connection after landing, toggle Airplane Mode, then re‑enable data roaming. - Manually select a different partner network if speeds are inconsistent in a specific area.Who this is forCity hoppers and rail pass travellers: one eSIM across multiple borders—no downtime at each station.Business travellers: predictable costs, easy hotspotting for your laptop. Centralised control available via For Business.Digital nomads: stable data across countries without re‑KYC or SIM shop detours.Families and groups: mix tiers and share hotspots as needed.Partners and resellers: offer a Europe SKU with clear value. Explore the Partner Hub.Europe vs single‑country and other regional plansWhen to choose the Europe regional plan: - You will cross two or more borders. - You want one data wallet with simple top‑ups. - You’re unsure of the exact route and need flexibility.When a single‑country plan may be better: - You’re staying put (e.g., Paris only) and want a local option like Esim France, Esim Italy, or Esim Spain for maximum value.Other regional choices: - Western Europe only? Compare with Esim Western Europe. - Crossing the Atlantic? Pair with Esim United States or go multi‑country with Esim North America.Practical usage examplesWeekend in London + day trip to Paris (Lite): maps, ride‑hailing, socials—keep video to SD and download playlists offline.Two‑week Italy + Spain itinerary (Standard): 10 GB covers maps, socials, moderate streaming. Top up if you add remote work days.Month‑long rail loop (Plus): 20 GB with hotspot allowance will handle email, calls, light video meetings.Remote work month across DE/AT/CH (Max): 50 GB plus hotspot is ideal for daily calls; set video meetings to 720p for consistency.FAQs1) Will it work on my phone? Most unlocked iPhones (XR/XS and newer) and many modern Androids support eSIM. Check your device and country notes on Destinations.2) Can I keep my number and WhatsApp? Yes. Keep your physical SIM for calls/SMS. Set Simology as “Data Only”. WhatsApp and similar apps continue to use your existing number.3) Does the plan include voice minutes or SMS? These are data‑only plans. Use apps like WhatsApp, FaceTime, or Teams for calling/messaging over data.4) When does validity start? Validity starts when the eSIM first connects to the network (not at purchase). You can install in advance over Wi‑Fi, then activate on arrival.5) Is 5G included? Where partner networks offer 5G and your device supports it, you can access 5G. Otherwise you’ll connect via 4G/LTE. Speeds vary by location and network load.6) Can I top up or extend my plan? Yes. Add data in your account without reinstalling the eSIM. Top‑ups keep your eSIM active for the original validity or as stated at checkout.The takeawayOne eSIM, 30 countries, plain‑English fair‑use, and easy top‑ups. That’s flexible roaming without the faff. Check coverage details, current tiers, and availability for your route on Destinations.Next step: Compare plans and buy your Europe eSIM on Destinations.

Hotspot & Tethering on eSIM: Limits, Speeds, and Safe Sharing

Hotspot & Tethering on eSIM: Limits, Speeds, and Safe Sharing

Travelling with an eSIM and need to get your laptop or tablet online? Turning your phone into a hotspot (or tethering via USB/Bluetooth) is often the most reliable way to work, stream, or map your way through a new city. This guide explains how to set up and optimise hotspot and tethering on eSIM devices, what limits to expect, how to tweak APN settings when hotspot is blocked, and how to keep things secure and cool under load. You’ll also find device-limit guidance, speed expectations, practical VPN advice for laptops, and battery/heat tips drawn from real-world use. Where rules and networks vary by country, we point to the right country pages and Playbooks so you can check local notes before you land. If you just need the bottom line: yes, hotspot works on most eSIMs, but plan rules, device caps, and APN settings often decide how well it works.Planning a trip? Start at Destinations to check local tips.Regional picks: Esim North America, Esim Western Europe, Esim United States, Esim France, Esim Italy, Esim Spain.Hotspot vs tethering: the quick definitionsPersonal hotspot: Your phone creates a Wi‑Fi network others can join.USB tethering: Your phone shares data over a cable to one computer; fastest and lowest latency; charges at the same time.Bluetooth tethering: Low-power, slow; fine for basic chat/email.Tethering vs hotspot: Tethering is the umbrella term; hotspot is usually Wi‑Fi sharing.eSIM doesn’t change the mechanics: if your plan allows it, hotspot/tethering will behave like a physical SIM. The differences come from plan permissions, APN profiles, local carrier policies and device limits.Does your eSIM plan allow hotspot/tethering?Most travel eSIMs allow hotspot, but not all. Some carriers disable tethering on certain APN profiles or cap the number of devices.Checklist before you rely on it: 1. Check the plan description for “tethering allowed” or “hotspot support”. 2. Look for data policy notes on the country/region page (start at Destinations or specific regions like Esim North America or Esim Western Europe). 3. Expect fair use in Europe and some throttling at peak times. If your plan says “mobile use only”, hotspot may be blocked. 4. Corporate travellers: consider a pooled or team plan so you’re not sharing a single phone. See For Business.Tip: If hotspot is off or greyed out as soon as you enable it, it’s often an APN configuration issue. See the APN section below.Set up hotspot on your phone (and fix common snags)iPhone/iPad (iOS/iPadOS)Basic setup: 1. Settings > Mobile Data > toggle Mobile Data on. 2. Tap Personal Hotspot. 3. Turn on Allow Others to Join. 4. Set a strong Wi‑Fi password (12+ characters). Avoid birthdays or simple words. 5. Optional: toggle Maximise Compatibility to use 2.4 GHz (better range, lower speed).If Personal Hotspot is missing or won’t enable, check APN fields: - Go to Settings > Mobile Data > Mobile Data Network. - You may see three APN sections: Mobile Data, LTE Setup (optional), and Personal Hotspot. - Copy the APN value from Mobile Data into Personal Hotspot (username/password too, if present). - Return to Personal Hotspot and try again.Pro tips (iOS): - If devices struggle to join, enable Maximise Compatibility to force 2.4 GHz, then try 5 GHz again later for higher speeds. - USB tether for long work sessions: plug into your laptop and enable Personal Hotspot; macOS/Windows will auto-detect. - Family Sharing can auto-join trusted Apple devices without sharing the password.Android (steps vary by brand, but generally)Basic setup: 1. Settings > Network & Internet (or Connections) > Hotspot & tethering. 2. Tap Wi‑Fi hotspot (or Mobile Hotspot). 3. Set Network name (SSID), Security = WPA2 or WPA3, and a strong password. 4. Toggle hotspot On. 5. Optional: Set AP band to 5 GHz for speed if all your devices support it.If hotspot toggles off instantly or says “Not available”: - Check Data Saver/VPN apps aren’t blocking tethering. - APN profile may be missing the DUN flag (tethering APN). Try: - Settings > Mobile network > Access Point Names. - Create a new APN using the APN details provided with your eSIM. - Under APN type, include: default,supl,dun - Save, select the new APN, toggle flight mode Off/On, then retry hotspot.Note: Some carriers lock APN editing. If you can’t add “dun”, use USB tether (often unblocked) or contact support via your plan page on Destinations.USB and Bluetooth tetheringUSB (iOS/Android): Plug your phone into your computer; enable Personal Hotspot/USB tethering. Best for speed, latency, and power (it charges your phone).Bluetooth: Pair devices; enable Bluetooth tethering. Useful when Wi‑Fi is congested, but speeds are modest.Device limits and realistic speedsDevice caps: - iPhone: typically up to 5 Wi‑Fi clients (plus 1 via USB and 1 via Bluetooth in some cases). Behaviour varies by iOS and device. - Android: commonly up to 10 Wi‑Fi clients, configurable in Hotspot settings. Some models/carriers cap lower.Performance expectations: - The hotspot speed ceiling is your phone’s own mobile data speed. Expect 5–15% overhead for Wi‑Fi sharing. - 5 GHz hotspot usually outperforms 2.4 GHz (less interference), but range is shorter. - USB tether bypasses Wi‑Fi overhead and interference, improving stability and latency—ideal for calls and remote desktop.Pro tips for better throughput: - Place the phone near a window for stronger mobile signal; avoid pockets and bags. - If 5G is weak or causing drops, try 4G/LTE only mode for steadier performance. - Change the hotspot channel (Android) if nearby Wi‑Fi networks are clashing. - Avoid chaining multiple VPNs (phone + laptop). See the VPN section.Using VPN on a laptop over hotspotA VPN can protect traffic on public networks, but it introduces overhead.What works best while travelling: - Prefer modern protocols (WireGuard, IKEv2) over older, heavy options (OpenVPN TCP). Try UDP-based connections for lower latency. - If your corporate VPN is mandatory, enable split tunnelling so only work apps use the VPN; streaming and updates go direct. - Use a kill switch to prevent data leakage if mobile signal drops. - Banking/gambling sites may flag unusual IP geolocation across borders. Temporarily disable the VPN if legitimate services won’t load. - Test your “work stack” (VPN + conferencing + RDP/VDI) on hotspot before you travel.If speeds collapse when starting the VPN: - Try a nearer VPN location. - Switch protocol (WireGuard/IKEv2). - Use USB tether to reduce latency and packet loss.Business teams that need guaranteed performance should consider device-per-person rather than sharing a single hotspot. See For Business for options, and the Playbooks linked from Destinations for country-specific notes.Battery, heat and reliability on the roadHotspot is power-hungry. Add 5G radios, and heat becomes the bottleneck.Practical checklist: - Use USB tether when possible: fastest and charges simultaneously. - If on Wi‑Fi hotspot, keep the phone on a table/stand with airflow; avoid dashboards and direct sun. - Disable unused radios: turn off Bluetooth/NFC if you don’t need them. - Lock the phone to 4G/LTE in weak 5G areas to reduce hunting and heat. - Lower screen brightness; use Low Power Mode (iOS) or Battery Saver (Android). - Keep a power bank handy, or a 20W+ charger for fast top-ups.If the phone overheats: - Pause heavy downloads/updates on connected devices. - Switch to 2.4 GHz (Maximise Compatibility) to reduce RF load. - Move to cooler shade; remove thick cases temporarily.Safe sharing: security and access controlDo: - Use WPA2 or WPA3 with a strong, unique password. - Change the hotspot password after sharing with new people. - Enable automatic turn-off when no devices are connected (Android setting on many models). - On iOS, consider Family Sharing for known Apple devices.Avoid: - Open (password-free) hotspots. - Sharing with strangers or in crowded venues where shoulder-surfing is easy. - Leaving hotspot on when you walk away from your laptop.Extra layer: - Keep your phone and laptop fully patched. - On Windows/macOS, mark the hotspot as “Private/Trusted” only if it’s yours; otherwise keep it “Public” to tighten the firewall.Troubleshooting: common tethering blockers and fixesSymptom: Hotspot setting is greyed out or turns off immediately - Cause: Plan blocks tethering or APN lacks DUN. - Fix: Edit APN (Android) to include APN type default,supl,dun, or copy APN into the iOS Personal Hotspot APN field. If APN editing is locked, try USB tether, then contact support via your plan page under Destinations.Symptom: Devices connect to hotspot but no internet - Cause: Captive portal or exhausted data. - Fix: Open a browser on the phone itself to trigger any network sign-in. Check your remaining data in the app/portal.Symptom: Poor speed on hotspot but good on phone - Cause: Wi‑Fi interference or 2.4 GHz congestion. - Fix: Switch hotspot band to 5 GHz (Android) or disable Maximise Compatibility (iOS).Symptom: VPN disconnects frequently - Cause: High packet loss over Wi‑Fi or marginal 5G signal. - Fix: Use USB tether; lock to LTE; change VPN protocol to WireGuard/IKEv2.Symptom: Laptop won’t see the hotspot - Cause: Hidden SSID or band mismatch. - Fix: Ensure SSID is broadcast; try the other band; forget and re-add the network on the laptop.Country notes and planningRules and performance vary by market and carrier. Before you fly: - United States: 5G coverage is broad but varies by city and band. Check Esim United States for plan notes and any hotspot caveats. - Western Europe: Generally friendly to tethering on mainstream plans; watch fair-use policies. Start with Esim Western Europe. - France/Italy/Spain: Review local network compatibility and APN notes in Esim France, Esim Italy and Esim Spain. - Regional coverage maps and Playbooks are linked from Destinations.Partners and travel teams can access implementation guidance and updates via the Partner Hub.Pro tips from the roadPrioritise USB tether for calls, RDP and VPN-heavy work.Keep a short, quality USB‑C or Lightning cable in your bag; cheap cables cause flaky tethering.Set laptop updates to “metered connection” to avoid background downloads chewing your data.Share with fewer devices. Each extra device adds overhead and contention.If you must share widely (family/team), consider a dedicated travel router that connects to your phone’s hotspot and manages the rest—then place the phone somewhere with the best signal.FAQQ: Do all eSIM plans allow hotspot/tethering? A: No. Most travel plans do, but some block it. Check your plan details on Destinations or the regional page (e.g. Esim North America, Esim Western Europe).Q: How many devices can I connect to my phone’s hotspot? A: iPhone typically supports around 5 Wi‑Fi devices; Android often allows up to 10 (varies by model and carrier). More devices mean less bandwidth per user.Q: Will using a VPN on my laptop slow things down? A: A bit. Expect additional latency and some throughput loss. Use USB tether, a modern protocol (WireGuard/IKEv2), and split tunnelling to keep speeds usable.Q: My hotspot toggle is greyed out on eSIM. What can I do? A: Ensure your plan allows tethering. Then check APN: on iOS, copy the data APN into the Personal Hotspot APN field; on Android, include “dun” in APN type (default,supl,dun). If APN editing is locked, try USB tether or contact support via your plan page.Q: Is 5G always better for hotspot? A: Not always. Weak 5G can fluctuate and overheat your phone. Locking to LTE can deliver steadier performance for calls and uploads, especially indoors.Q: What’s the safest way to share with a friend? A: Use WPA2/3 with a strong password, share via QR code, and change the password afterwards. Turn the hotspot off when done.Next step: Choose your destination, confirm hotspot support on the plan page, and note any APN specifics in the Playbooks. Start at Destinations.