Why QR Code Scams Are Exploding in Travel Hotspots
QR code fraud has become one of the fastest-growing cyber threats targeting travelers specifically. Airports, cafés, hotel lobbies, and transit hubs are prime hunting grounds because visitors are rushed, distracted, and desperately searching for Wi-Fi or local information — exactly the conditions that make people lower their guard.
According to the FBI's Internet Crime Complaint Center (IC3), phishing-related complaints — a category that now heavily includes QR-based attacks — resulted in over $18 million in reported losses in 2023 alone, with travel-related scams among the most commonly reported vectors. The U.S. Federal Trade Commission (FTC) published a dedicated consumer alert in 2024 warning that scammers are "tampering with QR codes in public places" to redirect victims to malicious websites designed to steal financial and personal information.
Here's the uncomfortable truth: a QR code is just a visual representation of a URL. You can't tell where it goes until you scan it — and by then, on some devices, the damage can already be done.
What Exactly Is a QR Code Scam ("Quishing")?
A QR code scam — increasingly called quishing (QR + phishing) — is any scheme in which a fraudulent QR code is used to deceive you into visiting a malicious website, surrendering credentials, or downloading harmful software. Unlike traditional email phishing, quishing bypasses most spam filters entirely because the malicious link is embedded in an image, not typed text.
There are three main delivery methods attackers use in travel environments:
1. Physical Sticker Overlays
A scammer prints a sticker with their own QR code and pastes it directly over a legitimate one — on a café table card, an airport information poster, a hotel check-in kiosk, or a public transport payment terminal. The sticker looks identical to the original at a glance.
2. Fake Free Wi-Fi Portals
You scan a QR code that promises "Free Airport Wi-Fi" or "Complimentary Café Internet." The code takes you to a convincing login page that asks for your email, phone number, or even a credit card "for verification." That data goes straight to the attacker.
3. Fraudulent Payment Codes
In restaurants or market stalls, a fake QR code replaces the legitimate payment link. You scan, enter payment details, and the money goes to a fraudulent account. The merchant doesn't receive a cent, and you've handed over your card information.
Where Are These Scams Most Common?
Quishing attacks are disproportionately concentrated in high-footfall travel environments. Knowing the hot zones helps you stay alert at exactly the right moments.
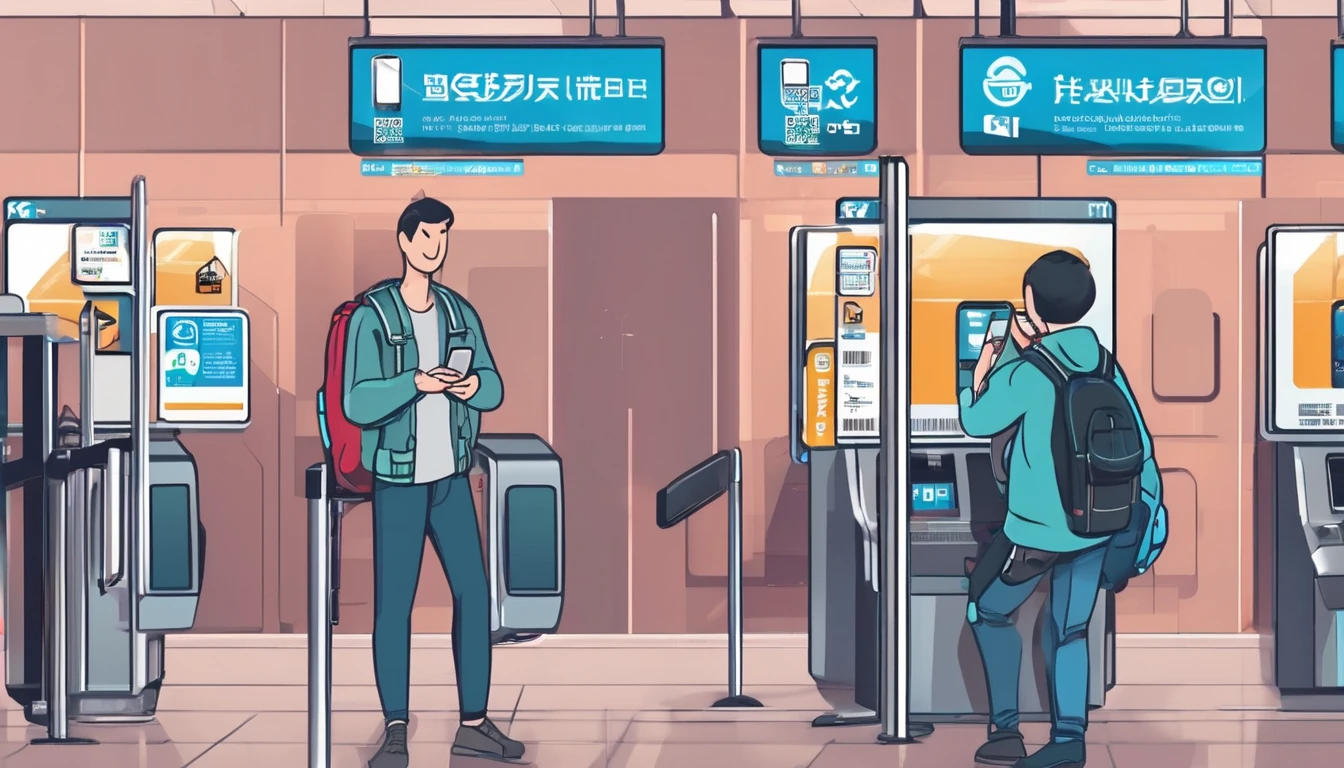
Airports are the single highest-risk location. Travelers are time-pressured, often in an unfamiliar terminal, and urgently need connectivity. QR codes appear on boarding pass kiosks, lounge access signs, baggage information boards, and currency exchange desks — any of which can be tampered with.
Cafés and coffee chains are the second most common target. Table-top QR menu cards are trivially easy to swap out; a scammer can walk in, peel off the legitimate sticker, replace it, and leave in under 60 seconds.
Hotel lobbies and business centers frequently display QR codes for Wi-Fi passwords, concierge services, and local maps. These are often printed on paper and left unattended, making them easy targets.
Public transport hubs — train stations, metro platforms, bus terminals — use QR codes for ticketing and timetables. Cities like London, Singapore, and Tokyo have all reported incidents of tampered transport QR codes.
Parking meters and EV charging stations have seen a dramatic rise in quishing attacks globally. The NCSC (National Cyber Security Centre, UK) specifically flagged parking meter fraud as a growing concern in its 2024 guidance.
How Do You Spot a Fake QR Code?
Spotting a fraudulent QR code before you scan it requires a combination of visual inspection and behavioral awareness. Most fake codes share a handful of telltale signs.
Check for Physical Tampering
Run your fingernail lightly across the QR code. A sticker overlay will have a raised edge you can feel. Look for:
- Misaligned borders or uneven margins around the code
- Slight color differences between the code and the surrounding material
- Bubbling, peeling edges, or an unusually glossy finish on a matte surface
- A code that seems "off-center" compared to the surrounding design
Preview the URL Before You Tap
Most modern smartphone cameras show a URL preview before you open the link. Read it carefully. Red flags include:
- Misspelled brand names (e.g.,
airprot-wifi.cominstead ofairportwifi.com) - Unusual top-level domains (
.xyz,.ru,.cnwhen you're in a Western country) - Shortened URLs (bit.ly, tinyurl) on official-looking signage — legitimate businesses rarely need to shorten their own URLs
- HTTP instead of HTTPS
- Long strings of random characters
Cross-Check with Staff
If you're at an airport or café and you're unsure whether a QR code is legitimate, ask a staff member to confirm it. This takes 10 seconds and eliminates virtually all risk. Legitimate businesses will always be able to point you to their official code or provide an alternative.
Use a QR Scanner with Built-In Security
Several third-party QR scanning apps include real-time URL reputation checking. Apps like Kaspersky QR Scanner or Trend Micro's QR Scanner flag known malicious domains before you land on them. Your phone's built-in camera scanner doesn't offer this protection by default.
What Happens If You Scan a Malicious QR Code?
The consequences depend on what the attacker has set up on the other end — and they range from mildly annoying to genuinely devastating.
Credential theft is the most common outcome. You land on a convincing fake login page for a service you recognize (Google, your bank, an airline loyalty program) and enter your username and password. The attacker now has your credentials.
Payment fraud happens when a fake payment portal captures your card details. Unlike credential theft, this can result in immediate financial loss.
Malware installation is less common on modern iOS and Android devices (which have strong sandboxing), but it's not impossible — particularly on older, unpatched operating systems. Malicious sites can attempt drive-by downloads or prompt you to install a "required app."
SIM swap facilitation: In some sophisticated attacks, the phishing page collects enough personal data (name, phone number, last four digits of a card) to enable a subsequent SIM swap attack against your mobile account.
Data harvesting for targeted scams: Even if nothing immediately harmful happens, your device metadata, location, and browsing behavior can be harvested and sold to other bad actors.
How to Protect Yourself: A Practical Checklist
Protecting yourself from quishing doesn't require technical expertise. It requires habit. Here's a checklist you can internalize before your next trip:
Before you travel:
- Update your phone's operating system and all apps — patched devices are far harder to exploit
- Enable two-factor authentication (2FA) on your email, banking, and airline accounts
- Consider installing a QR scanner app with URL reputation checking
- Note down the official Wi-Fi network names for airports you'll be transiting through (many airports publish these on their websites)
At the airport or café:
- Always preview the URL before opening a QR code link
- If the URL looks unfamiliar or shortened, don't proceed
- Physically inspect QR codes on table cards and signage for sticker overlays
- Ask staff to confirm any QR code you're unsure about
- Never enter payment details or passwords on a page you reached via a QR scan in a public place — navigate to the site directly instead
On public Wi-Fi (QR or otherwise):
- Use a VPN on any public network
- Avoid accessing banking or sensitive accounts over public Wi-Fi
- Log out of accounts when you're done rather than just closing the tab
If you think you've been scammed:
- Change passwords for any accounts you entered credentials for — immediately
- Contact your bank or card issuer to flag potential fraud
- Report the incident to your national cybercrime authority (IC3 in the US, Action Fraud in the UK, ReportCyber in Australia)
- Check your credit report for unusual activity in the following weeks
The Smartest Way to Avoid Airport Wi-Fi QR Codes Entirely
Here's the thing about airport and café Wi-Fi QR scams: the reason travelers are so vulnerable is that they need connectivity. They're scanning random QR codes because they don't have data. Remove that dependency, and you remove most of the risk.
A travel eSIM is the single most effective way to eliminate your reliance on public Wi-Fi — and by extension, your exposure to Wi-Fi-related QR scams. With a Simology eSIM activated before you depart, you land with data already working on your phone. No need to hunt for Wi-Fi, no need to scan anything, no need to enter credentials on an unfamiliar portal.
This isn't just a convenience argument. It's a security argument. When you're not desperately searching for connectivity, you're not in the mental state that scammers exploit.
If you're heading to Europe, Western Europe eSIM plans cover dozens of countries on a single plan, so you're connected the moment your flight lands — whether you touch down in Paris, Rome, or Amsterdam. Heading to Asia? Asia eSIM plans work across major destinations including Japan, Thailand, Singapore, and more, without needing to visit a local SIM shop or scan a single airport QR code.
For travelers to the United States — a country where airport Wi-Fi QR scams have been specifically flagged by the FBI — having a US eSIM already active means you can skip the terminal Wi-Fi entirely.
Are Some Countries Higher Risk Than Others?
QR code scams are a global phenomenon, but certain travel environments carry higher risk based on the prevalence of QR-based payments, the volume of international tourists, and local enforcement capacity.
High-risk environments tend to be in regions where QR payments are deeply embedded in daily life (making fake payment codes harder to spot) and where tourist volumes are very high. Southeast Asia — particularly Thailand, Vietnam, and Indonesia — has seen significant growth in QR payment fraud targeting tourists. Similarly, high-traffic European airports and major US hub airports have all recorded quishing incidents.
Lower-risk environments are typically those where QR codes are less ubiquitous in public spaces, or where strong consumer protection enforcement deters attackers. That said, "lower risk" doesn't mean "no risk" — quishing has been reported in virtually every country with significant international tourism.
The key variable isn't geography; it's context. A QR code on a laminated card at a major international chain café is lower risk than a hand-printed QR code taped to a wall at a small local market stall. Apply more scrutiny to improvised, unofficial-looking displays.
If you're traveling to Southeast Asia, having a dedicated Thailand eSIM or Vietnam eSIM already set up before arrival means you're never in the position of needing to scan an unknown Wi-Fi QR code just to get your bearings.
QR Code Scam Red Flags: Quick-Reference Comparison
| Signal | Likely Legitimate | Potential Scam |
|---|---|---|
| URL preview | Recognizable brand domain, HTTPS | Misspelled domain, HTTP, shortened URL |
| Physical code | Printed directly on material, no raised edges | Sticker overlay, peeling edges, misaligned |
| Context | Official signage, branded materials | Hand-written label, taped-on paper |
| What it asks for | Menu, timetable, general info | Login credentials, payment details |
| Staff awareness | Staff can confirm the code | Staff unaware or unable to verify |
| Domain TLD | .com, .org, country-specific (.co.uk, .com.au) | .xyz, .ru, .tk, unfamiliar TLD |
| URL length | Short, recognizable | Long random string, multiple subdomains |
What Should You Do If You've Already Been Scammed?
If you suspect you've fallen victim to a QR code scam, speed is everything. The faster you act, the more limited the damage.
Step 1 — Disconnect and don't interact further. Close the browser tab immediately. If you were prompted to install an app and did so, uninstall it right away.
Step 2 — Change your passwords. Start with your email account (the master key to everything else), then your banking apps, then your airline/hotel loyalty accounts. Use a different, trusted device if possible.
Step 3 — Contact your bank. If you entered any payment card details, call your bank's fraud line immediately. Most banks can freeze the card and initiate a chargeback investigation within minutes.
Step 4 — Enable 2FA everywhere. If you haven't already, now is the time. Even if an attacker has your password, 2FA stops them from accessing the account.
Step 5 — Report it. In the US, file a report at ic3.gov. In the UK, report to Action Fraud. In Australia, use ReportCyber. Reporting helps authorities identify patterns and warn other travelers.
Step 6 — Monitor your accounts. Check your bank statements and credit report regularly for the next 30-60 days. Identity theft can take weeks to surface.
FAQ
Are QR code scams actually common at airports, or is this overhyped?
QR code scams at airports are a documented and growing threat, not media hype. The FBI issued a specific public service announcement about quishing in 2022 and has continued updating its guidance, while the FTC published a dedicated consumer alert in 2024. High-footfall travel environments are disproportionately targeted because travelers are distracted, time-pressed, and in urgent need of connectivity — the perfect conditions for social engineering.
How can I tell if a QR code has been tampered with before I scan it?
Run your fingernail across the code — a sticker overlay will have a raised edge. Also look for misaligned borders, peeling corners, color inconsistencies, or a code that seems off-center relative to the surrounding design. If anything looks slightly "off," ask a staff member to confirm the code is legitimate before scanning.
What happens if I scan a malicious QR code but don't enter any information?
Simply landing on a malicious website is generally low-risk on a modern, fully updated smartphone, since iOS and Android have strong sandboxing that prevents most drive-by downloads. However, the site may still harvest your IP address, device metadata, and browsing behavior. If you were prompted to install an app or grant permissions and did so, that's when the risk escalates significantly — uninstall immediately and run a security scan.
Is it safe to use airport Wi-Fi if I connect via a QR code?
It depends on whether the QR code is legitimate and whether the network itself is secure. Even on a genuine airport Wi-Fi network, the connection is typically unencrypted, meaning your traffic can be intercepted. The safest approach is to use a VPN on any public Wi-Fi, avoid accessing sensitive accounts, and ideally use a travel eSIM for data instead of relying on public networks at all.
Can my phone get a virus just from scanning a QR code?
On a fully updated modern smartphone, simply scanning a QR code and landing on a webpage is very unlikely to install malware — mobile operating systems are designed to prevent this. The real risk is being tricked into taking an action: entering credentials, downloading an app, or granting permissions. Keep your OS and apps updated, and never install apps from sources prompted by a QR code in a public place.
Do QR code scams only happen at airports and cafés?
No — quishing attacks have been reported at parking meters, EV charging stations, hotel lobbies, museums, public transport hubs, and even on restaurant menus. Airports and cafés are particularly high-risk because of the combination of high tourist volumes, urgency around connectivity, and the prevalence of QR codes in those environments. Apply the same skepticism to any QR code in a public, high-traffic location.
What's the best way to avoid needing to scan unknown QR codes when traveling?
The most effective strategy is to arrive at your destination with mobile data already working, so you're never in a position of desperately needing public Wi-Fi. A travel eSIM activated before departure gives you instant connectivity the moment you land, eliminating the need to scan airport Wi-Fi QR codes entirely. Beyond that, navigate directly to websites rather than through QR codes whenever you need to access a service.
Should I report a QR code scam even if I didn't lose any money?
Yes — reporting is valuable even if you weren't financially harmed. Cybercrime agencies use reports to identify patterns, shut down fraudulent domains, and warn other travelers. In the US, report to the IC3 (ic3.gov); in the UK, to Action Fraud; in Australia, to ReportCyber. Your report could prevent someone else from becoming a victim.
The Bottom Line: Stay Skeptical, Stay Connected
QR code scams are a genuine and growing threat for travelers — but they're also highly preventable. The scams work because they exploit urgency and distraction, two things that airports and cafés reliably produce in abundance. Remove the urgency by arriving with data already on your phone, slow down for five seconds to inspect any QR code before you scan it, and trust your instincts when something feels slightly off.
The most powerful protective habit you can build is simple: never enter a password or payment details on a page you reached through a QR code in a public place. Navigate there directly instead.
For the connectivity side of the equation, a Simology travel eSIM means you land with data working, your home number still active, and zero need to hunt for sketchy airport Wi-Fi. It's not just more convenient — in 2026, it's genuinely the smarter security choice too.
Safe travels, and stay one step ahead.