Indonesia SIM Registration for Foreigners (2025): Passport, Tax ID & Where to Register

Blog

Indonesia SIM Registration for Foreign...

Indonesia SIM Registration for Foreigners (2025): Passport, Tax ID & Where to Register

30 Oct 2025

Indonesia SIM Registration for Foreigners (2025): Passport, Tax ID & Where to Register

If you want a local data plan in Indonesia, you must register your SIM. For tourists in 2025, the essentials are straightforward: bring your passport, buy from an official outlet, and (if you plan to use a local SIM) register your phone’s IMEI with Customs on arrival. Registration is fast when you do it in the right place—airport counters or flagship stores for Telkomsel, XL Axiata and Indosat (IM3). Corner shops and unbranded kiosks can sell a SIM but often can’t complete foreigner registration, which is why many travellers end up with a non-working card until they visit a carrier store.

You do not need an Indonesian tax ID to buy a SIM as a tourist. A local Tax ID (NPWP) is a resident requirement only. Expect instant activation once your passport and device details are captured, though some lines take up to a few hours. This guide explains exactly where to go, what to bring, how long it takes, and common snags to avoid. For a broader view of connectivity across the region, see our country pages under Destinations.

Quick facts: 2025 rules at a glance

  • Who must register: Everyone using an Indonesian SIM, including tourists.
  • IDs accepted for tourists: Passport (photo page). Some outlets also request your entry stamp/visa.
  • Tax ID (NPWP): Not required for tourists. May be requested for residents with KITAS/KITAP.
  • Where to register: Airport operator counters or official city stores (GraPARI for Telkomsel, XL Center, Indosat/IM3 Gallery).
  • IMEI rule: If you’ll use a local Indonesian SIM, register your phone’s IMEI with Customs on entry.
  • Time to activate: Usually minutes; allow up to 24 hours in edge cases.
  • Number of SIMs per ID: Operators may cap how many numbers can be linked to one passport. Expect a small limit.
  • Best coverage: Telkomsel generally leads for nationwide coverage, especially off the beaten path.

Indonesia SIM registration for tourists: what you need in 2025

To complete indonesia sim registration tourist requirements, you typically need:

  • Passport: The physical passport you used to enter Indonesia. Staff will scan or photograph it.
  • Entry details: Your entry stamp or visa (e.g., VOA/e-VOA) may be requested.
  • Local contact info: A temporary address (hotel/Airbnb) and Indonesian phone contact are sometimes asked but not always enforced.
  • Your phone: Keep it handy for SIM insertion, eSIM provisioning (where available), and test calls/data.
  • IMEI registration: If using a local SIM, Indonesian Customs needs your device IMEI recorded when you arrive.

Good to know: - Photocopies aren’t usually required; a physical passport is. - Staff complete the registration in their system. Tourists cannot complete the standard NIK/KK self-registration used by locals. - Some flagship stores issue eSIM profiles to eligible devices; availability and staff policy varies by location.

Where to register: airport kiosks vs city stores

Buying at the right place matters more than hunting the cheapest shelf price.

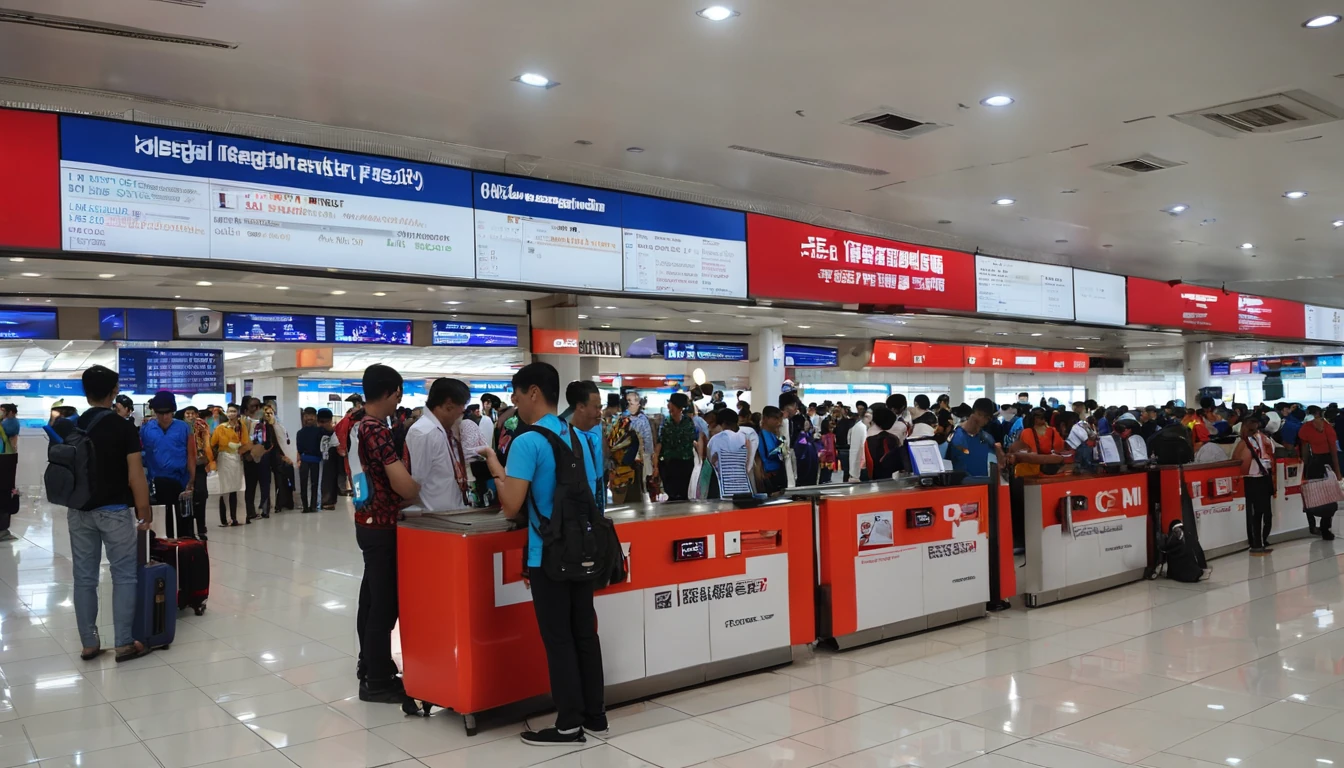
Airport operator counters (best for immediate connectivity)

  • Pros:
  • Passport registration is done on the spot.
  • Staff can help with IMEI questions and basic setup.
  • English-speaking staff are common in major airports (CGK Jakarta, DPS Bali).
  • You walk out connected.
  • Cons:
  • Packages can be pricier than in town.
  • Stock may be limited during peak arrivals.

Official city stores (often best value)

  • Pros:
  • Full service: SIM sale, passport registration, troubleshooting, eSIM availability in flagship branches.
  • Broader plan selection, often better value than airports.
  • Cons:
  • Requires a trip across town and queue time.
  • Opening hours vary; not 24/7.

Look for: - Telkomsel GraPARI - XL Center - Indosat Ooredoo Hutchison (IM3) Gallery

Small kiosks and convenience stores (proceed with caution)

  • Pros: Cheapest sticker price, everywhere.
  • Cons: Many cannot legally register a foreign passport. You may leave with a SIM that won’t activate until you visit an operator store. Not worth the risk for short stays.

Step-by-step: from landing to connected

1) Decide your approach
- If you only need calls/data for a day or two and you already have roaming or a regional eSIM, you may skip a local SIM entirely.
- If you want local rates for a week or more, a registered local SIM is usually best value.

2) Register your device IMEI with Customs (if using a local SIM)
- Before or on arrival, prepare your phone’s IMEI numbers (dial *#06#).
- Use the Mobile BeaCukai app or the customs desk at the airport to submit your device details. You’ll be given a confirmation/QR code.
- Present the QR/approval at the counter if asked. Tourists generally receive time-limited permission to use a local SIM on that device.
- If you forget at the airport, visit a Customs office soon after arrival. Using international roaming does not require IMEI registration.

3) Choose an operator
- Telkomsel: Widest coverage, especially outside big cities and across islands.
- XL Axiata: Good urban coverage and competitive pricing.
- Indosat (IM3): Often attractive data bundles and promos.
Tip: Ask specifically for a “tourist” or “foreigner” package and confirm voice/SMS inclusions if you need them.

4) Buy and register at an official counter
- Present your passport (and entry stamp if requested).
- Staff will capture your details, insert the SIM or issue an eSIM, and complete registration in the operator’s system.
- You may be asked for a local address (hotel is fine).
- Keep the SIM starter pack and receipt; they include your number and useful USSD codes.

5) Activate and test
- Restart your phone after SIM/eSIM provisioning.
- Check mobile data, calls, and SMS. APN settings usually configure automatically.
- If data doesn’t work immediately, toggle airplane mode, then try a manual network selection.

Costs, plans and activation timelines

Pricing shifts regularly, but as a guide:

  • Starter packs: IDR 50,000–150,000 for basic data with some local calls/SMS.
  • Tourist bundles: IDR 100,000–300,000 for larger data (e.g., 15–35 GB) and bonus app data or local minutes.
  • eSIM: Offered by some operator flagships; priced similarly to physical SIMs.

Activation speed: - At an official counter, your line typically goes live within minutes once registration is submitted.
- Network provisioning can take longer in busy periods; allow up to a few hours. Rarely, 24 hours.

Top-ups and extensions: - Use the operator’s app (requires your Indonesian number for OTP), vouchers from minimarts (Indomaret, Alfamart), or pay at an operator store. - Tourist lines may have validity limits aligned to your stay. Ask how to extend if you’re in-country longer.

Common snags (and how to fix them)

  • SIM shows “emergency calls only” or no service:
  • Check that IMEI registration was completed if you’re using a local SIM.
  • Try manual network selection (Telkomsel/XL/Indosat) and restart the phone.
  • Bought at a small kiosk and it won’t activate:
  • Visit an official operator store with your passport to complete foreigner registration.
  • No data despite signal bars:
  • Toggle airplane mode, reset network settings, or update APN to default for your operator.
  • Confirm your bundle includes data and is active.
  • eSIM failed to install:
  • Ensure you’re on stable Wi‑Fi, scan the QR again, or ask staff to reissue the profile. Some outlets can only issue physical SIMs to foreigners.
  • Line deactivated mid-trip:
  • It can happen if IMEI wasn’t registered or your package validity expired. Visit an operator store with your passport.
  • WhatsApp number change:
  • If you switch from a roaming number to a local number, use WhatsApp’s Change Number feature to keep chats and groups.

Passport vs Tax ID (NPWP): what you actually need

  • Tourists: Passport only. You will not be asked for a local Tax ID (NPWP) to buy/register a SIM as a short-stay visitor.
  • Residents and long-stay permit holders: Some outlets may request KITAS/KITAP and NPWP. Requirements vary by operator and tenure.
  • If staff mention “NIK/KK”: Those are local IDs for Indonesians. As a foreigner, your passport is used instead.

Business travellers and teams

Need multiple lines, consistent packages, or centralised spend? Coordinate ahead of arrival to avoid airport queueing and ad-hoc plans.

  • Explore enterprise options via For Business.
  • If you’re a travel/tech partner supporting teams across regions, visit our Partner Hub for scalable connectivity workflows.

Useful comparisons and onward travel

Heading elsewhere after Indonesia? Keep your connectivity simple:

FAQ

1) Do tourists need an Indonesian Tax ID (NPWP) to buy a SIM?
No. Tourists register with a passport. NPWP is for residents and is not a requirement for short-stay visitors.

2) Is IMEI registration mandatory for tourists?
If you plan to use a local Indonesian SIM, you should register your device IMEI with Customs on arrival. Roaming on your home SIM does not require IMEI registration. Airport customs counters can handle this in minutes.

3) Can I register my Indonesian SIM online?
Not as a tourist. Foreigners must complete registration in person at an official operator outlet (airport counters or flagship stores) where staff scan your passport and submit the registration.

4) How long does SIM activation take?
Usually within minutes after staff complete registration; sometimes up to a few hours. Very occasionally, it may take until the next day.

5) Can I get an eSIM as a tourist in Indonesia?
Some flagship operator stores can issue eSIMs to eligible devices, but availability varies by city and store. Airport counters often favour physical SIMs. Ask the outlet in advance if you specifically want eSIM.

6) How many SIMs can I register with one passport?
Operators may limit the number of active numbers linked to a single passport. Policies vary; expect a small cap and ask the staff if you need more than one line.

Next step

Planning your trip and want the latest local guidance and plan options? Start with Indonesia under our Destinations hub.

Read more blogs

Andes Highlights (3 Weeks): Peru–Bolivia–Chile–Argentina Connectivity

Andes Highlights (3 Weeks): Peru–Bolivia–Chile–Argentina Connectivity

Planning a south america itinerary 3 weeks through the high Andes? This route stitches together Peru’s Sacred Valley, Bolivia’s La Paz and Salar de Uyuni, Chile’s Atacama Desert, and northern Argentina’s quebradas or Mendoza wine country—often by long-distance bus and a couple of short flights. Connectivity is different at altitude: coverage is strong in cities but drops in high passes and salt flats; bus Wi‑Fi is patchy; border towns can be blackspots. The smart move is an eSIM with multi‑country coverage, backed by offline maps, offline translations, and a simple routine for crossing borders by bus without losing service. Below you’ll find a practical, connectivity-first itinerary; checklists to prep your phone, apps and documents; and on-the-ground tips for staying online where it matters: booking transport, hailing taxis, backing up photos, and navigating when the signal disappears.If you’re transiting via Europe or North America, you can also add a layover eSIM to stay connected door-to-door. Start with our country list on Destinations, then follow the steps, and you won’t waste time chasing SIM shops at 3,500 metres.The 3‑week Andes route at a glanceWeek 1: Peru (Cusco, Sacred Valley, Machu Picchu) - Fly into Cusco (or Lima then connect). - Base in Cusco; day trips to Pisac/Chinchero/Maras–Moray. - Train to Aguas Calientes; Machu Picchu visit; return to Cusco or continue to Puno/Lake Titicaca.Week 2: Bolivia and Chile (La Paz, Uyuni, San Pedro de Atacama) - Bus/collectivo via Copacabana to La Paz. - Fly or overnight bus to Uyuni. - 3‑day Uyuni–altiplano tour ending in San Pedro de Atacama (Chile).Week 3: Chile and Argentina (Atacama to Salta or Mendoza/Buenos Aires) - Choose: - North: San Pedro to Salta/Jujuy by bus; fly to Buenos Aires. - Or South: San Pedro–Calama flight to Santiago; bus or flight to Mendoza; onward to Buenos Aires.Connectivity notes (quick): - Cities: generally strong 4G/4G+; 5G in major hubs (Santiago, Buenos Aires). - Altitude/rural: expect long no‑signal stretches (Uyuni, altiplano passes, Paso Jama). - Bus Wi‑Fi: often advertised, rarely reliable. Plan to be offline onboard. - Border regions: networks switch; a multi‑country eSIM avoids sudden loss.eSIM vs local SIMs for a 4‑country tripFor a route with multiple borders and remote legs, eSIM wins on time and reliability.What a multi‑country eSIM gets you: - One plan across Peru, Bolivia, Chile, Argentina (check coverage per country on Destinations). - No passport/SIM registration queues at kiosks. - Keep your home number active on the physical SIM for calls/SMS codes. - Instant top‑ups if you burn data on photos or navigation.When a local SIM still helps: - Long stay in one country with heavy data use (e.g., a month in Buenos Aires). - Dead zones where a different local network performs better (rarely worth the hassle on a 3‑week pace).Practical approach: - Use an eSIM as your primary data line across all four countries. - If you find a specific local network far better in one region, add a cheap local SIM and keep the eSIM as backup.Device readiness checklist (before you fly)1) Check eSIM compatibility and SIM‑lock status on your phone.2) Buy and install your eSIM while on home Wi‑Fi. Keep a PDF/printed copy of the QR code.3) Label lines clearly (e.g., “eSIM Andes Data”, “Home SIM”).4) Turn on data roaming for the eSIM; leave roaming off for your home SIM to avoid charges.5) Set up dual‑SIM rules: data on eSIM; calls/SMS default to home SIM if needed.6) Download offline: Google Maps/Organic Maps for all target regions; language packs (Spanish at minimum); bus/air tickets; hotel confirmations.7) Cloud backups: set to upload on Wi‑Fi only; pre‑create shared albums for travel companions.8) Test tethering/hotspot with your laptop/tablet.If you’re transiting popular hubs, consider a short layover eSIM: - USA connections: add an Esim United States or a broader Esim North America.- Europe connections: Madrid/Barcelona? Use an Esim Spain. Paris or Rome? See Esim France and Esim Italy. Multi‑country layovers? Try Esim Western Europe.City‑by‑city connectivity notesCusco & the Sacred Valley (Peru)Coverage: Good in Cusco city; variable in high villages (Maras/Moray) and along Inca Trail approaches.Tips: Download Sacred Valley maps offline; pin viewpoints and ruins. most taxis use WhatsApp—save your accommodation’s number.Machu Picchu/Aguas Calientes: Patchy to none at the citadel. Upload your photos later; don’t rely on live ticket retrieval.Lake Titicaca: Puno and CopacabanaPuno: Reasonable 4G; bus terminals crowded—screenshot QR tickets.Crossing to Copacabana: Expect a signal drop around the border; have directions saved offline.La Paz (Bolivia)Good urban 4G; the cable car network has decent signal but tunnels do not.Yungas/“Death Road” tours: Mountain valleys cause dead zones—share your emergency contacts with the operator, carry a charged power bank, and don’t plan remote calls.Uyuni and the Altiplano (Bolivia to Chile)Uyuni town: OK 4G; ATMs finicky—use Wi‑Fi for banking apps.Salt flats/lagunas: Assume offline for most of the 3‑day tour. Guides often carry satellite phones; agree a pickup time/place in San Pedro and preload your map route.San Pedro de Atacama (Chile)Town: Solid 4G; accommodations often have Wi‑Fi but speeds vary.Geysers, Valle de la Luna: Offline navigation essential; sunrise trips start before mobile networks wake up in some areas.Salta/Jujuy or Mendoza/Buenos Aires (Argentina)Salta/Jujuy: Good city coverage; quebradas have long no‑signal sections.Mendoza: City 4G/5G; vineyards outside town can be patchy.Buenos Aires: Strong 4G/5G; ideal for cloud backups and large downloads before you fly home.Border crossings by bus: step‑by‑stepThe big ones on this route: Peru–Bolivia (Puno/Copacabana), Bolivia–Chile (Uyuni–San Pedro via Hito Cajón), Chile–Argentina (Paso Jama to Salta or Los Libertadores to Mendoza).How to keep service and sanity:1) The day before:- Top up your eSIM data.- Confirm your plan includes both countries you’re entering/leaving.- Download offline maps for both sides of the border and your town of arrival.- Save bus company WhatsApp and terminal address offline.2) On departure morning:- Keep a paper copy or offline PDF of tickets, insurance, and accommodation proof.- Charge phone and power bank; pack a short cable in your daypack.3) On the bus:- Don’t count on bus Wi‑Fi. Keep your eSIM as primary, but expect drops near mountain passes.- If your phone supports it, enable “Wi‑Fi calling” for later when you reach accommodation Wi‑Fi.4) At the border posts:- Data may be unavailable. Keep QR codes and booking numbers offline.- After exiting one country and entering the next, toggle Airplane Mode off/on to re‑register on the new network.- If the eSIM doesn’t attach, manually select a network in Mobile Settings.5) Arrival:- Send your accommodation a quick WhatsApp when you’re back online.- Recheck your eSIM’s data roaming is on; confirm you’re on an in‑country network, not a weak roaming partner.Pro tips: - Dual profiles: If your eSIM allows, keep a secondary profile for a different network in the same country—helpful in border towns.- Cash buffer: Some border terminals don’t accept cards; download a currency converter for offline use.Offline survival kit (5‑minute setup)Maps: Download regions for Cusco, Sacred Valley, Puno, La Paz, Uyuni, San Pedro, Salta/Jujuy or Mendoza, and Buenos Aires.Translations: Download Spanish for offline use; add phrasebook favourites (bus tickets, directions, dietary needs).Documents: Save PDFs of passports, tickets, hotel addresses; star them for quick access.Rides: Screenshots of pickup points; pin bus terminals and hotel doors.Entertainment: Podcasts and playlists for long bus legs, set to download on Wi‑Fi only.Altitude and your tech: what changesCoverage gaps lengthen: Fewer towers at high altitude; valleys can block signal. Assume offline on remote excursions.Batteries drain faster in cold: Keep your phone warm and carry a power bank (10,000–20,000 mAh).Hotel Wi‑Fi may be congested: Schedule big uploads (photo backups, app updates) for big-city stays like Santiago or Buenos Aires.GPS still works offline: Your blue dot shows on offline maps without data—preload everything.Data budgeting for 3 weeksTypical traveller usage across this route: - Messaging/Maps/Bookings: 0.2–0.5 GB/day- Social and photo sharing: 0.3–0.7 GB/day- Occasional video calls/streaming: 0.5–1.0 GB/dayFor a mixed-use trip, plan 15–25 GB for 3 weeks. Heavy creators should double it and upload over hotel Wi‑Fi when possible. If you work remotely, consider a higher‑capacity plan and a backup eSIM; see our guidance on For Business.Practical route with transport and connectivity cuesDays 1–4 Cusco base: Strong city signal; day trips may be spotty—go offline-ready.Days 5–6 Machu Picchu: Expect no service at the ruins; sync tickets ahead.Days 7–8 Puno to La Paz via Copacabana: Border signal drop; re‑register networks after crossing.Days 9–11 Uyuni tour to San Pedro: Treat as offline; charge nightly; carry spare cables.Days 12–14 San Pedro: Stable in town; tours offline; top up data before Paso Jama.Days 15–17 Salta/Jujuy or Mendoza: Good urban 4G; rural patches are offline.Days 18–21 Buenos Aires: Strongest connectivity of the trip; clear your uploads and map downloads for the flight home.Partnering and stopover extrasHospitality and tour operators in the Andes: help your guests stay connected—explore co‑branded solutions via our Partner Hub.Transatlantic flyers: test your eSIM setup on a layover with an Esim United States or Esim Western Europe before hitting high-altitude blackspots.FAQs1) Do I need a local SIM in each country?No. A multi‑country eSIM covering Peru, Bolivia, Chile and Argentina is simpler and works well for a 3‑week pace. Consider a local SIM only if you’ll spend longer in one country and want the absolute best regional coverage.2) Will my WhatsApp number change with an eSIM?No. WhatsApp is tied to your registered number, not your data line. Keep your home SIM active for voice/SMS (roaming off if you wish), and use the eSIM for data—WhatsApp continues as normal.3) Can I hotspot to my laptop or camera?Yes. Enable tethering on your eSIM. Mind your data: cloud backups and OS updates can burn gigabytes—set them to Wi‑Fi only or schedule in big cities.4) What if there’s no signal on the Uyuni/Atacama legs?That’s expected. GPS still works offline. Pre-download maps and translations, carry a power bank, and sync plans with your tour operator before departure.5) Will I get roaming charges at borders?If you’re using a multi‑country eSIM with coverage in both countries, you won’t incur extra roaming fees from your home carrier. Keep roaming off on your home SIM to avoid accidental use.6) I’m connecting via Europe or the US—worth getting a layover eSIM?Yes. It’s an easy way to test your setup and stay reachable. Try Esim North America or country options like Esim Spain, Esim France, or Esim Italy for common hubs.Next step: Browse South America coverage options and build your plan on Destinations.

SIM Registration by Country (Top 30 Destinations): Do You Need ID? (2025)

SIM Registration by Country (Top 30 Destinations): Do You Need ID? (2025)

Travellers are often surprised to learn that many countries now require “real‑name” registration to activate a local SIM or eSIM. In plain terms: you may need to show ID (usually a passport) and complete a quick form or selfie check before your number works. Other destinations still allow anonymous purchase, especially for data‑only plans. This guide summarises SIM registration by country across 30 of the most-visited destinations, so you know what to expect at the airport kiosk, high‑street shop, or when activating an eSIM in‑app.We update this list quarterly and link out to the most relevant country and regional guides, including Esim United States, Esim France, Esim Italy, Esim Spain, Esim Western Europe and Esim North America. For everything else, browse all country pages via Destinations.What is SIM registration?SIM registration (aka “real‑name registration”) ties a mobile number to an individual using a recognised ID. It usually happens: - At point of sale (airport desk, carrier shop, authorised reseller) - Online or in an app (video KYC, document upload, eID), especially for eSIMAuthorities use it to limit fraud and spam. For travellers, it means carrying your passport and sometimes completing a quick selfie or address check.Quick prep checklist (save this before you fly)Bring your physical passport and one backup photo/scan stored offline.Know your accommodation address (hotel is fine) and a reachable email.Have a payment method that matches your name (card or digital wallet).If you want a local plan on arrival, favour official carrier stores or airport counters for smoother tourist KYC.Consider activating an eSIM before departure to skip queues. Regional options like Esim Western Europe and Esim North America cover multi‑country trips.SIM registration by country: Top 30 (2025)Notes: - “Need ID?” reflects national rules for prepaid activation; retailers can still choose to verify even in “No” markets. - Requirements can change; use this as a traveller’s quick reference and confirm details in‑country.CountryNeed ID?Where to registerAccepted documentsPractical notesUnited StatesNo (not mandated)n/an/aSome carriers may verify identity for fraud prevention. See Esim United States.CanadaNo (not mandated)n/an/aRetailers may request ID at their discretion.MexicoNo (registry suspended)n/an/aThe national registry was struck down; keep passport handy just in case.BrazilYesCarrier store/airport kioskPassport; CPF often requestedTourists can register at major MNO shops; some can assist without a CPF.United KingdomNo (not mandated)n/an/aSome shops may ask for card/ID, but no legal registration for prepaid.FranceYesStore or online/appPassport/EU IDKeep SIM sleeve/contract; eSIM apps usually prompt for ID. See Esim France.SpainYesStore or onlinePassport/EU IDEasy at airports and high‑street shops. See Esim Spain.ItalyYesStore or video KYCPassportSome sellers request a codice fiscale; shops can generate one. See Esim Italy.GermanyYesStore; Postident/video IDPassport/EU IDOnline/eSIM often uses video identification.PortugalYesStorePassport/EU IDSome retailers ask for a local tax number (NIF); not always needed for prepaid.NetherlandsNo (not mandated)n/an/aID checks may occur for age/fraud, but no nationwide requirement.BelgiumYesStore or onlinePassport/eIDSelf‑registration portals common; bring passport.SwitzerlandYesStore or onlinePassport/IDHotel address typically accepted for tourists.GreeceYesStorePassport/EU IDRegister at operator shops or authorised kiosks; keep receipts.TurkeyYesOperator storePassportSIMs tied to device IMEI; unregistered devices may be blocked after ~120 days.PolandYesStore/post officePassport/EU IDRegistration widely available at convenience stores and post offices.IrelandNo (not mandated)n/an/aOperators may do light checks; no statutory prepaid registration.JapanYes (voice); data‑only often noStore or onlinePassportData‑only SIMs/eSIMs can be anonymous; voice/SMS requires ID.South KoreaYesCarrier store/airportPassport; ARC for long staysTourist SIM/eSIM desks at major airports streamline KYC.China (Mainland)YesCarrier service centrePassport; face photoRegistration is mandatory before activation. Bring passport in person.Hong KongYesOnline portal or storePassport/HKIDComplete real‑name registration or the line will be suspended.SingaporeYesTelco shop/retailerPassportMax 3 prepaid lines per person.MalaysiaYesStorePassportPhoto capture/biometric checks common at POS.ThailandYesOperator counterPassportExpect a quick photo capture with your passport.VietnamYesOperator storePassportAddress and photo usually required; use official shops.IndonesiaYesOperator outletPassportLocals use NIK/KK; tourists must register at a provider outlet.PhilippinesYesOnline portalPassportRegister within the stated window under the SIM Registration Act.IndiaYesStorePassport + visaeKYC at carrier stores; a local contact/address may be requested.AustraliaYesOnline or storePassport (visitors)Identity check is mandatory for activation.New ZealandNo (not mandated)n/an/aSome sellers may request ID; no nationwide rule as of 2025.Country and regional guides: Esim United States, Esim France, Esim Italy, Esim Spain, Esim Western Europe, Esim North America, and the full index at Destinations.How to buy and register smoothly (step‑by‑step)Decide eSIM vs physical SIM - Single or multi‑country trip? Consider Esim Western Europe or Esim North America. - Need calls/SMS? Some markets (e.g., Japan) require ID only for voice—data‑only eSIMs are simpler.Prepare documents - Keep your passport ready; jot down your hotel address and a local contact (hotel desk works).Choose the right channel - Airport carrier counters and flagship stores handle tourist KYC fastest. - For eSIM, complete the in‑app KYC with good lighting for any selfie/ID scan.Complete registration - Follow staff guidance or app prompts. Don’t leave until you’ve made a test call or used data.Keep proof - Save the receipt, SIM sleeve, QR code/eSIM email, and any confirmation SMS for the duration of your trip.Pro tips from frequent travellersArriving late? Pre‑activate an eSIM before you fly so you have data for ride‑hailing and maps on landing.Airport vs city: Airport kiosks are efficient but sometimes pricier than city shops; decide what you value more—speed or price.Brazil and Turkey specifics: Use official carrier stores; they’re set up for foreigner KYC and can explain CPF/IMEI rules.UK/US/Mexico: Even where registration isn’t mandated, keep your passport and a payment card handy in case a retailer requests verification.Keep it simple for teams: If you’re coordinating for a group or staff, consider centrally managed plans. See For Business. If you’re a reseller or TMC, explore our Partner Hub.When an eSIM helps vs when it doesn’tHelps:Short trips where you want instant data without visiting a shop.Anonymous data‑only allowed (e.g., many Japan MVNO data plans).Multi‑country itineraries covered by regional products like Esim Western Europe.Doesn’t help:Markets requiring in‑person KYC before activation (e.g., China), or where tourist eSIMs still need document upload.When you specifically need local voice/SMS and the operator mandates full ID.FAQDo I always need a passport to buy a SIM?No. Some countries don’t mandate registration (e.g., US, UK, Mexico, Netherlands, New Zealand). That said, many sellers still prefer to see ID. When ID is required, a passport is the safest bet for travellers.Can I register online for an eSIM instead of visiting a shop?Often yes. Many European operators support video ID or document upload for eSIM activation (e.g., Germany, France, Italy, Spain). In some markets (e.g., China), you’ll still need to visit a carrier store.How long does registration take?In store: 5–15 minutes at airport counters, sometimes longer in city shops. Online/app KYC: usually 2–10 minutes if your photos are clear and documents match.What if I don’t have a local address yet?A hotel address is typically acceptable. If asked for a contact number, use the hotel’s front desk.Will my phone get blocked if I use a local SIM?Only in certain markets with IMEI controls (notably Turkey). Tourists can use their phones for a limited period (commonly around 120 days) without registering the device. This does not affect roaming on your home SIM.Is roaming on my home SIM affected by these rules?No. Real‑name rules apply to activating local SIMs/eSIMs. Roaming with your existing SIM works as normal, subject to your home carrier’s rates.Next step: Plan your connectivity per stop with our country pages and regional eSIMs. Start with Destinations.

Navigation & Offline Maps: Google/Apple Maps with eSIM Fallback

Navigation & Offline Maps: Google/Apple Maps with eSIM Fallback

Planning to drive, walk, or cycle abroad and want reliable navigation without burning through mobile data? Here’s the traveller-proof setup: pre-download offline maps in Google Maps or Apple Maps, then use a light-touch eSIM as your live-traffic fallback. This gives you turn‑by‑turn guidance even with no signal, while still benefiting from up‑to‑date traffic, rerouting, and place details when you need them. It also plays nicely with CarPlay and Android Auto.This playbook explains exactly what to pre‑download, how to configure Google Maps and Apple Maps for offline use, how to set up your eSIM as a smart fallback, and how to budget data on the road. We’ll flag the trade‑offs (traffic vs. zero data), cover CarPlay/Android Auto behaviour, and share tested pro tips to avoid glitches. If you’re crossing borders, we’ll also show you how to download regional maps and pick a regional eSIM so you don’t juggle multiple SIMs at the wheel.Why combine offline maps with an eSIM fallbackOffline maps give you guaranteed turn‑by‑turn in areas with patchy signal or in tunnels, mountains, or rural routes.A small amount of mobile data from an eSIM lets your app fetch live traffic, closures, speed limits, POI details, and quicker reroutes.You control the trade‑off: run fully offline most of the time, and let eSIM data kick in for up‑to‑date insights when it matters (city driving, rush hour, roadworks).Works with CarPlay/Android Auto: the maps and guidance are on the phone; the car is just the display and controls.If you’ll drive across several countries, consider a regional plan like [Esim Western Europe] or [Esim North America] so you aren’t swapping profiles at borders. For single-country trips, pick the right local plan such as [Esim United States], [Esim France], [Esim Italy], or [Esim Spain]. Explore coverage by country via [Destinations].What you need before you flyiPhone on iOS 17 or later (for Apple Maps offline) or Android/iPhone with the latest Google Maps.1–3 GB free storage per large region (city sizes are much smaller).A travel eSIM active or ready to activate on arrival. See [Destinations], or go straight to [Esim Western Europe], [Esim North America], [Esim United States], [Esim France], [Esim Italy], or [Esim Spain].A charging cable for CarPlay/Android Auto (wired is more reliable and charges your phone).Optional: car mount for safer glanceable navigation.Data budgeting (typical): - Pure offline navigation: near‑zero data. - Navigation with live traffic: roughly 2–10 MB per hour, depending on area and zoom level. - Searching many places, downloading new regions, or sharing live ETA: can add tens of MB. Your mileage varies by map style, density, and how often you search. The setup below keeps usage predictable.Step‑by‑step: Set up Google Maps for google maps offline travel1) Update Google Maps - Open your app store and update Google Maps to the latest version.2) Download your regions - Open Google Maps. - Tap your profile picture > Offline maps > Select your own map. - Pan/zoom to cover your entire driving area (include airports, detours, border crossings). - Download. Repeat for additional areas if needed. - Optional: rename areas (e.g., “Tuscany”, “Pyrenees crossing”) for clarity.3) Set auto‑update and storage - In Offline maps, turn on auto‑update (Wi‑Fi only). - If storage is tight, switch download location to SD card (Android) or delete old areas.4) Pre‑plan your routes on Wi‑Fi - Search and save key stops (hotels, charging points, fuel, landmarks). - Add to a list or star favourites, so they’re available offline.5) Test offline - Temporarily enable Airplane Mode (leave GPS/location on). - Start navigation to a saved place within your downloaded area. - Confirm turn‑by‑turn works and map tiles are visible.6) Optimise mobile data use - Disable Street View and satellite layers (use the default map). - Use live traffic selectively: turn on when you enter busy zones, off elsewhere. - Avoid downloading new regions on mobile data; use Wi‑Fi.Pro tips for Google Maps: - Combine multiple smaller downloads rather than one huge area to speed updates and keep storage manageable. - For multi‑day drives, download along the whole corridor plus a 50–100 km buffer for detours. - Save offline “Lists” (e.g., “Day 3 stops”) and download their areas; searching by saved places works offline. - Transit directions generally need data. Downloading regions won’t give you live timetables. - If search fails offline, navigate by exact address or coordinates saved beforehand.Step‑by‑step: Set up Apple Maps offline + CarPlay1) Update iOS - Go to Settings > General > Software Update and ensure iOS 17 or later.2) Download maps - In Apple Maps, tap your profile picture > Offline Maps > Download New Map. - Search a city, region, or country; adjust the bounding box; download. - Repeat for all regions you’ll visit, including border areas.3) Auto‑update and options - In Offline Maps, enable automatic updates (Wi‑Fi recommended). - Turn on Optimize Storage if space is limited; Apple will prune less‑used areas.4) Save places and routes - Add hotels and key stops to Favourites; Apple Maps can navigate to these offline. - Pre‑start a sample route on Wi‑Fi to confirm guidance works.5) Use with CarPlay - Connect your iPhone (wired preferred for charging). - CarPlay uses your iPhone’s offline maps automatically. Voice guidance works without data. - Voice dictation and some POI details may require data; plan key searches ahead.Limitations to note: - Live traffic, incidents, and dynamic rerouting require data. - Public transport directions need data for schedules and service changes. - Rich POI details (photos, reviews) may be limited offline.Configure your eSIM as a smart fallbackThe goal: run offline most of the time, but allow small bursts of data for traffic updates, reroutes, and quick searches.On iPhone (Dual SIM/eSIM): 1) Install and activate your travel eSIM (don’t delete your home line). 2) Settings > Mobile Service: - Set the travel eSIM as the Mobile Data line. - Turn off Data Roaming on your home line to avoid accidental charges. - Enable Low Data Mode on the travel eSIM to reduce background use. 3) In Google Maps or Apple Maps, keep default settings; the apps will use small amounts of data when needed.On Android (may vary by device): 1) Install and activate the eSIM. 2) Settings > Network & Internet > SIMs: - Set the eSIM as the preferred SIM for mobile data. - Disable data on your home SIM while abroad. 3) Consider Data Saver mode to restrict background data.Choosing the right plan: - Single-country: [Esim United States], [Esim France], [Esim Italy], or [Esim Spain]. - Multi‑country: [Esim Western Europe] for EU/EEA/UK‑style trips, [Esim North America] for USA/Canada/Mexico. See all options via [Destinations].Data budgeting: how much does navigation actually use?Typical data ranges (indicative; terrain and behaviour vary): - Pure offline with pre‑downloaded maps: near‑zero during active navigation. - With live traffic and occasional reroutes: about 2–10 MB per hour of active driving. - Frequent place searches, exploring photos/reviews, or downloading new areas: add 20–100+ MB over a day. - Live ETA sharing: roughly 0.5–2 MB per 10 minutes of sharing.Ways to keep usage tight: - Download all regions and saved places on Wi‑Fi before departure. - Start navigation on Wi‑Fi when possible; the app caches portions of your route. - Toggle the traffic layer on only in urban areas or at expected bottlenecks. - Use text‑only search; avoid tapping into image‑heavy POI pages on mobile data. - Turn off map layers (3D buildings, satellite) and avoid Street View.Driving with CarPlay/Android Auto on a low‑data eSIMOffline first: both platforms display your pre‑downloaded maps and give voice guidance without data.Traffic smartly on‑demand: keep traffic on when entering congested zones; turn it off for rural stretches.Voice control: on‑device text‑to‑speech works offline. Voice dictation/search may need data; pre‑save destinations as Favourites or Lists to avoid dictation.Media vs. maps: streaming music/podcasts will dwarf navigation data. Download playlists or use car radio to keep total usage low.Phone power: wired CarPlay/Android Auto charges your phone and keeps GPS performance stable.Cross‑border trips: pre‑download by regionWestern Europe road trip: download each major country corridor (e.g., Paris–Lyon–Milan, Barcelona–Valencia–Costa Blanca), plus buffers around borders and ferry ports. Use [Esim Western Europe] to stay on one plan across countries.North America loop: download state/province blocks (e.g., California + Nevada + Arizona, or Ontario + Québec) with buffers on interstates. Use [Esim North America] or country‑specific [Esim United States].City breaks: download the city and surrounding commuter belt. For France, Italy, or Spain, pick [Esim France], [Esim Italy], or [Esim Spain] respectively.Business travel across regions? Centralise procurement and policies via [For Business], and manage partner deployments through the [Partner Hub].Troubleshooting quick fixesCan’t start navigation offline:Ensure you’re inside a downloaded area and the route doesn’t leave it.Use a saved Favourite or exact address. General POI searches may need data.“Map expired” warnings:Connect to Wi‑Fi and update offline maps. Enable auto‑update to avoid future lapses.GPS drift or no location:Disable battery saver while navigating; it can throttle GPS.Mount the phone with a clear view of the sky; avoid placing it deep in the console.Storage full:Remove unused map areas or lower the area size.On Android, store offline maps on an SD card if available.CarPlay/Android Auto disconnects:Use a high‑quality cable or switch to wired from wireless.Keep the phone unlocked the first time you connect after updates.FAQ1) Do GPS and turn‑by‑turn work without mobile data? Yes. GPS is independent of mobile data. With downloaded maps, both Google Maps and Apple Maps provide turn‑by‑turn offline.2) Will I still get live traffic and road closures offline? No. Live traffic, incidents, and dynamic rerouting need data. Use your eSIM sparingly to fetch these when entering busy areas.3) How much space do offline maps take? A large city might be a few hundred MB; a broad region can be 1–3 GB. It depends on density and how much you include. Download only what you need, plus a sensible buffer.4) Can I use public transport directions offline? Generally, no. Schedules, routes, and service changes require data. You can still view station locations offline but not live timetables.5) Does offline search work for places and restaurants? Partially. Both apps support basic offline search within downloaded areas, but detailed POI info (reviews, photos, opening hours) and broad discovery typically need data.6) Can I share my ETA without using much data? Yes. ETA sharing uses modest data (roughly 0.5–2 MB per 10 minutes). Toggle it only when needed to keep usage low.Next step: Choose your region and plan your downloads with [Destinations].