Indonesia SIM Registration for Foreigners (2025): Passport, Tax ID & Where to Register

Blog

Indonesia SIM Registration for Foreign...

Indonesia SIM Registration for Foreigners (2025): Passport, Tax ID & Where to Register

30 Oct 2025

Indonesia SIM Registration for Foreigners (2025): Passport, Tax ID & Where to Register

If you want a local data plan in Indonesia, you must register your SIM. For tourists in 2025, the essentials are straightforward: bring your passport, buy from an official outlet, and (if you plan to use a local SIM) register your phone’s IMEI with Customs on arrival. Registration is fast when you do it in the right place—airport counters or flagship stores for Telkomsel, XL Axiata and Indosat (IM3). Corner shops and unbranded kiosks can sell a SIM but often can’t complete foreigner registration, which is why many travellers end up with a non-working card until they visit a carrier store.

You do not need an Indonesian tax ID to buy a SIM as a tourist. A local Tax ID (NPWP) is a resident requirement only. Expect instant activation once your passport and device details are captured, though some lines take up to a few hours. This guide explains exactly where to go, what to bring, how long it takes, and common snags to avoid. For a broader view of connectivity across the region, see our country pages under Destinations.

Quick facts: 2025 rules at a glance

  • Who must register: Everyone using an Indonesian SIM, including tourists.
  • IDs accepted for tourists: Passport (photo page). Some outlets also request your entry stamp/visa.
  • Tax ID (NPWP): Not required for tourists. May be requested for residents with KITAS/KITAP.
  • Where to register: Airport operator counters or official city stores (GraPARI for Telkomsel, XL Center, Indosat/IM3 Gallery).
  • IMEI rule: If you’ll use a local Indonesian SIM, register your phone’s IMEI with Customs on entry.
  • Time to activate: Usually minutes; allow up to 24 hours in edge cases.
  • Number of SIMs per ID: Operators may cap how many numbers can be linked to one passport. Expect a small limit.
  • Best coverage: Telkomsel generally leads for nationwide coverage, especially off the beaten path.

Indonesia SIM registration for tourists: what you need in 2025

To complete indonesia sim registration tourist requirements, you typically need:

  • Passport: The physical passport you used to enter Indonesia. Staff will scan or photograph it.
  • Entry details: Your entry stamp or visa (e.g., VOA/e-VOA) may be requested.
  • Local contact info: A temporary address (hotel/Airbnb) and Indonesian phone contact are sometimes asked but not always enforced.
  • Your phone: Keep it handy for SIM insertion, eSIM provisioning (where available), and test calls/data.
  • IMEI registration: If using a local SIM, Indonesian Customs needs your device IMEI recorded when you arrive.

Good to know: - Photocopies aren’t usually required; a physical passport is. - Staff complete the registration in their system. Tourists cannot complete the standard NIK/KK self-registration used by locals. - Some flagship stores issue eSIM profiles to eligible devices; availability and staff policy varies by location.

Where to register: airport kiosks vs city stores

Buying at the right place matters more than hunting the cheapest shelf price.

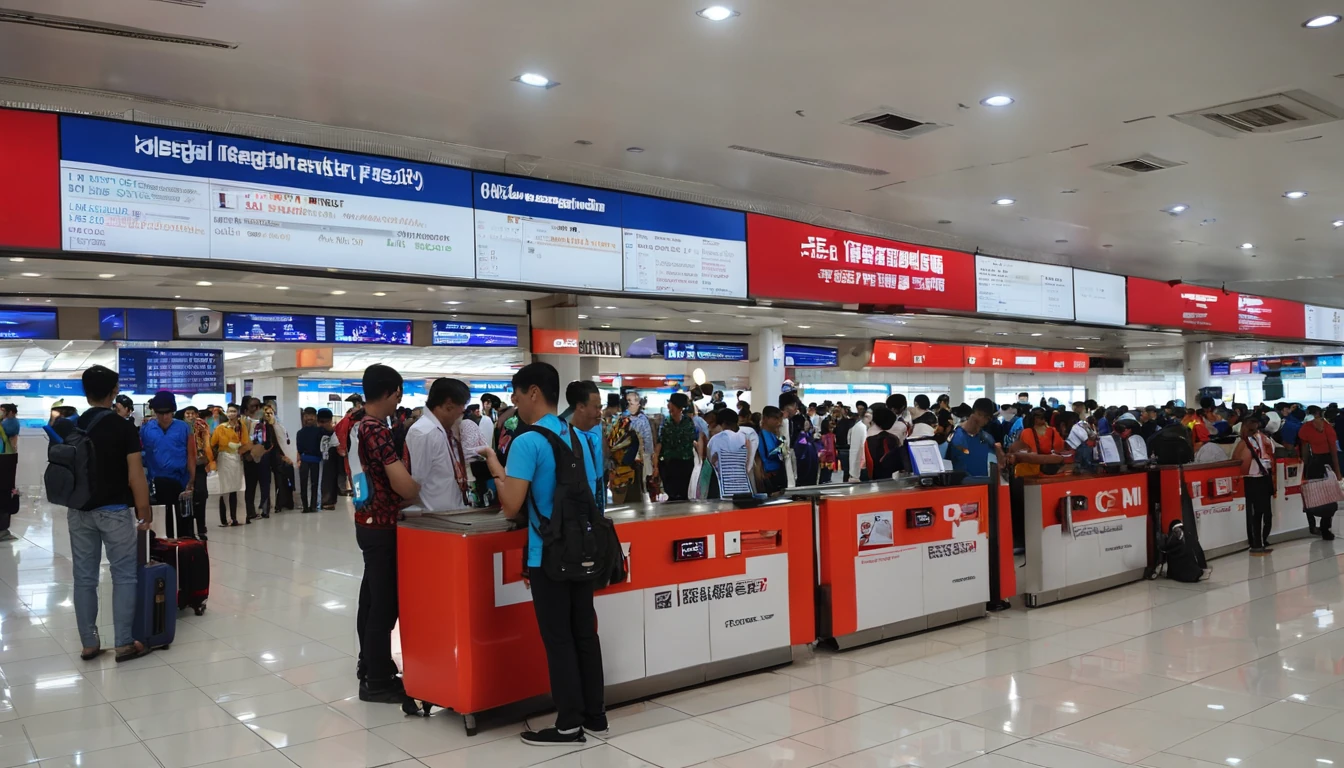
Airport operator counters (best for immediate connectivity)

  • Pros:
  • Passport registration is done on the spot.
  • Staff can help with IMEI questions and basic setup.
  • English-speaking staff are common in major airports (CGK Jakarta, DPS Bali).
  • You walk out connected.
  • Cons:
  • Packages can be pricier than in town.
  • Stock may be limited during peak arrivals.

Official city stores (often best value)

  • Pros:
  • Full service: SIM sale, passport registration, troubleshooting, eSIM availability in flagship branches.
  • Broader plan selection, often better value than airports.
  • Cons:
  • Requires a trip across town and queue time.
  • Opening hours vary; not 24/7.

Look for: - Telkomsel GraPARI - XL Center - Indosat Ooredoo Hutchison (IM3) Gallery

Small kiosks and convenience stores (proceed with caution)

  • Pros: Cheapest sticker price, everywhere.
  • Cons: Many cannot legally register a foreign passport. You may leave with a SIM that won’t activate until you visit an operator store. Not worth the risk for short stays.

Step-by-step: from landing to connected

1) Decide your approach
- If you only need calls/data for a day or two and you already have roaming or a regional eSIM, you may skip a local SIM entirely.
- If you want local rates for a week or more, a registered local SIM is usually best value.

2) Register your device IMEI with Customs (if using a local SIM)
- Before or on arrival, prepare your phone’s IMEI numbers (dial *#06#).
- Use the Mobile BeaCukai app or the customs desk at the airport to submit your device details. You’ll be given a confirmation/QR code.
- Present the QR/approval at the counter if asked. Tourists generally receive time-limited permission to use a local SIM on that device.
- If you forget at the airport, visit a Customs office soon after arrival. Using international roaming does not require IMEI registration.

3) Choose an operator
- Telkomsel: Widest coverage, especially outside big cities and across islands.
- XL Axiata: Good urban coverage and competitive pricing.
- Indosat (IM3): Often attractive data bundles and promos.
Tip: Ask specifically for a “tourist” or “foreigner” package and confirm voice/SMS inclusions if you need them.

4) Buy and register at an official counter
- Present your passport (and entry stamp if requested).
- Staff will capture your details, insert the SIM or issue an eSIM, and complete registration in the operator’s system.
- You may be asked for a local address (hotel is fine).
- Keep the SIM starter pack and receipt; they include your number and useful USSD codes.

5) Activate and test
- Restart your phone after SIM/eSIM provisioning.
- Check mobile data, calls, and SMS. APN settings usually configure automatically.
- If data doesn’t work immediately, toggle airplane mode, then try a manual network selection.

Costs, plans and activation timelines

Pricing shifts regularly, but as a guide:

  • Starter packs: IDR 50,000–150,000 for basic data with some local calls/SMS.
  • Tourist bundles: IDR 100,000–300,000 for larger data (e.g., 15–35 GB) and bonus app data or local minutes.
  • eSIM: Offered by some operator flagships; priced similarly to physical SIMs.

Activation speed: - At an official counter, your line typically goes live within minutes once registration is submitted.
- Network provisioning can take longer in busy periods; allow up to a few hours. Rarely, 24 hours.

Top-ups and extensions: - Use the operator’s app (requires your Indonesian number for OTP), vouchers from minimarts (Indomaret, Alfamart), or pay at an operator store. - Tourist lines may have validity limits aligned to your stay. Ask how to extend if you’re in-country longer.

Common snags (and how to fix them)

  • SIM shows “emergency calls only” or no service:
  • Check that IMEI registration was completed if you’re using a local SIM.
  • Try manual network selection (Telkomsel/XL/Indosat) and restart the phone.
  • Bought at a small kiosk and it won’t activate:
  • Visit an official operator store with your passport to complete foreigner registration.
  • No data despite signal bars:
  • Toggle airplane mode, reset network settings, or update APN to default for your operator.
  • Confirm your bundle includes data and is active.
  • eSIM failed to install:
  • Ensure you’re on stable Wi‑Fi, scan the QR again, or ask staff to reissue the profile. Some outlets can only issue physical SIMs to foreigners.
  • Line deactivated mid-trip:
  • It can happen if IMEI wasn’t registered or your package validity expired. Visit an operator store with your passport.
  • WhatsApp number change:
  • If you switch from a roaming number to a local number, use WhatsApp’s Change Number feature to keep chats and groups.

Passport vs Tax ID (NPWP): what you actually need

  • Tourists: Passport only. You will not be asked for a local Tax ID (NPWP) to buy/register a SIM as a short-stay visitor.
  • Residents and long-stay permit holders: Some outlets may request KITAS/KITAP and NPWP. Requirements vary by operator and tenure.
  • If staff mention “NIK/KK”: Those are local IDs for Indonesians. As a foreigner, your passport is used instead.

Business travellers and teams

Need multiple lines, consistent packages, or centralised spend? Coordinate ahead of arrival to avoid airport queueing and ad-hoc plans.

  • Explore enterprise options via For Business.
  • If you’re a travel/tech partner supporting teams across regions, visit our Partner Hub for scalable connectivity workflows.

Useful comparisons and onward travel

Heading elsewhere after Indonesia? Keep your connectivity simple:

FAQ

1) Do tourists need an Indonesian Tax ID (NPWP) to buy a SIM?
No. Tourists register with a passport. NPWP is for residents and is not a requirement for short-stay visitors.

2) Is IMEI registration mandatory for tourists?
If you plan to use a local Indonesian SIM, you should register your device IMEI with Customs on arrival. Roaming on your home SIM does not require IMEI registration. Airport customs counters can handle this in minutes.

3) Can I register my Indonesian SIM online?
Not as a tourist. Foreigners must complete registration in person at an official operator outlet (airport counters or flagship stores) where staff scan your passport and submit the registration.

4) How long does SIM activation take?
Usually within minutes after staff complete registration; sometimes up to a few hours. Very occasionally, it may take until the next day.

5) Can I get an eSIM as a tourist in Indonesia?
Some flagship operator stores can issue eSIMs to eligible devices, but availability varies by city and store. Airport counters often favour physical SIMs. Ask the outlet in advance if you specifically want eSIM.

6) How many SIMs can I register with one passport?
Operators may limit the number of active numbers linked to a single passport. Policies vary; expect a small cap and ask the staff if you need more than one line.

Next step

Planning your trip and want the latest local guidance and plan options? Start with Indonesia under our Destinations hub.

Read more blogs

Andes Highlights (3 Weeks): Peru–Bolivia–Chile–Argentina Connectivity

Andes Highlights (3 Weeks): Peru–Bolivia–Chile–Argentina Connectivity

Planning a south america itinerary 3 weeks through the high Andes? This route stitches together Peru’s Sacred Valley, Bolivia’s La Paz and Salar de Uyuni, Chile’s Atacama Desert, and northern Argentina’s quebradas or Mendoza wine country—often by long-distance bus and a couple of short flights. Connectivity is different at altitude: coverage is strong in cities but drops in high passes and salt flats; bus Wi‑Fi is patchy; border towns can be blackspots. The smart move is an eSIM with multi‑country coverage, backed by offline maps, offline translations, and a simple routine for crossing borders by bus without losing service. Below you’ll find a practical, connectivity-first itinerary; checklists to prep your phone, apps and documents; and on-the-ground tips for staying online where it matters: booking transport, hailing taxis, backing up photos, and navigating when the signal disappears.If you’re transiting via Europe or North America, you can also add a layover eSIM to stay connected door-to-door. Start with our country list on Destinations, then follow the steps, and you won’t waste time chasing SIM shops at 3,500 metres.The 3‑week Andes route at a glanceWeek 1: Peru (Cusco, Sacred Valley, Machu Picchu) - Fly into Cusco (or Lima then connect). - Base in Cusco; day trips to Pisac/Chinchero/Maras–Moray. - Train to Aguas Calientes; Machu Picchu visit; return to Cusco or continue to Puno/Lake Titicaca.Week 2: Bolivia and Chile (La Paz, Uyuni, San Pedro de Atacama) - Bus/collectivo via Copacabana to La Paz. - Fly or overnight bus to Uyuni. - 3‑day Uyuni–altiplano tour ending in San Pedro de Atacama (Chile).Week 3: Chile and Argentina (Atacama to Salta or Mendoza/Buenos Aires) - Choose: - North: San Pedro to Salta/Jujuy by bus; fly to Buenos Aires. - Or South: San Pedro–Calama flight to Santiago; bus or flight to Mendoza; onward to Buenos Aires.Connectivity notes (quick): - Cities: generally strong 4G/4G+; 5G in major hubs (Santiago, Buenos Aires). - Altitude/rural: expect long no‑signal stretches (Uyuni, altiplano passes, Paso Jama). - Bus Wi‑Fi: often advertised, rarely reliable. Plan to be offline onboard. - Border regions: networks switch; a multi‑country eSIM avoids sudden loss.eSIM vs local SIMs for a 4‑country tripFor a route with multiple borders and remote legs, eSIM wins on time and reliability.What a multi‑country eSIM gets you: - One plan across Peru, Bolivia, Chile, Argentina (check coverage per country on Destinations). - No passport/SIM registration queues at kiosks. - Keep your home number active on the physical SIM for calls/SMS codes. - Instant top‑ups if you burn data on photos or navigation.When a local SIM still helps: - Long stay in one country with heavy data use (e.g., a month in Buenos Aires). - Dead zones where a different local network performs better (rarely worth the hassle on a 3‑week pace).Practical approach: - Use an eSIM as your primary data line across all four countries. - If you find a specific local network far better in one region, add a cheap local SIM and keep the eSIM as backup.Device readiness checklist (before you fly)1) Check eSIM compatibility and SIM‑lock status on your phone.2) Buy and install your eSIM while on home Wi‑Fi. Keep a PDF/printed copy of the QR code.3) Label lines clearly (e.g., “eSIM Andes Data”, “Home SIM”).4) Turn on data roaming for the eSIM; leave roaming off for your home SIM to avoid charges.5) Set up dual‑SIM rules: data on eSIM; calls/SMS default to home SIM if needed.6) Download offline: Google Maps/Organic Maps for all target regions; language packs (Spanish at minimum); bus/air tickets; hotel confirmations.7) Cloud backups: set to upload on Wi‑Fi only; pre‑create shared albums for travel companions.8) Test tethering/hotspot with your laptop/tablet.If you’re transiting popular hubs, consider a short layover eSIM: - USA connections: add an Esim United States or a broader Esim North America.- Europe connections: Madrid/Barcelona? Use an Esim Spain. Paris or Rome? See Esim France and Esim Italy. Multi‑country layovers? Try Esim Western Europe.City‑by‑city connectivity notesCusco & the Sacred Valley (Peru)Coverage: Good in Cusco city; variable in high villages (Maras/Moray) and along Inca Trail approaches.Tips: Download Sacred Valley maps offline; pin viewpoints and ruins. most taxis use WhatsApp—save your accommodation’s number.Machu Picchu/Aguas Calientes: Patchy to none at the citadel. Upload your photos later; don’t rely on live ticket retrieval.Lake Titicaca: Puno and CopacabanaPuno: Reasonable 4G; bus terminals crowded—screenshot QR tickets.Crossing to Copacabana: Expect a signal drop around the border; have directions saved offline.La Paz (Bolivia)Good urban 4G; the cable car network has decent signal but tunnels do not.Yungas/“Death Road” tours: Mountain valleys cause dead zones—share your emergency contacts with the operator, carry a charged power bank, and don’t plan remote calls.Uyuni and the Altiplano (Bolivia to Chile)Uyuni town: OK 4G; ATMs finicky—use Wi‑Fi for banking apps.Salt flats/lagunas: Assume offline for most of the 3‑day tour. Guides often carry satellite phones; agree a pickup time/place in San Pedro and preload your map route.San Pedro de Atacama (Chile)Town: Solid 4G; accommodations often have Wi‑Fi but speeds vary.Geysers, Valle de la Luna: Offline navigation essential; sunrise trips start before mobile networks wake up in some areas.Salta/Jujuy or Mendoza/Buenos Aires (Argentina)Salta/Jujuy: Good city coverage; quebradas have long no‑signal sections.Mendoza: City 4G/5G; vineyards outside town can be patchy.Buenos Aires: Strong 4G/5G; ideal for cloud backups and large downloads before you fly home.Border crossings by bus: step‑by‑stepThe big ones on this route: Peru–Bolivia (Puno/Copacabana), Bolivia–Chile (Uyuni–San Pedro via Hito Cajón), Chile–Argentina (Paso Jama to Salta or Los Libertadores to Mendoza).How to keep service and sanity:1) The day before:- Top up your eSIM data.- Confirm your plan includes both countries you’re entering/leaving.- Download offline maps for both sides of the border and your town of arrival.- Save bus company WhatsApp and terminal address offline.2) On departure morning:- Keep a paper copy or offline PDF of tickets, insurance, and accommodation proof.- Charge phone and power bank; pack a short cable in your daypack.3) On the bus:- Don’t count on bus Wi‑Fi. Keep your eSIM as primary, but expect drops near mountain passes.- If your phone supports it, enable “Wi‑Fi calling” for later when you reach accommodation Wi‑Fi.4) At the border posts:- Data may be unavailable. Keep QR codes and booking numbers offline.- After exiting one country and entering the next, toggle Airplane Mode off/on to re‑register on the new network.- If the eSIM doesn’t attach, manually select a network in Mobile Settings.5) Arrival:- Send your accommodation a quick WhatsApp when you’re back online.- Recheck your eSIM’s data roaming is on; confirm you’re on an in‑country network, not a weak roaming partner.Pro tips: - Dual profiles: If your eSIM allows, keep a secondary profile for a different network in the same country—helpful in border towns.- Cash buffer: Some border terminals don’t accept cards; download a currency converter for offline use.Offline survival kit (5‑minute setup)Maps: Download regions for Cusco, Sacred Valley, Puno, La Paz, Uyuni, San Pedro, Salta/Jujuy or Mendoza, and Buenos Aires.Translations: Download Spanish for offline use; add phrasebook favourites (bus tickets, directions, dietary needs).Documents: Save PDFs of passports, tickets, hotel addresses; star them for quick access.Rides: Screenshots of pickup points; pin bus terminals and hotel doors.Entertainment: Podcasts and playlists for long bus legs, set to download on Wi‑Fi only.Altitude and your tech: what changesCoverage gaps lengthen: Fewer towers at high altitude; valleys can block signal. Assume offline on remote excursions.Batteries drain faster in cold: Keep your phone warm and carry a power bank (10,000–20,000 mAh).Hotel Wi‑Fi may be congested: Schedule big uploads (photo backups, app updates) for big-city stays like Santiago or Buenos Aires.GPS still works offline: Your blue dot shows on offline maps without data—preload everything.Data budgeting for 3 weeksTypical traveller usage across this route: - Messaging/Maps/Bookings: 0.2–0.5 GB/day- Social and photo sharing: 0.3–0.7 GB/day- Occasional video calls/streaming: 0.5–1.0 GB/dayFor a mixed-use trip, plan 15–25 GB for 3 weeks. Heavy creators should double it and upload over hotel Wi‑Fi when possible. If you work remotely, consider a higher‑capacity plan and a backup eSIM; see our guidance on For Business.Practical route with transport and connectivity cuesDays 1–4 Cusco base: Strong city signal; day trips may be spotty—go offline-ready.Days 5–6 Machu Picchu: Expect no service at the ruins; sync tickets ahead.Days 7–8 Puno to La Paz via Copacabana: Border signal drop; re‑register networks after crossing.Days 9–11 Uyuni tour to San Pedro: Treat as offline; charge nightly; carry spare cables.Days 12–14 San Pedro: Stable in town; tours offline; top up data before Paso Jama.Days 15–17 Salta/Jujuy or Mendoza: Good urban 4G; rural patches are offline.Days 18–21 Buenos Aires: Strongest connectivity of the trip; clear your uploads and map downloads for the flight home.Partnering and stopover extrasHospitality and tour operators in the Andes: help your guests stay connected—explore co‑branded solutions via our Partner Hub.Transatlantic flyers: test your eSIM setup on a layover with an Esim United States or Esim Western Europe before hitting high-altitude blackspots.FAQs1) Do I need a local SIM in each country?No. A multi‑country eSIM covering Peru, Bolivia, Chile and Argentina is simpler and works well for a 3‑week pace. Consider a local SIM only if you’ll spend longer in one country and want the absolute best regional coverage.2) Will my WhatsApp number change with an eSIM?No. WhatsApp is tied to your registered number, not your data line. Keep your home SIM active for voice/SMS (roaming off if you wish), and use the eSIM for data—WhatsApp continues as normal.3) Can I hotspot to my laptop or camera?Yes. Enable tethering on your eSIM. Mind your data: cloud backups and OS updates can burn gigabytes—set them to Wi‑Fi only or schedule in big cities.4) What if there’s no signal on the Uyuni/Atacama legs?That’s expected. GPS still works offline. Pre-download maps and translations, carry a power bank, and sync plans with your tour operator before departure.5) Will I get roaming charges at borders?If you’re using a multi‑country eSIM with coverage in both countries, you won’t incur extra roaming fees from your home carrier. Keep roaming off on your home SIM to avoid accidental use.6) I’m connecting via Europe or the US—worth getting a layover eSIM?Yes. It’s an easy way to test your setup and stay reachable. Try Esim North America or country options like Esim Spain, Esim France, or Esim Italy for common hubs.Next step: Browse South America coverage options and build your plan on Destinations.

eSIM Compatible Phones (Updated 2025): iPhone, Samsung, Pixel & More

eSIM Compatible Phones (Updated 2025): iPhone, Samsung, Pixel & More

Travellers are ditching plastic SIMs for eSIMs because they’re fast to set up, kinder to your phone’s SIM tray, and usually cheaper than roaming. But eSIM support varies by model and region, and not every “dual-SIM” phone actually supports a digital SIM. This 2025 guide gives you the definitive compatibility picture: quick checks you can run in under two minutes, a brand-by-brand device matrix, and practical install tips that avoid airport Wi‑Fi panic. If you’re planning a trip to the US, Europe or beyond, we’ll also point you to dependable regional plans like Esim United States, Esim Western Europe and Esim North America.Key point: model names alone aren’t enough. Variants from different countries or carriers can enable or disable eSIM. Use the quick checks below to confirm your exact device, then pick a plan from our global Destinations page.The fastest way to confirm eSIM support (2‑minute check)Step 1: Find your EIDiPhone: Settings > General > About. Look for “EID”.Android (Pixel/Samsung/others): Settings > About phone (or Status). Look for “EID”.Or dial *#06# on most phones. If you see an EID, your hardware supports eSIM.Step 2: Look for an “Add eSIM” optioniPhone: Settings > Mobile Data > Add eSIM.Samsung: Settings > Connections > SIM manager > Add eSIM.Pixel/Android: Settings > Network & Internet > SIMs > + Add eSIM.Step 3: Update and unlockInstall the latest iOS/Android update.Ensure the phone is network unlocked for travel eSIMs.Step 4: Dual SIM expectationsMost recent iPhones, Pixels and flagships support two lines active (one or two eSIMs depending on model). Mid‑range Androids may allow only one eSIM active alongside a physical SIM.Pro tip: No EID showing? Your model or region variant likely doesn’t support eSIM, or the feature is disabled by firmware/carrier.eSIM‑compatible phones in 2025: the definitive listModel availability and eSIM features can vary by region and carrier firmware. Use this as a guide, then run the quick checks above on your exact handset.Apple iPhone (global leaders for eSIM)iPhone 16 / 16 Plus / 16 Pro / 16 Pro Max – eSIM supported; US models are eSIM‑only (no SIM tray).iPhone 15 family – eSIM supported; US models are eSIM‑only.iPhone 14 family – eSIM supported; US models are eSIM‑only.iPhone 13, 12, 11 families – eSIM supported.iPhone XS, XS Max, XR – first iPhones with eSIM.iPhone SE (2nd gen 2020, 3rd gen 2022) – eSIM supported.Notes for travellers: - iPhone 13 and newer can run two eSIMs simultaneously (or one eSIM + one physical SIM on non‑US models). - iOS allows storing multiple eSIM profiles and switching as you travel.Samsung Galaxy (flagships and many A‑series)Galaxy S24 / S23 / S22 / S21 / S20 series – eSIM supported on most global variants.S20 FE: eSIM availability depends on edition/region; later “2022” models added eSIM in many markets.Galaxy Z Fold and Z Flip (all generations since eSIM was introduced) – eSIM supported.Galaxy Note20 / Note20 Ultra – eSIM supported on most variants.Galaxy A‑series (region‑dependent): A55, A54, A35, A34, A25 5G, A15 5G and newer mid‑range models often include eSIM in Europe/Asia; some US carrier‑branded units disable it.Notes for travellers: - eSIM on Samsung can be region/carrier dependent. Check Settings > Connections > SIM manager. - Many newer models support multiple stored eSIMs; simultaneous active lines vary by device/firmware.Google Pixel (Android’s eSIM reference)Pixel 9 / 9 Pro / 9 Pro Fold – eSIM supported.Pixel 8 / 8 Pro – eSIM supported; dual eSIM possible on recent Android builds.Pixel 7 / 7 Pro / 7a – eSIM supported.Pixel 6 / 6 Pro / 6a – eSIM supported.Pixel 5 / 4 / 4a – eSIM supported.Pixel 3 / 3a – eSIM supported in many regions; some carrier variants limit it.Pixel Fold – eSIM supported.Notes for travellers: - Pixel 2 had a limited eSIM implementation (mostly Google Fi); treat it as non‑universal.- Keep Android 13+ for the smoothest eSIM experience.Other Android brands (selected models with widespread eSIM support)Because eSIM on these brands varies more by market and firmware, treat this as “supported in many regions” and confirm on your device with the EID check.OnePlus: 11, 12, 13 – eSIM on many EU/IN/global variants; earlier models largely lacked eSIM.Sony Xperia: 1 V/VI, 5 V, 10 V/VI – eSIM widely supported.Motorola: Razr (2019 onwards), Razr 40/50 series; Edge 30/40 families and newer – many variants support eSIM.Xiaomi: 13 / 13 Pro / 13T Pro, 14 / 14 Pro / 14 Ultra – growing eSIM support by region; confirm locally.OPPO: Find X5/X6/X7 series; Reno 8/10 series – selected regional variants support eSIM.Huawei: Selected P and Mate series (e.g., P40/P50/P60, Mate 40/50) support eSIM in some markets.Nothing: Phone (1) and Phone (2) support eSIM.Fairphone: Fairphone 4 and 5 support eSIM.Nokia/HMD: Nokia X30 5G, XR21 and some enterprise models support eSIM.Pro tips: - Mid‑range and carrier‑branded Androids are the most inconsistent. Always check for EID and an “Add eSIM” option. - If your dual‑SIM tray has two physical SIM slots, eSIM may still be supported—but it’s not guaranteed.iPhone vs Samsung vs Pixel on the roadiPhoneBest overall consistency. US iPhone 14/15/16 are eSIM‑only, which is ideal for travel plans.iOS makes it simple to label lines (e.g., “Japan Data”) and pick a default for data/voice.Can store multiple profiles; two lines active on iPhone 13 and newer.SamsungPowerful SIM manager with clear toggles for data/voice/roaming.Watch for model/region variance on A‑series and FE models.If “Add eSIM” is missing, update software; some regions enable it via firmware.PixelClean implementation with helpful prompts; strong dual‑SIM standby on recent models.Updating to the latest Android build often unlocks dual eSIM improvements.Great for quick QR installs before you fly.How to install a Simology eSIM (step‑by‑step)Do this on Wi‑Fi before you travel.1) Buy a plan- Choose your country or region on Destinations. For multi‑country trips, consider Esim Western Europe or Esim North America.2) Open your QR or activation details- Keep the email/app screen open on another device, or print the QR.3) Add the eSIM- iPhone: Settings > Mobile Data > Add eSIM > Use QR Code.- Samsung: Settings > Connections > SIM manager > Add eSIM > Scan QR.- Pixel: Settings > Network & Internet > SIMs > + Add eSIM.4) Label and set defaults- Name it (e.g., “Trip EU”) and set it as the Mobile Data line. Keep your primary line for calls/texts if needed.5) Enable Data Roaming on the travel eSIM- Required for regional packs like Esim France, Esim Italy or Esim Spain.6) Test before departure- Toggle the eSIM off/on and check APN auto‑config. You’re ready.Pro tips: - Arriving late? Install the eSIM at home so it activates instantly on landing.- Use regional bundles to avoid switching plans mid‑trip (e.g., Esim United States for the US or Esim Western Europe for multi‑country EU travel).- Business travellers: centralise purchasing and compliance with For Business.Troubleshooting and gotchasNo “Add eSIM” optionUpdate software; reboot; check if the phone is carrier‑branded (some carriers hide the menu on mid‑range models).No EID foundYour device likely lacks eSIM hardware or the variant disables it.QR won’t scanEnter activation details manually. Ensure you’re on Wi‑Fi and any VPN is off.“Maximum eSIMs reached”Delete old, unused eSIM profiles to free a slot.Data not working on arrivalConfirm the travel eSIM is set as the Mobile Data line and Data Roaming is on. Reboot once after network attach.Locked phoneTravel eSIMs require an unlocked device. Contact your carrier to request unlock before you fly.Partners and resellers: streamline onboarding and co‑branded offers via the Partner Hub.FAQHow do I know if my phone is eSIM capable?Check for an EID in Settings (or dial *#06#) and an “Add eSIM” option in your SIM settings. If both exist, your phone supports eSIM. If either is missing, it likely doesn’t.Do I need an unlocked phone to use a travel eSIM?Yes. Most travel eSIMs, including Simology plans, require an unlocked device. A carrier‑locked phone generally only accepts that carrier’s eSIMs.Can I run two lines at the same time?Most modern iPhones (13 and newer) and recent Pixels/Samsungs support two active lines (e.g., personal number plus travel data). Some mid‑range Androids limit you to one active eSIM at a time.How many eSIMs can I store?It varies by model. Recent iPhones and Pixels can store multiple eSIM profiles (often 5–10 or more) but typically allow only two lines active simultaneously. You can switch profiles in Settings.Can I move an eSIM to a new phone?Some providers support eSIM transfer in‑app or via QR reissue, but many treat eSIMs as one‑device only. Plan to install a fresh eSIM on your new phone.Will eSIM drain my battery faster?Not noticeably. Running two lines can use slightly more power, but modern radios manage this efficiently. Most users won’t see a meaningful difference.Next step: Confirm your phone with the quick checks above, then pick your destination plan on Destinations.

Multi‑Network Smart Switching for Partners: SLA Uplift & Fewer Support Tickets

Multi‑Network Smart Switching for Partners: SLA Uplift & Fewer Support Tickets

Modern travellers expect connectivity that “just works”, anywhere, anytime. For partners and wholesalers, that means delivering resilient mobile data that rides over multiple networks and quietly switches when conditions degrade. Multi‑network smart switching turns a single‑carrier promise into a carrier‑diverse service level, lifting uptime, lowering latency and slashing support noise when customers cross borders or move between urban and rural cells. This article explains how smart switching works, what uplift to expect in real numbers, and how to frame it in your sales deck. We’ll cover SLA design, implementation checklists, and practical measurement so you can prove more minutes of service delivered, fewer “no service” moments and faster apps. If you sell travel eSIM across regions such as Esim Western Europe and Esim North America, smart switching is the most efficient path to better SLAs and fewer escalations—without asking end users to fiddle with settings or swap profiles.What is multi‑network smart switching?Multi‑network smart switching is a policy‑driven capability embedded in the SIM/eSIM stack that selects the best available network at any moment, based on real‑time quality signals such as:Radio availability and signal qualityAttach success/failure and PDP/PDN session stabilityLatency to key targets (e.g., DNS, CDN edges)Packet loss and jitterCommercial rules (whitelists/blacklists, cost ceilings, fair use)Instead of pinning a device to a single carrier, your eSIM has access to multiple MNOs/MVNOs in each country. A lightweight policy engine monitors quality and triggers network reselection or profile steering if the current path degrades.For travellers, the experience is invisible: the device stays online as they move from, say, Paris to Barcelona (see Esim France and Esim Spain), or from New York to California (Esim United States). For partners, it’s the simplest way to add resilience and meet enterprise‑grade expectations across our Destinations.Why smart switching matters for SLAsQuantifying uptime upliftIf you rely on a single network with 99.0% monthly availability, that’s about 7 hours and 18 minutes of downtime per month. With access to two independent networks of similar quality, the combined availability approaches:Combined availability ≈ 1 − (1 − A1) × (1 − A2)Example with A1 = 0.990 and A2 = 0.990 → 1 − 0.01 × 0.01 = 99.99%Real‑world failures are not perfectly independent (storms, fibre cuts, or national outages can hit multiple networks), so a conservative planning assumption is:Single‑network monthly downtime: 200–450 minutes (varies by market granularity)Dual/triple‑network smart switching downtime: 5–30 minutesPractical uplift: 10× to 40× less downtime, translating into 99.95%–99.99% delivered availabilityEven a modest two‑network design with correlated risks typically lifts availability from 99.0–99.5% to 99.95%+. Across an active travel cohort, that’s hundreds of “saved” online minutes per 1,000 user‑days.Latency and app performanceChoosing the lowest‑latency path matters for cloud apps, maps and messaging. Smart switching prefers networks with:Local or regional breakout rather than home‑routed trafficHealthier peering to major CDNs and collaboration suitesLower radio congestion in the momentObserved results partners can expect:EU intra‑region p95 latency improvements of 20–40% when switching to a better‑peered MNO (e.g., from 120–160 ms to 70–110 ms)Within the US, p95 latency reductions of 15–30% by avoiding congested areas or leveraging a stronger regional carrier10–25% reduction in time‑to‑first‑byte for common mobile web flowsFor many travel use cases, perceived speed is as valuable as raw throughput. Lower p95 latency (not just averages) is what keeps video calls and maps usable.Support ticket reductionMost travel connectivity tickets cluster into a few buckets:No service / can’t attach“Data is slow”Intermittent dropsAPN/profile confusionSmart switching prevents the first three by auto‑moving away from bad cells, degraded cores or poorly performing peering. Typical reductions once deployed:30–50% fewer “no service” tickets20–35% fewer “slow data” tickets40–60% drop in intermittent dropouts, especially at cell edges and transit hubsFewer incidents means lower support cost per account and happier travellers—reflected in higher CSAT/NPS.How smart switching works in practiceMulti‑MNO access per country: eSIM profiles grant access to multiple carriers in markets covered by products such as Esim Western Europe, Esim North America, and country packs like Esim Italy.Policy‑based steering: The eSIM stack and partner platform set preferred/forbidden networks and thresholds for switching (e.g., persistent packet loss, repeated attach failures, or sustained high latency).Fast, graceful failover: Devices usually reselect within seconds when a better cell is available; full context rebuild may take longer when moving between cores. End users typically experience a brief blip rather than an outage.Compliance‑aware: Partners can restrict selection to specific networks for regulatory or contractual reasons, while still maintaining diversity where permitted.Note: switching behaviour can vary by device OS and modem firmware. Always include device diversity in your test plan.Designing a multi network switching SLAA robust multi network switching SLA should define:Coverage scope: Countries/regions and included technologies (4G/5G NSA/SA; 2G fallback where applicable).Availability target: e.g., 99.95% monthly at the service edge (successful data session and reachability to defined targets).Latency: p95 thresholds to strategic targets (e.g., 100 ms within region), plus packet loss/jitter bounds.Attach success: e.g., >99.8% attach success within three attempts.Time‑to‑recover: e.g., recovery within 60 seconds from RAN loss where another network is available.Maintenance windows: whether counted or excluded.Measurement method: synthetic probes, device telemetry, or both; time‑zone and aggregation rules.Credits/remedies: aligned to impact, not just percentage figures.Practical baseline examples to include in proposals:Expected availability: 99.95–99.99% across Tier‑1 markets; 99.9–99.95% in challenging geographies.p95 latency targets: 70–110 ms in Western Europe; 60–120 ms across the United States; 90–140 ms cross‑border in North America.Typical downtime minutes avoided vs. single‑network: 150–400 minutes per month saved at scale.Caveat: When multiple carriers share common infrastructure (e.g., the same backhaul or data centre), failures may correlate. Build safety margins into your SLA targets and document assumptions.Implementation checklist for partners1) Select the right products and footprint - Map travel routes against our Destinations. - Choose regional packs where roaming density is high, like Esim Western Europe. - For US‑heavy travel, include Esim United States and broader Esim North America.2) Define policy and constraints - Whitelist preferred networks per country; blacklist known weak cells where needed. - Set switching thresholds (attach retries, packet loss %, p95 latency ceilings). - Add compliance rules (e.g., force domestic breakout for specific roles).3) Prepare devices - Validate APN and OS versions; ensure eSIM installation flow is clear. - Test both iOS and Android, including dual‑SIM scenarios.4) Run a structured field test - Build a route‑based test matrix (airports, transit, hotels, rural). - Collect p95 latency, packet loss, attach success, and time‑to‑failover.5) Operationalise monitoring - Set up synthetic probes in key cities (e.g., Paris, Milan, Madrid, New York). - Alert on threshold breaches and trigger automated steering adjustments.6) Update support playbooks - Replace “toggle airplane mode” scripts with “smart switching check” steps. - Categorise tickets to isolate improvements in the first 60 days.7) Close the SLA loop - Publish monthly reports with uptime minutes delivered, p95 latency, and ticket volume changes. - Share before/after comparisons with enterprise customers.Pro tip: Keep policy simple to start. Two‑tier thresholds (degradation and failover) often outperform complex rule stacks and are easier to explain in an SLA.Measuring outcomes: before/after that executives understandTrack and report the metrics that translate to traveller experience and support load:Downtime minutes per 1,000 user‑daysp95 latency by country and by hour of dayAttach success rate and PDP/PDN drop rateTime‑to‑failover when quality degradesTicket volumes by category and severityCSAT/NPS for connectivity over timeBenchmarks seen after rollout:Downtime per 10,000 user‑days: from 500+ minutes down to 50–150 minutesp95 latency: 20–40% reduction in Western Europe and 15–30% across the USAttach failure rate: 25–50% reductionSupport tickets: 35–55% reduction overall; first‑response times down by 20–30%These results form the backbone of your SLA narrative and your sales proof points.How to position smart switching in your sales deckStructure your pitch around outcomes, not internals:Headline: “Always‑on travel connectivity with carrier diversity. 99.95%+ delivered availability. Auto‑failover in seconds.”Visual: Route map with overlapping carrier coverage; a call‑out of “no single‑carrier dependency”.Benefits slide:10–40× fewer downtime minutes vs. single‑network roaming20–40% lower p95 latency in key markets35–55% fewer support ticketsZero user action required; seamless device experienceProof points:Before/after metrics from a pilot on Esim Western EuropeUS results from Esim United StatesSLA summary: Clear targets for availability, latency, time‑to‑recover, and measurement approachBuyer‑friendly close: “Start with a 60‑day pilot, monitored and co‑managed.”Pro tip: Put p95 latency on the same slide as collaboration app performance (e.g., “Teams/Meet calls stay stable at p95 < 110 ms”). Stakeholders can connect the dots instantly.Where smart switching helps mostFrequent‑traveller teams moving between EU countries (Paris–Milan–Barcelona) with Esim France, Esim Italy and Esim SpainUS‑centric road warriors relying on robust coverage across states with Esim North AmericaPop‑up retail and events that cannot tolerate single‑cell congestionField service in rural areas where one network often outperforms othersCritical apps that are latency‑sensitive (payments, UCaaS, live translation)Pro tips for smooth operationsKeep the APN consistent across products to simplify device setup and MDM policies.Monitor p95, not just averages. It’s where user pain lives.Maintain a minimal “known good networks” list per country and review quarterly.Educate users that brief blips can occur during switching; the system is protecting them from longer outages.Use synthetic probes near airports and train stations—congestion there is a leading indicator for broader issues.FAQQ: How is smart switching different from traditional roaming steering?A: Traditional steering prioritises a preferred roaming partner for commercial reasons. Smart switching prioritises real‑time quality and resilience, moving between multiple networks to protect the user experience and SLA.Q: Will frequent switching drain battery?A: Properly tuned policies avoid flapping. Devices remain attached until quality falls below thresholds, then reselect. In practice, battery impact is negligible compared to the gains from avoiding repeated manual toggling or stalled apps.Q: Does the IP address change when the device switches?A: It can. Moving to a different core or breakout may change IP. For most travel use cases that’s fine. If you require session persistence, design app logic to handle IP changes or pin traffic via a corporate VPN.Q: Can we restrict networks for compliance or cost?A: Yes. You can whitelist/blacklist networks per country while preserving diversity within the allowed set. Document these constraints in the SLA so expectations remain clear.Q: What happens in areas with limited technology (e.g., only 4G available)?A: Smart switching still helps by selecting the strongest available 4G cell and the best‑performing core. Where 5G is present, policies can prefer 5G where it improves latency and stability.Q: How does this work across regions like Western Europe and North America?A: Regional eSIMs such as Esim Western Europe and Esim North America include multi‑MNO access in each country, enabling the same smart switching behaviour as you cross borders.The partner advantageMulti‑network smart switching converts a roaming product into a resilient service with measurable SLA uplift. It protects travellers from localised outages, evening congestion and poor peering, while reducing your support burden. With clear SLA targets, a simple policy, and disciplined measurement, you can prove value fast—and price accordingly.Next step: Explore packaging, SLAs and co‑marketing materials in our Partner Hub. If you’d like to discuss enterprise rollouts, visit For Business.