Indonesia SIM Registration for Foreigners (2025): Passport, Tax ID & Where to Register

Blog

Indonesia SIM Registration for Foreign...

Indonesia SIM Registration for Foreigners (2025): Passport, Tax ID & Where to Register

30 Oct 2025

Indonesia SIM Registration for Foreigners (2025): Passport, Tax ID & Where to Register

If you want a local data plan in Indonesia, you must register your SIM. For tourists in 2025, the essentials are straightforward: bring your passport, buy from an official outlet, and (if you plan to use a local SIM) register your phone’s IMEI with Customs on arrival. Registration is fast when you do it in the right place—airport counters or flagship stores for Telkomsel, XL Axiata and Indosat (IM3). Corner shops and unbranded kiosks can sell a SIM but often can’t complete foreigner registration, which is why many travellers end up with a non-working card until they visit a carrier store.

You do not need an Indonesian tax ID to buy a SIM as a tourist. A local Tax ID (NPWP) is a resident requirement only. Expect instant activation once your passport and device details are captured, though some lines take up to a few hours. This guide explains exactly where to go, what to bring, how long it takes, and common snags to avoid. For a broader view of connectivity across the region, see our country pages under Destinations.

Quick facts: 2025 rules at a glance

  • Who must register: Everyone using an Indonesian SIM, including tourists.
  • IDs accepted for tourists: Passport (photo page). Some outlets also request your entry stamp/visa.
  • Tax ID (NPWP): Not required for tourists. May be requested for residents with KITAS/KITAP.
  • Where to register: Airport operator counters or official city stores (GraPARI for Telkomsel, XL Center, Indosat/IM3 Gallery).
  • IMEI rule: If you’ll use a local Indonesian SIM, register your phone’s IMEI with Customs on entry.
  • Time to activate: Usually minutes; allow up to 24 hours in edge cases.
  • Number of SIMs per ID: Operators may cap how many numbers can be linked to one passport. Expect a small limit.
  • Best coverage: Telkomsel generally leads for nationwide coverage, especially off the beaten path.

Indonesia SIM registration for tourists: what you need in 2025

To complete indonesia sim registration tourist requirements, you typically need:

  • Passport: The physical passport you used to enter Indonesia. Staff will scan or photograph it.
  • Entry details: Your entry stamp or visa (e.g., VOA/e-VOA) may be requested.
  • Local contact info: A temporary address (hotel/Airbnb) and Indonesian phone contact are sometimes asked but not always enforced.
  • Your phone: Keep it handy for SIM insertion, eSIM provisioning (where available), and test calls/data.
  • IMEI registration: If using a local SIM, Indonesian Customs needs your device IMEI recorded when you arrive.

Good to know: - Photocopies aren’t usually required; a physical passport is. - Staff complete the registration in their system. Tourists cannot complete the standard NIK/KK self-registration used by locals. - Some flagship stores issue eSIM profiles to eligible devices; availability and staff policy varies by location.

Where to register: airport kiosks vs city stores

Buying at the right place matters more than hunting the cheapest shelf price.

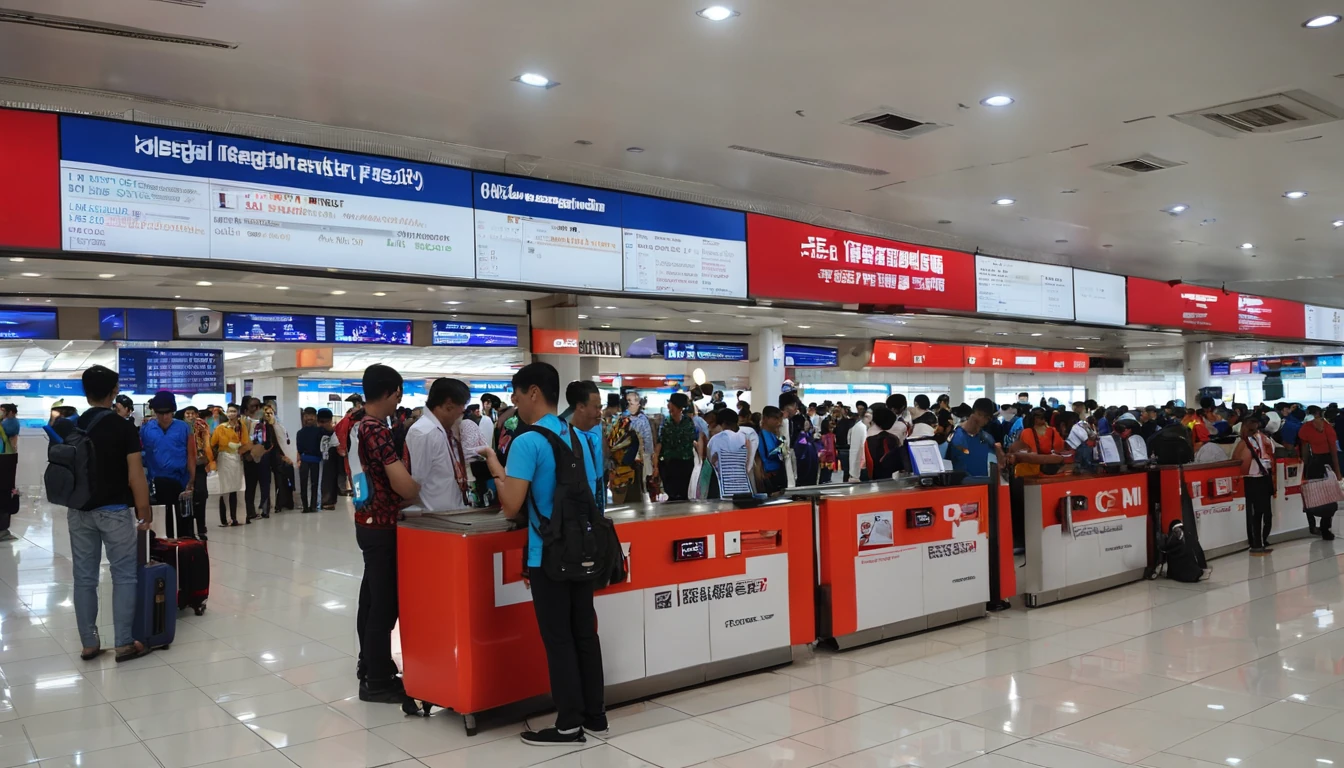
Airport operator counters (best for immediate connectivity)

  • Pros:
  • Passport registration is done on the spot.
  • Staff can help with IMEI questions and basic setup.
  • English-speaking staff are common in major airports (CGK Jakarta, DPS Bali).
  • You walk out connected.
  • Cons:
  • Packages can be pricier than in town.
  • Stock may be limited during peak arrivals.

Official city stores (often best value)

  • Pros:
  • Full service: SIM sale, passport registration, troubleshooting, eSIM availability in flagship branches.
  • Broader plan selection, often better value than airports.
  • Cons:
  • Requires a trip across town and queue time.
  • Opening hours vary; not 24/7.

Look for: - Telkomsel GraPARI - XL Center - Indosat Ooredoo Hutchison (IM3) Gallery

Small kiosks and convenience stores (proceed with caution)

  • Pros: Cheapest sticker price, everywhere.
  • Cons: Many cannot legally register a foreign passport. You may leave with a SIM that won’t activate until you visit an operator store. Not worth the risk for short stays.

Step-by-step: from landing to connected

1) Decide your approach
- If you only need calls/data for a day or two and you already have roaming or a regional eSIM, you may skip a local SIM entirely.
- If you want local rates for a week or more, a registered local SIM is usually best value.

2) Register your device IMEI with Customs (if using a local SIM)
- Before or on arrival, prepare your phone’s IMEI numbers (dial *#06#).
- Use the Mobile BeaCukai app or the customs desk at the airport to submit your device details. You’ll be given a confirmation/QR code.
- Present the QR/approval at the counter if asked. Tourists generally receive time-limited permission to use a local SIM on that device.
- If you forget at the airport, visit a Customs office soon after arrival. Using international roaming does not require IMEI registration.

3) Choose an operator
- Telkomsel: Widest coverage, especially outside big cities and across islands.
- XL Axiata: Good urban coverage and competitive pricing.
- Indosat (IM3): Often attractive data bundles and promos.
Tip: Ask specifically for a “tourist” or “foreigner” package and confirm voice/SMS inclusions if you need them.

4) Buy and register at an official counter
- Present your passport (and entry stamp if requested).
- Staff will capture your details, insert the SIM or issue an eSIM, and complete registration in the operator’s system.
- You may be asked for a local address (hotel is fine).
- Keep the SIM starter pack and receipt; they include your number and useful USSD codes.

5) Activate and test
- Restart your phone after SIM/eSIM provisioning.
- Check mobile data, calls, and SMS. APN settings usually configure automatically.
- If data doesn’t work immediately, toggle airplane mode, then try a manual network selection.

Costs, plans and activation timelines

Pricing shifts regularly, but as a guide:

  • Starter packs: IDR 50,000–150,000 for basic data with some local calls/SMS.
  • Tourist bundles: IDR 100,000–300,000 for larger data (e.g., 15–35 GB) and bonus app data or local minutes.
  • eSIM: Offered by some operator flagships; priced similarly to physical SIMs.

Activation speed: - At an official counter, your line typically goes live within minutes once registration is submitted.
- Network provisioning can take longer in busy periods; allow up to a few hours. Rarely, 24 hours.

Top-ups and extensions: - Use the operator’s app (requires your Indonesian number for OTP), vouchers from minimarts (Indomaret, Alfamart), or pay at an operator store. - Tourist lines may have validity limits aligned to your stay. Ask how to extend if you’re in-country longer.

Common snags (and how to fix them)

  • SIM shows “emergency calls only” or no service:
  • Check that IMEI registration was completed if you’re using a local SIM.
  • Try manual network selection (Telkomsel/XL/Indosat) and restart the phone.
  • Bought at a small kiosk and it won’t activate:
  • Visit an official operator store with your passport to complete foreigner registration.
  • No data despite signal bars:
  • Toggle airplane mode, reset network settings, or update APN to default for your operator.
  • Confirm your bundle includes data and is active.
  • eSIM failed to install:
  • Ensure you’re on stable Wi‑Fi, scan the QR again, or ask staff to reissue the profile. Some outlets can only issue physical SIMs to foreigners.
  • Line deactivated mid-trip:
  • It can happen if IMEI wasn’t registered or your package validity expired. Visit an operator store with your passport.
  • WhatsApp number change:
  • If you switch from a roaming number to a local number, use WhatsApp’s Change Number feature to keep chats and groups.

Passport vs Tax ID (NPWP): what you actually need

  • Tourists: Passport only. You will not be asked for a local Tax ID (NPWP) to buy/register a SIM as a short-stay visitor.
  • Residents and long-stay permit holders: Some outlets may request KITAS/KITAP and NPWP. Requirements vary by operator and tenure.
  • If staff mention “NIK/KK”: Those are local IDs for Indonesians. As a foreigner, your passport is used instead.

Business travellers and teams

Need multiple lines, consistent packages, or centralised spend? Coordinate ahead of arrival to avoid airport queueing and ad-hoc plans.

  • Explore enterprise options via For Business.
  • If you’re a travel/tech partner supporting teams across regions, visit our Partner Hub for scalable connectivity workflows.

Useful comparisons and onward travel

Heading elsewhere after Indonesia? Keep your connectivity simple:

FAQ

1) Do tourists need an Indonesian Tax ID (NPWP) to buy a SIM?
No. Tourists register with a passport. NPWP is for residents and is not a requirement for short-stay visitors.

2) Is IMEI registration mandatory for tourists?
If you plan to use a local Indonesian SIM, you should register your device IMEI with Customs on arrival. Roaming on your home SIM does not require IMEI registration. Airport customs counters can handle this in minutes.

3) Can I register my Indonesian SIM online?
Not as a tourist. Foreigners must complete registration in person at an official operator outlet (airport counters or flagship stores) where staff scan your passport and submit the registration.

4) How long does SIM activation take?
Usually within minutes after staff complete registration; sometimes up to a few hours. Very occasionally, it may take until the next day.

5) Can I get an eSIM as a tourist in Indonesia?
Some flagship operator stores can issue eSIMs to eligible devices, but availability varies by city and store. Airport counters often favour physical SIMs. Ask the outlet in advance if you specifically want eSIM.

6) How many SIMs can I register with one passport?
Operators may limit the number of active numbers linked to a single passport. Policies vary; expect a small cap and ask the staff if you need more than one line.

Next step

Planning your trip and want the latest local guidance and plan options? Start with Indonesia under our Destinations hub.

Read more blogs

Andes Highlights (3 Weeks): Peru–Bolivia–Chile–Argentina Connectivity

Andes Highlights (3 Weeks): Peru–Bolivia–Chile–Argentina Connectivity

Planning a south america itinerary 3 weeks through the high Andes? This route stitches together Peru’s Sacred Valley, Bolivia’s La Paz and Salar de Uyuni, Chile’s Atacama Desert, and northern Argentina’s quebradas or Mendoza wine country—often by long-distance bus and a couple of short flights. Connectivity is different at altitude: coverage is strong in cities but drops in high passes and salt flats; bus Wi‑Fi is patchy; border towns can be blackspots. The smart move is an eSIM with multi‑country coverage, backed by offline maps, offline translations, and a simple routine for crossing borders by bus without losing service. Below you’ll find a practical, connectivity-first itinerary; checklists to prep your phone, apps and documents; and on-the-ground tips for staying online where it matters: booking transport, hailing taxis, backing up photos, and navigating when the signal disappears.If you’re transiting via Europe or North America, you can also add a layover eSIM to stay connected door-to-door. Start with our country list on Destinations, then follow the steps, and you won’t waste time chasing SIM shops at 3,500 metres.The 3‑week Andes route at a glanceWeek 1: Peru (Cusco, Sacred Valley, Machu Picchu) - Fly into Cusco (or Lima then connect). - Base in Cusco; day trips to Pisac/Chinchero/Maras–Moray. - Train to Aguas Calientes; Machu Picchu visit; return to Cusco or continue to Puno/Lake Titicaca.Week 2: Bolivia and Chile (La Paz, Uyuni, San Pedro de Atacama) - Bus/collectivo via Copacabana to La Paz. - Fly or overnight bus to Uyuni. - 3‑day Uyuni–altiplano tour ending in San Pedro de Atacama (Chile).Week 3: Chile and Argentina (Atacama to Salta or Mendoza/Buenos Aires) - Choose: - North: San Pedro to Salta/Jujuy by bus; fly to Buenos Aires. - Or South: San Pedro–Calama flight to Santiago; bus or flight to Mendoza; onward to Buenos Aires.Connectivity notes (quick): - Cities: generally strong 4G/4G+; 5G in major hubs (Santiago, Buenos Aires). - Altitude/rural: expect long no‑signal stretches (Uyuni, altiplano passes, Paso Jama). - Bus Wi‑Fi: often advertised, rarely reliable. Plan to be offline onboard. - Border regions: networks switch; a multi‑country eSIM avoids sudden loss.eSIM vs local SIMs for a 4‑country tripFor a route with multiple borders and remote legs, eSIM wins on time and reliability.What a multi‑country eSIM gets you: - One plan across Peru, Bolivia, Chile, Argentina (check coverage per country on Destinations). - No passport/SIM registration queues at kiosks. - Keep your home number active on the physical SIM for calls/SMS codes. - Instant top‑ups if you burn data on photos or navigation.When a local SIM still helps: - Long stay in one country with heavy data use (e.g., a month in Buenos Aires). - Dead zones where a different local network performs better (rarely worth the hassle on a 3‑week pace).Practical approach: - Use an eSIM as your primary data line across all four countries. - If you find a specific local network far better in one region, add a cheap local SIM and keep the eSIM as backup.Device readiness checklist (before you fly)1) Check eSIM compatibility and SIM‑lock status on your phone.2) Buy and install your eSIM while on home Wi‑Fi. Keep a PDF/printed copy of the QR code.3) Label lines clearly (e.g., “eSIM Andes Data”, “Home SIM”).4) Turn on data roaming for the eSIM; leave roaming off for your home SIM to avoid charges.5) Set up dual‑SIM rules: data on eSIM; calls/SMS default to home SIM if needed.6) Download offline: Google Maps/Organic Maps for all target regions; language packs (Spanish at minimum); bus/air tickets; hotel confirmations.7) Cloud backups: set to upload on Wi‑Fi only; pre‑create shared albums for travel companions.8) Test tethering/hotspot with your laptop/tablet.If you’re transiting popular hubs, consider a short layover eSIM: - USA connections: add an Esim United States or a broader Esim North America.- Europe connections: Madrid/Barcelona? Use an Esim Spain. Paris or Rome? See Esim France and Esim Italy. Multi‑country layovers? Try Esim Western Europe.City‑by‑city connectivity notesCusco & the Sacred Valley (Peru)Coverage: Good in Cusco city; variable in high villages (Maras/Moray) and along Inca Trail approaches.Tips: Download Sacred Valley maps offline; pin viewpoints and ruins. most taxis use WhatsApp—save your accommodation’s number.Machu Picchu/Aguas Calientes: Patchy to none at the citadel. Upload your photos later; don’t rely on live ticket retrieval.Lake Titicaca: Puno and CopacabanaPuno: Reasonable 4G; bus terminals crowded—screenshot QR tickets.Crossing to Copacabana: Expect a signal drop around the border; have directions saved offline.La Paz (Bolivia)Good urban 4G; the cable car network has decent signal but tunnels do not.Yungas/“Death Road” tours: Mountain valleys cause dead zones—share your emergency contacts with the operator, carry a charged power bank, and don’t plan remote calls.Uyuni and the Altiplano (Bolivia to Chile)Uyuni town: OK 4G; ATMs finicky—use Wi‑Fi for banking apps.Salt flats/lagunas: Assume offline for most of the 3‑day tour. Guides often carry satellite phones; agree a pickup time/place in San Pedro and preload your map route.San Pedro de Atacama (Chile)Town: Solid 4G; accommodations often have Wi‑Fi but speeds vary.Geysers, Valle de la Luna: Offline navigation essential; sunrise trips start before mobile networks wake up in some areas.Salta/Jujuy or Mendoza/Buenos Aires (Argentina)Salta/Jujuy: Good city coverage; quebradas have long no‑signal sections.Mendoza: City 4G/5G; vineyards outside town can be patchy.Buenos Aires: Strong 4G/5G; ideal for cloud backups and large downloads before you fly home.Border crossings by bus: step‑by‑stepThe big ones on this route: Peru–Bolivia (Puno/Copacabana), Bolivia–Chile (Uyuni–San Pedro via Hito Cajón), Chile–Argentina (Paso Jama to Salta or Los Libertadores to Mendoza).How to keep service and sanity:1) The day before:- Top up your eSIM data.- Confirm your plan includes both countries you’re entering/leaving.- Download offline maps for both sides of the border and your town of arrival.- Save bus company WhatsApp and terminal address offline.2) On departure morning:- Keep a paper copy or offline PDF of tickets, insurance, and accommodation proof.- Charge phone and power bank; pack a short cable in your daypack.3) On the bus:- Don’t count on bus Wi‑Fi. Keep your eSIM as primary, but expect drops near mountain passes.- If your phone supports it, enable “Wi‑Fi calling” for later when you reach accommodation Wi‑Fi.4) At the border posts:- Data may be unavailable. Keep QR codes and booking numbers offline.- After exiting one country and entering the next, toggle Airplane Mode off/on to re‑register on the new network.- If the eSIM doesn’t attach, manually select a network in Mobile Settings.5) Arrival:- Send your accommodation a quick WhatsApp when you’re back online.- Recheck your eSIM’s data roaming is on; confirm you’re on an in‑country network, not a weak roaming partner.Pro tips: - Dual profiles: If your eSIM allows, keep a secondary profile for a different network in the same country—helpful in border towns.- Cash buffer: Some border terminals don’t accept cards; download a currency converter for offline use.Offline survival kit (5‑minute setup)Maps: Download regions for Cusco, Sacred Valley, Puno, La Paz, Uyuni, San Pedro, Salta/Jujuy or Mendoza, and Buenos Aires.Translations: Download Spanish for offline use; add phrasebook favourites (bus tickets, directions, dietary needs).Documents: Save PDFs of passports, tickets, hotel addresses; star them for quick access.Rides: Screenshots of pickup points; pin bus terminals and hotel doors.Entertainment: Podcasts and playlists for long bus legs, set to download on Wi‑Fi only.Altitude and your tech: what changesCoverage gaps lengthen: Fewer towers at high altitude; valleys can block signal. Assume offline on remote excursions.Batteries drain faster in cold: Keep your phone warm and carry a power bank (10,000–20,000 mAh).Hotel Wi‑Fi may be congested: Schedule big uploads (photo backups, app updates) for big-city stays like Santiago or Buenos Aires.GPS still works offline: Your blue dot shows on offline maps without data—preload everything.Data budgeting for 3 weeksTypical traveller usage across this route: - Messaging/Maps/Bookings: 0.2–0.5 GB/day- Social and photo sharing: 0.3–0.7 GB/day- Occasional video calls/streaming: 0.5–1.0 GB/dayFor a mixed-use trip, plan 15–25 GB for 3 weeks. Heavy creators should double it and upload over hotel Wi‑Fi when possible. If you work remotely, consider a higher‑capacity plan and a backup eSIM; see our guidance on For Business.Practical route with transport and connectivity cuesDays 1–4 Cusco base: Strong city signal; day trips may be spotty—go offline-ready.Days 5–6 Machu Picchu: Expect no service at the ruins; sync tickets ahead.Days 7–8 Puno to La Paz via Copacabana: Border signal drop; re‑register networks after crossing.Days 9–11 Uyuni tour to San Pedro: Treat as offline; charge nightly; carry spare cables.Days 12–14 San Pedro: Stable in town; tours offline; top up data before Paso Jama.Days 15–17 Salta/Jujuy or Mendoza: Good urban 4G; rural patches are offline.Days 18–21 Buenos Aires: Strongest connectivity of the trip; clear your uploads and map downloads for the flight home.Partnering and stopover extrasHospitality and tour operators in the Andes: help your guests stay connected—explore co‑branded solutions via our Partner Hub.Transatlantic flyers: test your eSIM setup on a layover with an Esim United States or Esim Western Europe before hitting high-altitude blackspots.FAQs1) Do I need a local SIM in each country?No. A multi‑country eSIM covering Peru, Bolivia, Chile and Argentina is simpler and works well for a 3‑week pace. Consider a local SIM only if you’ll spend longer in one country and want the absolute best regional coverage.2) Will my WhatsApp number change with an eSIM?No. WhatsApp is tied to your registered number, not your data line. Keep your home SIM active for voice/SMS (roaming off if you wish), and use the eSIM for data—WhatsApp continues as normal.3) Can I hotspot to my laptop or camera?Yes. Enable tethering on your eSIM. Mind your data: cloud backups and OS updates can burn gigabytes—set them to Wi‑Fi only or schedule in big cities.4) What if there’s no signal on the Uyuni/Atacama legs?That’s expected. GPS still works offline. Pre-download maps and translations, carry a power bank, and sync plans with your tour operator before departure.5) Will I get roaming charges at borders?If you’re using a multi‑country eSIM with coverage in both countries, you won’t incur extra roaming fees from your home carrier. Keep roaming off on your home SIM to avoid accidental use.6) I’m connecting via Europe or the US—worth getting a layover eSIM?Yes. It’s an easy way to test your setup and stay reachable. Try Esim North America or country options like Esim Spain, Esim France, or Esim Italy for common hubs.Next step: Browse South America coverage options and build your plan on Destinations.

UAE eSIM & Mobile Internet Guide (2025): VoIP Restrictions, 5G, Airport Setup

UAE eSIM & Mobile Internet Guide (2025): VoIP Restrictions, 5G, Airport Setup

Staying connected in the UAE is straightforward if you plan for two things: strict VoIP rules and fast, urban 5G. This guide explains exactly how to set up your eSIM at Dubai (DXB) or Abu Dhabi (AUH), what to expect from the networks (Etisalat by e& and du), and the practical reality of calling apps in 2025. Whether you need maps and messaging for a stopover or reliable data for a week of meetings, you’ll find clear steps, pro tips, and fixes that work at the airport and on the go. If you’re combining the UAE with a wider trip, we also link to regional eSIMs for Europe and North America. When you’re ready to buy, head to Simology’s UAE listing via our Destinations page.Quick take: eSIM in the UAE (2025)Coverage: Excellent 4G LTE in cities; widespread 5G in Dubai and Abu Dhabi.Networks: Etisalat (e&) and du are the main operators; Virgin Mobile runs on du.Speeds: 4G typically 30–150 Mbps; 5G is faster in central areas.VoIP: WhatsApp, FaceTime and similar calls are restricted; use approved apps like BOTIM.Setup: Install the eSIM before you land; finish activation on airport Wi‑Fi.Hotspot: Generally allowed on travel eSIMs; check plan details.Best for: Urban travellers, stopovers, and business trips.Pro tip: If your itinerary includes Europe or North America, consider adding a regional plan such as Esim Western Europe or Esim North America alongside your UAE eSIM.The UAE mobile landscape: coverage, networks and 5GOperators and coverageEtisalat by e& (often shown as “etisalat by e&” or just “e&” on your phone) and du are the two nationwide networks.Coverage is excellent across Dubai, Abu Dhabi, and other cities. Desert highways and remote areas can drop to 3G/4G, so cache offline maps if you’re driving.Virgin Mobile is an app-based service that uses the du network.5G in practice5G is widely available in central Dubai (Downtown, DIFC, Dubai Marina, JBR, City Walk, Expo area) and central Abu Dhabi (Corniche, Al Maryah Island, Saadiyat, Yas).Airports (DXB and AUH), major malls, and business districts typically have strong 5G. Speeds vary by congestion and device; expect peak performance outdoors and near cell sites.Traveller eSIMs may connect on 4G only, even where 5G exists, depending on the plan. Check your plan description on our Destinations page.Pro tip: If 5G feels inconsistent, manually lock your device to 4G/LTE for a steadier experience when uploading photos or hotspotting.VoIP restrictions: what works, what doesn’tThe UAE restricts unlicensed VoIP services. Practically, this means:Commonly blocked on mobile networks: WhatsApp voice/video calls, FaceTime audio/video, Telegram calls, Facebook/Instagram calls, Viber calls, ordinary Skype-to-Skype.Generally usable: BOTIM (Etisalat-approved), Voico, Zoom, Microsoft Teams, Google Meet, Webex. Plain messaging (WhatsApp, iMessage, Telegram text) works normally.Notes: - Hotels and cafés sometimes run network policies similar to mobile networks, so blocked services usually remain blocked on Wi‑Fi. - FaceTime audio/video may appear to connect but will not pass media on most networks. - Corporate VPNs may allow some calling apps to connect, but performance can be poor and reliability varies. Use responsibly and in line with your employer’s policy.Workarounds that actually help: - Agree on an approved app: Install BOTIM or Voico before you fly, and share your ID with contacts. - For business: Schedule calls on Teams/Zoom/Meet and share links in advance. - Stick to text: WhatsApp/iMessage/Telegram text are reliable for coordination. - Use in-app call alternatives: Some ride-hailing and delivery apps offer in-app VoIP that complies locally.Which eSIM should you choose?You have three common options:1) Travel eSIM (data-only) - Best for: Tourists and short business trips. - Pros: Instant delivery by email/QR, keep your physical SIM active, flexible data sizes, hotspot-friendly. - Cons: No local UAE phone number; calls via VoIP are restricted (see above).2) UAE operator tourist eSIM/SIM (Etisalat or du) - Best for: Those who need a local number for calls/SMS and bundles that include BOTIM minutes. - Pros: Local number, sometimes include approved VoIP minutes and local call allowances. - Cons: In-person registration and passport scan; plans may be pricier for short stays.3) Regional eSIM if you’re continuing your trip - If you’re connecting the UAE with the US or Europe, add a regional plan so you avoid airport queues at your next stop: - Esim United States - Esim France - Esim Italy - Esim Spain - Esim Western Europe - Esim North AmericaFind our UAE eSIM options via Destinations. Teams organising travel for staff should see Simology For Business for centralised purchasing and support. Travel agents and resellers can partner via our Partner Hub.Device compatibility checklistBefore buying an esim uae plan, check:iPhone: XS/XR or newer support eSIM. Dual eSIM is supported on iPhone 13 and newer. Avoid Mainland China–market iPhones without eSIM (Hong Kong models vary).Samsung: Most Galaxy S20 and newer, Fold/Flip lines support eSIM. Some regional variants lack eSIM—check model settings.Google Pixel: Pixel 3 and newer support eSIM (except some early U.S. carrier models).iPads: Many cellular iPads support eSIM for data.Locked phones: If your device is network-locked, it may not accept a third-party eSIM. Verify with your home carrier.Tip: Open Settings > Mobile/Cellular and confirm you see “Add eSIM” or “Add mobile plan” before purchase.Step-by-step: install and activate your UAE eSIMDo this before you board or while you taxi to the gate:1) Purchase: Choose your UAE eSIM from Destinations and note the plan’s activation rules (some start on first connection, others on QR scan). 2) Install the eSIM: - iPhone: Settings > Mobile Data > Add eSIM > Use QR Code (or “Convert to eSIM” if applicable). - Android (Pixel/Samsung): Settings > Network & Internet/Mobile Network > SIMs/eSIM > Add carrier > Scan QR. 3) Label lines: Set your primary line (home SIM) to “Calls/SMS” and the new eSIM as “Data only.” 4) Data roaming: Enable data roaming for the eSIM line. 5) APN: If your plan specifies an APN, enter it exactly. If not, leave default/automatic. 6) Auto-select network: Leave network selection on automatic for the first connection. 7) Airplane mode toggle: After install, toggle airplane mode on/off to refresh.Finish activation on arrival:8) Connect to airport Wi‑Fi, then disable Wi‑Fi for a moment to let mobile data handshake. If data does not start within 2–3 minutes, see “Troubleshooting” below.Airport setup: DXB and AUHAt Dubai (DXB) and Abu Dhabi (AUH), you’ll pass reliable public Wi‑Fi almost immediately after disembarkation. Use it to finalise your eSIM:After landing:Turn on your phone and ensure the eSIM line is active with data roaming.Join airport Wi‑Fi if you need to download eSIM instructions or confirm APN.Once your eSIM registers on Etisalat or du, you should see 4G/5G in the status bar.If you prefer a local operator tourist SIM:Etisalat and du kiosks are in arrivals. Bring your passport. Tourist bundles often include data plus local minutes and approved VoIP (e.g., BOTIM) allowances.Pro tip: If you’re in a rush from gate to taxi, let the eSIM settle while you’re on Wi‑Fi; mobile data usually comes up by the time you reach immigration.Hotspot and tetheringMost travel eSIMs that work in the UAE allow personal hotspot. It’s ideal for laptops and tablets during layovers or meetings. If hotspot doesn’t work:Confirm hotspot is enabled for the eSIM line, not the home SIM.Some “unlimited” plans throttle hotspot first—check your plan’s fine print on our Destinations listing.Try 4G/LTE only mode for stability when tethering.Data budgeting and speedsPlan your allowance:Light user (maps, messaging, ride-hailing): 1–2 GB for a weekend.Typical city trip (social, navigation, Uber/Careem, browsing): 3–5 GB per week.Content-heavy (short videos, cloud files, hotspots): 8–15 GB per week.Expected performance:4G LTE: 30–150 Mbps; low latency in city centres.5G: Much faster where available; best outdoors or near windows.High-rises and underground car parks may attenuate signal—download offline maps for safety.Troubleshooting: quick fixes that workIf you see “No Service” or data won’t start:1) Restart the phone. 2) Ensure the eSIM line is set as the active “Mobile Data” line and data roaming is ON for that line. 3) Toggle airplane mode for 10 seconds. 4) Manually select a network: Settings > Network > Network operators > Choose “etisalat by e&” or “du.” Test both. 5) APN check: Enter the exact APN from your eSIM instructions. If none provided, leave automatic. 6) Disable VPN/Private Relay: VPNs can block first registration or slow handshakes. 7) iMessage/FaceTime activation: These use SMS on your primary line; keep your home SIM active for activation prompts. 8) Still stuck? Reinstall the eSIM using the original QR or contact support from the purchase email on Destinations.Pro tip: If calls on WhatsApp/FaceTime don’t work, that’s expected due to UAE restrictions—switch to BOTIM or schedule a Zoom/Teams.Business travel essentialsReliability: Prefer plans that connect to Etisalat (e&) in central Dubai/Abu Dhabi for the broadest coverage.Calls: For external stakeholders, share a Teams/Zoom link in calendar invites to bypass VoIP restrictions.Multi-country: If you’re hopping to Europe or the US, pre-load Esim Western Europe and Esim United States so you’re online on touchdown.Centralised purchasing: Manage staff connectivity and receipts via Simology For Business. Agencies and partners can onboard via the Partner Hub.FAQ: UAE eSIM and mobile internet1) Will WhatsApp calling work in the UAE? - WhatsApp voice and video calls are typically blocked on both mobile data and most public Wi‑Fi. Use BOTIM, Voico, or schedule calls on Teams/Zoom/Meet instead. Regular WhatsApp messaging works fine.2) Do I get a local UAE phone number with a travel eSIM? - Most travel eSIMs are data-only and don’t include a local number. If you need local voice/SMS, consider a UAE tourist SIM/eSIM from Etisalat or du at the airport.3) Will I get 5G with a travel eSIM? - Some plans connect on 5G, but many are 4G-only. In real-world use, good 4G in Dubai/Abu Dhabi is more than sufficient for navigation, social, and hotspotting. Check your plan details on Destinations.4) Can I keep my home number active for SMS? - Yes. Keep your physical SIM (home line) set for Calls/SMS and the UAE eSIM for Data. This lets you receive bank OTPs and iMessage activations while using UAE data.5) Are VPNs allowed? - We don’t provide legal advice. Technically, many corporate VPNs function. Use any VPN in accordance with local laws and your employer’s policy. Note that VPNs can slow or disrupt first-time eSIM activation—disable during setup if needed.6) How do I fix “Installed but no data” after landing? - Turn on data roaming for the eSIM, toggle airplane mode, try manual network selection (Etisalat/du), check APN, disable VPN/Private Relay, then restart. If issues persist, contact support from your order confirmation.Next stepReady to get connected? Choose your UAE plan on Simology’s Destinations page and install your eSIM before you fly.

Berlin Speed Test: BER Airport, Mitte, U‑Bahn – Plus ICE Corridor Snapshot

Berlin Speed Test: BER Airport, Mitte, U‑Bahn – Plus ICE Corridor Snapshot

Overview Berlin is one of Europe’s most visited capitals and a major rail hub, but what does connectivity actually feel like on the ground? We ran a berlin mobile speed test across three environments that matter to travellers: BER airport (airside and landside), central Mitte at street level, and the U‑Bahn underground. We also added an ICE high‑speed rail snapshot from Berlin Hbf towards Leipzig to capture performance at 250 km/h. This is a practical, traveller‑first report: clear numbers, what worked, what didn’t, and how to set up for fewer connection headaches. You’ll find a concise methodology, pro tips to minimise dropouts, and an open CSV you can reuse. If you’re planning a multi‑country trip, cross‑check your route on our Destinations page and consider a regional plan like Esim Western Europe. Teams needing SLA‑style reliability can head to For Business for multi‑SIM provisioning and failover options.What we tested and howNetworks: Deutsche Telekom, Vodafone, O2/TelefónicaTech observed: 5G (primarily n78 mid‑band and DSS), 4G/LTE in deeper indoor/underground zonesTools: Ookla Speedtest (UDP), HTTP download checks, DNS latency probesDevices: 2024/2025 flagship handsets with 5G SA/NSA support, eSIM provisionedSampling windows: Off‑peak and peak (07:00–09:00, 12:00–14:00, 17:00–19:00)Metrics: Down/up throughput (Mbps), ping and jitter (ms), brief notes on environmentLimitations: Network conditions vary with time, congestion, phone model, and exact location. Underground results depend heavily on distributed antenna systems (DAS) and tunnel handovers. The ICE snapshot mixes window‑seat and aisle results; on‑board Wi‑Fi performance fluctuates with train load.Key outcomes at a glanceFastest median in open outdoor Berlin: Deutsche Telekom, followed by Vodafone, then O2. Telekom often cleared 500–700 Mbps on n78 in Mitte.Underground U‑Bahn: Platforms are generally well covered; mid‑tunnel handover remains the weak spot. Expect 5–20 seconds of dips; deeper lines like U8 have more variability.BER airport: Strong 5G in Terminal 1 Check‑in and airside concourses; speeds taper on lower levels near rail platforms.ICE corridor: Direct cellular (your own SIM) outperformed on‑train Wi‑Fi for peak throughput. Telekom had the smoothest handovers at >200 km/h; O2 showed more jitter and short stalls.If you need consistent upload for calls: favour Telekom or Vodafone; O2’s uplink was adequate but spikier in motion.BER Airport: where to expect the best signalWe measured across Departures (T1), Arrivals, security queues, and the rail level.What we saw: - Departures (T1 Check‑in): - Deutsche Telekom 5G n78 frequently 500–700 Mbps down, 60–80 Mbps up, 15–25 ms ping. - Vodafone 5G n78 300–500 Mbps down, 40–70 Mbps up, 20–30 ms ping. - O2 5G DSS/4G mix 120–250 Mbps down, 25–45 Mbps up, 25–35 ms ping. - Airside near gates: Similar to Departures, slightly more variance as crowds swell. Video calls were stable on Telekom and Vodafone; O2 was fine for HD streaming. - Arrivals hall and baggage: More reflective surfaces and footfall increased jitter. Throughput decreased by ~20–30% versus Departures in peak times. - S‑Bahn/FEX rail level: Radio penetration is tougher. Expect 50–150 Mbps on Telekom/Vodafone and 30–90 Mbps on O2, with occasional ping spikes >40 ms.Practical note: If you land and need to sync large files, do it before descending to the rail platforms. For multi‑country travellers, consider activating Esim Western Europe on approach to Berlin so you’re live on touchdown.Mitte street‑level: fast and dense, with a few shadowsWe sampled Alexanderplatz, Museum Island, Unter den Linden, and Hackescher Markt.Alexanderplatz: Open sky and dense cell grid. Telekom peaks >700 Mbps down; Vodafone often 400–600 Mbps; O2 around 200–350 Mbps. Pings 12–25 ms.Museum Island/Unter den Linden: Architectural canyons introduce shadowing. Expect 150–400 Mbps depending on your angle to the site antenna. Uploads remained healthy (35–80 Mbps) on Telekom and Vodafone.Hackescher Markt: Busy microcell environment with good mid‑band 5G. Median down ~500 Mbps on Telekom, ~380 Mbps on Vodafone, ~220 Mbps on O2 during lunch rush.Pro tip: If a call becomes choppy on a corner, take two steps towards open sky or away from heavily tinted glass. Small positional changes can restore a clean n78 link.U‑Bahn underground: platforms good, tunnels improvingBerlin’s U‑Bahn has broad 4G/5G coverage on platforms via DAS. In‑tunnel continuity is line‑dependent.Highlights: - Platforms (U2 Alexanderplatz, U5 Museumsinsel, U6 Friedrichstraße, U8 Bernauer Str.): - Telekom: 180–350 Mbps down, 30–60 up, ping ~20–30 ms. - Vodafone: 130–260 Mbps down, 25–50 up, ping ~25–35 ms. - O2: 80–160 Mbps down, 15–35 up, ping ~30–45 ms. - Tunnels between stations: - Brief dips (5–20 s) still occur, especially on deeper U8 and in older segments without continuous DAS. - U5’s newer sections showed the most consistent handovers. - Station Wi‑Fi: Where present, it’s fine for messaging but often congested at peak; your cellular SIM will typically be faster and more predictable.Checklist to keep calls alive underground: 1. Force 5G Auto/NSA rather than 5G SA if your device struggles with handovers. 2. Enable Wi‑Fi Calling but keep mobile data on; your phone may juggle gracefully on platforms. 3. Use a codec‑adaptive calling app (most modern meeting apps do this by default). 4. If a tunnel is coming, switch your meeting to audio‑only for 1–2 minutes.ICE corridor snapshot: Berlin Hbf → Leipzig Hbf (via Südkreuz)High‑speed rail is a stress test for mobility. We measured both direct device connectivity and DB’s on‑train Wi‑Fi.What we saw at 200–250 km/h: - Direct device (window seat): - Telekom: 80–250 Mbps down, 20–60 up; smoothest cell reselection; few sub‑10‑second stalls. - Vodafone: 60–180 Mbps down, 15–45 up; occasional 10–20 s dips in cuttings. - O2: 30–120 Mbps down, 10–35 up; more variability and brief drops, especially after handovers. - Direct device (aisle seat): - Expect 20–40% lower throughput due to window coatings and body shadowing. - DB on‑train Wi‑Fi (aggregated cellular backhaul): - Typical 5–20 Mbps to client, sporadic bursts to 40 Mbps off‑peak. - Latency spikier (60–150 ms). Fine for email, chat, and SD video; less ideal for live screen‑sharing.Pro tips for trains: - Sit near a window for stronger direct signal if you plan to hotspot your laptop. - Keep a secondary eSIM active for failover. A regional plan like Esim Western Europe gives you redundancy across carriers and borders. - Download meeting decks offline and record calls locally if critical. - Business travellers: ask us about pooled data and SIM rotation on For Business.Practical recommendations for travellersBest single‑network experience in Berlin: Deutsche Telekom for raw speed and in‑motion stability; Vodafone is a solid second. O2 is improving and fine for typical streaming and calls.Underground reliability: Don’t bet meetings on mid‑tunnel continuity. Aim to join from platforms or street‑level.Airport workflows: Upload large files or download maps at Departures/airside before heading to the rail levels.Multi‑country plans: If Berlin is part of a wider itinerary, pick Esim Western Europe. If you’re coming from North America and hopping onward, review Esim North America and Esim United States.Side trips: Heading to Paris, Rome or Barcelona after Berlin? Keep the same eSIM active across regions with Esim France, Esim Italy or Esim Spain.Open dataset (CSV)You can copy and reuse the sample below. Timestamps local (CEST/CET). Location granularity is approximate for privacy.timestamp,location,mode,carrier,tech,down_mbps,up_mbps,ping_ms,jitter_ms,notes 2025-10-18 08:42,BER T1 Check-in,airport,Telekom,5G n78,642,72,18,4,Light crowd 2025-10-18 08:47,BER T1 Check-in,airport,Vodafone,5G n78,418,58,22,6,Peak counter queue 2025-10-18 08:52,BER T1 Check-in,airport,O2,5G DSS,211,37,27,8,Two bars 2025-10-18 09:10,BER Airside A20,airport,Telekom,5G n78,588,65,19,5,Near window 2025-10-18 09:16,BER Arrivals,airport,Vodafone,5G n78,312,49,26,9,Baggage area 2025-10-18 09:23,BER Rail level,s_bahn,Telekom,LTE/5G,128,28,33,12,Lower level 2025-10-18 12:05,Alexanderplatz,street,Telekom,5G n78,732,81,14,3,Open square 2025-10-18 12:09,Alexanderplatz,street,Vodafone,5G n78,496,62,20,4,Lunch rush 2025-10-18 12:12,Alexanderplatz,street,O2,5G DSS,263,41,24,7,Stable 2025-10-18 12:40,Museum Island,street,Telekom,5G n78,384,57,21,6,Building shadow 2025-10-18 12:44,Unter den Linden,street,Vodafone,5G n78,352,53,23,7,Busy footfall 2025-10-18 13:05,Hackescher Markt,street,Telekom,5G n78,522,68,17,5,Microcells 2025-10-18 13:08,Hackescher Markt,street,Vodafone,5G n78,389,56,19,5,Good signal 2025-10-18 13:10,Hackescher Markt,street,O2,5G DSS,221,33,28,9,Bursty 2025-10-18 17:36,U2 Alexanderplatz,ubahn,Telekom,LTE/5G,298,54,24,8,Platform 2025-10-18 17:38,U5 Museumsinsel,ubahn,Vodafone,LTE/5G,214,39,28,9,Platform 2025-10-18 17:50,U8 Bernauer Str.,ubahn,O2,LTE,122,26,36,11,Platform 2025-10-18 17:54,U8 Tunnel Nbound,ubahn,Telekom,LTE,18,6,55,22,10s dip 2025-10-19 10:15,Berlin Hbf → Südkreuz,ice,Telekom,5G/LTE,146,41,35,10,Window seat 2025-10-19 10:47,Teltow countryside,ice,Vodafone,5G/LTE,92,28,41,14,Cutting 2025-10-19 11:22,Approach Leipzig,ice,O2,LTE,58,17,48,19,Brief stall 2025-10-19 11:30,ICE onboard Wi‑Fi,ice,DB Wi‑Fi,Multi,17,8,96,37,2nd classNote: “5G DSS” indicates dynamic spectrum sharing on lower bands; peak rates lower than mid‑band n78.Reproduce our berlin mobile speed testFollow this in Berlin for comparable results: 1. Use a recent 5G phone; enable 5G Auto (NSA first). 2. Install Ookla Speedtest and one HTTP download tester; clear caches. 3. Test three times per location; note crowd level and whether you’re indoors, underground, or in motion. 4. Log metrics with timestamps and brief notes. Keep GPS coarse to protect privacy. 5. For U‑Bahn, run one test per platform and one mid‑tunnel (airplane mode toggle can help reset). 6. On ICE, test at window and aisle; add a run via the DB Wi‑Fi for comparison.Pro tips to minimise painDual‑SIM redundancy: Keep two profiles (e.g., Telekom plus a regional plan like Esim Western Europe) and let the phone fail over on poor signal.Map caching: Pre‑download offline maps before entering tunnels or boarding ICE.Meeting hygiene: Switch to audio‑only before tunnels, and record locally to avoid cloud hiccups.Device placement: On trains, place your phone near the window; hotspot to your laptop only when needed to conserve radio headroom.Business teams: Pool data and apply per‑route policies via For Business. Partners can collaborate on larger corridor studies through our Partner Hub.FAQWhich network is best overall in Berlin?In our sample, Deutsche Telekom delivered the fastest medians and the smoothest handovers in motion. Vodafone was consistently solid; O2 worked fine for everyday use but had more variability underground and on ICE.Is there reliable 5G in the U‑Bahn?Stations are well covered with 4G/5G and feel reliable. Mid‑tunnel performance is improving but still prone to short dips; plan calls from platforms or street level.How is connectivity at BER airport?Strong in Departures and airside with mid‑band 5G; Arrivals has slightly higher jitter. The rail level is usable but slower due to signal penetration limits.Does ICE on‑train Wi‑Fi beat using my own SIM?Not for peak speeds. The Wi‑Fi is adequate for email and messaging, but direct cellular via a good carrier and window seat usually performs better for heavy tasks.I’m travelling beyond Germany—do I need a separate plan?Not necessarily. A regional eSIM like Esim Western Europe covers multiple countries. If your trip spans the US and Europe, explore Esim North America and Esim United States.Where can I see more city results or plan my route?Check our live and upcoming coverage on Destinations. If you’re a provider or venue operator, see collaboration options on the Partner Hub. For multi‑SIM fleets and SLAs, visit For Business.Next step: Planning Berlin plus a few European stops? Set yourself up with Esim Western Europe so you land connected and stay that way across borders.