eSIM for USA Travel (Tourists): Best Options & Setup

Blog

eSIM for USA Travel (Tourists): Best O...

eSIM for USA Travel (Tourists): Best Options & Setup

31 Oct 2025

eSIM for USA Travel (Tourists): Best Options & Setup

Planning a trip to the United States and want reliable data without hunting for a SIM at the airport or paying roaming fees? An eSIM is the fastest, simplest way to get connected as soon as you land. This guide explains the best eSIM options for USA travel, how to choose the right plan, network coverage realities (city vs national parks), and exactly how to set it up on iPhone and Android. Whether you’re in New York for a long weekend, driving the Pacific Coast Highway, or working remotely across time zones, you’ll find practical advice for smooth connectivity. We’ll also cover whether you need a US number, how much data you really need, and what to do if things don’t connect first time. If you’re comparing plans now, jump straight to our USA range on Esim United States, or browse every country on Destinations.

Why use an eSIM for USA travel?

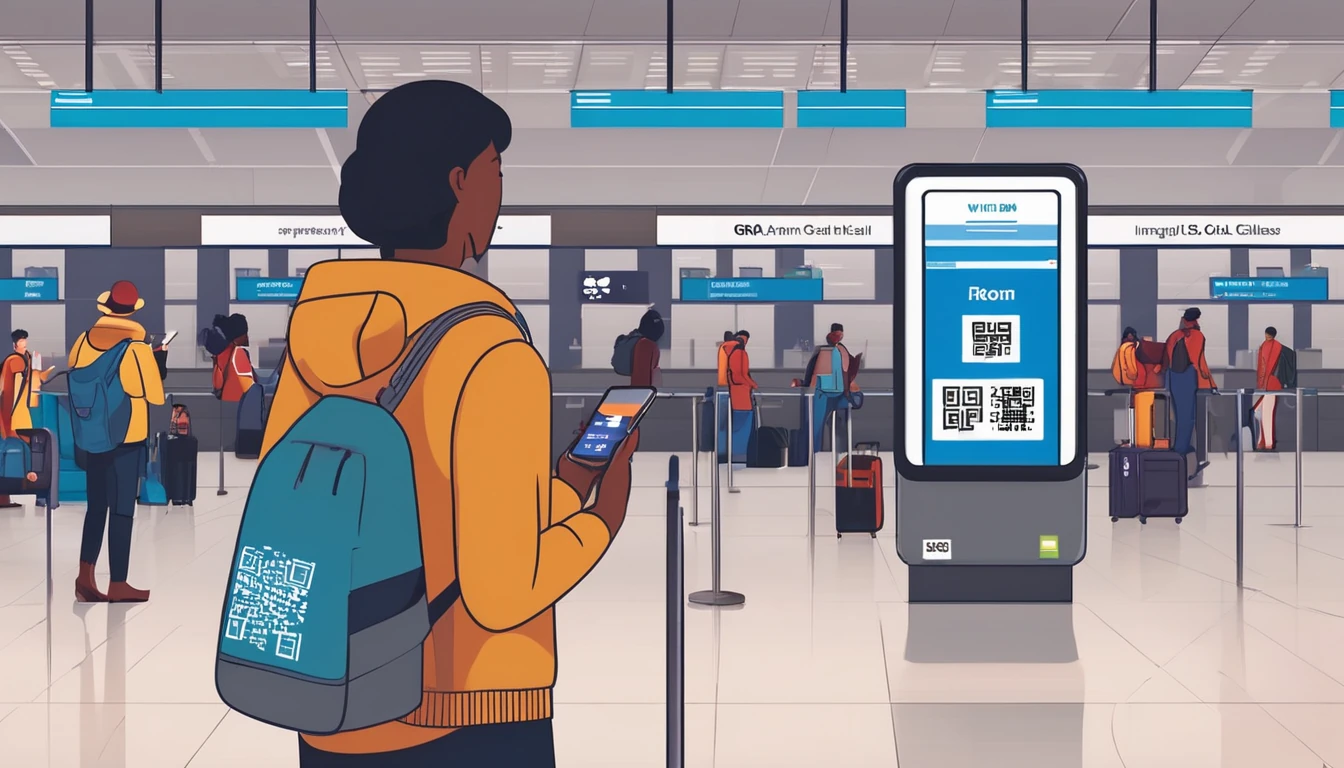
  • Instant setup over Wi‑Fi—no physical SIM swap.
  • Keep your home number active for calls/2FA via dual SIM.
  • Avoid unpredictable roaming charges; pay a clear, local data rate.
  • Flexible: 7/15/30‑day options, top‑ups, and multi‑country packs.
  • Works on modern iPhones, Google Pixel, and many Samsung models.

Pro tip: Install your eSIM profile before you fly (on Wi‑Fi), then activate data on arrival so your plan window starts when you actually need it.

Quick picks: best eSIM options for USA trips

Use these scenarios to narrow your choice. Then compare plans on Esim United States.

Best for short city breaks (3–7 days)

  • Choose a 3–5 GB or 10 GB plan with 5G access.
  • Prioritise strong urban coverage (T‑Mobile and AT&T are typically excellent in cities).
  • Check if hotspot/tethering is included for sharing data to a laptop.

Best for road trips and national parks

  • Pick a plan that supports both AT&T and T‑Mobile where possible, or one known for broad nationwide coverage.
  • Expect patchy service in remote areas (e.g., parts of Yosemite, Yellowstone, deserts). Download offline maps ahead of time.
  • A 15–30 GB plan is sensible for navigation, music, and occasional video.

Best for heavy data users and hotspot

  • Look for “unlimited” plans with clear Fair Use Policies (FUP). Many cap high‑speed data per day (e.g., 2–5 GB) before throttling.
  • If you hotspot regularly, confirm hotspot allowance; not all “unlimited” plans allow tethering at full speed.

Best if you need a US number

  • Most travel eSIMs are data‑only. If you need a local number (for reservations, ride‑hailing verification), choose a plan that explicitly includes voice/SMS.
  • Alternatively, use your home number over Wi‑Fi Calling, or use apps like WhatsApp/Telegram for messaging.

Best for multi‑country trips

Coverage and performance in the US: what to expect

  • Networks: The “Big 3” are AT&T, T‑Mobile, and Verizon. Most travel eSIMs use AT&T and/or T‑Mobile. Some plans can switch networks automatically based on signal.
  • Cities and suburbs: 5G is widespread, with excellent performance from AT&T and T‑Mobile.
  • Rural and national parks: Coverage varies. Verizon is often strongest in remote zones, but many travel eSIMs won’t use Verizon. Don’t rely on continuous data during long stretches in the mountains or deserts.
  • Speed management: Many eSIM plans are subject to “deprioritisation” at busy times, meaning locals may get priority in congested cells. This is normal and short‑lived.
  • Hotspot: Allowed on many plans, sometimes with limits. Check the plan’s hotspot policy before purchase.

Pro tip: If your eSIM supports manual network selection, try switching between AT&T and T‑Mobile in rural areas to find a workable signal.

How to set up your USA eSIM (step‑by‑step)

You’ll receive either a QR code or a manual activation code after purchase. Install on Wi‑Fi.

Before you fly (checklist)

  • Confirm your phone supports eSIM and is carrier‑unlocked.
  • Buy your plan and keep the QR/manual code handy.
  • Install the eSIM profile on Wi‑Fi, but do not enable mobile data until landing if your plan starts on first connection.
  • Download offline maps for your route/parks.
  • Turn on Wi‑Fi Calling on your primary line if you plan to use your home number over data.

iPhone (iOS 17/18)

  1. Settings > Mobile Service (or Cellular) > Add eSIM.
  2. Scan the QR code or choose “Use Activation Code” and paste the code.
  3. Label it “USA eSIM”.
  4. Set Default Line: keep your primary for calls/SMS if you like; set USA eSIM as “Mobile Data”.
  5. Under Mobile Data, toggle “Allow Mobile Data Switching” off if you want to force data via the USA eSIM only.
  6. On landing, enable the USA eSIM line and Mobile Data. Ensure Data Roaming is on for the eSIM line.

Android (Pixel/Samsung)

  1. Settings > Network & Internet > SIMs (names vary).
  2. Add eSIM > Scan QR or “Enter code manually”.
  3. Name it “USA eSIM”.
  4. Set “Mobile data” to USA eSIM; keep your primary SIM for calls if needed.
  5. Enable Data Roaming for the eSIM line on arrival.

On arrival: connect cleanly

  • Turn off data roaming on your home SIM to avoid accidental roaming.
  • Turn on only the USA eSIM for data.
  • If no data, toggle Airplane mode for 10 seconds, then back on. Try a manual network scan.

Troubleshooting quick fixes

  • APN: Some plans require a custom APN. Check your plan instructions and add the APN under Mobile Network settings.
  • 5G not available: Switch to 4G/LTE; some areas are LTE‑only or 5G is restricted on roaming profiles.
  • No service: Manually select AT&T or T‑Mobile. Reboot if needed.
  • Still stuck: Reinstall the eSIM profile only if advised by support. Contact support via chat/email (note time zones).

How much data do you need?

  • Light user (messaging, maps, email): 3–5 GB/week.
  • Typical city tourist (socials, ride‑hailing, light video): 5–10 GB/week.
  • Road‑tripper (navigation, streaming music, photos backup): 10–20 GB for 2 weeks.
  • Remote worker (video calls, hotspot): 20–40 GB/month or an unlimited plan with clear FUP.

Pro tip: Autoplay on socials and cloud photo backups burn data. Disable video autoplay and set photos to “Wi‑Fi only” backup to stretch your allowance.

Cost and plan features to compare

When comparing eSIM USA travel plans, look beyond data size.

  • Validity and start rules: Does the plan start on first connection or date of purchase?
  • Network access: AT&T, T‑Mobile, or both; 5G access included?
  • Fair Use Policy: Daily high‑speed caps on “unlimited”; throttled speeds after cap?
  • Hotspot/tethering: Allowed, and at what speeds?
  • Top‑ups: Can you add more data without reinstalling a new eSIM?
  • Support hours: Live chat/email availability in your travel time zone.
  • Refund policy: Refund if you haven’t activated and there’s a compatibility issue.
  • Number: Data‑only vs plans including a US number (voice/SMS).
  • Device limits: Some plans restrict installation to one device; eSIMs can’t be “moved” once installed.

Compare current options on Esim United States, or explore regional bundles on Esim North America.

Planning multi‑stop trips?

If you’re visiting multiple countries, regional eSIMs reduce admin and avoid mid‑trip SIM swaps.

Browse every country and region on Destinations.

Business and group travellers

  • Business teams: Centralise spend and manage multiple lines with pooled data and consolidated billing. See For Business.
  • Tour leaders and creators: If you’re provisioning connectivity for clients or audiences, explore revenue‑share and co‑branding via our Partner Hub.

At a glance: USA eSIM options (product snapshot)

What we like - Fast, self‑serve activation and immediate connectivity on landing. - Competitive 5G data packs with clear validity. - Options for both city breaks and long road trips; some plans support multi‑network access.

Considerations - Data‑only plans won’t give you a US phone number; pick a voice‑enabled plan if needed. - Rural coverage is inherently variable; download offline maps and expect dead zones in parks. - “Unlimited” usually has a daily high‑speed cap—check each plan’s FUP.

Compare and buy on Esim United States.

FAQs

1) Will my phone work with a USA eSIM? - iPhone XR/XS and newer support eSIM; US iPhone 14/15 models are eSIM‑only. Most Google Pixel 4+ and Samsung Galaxy S20/S21/S22/S23/S24 variants support eSIM. Your device must be carrier‑unlocked. Check your exact model’s eSIM support before purchase.

2) Do I get a US phone number with an eSIM? - Many travel eSIMs are data‑only, so no local number. If you need one, choose a plan that explicitly includes voice/SMS, or use your home number via Wi‑Fi Calling. Apps such as WhatsApp/iMessage work over data without a US number.

3) When should I activate my plan? - Install the eSIM profile on Wi‑Fi before you fly. If your plan starts on first network connection, enable mobile data only once you land in the USA.

4) Will it work in national parks and rural areas? - Coverage can be limited. AT&T and T‑Mobile are strong across most highways and towns, but expect dead zones in mountains, canyons, and deserts. Download offline maps and don’t rely on constant connectivity.

5) Can I keep my WhatsApp and iMessage? - Yes. These apps tie to your existing number/account and will continue working over the eSIM’s data. Keep your primary SIM active (with data roaming off) to receive calls/SMS if needed.

6) Is tethering allowed? - Often yes, but it’s plan‑specific. Some “unlimited” offers limit hotspot speeds or daily high‑speed amounts. Check the plan details before purchase.

The bottom line

For most travellers, an eSIM is the most convenient and cost‑effective way to stay connected in the USA. Choose your plan based on trip length, expected data use, and where you’ll be—cities vs road‑tripping through parks. Install before you fly, activate on landing, and keep your home number for calls and 2FA via dual SIM.

Next step: Compare plans and get connected in minutes on Esim United States.

Read more blogs

Andes Highlights (3 Weeks): Peru–Bolivia–Chile–Argentina Connectivity

Andes Highlights (3 Weeks): Peru–Bolivia–Chile–Argentina Connectivity

Planning a south america itinerary 3 weeks through the high Andes? This route stitches together Peru’s Sacred Valley, Bolivia’s La Paz and Salar de Uyuni, Chile’s Atacama Desert, and northern Argentina’s quebradas or Mendoza wine country—often by long-distance bus and a couple of short flights. Connectivity is different at altitude: coverage is strong in cities but drops in high passes and salt flats; bus Wi‑Fi is patchy; border towns can be blackspots. The smart move is an eSIM with multi‑country coverage, backed by offline maps, offline translations, and a simple routine for crossing borders by bus without losing service. Below you’ll find a practical, connectivity-first itinerary; checklists to prep your phone, apps and documents; and on-the-ground tips for staying online where it matters: booking transport, hailing taxis, backing up photos, and navigating when the signal disappears.If you’re transiting via Europe or North America, you can also add a layover eSIM to stay connected door-to-door. Start with our country list on Destinations, then follow the steps, and you won’t waste time chasing SIM shops at 3,500 metres.The 3‑week Andes route at a glanceWeek 1: Peru (Cusco, Sacred Valley, Machu Picchu) - Fly into Cusco (or Lima then connect). - Base in Cusco; day trips to Pisac/Chinchero/Maras–Moray. - Train to Aguas Calientes; Machu Picchu visit; return to Cusco or continue to Puno/Lake Titicaca.Week 2: Bolivia and Chile (La Paz, Uyuni, San Pedro de Atacama) - Bus/collectivo via Copacabana to La Paz. - Fly or overnight bus to Uyuni. - 3‑day Uyuni–altiplano tour ending in San Pedro de Atacama (Chile).Week 3: Chile and Argentina (Atacama to Salta or Mendoza/Buenos Aires) - Choose: - North: San Pedro to Salta/Jujuy by bus; fly to Buenos Aires. - Or South: San Pedro–Calama flight to Santiago; bus or flight to Mendoza; onward to Buenos Aires.Connectivity notes (quick): - Cities: generally strong 4G/4G+; 5G in major hubs (Santiago, Buenos Aires). - Altitude/rural: expect long no‑signal stretches (Uyuni, altiplano passes, Paso Jama). - Bus Wi‑Fi: often advertised, rarely reliable. Plan to be offline onboard. - Border regions: networks switch; a multi‑country eSIM avoids sudden loss.eSIM vs local SIMs for a 4‑country tripFor a route with multiple borders and remote legs, eSIM wins on time and reliability.What a multi‑country eSIM gets you: - One plan across Peru, Bolivia, Chile, Argentina (check coverage per country on Destinations). - No passport/SIM registration queues at kiosks. - Keep your home number active on the physical SIM for calls/SMS codes. - Instant top‑ups if you burn data on photos or navigation.When a local SIM still helps: - Long stay in one country with heavy data use (e.g., a month in Buenos Aires). - Dead zones where a different local network performs better (rarely worth the hassle on a 3‑week pace).Practical approach: - Use an eSIM as your primary data line across all four countries. - If you find a specific local network far better in one region, add a cheap local SIM and keep the eSIM as backup.Device readiness checklist (before you fly)1) Check eSIM compatibility and SIM‑lock status on your phone.2) Buy and install your eSIM while on home Wi‑Fi. Keep a PDF/printed copy of the QR code.3) Label lines clearly (e.g., “eSIM Andes Data”, “Home SIM”).4) Turn on data roaming for the eSIM; leave roaming off for your home SIM to avoid charges.5) Set up dual‑SIM rules: data on eSIM; calls/SMS default to home SIM if needed.6) Download offline: Google Maps/Organic Maps for all target regions; language packs (Spanish at minimum); bus/air tickets; hotel confirmations.7) Cloud backups: set to upload on Wi‑Fi only; pre‑create shared albums for travel companions.8) Test tethering/hotspot with your laptop/tablet.If you’re transiting popular hubs, consider a short layover eSIM: - USA connections: add an Esim United States or a broader Esim North America.- Europe connections: Madrid/Barcelona? Use an Esim Spain. Paris or Rome? See Esim France and Esim Italy. Multi‑country layovers? Try Esim Western Europe.City‑by‑city connectivity notesCusco & the Sacred Valley (Peru)Coverage: Good in Cusco city; variable in high villages (Maras/Moray) and along Inca Trail approaches.Tips: Download Sacred Valley maps offline; pin viewpoints and ruins. most taxis use WhatsApp—save your accommodation’s number.Machu Picchu/Aguas Calientes: Patchy to none at the citadel. Upload your photos later; don’t rely on live ticket retrieval.Lake Titicaca: Puno and CopacabanaPuno: Reasonable 4G; bus terminals crowded—screenshot QR tickets.Crossing to Copacabana: Expect a signal drop around the border; have directions saved offline.La Paz (Bolivia)Good urban 4G; the cable car network has decent signal but tunnels do not.Yungas/“Death Road” tours: Mountain valleys cause dead zones—share your emergency contacts with the operator, carry a charged power bank, and don’t plan remote calls.Uyuni and the Altiplano (Bolivia to Chile)Uyuni town: OK 4G; ATMs finicky—use Wi‑Fi for banking apps.Salt flats/lagunas: Assume offline for most of the 3‑day tour. Guides often carry satellite phones; agree a pickup time/place in San Pedro and preload your map route.San Pedro de Atacama (Chile)Town: Solid 4G; accommodations often have Wi‑Fi but speeds vary.Geysers, Valle de la Luna: Offline navigation essential; sunrise trips start before mobile networks wake up in some areas.Salta/Jujuy or Mendoza/Buenos Aires (Argentina)Salta/Jujuy: Good city coverage; quebradas have long no‑signal sections.Mendoza: City 4G/5G; vineyards outside town can be patchy.Buenos Aires: Strong 4G/5G; ideal for cloud backups and large downloads before you fly home.Border crossings by bus: step‑by‑stepThe big ones on this route: Peru–Bolivia (Puno/Copacabana), Bolivia–Chile (Uyuni–San Pedro via Hito Cajón), Chile–Argentina (Paso Jama to Salta or Los Libertadores to Mendoza).How to keep service and sanity:1) The day before:- Top up your eSIM data.- Confirm your plan includes both countries you’re entering/leaving.- Download offline maps for both sides of the border and your town of arrival.- Save bus company WhatsApp and terminal address offline.2) On departure morning:- Keep a paper copy or offline PDF of tickets, insurance, and accommodation proof.- Charge phone and power bank; pack a short cable in your daypack.3) On the bus:- Don’t count on bus Wi‑Fi. Keep your eSIM as primary, but expect drops near mountain passes.- If your phone supports it, enable “Wi‑Fi calling” for later when you reach accommodation Wi‑Fi.4) At the border posts:- Data may be unavailable. Keep QR codes and booking numbers offline.- After exiting one country and entering the next, toggle Airplane Mode off/on to re‑register on the new network.- If the eSIM doesn’t attach, manually select a network in Mobile Settings.5) Arrival:- Send your accommodation a quick WhatsApp when you’re back online.- Recheck your eSIM’s data roaming is on; confirm you’re on an in‑country network, not a weak roaming partner.Pro tips: - Dual profiles: If your eSIM allows, keep a secondary profile for a different network in the same country—helpful in border towns.- Cash buffer: Some border terminals don’t accept cards; download a currency converter for offline use.Offline survival kit (5‑minute setup)Maps: Download regions for Cusco, Sacred Valley, Puno, La Paz, Uyuni, San Pedro, Salta/Jujuy or Mendoza, and Buenos Aires.Translations: Download Spanish for offline use; add phrasebook favourites (bus tickets, directions, dietary needs).Documents: Save PDFs of passports, tickets, hotel addresses; star them for quick access.Rides: Screenshots of pickup points; pin bus terminals and hotel doors.Entertainment: Podcasts and playlists for long bus legs, set to download on Wi‑Fi only.Altitude and your tech: what changesCoverage gaps lengthen: Fewer towers at high altitude; valleys can block signal. Assume offline on remote excursions.Batteries drain faster in cold: Keep your phone warm and carry a power bank (10,000–20,000 mAh).Hotel Wi‑Fi may be congested: Schedule big uploads (photo backups, app updates) for big-city stays like Santiago or Buenos Aires.GPS still works offline: Your blue dot shows on offline maps without data—preload everything.Data budgeting for 3 weeksTypical traveller usage across this route: - Messaging/Maps/Bookings: 0.2–0.5 GB/day- Social and photo sharing: 0.3–0.7 GB/day- Occasional video calls/streaming: 0.5–1.0 GB/dayFor a mixed-use trip, plan 15–25 GB for 3 weeks. Heavy creators should double it and upload over hotel Wi‑Fi when possible. If you work remotely, consider a higher‑capacity plan and a backup eSIM; see our guidance on For Business.Practical route with transport and connectivity cuesDays 1–4 Cusco base: Strong city signal; day trips may be spotty—go offline-ready.Days 5–6 Machu Picchu: Expect no service at the ruins; sync tickets ahead.Days 7–8 Puno to La Paz via Copacabana: Border signal drop; re‑register networks after crossing.Days 9–11 Uyuni tour to San Pedro: Treat as offline; charge nightly; carry spare cables.Days 12–14 San Pedro: Stable in town; tours offline; top up data before Paso Jama.Days 15–17 Salta/Jujuy or Mendoza: Good urban 4G; rural patches are offline.Days 18–21 Buenos Aires: Strongest connectivity of the trip; clear your uploads and map downloads for the flight home.Partnering and stopover extrasHospitality and tour operators in the Andes: help your guests stay connected—explore co‑branded solutions via our Partner Hub.Transatlantic flyers: test your eSIM setup on a layover with an Esim United States or Esim Western Europe before hitting high-altitude blackspots.FAQs1) Do I need a local SIM in each country?No. A multi‑country eSIM covering Peru, Bolivia, Chile and Argentina is simpler and works well for a 3‑week pace. Consider a local SIM only if you’ll spend longer in one country and want the absolute best regional coverage.2) Will my WhatsApp number change with an eSIM?No. WhatsApp is tied to your registered number, not your data line. Keep your home SIM active for voice/SMS (roaming off if you wish), and use the eSIM for data—WhatsApp continues as normal.3) Can I hotspot to my laptop or camera?Yes. Enable tethering on your eSIM. Mind your data: cloud backups and OS updates can burn gigabytes—set them to Wi‑Fi only or schedule in big cities.4) What if there’s no signal on the Uyuni/Atacama legs?That’s expected. GPS still works offline. Pre-download maps and translations, carry a power bank, and sync plans with your tour operator before departure.5) Will I get roaming charges at borders?If you’re using a multi‑country eSIM with coverage in both countries, you won’t incur extra roaming fees from your home carrier. Keep roaming off on your home SIM to avoid accidental use.6) I’m connecting via Europe or the US—worth getting a layover eSIM?Yes. It’s an easy way to test your setup and stay reachable. Try Esim North America or country options like Esim Spain, Esim France, or Esim Italy for common hubs.Next step: Browse South America coverage options and build your plan on Destinations.

Public Wi‑Fi vs Mobile Data: When It’s Safe (and When It’s Not)

Public Wi‑Fi vs Mobile Data: When It’s Safe (and When It’s Not)

Public Wi‑Fi is everywhere: airports, cafés, hotels, trains and planes. It’s convenient and often free—but it also introduces real risks that most travellers don’t see. Attackers can spoof hotspots, tamper with logins via captive portals, or downgrade your secure connections. Meanwhile, your mobile data connection is generally encrypted end‑to‑end by your operator and harder to meddle with. This guide explains the practical trade‑offs so you can make quick, confident decisions on the road. You’ll learn how captive portals work, what SSL stripping looks like in 2025, how to spot fake hotspots, and the exact settings to toggle before you connect. We’ll finish with a simple decision tree and safer defaults using eSIM, so you stay online without gambling with your banking, email or client data. If “public wifi safety” is your concern, this is your one‑stop, traveller‑first checklist.The quick answer: when to use mobile data vs public Wi‑FiUse this 30‑second decision tree.Do you need to log in to banking, payments, email admin, cloud consoles, or handle work credentials?Yes → Use mobile data/eSIM. Avoid public Wi‑Fi.No → Continue.Is the Wi‑Fi network name verified with staff or signage, and protected by a password (WPA2/WPA3)?No → Use mobile data/eSIM.Yes → Continue.Are you forced through a captive portal (web page that asks you to accept terms, add email/room number)?Yes → Connect only to accept terms, then immediately enable your VPN before doing anything sensitive—or prefer mobile data.No → Continue.Are you seeing any certificate warnings, HTTP-only pages, or “Not secure” indicators?Yes → Disconnect and use mobile data/eSIM.No → Low risk—proceed for casual browsing/streaming.Pro tip: If you’re in any doubt, default to mobile data or an eSIM travel plan. It’s the safest baseline.How public Wi‑Fi actually works (and where it breaks)Captive portals: convenience with a catchMost public networks use captive portals: you connect, your first web request is intercepted, and you’re redirected to a sign‑in/terms page. This interception happens before encryption to the wider internet starts. Risks: - Phishing: Fake portals mimicking a venue’s page to capture email, passwords or card details. - Tracking: Your device’s MAC address and browser fingerprint may be logged. - Forced insecure requests: Some portals push you through HTTP before you can enable a VPN.What to do: Confirm the network name with staff, use a throwaway email if required, and switch on your VPN the moment the portal grants access.SSL stripping and downgrade tricksModern sites use HTTPS with HSTS (HTTP Strict Transport Security). Attackers on open Wi‑Fi may attempt to: - Block HTTPS upgrades, keeping you on HTTP. - Inject a look‑alike page before a secure session starts. - Present bogus certificates hoping you’ll click “Continue”.Your defence: Never ignore certificate warnings. Use a browser with HTTPS‑only mode. Prefer apps with certificate pinning (many banking apps do this and will refuse unsafe connections).Fake hotspots (“evil twins”)Attackers clone a network name like “Airport_Free_WiFi” and broadcast stronger signal. If your device auto‑joins based on name alone, you’re connected to them. They can see and tamper with unencrypted traffic, and attempt man‑in‑the‑middle on poorly configured apps.Defence: Disable auto‑join for public networks, verify the exact SSID with staff, and “Forget” networks after use.Public Wi‑Fi vs mobile data: the real‑world risk differenceMobile data/eSIM: Your traffic rides an encrypted channel within the mobile network. While sophisticated threats (e.g., IMSI catchers) exist, they’re rare and targeted. For travellers, mobile data is significantly safer than open Wi‑Fi for logins and payments.Public Wi‑Fi: Shared medium, easy to spoof, and often funnels you through captive portals where interception is simplest. Hotels and conferences are common targets.Bottom line: Default to mobile data/eSIM for anything sensitive. Use public Wi‑Fi for low‑risk browsing and downloads only when you’ve verified the network and hardened your device.Safer connectivity with eSIM when you travelA local or regional eSIM gives you affordable mobile data without hunting for risky Wi‑Fi. With Simology, you can browse plans by country or region via Destinations. Popular picks: - USA city breaks and road trips: Esim United States or broader Esim North America - Euro adventures: Esim France, Esim Italy, Esim Spain or multi‑country Esim Western EuropeFor teams, zero‑drama travel data beats hotel Wi‑Fi every time—see For Business. Travel suppliers and venues can explore safer guest connectivity via our Partner Hub.Before you connect: a quick hardening checklistDo these once, then you’re covered trip‑wide.Turn on automatic updates for your OS, browser and key apps.Enable HTTPS‑Only/Always‑On in your browser.Install and configure a reputable VPN. Set “connect on untrusted Wi‑Fi.”Disable auto‑join for open networks; remove old public SSIDs.Turn off file sharing, printer sharing, and AirDrop/Nearby Share to “Contacts only” or Off.Use a passcode/biometrics and full‑disk encryption (default on modern devices).Prefer app‑based 2FA (not SMS) for important logins.Pro tip: Add your eSIM before you travel so you land connected—no need to touch airport Wi‑Fi.Connecting to public Wi‑Fi: step‑by‑stepVerify the exact network name and whether a password is required.Turn off auto‑join for that network (so you connect consciously each time).Connect and load the captive portal. Provide only minimal info—avoid reusing important passwords.Once online, immediately enable your VPN before opening any other app or site.Check your browser shows the padlock/HTTPS on sites you visit. If you see a warning, stop.Keep sessions short. When you’re done, “Forget” the network.Pro tip: If a venue offers a WPA2/WPA3 password, prefer it over truly open networks—there’s at least basic encryption between your device and the hotspot.Spotting common attack patterns on public Wi‑FiPortal phishing: The sign‑in page asks for your email and password for a third‑party service (e.g., “Sign in with your email provider”). Don’t. Portals should never need those credentials.SSL warnings: “Your connection is not private” pop‑ups. Never click through—disconnect.Name games: Multiple similar SSIDs (FreeAirportWiFi, Airport_Free_WiFi, AirportWiFi‑Guest). Ask staff which is real.Rogue DNS: You type a familiar address and land on an odd‑looking site. Quit immediately; recheck with mobile data.Sudden certificate prompts in apps that never ask for them (email, messaging). Treat as a red flag.When a VPN helps—and when it can’tHelps with: Encrypting your traffic across the local Wi‑Fi so others can’t sniff it; bypassing rogue DNS; reducing hijacking risk.Limitations: You usually must connect to the hotspot (and often its captive portal) before the VPN can start. A compromised device or phishing page can still trick you before the VPN is active.Practical tip: Connect → complete the portal with minimal info → enable VPN immediately → proceed. If the VPN won’t connect or drops repeatedly, switch to mobile data.Venue‑by‑venue: what to expectAirports and trains: High‑volume, prime targets for spoofed SSIDs. Treat as untrusted; prefer mobile data.Hotels: Portals tied to room numbers or surnames are common, but networks are shared across floors. Use VPN; avoid admin logins.Cafés and bars: SSIDs frequently change; lots of clones around. Verify the name at the till.Conferences: Attackers love events. Expect evil‑twin networks. Use mobile data for anything sensitive.In‑flight Wi‑Fi: Often proxied and filtered. Fine for casual use, but not for banking or work admin.Quick device hardening checklist (phones and laptops)Disable Wi‑Fi when you’re not using it; rely on mobile data/eSIM.Use a privacy‑focused DNS provider within your VPN, or set encrypted DNS (DoH/DoT) in system settings if supported.Limit sensitive notifications on lock screen.Use separate browser profiles: one for travel, one for personal.Log out of sessions you don’t need; clear site data after public Wi‑Fi sessions.For work devices, stick to your organisation’s managed VPN and policies.Pro tip: If your work depends on reliable, safe connectivity, standardise on eSIM data and keep Wi‑Fi as a last resort.Simple “safer by default” plan for travellersBefore you fly: Add a local or regional eSIM from Destinations.On the ground: Use mobile data for logins, bookings and payments.Only use public Wi‑Fi for downloads or streaming you don’t mind being interrupted.Keep your VPN ready for those moments where Wi‑Fi is unavoidable.Forget networks after use; don’t auto‑join anything public.FAQ: Public Wi‑Fi vs mobile dataIs public Wi‑Fi safe if the site shows HTTPS?Safer, but not safe by default. HTTPS protects the connection to that site, but portals, DNS tampering and fake certificates can still bite. Always heed warnings and prefer a VPN.Is mobile data always safer?For most travellers, yes. Mobile networks encrypt traffic at the radio layer and are harder to spoof casually. It’s the better choice for banking, email and bookings.Should I use a VPN on public Wi‑Fi?Yes. Use a reputable VPN and enable it immediately after the captive portal. If it won’t connect reliably, switch to mobile data.Can I do mobile banking on hotel Wi‑Fi?Best practice: use mobile data/eSIM for banking. If you must use Wi‑Fi, use your banking app (which likely pins certificates), turn on your VPN, and double‑check for any warnings.How do I tell if a hotspot is fake?Verify the exact network name with staff; beware multiple look‑alike names; check signal strength anomalies; avoid previously saved “free” SSIDs; and prefer password‑protected Wi‑Fi.Do I need an eSIM if venues offer free Wi‑Fi?If you value reliability and security, yes. An eSIM keeps you online for sensitive tasks without relying on unknown networks. Explore country and regional options via Esim United States, Esim France, Esim Italy, Esim Spain and Esim Western Europe, or go broader with Esim North America.Next step: Choose a safe, local data plan before you travel—browse Destinations and add your eSIM in minutes.

Best Offline Maps for Travel (2025): Google vs Apple vs Maps.me

Best Offline Maps for Travel (2025): Google vs Apple vs Maps.me

Offline maps are the safety net every traveller needs. Whether you’re driving across the States, wandering Paris backstreets, or hiking in the Dolomites, having maps that work with no signal can save battery, data, and stress. In 2025, three apps stand out: Google Maps, Apple Maps, and Maps.me. Each handles downloads, storage, and navigation modes differently—and those differences matter when you’re abroad, on a budget, or off-grid.This guide compares them side by side: how big the downloads are, how well driving vs walking works offline, what’s searchable without data, and how easy it is to keep maps up to date. You’ll also find quick setup steps, traveller checklists, and pro tips to avoid common gotchas. Want occasional data for place details or live traffic? Pair your offline maps with a local eSIM—options for the US, Europe and more are linked throughout so you can plan, download, and go with confidence.Quick take: Which offline map should you use in 2025?City breaks and mixed transport: Apple Maps (iOS 17+) for excellent offline walking/driving navigation and clean place info. Pair with a regional eSIM like Esim Western Europe for live transit and restaurant updates.Long road trips: Google Maps for reliable offline driving and big POI database; set storage to SD on Android. Add traffic with Esim North America or Esim United States.Hiking/off-grid: Maps.me for fully offline hiking trails and GPX/KML support. Great where coverage is patchy (e.g., national parks in Italy/Spain—see Esim Italy and Esim Spain for towns and transfer days).Low storage phones: Google Maps or Apple Maps (choose smaller areas). Maps.me is efficient for single regions but large if you grab whole countries.Android users with SD cards: Google Maps or Maps.me—both can store to SD, saving internal space.Explore where you’re heading with our country and city guides: Destinations.Side-by-side comparison (2025)Coverage and region downloadsGoogle MapsDownload by drawing a rectangle. Large trips often need multiple tiles.Good for cities/regions; entire countries require several downloads.Auto-updates available on Wi‑Fi.Apple Maps (iOS 17+)Download by area (rectangle). Simple to manage; can be large for whole-country coverage.Auto-updates on Wi‑Fi; “Use Offline Maps Only” option helps preserve data.Maps.meDownload by country/region (OpenStreetMap-based). Straightforward for full-country travel.Sub-regions available for big countries (e.g., states/provinces).Navigation modes offlineGoogle MapsTurn-by-turn offline: driving only.Walking/cycling: maps display offline, but routing typically requires data.No offline public transport routing.Apple MapsTurn-by-turn offline: driving, walking, and cycling supported.Transit timetables/updates require data.Maps.meTurn-by-turn offline: driving, walking, and cycling, plus many hiking trails.No built-in transit schedules.Search and place details offlineGoogle MapsOffline search works for saved area: place names, categories (e.g., “cafe”), and saved lists.Limited reviews/photos offline; star ratings may be cached.Apple MapsOffline search for places within the downloaded area; place cards show key info cached at download.Rich details (live photos, opening hours updates) need data.Maps.meOffline search across OSM POIs; very good for landmarks and trails, variable for small businesses.Fewer phone numbers/website links; info depends on community data.Storage size and space managementTypical ranges (heavily variable by density and coverage you select): - Google Maps - Major city: ~300–700 MB - Large region: 0.8–2.5 GB - Whole-country coverage: multiple tiles totalling several GB - Android: can store offline areas on SD card. - Apple Maps - Major city: ~250–700 MB - Large region: 1–3 GB - Whole-country: 4–9 GB+ depending on detail - iPhone only; no SD card—manage space carefully. - Maps.me - City/region: ~50–300 MB - Medium country: ~300 MB–1.5 GB - Large country: 2–5 GB+ (downloaded as regional chunks) - Android: supports SD card storage.Tip: Sizes expand with road density, 3D buildings, and POI richness. Always check your free space before trips.Battery and data useAll three work in aeroplane mode with GPS on. Expect 3–7% battery per hour of screen-on navigation; less if you lock the screen and use voice prompts.Live traffic, satellite imagery, and photos drive data usage—offline maps avoid this unless you go online.Apple and Google reduce data by preferring offline areas for routing when available.Privacy notesOffline navigation reduces data transfer but location services still operate. Review each app’s privacy settings before travel.How to download and set up offline mapsGoogle Maps (iOS/Android)Open Google Maps > tap your profile picture > Offline maps.Tap Select your own map > pinch/drag to cover your area > Download.Repeat for long routes (ensure overlaps). Aim to cover airports and fallback routes.Settings > Offline maps > turn on Auto-update and set Download preferences to Wi‑Fi only.Android only: Settings > Offline maps > Storage preferences > SD card (if available).Save key places to a List (e.g., Hotels, Must-eats) so they load offline.Pro tip: Name each area clearly (e.g., “France North”) to avoid gaps.Apple Maps (iOS 17+)Apple Maps > tap your photo/initials > Offline Maps > Download New Map.Search a city/region, adjust the rectangle to cover all planned travel.Toggle Auto-Update on. Enable Only Use Offline Maps to avoid roaming charges.Download multiple areas for long drives (e.g., Calais–Lyon–Nice).Add favourites (home, hotels, car hire) for quick access offline.Pro tip: If space is tight, download city centres plus intercity corridors rather than whole countries.Maps.me (iOS/Android)Install Maps.me and open once with data/Wi‑Fi.Search your destination; Maps.me offers the relevant regional download—confirm.For big countries, pick only the regions you need (e.g., “Lombardy” instead of all Italy).Settings > Map storage > SD card (Android) if available.Import GPX/KML hiking routes via email, cloud drive, or file manager.Pro tip: Create bookmark groups (e.g., “Trailheads”, “Cafes”) so they stay visible offline.Traveller checklistsBefore you flyDownload maps on Wi‑Fi and while charging.Cover airports, train stations, accommodation, and planned day trips.Turn on auto-update; verify last-updated date for each area.Save/bookmark essential places with local-language names.Test in aeroplane mode: open the app, get a route, start navigation.Pack a power bank; voice navigation drains less battery than screen-on use.On the groundKeep GPS on; use aeroplane mode to conserve battery and avoid roaming.If routes fail, you may be outside your offline area—zoom out and check coverage tiles.Switch to a local eSIM for live traffic and updated hours when needed:USA: Esim United StatesNorth America trips: Esim North AmericaWestern Europe: Esim Western EuropeCountry options: Esim France, Esim Italy, Esim SpainDriving and hiking specificsDriving: Preload fuel stops and rest areas. Expect no live traffic offline; allow buffer time.Hiking: Use Maps.me and import GPX tracks; download entire mountain regions. Carry a paper map/compass as backup in remote terrain.Accuracy notes by use caseDriving accuracyGoogle Maps: Best-in-class road coverage and address search; offline routing is robust, but no live traffic or dynamic rerouting around closures without data.Apple Maps: Strong lane guidance and clear visuals; offline driving is smooth. Traffic-aware routing requires data.Maps.me: Gets you from A to B offline; occasional quirks at complex interchanges. No traffic layer.Walking and cyclingApple Maps: Reliable offline walking/cycling directions with readable cues—great in dense cities.Maps.me: Good for walking and cycling; strengths include parks, trails, and shortcuts from OSM.Google Maps: Walking/cycling routing typically needs data. Use offline map for visual reference if needed.Hiking and off-gridMaps.me shines with trail coverage and GPX import. Still, verify trail status locally.Apple/Google can display terrain and paths, but aren’t designed as primary hiking tools offline.Pro tips to save time, space, and batteryUse two apps: Google or Apple for driving and addresses; Maps.me for trails or neighbourhood shortcuts.SD card on Android: Move Google/Maps.me downloads to SD to free internal storage.Minimalist downloads: City + intercity corridors instead of entire countries to keep sizes down.Save essentials: Hotel, embassy, car park, metro entrances, ATMs—by name and by dropping pins.Naming matters: Store shots of hotel exteriors and local-language names in your notes for easier offline search.Keep a light data fallback: A low-cost regional eSIM (e.g., Esim Western Europe) unlocks live traffic, restaurant hours, and last-minute changes.Teams on the road: Standardise one app + shared lists; see For Business.Creators and agencies: Share travel tech checklists with your audience via our Partner Hub.FAQs1) Do Google Maps work offline for walking? - You can view the map and saved places offline, but turn-by-turn offline navigation is primarily for driving. For reliable offline walking routes, use Apple Maps (iOS 17+) or Maps.me.2) Will offline maps expire? - Yes. Google and Apple periodically expire or update downloads to ensure freshness. Keep Auto-update on and refresh before long trips.3) How much storage should I budget? - For a multi-city week: 1–3 GB is typical. Whole countries can run 4–9 GB+. Maps.me regions are smaller but add up if you grab many. Always check free space first.4) Can I rely on offline maps without GPS? - No. GPS is required for blue‑dot positioning and navigation. You can still browse maps without GPS, but routing and location accuracy suffer.5) Is Maps.me accurate in cities? - Generally yes for landmarks and streets, but small-business POIs may lag. Pair with Google or Apple when you have data for the latest openings.6) Should I use one app or two? - Use the best tool per task: Google or Apple for addresses and driving; Maps.me for trails and deep offline use. Download both if space allows.The bottom linePick based on your trip: Apple Maps for city walking and clear offline guidance; Google Maps for road trips and strong POI search; Maps.me for hiking and fully offline scenarios.Download early, test in aeroplane mode, and keep auto-updates on.Consider a light data layer for live essentials—traffic, opening hours, and last-minute changes.Next step: Travelling across multiple countries? Add flexible coverage with Esim Western Europe so your offline maps are backed by instant data when you need it.