Is eSIM Secure? Myths, Risks & How to Stay Safe

Blog

Is eSIM Secure? Myths, Risks & How to ...

Is eSIM Secure? Myths, Risks & How to Stay Safe

31 Oct 2025

Is eSIM Secure? Myths, Risks & How to Stay Safe

Travellers love eSIM for instant setup, no queues and easy switching. But many still ask a simple question: is eSIM safe? In short: yes—when you buy from a reputable provider and follow a few basic security steps, eSIM is as safe as (and often safer than) a traditional plastic SIM. It uses GSMA-standard, carrier-grade security, with profiles delivered over encrypted channels and protected by your phone’s hardware.

That said, no connectivity method is magically immune to risk. The biggest day‑to‑day threats to travellers are not eSIM itself but account takeover, dodgy QR codes, and—by far the most common—unsafe public Wi‑Fi. This guide cuts through the noise, explains how eSIM security really works, and gives you practical checklists to stay protected on the road. If you’re planning multi‑country travel, explore our regional options like Esim Western Europe or Esim North America, or browse all Destinations.

eSIM security, in plain English

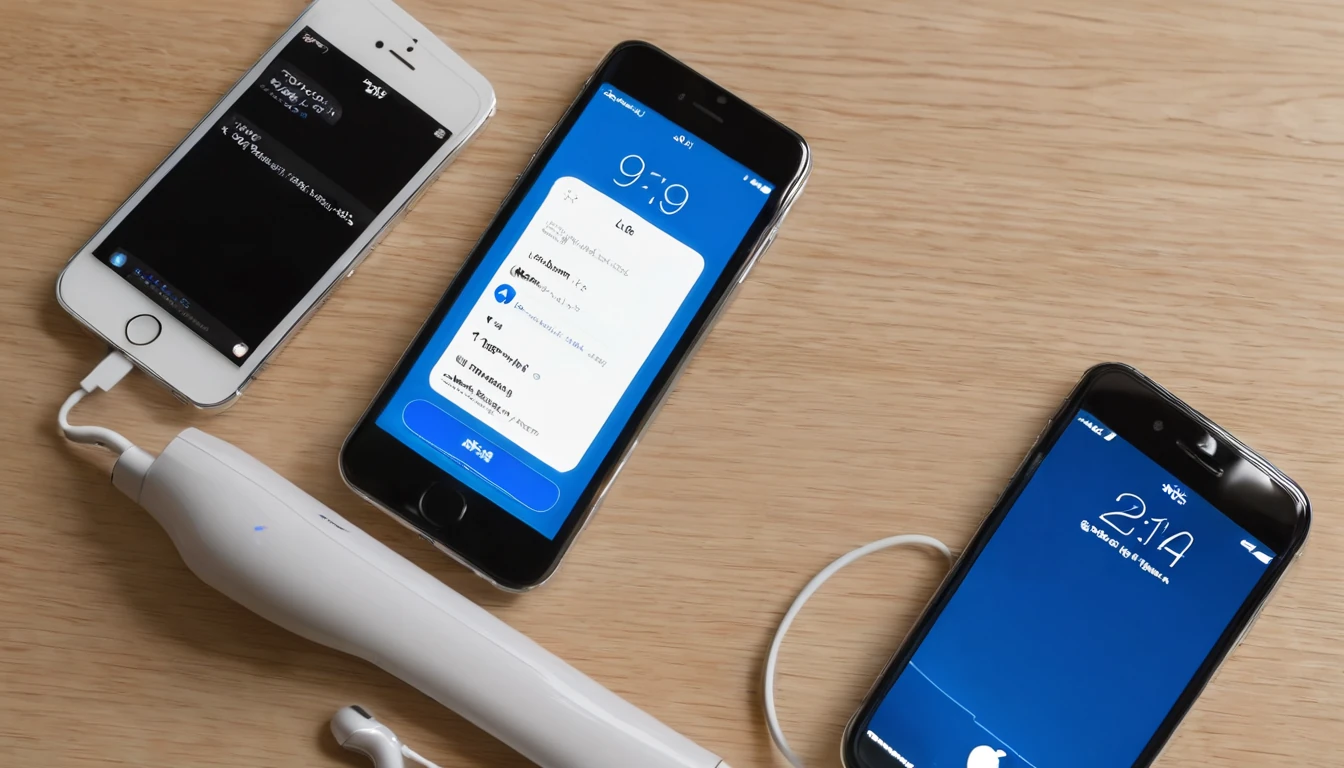
An eSIM is a secure chip inside your phone that stores your mobile plan as a digital profile. Instead of inserting a plastic SIM, you download a profile from a secure server (known as an SM-DP+). Your phone and the server verify each other using certificates, then exchange encrypted data to install the profile.

Key points that matter for safety: - No physical card to steal, lose, or swap. - Profiles are bound to your device’s secure hardware. - Provisioning uses mutual authentication and encryption based on GSMA standards used by mobile operators worldwide. - You control activation, deactivation, and deletion on your device settings.

Is eSIM safe? The short answer

Yes. eSIMs use operator‑grade security and reduce several risks associated with plastic SIMs.

Why eSIM can be safer than a physical SIM: - Harder to steal or swap: There’s no tiny card to remove. Many eSIM transfers require device unlock and/or account verification. - Encrypted delivery: Profiles are provisioned over secure channels; the QR code is just a pointer, not the profile itself. - Faster control if lost: You can remotely erase your phone (which removes eSIM profiles) and suspend service via your carrier promptly.

Where the real risks are: - Social engineering (SIM swap via your carrier account, not via “hacking” the eSIM itself). - Malicious QR codes or fake eSIM vendors. - Insecure public Wi‑Fi, which remains a far bigger everyday threat than mobile data.

Common myths, debunked

“eSIMs are easy to hack”

Reality: There’s no public evidence of widespread eSIM profile “hacking” on modern devices. Attacks we hear about are usually account takeovers (convincing a carrier to port your number) or device theft. Keep your carrier/Apple/Google accounts locked down with strong, unique passwords and multi‑factor authentication (MFA).

“Scanning a QR code is unsafe”

The QR code typically contains the address of the secure server (SM-DP+) and an activation code. The sensitive bits still travel through an encrypted, authenticated session between your phone and the operator. The risk isn’t the QR format—it’s scanning codes from untrusted sources. Only use codes from your provider’s website/app or official email.

“eSIM can be cloned”

Cloning traditional SIMs required physical access and exploits. eSIM profiles are bound to device hardware and provisioned with mutual authentication, making cloning impractical for opportunistic attackers. Your bigger risk is someone taking over your carrier account, not copying your eSIM.

“eSIM drains battery or tracks me more”

No. eSIM is simply the way your device stores carrier credentials. Network behaviour, not eSIM itself, affects battery and privacy. As with any mobile plan, your operator sees the usual network metadata.

“Public Wi‑Fi is fine if there’s a password”

A café password does not equal end‑to‑end security. Open or shared‑password Wi‑Fi can be spoofed (“evil twin”), intercepted, or used to inject malicious captive portals. Mobile data via eSIM avoids most of these pitfalls.

The real risks (and how to lower them)

  • Account takeover (SIM swap)
  • Risk: An attacker convinces your carrier to move your number to their device.
  • Reduce it:
    • Add a carrier account PIN and enable MFA.
    • Use unique passwords stored in a password manager.
    • Be wary of phishing that targets your email, Apple ID, Google account, or banking.
  • Fake eSIM sellers and malicious profiles
  • Risk: Phishing sites selling bogus “eSIMs,” or QR codes that lead you to install unknown profiles.
  • Reduce it:
    • Buy from reputable providers and official marketplaces.
    • Confirm the web domain and payment gateway before purchase.
    • Avoid Telegram/WhatsApp “resellers” without verifiable credentials.
  • QR code interception or tampering
  • Risk: Using public PCs or shared screens to display codes; others scan your code.
  • Reduce it:
    • Access codes privately on your own device.
    • Never share activation codes or order emails.
  • Lost or stolen phone
  • Risk: Thieves may use your data/number if the phone remains unlocked.
  • Reduce it:
    • Set a strong device passcode and enable biometric unlock.
    • Turn on Find My (iOS) / Find My Device (Android).
    • Remote‑lock/erase immediately; contact your carrier to suspend service.
  • Public Wi‑Fi risks
  • Risk: Data interception, malicious hotspots, credential theft.
  • Reduce it:
    • Prefer mobile data via eSIM for banking, booking, and email.
    • If Wi‑Fi is unavoidable, use a trusted VPN and disable auto‑join for open networks.

Pro tip: When you arrive, enable “Allow Mobile Data Switching” (iOS) or equivalent dual‑SIM settings carefully, so your primary line isn’t used for roaming by mistake.

A traveller’s security checklist

Before you fly

  1. Buy your eSIM from a trusted provider. Explore country packs like Esim United States, Esim France, Esim Italy or Esim Spain, or regional bundles such as Esim Western Europe and Esim North America. You can compare all options under Destinations.
  2. Secure your accounts: - Set a carrier account PIN and enable MFA. - Turn on MFA for email, Apple ID/Google, and banking.
  3. Update your phone to the latest OS.
  4. Set a strong device passcode; enable biometrics.
  5. Prepare backups (iCloud/Google) and enable Find My/Find My Device.

When installing your eSIM

  • Use a trusted network (mobile data or your home Wi‑Fi).
  • Scan the QR code from your provider only; avoid screenshots in group chats.
  • Confirm the Data Roaming toggle for the correct line to avoid bill shock.
  • Keep your primary number as “Calls & SMS” only (if you need it) and route data through your travel eSIM.

On the road

  • Prefer eSIM mobile data over public Wi‑Fi for sensitive tasks.
  • If you must use Wi‑Fi:
  • Verify the network name with staff; beware of lookalikes.
  • Use a VPN; avoid logging into critical accounts on captive portals.
  • Turn off auto‑join for open networks.
  • Monitor usage and plan validity in your device settings.
  • If your phone is lost/stolen: remote‑lock and erase, then contact your provider to suspend the line.

When you head home

  • Delete unused travel eSIM profiles in Settings.
  • Review your accounts and change any passwords used on shared networks.
  • Keep your provider receipts and emails for future trips.

Pro tip: Dual‑SIM setups are ideal. Keep your home number for calls/SMS (data off), and run data on your local eSIM for cheaper, safer connectivity.

eSIM vs public Wi‑Fi: which is safer?

For day‑to‑day travel, mobile data via eSIM is generally safer than public Wi‑Fi: - Air interface encryption: 4G/5G encrypt traffic between your phone and the tower. While telecom‑grade threats exist, opportunistic interception on mobile networks is far less common than Wi‑Fi sniffing. - Fewer “evil twin” attacks: It’s trivial to mimic “Free Airport Wi‑Fi”; it’s not trivial to mimic a mobile network your phone will trust. - Less captive portal risk: Wi‑Fi portals can inject scripts or trick you into entering credentials. Mobile data doesn’t have this layer.

When to consider Wi‑Fi: - Large downloads or video calls where you trust the network (e.g., hotel room with unique password, enterprise WPA2‑Enterprise). Even then, a VPN adds protection.

Bottom line: For most travellers wondering “is eSIM safe?”, the bigger question is “is this Wi‑Fi safe?”. If in doubt, stick to eSIM data.

For business travellers and teams

Mobile security is a team sport: - Standardise on eSIM data for travel devices to reduce Wi‑Fi risk. - Use MDM/EMM to enforce passcodes, remote‑wipe and VPN. - Require MFA on all corporate accounts and set carrier account PINs for employees. - Centralise purchasing for predictable costs and vetted vendors. See Simology For Business. - Agencies, TMCs, and resellers can streamline secure eSIM distribution via our Partner Hub.

Where to buy securely

Choose reputable providers with transparent plans, clear activation steps and responsive support: - Country eSIMs: Esim United States, Esim France, Esim Italy, Esim Spain. - Regional bundles: Esim Western Europe, Esim North America. - Explore all Destinations to match your route and budget.

Pro tip: Install the eSIM before you fly so you’re online the moment you land—no airport Wi‑Fi needed.

FAQ

Q: Is eSIM safer than a physical SIM? A: In many ways, yes. There’s no card to steal, profiles are tied to device hardware, and provisioning uses encrypted, authenticated channels. The major risk remains account takeover, not the eSIM tech itself.

Q: Can someone hack my eSIM by scanning my QR code? A: Not if you keep it private. The QR code points your phone to a secure server; the actual profile is delivered over an encrypted, mutually authenticated session. Treat the code like a password—don’t share or display it publicly.

Q: What if my phone is lost or stolen while travelling? A: Immediately use Find My/Find My Device to lock and erase the phone, which removes the eSIM profile. Then contact your provider to suspend or transfer the line. A strong device passcode and biometrics limit misuse.

Q: Is public Wi‑Fi safe if I use HTTPS? A: HTTPS helps, but Wi‑Fi still carries risks: malicious hotspots, DNS tampering, captive portal tricks, and misconfigured apps. For sensitive tasks, mobile data via eSIM is typically safer. If Wi‑Fi is unavoidable, use a trusted VPN.

Q: Can I use eSIM and a physical SIM at the same time? A: Yes. Most modern phones support dual‑SIM (one physical + one eSIM, or dual eSIM). You can set calls/SMS on one line and data on the other—ideal for keeping your home number active while using a local data plan.

Q: Does eSIM affect battery life or privacy? A: Not inherently. eSIM is just how your plan is stored. Battery life depends on network conditions and usage; privacy is governed by your device settings and operator policies, similar to a physical SIM.

Next step: Plan your trip with the right regional or country eSIM—start with our full list of Destinations.

Read more blogs

Andes Highlights (3 Weeks): Peru–Bolivia–Chile–Argentina Connectivity

Andes Highlights (3 Weeks): Peru–Bolivia–Chile–Argentina Connectivity

Planning a south america itinerary 3 weeks through the high Andes? This route stitches together Peru’s Sacred Valley, Bolivia’s La Paz and Salar de Uyuni, Chile’s Atacama Desert, and northern Argentina’s quebradas or Mendoza wine country—often by long-distance bus and a couple of short flights. Connectivity is different at altitude: coverage is strong in cities but drops in high passes and salt flats; bus Wi‑Fi is patchy; border towns can be blackspots. The smart move is an eSIM with multi‑country coverage, backed by offline maps, offline translations, and a simple routine for crossing borders by bus without losing service. Below you’ll find a practical, connectivity-first itinerary; checklists to prep your phone, apps and documents; and on-the-ground tips for staying online where it matters: booking transport, hailing taxis, backing up photos, and navigating when the signal disappears.If you’re transiting via Europe or North America, you can also add a layover eSIM to stay connected door-to-door. Start with our country list on Destinations, then follow the steps, and you won’t waste time chasing SIM shops at 3,500 metres.The 3‑week Andes route at a glanceWeek 1: Peru (Cusco, Sacred Valley, Machu Picchu) - Fly into Cusco (or Lima then connect). - Base in Cusco; day trips to Pisac/Chinchero/Maras–Moray. - Train to Aguas Calientes; Machu Picchu visit; return to Cusco or continue to Puno/Lake Titicaca.Week 2: Bolivia and Chile (La Paz, Uyuni, San Pedro de Atacama) - Bus/collectivo via Copacabana to La Paz. - Fly or overnight bus to Uyuni. - 3‑day Uyuni–altiplano tour ending in San Pedro de Atacama (Chile).Week 3: Chile and Argentina (Atacama to Salta or Mendoza/Buenos Aires) - Choose: - North: San Pedro to Salta/Jujuy by bus; fly to Buenos Aires. - Or South: San Pedro–Calama flight to Santiago; bus or flight to Mendoza; onward to Buenos Aires.Connectivity notes (quick): - Cities: generally strong 4G/4G+; 5G in major hubs (Santiago, Buenos Aires). - Altitude/rural: expect long no‑signal stretches (Uyuni, altiplano passes, Paso Jama). - Bus Wi‑Fi: often advertised, rarely reliable. Plan to be offline onboard. - Border regions: networks switch; a multi‑country eSIM avoids sudden loss.eSIM vs local SIMs for a 4‑country tripFor a route with multiple borders and remote legs, eSIM wins on time and reliability.What a multi‑country eSIM gets you: - One plan across Peru, Bolivia, Chile, Argentina (check coverage per country on Destinations). - No passport/SIM registration queues at kiosks. - Keep your home number active on the physical SIM for calls/SMS codes. - Instant top‑ups if you burn data on photos or navigation.When a local SIM still helps: - Long stay in one country with heavy data use (e.g., a month in Buenos Aires). - Dead zones where a different local network performs better (rarely worth the hassle on a 3‑week pace).Practical approach: - Use an eSIM as your primary data line across all four countries. - If you find a specific local network far better in one region, add a cheap local SIM and keep the eSIM as backup.Device readiness checklist (before you fly)1) Check eSIM compatibility and SIM‑lock status on your phone.2) Buy and install your eSIM while on home Wi‑Fi. Keep a PDF/printed copy of the QR code.3) Label lines clearly (e.g., “eSIM Andes Data”, “Home SIM”).4) Turn on data roaming for the eSIM; leave roaming off for your home SIM to avoid charges.5) Set up dual‑SIM rules: data on eSIM; calls/SMS default to home SIM if needed.6) Download offline: Google Maps/Organic Maps for all target regions; language packs (Spanish at minimum); bus/air tickets; hotel confirmations.7) Cloud backups: set to upload on Wi‑Fi only; pre‑create shared albums for travel companions.8) Test tethering/hotspot with your laptop/tablet.If you’re transiting popular hubs, consider a short layover eSIM: - USA connections: add an Esim United States or a broader Esim North America.- Europe connections: Madrid/Barcelona? Use an Esim Spain. Paris or Rome? See Esim France and Esim Italy. Multi‑country layovers? Try Esim Western Europe.City‑by‑city connectivity notesCusco & the Sacred Valley (Peru)Coverage: Good in Cusco city; variable in high villages (Maras/Moray) and along Inca Trail approaches.Tips: Download Sacred Valley maps offline; pin viewpoints and ruins. most taxis use WhatsApp—save your accommodation’s number.Machu Picchu/Aguas Calientes: Patchy to none at the citadel. Upload your photos later; don’t rely on live ticket retrieval.Lake Titicaca: Puno and CopacabanaPuno: Reasonable 4G; bus terminals crowded—screenshot QR tickets.Crossing to Copacabana: Expect a signal drop around the border; have directions saved offline.La Paz (Bolivia)Good urban 4G; the cable car network has decent signal but tunnels do not.Yungas/“Death Road” tours: Mountain valleys cause dead zones—share your emergency contacts with the operator, carry a charged power bank, and don’t plan remote calls.Uyuni and the Altiplano (Bolivia to Chile)Uyuni town: OK 4G; ATMs finicky—use Wi‑Fi for banking apps.Salt flats/lagunas: Assume offline for most of the 3‑day tour. Guides often carry satellite phones; agree a pickup time/place in San Pedro and preload your map route.San Pedro de Atacama (Chile)Town: Solid 4G; accommodations often have Wi‑Fi but speeds vary.Geysers, Valle de la Luna: Offline navigation essential; sunrise trips start before mobile networks wake up in some areas.Salta/Jujuy or Mendoza/Buenos Aires (Argentina)Salta/Jujuy: Good city coverage; quebradas have long no‑signal sections.Mendoza: City 4G/5G; vineyards outside town can be patchy.Buenos Aires: Strong 4G/5G; ideal for cloud backups and large downloads before you fly home.Border crossings by bus: step‑by‑stepThe big ones on this route: Peru–Bolivia (Puno/Copacabana), Bolivia–Chile (Uyuni–San Pedro via Hito Cajón), Chile–Argentina (Paso Jama to Salta or Los Libertadores to Mendoza).How to keep service and sanity:1) The day before:- Top up your eSIM data.- Confirm your plan includes both countries you’re entering/leaving.- Download offline maps for both sides of the border and your town of arrival.- Save bus company WhatsApp and terminal address offline.2) On departure morning:- Keep a paper copy or offline PDF of tickets, insurance, and accommodation proof.- Charge phone and power bank; pack a short cable in your daypack.3) On the bus:- Don’t count on bus Wi‑Fi. Keep your eSIM as primary, but expect drops near mountain passes.- If your phone supports it, enable “Wi‑Fi calling” for later when you reach accommodation Wi‑Fi.4) At the border posts:- Data may be unavailable. Keep QR codes and booking numbers offline.- After exiting one country and entering the next, toggle Airplane Mode off/on to re‑register on the new network.- If the eSIM doesn’t attach, manually select a network in Mobile Settings.5) Arrival:- Send your accommodation a quick WhatsApp when you’re back online.- Recheck your eSIM’s data roaming is on; confirm you’re on an in‑country network, not a weak roaming partner.Pro tips: - Dual profiles: If your eSIM allows, keep a secondary profile for a different network in the same country—helpful in border towns.- Cash buffer: Some border terminals don’t accept cards; download a currency converter for offline use.Offline survival kit (5‑minute setup)Maps: Download regions for Cusco, Sacred Valley, Puno, La Paz, Uyuni, San Pedro, Salta/Jujuy or Mendoza, and Buenos Aires.Translations: Download Spanish for offline use; add phrasebook favourites (bus tickets, directions, dietary needs).Documents: Save PDFs of passports, tickets, hotel addresses; star them for quick access.Rides: Screenshots of pickup points; pin bus terminals and hotel doors.Entertainment: Podcasts and playlists for long bus legs, set to download on Wi‑Fi only.Altitude and your tech: what changesCoverage gaps lengthen: Fewer towers at high altitude; valleys can block signal. Assume offline on remote excursions.Batteries drain faster in cold: Keep your phone warm and carry a power bank (10,000–20,000 mAh).Hotel Wi‑Fi may be congested: Schedule big uploads (photo backups, app updates) for big-city stays like Santiago or Buenos Aires.GPS still works offline: Your blue dot shows on offline maps without data—preload everything.Data budgeting for 3 weeksTypical traveller usage across this route: - Messaging/Maps/Bookings: 0.2–0.5 GB/day- Social and photo sharing: 0.3–0.7 GB/day- Occasional video calls/streaming: 0.5–1.0 GB/dayFor a mixed-use trip, plan 15–25 GB for 3 weeks. Heavy creators should double it and upload over hotel Wi‑Fi when possible. If you work remotely, consider a higher‑capacity plan and a backup eSIM; see our guidance on For Business.Practical route with transport and connectivity cuesDays 1–4 Cusco base: Strong city signal; day trips may be spotty—go offline-ready.Days 5–6 Machu Picchu: Expect no service at the ruins; sync tickets ahead.Days 7–8 Puno to La Paz via Copacabana: Border signal drop; re‑register networks after crossing.Days 9–11 Uyuni tour to San Pedro: Treat as offline; charge nightly; carry spare cables.Days 12–14 San Pedro: Stable in town; tours offline; top up data before Paso Jama.Days 15–17 Salta/Jujuy or Mendoza: Good urban 4G; rural patches are offline.Days 18–21 Buenos Aires: Strongest connectivity of the trip; clear your uploads and map downloads for the flight home.Partnering and stopover extrasHospitality and tour operators in the Andes: help your guests stay connected—explore co‑branded solutions via our Partner Hub.Transatlantic flyers: test your eSIM setup on a layover with an Esim United States or Esim Western Europe before hitting high-altitude blackspots.FAQs1) Do I need a local SIM in each country?No. A multi‑country eSIM covering Peru, Bolivia, Chile and Argentina is simpler and works well for a 3‑week pace. Consider a local SIM only if you’ll spend longer in one country and want the absolute best regional coverage.2) Will my WhatsApp number change with an eSIM?No. WhatsApp is tied to your registered number, not your data line. Keep your home SIM active for voice/SMS (roaming off if you wish), and use the eSIM for data—WhatsApp continues as normal.3) Can I hotspot to my laptop or camera?Yes. Enable tethering on your eSIM. Mind your data: cloud backups and OS updates can burn gigabytes—set them to Wi‑Fi only or schedule in big cities.4) What if there’s no signal on the Uyuni/Atacama legs?That’s expected. GPS still works offline. Pre-download maps and translations, carry a power bank, and sync plans with your tour operator before departure.5) Will I get roaming charges at borders?If you’re using a multi‑country eSIM with coverage in both countries, you won’t incur extra roaming fees from your home carrier. Keep roaming off on your home SIM to avoid accidental use.6) I’m connecting via Europe or the US—worth getting a layover eSIM?Yes. It’s an easy way to test your setup and stay reachable. Try Esim North America or country options like Esim Spain, Esim France, or Esim Italy for common hubs.Next step: Browse South America coverage options and build your plan on Destinations.

Transfer Your eSIM to a New iPhone (eSIM Quick Transfer)

Transfer Your eSIM to a New iPhone (eSIM Quick Transfer)

Moving to a new iPhone and want your mobile plan to come with you? If you use an eSIM, Apple’s eSIM Quick Transfer makes it fast to move your plan on‑device—no plastic SIM, no store visit. This guide explains the smoothest way to transfer your eSIM during setup or afterwards in Settings, plus what to do if Quick Transfer isn’t supported by your carrier. We’ll cover when to delete the old profile, how to check for carrier locks, and the small settings that keep travellers online abroad without bill shock.Whether you’re switching right before a trip or juggling multiple travel eSIMs (for example, a Esim United States for a New York conference and an Esim Western Europe for a summer rail pass), follow these steps to keep service uninterrupted. If Quick Transfer isn’t available, you can still move your plan using a QR code or a reissued eSIM from your provider.What you’ll need before you startRun through this short checklist to avoid mid‑transfer snags:Compatible iPhones:iPhone XS/XR or later support eSIM. US models of iPhone 14 and later are eSIM‑only (no physical SIM tray).iOS up to date on both devices (ideally iOS 17 or later).Both phones charged (30%+), Wi‑Fi and Bluetooth turned on, and placed side‑by‑side.You know the device passcodes and Apple ID login (helps with Quick Start, though Apple ID is not strictly required for Quick Transfer in Settings).Old iPhone not erased and the eSIM profile still present.Carrier supports eSIM on both devices, and supports eSIM Quick Transfer. If not, use the QR/reissue route below.Unlocked phones if you plan to use international eSIMs:Check on each iPhone: Settings > General > About > Carrier Lock. “No SIM restrictions” means unlocked.If you’re travelling:Confirm your plan or travel eSIM is valid for your destination (browse Destinations, including Esim North America, Esim France, Esim Italy, or Esim Spain).Pro tip: Never delete the eSIM from your old iPhone until the new phone shows a signal and data works. Deleting too early can strand your number and require a carrier reissue.Option 1: Transfer your eSIM during new iPhone setup (Quick Start)This is the cleanest approach when unboxing a new iPhone.1) Power on the new iPhone and place it next to your old one.2) On the old iPhone, tap Continue when the Quick Start prompt appears.3) Scan the swirling animation on the new iPhone using the old iPhone’s camera.4) Follow on‑screen steps until you reach “Transfer your mobile plan” or “Set up eSIM.”5) Choose the line(s) to transfer. If you use multiple eSIMs (e.g., a primary number plus a travel data eSIM), you’ll see each line listed.6) Approve on the old iPhone and wait while the plan moves to the new iPhone. Keep both devices unlocked and nearby.7) When prompted, set your default line for Voice and Data, and label your lines (e.g., “Personal UK” and “Travel EU”).8) Finish setup, then test: - Toggle Airplane Mode off, confirm bars appear. - Open a webpage to confirm mobile data. - If needed, enable Data Roaming for your travel eSIM (Settings > Mobile Data > your eSIM > Data Roaming).Pro tips: - Travelling soon? Set your travel eSIM as “Mobile Data” and your home SIM as “Voice” to keep calls/SMS on your usual number while using local data abroad. - To avoid accidental roaming charges, keep Data Roaming off on your home line when abroad and only enable it on your travel eSIM.Option 2: Transfer after setup (eSIM Quick Transfer in Settings)If you’ve already finished setup, you can still move the eSIM on‑device.1) On the new iPhone, go to: - Settings > Mobile Data (or Cellular) > Add eSIM. - Tap “Transfer From Nearby iPhone.”2) On the old iPhone, confirm the transfer when prompted and select the line to move.3) Wait for activation to complete on the new iPhone. Stay on Wi‑Fi and keep Bluetooth on.4) Test calls/data as above. If your travel eSIM is for a region such as Esim Western Europe, toggle Data Roaming on only when you arrive in‑region.5) Only after testing, remove the old eSIM profile from the old iPhone: - Settings > Mobile Data > tap the plan > Remove eSIM.If “Transfer From Nearby iPhone” doesn’t appear or fails, your carrier may not support Quick Transfer. Use the QR/reissue method below.Option 3: Use a QR code or eSIM reissue when Quick Transfer isn’t availableUse this when: - Your carrier doesn’t support Quick Transfer. - Your old iPhone is lost, stolen, or no longer turns on. - You’re switching between ecosystems (iPhone to Android, or vice versa).How to proceed:1) Request a new eSIM (reissue) from your carrier or eSIM provider. - They’ll send a fresh QR code or SM‑DP+ server and activation code. - Some providers charge a small replacement fee or require identity verification.2) On the new iPhone, install the eSIM: - Settings > Mobile Data > Add eSIM > Use QR Code. - Scan the QR or tap “Enter Details Manually” to input the SM‑DP+ address and activation code.3) Wait for activation, then test calls/data.4) Once confirmed working on the new iPhone, remove the old eSIM from the old device if it’s still in your possession: - Settings > Mobile Data > select the plan > Remove eSIM.Traveller note: If you’re lining up a trip, you can add a travel eSIM in advance, then toggle it on when you land. Browse regional options like Esim United States, Esim France, or Esim Spain under Destinations.When should you delete the eSIM from your old iPhone?Only delete after the new iPhone: - Shows signal bars for that line. - Can place/receive a call (if it’s a voice line). - Loads a web page on mobile data (if it’s a data line). - Roams correctly in your destination if you’re abroad.Why this matters: Deleting early can sever the link to your number or data plan. If something goes wrong, you’ll need a reissue from your carrier, which can take time—annoying if you’re at an airport.If you plan to trade‑in or sell the old iPhone: - Remove the eSIM, sign out of Apple ID, and erase all content only after confirming the line is active on the new device.Configure your lines after transfer (recommended for travellers)After the move, fine‑tune these settings:Labels:Settings > Mobile Data > each plan > Mobile Plan Label.Use clear names like “Home” and “Trip – Italy/France.”Default line and data line:Choose which line handles Voice and which handles Mobile Data.For trips, set your travel eSIM as the data line; keep home line for calls/SMS.Data Roaming:On for the travel eSIM, off for your home line when abroad.Network selection:If coverage is patchy, try manual network selection under your travel eSIM settings.Some regional plans (e.g., Esim Western Europe) roam across multiple partner networks—manual selection can help in fringe areas.Personal Hotspot:If you plan to tether laptops or tablets, ensure your plan supports it and toggle on. Useful for remote work trips—see For Business if you manage teams on the road.Troubleshooting: common eSIM transfer errors“Transfer not supported by your carrier”Use the QR/reissue method. Contact your carrier or eSIM provider for a new activation code.“Cannot complete cellular plan change” or activation stallsUpdate iOS on both devices.Reboot both phones, keep them on Wi‑Fi, and retry.Check time/date are set automatically.Reset Network Settings (Settings > General > Transfer or Reset iPhone > Reset > Reset Network Settings), then try again.No signal after transferToggle Airplane Mode off/on.Ensure the plan is enabled in Settings > Mobile Data.For travel eSIMs, enable Data Roaming and check APN settings provided by your eSIM provider.Try manual network selection temporarily.eSIM missing after restoring from iCloudeSIMs are not included in iCloud or iTunes backups. You must transfer via Quick Transfer or reinstall via QR/reissue.Carrier lock blocks activationCheck Carrier Lock status under Settings > General > About. If locked, the device may only accept that carrier’s eSIM. Request an unlock if eligible.Business or multi‑device rolloutsIf you deploy iPhones for teams, standardise your process:Keep devices on the latest iOS and confirm unlock status before travel.Maintain a secure record of eSIM QR codes/activation details for reissue scenarios.Train staff to transfer via Settings > Add eSIM > Transfer From Nearby iPhone.For recurring travel (events, rotations), consider regional packs such as Esim North America or Esim Western Europe. Explore centralised options via For Business and partner resources in the Partner Hub.FAQsCan I transfer an eSIM if my old iPhone is dead or lost?Not via Quick Transfer. Ask your carrier or eSIM provider for a reissue/QR and activate it on the new iPhone.Does an iCloud backup move my eSIM?No. eSIMs are not included in backups. Use Quick Transfer or reinstall using a QR/activation code.Do I need the same Apple ID on both iPhones?No for Quick Transfer in Settings, but being signed in enables the smoother Quick Start flow during setup. You’ll still need both phones nearby and unlocked.Can I move an eSIM from iPhone to Android (or back)?There’s no cross‑platform “Quick Transfer.” You must remove/deactivate the old eSIM and install a new one on the other device using a QR/activation code from your provider.Will this work abroad without Wi‑Fi?The transfer needs local connectivity and Bluetooth; Wi‑Fi is strongly recommended. If you’re already travelling, use hotel or airport Wi‑Fi for a stable transfer.Which iPhones support eSIM?iPhone XS/XR and later. US iPhone 14 and newer are eSIM‑only. Check your carrier’s eSIM support and device unlock status before buying a travel eSIM.Key takeawaysUse Quick Start during setup or “Transfer From Nearby iPhone” in Settings for the fastest, no‑QR move.Don’t delete the old eSIM until the new iPhone is fully working on that line.If Quick Transfer isn’t supported or the old phone is unavailable, request a QR/reissue from your provider.Travellers should set the travel eSIM as the data line and keep Data Roaming off on the home line.Check device unlock status early to avoid surprises when buying regional eSIMs like Esim Italy or Esim United States.Next step: Planning a trip? Pick the right regional plan now in Destinations.

Lost or Stolen Phone Abroad: Step‑by‑Step Playbook (iOS & Android)

Lost or Stolen Phone Abroad: Step‑by‑Step Playbook (iOS & Android)

When your phone disappears on the road, minutes matter. Your device holds maps, payments, messages, photos, boarding passes and the keys to your accounts. This practical playbook prioritises fast actions that stop thieves from accessing your data, block mobile service misuse, and put you on the front foot for recovery or insurance. Whether you’re on iPhone or Android, start by remotely locking the device, then secure your number and accounts, document everything, and get reconnected quickly with a replacement handset and eSIM. You’ll also find pro tips to make your next trip far safer, from enabling Find My/Find Device and backup, to setting SIM PINs and storing your IMEI. If you’re replacing your device on the move, we’ve included options to get instant connectivity via regional eSIMs (e.g., Esim Western Europe or Esim North America). Keep calm, follow the steps, and you’ll minimise disruption and risk.Step 1: Lock down the phone in the first 10 minutesPrioritise account and data safety over recovery. Only attempt in‑person retrieval if it’s unquestionably safe. Do not confront suspected thieves.iPhone: Use Find MyUse any browser (iCloud.com/find) or another Apple device.Sign in to iCloud with your Apple ID.Select the missing iPhone. If it’s online, you’ll see its location.Mark as Lost: - Locks the device with a passcode. - Disables Apple Pay. - Lets you display a message and a callback number (use a trusted number that’s not your own lost phone).If sensitive data is at risk or the phone is unlikely to be recovered, Erase iPhone remotely. - Note: After erasing, you can’t track the phone’s live location, but Activation Lock prevents re‑use without your Apple ID.Turn on Notify When Found to get a location alert if it comes online.Remove the device from your Apple ID only after you’ve fully given up recovery and finished any insurance process.Pro tips: - If you set up Stolen Device Protection (iOS 17.3+), certain changes now require Face ID/Touch ID and a security delay away from familiar locations. - You can see device details (serial/IMEI) in your Apple ID account under Devices—useful for insurance.Android: Use Find My DeviceOn a browser, go to google.com/android/find and sign in to the Google account on your phone.Select the device. If online, you’ll see its location or last seen.Secure Device: - Locks the phone and signs you out of Google on the device. - Lets you display a message and callback number.If recovery is unlikely, Erase Device remotely. - Note: After erasing, you can’t track it further. Factory reset protection may still deter reuse depending on brand.If supported and enabled, the Find My Device network can help locate some devices even when offline.Pro tips: - Remove contactless cards from Google Wallet at pay.google.com > Payment methods. - Keep screenshots of the Find My Device actions; they help with insurance.Step 2: Protect your mobile service (SIM/eSIM)Your phone number is the gateway to SMS codes and calls. Lock it down next.Contact your mobile operator or eSIM provider immediately to suspend the line. - Ask for a temporary suspension to block calls/data and prevent SIM‑swap attacks. - For physical SIMs, suspension stops misuse if the card is removed. - For eSIMs, suspension blocks the profile on the stolen device.Request a replacement SIM/eSIM for your new or spare device. - Some providers let you re‑download the eSIM profile to a new phone via their app/portal.If you use a travel eSIM, keep your order ID and QR code handy. Many plans can be reissued to a replacement handset on the road.Reconnecting options with Simology: - Travelling in the region? Get back online fast with Esim Western Europe, Esim France, Esim Italy or Esim Spain. - In the US or Canada/Mexico? See Esim United States and Esim North America. - Unsure which plan fits? Browse coverage on Destinations.What support might ask for: - Your phone number and plan details. - Order number/ICCID (for eSIM). - IMEI of the lost device and the IMEI of your replacement device.Step 3: Secure your accounts and moneyStop unauthorised access while you organise a replacement.Change your Apple ID/Google account password first, then email, banking, social, and travel accounts.Review and revoke active sessions:Apple ID: Settings > Your Name > Password & Security > Manage devices.Google: myaccount.google.com > Security > Your devices and Recent security activity.Rotate two‑factor authentication:Move 2FA from SMS to an authenticator app or passkeys where available.Update recovery email/phone numbers if your number is impacted.Disable contactless cards:Apple: Mark as Lost disables Apple Pay, but also remove cards via your Apple ID if you’re concerned.Google: Remove cards at pay.google.com and your bank’s app.Messaging apps:WhatsApp: Register your number on a new device to log out the old one; if you can’t, email support@whatsapp.com with “Lost/Stolen: Please deactivate my account.”Signal/Telegram: Install on your new device to invalidate the old session and review linked devices.Banking/fintech:Freeze cards in your banking app and re‑issue new cards if needed.Review recent transactions and set up alerts.Pro tips: - Prioritise email first; it’s the reset path for most services. - Use strong, unique passwords and a password manager. Change the master password if it was stored on the lost device without strong device encryption/passcode.Step 4: Document and report for insuranceInsurers need evidence and timelines. Start your paper trail early.File a local police report as soon as is safe to do so (ideally within 24 hours). Bring:Device make/model, colour, distinguishing marks.IMEI/serial number.Date/time and place of loss/theft, and any case numbers.Gather documents:Proof of purchase (receipt/invoice).Photos of the device and accessories (if you have them).Screenshots or emails showing Find My/Find Device actions and status.Travel proof (boarding pass/hotel booking) if your policy requires it.Notify your travel insurer and follow their claim form. Ask exactly what they require and any deadlines.If a police report isn’t possible (e.g., remote location), document why and record any alternative official report you can obtain (e.g., hotel/transport incident logs).Finding your IMEI without the phone: - Check the original box or receipt. - Apple: appleid.apple.com > Sign in > Devices. - Google/Android: Some manufacturers show device info in your Google account; your mobile operator may have it on file.Pro tips: - Keep copies in cloud storage you can access from any device. - Don’t erase the device until you’ve captured any last‑known location you might need for the report—balance this with security risk.Step 5: Replace your phone and get back onlineYou don’t need to wait until you’re home.Borrow or buy a local handset:Ensure it’s unlocked and eSIM‑capable if you plan to use an eSIM.Mid‑range Android devices are widely available and affordable in most cities.Restore your data:iPhone: Restore from iCloud or a recent Finder/iTunes backup.Android: Restore from Google One/Drive backup during setup.Reconnect with eSIM:Re‑download your plan from your provider app or QR code.Or choose a new plan matched to where you are or heading next via Destinations, including Esim Western Europe, Esim United States, Esim France, Esim Italy, Esim Spain or Esim North America.Verify your restored device:Re‑enable Face ID/Touch ID and a strong passcode.Re‑set up 2FA/authenticator apps and confirm recovery methods.Re‑add payment cards to Apple Pay/Google Wallet and test a low‑value transaction.For team travellers: - Centralise line suspensions and device replacements via your IT/admin. If you manage staff on the road, explore For Business for easier eSIM provisioning and controls, and our Partner Hub if you’re a travel partner supporting customers.Step 6: Prevent it next time – a 10‑minute pre‑travel checklistDo this before every trip.Enable device location and recovery:iPhone: Settings > Your Name > Find My > Find My iPhone (On). Turn on Send Last Location.Android: Settings > Security & privacy > Find My Device (On).Turn on automatic cloud backups for photos, messages and app data.Use a strong passcode and biometrics. Disable lock‑screen previews and Control Centre/Quick Settings access from the lock screen.Enable Stolen Device Protection (iOS 17.3+) and review your Google account’s security checks.Set a SIM PIN to prevent SIM profile use if removed from the phone.Record IMEI and serial number; store in secure cloud notes you can access without the phone.Store eSIM QR codes/order details securely for quick re‑download.Move critical 2FA away from SMS to an authenticator app or passkeys, and add recovery contacts.Keep travel insurance policy numbers and claim contacts handy.Consider a slim cross‑body or zipped pocket; use “do not disturb” pockets in crowds.Pro tips: - Add a lock‑screen message with an email address and a reward note. Genuine finders do exist. - Keep a small “backup kit”: old unlocked handset, printed QR codes, spare power bank.FAQ1) I didn’t enable Find My/Find Device. Is there anything I can do? - Yes: immediately change your Apple ID/Google password, suspend your line with your operator/eSIM provider, and secure your accounts. File a police report and proceed with insurance. You won’t be able to live‑track the device, but account lockdowns still protect you.2) Can thieves use my eSIM or make calls? - If your line is active, they can use data and receive SMS codes. Suspend the line right away. A SIM PIN helps, but suspension is the sure fix. For eSIMs, suspension blocks the profile on that device.3) Should I erase my phone remotely? - If recovery seems unlikely or sensitive data is at risk, yes. Be aware you cannot track it afterwards. iPhone’s Activation Lock and Android’s factory reset protection still deter reuse without your account credentials.4) How do I find my IMEI after the phone is gone? - Check the device box/receipt, your Apple ID Devices list, your Google account/device portal (where supported), or ask your mobile operator. Save it in your travel notes next time.5) Do I need a police report for insurance? - Most travel insurers require a timely report for theft claims. Obtain one as soon as practical and keep copies of all supporting evidence (Find My screenshots, receipts, boarding passes). Ask your insurer exactly what they need.6) Is it safe to go to the map location and retrieve my phone? - Prioritise personal safety. Avoid confronting suspects. If the phone appears to be moving or in a private property, share details with local authorities and your insurer rather than intervening yourself.—Next step: Get reconnected fast with the right travel plan for where you are. Explore Destinations.