Best eSIM for International Travel (2025): Simology vs Airalo vs Holafly vs Nomad

Blog

Best eSIM for International Travel (20...

Best eSIM for International Travel (2025): Simology vs Airalo vs Holafly vs Nomad

30 Oct 2025

Best eSIM for International Travel (2025): Simology vs Airalo vs Holafly vs Nomad

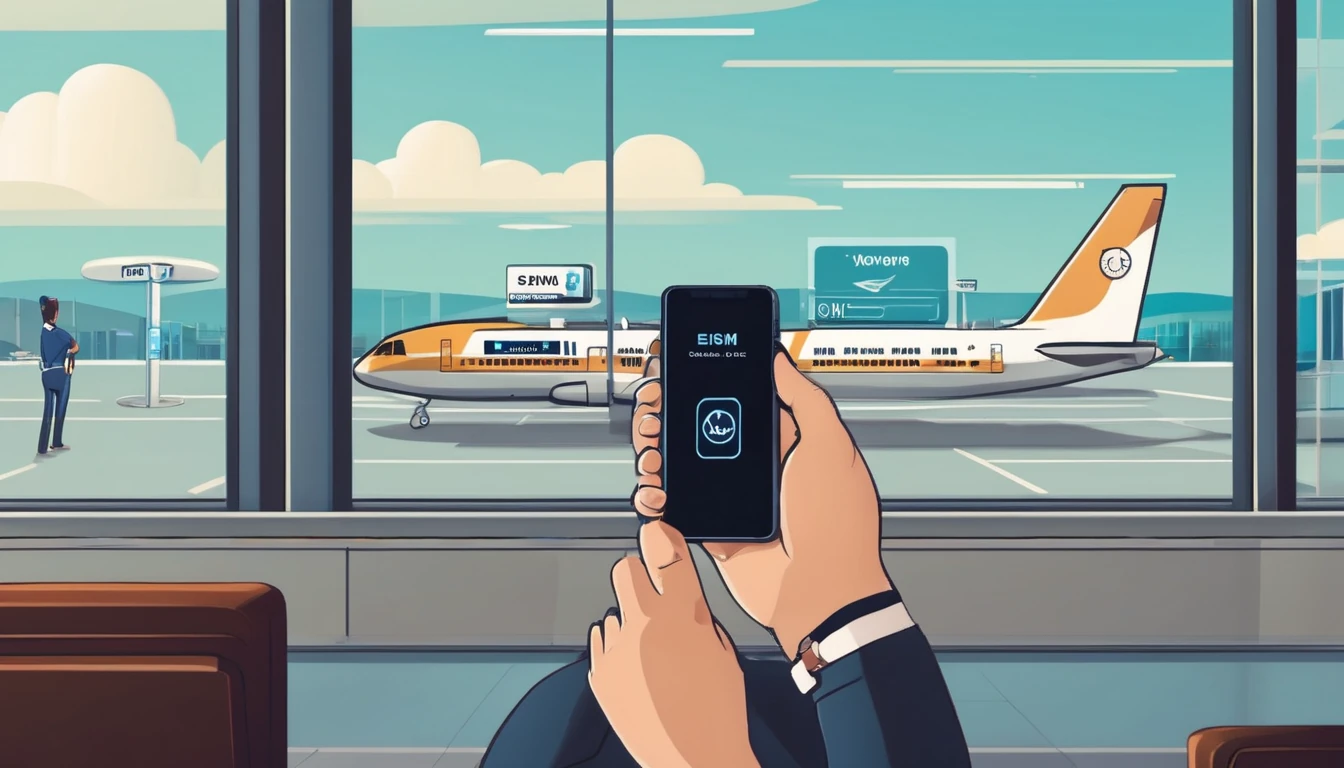
Planning data for a multi-country trip shouldn’t be a gamble. The best eSIM for international travel in 2025 blends wide coverage, predictable pricing, and hassle-free switching when a local network gets congested or weak. That’s why our top criterion this year is multi‑network switching: the ability for your eSIM to use more than one carrier in the same country and automatically move to a stronger signal. It’s the biggest reliability upgrade for travellers since eSIMs arrived.

In this guide, we compare Simology, Airalo, Holafly, and Nomad against criteria that matter on the road: real-world coverage, speed access (4G/5G), hotspot support, regional roaming, plan flexibility, and support. We’ll flag where each provider fits best, give you practical checklists, and link straight to destination pages so you can price up your route in minutes. If you’re heading to Europe, North America, or a single country like the US, France, Italy or Spain, you’ll find specific plan pointers below and via our Destinations.

How we compared (criteria that matter in 2025)

  • Coverage redundancy: Does the eSIM use multiple local networks in-country and switch automatically?
  • Speed access: Consistent 4G/5G access; realistic speeds at peak times; fair use policies.
  • Plan design: Single-country vs regional/global; data allowances; durations; top-ups.
  • Tethering: Hotspot/hotspot limits; restrictions that can trip you up.
  • Transparency: Clear fair-use and throttling; no surprise overages.
  • App and support: Installation, diagnostics, 24/7 help, offline instructions.
  • Price per GB: Value relative to local prepaid and other eSIMs (not just headline “unlimited”).

Quick verdict

  • Simology: Best overall for reliability and multi-country trips thanks to multi‑network switching and strong regional bundles. Great balance of speed, flexibility, and support.
  • Airalo: Best for bargain hunters on single-country light/medium data, if you’re okay with typically using one local network per country.
  • Holafly: Best for simple “unlimited”-style plans if you accept fair‑use throttling and hotspot caveats; ideal for heavy daily social/maps use.
  • Nomad: Strong all-rounder with flexible plan sizes and a good app; coverage varies by destination, often single-network per country.

Jump to regions: Esim Western Europe | Esim North America | Esim United States | Esim France | Esim Italy | Esim Spain

Deep dive: Simology vs Airalo vs Holafly vs Nomad

Simology — multi‑network reliability and regional freedom

What stands out - Multi‑network switching in many countries: your eSIM connects to more than one local carrier and can move when signal or capacity drops. This is crucial in rural areas, basements, stadiums, and busy city centres. - 4G/5G where available, with clear fair‑use terms. Hotspot/tethering supported on most plans. - Regional passes that “just work” across borders (great for train trips and road trips). See Esim Western Europe and Esim North America. - Transparent pricing, easy top‑ups, and traveller‑friendly setup. Business features and consolidated billing via For Business.

Best for - Travellers prioritising reliability over shaving the last dollar off per‑GB. - Multi‑country itineraries where you want one eSIM to roam across borders without manual switching. - Remote workers who need dependable hotspotting and consistent speeds.

Considerations - Absolute rock-bottom pricing may exist on marketplace apps for light users. If you rarely leave a major city and don’t need redundancy, a cheaper single‑network plan might suffice.

Helpful links to price up trips: - United States: Esim United States - Europe: Esim Western Europe, or country‑specific pages like Esim France, Esim Italy, Esim Spain - North America multi‑country: Esim North America

Airalo — broad marketplace, budget-friendly basics

What stands out - Huge catalogue of country eSIMs with varying plan sizes and durations; competitive pricing for light/moderate use. - Simple top‑ups and installation flows in-app.

Best for - Single-country trips where you’ll stay mostly in cities and don’t need multi‑network redundancy. - Travellers who want the lowest entry price and are comfortable checking network notes for each country.

Considerations - In many destinations, plans connect to a single local network; if coverage dips, you can’t switch. Speeds and 5G access vary by plan and country. - Read tethering terms — most allow hotspot, but not all.

Holafly — unlimited-style convenience with trade-offs

What stands out - “Unlimited data” plans in many countries and regions; good for heavy daily users who value simplicity. - Straightforward installation and support.

Best for - Travellers who stream, map, and message heavily and prefer not to manage data balances.

Considerations - Unlimited typically involves fair‑use policies that may throttle speeds after sustained high usage; exact thresholds vary by destination. - Hotspot/tethering may be limited or not included on some unlimited plans — check destination specifics before relying on it. - Pricing is higher than metered alternatives for light users.

Nomad — flexible plans and a solid app

What stands out - Good mix of plan sizes and durations, with competitive pricing in several popular destinations. - Smooth app experience and straightforward top‑ups.

Best for - Travellers who want a balance between price and simplicity and are comfortable selecting by country.

Considerations - Coverage and speed depend on the underlying partner network(s); often single-network per country. Review destination notes for 5G and hotspot support.

Which plan should you pick? Real-world scenarios

  • One country, light data (maps, messages, rides)
  • Airalo or Nomad can be the cheapest route if you’re mostly urban and don’t need redundancy.
  • Prefer reliability across cities and countryside? Choose Simology’s single‑country options, e.g. Esim United States or Esim France, for multi‑network coverage where available.
  • Two to six countries in Europe (train trips, road trips)
  • Use a regional pass to avoid juggling eSIMs. Simology’s Esim Western Europe keeps service live as you cross borders, with multi‑network switching in many countries including Esim Italy and Esim Spain.
  • Heavy user who prefers “unlimited”? Holafly’s Europe options may fit, if you’re fine with fair‑use throttling and potential hotspot limits.
  • US/Canada/Mexico loop or North America business travel
  • Go regional. Simology’s Esim North America covers typical NA routes with multi‑network redundancy in key areas.
  • If visiting only one country and mainly urban, a low‑cost Airalo/Nomad plan may suffice for light users.
  • Remote work and tethering
  • Prioritise providers that allow hotspot and offer redundancy. Simology plans generally include tethering and multi‑network switching for steadier connections during calls and uploads.
  • Avoid “unlimited” plans where hotspot is restricted if you must tether.
  • Teams and frequent flyers
  • Centralise purchasing and support with Simology For Business and manage destinations across staff via the portal. If you run a travel brand or community, see our Partner Hub.

Setup checklist: get it right first time

Before you fly 1. Check device compatibility: your phone must be eSIM‑capable and network‑unlocked. 2. Pick the right scope: single-country vs regional. If crossing borders, a regional pass reduces admin. 3. Download the provider app on Wi‑Fi; have your QR or installation instructions offline (screenshots work). 4. Know the APN: most eSIMs auto‑configure; if not, note the APN from your plan page. 5. Decide your line settings: keep your physical SIM for calls/SMS if needed; set the eSIM for mobile data.

On arrival 1. Toggle on the eSIM line and enable Data Roaming for that line. 2. Set the eSIM as your Mobile Data line (and default for iMessage/FaceTime if desired). 3. Check you’re on 4G/5G. If speeds seem off, toggle airplane mode or manually reselect a network. 4. If prompted, add the APN and restart your device. 5. Test maps/web; then enable hotspot if you plan to tether.

Pro tips - Save your boarding pass and eSIM QR offline; airport Wi‑Fi can be patchy. - If you rely on ride‑hailing on arrival, pre-install and test your eSIM before take‑off. - In weak-signal areas, providers with multi‑network switching (e.g., Simology) reduce dead zones and congestion pain. - “Unlimited” isn’t infinite speed: fair‑use can slow you at peak times. If you must upload large files, schedule off‑peak or use Wi‑Fi.

Why multi‑network switching matters

  • Fewer dead spots: If Carrier A has a weak cell in a rural valley or crowded station, your eSIM can move to Carrier B.
  • Smoother 5G handoffs: Access to multiple 5G footprints increases the chance of staying on high‑speed data.
  • Real reliability for business use: Hotspotting on calls or pushing large files benefits from redundant routes.

Simology prioritises this capability in many destinations and regional bundles, which is why it leads our 2025 pick for the best eSIM for international travel.

FAQs

  • Which eSIM is best for multi‑country trips?
  • Simology’s regional passes like Esim Western Europe and Esim North America are designed for border‑hopping with multi‑network reliability. If you prefer “unlimited”, compare with Holafly but check hotspot and fair‑use details.
  • Is “unlimited data” truly unlimited?
  • Typically not. Most “unlimited” plans apply fair‑use policies that may throttle speeds after sustained heavy use. If you need consistently fast data, consider a high‑allowance metered plan instead of relying on “unlimited.”
  • Will I get 5G everywhere?
  • 5G availability depends on the local networks and the plan. Many destinations offer 5G in major cities, with 4G elsewhere. Simology exposes 5G where partners support it; check your specific country page via Destinations.
  • Can I use my phone as a hotspot?
  • Often yes, but not always. Simology plans generally support tethering. Some unlimited‑style plans (e.g., certain Holafly destinations) may restrict it. Check your plan’s terms before relying on hotspot for work.
  • Do I need to complete identity checks (eKYC)?
  • Some countries require ID for mobile service. Many tourist eSIMs avoid this, but regulations can change. If eKYC is required, your provider will prompt you in‑app with simple steps.
  • What if my phone is locked?
  • Network‑locked phones can’t use most travel eSIMs. Contact your carrier to unlock before you fly. You can still use Wi‑Fi only, but mobile data via eSIM requires an unlocked device.

The bottom line

If you want the best eSIM for international travel in 2025, prioritise multi‑network switching, regional coverage, clear hotspot rules, and transparent fair‑use. Simology leads on reliability and cross‑border simplicity, with straightforward options for single countries like the Esim United States and Europe staples (Esim France, Esim Italy, Esim Spain), plus regional passes across Esim Western Europe and Esim North America.

Next step: Compare plans and coverage for your route via our Destinations.

Read more blogs

Andes Highlights (3 Weeks): Peru–Bolivia–Chile–Argentina Connectivity

Andes Highlights (3 Weeks): Peru–Bolivia–Chile–Argentina Connectivity

Planning a south america itinerary 3 weeks through the high Andes? This route stitches together Peru’s Sacred Valley, Bolivia’s La Paz and Salar de Uyuni, Chile’s Atacama Desert, and northern Argentina’s quebradas or Mendoza wine country—often by long-distance bus and a couple of short flights. Connectivity is different at altitude: coverage is strong in cities but drops in high passes and salt flats; bus Wi‑Fi is patchy; border towns can be blackspots. The smart move is an eSIM with multi‑country coverage, backed by offline maps, offline translations, and a simple routine for crossing borders by bus without losing service. Below you’ll find a practical, connectivity-first itinerary; checklists to prep your phone, apps and documents; and on-the-ground tips for staying online where it matters: booking transport, hailing taxis, backing up photos, and navigating when the signal disappears.If you’re transiting via Europe or North America, you can also add a layover eSIM to stay connected door-to-door. Start with our country list on Destinations, then follow the steps, and you won’t waste time chasing SIM shops at 3,500 metres.The 3‑week Andes route at a glanceWeek 1: Peru (Cusco, Sacred Valley, Machu Picchu) - Fly into Cusco (or Lima then connect). - Base in Cusco; day trips to Pisac/Chinchero/Maras–Moray. - Train to Aguas Calientes; Machu Picchu visit; return to Cusco or continue to Puno/Lake Titicaca.Week 2: Bolivia and Chile (La Paz, Uyuni, San Pedro de Atacama) - Bus/collectivo via Copacabana to La Paz. - Fly or overnight bus to Uyuni. - 3‑day Uyuni–altiplano tour ending in San Pedro de Atacama (Chile).Week 3: Chile and Argentina (Atacama to Salta or Mendoza/Buenos Aires) - Choose: - North: San Pedro to Salta/Jujuy by bus; fly to Buenos Aires. - Or South: San Pedro–Calama flight to Santiago; bus or flight to Mendoza; onward to Buenos Aires.Connectivity notes (quick): - Cities: generally strong 4G/4G+; 5G in major hubs (Santiago, Buenos Aires). - Altitude/rural: expect long no‑signal stretches (Uyuni, altiplano passes, Paso Jama). - Bus Wi‑Fi: often advertised, rarely reliable. Plan to be offline onboard. - Border regions: networks switch; a multi‑country eSIM avoids sudden loss.eSIM vs local SIMs for a 4‑country tripFor a route with multiple borders and remote legs, eSIM wins on time and reliability.What a multi‑country eSIM gets you: - One plan across Peru, Bolivia, Chile, Argentina (check coverage per country on Destinations). - No passport/SIM registration queues at kiosks. - Keep your home number active on the physical SIM for calls/SMS codes. - Instant top‑ups if you burn data on photos or navigation.When a local SIM still helps: - Long stay in one country with heavy data use (e.g., a month in Buenos Aires). - Dead zones where a different local network performs better (rarely worth the hassle on a 3‑week pace).Practical approach: - Use an eSIM as your primary data line across all four countries. - If you find a specific local network far better in one region, add a cheap local SIM and keep the eSIM as backup.Device readiness checklist (before you fly)1) Check eSIM compatibility and SIM‑lock status on your phone.2) Buy and install your eSIM while on home Wi‑Fi. Keep a PDF/printed copy of the QR code.3) Label lines clearly (e.g., “eSIM Andes Data”, “Home SIM”).4) Turn on data roaming for the eSIM; leave roaming off for your home SIM to avoid charges.5) Set up dual‑SIM rules: data on eSIM; calls/SMS default to home SIM if needed.6) Download offline: Google Maps/Organic Maps for all target regions; language packs (Spanish at minimum); bus/air tickets; hotel confirmations.7) Cloud backups: set to upload on Wi‑Fi only; pre‑create shared albums for travel companions.8) Test tethering/hotspot with your laptop/tablet.If you’re transiting popular hubs, consider a short layover eSIM: - USA connections: add an Esim United States or a broader Esim North America.- Europe connections: Madrid/Barcelona? Use an Esim Spain. Paris or Rome? See Esim France and Esim Italy. Multi‑country layovers? Try Esim Western Europe.City‑by‑city connectivity notesCusco & the Sacred Valley (Peru)Coverage: Good in Cusco city; variable in high villages (Maras/Moray) and along Inca Trail approaches.Tips: Download Sacred Valley maps offline; pin viewpoints and ruins. most taxis use WhatsApp—save your accommodation’s number.Machu Picchu/Aguas Calientes: Patchy to none at the citadel. Upload your photos later; don’t rely on live ticket retrieval.Lake Titicaca: Puno and CopacabanaPuno: Reasonable 4G; bus terminals crowded—screenshot QR tickets.Crossing to Copacabana: Expect a signal drop around the border; have directions saved offline.La Paz (Bolivia)Good urban 4G; the cable car network has decent signal but tunnels do not.Yungas/“Death Road” tours: Mountain valleys cause dead zones—share your emergency contacts with the operator, carry a charged power bank, and don’t plan remote calls.Uyuni and the Altiplano (Bolivia to Chile)Uyuni town: OK 4G; ATMs finicky—use Wi‑Fi for banking apps.Salt flats/lagunas: Assume offline for most of the 3‑day tour. Guides often carry satellite phones; agree a pickup time/place in San Pedro and preload your map route.San Pedro de Atacama (Chile)Town: Solid 4G; accommodations often have Wi‑Fi but speeds vary.Geysers, Valle de la Luna: Offline navigation essential; sunrise trips start before mobile networks wake up in some areas.Salta/Jujuy or Mendoza/Buenos Aires (Argentina)Salta/Jujuy: Good city coverage; quebradas have long no‑signal sections.Mendoza: City 4G/5G; vineyards outside town can be patchy.Buenos Aires: Strong 4G/5G; ideal for cloud backups and large downloads before you fly home.Border crossings by bus: step‑by‑stepThe big ones on this route: Peru–Bolivia (Puno/Copacabana), Bolivia–Chile (Uyuni–San Pedro via Hito Cajón), Chile–Argentina (Paso Jama to Salta or Los Libertadores to Mendoza).How to keep service and sanity:1) The day before:- Top up your eSIM data.- Confirm your plan includes both countries you’re entering/leaving.- Download offline maps for both sides of the border and your town of arrival.- Save bus company WhatsApp and terminal address offline.2) On departure morning:- Keep a paper copy or offline PDF of tickets, insurance, and accommodation proof.- Charge phone and power bank; pack a short cable in your daypack.3) On the bus:- Don’t count on bus Wi‑Fi. Keep your eSIM as primary, but expect drops near mountain passes.- If your phone supports it, enable “Wi‑Fi calling” for later when you reach accommodation Wi‑Fi.4) At the border posts:- Data may be unavailable. Keep QR codes and booking numbers offline.- After exiting one country and entering the next, toggle Airplane Mode off/on to re‑register on the new network.- If the eSIM doesn’t attach, manually select a network in Mobile Settings.5) Arrival:- Send your accommodation a quick WhatsApp when you’re back online.- Recheck your eSIM’s data roaming is on; confirm you’re on an in‑country network, not a weak roaming partner.Pro tips: - Dual profiles: If your eSIM allows, keep a secondary profile for a different network in the same country—helpful in border towns.- Cash buffer: Some border terminals don’t accept cards; download a currency converter for offline use.Offline survival kit (5‑minute setup)Maps: Download regions for Cusco, Sacred Valley, Puno, La Paz, Uyuni, San Pedro, Salta/Jujuy or Mendoza, and Buenos Aires.Translations: Download Spanish for offline use; add phrasebook favourites (bus tickets, directions, dietary needs).Documents: Save PDFs of passports, tickets, hotel addresses; star them for quick access.Rides: Screenshots of pickup points; pin bus terminals and hotel doors.Entertainment: Podcasts and playlists for long bus legs, set to download on Wi‑Fi only.Altitude and your tech: what changesCoverage gaps lengthen: Fewer towers at high altitude; valleys can block signal. Assume offline on remote excursions.Batteries drain faster in cold: Keep your phone warm and carry a power bank (10,000–20,000 mAh).Hotel Wi‑Fi may be congested: Schedule big uploads (photo backups, app updates) for big-city stays like Santiago or Buenos Aires.GPS still works offline: Your blue dot shows on offline maps without data—preload everything.Data budgeting for 3 weeksTypical traveller usage across this route: - Messaging/Maps/Bookings: 0.2–0.5 GB/day- Social and photo sharing: 0.3–0.7 GB/day- Occasional video calls/streaming: 0.5–1.0 GB/dayFor a mixed-use trip, plan 15–25 GB for 3 weeks. Heavy creators should double it and upload over hotel Wi‑Fi when possible. If you work remotely, consider a higher‑capacity plan and a backup eSIM; see our guidance on For Business.Practical route with transport and connectivity cuesDays 1–4 Cusco base: Strong city signal; day trips may be spotty—go offline-ready.Days 5–6 Machu Picchu: Expect no service at the ruins; sync tickets ahead.Days 7–8 Puno to La Paz via Copacabana: Border signal drop; re‑register networks after crossing.Days 9–11 Uyuni tour to San Pedro: Treat as offline; charge nightly; carry spare cables.Days 12–14 San Pedro: Stable in town; tours offline; top up data before Paso Jama.Days 15–17 Salta/Jujuy or Mendoza: Good urban 4G; rural patches are offline.Days 18–21 Buenos Aires: Strongest connectivity of the trip; clear your uploads and map downloads for the flight home.Partnering and stopover extrasHospitality and tour operators in the Andes: help your guests stay connected—explore co‑branded solutions via our Partner Hub.Transatlantic flyers: test your eSIM setup on a layover with an Esim United States or Esim Western Europe before hitting high-altitude blackspots.FAQs1) Do I need a local SIM in each country?No. A multi‑country eSIM covering Peru, Bolivia, Chile and Argentina is simpler and works well for a 3‑week pace. Consider a local SIM only if you’ll spend longer in one country and want the absolute best regional coverage.2) Will my WhatsApp number change with an eSIM?No. WhatsApp is tied to your registered number, not your data line. Keep your home SIM active for voice/SMS (roaming off if you wish), and use the eSIM for data—WhatsApp continues as normal.3) Can I hotspot to my laptop or camera?Yes. Enable tethering on your eSIM. Mind your data: cloud backups and OS updates can burn gigabytes—set them to Wi‑Fi only or schedule in big cities.4) What if there’s no signal on the Uyuni/Atacama legs?That’s expected. GPS still works offline. Pre-download maps and translations, carry a power bank, and sync plans with your tour operator before departure.5) Will I get roaming charges at borders?If you’re using a multi‑country eSIM with coverage in both countries, you won’t incur extra roaming fees from your home carrier. Keep roaming off on your home SIM to avoid accidental use.6) I’m connecting via Europe or the US—worth getting a layover eSIM?Yes. It’s an easy way to test your setup and stay reachable. Try Esim North America or country options like Esim Spain, Esim France, or Esim Italy for common hubs.Next step: Browse South America coverage options and build your plan on Destinations.

Samsung Galaxy Watch eSIM Setup: LTE Models & Troubleshooting

Samsung Galaxy Watch eSIM Setup: LTE Models & Troubleshooting

Travelling with a Galaxy Watch that can call, text and stream without your phone is incredibly convenient—if you set up eSIM correctly. This guide explains exactly how to complete your Galaxy Watch eSIM setup, the differences between Wear OS and Tizen models, and how Bluetooth/LTE handoff works when you’re on the move. We’ll also cover emergency SOS configuration and the most common errors travellers hit, with practical fixes. One important note up front: mobile operators often treat smartwatch eSIMs differently from phone eSIMs. Many “companion” watch plans mirror your phone number but don’t roam internationally. For most travellers, the best approach is to run a local or regional eSIM on your phone and let the watch piggyback via Bluetooth or Wi‑Fi. When LTE on the watch is available, you’ll know exactly how to activate it—and how to keep your battery, signal and safety features working abroad.Know your Galaxy Watch: LTE vs Bluetooth, Wear OS vs TizenNot every Samsung watch supports eSIM. Check your exact model and finish.LTE‑capable Wear OS models (One UI Watch): Galaxy Watch4 LTE/Classic LTE, Watch5 LTE/Pro LTE, Watch6 LTE/Classic LTE, Watch7 LTE, and Galaxy Watch Ultra (LTE). Availability varies by region.LTE‑capable Tizen models: Galaxy Watch (2018) LTE, Watch Active2 LTE, Galaxy Watch3 LTE.Bluetooth‑only variants do not support eSIM or cellular; they rely on your phone’s connection.Key differences that affect setup and travel: - OS and app support: - Wear OS Galaxy Watches require an Android phone (Android 8.0+, Google Mobile Services). iPhone is not supported. - Older Tizen models can pair to iPhone with limited features; eSIM activation typically still requires the Galaxy Wearable app on Android. - Plan type: - Many carriers sell a “Number Share/One Number” plan for the watch. It mirrors your phone’s number and uses your phone’s account. - Standalone smartwatch plans exist but are region‑ and carrier‑specific. - Roaming: - Companion watch plans frequently do not roam. Expect LTE to drop when you leave your home country. Your watch will fall back to Bluetooth or Wi‑Fi.What you need before you startTick these off before attempting eSIM activation:An LTE variant of your Galaxy Watch (check the box or back of the watch for “LTE”).Unlocked watch (or locked to the carrier you plan to use).An Android phone with the Galaxy Wearable app installed and paired to the watch.A carrier plan that supports Galaxy Watch eSIM (Number Share or standalone). Some carriers require a Samsung phone on the same account.Stable Wi‑Fi or mobile data on your phone during activation.The carrier’s eSIM QR code or activation link (sometimes delivered via SMS to the phone).Adequate battery (50%+ recommended).Traveller tip: Most users should install a travel eSIM on their phone for data and calls, then let the watch connect via Bluetooth or Wi‑Fi. Explore local and regional options via Destinations, including Esim United States, Esim France, Esim Italy, Esim Spain, Esim Western Europe and Esim North America.Galaxy Watch eSIM setup (Wear OS: Watch4/5/6/7/Ultra)There are two reliable paths: using the Galaxy Wearable app on your phone or using the watch settings. The app route is more common and preferred.Option A: Add your carrier plan via Galaxy Wearable (recommended)1) On your phone, open Galaxy Wearable > Watch settings. 2) Tap Mobile plans (sometimes listed as Mobile networks or Watch mobile plans). 3) Tap Add mobile plan or Set up mobile plan. 4) Follow your carrier’s flow: - If your carrier supports Number Share, you’ll authenticate and link the watch to your phone line. - If you have a QR code, choose Scan QR code and point your phone camera at it. - If manual entry is offered, you may enter an SM‑DP+ address and activation code from your carrier. 5) Wait for activation to complete (usually 1–10 minutes). Keep Bluetooth on and Wi‑Fi/data connected. 6) On the watch, go to Settings > Connections > Mobile networks and ensure it shows Connected or On.Pro tips: - If you’re prompted to “Finish setup on your carrier website,” complete that step without closing the Wearable app. - If the plan says “Pending activation,” reboot both phone and watch, then recheck Mobile networks.Option B: Add a plan on the watch1) On the watch, open Settings > Connections > Mobile networks (or Mobile plans). 2) Tap Add mobile plan. 3) Choose your carrier or Scan QR code. 4) Complete the on‑screen steps, then toggle Mobile networks to On.Battery saver hint: After activation, set Settings > Connections > Mobile networks > Auto, so the watch prefers Bluetooth/Wi‑Fi and uses LTE only when needed.Galaxy Watch eSIM setup (Tizen: Watch/Active2/Watch3 LTE)On Tizen models, most activations run through Galaxy Wearable on Android.1) On your phone, open Galaxy Wearable > Mobile plans. 2) Tap Add plan. Your carrier app or web page may open. 3) Sign in to your carrier account, choose “Add a smartwatch” or “Number Share,” and follow the prompts. 4) If given a QR code, scan it when prompted. 5) Wait for provisioning to complete. 6) On the watch, go to Settings > Connections > Mobile networks and switch to On or Auto.Notes: - Some carriers require temporary use of a Samsung Galaxy phone to initiate watch provisioning, even if your daily phone is another Android brand. - On older firmware, the Mobile plans menu may appear only after your carrier whitelists your watch’s eID/IMEI. Contact support if it’s missing.Bluetooth/LTE/Wi‑Fi handoff: how it works on the moveUnderstanding handoff prevents surprises—and saves battery.In range of your phone (Bluetooth on):Calls, texts and data route through your phone. The watch uses minimal power.Out of range of your phone:If Mobile networks is On and you have coverage, the watch uses LTE for calls, texts and standalone data.If no LTE but known Wi‑Fi is available, the watch attempts Wi‑Fi calling/data (carrier dependent).Call continuity:With Number Share, calls to your phone number can ring both devices or anchor to one device based on carrier settings.Battery impact:LTE uses more power. Set Mobile networks to Auto, and enable Wi‑Fi when travelling to reduce drain.Traveller‑first advice: When roaming where your watch plan doesn’t work, install a local or regional eSIM on your phone (for example, Esim Western Europe or Esim North America). Keep Bluetooth on so your watch stays smart without burning through battery on a futile LTE search.Set up SOS and safety features (before you travel)Emergency features can still help when your watch is off‑grid or your LTE plan won’t roam.Wear OS (Watch4/5/6/7/Ultra)1) On the watch: Settings > Safety & emergency (or Advanced features > SOS). 2) Add emergency contacts. Enable Share location and Send SOS messages if available. 3) Set the Side/Home key action (e.g., press 5 times to call emergency services). 4) In the Galaxy Wearable app, review Emergency SOS settings, fall detection (if supported), and contact preferences.Tizen (Watch/Active2/Watch3)1) On the watch: Settings > Advanced > SOS. 2) Add emergency contacts and enable SOS with Home key presses. 3) In Galaxy Wearable, confirm SOS numbers and message options.Important travel notes: - Local emergency numbers vary by country. Some devices auto‑dial the local code; others don’t. Add a trusted contact who can coordinate help and share your live location by SMS. - If your watch’s LTE won’t roam, SOS calls will rely on your phone via Bluetooth or on Wi‑Fi calling. Test at home before departure.Troubleshooting common Galaxy Watch eSIM issuesUse these quick diagnostics in order.“Mobile plans/Mobile networks” menu missingEnsure you have an LTE model, not Bluetooth‑only.Update watch and Galaxy Wearable to the latest version.Pair to an Android phone (Wear OS models require Android; Tizen activation is unreliable from iOS).Some carriers only populate the menu after they add your watch’s eID/IMEI to their system. Contact support.QR code invalid or won’t scanCheck lighting and screen brightness; clean the watch/phone camera lens.Confirm the QR code is intended for a smartwatch plan (not a phone eSIM).Try manual SM‑DP+ and activation code entry if your carrier provides them.Request a fresh QR code—many codes expire after a short window.Activation stuck on “Pending” or fails at provisioningReboot phone and watch. Retry from Galaxy Wearable > Mobile plans.Ensure the watch has a strong Wi‑Fi connection during provisioning.If you’re using e.g. Number Share, make sure the phone line is active and on the same carrier account.Some carriers require a Samsung phone for initial activation—borrow one if necessary, then switch back.No signal or “Not registered on network”Confirm the plan is active in your carrier account and specifically provisioned as a wearable line.In Settings > Connections > Mobile networks, toggle Off/On, then set Network mode to Auto.Move to an area with known coverage (rooftop/near a window). Watches have smaller antennas than phones.If travelling, verify whether your watch plan supports roaming (most do not). Use your phone’s local eSIM and Bluetooth instead.Roaming doesn’t work abroadThis is expected for many watch plans. The fix is to:Turn Mobile networks Off on the watch to save battery.Use a local/regional eSIM on your phone for connectivity—see Destinations for options like Esim France, Esim Italy and Esim Spain.Keep Bluetooth and Wi‑Fi on for seamless handoff.Battery drains fast on LTESet Mobile networks to Auto rather than Always on.Enable Wi‑Fi and add trusted networks at your hotel or office.Disable continuous location services you don’t need (but keep SOS location on).For workouts, download playlists offline instead of streaming over LTE.Calls/SMS not syncing with your phone numberConfirm Number Share/One Number is active on your carrier account.In Galaxy Wearable > Notifications, allow the apps you want on your watch.If using dual‑SIM on your phone, ensure the “default for calls/messages” line matches your Number Share setup.Travel‑ready connectivity picksFor most trips, keep the watch on Bluetooth/Wi‑Fi and equip your phone with a destination eSIM for affordable data and calls. Start with Destinations to find country and regional packs, including: - Esim United States - Esim Western Europe - Esim North America - Esim France, Esim Italy, Esim SpainBusiness travellers can centralise spend and manage multiple lines via For Business. If you’re a distributor, agency or VAR, explore collaboration options in the Partner Hub.FAQ1) Can I use my Galaxy Watch LTE without my phone? - Yes. With a compatible eSIM plan and Mobile networks set to On, the watch can place calls, send texts and use data on its own. Battery life will be shorter than in Bluetooth mode.2) Will my Galaxy Watch eSIM roam internationally? - Usually not. Companion watch plans commonly block international roaming. Expect LTE to work at home, but not abroad. Use your phone with a local eSIM and let the watch connect over Bluetooth or Wi‑Fi.3) Can I install a normal phone eSIM on the watch? - No. The watch requires a plan provisioned as a smartwatch line. Standard phone eSIM profiles typically won’t activate on a watch.4) Do I need a Samsung phone to activate the watch eSIM? - Wear OS models require an Android phone with Google services. Some carriers do require a Samsung phone for initial provisioning; after activation, you can use other Android brands.5) How do I know if my watch is LTE? - Check the model name (often includes “LTE”) on the box, the back of the watch, or in Settings > About watch. Also look for the Mobile networks/Mobile plans menu in settings.6) Does SOS work when I’m abroad? - It depends on connectivity. If your watch’s LTE doesn’t roam, SOS may still work via Bluetooth to your phone or via Wi‑Fi calling. Add emergency contacts, enable location sharing, and test before you travel.Next step: Choose your travel eSIM in minutes. Browse Destinations and get connected before you fly.

2FA & Banking OTP While Traveling: Safer Options That Work

2FA & Banking OTP While Traveling: Safer Options That Work

Planning travel is exciting until a login prompt stops you buying a ticket or moving money. Many banks still send one-time passcodes (OTP) by SMS or voice call, which can fail abroad or be risky. The good news: with a little prep you can make bank OTP travel 2FA reliable and safer, even when you’re swapping SIMs and hopping between hotel Wi‑Fi and airport lounges.This guide explains what breaks, what to fix, and exactly how to set up app-based authentication, backup codes, and dual-SIM so your home number stays reachable without blowing your bill. We’ll cover SIM-aware threats (like SIM-swap), Wi‑Fi Calling (VoWiFi) caveats, and recovery plans if your phone is lost. Whether you’re heading to Paris, New York, or across Western Europe, the goal is simple: keep access to money and critical accounts, with less stress and fewer surprises. If you manage teams on the move, we’ve added business-friendly steps too.Why SMS OTP fails on the roadSMS codes are convenient at home but fragile in transit. Common failure points:SIM reliance: SMS OTP depends on your mobile number and the SIM being reachable. If your home SIM isn’t active, your bank’s code won’t arrive.Roaming gaps: You may be out of coverage, on the wrong network, or roaming disabled to avoid charges. No signal = no SMS.Wi‑Fi Calling limits: Some carriers support SMS over Wi‑Fi; others don’t or restrict it abroad. Even when it works, push notifications can be delayed.SIM-swap risk: Attackers can social‑engineer your number onto a new SIM. If SMS is your only factor, your accounts are exposed.Bank risk controls: Unfamiliar IPs, countries, or devices can trigger extra checks; if you can’t receive OTP, you’re stuck.Core principle: treat SMS OTP as a backup, not your primary second factor. Use an app-based authenticator (or a bank’s own code generator) whenever possible.How to prepare your 2FA for travel (step-by-step)Do this at least a week before departure.1) Audit critical accounts - Banks and cards - Primary email (it’s your password reset hub) - Cloud storage/password manager - Work accounts if you’ll access them abroad2) Switch to app-based codes or bank app approvals - Turn on Time‑based One‑Time Passwords (TOTP) in each service’s security settings. - Good authenticator options: 1Password, Bitwarden, Microsoft Authenticator, Google Authenticator, Authy. Password managers with built‑in TOTP reduce app juggling. - For banks, prefer in‑app approvals or built‑in “code generator” features over SMS when offered.3) Generate and store backup codes - Most services issue single‑use backup codes. Save them offline in a secure note, printed copy in your passport wallet, or your password manager. - Label them clearly by service and date.4) Add a second method/device - If supported, register a hardware security key (FIDO2) and keep it separate from your phone. - Add a second authenticator on a spare phone or tablet you’ll carry. If your primary device dies, you still have access.5) Harden recovery options - Recovery email: ensure you can sign in while abroad (no SMS lockout). - Recovery phone: use a number you’ll control and can receive on (see dual‑SIM tips below). - Set a strong voicemail PIN and disable call forwarding to reduce voice‑OTP hijack risk.6) Test before you fly - Put your phone in airplane mode, enable Wi‑Fi, and log in using app‑based codes and bank app approvals. - Temporarily remove the SIM to simulate “no network” and confirm your login still works.Pro tips: - Prefer authenticator apps that back up or securely sync 2FA entries across devices (with strong encryption and a recovery key). - If your bank supports “offline” code generation in its app, learn where it is and how to use it without data. - Turn on transaction alerts in your banking app; they’ll work over data even if SMS is unreliable.Keep your home number reachable without blowing your billThe ideal travel setup is dual‑SIM: use a local eSIM for data while keeping your home SIM active for occasional inbound SMS.Install a travel eSIM for your destination or region:For the US, choose Esim United States.For Canada/US/Mexico, see Esim North America.Touring multiple countries? Pick Esim Western Europe or country packs like Esim France, Esim Italy, and Esim Spain.Put your home SIM in the second slot (or keep it as the physical SIM).Settings checklist (iPhone and Android have equivalent options): - Set the eSIM as the default for mobile data. - Disable data roaming on your home SIM to avoid bill shock. - Keep voice/SMS enabled on the home SIM so OTP texts can still arrive. - Choose the eSIM for iMessage/FaceTime/WhatsApp data, but keep the home number active in iMessage if you rely on it for contacts. - Label the lines clearly (e.g., “Home” and “Travel”) to avoid sending calls/texts from the wrong number.Cost control: - Receiving SMS while roaming is often free or low‑cost; check your carrier. - Block outbound calls/SMS on the home SIM if pricing is punitive. - If your carrier offers a cheap daily roaming pass that includes inbound reliability, consider enabling it for “OTP days” only.Wi‑Fi Calling (VoWiFi) caveatsWi‑Fi Calling can deliver calls and sometimes SMS to your home number over Wi‑Fi, but there are gotchas: - Not all carriers support SMS over Wi‑Fi, and some restrict it outside your home country. - Corporate devices may have Wi‑Fi Calling disabled by policy. - Access to premium short codes (used by some banks) may be inconsistent on Wi‑Fi Calling abroad. - Hotel and guest Wi‑Fi can block SIP/IMS traffic; a mobile hotspot or VPN can help, but don’t rely on it.What to do: - Test Wi‑Fi Calling with your bank’s OTP SMS at home (router off/on) and again on a different Wi‑Fi network before travel. - If it fails, plan to keep the home SIM reachable on a roaming signal or switch your bank to app‑based codes.Bank‑specific preparationDo these with each bank/card issuer:Enable app‑based 2FA or in‑app approvals. If only SMS/voice are available, keep the home SIM reachable and confirm costs.Set up offline code generation if your bank app supports it.Add a travel‑friendly contact method (secure messages in the app). Save international support numbers.Turn on spend notifications in the app (push over data).If your bank uses location for fraud checks, allow the app limited location access while using it; this can reduce declines abroad.Add or confirm a phone banking PIN/password for support calls.Optional but useful: - Put a travel note on your cards if your bank still requests it. - Ask if the bank supports hardware keys or passkeys for web logins.SIM-aware risks and how to reduce themSIM swap/port‑out fraud: Set a port‑out PIN with your carrier and lock your account. Avoid posting travel dates publicly.Physical SIM loss: If your home SIM is removable, treat it like a payment card. Use a dual‑SIM phone so you don’t need to carry loose SIM trays.QR eSIM theft: Keep your travel eSIM QR private; it’s like a password.Public Wi‑Fi risks: Prefer your eSIM’s mobile data for banking. If you must use Wi‑Fi, use your own hotspot or a trusted network.Lost phone or no signal: your “break‑glass” planBackup codes: Carry printed copies for your bank and email in a separate location from your phone.Second device: Bring a small spare phone or tablet with your authenticator and bank app installed and tested.Hardware key: Keep one in your bag, one at home with a trusted person.Recovery contacts: Store support numbers and your account identifiers offline.Password manager: Ensure you can access it on your spare device with offline vault or known credentials.Carrier access: Know how to suspend your line or enable eSIM transfer quickly if the device is lost.If locked out: - Use the bank’s secure messaging in the app on your second device, or call using international numbers over data/Wi‑Fi. - As a last resort, use backup codes to sign in and rotate factors immediately.Common travel scenarios and fixesHotel Wi‑Fi won’t deliver OTP SMS on Wi‑Fi CallingSwitch to mobile data on your travel eSIM. If SMS still doesn’t arrive, move where your home SIM has a roaming signal briefly.Airport SIM swap text looks suspiciousIgnore unexpected “SIM change” or “reset your password” texts. Verify with your carrier via the official app, not links in the SMS.New phone mid‑tripBefore migrating, export/transfer your authenticator entries and verify bank app access. Don’t wipe the old device until you’ve tested logins.Work phone onlyCoordinate with IT to ensure your MDM policy allows Wi‑Fi Calling, authenticator apps, and banking apps while abroad.For teams and frequent travellersIf you manage travellers or devices: - Standardise on app‑based 2FA and a supported authenticator across the org. - Issue dual‑SIM devices and approved travel eSIMs. See regional options via Destinations and bundles like Esim Western Europe or Esim North America. - Provide a “break‑glass” runbook and seed backup codes securely. - Align policies for Wi‑Fi Calling, roaming, and password manager usage. - For scalable provisioning and billing, explore Simology For Business and partner options through our Partner Hub.Quick regional picks for data while keeping your number aliveCity breaks or conferences in the States: Esim United StatesCross‑border North America: Esim North AmericaMulti‑country Europe itineraries: Esim Western EuropeCountry‑specific options: Esim France, Esim Italy, Esim SpainFAQQ: Is SMS OTP safe enough for travel? A: It’s better than nothing but fragile and vulnerable to SIM‑swap and roaming issues. Make app‑based 2FA your default and keep SMS as a backup.Q: Will Wi‑Fi Calling deliver my bank’s OTP abroad? A: Sometimes. It depends on your carrier and network. Test before you go, and don’t rely on it as your only method.Q: What’s the best authenticator app for travellers? A: Use one that supports secure backup/sync and multiple devices (e.g., 1Password, Bitwarden, Microsoft Authenticator). Avoid single‑device setups that strand you if your phone dies.Q: Can I use a VOIP number (like Google Voice) for bank OTP? A: Many banks block VOIP for OTP. Keep your mobile carrier number active for recovery, but lean on app‑based codes for login.Q: How do I avoid roaming charges but still get OTP SMS? A: Use a dual‑SIM setup. Put a travel eSIM on data and disable data roaming on your home SIM while keeping voice/SMS enabled. Receiving SMS is often free or low‑cost—check your carrier.Q: What if my bank only offers SMS or voice OTP? A: Keep your home SIM reachable (roaming or Wi‑Fi Calling) and add strong recovery options. Ask the bank about in‑app approvals or a code generator; some features aren’t obvious until you ask.Next step: Pick your travel eSIM so you can use app approvals over reliable data while keeping your home number available for backup. Start with Destinations to choose the right plan.