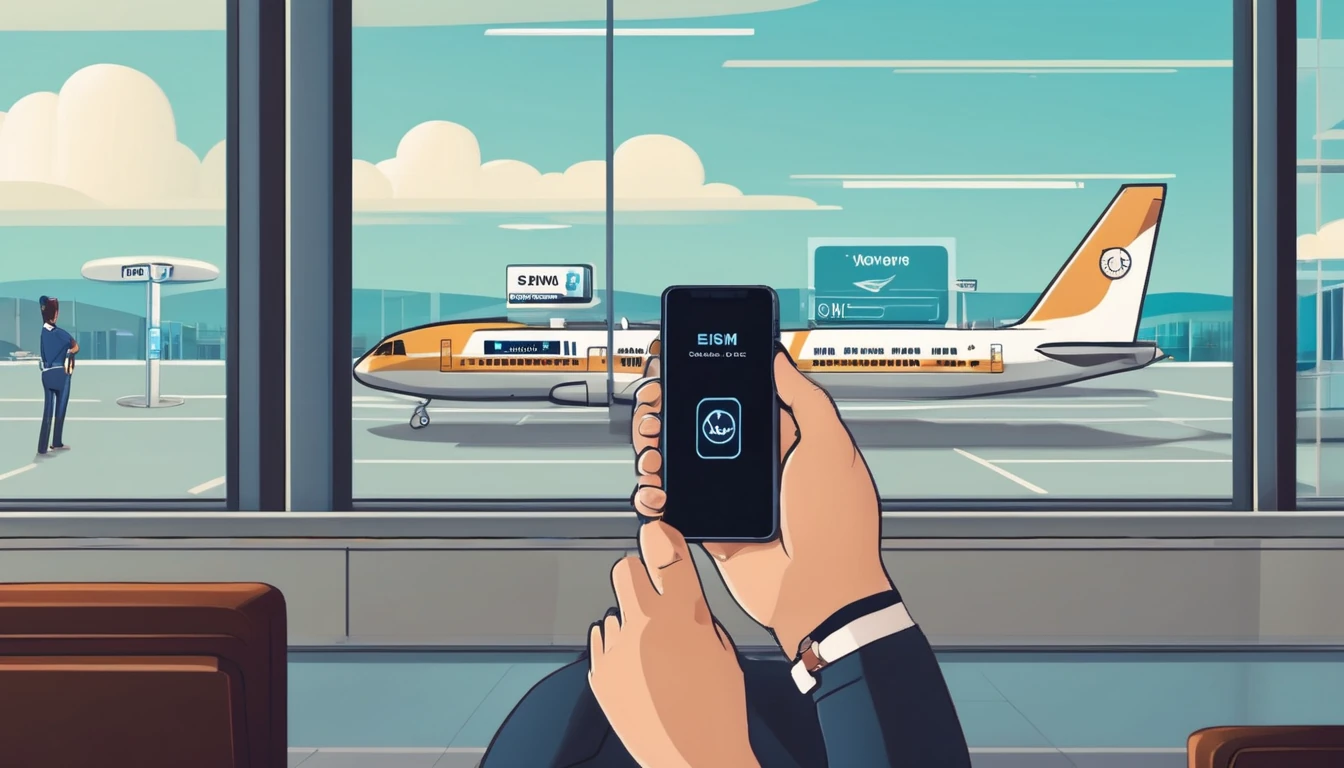
2FA & Banking OTP While Traveling: Safer Options That Work

Blog

2FA & Banking OTP While Traveling: Saf...

2FA & Banking OTP While Traveling: Safer Options That Work

30 Oct 2025

2FA & Banking OTP While Traveling: Safer Options That Work

Planning travel is exciting until a login prompt stops you buying a ticket or moving money. Many banks still send one-time passcodes (OTP) by SMS or voice call, which can fail abroad or be risky. The good news: with a little prep you can make bank OTP travel 2FA reliable and safer, even when you’re swapping SIMs and hopping between hotel Wi‑Fi and airport lounges.

This guide explains what breaks, what to fix, and exactly how to set up app-based authentication, backup codes, and dual-SIM so your home number stays reachable without blowing your bill. We’ll cover SIM-aware threats (like SIM-swap), Wi‑Fi Calling (VoWiFi) caveats, and recovery plans if your phone is lost. Whether you’re heading to Paris, New York, or across Western Europe, the goal is simple: keep access to money and critical accounts, with less stress and fewer surprises. If you manage teams on the move, we’ve added business-friendly steps too.

Why SMS OTP fails on the road

SMS codes are convenient at home but fragile in transit. Common failure points:

  • SIM reliance: SMS OTP depends on your mobile number and the SIM being reachable. If your home SIM isn’t active, your bank’s code won’t arrive.
  • Roaming gaps: You may be out of coverage, on the wrong network, or roaming disabled to avoid charges. No signal = no SMS.
  • Wi‑Fi Calling limits: Some carriers support SMS over Wi‑Fi; others don’t or restrict it abroad. Even when it works, push notifications can be delayed.
  • SIM-swap risk: Attackers can social‑engineer your number onto a new SIM. If SMS is your only factor, your accounts are exposed.
  • Bank risk controls: Unfamiliar IPs, countries, or devices can trigger extra checks; if you can’t receive OTP, you’re stuck.

Core principle: treat SMS OTP as a backup, not your primary second factor. Use an app-based authenticator (or a bank’s own code generator) whenever possible.

How to prepare your 2FA for travel (step-by-step)

Do this at least a week before departure.

1) Audit critical accounts - Banks and cards - Primary email (it’s your password reset hub) - Cloud storage/password manager - Work accounts if you’ll access them abroad

2) Switch to app-based codes or bank app approvals - Turn on Time‑based One‑Time Passwords (TOTP) in each service’s security settings. - Good authenticator options: 1Password, Bitwarden, Microsoft Authenticator, Google Authenticator, Authy. Password managers with built‑in TOTP reduce app juggling. - For banks, prefer in‑app approvals or built‑in “code generator” features over SMS when offered.

3) Generate and store backup codes - Most services issue single‑use backup codes. Save them offline in a secure note, printed copy in your passport wallet, or your password manager. - Label them clearly by service and date.

4) Add a second method/device - If supported, register a hardware security key (FIDO2) and keep it separate from your phone. - Add a second authenticator on a spare phone or tablet you’ll carry. If your primary device dies, you still have access.

5) Harden recovery options - Recovery email: ensure you can sign in while abroad (no SMS lockout). - Recovery phone: use a number you’ll control and can receive on (see dual‑SIM tips below). - Set a strong voicemail PIN and disable call forwarding to reduce voice‑OTP hijack risk.

6) Test before you fly - Put your phone in airplane mode, enable Wi‑Fi, and log in using app‑based codes and bank app approvals. - Temporarily remove the SIM to simulate “no network” and confirm your login still works.

Pro tips: - Prefer authenticator apps that back up or securely sync 2FA entries across devices (with strong encryption and a recovery key). - If your bank supports “offline” code generation in its app, learn where it is and how to use it without data. - Turn on transaction alerts in your banking app; they’ll work over data even if SMS is unreliable.

Keep your home number reachable without blowing your bill

The ideal travel setup is dual‑SIM: use a local eSIM for data while keeping your home SIM active for occasional inbound SMS.

Settings checklist (iPhone and Android have equivalent options): - Set the eSIM as the default for mobile data. - Disable data roaming on your home SIM to avoid bill shock. - Keep voice/SMS enabled on the home SIM so OTP texts can still arrive. - Choose the eSIM for iMessage/FaceTime/WhatsApp data, but keep the home number active in iMessage if you rely on it for contacts. - Label the lines clearly (e.g., “Home” and “Travel”) to avoid sending calls/texts from the wrong number.

Cost control: - Receiving SMS while roaming is often free or low‑cost; check your carrier. - Block outbound calls/SMS on the home SIM if pricing is punitive. - If your carrier offers a cheap daily roaming pass that includes inbound reliability, consider enabling it for “OTP days” only.

Wi‑Fi Calling (VoWiFi) caveats

Wi‑Fi Calling can deliver calls and sometimes SMS to your home number over Wi‑Fi, but there are gotchas: - Not all carriers support SMS over Wi‑Fi, and some restrict it outside your home country. - Corporate devices may have Wi‑Fi Calling disabled by policy. - Access to premium short codes (used by some banks) may be inconsistent on Wi‑Fi Calling abroad. - Hotel and guest Wi‑Fi can block SIP/IMS traffic; a mobile hotspot or VPN can help, but don’t rely on it.

What to do: - Test Wi‑Fi Calling with your bank’s OTP SMS at home (router off/on) and again on a different Wi‑Fi network before travel. - If it fails, plan to keep the home SIM reachable on a roaming signal or switch your bank to app‑based codes.

Bank‑specific preparation

Do these with each bank/card issuer:

  • Enable app‑based 2FA or in‑app approvals. If only SMS/voice are available, keep the home SIM reachable and confirm costs.
  • Set up offline code generation if your bank app supports it.
  • Add a travel‑friendly contact method (secure messages in the app). Save international support numbers.
  • Turn on spend notifications in the app (push over data).
  • If your bank uses location for fraud checks, allow the app limited location access while using it; this can reduce declines abroad.
  • Add or confirm a phone banking PIN/password for support calls.

Optional but useful: - Put a travel note on your cards if your bank still requests it. - Ask if the bank supports hardware keys or passkeys for web logins.

SIM-aware risks and how to reduce them

  • SIM swap/port‑out fraud: Set a port‑out PIN with your carrier and lock your account. Avoid posting travel dates publicly.
  • Physical SIM loss: If your home SIM is removable, treat it like a payment card. Use a dual‑SIM phone so you don’t need to carry loose SIM trays.
  • QR eSIM theft: Keep your travel eSIM QR private; it’s like a password.
  • Public Wi‑Fi risks: Prefer your eSIM’s mobile data for banking. If you must use Wi‑Fi, use your own hotspot or a trusted network.

Lost phone or no signal: your “break‑glass” plan

  • Backup codes: Carry printed copies for your bank and email in a separate location from your phone.
  • Second device: Bring a small spare phone or tablet with your authenticator and bank app installed and tested.
  • Hardware key: Keep one in your bag, one at home with a trusted person.
  • Recovery contacts: Store support numbers and your account identifiers offline.
  • Password manager: Ensure you can access it on your spare device with offline vault or known credentials.
  • Carrier access: Know how to suspend your line or enable eSIM transfer quickly if the device is lost.

If locked out: - Use the bank’s secure messaging in the app on your second device, or call using international numbers over data/Wi‑Fi. - As a last resort, use backup codes to sign in and rotate factors immediately.

Common travel scenarios and fixes

  • Hotel Wi‑Fi won’t deliver OTP SMS on Wi‑Fi Calling
  • Switch to mobile data on your travel eSIM. If SMS still doesn’t arrive, move where your home SIM has a roaming signal briefly.
  • Airport SIM swap text looks suspicious
  • Ignore unexpected “SIM change” or “reset your password” texts. Verify with your carrier via the official app, not links in the SMS.
  • New phone mid‑trip
  • Before migrating, export/transfer your authenticator entries and verify bank app access. Don’t wipe the old device until you’ve tested logins.
  • Work phone only
  • Coordinate with IT to ensure your MDM policy allows Wi‑Fi Calling, authenticator apps, and banking apps while abroad.

For teams and frequent travellers

If you manage travellers or devices: - Standardise on app‑based 2FA and a supported authenticator across the org. - Issue dual‑SIM devices and approved travel eSIMs. See regional options via Destinations and bundles like Esim Western Europe or Esim North America. - Provide a “break‑glass” runbook and seed backup codes securely. - Align policies for Wi‑Fi Calling, roaming, and password manager usage. - For scalable provisioning and billing, explore Simology For Business and partner options through our Partner Hub.

Quick regional picks for data while keeping your number alive

FAQ

Q: Is SMS OTP safe enough for travel? A: It’s better than nothing but fragile and vulnerable to SIM‑swap and roaming issues. Make app‑based 2FA your default and keep SMS as a backup.

Q: Will Wi‑Fi Calling deliver my bank’s OTP abroad? A: Sometimes. It depends on your carrier and network. Test before you go, and don’t rely on it as your only method.

Q: What’s the best authenticator app for travellers? A: Use one that supports secure backup/sync and multiple devices (e.g., 1Password, Bitwarden, Microsoft Authenticator). Avoid single‑device setups that strand you if your phone dies.

Q: Can I use a VOIP number (like Google Voice) for bank OTP? A: Many banks block VOIP for OTP. Keep your mobile carrier number active for recovery, but lean on app‑based codes for login.

Q: How do I avoid roaming charges but still get OTP SMS? A: Use a dual‑SIM setup. Put a travel eSIM on data and disable data roaming on your home SIM while keeping voice/SMS enabled. Receiving SMS is often free or low‑cost—check your carrier.

Q: What if my bank only offers SMS or voice OTP? A: Keep your home SIM reachable (roaming or Wi‑Fi Calling) and add strong recovery options. Ask the bank about in‑app approvals or a code generator; some features aren’t obvious until you ask.

Next step: Pick your travel eSIM so you can use app approvals over reliable data while keeping your home number available for backup. Start with Destinations to choose the right plan.

Read more blogs

EU Long Stays: Fair‑Use for Nomads & Students (90/180‑Day Rule)

EU Long Stays: Fair‑Use for Nomads & Students (90/180‑Day Rule)

Planning a long stretch around Europe? Here’s the traveller‑first guide to EU fair use on long stays. Confusion often comes from mixing two different systems: immigration rules (the Schengen 90/180‑day stay limit) and telecom rules (EU roaming fair use). They are not the same. Immigration limits how long you can stay. Telecom fair use limits how long you can roam on an EU plan before surcharges kick in. If you’re a student with local residency, you’re treated differently to a roaming nomad bouncing between countries. And regional eSIMs add a third option that avoids most “home vs abroad” checks altogether. This guide cuts through the jargon with plain‑English explanations, examples you can copy, and practical checklists to keep your connectivity clean and cost‑predictable. If you just want a solution: country eSIMs are best when you settle in one place; regional EU eSIMs shine for multi‑country hops. Keep reading for the details and how to choose.The quick version: Fair‑use vs 90/18090/180 rule: Immigration. Most visa‑exempt visitors can stay in the Schengen Area up to 90 days in any 180‑day period. Nothing to do with mobile plans.EU roaming fair use: Telecom. EU/EEA operators let their customers “roam like at home” across the EU. To stop permanent roaming, they can apply fair‑use checks over a four‑month window and, if triggered, add regulated surcharges after warning you.Regional travel eSIMs: These are made for roaming. They don’t rely on EU “roam like at home” privileges, so the home‑vs‑abroad test usually doesn’t apply. Instead, your limit is the plan’s validity and data allowance.For country coverage quirks (e.g., Switzerland, UK post‑Brexit), see Destinations.What the EU fair‑use policy actually says (for travellers)EU “Roam Like at Home” (RLAH) protects EU/EEA subscribers using their home mobile plan around the bloc. It applies primarily if you hold an EU plan with an EU operator.The home‑presence and usage test (4‑month window)Your EU operator can watch usage over at least four months. If both are true, they may flag permanent roaming:1) You’ve been more time “abroad” than “at home,” and2) You used more data while roaming than you did at home.If they detect this, they must warn you and give at least 14 days to change your pattern (e.g., use the line domestically or reduce roaming). If nothing changes, they can add small, regulated surcharges on roaming usage. Your service isn’t cut off, but costs rise.Data caps on “unlimited” plans while roamingIf your domestic plan is unlimited or very cheap per GB, your operator can set a specific fair‑use roaming data allowance, calculated from your plan price and EU wholesale caps. The allowance and any out‑of‑bundle surcharge must be clearly communicated. Always read the roaming section of your tariff.Residency or “stable links”Operators can ask for proof of residency or stable links (study, work) when you buy or keep a domestic plan. This isn’t immigration control; it’s to ensure domestic plans aren’t used as permanent roaming products.Warnings and surchargesYou’ll receive a warning before any fair‑use surcharge applies.Surcharges are capped by EU rules and reviewed periodically.Paying a surcharge doesn’t fix the root cause. If your lifestyle is long‑term roaming, reconsider your setup (see below).Note: RLAH covers EU/EEA. It does not automatically include Switzerland or the UK. Check Destinations before you go.Residency vs roaming: which bucket are you in?Students with a local contract (resident or stable link)If you study in, say, France and sign up for a French mobile plan using local documentation, France becomes your “home” for that line. Your everyday use in France typically outweighs your time abroad, so your weekend trips to Spain or a fortnight in Italy sit comfortably within fair use. For deeper country fit, see Esim France, Esim Spain and Esim Italy.Digital nomads and long‑stay visitors (non‑resident)If you don’t have EU residency and you rely on a single EU domestic SIM while rarely returning to its home country, you’re likely to trip the fair‑use test after a few months. Two cleaner options:Use country eSIMs in each country you stay in for a month or two; orUse a regional travel eSIM designed for roaming around Europe.How regional eSIMs fit into long staysRegional travel eSIMs are built for cross‑border use. Instead of offering a domestic plan with RLAH, they provide roaming access in multiple countries from day one. This sidesteps the “domestic vs roaming” test entirely.Multi‑country coverage: A single profile that works across much of the EU. See Esim Western Europe for a practical one‑SIM solve when you’re rotating through EU hubs.Validity and data: Plans come with defined validity (e.g., 15–90 days) and data buckets. If you run out, top up or add another plan—no residency checks.Outside the EU: Heading to or from North America? Pair your Europe plan with Esim North America or set up before you fly with Esim United States.When you’re staying a whole term in one country, a local eSIM can be cheaper for heavy data. For multi‑country months, regional usually wins on simplicity.When to choose a country eSIM vs a regional EU eSIMChoose a country eSIM when:You’ll spend 30+ days in one country and use lots of data.You need local rates for domestic calls or long‑term top‑ups.Example pages: Esim France, Esim Italy, Esim Spain.Choose a regional EU eSIM when:You’ll cross borders frequently (e.g., 3–6 countries over 2–4 months).You prefer one number/data plan to manage across the trip.See: Esim Western Europe.Use dual‑SIM: keep your primary line for authentication calls/SMS, and set the travel eSIM as your data line.Step‑by‑step: Students (semester or year abroad)1) Get a local plan in your host country- Sign up with local ID/student proof. Your host country becomes “home” for that plan.2) Read the roaming section of your tariff- Note any roaming data caps and the four‑month fair‑use window.3) Use your host‑country SIM domestically most of the time- Weekend trips are fine. Long multi‑month trips outside your host country might trigger warnings.4) Add a regional eSIM for holiday stretches- If you’ll travel for several weeks, switch your data line to Esim Western Europe to avoid breaching your domestic plan’s fair‑use pattern.5) Keep alerts on- Don’t ignore SMS warnings. You usually get at least 14 days to adjust your usage before surcharges apply.6) Check non‑EU neighbours- UK/Switzerland often sit outside inclusive roaming. Verify on Destinations before you go.Step‑by‑step: Digital nomads (90–180 days across EU)1) Decide your pattern- Many short stays in multiple countries? Start with a regional plan. One or two long stops? Mix in country eSIMs for each stop.2) Set up before you move- Install the eSIM profile while you have reliable Wi‑Fi. Test with a small top‑up.3) Use dual‑SIM smartly- Keep your home SIM active for 2FA/texts. Set the travel eSIM as the default for data.4) Rotate plans, not penalties- Regional eSIMs like Esim Western Europe are priced for roaming and won’t run into EU “permanent roaming” tests. When staying put, switch to the local country plan (e.g., Esim Spain).5) Avoid long‑term reliance on a single EU domestic plan- If you don’t live there, the four‑month fair‑use pattern will likely catch up and add surcharges.6) Leaving or arriving via the US/Canada?- Bridge the gap with Esim North America or sort stateside coverage with Esim United States.Worked examplesStudent in France, 9 months, frequent tripsYou take a French plan as your main line. You spend most days in France, with occasional weekends in Spain/Italy. You remain well within fair use. For a four‑week summer rail trip, you add Esim Western Europe for data and keep the French SIM for calls/SMS.Nomad, 5 months, 5 countriesMonth in Portugal, then Spain, France, Belgium, Netherlands. You use a regional plan for months 1–3. For months 4–5, because you’re stationary and need more data, you add Esim Spain and Esim France during those longer stays. No EU domestic fair‑use checks apply to your regional eSIM; the country eSIMs are priced for local use when you’re settled.US visitor, 2 months in Italy with side tripsYou keep your US number active for banking but avoid pricey long‑term roaming on your domestic US plan. You install Esim Italy for the base month and add a short regional top‑up for a two‑week loop through neighbouring countries.Pro tips to stay compliant and connectedTrack days and data: set a calendar reminder every time you cross a border and use your phone’s data counter per SIM.Respect SMS warnings: they are your early‑warning system before surcharges.Prefer Wi‑Fi calling and messaging apps for cross‑border calls.Use hotspot sparingly if your plan restricts tethering.Check country exceptions on Destinations before visiting microstates or non‑EU neighbours.Business travellers: corporate pools can smooth roaming costs—see For Business or partner with us via the Partner Hub.FAQQ1: Does the Schengen 90/180‑day rule limit my mobile usage?A: No. 90/180 is immigration. EU telecom fair use is separate. You could be within your visa limit yet still trigger a roaming fair‑use surcharge—or vice versa.Q2: How long can I roam on an EU domestic plan before fair‑use kicks in?A: Operators check at least a four‑month window. If, in that period, you spend more time and use more data abroad than at home, they can warn you and later add regulated surcharges.Q3: I have an “unlimited” EU plan. Is roaming unlimited too?A: Not necessarily. Operators can set a specific fair‑use roaming data cap for unlimited/low‑cost plans and must tell you the allowance and any surcharge once you hit it.Q4: Do regional travel eSIMs have fair‑use limits?A: They’re built for roaming, so the EU “home vs abroad” test doesn’t apply. You’re bound by the plan’s validity and data bucket, plus any reasonable‑use terms (e.g., hotspot limits). For multi‑country trips, see Esim Western Europe.Q5: If I buy a French SIM, can I spend the summer in Italy on it?A: Yes, but extended, heavier use outside France could trigger the four‑month fair‑use test. For a long Italy stay, switch to Esim Italy or add a regional eSIM for the travel leg.Q6: I’m a US traveller. Should I rely on my US plan’s roaming?A: For short trips, maybe. For long stays, many US plans throttle or cap roaming after a few weeks. It’s usually better value to keep your US number for SMS and run EU data on a regional or country eSIM. Start here: Esim United States and Esim Western Europe.Next stepPlan your route, pick your coverage: explore country and regional options on Esim Western Europe, then check country specifics via Destinations.

AirDrop & Nearby Share Safety: Prevent Drive‑By Transfers

AirDrop & Nearby Share Safety: Prevent Drive‑By Transfers

Stuck in a crowded airport, train carriage or festival queue with Bluetooth on? That’s exactly when “drive‑by” file shares happen: strangers pushing images, contact cards or links to any nearby device that’s accepting transfers. This guide gives you practical, traveller‑first settings to block nuisance and risky shares on iPhone, iPad, Mac, Android (Quick Share/Nearby Share), Windows and Chromebooks. You’ll learn how to limit discoverability, require approval, use school/work modes, and practise sensible Bluetooth hygiene in crowds. Keep your device quiet, your name private, and your day disruption‑free.Whether you’re city‑hopping across Esim Western Europe, heading to the US on Esim North America or planning a single‑country stay with Esim United States, Esim France, Esim Italy or Esim Spain, set these protections before you reach the crowd. It takes under two minutes and prevents nasty surprises, from obscene images to phishing links disguised as “helpful” travel info.What’s the risk with “drive‑by” sharing?Nuisance or harassment: Unsolicited photos or videos—often explicit—pushed to anyone discoverable.Social engineering: Link or contact cards that mimic transport alerts or venue info.Privacy leakage: Your full name and device name can appear to everyone nearby.Corporate exposure: Travellers on work devices may breach policy if they accept unknown files.Distraction risk: Prompts popping up as you navigate boarding gates or ride‑share pickups.The fix isn’t to switch everything off forever. It’s to keep your device non‑discoverable by default, require approvals, and temporarily enable “Everyone” only when you actively share—with a strict timeout.Core principles for airdrop safety travelStay non‑discoverable by default: “Receiving Off” (Apple) or “No one/Hidden” (Android/Windows/ChromeOS).Use Contacts Only or Your devices when you must be visible; avoid “Everyone” unless absolutely necessary.Require approvals for all shares except your own devices.Keep your device identity generic (name and profile photo).Practise Bluetooth/Wi‑Fi hygiene in crowds; disable passive scanning where possible.For kids and corporate travellers, use system restrictions or management profiles.How to lock down AirDrop on iPhone and iPad (iOS 16+)AirDrop is safe when tightly scoped. Set it once, and use the “Everyone for 10 Minutes” option only when you’re actively sharing.Step‑by‑step: Set AirDrop to Contacts Only or Receiving OffOpen Control Centre (swipe down from the top‑right).Press and hold the network tile (with Wi‑Fi/Bluetooth).Tap AirDrop.Choose: - Receiving Off (most private), or - Contacts Only (balanced default). - Only choose Everyone for 10 Minutes when sending to a non‑contact in front of you.Pro tip: After any “Everyone for 10 Minutes” session, AirDrop auto‑reverts. Still, check it reset before entering a crowd.Disable “Bringing Devices Together” (NameDrop)This proximity feature makes sharing easier—but can invite bumps in crowded queues.Go to Settings > General > AirDrop.Toggle off Bringing Devices Together.Make your device name genericYour name is often visible when others look for devices.Settings > General > About > Name.Use something nondescript, e.g., “iPhone‑12” instead of your full name.Restrict AirDrop for kids or loaner devicesSettings > Screen Time.Content & Privacy Restrictions > Allowed Apps > toggle off AirDrop.This blocks AirDrop system‑wide until you re‑enable it. Great for school trips.How to harden AirDrop on Mac (macOS)When you travel with a Mac, keep it non‑discoverable unless actively sharing.Open Finder > AirDrop (left sidebar).At the bottom, set “Allow me to be discovered by” to: - No One (most private), or - Contacts Only (balanced).Disable Bluetooth from the menu bar if you don’t need it.Pro tip: Shares to yourself (same Apple ID) auto‑accept—safe and silent. Avoid “Everyone” in public places.Android: Secure Nearby Share/Quick ShareGoogle and Samsung unified sharing under “Quick Share” (formerly “Nearby Share”). Settings vary slightly by device, but the principles are the same.Step‑by‑step: Limit visibility and approvalsOn most Android devices (Pixel/OnePlus and many others): 1. Settings > Google > Devices & sharing > Quick Share. 2. Set Device visibility to: - No one (Hidden) by default, or - Contacts (safer than Everyone), or - Your devices (for seamless self‑sharing). 3. Ensure “Allow your devices to share without approval” is enabled only for your own devices. Require approval from everyone else.On Samsung: 1. Settings > Connected devices > Quick Share (or directly in Quick Share app). 2. Who can share with you: Contacts only or No one. 3. Turn off “Show my phone to others” unless you’re actively sharing.Quick toggle: - Pull down Quick Settings > long‑press Quick Share > adjust visibility. - If you must use “Everyone”, set it and immediately long‑press again to confirm it will time out (typically 10 minutes).Make your device identity boringSettings > About phone > Device name: Use “Pixel‑7” or similar.Google Account profile picture/name can appear to contacts—choose neutral options while travelling, if you like.Work profile (Android Enterprise)If your phone has a Work profile, your IT admin can disable Quick Share in the work context. Keep personal sharing off in crowds, and use your corporate channel (email/Teams/Drive) for work files. Business travellers can learn more on For Business and share this with IT via our Partner Hub.Windows and Chromebooks: Nearby sharing/Quick Share basicsWindows 10/11: Nearby sharingSettings > System > Nearby sharing.Set to Off or My devices only.Choose your save location (e.g., Downloads) and avoid auto‑opening received files.Pro tip: Rename your PC to something generic (Settings > System > About > Rename this PC).ChromeOS: Quick ShareSettings > Connected devices > Quick Share.Device visibility: No one or Contacts only.Disable “Open received files automatically” if available.Bluetooth and Wi‑Fi hygiene in crowdsMost local sharing relies on Bluetooth and Wi‑Fi for discovery. Tidy these up before stepping into a crowd.Turn off Bluetooth if you don’t need headphones or a watch right then.If you must keep Bluetooth on, keep AirDrop/Quick Share non‑discoverable.On Android: Settings > Location > Location services > disable Wi‑Fi scanning and Bluetooth scanning to reduce passive discovery beacons.Avoid public Wi‑Fi at pinch points (stations, stadium gates). Use mobile data instead—an eSIM like Esim Western Europe or Esim North America keeps you connected without exposure to crowded hotspots.Pro tip: If you must join venue Wi‑Fi, use a separate email for sign‑ups and avoid installing “Wi‑Fi helper” apps.Quick checklists for busy travellers30‑second pre‑crowd check (iPhone/iPad/Mac)AirDrop: Contacts Only or Receiving Off.NameDrop/Bringing Devices Together: Off.Device name: Generic.Bluetooth: Off if not needed; otherwise keep AirDrop restricted.Mac: Finder > AirDrop > No One or Contacts Only.30‑second pre‑crowd check (Android/Windows/ChromeOS)Quick Share/Nearby Share: No one/Hidden (or Contacts only).Require approval from everyone except your own devices.Device name: Generic.Bluetooth scanning and Wi‑Fi scanning: Off on Android.Windows Nearby sharing: Off or My devices only.When you actually need to share with a strangerMove a few steps aside from the crowd.Enable “Everyone for 10 minutes” (iOS) or “Everyone” with a timeout (Android/ChromeOS).Confirm the recipient’s device name and photo in person.Send the file and immediately reset visibility to Contacts Only/No one.Families, schools and business tripsFamilies: Use Screen Time to disable AirDrop on kids’ iPhones/iPads during trips. Teach “never accept from strangers” and how to set Receiving Off.Schools: Managed devices can block AirDrop/Quick Share during school events and trips. Share these settings with your IT lead.Businesses: Enforce Contacts Only or disable local sharing on managed devices for travellers. Build a standard “pre‑travel device checklist” and distribute it through your MDM. See For Business and our Partner Hub for deployment guidance.Practical traveller tips that stickKeep shares to known contacts. If someone nearby asks you to accept “their boarding pass” or “ride receipt”, decline and ask them to show it on their screen.Don’t tap unknown links from local shares; navigate to the airline, rail, or venue site/app yourself.Clear your Downloads/Files after trips; remove anything you don’t recognise.Use mobile data where possible. Regional passes like Esim Western Europe or single‑country options such as Esim France, Esim Italy, Esim Spain and Esim United States keep you online without risky public Wi‑Fi.FAQIs AirDrop safe to leave on while travelling?Yes, if set to Contacts Only or Receiving Off. Avoid “Everyone” except during a deliberate, brief share.What’s the Android equivalent of AirDrop?Quick Share (formerly Nearby Share). Set visibility to No one/Contacts, require approvals, and only use “Everyone” briefly.Can I stop my name appearing to strangers?Yes. Change your device name to something generic. On iPhone, Settings > General > About > Name; on Android, Settings > About phone > Device name; on Windows, rename your PC. Also disable photo/profile sharing where offered.How do I stop kids receiving random photos?On iOS: Screen Time > Content & Privacy > Allowed Apps > disable AirDrop. On Android: set Quick Share to No one and lock Settings behind a parental control app or Family Link.Does turning off Bluetooth stop all drive‑bys?It prevents discovery but may disrupt your watch/headphones and in some cases car keys. If you must keep Bluetooth on, set sharing visibility to Hidden/Contacts only.Will eSIM help with sharing safety?Indirectly. An eSIM keeps you on mobile data so you can avoid crowded public Wi‑Fi, reducing other exposure risks while travelling. Explore coverage by country and region via Destinations and options like Esim North America.Next stepPlan your route and set up your device before you go. Explore local coverage and pick the right travel eSIM on Destinations, then run the 30‑second safety checks above before you enter a crowd.

Dual SIM on iPhone with eSIM: Default Line, Data, iMessage/FaceTime

Dual SIM on iPhone with eSIM: Default Line, Data, iMessage/FaceTime

Travel is smoother when your iPhone uses a local data plan while your home number stays reachable. That’s exactly what Dual SIM with eSIM enables. In this guide we’ll show you, step by step, how to add and label lines, choose your default for calls and SMS, set the correct data line, and decide which number powers iMessage and FaceTime. We’ll also cover roaming-safe presets so you land, switch on, and avoid bill shock. Whether you’re heading to the US, Europe or further afield, a few minutes of set-up makes the difference between seamless connectivity and expensive mistakes. If you need an eSIM first, browse country and regional plans on our Destinations page, including regional bundles like Esim Western Europe and Esim North America, or country options such as Esim United States, Esim France, Esim Italy, and Esim Spain.What “Dual SIM with eSIM” means on iPhoneYou can have two mobile plans on one iPhone: typically your physical SIM (home number) plus an eSIM (travel data), or two eSIMs on newer models.You choose which line handles voice and SMS by default.You pick a single data line at any time, with optional “Allow Mobile Data Switching” to keep data alive for calls on the other line.iMessage and FaceTime can be tied to either number (or your Apple ID), and you can switch per-contact when needed.This guide focuses on practical, traveller-first settings to keep your home number reachable while your travel eSIM handles data securely and affordably.Check your iPhone supports Dual SIM with eSIMMost recent iPhones support Dual SIM. Quick checkpoints:iPhone XS/XR and later: Dual SIM (one physical SIM + one eSIM).iPhone 13 and later: can support two active eSIMs simultaneously (no physical card required).US-model iPhone 14 and newer: eSIM-only (no physical SIM slot).To confirm on your device: 1. Go to Settings > General > About. 2. Look for “Digital SIM” or “eSIM” entries. If you see IMEI entries for two eSIMs, your phone supports dual eSIM. 3. Ensure you’re on the latest iOS for best Dual SIM features.Step 1: Add your travel eSIM and label your linesBefore you fly, install and label your eSIM so switching is painless on arrival.Purchase the right plan for your trip: - North America: Esim North America - United States: Esim United States - Western Europe: Esim Western Europe - Popular countries: Esim France, Esim Italy, Esim Spain - Explore all options: DestinationsInstall the eSIM: - Settings > Mobile Data (Cellular) > Add eSIM. Follow the on‑screen steps to scan your QR code or use the activation code. - If offered, “Convert to eSIM” can move your physical SIM to eSIM on supported devices.Label each line clearly: - iOS prompts you to label the plans. Choose intuitive labels like “Home” and “Travel”. - You can rename later: Settings > Mobile Data > tap a plan > Label.Pro tips: - Label accuracy is crucial; it’s how you’ll pick the right line in call/message screens. - Install eSIM while you still have good Wi‑Fi and time to test.Step 2: Choose your default line for calls and SMSThis controls which number your iPhone uses when you tap a number or send an SMS from scratch.Go to Settings > Mobile Data > Default Voice Line.Pick “Home” (your primary) if you want all ordinary calls/SMS to continue from your usual number.If you prefer to make outbound calls from your travel number (e.g., local business calls abroad), choose “Travel”.Per-contact preference: - Open the Contacts app > select a contact > tap “Preferred Line” (or “Preferred Cellular Plan”) > choose Home or Travel. - iPhone learns your behaviour and can automatically use the last line you used for that contact.Pro tip: - Keep Default Voice Line = Home, then set exceptions (like hotels/restaurants) to Travel so you appear local.Step 3: Set your mobile data line and RoamingThis is the big one for bill safety: make the eSIM your data source and block roaming on your home line.Settings > Mobile Data > Mobile Data > select “Travel”.Tap your Home line > toggle Data Roaming OFF.Tap your Travel line > toggle Data Roaming ON (if you’re abroad) so data works when you land.Optional: under Mobile Data, enable “Allow Mobile Data Switching”. This lets iPhone temporarily use the data line for ongoing voice calls on the other line. If you want strict control (no surprises), keep this OFF.When to disable your Home line entirely: - If your carrier charges for incoming roaming calls, you may prefer to disable the Home line: Settings > Mobile Data > tap Home > Turn On This Line = OFF. - If you still need OTP texts or critical calls, leave the Home line ON but keep Data Roaming OFF (you can still receive SMS over the cellular network; check your carrier’s policies for any charges).Pro tips: - Test data before you fly: switch Mobile Data to Travel, toggle Data Roaming ON, then back to Home until you depart. - If your Travel plan includes Wi‑Fi calling, consider making calls over apps (WhatsApp, FaceTime, Teams) to avoid local call charges.Step 4: Set iMessage and FaceTime to the right numberYou can attach iMessage/FaceTime to your travel number or keep them linked to your home number while using the travel eSIM for data.iMessage: 1. Settings > Messages > iMessage = ON. 2. Tap Send & Receive. 3. Tick the phone numbers and/or Apple ID you want active. 4. Under “Start New Conversations From”, choose the number you want by default (Home or Travel).FaceTime: 1. Settings > FaceTime > FaceTime = ON. 2. Tick the addresses/numbers to receive calls at. 3. Set “Caller ID” (or similar option) to the number you want people to see when you call.Switch the line per conversation: - In Messages, open a conversation > tap the contact name/photo at the top > change the line if the option appears (or start a new message and tap the line label above the keyboard to choose Home/Travel before sending).Pro tips: - For continuity with family and friends, keep iMessage/FaceTime on your Home number and use the Travel number only for local contacts. - If verification codes arrive via iMessage instead of SMS, they’ll still work over your Travel data because iMessage uses the internet.Traveller presets: fast, safe switchingiOS doesn’t have one‑tap “profiles”, but you can mimic them with a simple routine.Before you fly (10‑minute checklist): - Install and label your eSIM: “Travel”. - Settings > Mobile Data: - Mobile Data = Home (for now). - Home line > Data Roaming = OFF. - Travel line > Data Roaming = ON. - Messages > Send & Receive: - Choose “Start New Conversations From” = Home (or Travel if you want a local sender ID). - FaceTime > Caller ID = preferred number. - Save a few key contacts with Preferred Line = Travel (hotel, taxi, local colleagues).On the plane/at the gate: - Settings > Mobile Data > Mobile Data = Travel. - Optional: Allow Mobile Data Switching = OFF for strict control.On arrival: - Toggle Airplane Mode OFF; wait 1–2 minutes for the Travel eSIM to register. - Confirm data works (open a lightweight website). - Make a quick test call/iMessage.During your stay: - Keep Home line ON with Data Roaming OFF to receive SMS when needed. - For local calls, set Preferred Line = Travel per contact or temporarily switch the Default Voice Line.Heading home: - Switch Mobile Data back to Home. - Turn off the Travel line if you won’t use it until your next trip, or leave it installed for future travel.Troubleshooting: quick fixes that workNo data on the Travel eSIM: - Check Settings > Mobile Data > Mobile Data = Travel. - Settings > Mobile Data > tap Travel > Data Roaming = ON. - Restart iPhone; toggle Airplane Mode for 10 seconds. - Settings > General > About: if prompted for a Carrier Settings Update, accept. - If your plan requires a specific APN, it should auto‑configure with eSIM; if not provided, contact support.Calls/SMS using the wrong number: - Settings > Mobile Data > Default Voice Line = intended line. - For specific contacts, set Preferred Line. - In the Messages conversation, change the line before sending.iMessage/FaceTime not activating: - Ensure you have data on the active line and can receive SMS on at least one line. - Toggle iMessage/FaceTime OFF and back ON. - Sign out/in of Apple ID in Messages/FaceTime settings as a last resort.Can’t see “Allow Mobile Data Switching”: - It shows only when both lines are active and one is selected for Mobile Data.Missing the option to assign “Preferred Line”: - Make sure both lines are turned ON (Settings > Mobile Data > tap each plan).Picking the right eSIM for your routeSingle country city-breaks: choose country plans such as Esim United States, Esim France, Esim Italy or Esim Spain.Multi-country tours: regional passes like Esim Western Europe reduce border friction, while Esim North America suits US/Canada/Mexico hops.Unsure? Start at Destinations to filter by region, data size and duration.For teams and frequent travellers: - Centralise budgets and provisioning via For Business. - Travel agencies, IT resellers and affiliates can explore our partner tools at the Partner Hub.Pro tips for power usersDual SIM iPhone eSIM pairing: on iPhone 13 and newer, you can keep two eSIMs active—useful if your “home” number is also an eSIM.Visual labelling: add emojis to line labels (e.g., “Home 🏠”, “Travel ✈️”) to avoid mistakes when switching lines in Messages or Phone.Battery and coverage: if coverage is weak on one line, disabling that line can improve standby time.Maps and ride‑hailing: test these apps on the Travel data line before leaving the airport to confirm routing and SMS verification work.Keep it simple: Default Voice Line = Home, Mobile Data = Travel is the safest starting point for most travellers.FAQ1) Can I keep my home SIM for calls/SMS but use the eSIM for data? - Yes. Set Default Voice Line = Home. Set Mobile Data = Travel. Turn Data Roaming OFF on Home. You can still receive SMS on Home while using data on Travel.2) Will I get roaming charges on my home line if it’s on? - Data roaming is prevented if you turn Data Roaming OFF on the Home line. Voice/SMS charges depend on your carrier and whether you answer/receive calls or send texts while abroad. For maximum control, you can turn the Home line OFF entirely.3) Can iMessage/FaceTime use my home number while data comes from the Travel eSIM? - Yes. iMessage/FaceTime work over the active data connection, regardless of which number you choose in Send & Receive/Caller ID. Pick “Start New Conversations From” = Home to keep continuity.4) How do I switch the sending line in a specific message thread? - Open the conversation, tap the header (contact name/photo), and choose the line, or start a new message, then tap the line label above the keyboard to switch before sending.5) Why don’t I see both lines at once? - Ensure your iPhone supports Dual SIM and both lines are turned ON: Settings > Mobile Data > tap each plan > Turn On This Line. Older models may support only one eSIM plus one physical SIM, while newer models support two eSIMs.6) Can I keep two eSIMs active, no physical SIM? - On iPhone 13 and newer, yes—two active eSIMs are supported. US-model iPhone 14+ are eSIM-only devices and handle multiple eSIMs easily.Next step: Choose the right travel plan for your route on Destinations, then follow the steps above to set Mobile Data = Travel and Default Voice Line = Home before you fly.