Best eSIM for Europe (2025): Plans, Coverage, Fair-Use

Blog

Best eSIM for Europe (2025): Plans, Co...

Best eSIM for Europe (2025): Plans, Coverage, Fair-Use

30 Oct 2025

Best eSIM for Europe (2025): Plans, Coverage, Fair-Use

Choosing the best eSIM for Europe in 2025 comes down to what you actually do on the road: how many countries you’ll cross, how much data you burn, whether you need 5G, and if hotspot tethering matters. Pricing is competitive, but not all “Europe” eSIMs are equal—some throttle after small “unlimited” buckets, some exclude popular destinations, and others won’t let you tether at all. This guide compares Europe-ready eSIMs by price per GB, 5G access, hotspot policy, and fair-use rules, so you don’t discover limits at the worst time (like mid-ride-share across borders).

For most travellers, Simology’s regional plan is a standout: consistent 4G/5G coverage across key countries, transparent allowances, hotspot enabled, and simple top-ups. If you’re mainly in one country, a local eSIM (e.g., France, Italy, Spain) can push price per GB down even further. Flying via the US or Canada? Pair a Europe eSIM with a North America plan to stay connected gate-to-gate. Below is how to choose, what to expect, and the fastest way to avoid fair-use surprises.

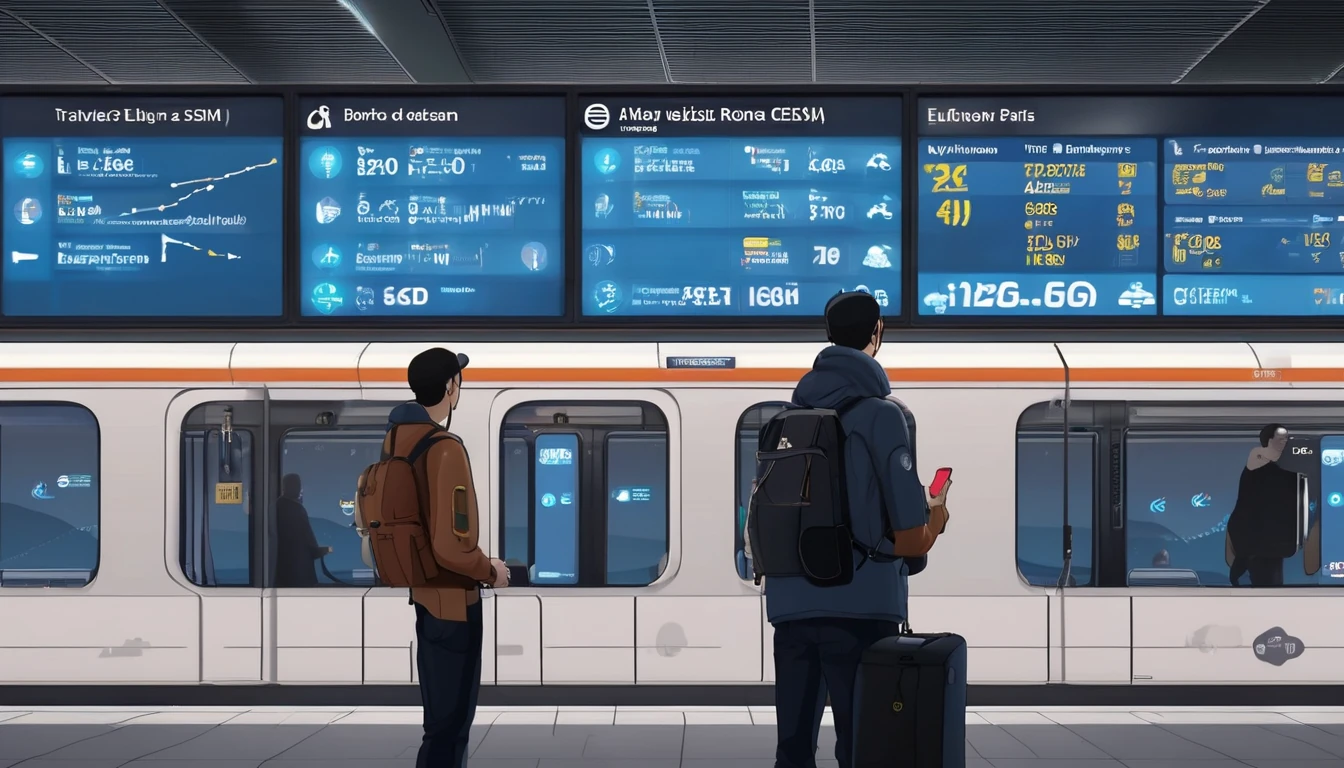
Quick verdict: the best eSIM for Europe in 2025

  • Best overall for multi-country trips: Simology Esim Western Europe — multi-country coverage, hotspot allowed, fair-use clearly stated, easy top-up.
  • Best value if staying in one country: Simology country eSIMs such as Esim France, Esim Italy and Esim Spain — usually the lowest price per GB.
  • Best for transatlantic travellers: Pair Esim United States or Esim North America with a Europe plan for seamless coverage on both sides.
  • Best for teams and frequent flyers: Managed accounts via For Business — pooled visibility, cost control, consolidated billing.

If you’re unsure which countries are covered, start with the full list on Destinations.

How we compared Europe eSIMs

  • Price per GB: Divide plan price by included GB. Ignore “unlimited” claims unless a clear daily/total high-speed cap is disclosed.
  • Coverage footprint: Number of countries, inclusion of the big four (France, Italy, Spain, Germany) plus the UK, Nordics, Benelux, Portugal, Switzerland and popular Balkans.
  • Network quality: Access to top local operators and 5G in major cities; no permanent throttling.
  • Hotspot/tethering: Explicitly allowed by default.
  • Fair-use policy (FUP): Transparent thresholds, reasonable roaming terms, and no punitive restrictions for normal travel use.
  • Ease of use: Instant delivery, QR installation, quick top-ups, responsive support.

Simology’s regional and country eSIMs score well on the above, particularly on price-per-GB transparency and hotspot inclusion.

The best Simology picks for Europe

Esim Western Europe — top pick for most travellers

Who it’s for: - City-hoppers doing 3–12 countries in one trip - Families or remote workers who rely on hotspot - Travellers wanting simple top-ups and a single eSIM across borders

What you get: - Broad multi-country coverage across Western Europe with 4G/5G where available - Hotspot/tethering enabled - Clear, upfront data allowances with straightforward price-per-GB - Friendly fair-use terms intended for travel (not permanent roaming)

Why it’s hard to beat: - You avoid the SIM shuffle at borders and keep one APN and one data monitor - 5G in major hubs for quick downloads and video calls - Competitive price-per-GB compared with typical regional packs

Consider if: - You’re mostly staying in one country (a local eSIM may be cheaper per GB) - You need calling minutes (data-only eSIMs use VoIP apps; pair with your primary SIM for voice/SMS)

Check availability and covered nations on Esim Western Europe and confirm your route against Destinations.

Country eSIMs — the best price per GB when you stay put

If your itinerary centres on a single country, local plans often win on value and sometimes on peak speeds.

  • France: See Esim France for dense 5G in Paris, Lyon, Marseille and strong rail-corridor coverage. Excellent for city weekends and Riviera road trips.
  • Italy: Esim Italy offers solid 5G in major cities and coastal belts; good for hotspots on trains and ferries.
  • Spain: With Esim Spain, coverage is wide across cities and islands; great for digital nomads needing steady tethering.

Choose a country eSIM when: - You won’t cross borders or only do a quick day trip - You want the lowest cost per GB and plan to stream or hotspot frequently

Transatlantic and multi-region itineraries

Connecting through North America? Avoid airport Wi‑Fi hunting by pairing your Europe eSIM with a North America plan:

Install both profiles before you fly, then toggle data lines per region. If you’re organising trips for teams or events, centralise management with For Business. Travel brands and creators can explore partnerships via the Partner Hub.

Fair-use policies in Europe explained (and how they affect you)

Fair-use policies exist to prevent abuse of roaming and unlimited plans. Here’s what matters in practice:

  • Roaming vs “local”: Most Europe eSIMs are regional roaming bundles. That’s fine for travel, but networks may apply FUP while roaming, such as deprioritisation or caps during congestion.
  • “Unlimited” usually isn’t: High-speed data often has a daily or total cap (e.g., 1–5 GB/day at full speed, then throttled). If a plan says unlimited, look for the high-speed allowance first.
  • Hotspot limits: Some providers block tethering or throttle hotspot specifically. Simology plans allow hotspot by default unless stated otherwise.
  • Country exclusions: Not every “Europe” plan includes Switzerland, the Balkans or microstates. Confirm the exact list on Destinations.
  • Usage window: Plans run for a set validity period from first activation; unused data may not roll over.

Practical takeaways: - Pick a plan with a clear high-speed allowance if you work on the go. - Expect speed variation at busy times or on rural routes; try different network selections if your device allows. - For long trips, buy a sensible base allowance and top up rather than chasing “unlimited”.

Step-by-step: how to choose the right Europe eSIM

1) Map your route - List every country and the number of days in each. - If 3+ countries, lean towards Esim Western Europe; otherwise a country eSIM may be cheaper.

2) Estimate your data need - Light (maps, messages, occasional rides): 3–5 GB/week - Moderate (social, short video, hotspot for email): 6–10 GB/week - Heavy (HD video, frequent hotspot/video calls): 12–20 GB+/week

3) Decide on 5G vs 4G - If you upload media, join video calls, or plan to tether often, choose 5G access where available.

4) Confirm hotspot - Ensure your plan explicitly allows tethering if you’ll share data to a laptop or tablet.

5) Plan your dual-SIM setup - Keep your home SIM active for calls/SMS, but set the eSIM as your data line and switch data roaming off on your primary SIM to avoid bill shock.

6) Check device compatibility - Most recent iPhone, Samsung Galaxy, Google Pixel and other flagships support eSIM. If unsure, consult your device specs.

7) Buy and install early - Purchase from Simology, scan the QR code, and add the eSIM before departure while on good Wi‑Fi.

8) Test and label - Toggle mobile data to the eSIM briefly at home to confirm activation. Name it “Europe Data” (or country) to avoid confusion.

Activation and on‑trip checklist

Before you fly: - Install your eSIM profile over Wi‑Fi. - Set the eSIM as “Mobile Data” line; turn data roaming off on your primary SIM. - Download offline maps; update apps while on Wi‑Fi.

On arrival: - Toggle the eSIM data line on. - Ensure Data Roaming is enabled for the eSIM line. - If speeds seem slow, briefly toggle Airplane Mode or select a different partner network in Settings.

During your trip: - Monitor data usage in your phone settings. - Hotspot when needed; disable when idle to save battery and data. - Top up through your Simology account if you’re running low.

Pro tips to save data and avoid surprises

  • Use Low Data Mode/ Data Saver on your phone.
  • Disable auto-play for video in social apps.
  • Cache music and podcasts on Wi‑Fi.
  • Prefer Wi‑Fi for big backups; pause cloud photo sync while roaming.
  • Use Wi‑Fi calling for voice; WhatsApp/FaceTime use your existing number even on a data-only eSIM.
  • For road trips, keep offline maps for every country you’ll cross.
  • If you’ll be in the US before/after Europe, install Esim United States or Esim North America in advance.

FAQ: Europe eSIMs

1) Will my phone work with a Europe eSIM? - Most recent iPhone (XR/XS and newer), Google Pixel (3 and newer), and flagship Samsung devices support eSIM. Region-specific models vary. If in doubt, check your device settings for “Add eSIM” or consult the manufacturer’s specs.

2) Can I use hotspot/tethering with Simology eSIMs? - Yes, Simology plans allow hotspot unless stated otherwise on the specific product page. Tethering performance depends on local network conditions.

3) How fast is 5G in Europe? - In major cities, typical real-world 5G ranges from 150–500 Mbps, with higher peaks possible. Speeds vary by network, location, and time of day, and can be managed during congestion.

4) I’m visiting 8–10 countries in two weeks. What’s best? - A regional plan like Esim Western Europe keeps things simple across borders. If you’ll spend 5+ days in a single country with heavy usage, add a local eSIM (e.g., Esim France or Esim Italy) for cheaper per‑GB data during that block.

5) Do I need to show ID to buy an eSIM in Europe? - Most data-only eSIMs in Europe do not require ID, but requirements vary by country. If verification is required, Simology will prompt you during checkout.

6) Can I keep my WhatsApp number and receive texts from my bank? - Yes. Your WhatsApp stays linked to your number. Keep your physical SIM active for SMS; set the eSIM as data-only and turn off data roaming on the primary SIM to avoid charges.

The bottom line

The best eSIM for Europe is the one that matches your route, data habits, and need for 5G and hotspot. For most travellers crossing multiple borders, Simology’s Esim Western Europe combines solid coverage, transparent allowances, and tethering without hoops. If you’ll camp in one country, local eSIMs like Esim France, Esim Italy or Esim Spain usually deliver the lowest price per GB. Flying via the US or Canada? Add Esim United States or Esim North America for smooth connectivity end to end.

Next step: Compare coverage and pick your plan on Esim Western Europe.

Read more blogs

Andes Highlights (3 Weeks): Peru–Bolivia–Chile–Argentina Connectivity

Andes Highlights (3 Weeks): Peru–Bolivia–Chile–Argentina Connectivity

Planning a south america itinerary 3 weeks through the high Andes? This route stitches together Peru’s Sacred Valley, Bolivia’s La Paz and Salar de Uyuni, Chile’s Atacama Desert, and northern Argentina’s quebradas or Mendoza wine country—often by long-distance bus and a couple of short flights. Connectivity is different at altitude: coverage is strong in cities but drops in high passes and salt flats; bus Wi‑Fi is patchy; border towns can be blackspots. The smart move is an eSIM with multi‑country coverage, backed by offline maps, offline translations, and a simple routine for crossing borders by bus without losing service. Below you’ll find a practical, connectivity-first itinerary; checklists to prep your phone, apps and documents; and on-the-ground tips for staying online where it matters: booking transport, hailing taxis, backing up photos, and navigating when the signal disappears.If you’re transiting via Europe or North America, you can also add a layover eSIM to stay connected door-to-door. Start with our country list on Destinations, then follow the steps, and you won’t waste time chasing SIM shops at 3,500 metres.The 3‑week Andes route at a glanceWeek 1: Peru (Cusco, Sacred Valley, Machu Picchu) - Fly into Cusco (or Lima then connect). - Base in Cusco; day trips to Pisac/Chinchero/Maras–Moray. - Train to Aguas Calientes; Machu Picchu visit; return to Cusco or continue to Puno/Lake Titicaca.Week 2: Bolivia and Chile (La Paz, Uyuni, San Pedro de Atacama) - Bus/collectivo via Copacabana to La Paz. - Fly or overnight bus to Uyuni. - 3‑day Uyuni–altiplano tour ending in San Pedro de Atacama (Chile).Week 3: Chile and Argentina (Atacama to Salta or Mendoza/Buenos Aires) - Choose: - North: San Pedro to Salta/Jujuy by bus; fly to Buenos Aires. - Or South: San Pedro–Calama flight to Santiago; bus or flight to Mendoza; onward to Buenos Aires.Connectivity notes (quick): - Cities: generally strong 4G/4G+; 5G in major hubs (Santiago, Buenos Aires). - Altitude/rural: expect long no‑signal stretches (Uyuni, altiplano passes, Paso Jama). - Bus Wi‑Fi: often advertised, rarely reliable. Plan to be offline onboard. - Border regions: networks switch; a multi‑country eSIM avoids sudden loss.eSIM vs local SIMs for a 4‑country tripFor a route with multiple borders and remote legs, eSIM wins on time and reliability.What a multi‑country eSIM gets you: - One plan across Peru, Bolivia, Chile, Argentina (check coverage per country on Destinations). - No passport/SIM registration queues at kiosks. - Keep your home number active on the physical SIM for calls/SMS codes. - Instant top‑ups if you burn data on photos or navigation.When a local SIM still helps: - Long stay in one country with heavy data use (e.g., a month in Buenos Aires). - Dead zones where a different local network performs better (rarely worth the hassle on a 3‑week pace).Practical approach: - Use an eSIM as your primary data line across all four countries. - If you find a specific local network far better in one region, add a cheap local SIM and keep the eSIM as backup.Device readiness checklist (before you fly)1) Check eSIM compatibility and SIM‑lock status on your phone.2) Buy and install your eSIM while on home Wi‑Fi. Keep a PDF/printed copy of the QR code.3) Label lines clearly (e.g., “eSIM Andes Data”, “Home SIM”).4) Turn on data roaming for the eSIM; leave roaming off for your home SIM to avoid charges.5) Set up dual‑SIM rules: data on eSIM; calls/SMS default to home SIM if needed.6) Download offline: Google Maps/Organic Maps for all target regions; language packs (Spanish at minimum); bus/air tickets; hotel confirmations.7) Cloud backups: set to upload on Wi‑Fi only; pre‑create shared albums for travel companions.8) Test tethering/hotspot with your laptop/tablet.If you’re transiting popular hubs, consider a short layover eSIM: - USA connections: add an Esim United States or a broader Esim North America.- Europe connections: Madrid/Barcelona? Use an Esim Spain. Paris or Rome? See Esim France and Esim Italy. Multi‑country layovers? Try Esim Western Europe.City‑by‑city connectivity notesCusco & the Sacred Valley (Peru)Coverage: Good in Cusco city; variable in high villages (Maras/Moray) and along Inca Trail approaches.Tips: Download Sacred Valley maps offline; pin viewpoints and ruins. most taxis use WhatsApp—save your accommodation’s number.Machu Picchu/Aguas Calientes: Patchy to none at the citadel. Upload your photos later; don’t rely on live ticket retrieval.Lake Titicaca: Puno and CopacabanaPuno: Reasonable 4G; bus terminals crowded—screenshot QR tickets.Crossing to Copacabana: Expect a signal drop around the border; have directions saved offline.La Paz (Bolivia)Good urban 4G; the cable car network has decent signal but tunnels do not.Yungas/“Death Road” tours: Mountain valleys cause dead zones—share your emergency contacts with the operator, carry a charged power bank, and don’t plan remote calls.Uyuni and the Altiplano (Bolivia to Chile)Uyuni town: OK 4G; ATMs finicky—use Wi‑Fi for banking apps.Salt flats/lagunas: Assume offline for most of the 3‑day tour. Guides often carry satellite phones; agree a pickup time/place in San Pedro and preload your map route.San Pedro de Atacama (Chile)Town: Solid 4G; accommodations often have Wi‑Fi but speeds vary.Geysers, Valle de la Luna: Offline navigation essential; sunrise trips start before mobile networks wake up in some areas.Salta/Jujuy or Mendoza/Buenos Aires (Argentina)Salta/Jujuy: Good city coverage; quebradas have long no‑signal sections.Mendoza: City 4G/5G; vineyards outside town can be patchy.Buenos Aires: Strong 4G/5G; ideal for cloud backups and large downloads before you fly home.Border crossings by bus: step‑by‑stepThe big ones on this route: Peru–Bolivia (Puno/Copacabana), Bolivia–Chile (Uyuni–San Pedro via Hito Cajón), Chile–Argentina (Paso Jama to Salta or Los Libertadores to Mendoza).How to keep service and sanity:1) The day before:- Top up your eSIM data.- Confirm your plan includes both countries you’re entering/leaving.- Download offline maps for both sides of the border and your town of arrival.- Save bus company WhatsApp and terminal address offline.2) On departure morning:- Keep a paper copy or offline PDF of tickets, insurance, and accommodation proof.- Charge phone and power bank; pack a short cable in your daypack.3) On the bus:- Don’t count on bus Wi‑Fi. Keep your eSIM as primary, but expect drops near mountain passes.- If your phone supports it, enable “Wi‑Fi calling” for later when you reach accommodation Wi‑Fi.4) At the border posts:- Data may be unavailable. Keep QR codes and booking numbers offline.- After exiting one country and entering the next, toggle Airplane Mode off/on to re‑register on the new network.- If the eSIM doesn’t attach, manually select a network in Mobile Settings.5) Arrival:- Send your accommodation a quick WhatsApp when you’re back online.- Recheck your eSIM’s data roaming is on; confirm you’re on an in‑country network, not a weak roaming partner.Pro tips: - Dual profiles: If your eSIM allows, keep a secondary profile for a different network in the same country—helpful in border towns.- Cash buffer: Some border terminals don’t accept cards; download a currency converter for offline use.Offline survival kit (5‑minute setup)Maps: Download regions for Cusco, Sacred Valley, Puno, La Paz, Uyuni, San Pedro, Salta/Jujuy or Mendoza, and Buenos Aires.Translations: Download Spanish for offline use; add phrasebook favourites (bus tickets, directions, dietary needs).Documents: Save PDFs of passports, tickets, hotel addresses; star them for quick access.Rides: Screenshots of pickup points; pin bus terminals and hotel doors.Entertainment: Podcasts and playlists for long bus legs, set to download on Wi‑Fi only.Altitude and your tech: what changesCoverage gaps lengthen: Fewer towers at high altitude; valleys can block signal. Assume offline on remote excursions.Batteries drain faster in cold: Keep your phone warm and carry a power bank (10,000–20,000 mAh).Hotel Wi‑Fi may be congested: Schedule big uploads (photo backups, app updates) for big-city stays like Santiago or Buenos Aires.GPS still works offline: Your blue dot shows on offline maps without data—preload everything.Data budgeting for 3 weeksTypical traveller usage across this route: - Messaging/Maps/Bookings: 0.2–0.5 GB/day- Social and photo sharing: 0.3–0.7 GB/day- Occasional video calls/streaming: 0.5–1.0 GB/dayFor a mixed-use trip, plan 15–25 GB for 3 weeks. Heavy creators should double it and upload over hotel Wi‑Fi when possible. If you work remotely, consider a higher‑capacity plan and a backup eSIM; see our guidance on For Business.Practical route with transport and connectivity cuesDays 1–4 Cusco base: Strong city signal; day trips may be spotty—go offline-ready.Days 5–6 Machu Picchu: Expect no service at the ruins; sync tickets ahead.Days 7–8 Puno to La Paz via Copacabana: Border signal drop; re‑register networks after crossing.Days 9–11 Uyuni tour to San Pedro: Treat as offline; charge nightly; carry spare cables.Days 12–14 San Pedro: Stable in town; tours offline; top up data before Paso Jama.Days 15–17 Salta/Jujuy or Mendoza: Good urban 4G; rural patches are offline.Days 18–21 Buenos Aires: Strongest connectivity of the trip; clear your uploads and map downloads for the flight home.Partnering and stopover extrasHospitality and tour operators in the Andes: help your guests stay connected—explore co‑branded solutions via our Partner Hub.Transatlantic flyers: test your eSIM setup on a layover with an Esim United States or Esim Western Europe before hitting high-altitude blackspots.FAQs1) Do I need a local SIM in each country?No. A multi‑country eSIM covering Peru, Bolivia, Chile and Argentina is simpler and works well for a 3‑week pace. Consider a local SIM only if you’ll spend longer in one country and want the absolute best regional coverage.2) Will my WhatsApp number change with an eSIM?No. WhatsApp is tied to your registered number, not your data line. Keep your home SIM active for voice/SMS (roaming off if you wish), and use the eSIM for data—WhatsApp continues as normal.3) Can I hotspot to my laptop or camera?Yes. Enable tethering on your eSIM. Mind your data: cloud backups and OS updates can burn gigabytes—set them to Wi‑Fi only or schedule in big cities.4) What if there’s no signal on the Uyuni/Atacama legs?That’s expected. GPS still works offline. Pre-download maps and translations, carry a power bank, and sync plans with your tour operator before departure.5) Will I get roaming charges at borders?If you’re using a multi‑country eSIM with coverage in both countries, you won’t incur extra roaming fees from your home carrier. Keep roaming off on your home SIM to avoid accidental use.6) I’m connecting via Europe or the US—worth getting a layover eSIM?Yes. It’s an easy way to test your setup and stay reachable. Try Esim North America or country options like Esim Spain, Esim France, or Esim Italy for common hubs.Next step: Browse South America coverage options and build your plan on Destinations.

iPad eSIM Setup (Wi‑Fi + Cellular): Supported Models & Steps

iPad eSIM Setup (Wi‑Fi + Cellular): Supported Models & Steps

If you travel with an iPad, an eSIM is the cleanest way to get online without hunting for physical SIMs. This guide covers exactly which iPads support eSIM, how to install a travel eSIM step‑by‑step, and how to configure data, roaming and Personal Hotspot so your other devices can share the connection. We’ve written this with travellers in mind: fast, reliable setup, minimal faff.A quick heads-up: eSIM works only on Wi‑Fi + Cellular iPad models, not Wi‑Fi‑only versions. Availability of eSIM can also vary by country or region (for example, eSIM on iPad is not offered in mainland China). Below you’ll find a simple model matrix, essential pre‑checks, and three install methods (QR code, activation code, and link). We’ll also share practical hotspot tips, how to switch or remove plans, and troubleshooting steps if something doesn’t behave.When you’re ready to pick a plan, explore region and country options on our global Destinations, including popular picks such as Esim United States, Esim France, Esim Italy, Esim Spain, Esim Western Europe and Esim North America.Quick check: does your iPad support eSIM?Only Wi‑Fi + Cellular models support any mobile plan (physical SIM or eSIM).eSIM support starts from specific generations (see lists below).Mainland China: iPad models with eSIM are not offered; availability in Hong Kong and Macao depends on local carriers.To confirm your model: Settings > General > About > Model Name and Model Number.iPad models that support eSIM (Wi‑Fi + Cellular)If your iPad is one of the following, it supports eSIM in most regions outside mainland China:iPad Pro12.9‑inch (3rd generation and later: 2018, 2020, 2021, 2022 and newer)11‑inch (1st generation and later: 2018, 2020, 2021, 2022 and newer)iPad AiriPad Air (3rd generation, 2019)iPad Air (4th generation, 2020)iPad Air (5th generation, 2022) and lateriPad miniiPad mini (5th generation, 2019)iPad mini (6th generation, 2021) and lateriPad (standard)iPad (7th generation, 2019)iPad (8th generation, 2020)iPad (9th generation, 2021)iPad (10th generation, 2022) and laterTip: Even on eSIM‑capable iPads, there may also be a physical nano‑SIM tray. You can use either a physical SIM or eSIM (one active plan at a time).Models without eSIM (Apple SIM or physical SIM only)These iPads do not support eSIM. Some include Apple SIM (removable or embedded), which Apple discontinued for new activations. You’ll need a physical SIM if you’re using these models.iPad Pro 12.9‑inch (1st and 2nd gen: 2015, 2017)iPad Pro 10.5‑inch (2017)iPad Pro 9.7‑inch (2016)iPad Air 2 (2014), iPad Air (1st gen, 2013)iPad (5th gen, 2017; 6th gen, 2018)iPad mini 3 (2014), iPad mini 4 (2015)Note on Apple SIM: Apple ended remote provisioning for Apple SIM in 2022. If you relied on Apple SIM for travel data, upgrade to an eSIM‑capable iPad or use a physical SIM from a local carrier.What you need before you startA Wi‑Fi + Cellular iPad that supports eSIM (see lists above)A stable Wi‑Fi connection for activationiPadOS updated (Settings > General > Software Update)An unlocked device (or a plan compatible with your iPad’s lock status)Your eSIM details from your provider:A QR code to scan; orAn activation code (SM‑DP+ address + Activation Code); orAn install link you can open on the iPadEnough battery or a charger nearbyPro tip: Travelling to multiple countries? Consider regional plans like Esim Western Europe or Esim North America so you don’t have to swap or re‑install between borders.iPad eSIM setup: three easy methodsOn iPad, the menu is “Mobile Data” (instead of “Cellular” on iPhone). Depending on iPadOS version, wording may be “Add eSIM” or “Add Data Plan”.Method 1: Scan a QR code (fastest)Connect the iPad to Wi‑Fi.Go to Settings > Mobile Data.Tap Add eSIM or Add Data Plan.Choose Use QR Code. Aim the camera at the QR code.When the plan appears, tap Continue, then Add Data Plan.If prompted, label the plan (e.g., “Trip Europe”).Let the activation complete, then follow any on‑screen prompts.If the camera can’t read the code, ensure good lighting and a steady hand. If it still fails, use Method 2 with the manual SM‑DP+ details.Method 2: Install via activation code (SM‑DP+ address)Connect to Wi‑Fi and open Settings > Mobile Data.Tap Add eSIM or Add Data Plan.Select Enter Details Manually.Enter the SM‑DP+ Address and Activation Code exactly as provided. Leave Confirmation Code blank unless your provider gave one.Tap Next and wait for the plan to download.Add the plan and assign a label when prompted.Tip: These fields are case‑sensitive. Copy/paste if possible to avoid typos.Method 3: Install via linkWith Wi‑Fi on, open the install link provided by your eSIM seller directly on the iPad.Tap Allow when iPad prompts to add a mobile data plan.Follow the on‑screen steps to add and label the plan.If you received the link on another device, email it to yourself or open it in a synced note on the iPad.Configure data, roaming and Personal HotspotOnce your plan is installed, configure it for travel.Set your data plan and enable roamingSettings > Mobile Data.Under Mobile Data, ensure your new plan is selected for data.Tap Mobile Data Options > Data Roaming and turn it on if you’re using the plan outside its home country.If your provider gave APN settings, tap Mobile Data Network and enter the APN, Username and Password as instructed. Most travel eSIMs auto‑configure.Pro tip: If you also have a physical SIM inserted, choose which plan provides data to avoid accidental roaming fees on the other plan.Turn on Personal HotspotSettings > Personal Hotspot (or Settings > Mobile Data > Personal Hotspot).Toggle Allow Others to Join.Set a strong Wi‑Fi password.Optional: turn on Maximise Compatibility (makes the hotspot more compatible with older devices by using 2.4 GHz; slightly reduces top speeds).Hotspot travel tips: - Keep the iPad charging when tethering for long periods. - Place the iPad near a window for better signal. - If speeds drop, toggle Airplane Mode off/on or briefly turn the hotspot off/on to refresh the session. - Some plans restrict tethering; check your plan terms if the hotspot toggle is missing or won’t stay on.Switching, pausing or removing eSIM plansTemporarily turn a plan off: Settings > Mobile Data > tap the plan > turn off Turn On This Line.Switch data between plans: Settings > Mobile Data > Mobile Data (select the plan for data).Rename a plan: Settings > Mobile Data > tap the plan label > Change Label.Remove a plan: Settings > Mobile Data > tap the plan > Remove Data Plan. Removing deletes the eSIM profile from your iPad. Keep your QR/activation details if you might need to reinstall (reinstallability depends on your provider’s policy).Storage: iPad can store multiple eSIM profiles, but only one can provide data at a time.Troubleshooting and pro tipsIf something isn’t working, run through these checks:“Add eSIM” is missingEnsure you’re on a Wi‑Fi + Cellular model that supports eSIM.Update iPadOS and restart.If your iPad was bought in a region that restricts eSIM, the option may be unavailable.QR code won’t scanClean the camera lens; brighten the screen showing the code.Zoom the code on another device or print it larger.Use manual entry via SM‑DP+ and Activation Code.“Activation code invalid” or “Can’t add plan”Confirm the SM‑DP+ address and Activation Code are entered exactly.Check that your plan hasn’t already been installed on another device.Try again on a stronger Wi‑Fi network.“No Service” after installSettings > Mobile Data > ensure the new plan is On and selected for data.Turn on Data Roaming if abroad.Check Mobile Data Network for custom APN details (if provided).Update Carrier Settings: Settings > General > About (wait for any prompt).Toggle Airplane Mode for 10 seconds; restart the iPad.Hotspot won’t workVerify your plan includes tethering.Turn Personal Hotspot off/on; change the password.On the device connecting, “Forget” the hotspot network and reconnect.Use Maximise Compatibility for older laptops or cameras.Still stuck?Reset Network Settings: Settings > General > Transfer or Reset iPad > Reset > Reset Network Settings (you’ll need to rejoin Wi‑Fi).Reinstall the eSIM with the original QR/activation details.Pro tip for work trips: If you manage multiple iPads for a team, our For Business solutions simplify bulk eSIM delivery and spend control. Partners and resellers can onboard via the Partner Hub.Travel picks for your iPadChoose a plan by country or region to match your itinerary:Country focus:USA: see Esim United StatesFrance: see Esim FranceItaly: see Esim ItalySpain: see Esim SpainMulti‑country:Western Europe: see Esim Western EuropeNorth America: see Esim North AmericaOr browse all Destinations for more regions and data sizes.Tip: For road trips across borders, regional plans reduce SIM swaps and keep your iPad’s hotspot stable for your laptop and camera.FAQCan I use an eSIM on a Wi‑Fi‑only iPad?No. Only Wi‑Fi + Cellular iPads support any mobile data plan (physical SIM or eSIM).Will my iPad get a phone number with an eSIM?Travel eSIMs for iPad are typically data‑only. You won’t get voice calls or regular SMS. Use apps like FaceTime, WhatsApp, or Teams over data.How many eSIMs can I store on an iPad?Several, depending on model and iPadOS. Only one can be active for data at a time, but you can switch in Settings without re‑scanning the QR, provided the provider permits re‑activation.Can I move an eSIM from my iPad to an iPhone (or another iPad)?Not directly. You’ll usually need to install the eSIM fresh on the new device using the original QR/activation details, or request a transfer from your provider if supported.Does Personal Hotspot work with an eSIM?Yes, if your plan allows tethering. Enable it in Settings > Personal Hotspot and share the password with your other devices.Is eSIM supported everywhere?eSIM on iPad is not offered in mainland China, and local carrier support varies by market. Check coverage and compatibility for your destination before you travel.Next step: Pick your plan by country or region on our global Destinations page and install your eSIM in minutes.

Secure Your Hotspot: Share eSIM Data Safely with Laptops & Tablets

Secure Your Hotspot: Share eSIM Data Safely with Laptops & Tablets

Travellers rely on eSIM data and mobile hotspots to keep laptops and tablets online at airports, cafés, hotels and in vehicles. It’s convenient—but it also opens a door to your data if you don’t lock it down. A secure mobile hotspot protects the Wi‑Fi link between your phone and your devices, reduces the chance of freeloaders consuming your data, and limits exposure if someone nearby tries to connect. In this guide you’ll harden your hotspot for real-world travel: use WPA3 where possible, set strong passwords, avoid common myths like hiding the SSID, choose safer tethering modes (USB/Bluetooth) when appropriate, configure device limits and timeouts, and layer in smart VPN practices. You’ll also learn how carrier “tethering keys” and APN settings affect hotspot reliability on eSIM plans—so you can prevent frustrating “hotspot not available” surprises. Whether you’re heading to the US, touring Europe, or managing a team on the road, this is a practical, step-by-step approach you can apply before you fly.Why your mobile hotspot needs hardeningYour phone’s hotspot is a tiny Wi‑Fi router. In busy environments, nearby devices can see it, attempt to connect, and—even if they fail—probe it for weaknesses. Risks include:Guessable passwords enabling freeloading or eavesdroppingOlder security modes (WPA/WEP) exposing the connection to sniffingExposed device services (file sharing, AirDrop, SMB, printer services)Data overuse from unknown clients or background sync on connected laptopsRogue configuration profiles changing APN or DNS without your consentGood news: a handful of settings sharply reduce those risks without slowing you down.The golden rules (fast checklist)Use WPA3 (or WPA3/WPA2 transition) if available; otherwise WPA2‑PSK only. Never open, WEP or WPA.Create a 16–24 character password with letters (upper/lower), numbers and symbols. Avoid words and patterns.Keep SSID broadcast on; choose a neutral name (no personal info or device model).Limit connections to the minimum necessary (often 1–3) and enable auto‑turn‑off when idle.Prefer USB tethering for a single laptop when possible; it reduces the Wi‑Fi attack surface.Keep “Maximise Compatibility” OFF (iPhone) unless an older device can’t connect.Use a reputable VPN with a kill switch on laptops/tablets for sensitive work.Don’t install unknown carrier or APN profiles to “unlock” tethering—use plans that include hotspot.Pro tip: Before your trip, test your hotspot with all devices you plan to use. Fixing compatibility at home beats doing it at a gate with 3% battery.How to set up a secure mobile hotspotiPhone/iPad (iOS/iPadOS 16/17/18)Open Settings > Personal Hotspot.Toggle Allow Others to Join ON when you need the hotspot; otherwise keep it OFF.Tap Wi‑Fi Password and set a 16+ character passphrase. Use a password manager to generate/store.Keep Maximise Compatibility OFF for stronger security and 5 GHz performance. Only turn it ON if an older device cannot connect.Avoid Family Sharing unless you truly need it; it makes joining easier for family devices.When finished, turn Allow Others to Join OFF to shut the hotspot.Notes: - iOS negotiates modern security automatically. Leaving Maximise Compatibility OFF helps avoid falling back to older standards. - You can view connected devices in the status bar/Control Centre; toggling the hotspot off disconnects all clients.Android (12/13/14/15 — Pixel/Samsung/others)Menu names vary slightly, but the essentials are similar.Settings > Network & Internet (or Connections) > Hotspot & Tethering > Wi‑Fi Hotspot.Network name (SSID): choose a neutral name (e.g., “Trip‑WiFi‑A”), not your surname, hotel room, or phone model.Security: choose WPA3‑Personal, or WPA3/WPA2 if offered. If not available, choose WPA2‑PSK. Never choose “None.”Password: 16–24 characters. Avoid common substitutions (P@ssw0rd‑style).AP band: prefer 5 GHz for speed and less interference; fall back to 2.4 GHz only for older devices.Advanced: - Turn on Auto‑disable hotspot when no devices are connected. - Set Maximum connections to the smallest number you need (1–3). - If available, enable “Block clients from communicating” or “AP isolation.” - Ensure WPS is OFF (if your device exposes that option).Share via QR only with trusted people, then rotate the password afterwards if you won’t share again.Prefer USB or Bluetooth tethering when practicalUSB tethering (best for one laptop)Pros: No Wi‑Fi beacon to attack, stable speeds, charges your phone.How: Connect your phone via USB; on Android enable USB tethering. On iPhone, connect by USB and trust the computer; hotspot should appear as a network.Bluetooth tethering (lower bandwidth, very short range)Pros: Minimal radio footprint in crowded spaces.How: Pair your devices with a PIN, then enable Bluetooth tethering on the phone and choose the connection from your laptop’s Bluetooth menu.Use Wi‑Fi hotspot only when you need multiple devices or USB isn’t convenient.Strong passphrase strategy that travels wellLength beats complexity. Aim for 16–24 characters. Example: three random words plus numbers/symbols (not a quote or lyric).Avoid personal info (names, birthdays, destinations).Store in your password manager; share via QR for convenience, then rotate afterwards.Rotate the password if you’ve shared it with anyone outside your group or used it in a busy venue.Pro tip: If you often share with family, keep a “guest” hotspot name and password you rotate at the end of each trip.Hidden SSID: myth vs realityHiding your SSID sounds secure, but:Clients that have connected before will “probe” for the hidden network, leaking its name and aiding tracking.Attackers can still detect and target hidden networks.It complicates connecting and troubleshooting.Recommendation: leave SSID broadcast ON, use strong WPA3/WPA2 security, and choose a neutral SSID.eSIM, APN settings and “tethering keys”: what mattersHotspot availability depends on your plan and APN configuration:Many carriers enable tethering only on plans with hotspot allowed. Using the wrong APN or plan can block Personal Hotspot entirely.On iPhone, APN and tethering settings come from the eSIM profile; you generally can’t edit them. If Personal Hotspot is missing or greyed out, contact your provider.On Android, you can view Access Point Names (APN) under Settings > Mobile Network > Access Point Names. Your eSIM profile should auto‑populate APN, username, authentication (PAP/CHAP), and APN type.If your provider specifies it, APN type may include “dun” (tethering). Don’t add “dun” unless the provider instructs you; arbitrary changes can break data or violate terms.Avoid third‑party “unlock tethering” guides and unknown configuration profiles. They can introduce privacy risks and service instability.Before you travel, choose an eSIM that clearly includes hotspot/tethering. Browse country and regional options in Destinations or go directly to regional packs like Esim United States, Esim Western Europe, or Esim North America. Planning France, Italy or Spain? See Esim France, Esim Italy and Esim Spain.For teams, ensure your chosen plan includes hotspot and document APN details for travellers. If you manage devices at scale, explore rollout options via For Business. Partners and resellers can coordinate provisioning through the Partner Hub.Client device hygiene: lock down the laptop/tablet tooYour hotspot encrypts the air. Your device still needs its own armour:Mark the network as Public (Windows) or disable file/printer sharing when on hotspot.Turn on the OS firewall and block inbound connections. Keep OS and browsers updated.Disable AirDrop/Nearby Share/SMB/AFP unless needed.Use randomised MAC addresses on client devices to reduce tracking; keep a note if you rely on MAC filters.Turn off Auto‑Join for older or untrusted SSIDs to avoid accidental connections when your hotspot is off.Pro tip: Enable client isolation on the hotspot if available. It prevents connected devices from seeing each other—useful when sharing with colleagues you don’t fully manage.VPN best practices over a hotspotUse a reputable VPN on laptops/tablets for work, banking and sensitive research. It protects you if apps fall back to unencrypted protocols and shields DNS lookups.Prefer protocols like WireGuard or modern OpenVPN with a kill switch. Turn on auto‑connect on untrusted networks.Choose an exit location close to your actual region for better latency and fewer geo‑blocking issues.Split tunnelling can preserve streaming/VC quality if your VPN slows some services.Corporate users: follow your company’s VPN policy—your IT may require always‑on VPN. See For Business for enterprise‑friendly eSIM options that work well with corporate VPNs.Remember: hotspot encryption protects the Wi‑Fi hop; a VPN protects end‑to‑end traffic.Monitoring, limits and battery awarenessWatch the connected device list. If an unexpected device appears, change the password immediately.Set a data warning/limit on your phone to avoid bill shock from laptop updates.Enable automatic hotspot timeout when idle.Carry a compact power bank; tethering drains the phone faster, especially on 5G. USB tethering helps by charging while connected.Pre‑trip hotspot security checklistUpdate phone OS and client device OS/browsers.Confirm your eSIM plan includes hotspot/tethering (see Destinations).Test hotspot with each device; verify WPA3/WPA2 connection.Set a strong 16–24 character password; store in your password manager.Configure device limits, auto‑timeout, and 5 GHz band.Install/verify VPN with auto‑connect and kill switch on client devices.Prepare a USB cable for tethering to your primary laptop.Pack a power bank; enable data warnings.FAQsQ: Should I hide my SSID? A: No. Hidden SSIDs don’t stop determined attackers and can make your devices broadcast the network name in probes. Keep SSID broadcast on, choose a neutral name, and rely on WPA3/WPA2 with a strong password.Q: Is Bluetooth or USB tethering safer than Wi‑Fi? A: USB is the safest for one laptop—no Wi‑Fi beacon, and it charges the phone. Bluetooth has a smaller footprint but lower speeds. Use Wi‑Fi hotspot when you need to connect multiple devices.Q: How strong should my hotspot password be? A: At least 16 characters mixing upper/lowercase, numbers and symbols. Avoid dictionary words or predictable patterns. Rotate it after sharing outside your group.Q: Do I need a VPN if I’m using my own hotspot? A: It’s still wise. Hotspot security encrypts the Wi‑Fi hop, not the full path to websites/services. A VPN protects against leaky apps, insecure sites and prying networks between your carrier and destination.Q: Why can’t my older laptop connect to my WPA3 hotspot? A: Older Wi‑Fi adapters don’t support WPA3. On iPhone, temporarily enable Maximise Compatibility; on Android, switch security to WPA3/WPA2 transition or WPA2. Revert to stronger settings afterwards.Q: Does tethering use more data? A: Laptops often download updates and sync in the background, so hotspot usage can spike. Set OS metered connection mode and disable large updates over mobile data. Add data warnings to your phone.Next step: Choose an eSIM plan with hotspot enabled for your route. Start with Destinations or pick a regional pass like Esim Western Europe or Esim North America and set up your secure hotspot before you travel.