Bangkok Speed Test: BKK/DMK Airports, BTS/MRT, Old City

Blog

Bangkok Speed Test: BKK/DMK Airports, ...

Bangkok Speed Test: BKK/DMK Airports, BTS/MRT, Old City

30 Oct 2025

Bangkok Speed Test: BKK/DMK Airports, BTS/MRT, Old City

Traveller data performance in Bangkok is a story of two cities: excellent 5G in modern corridors, and uneven throughput where tourists actually linger. This bangkok mobile speed test focuses on the transit spine most visitors use—Suvarnabhumi (BKK) and Don Mueang (DMK) airports, the BTS Skytrain, the MRT, and the Old City (Rattanakosin, incl. Khao San). We ran day-vs-night comparisons across crowded windows and quieter hours. The topline: Bangkok can be blisteringly fast, but speed swings are real during peak passenger surges and at dense nightlife hotspots. Underground MRT holds steady but is rarely the quickest; BTS platforms outperform trains in motion; airport arrivals are the slowest zones you’ll hit on arrival, especially mid‑day.

This report is part of Simology’s Connectivity Lab series. We publish our raw measurements—download and upload throughput, latency, jitter and loss—as an open CSV for independent analysis. You can access methodology notes and the dataset via our Partner Hub, and browse more country snapshots on Destinations. If you’re flying onward to the US or Europe, we also link relevant eSIM options below.

How we tested (field protocol)

  • Devices: iPhone 15 Pro and Pixel 8 (dual-SIM eSIM), both 5G-capable.
  • Networks: leading Thai operators (multi-network eSIM profiles); automatic network selection enabled.
  • Tools: Ookla Speedtest app + nPerf cross-check; 3–5 runs per location per time window; medians reported.
  • Time windows:
  • Morning peak: 07:00–09:30
  • Midday: 12:00–14:00
  • Evening peak: 17:00–20:00
  • Late night: 22:30–00:30
  • Locations: BKK and DMK landside/airside zones, BTS core stations and on-train, MRT Blue/Purple platforms and in-car, Old City street-level (Grand Palace perimeter, Khao San Road, Phra Athit).
  • SIM plans: 5G bundles with high fair-use thresholds (FUPs ≥100 GB) to avoid throttling during tests.

Pro tip: - Before testing, toggle aeroplane mode for 10 seconds to refresh radio attach and clear stale sessions.

Snapshot findings (medians across operators)

  • Suvarnabhumi (BKK), main concourses:
  • Day: 120–180 Mbps down, 18–35 Mbps up, 18–28 ms latency
  • Night: 250–420 Mbps down, 25–55 Mbps up, 15–22 ms latency
  • Don Mueang (DMK), older terminals:
  • Day: 60–95 Mbps down, 12–25 Mbps up, 22–35 ms latency
  • Night: 130–200 Mbps down, 16–40 Mbps up, 18–28 ms latency
  • BTS Skytrain (platforms vs on-train):
  • Platforms (core): 140–260 Mbps day, 210–380 Mbps night
  • On-train (moving): 70–140 Mbps day, 120–220 Mbps night; brief dips during handovers
  • MRT Blue Line (underground):
  • Platforms: 80–150 Mbps day, 110–180 Mbps night
  • In-car: 55–110 Mbps day, 90–140 Mbps night; latency 25–40 ms
  • Old City (Rattanakosin incl. Khao San):
  • Day: 45–95 Mbps down, 10–20 Mbps up
  • Night (21:00–23:30): 18–60 Mbps down, 8–16 Mbps up; crowd saturation often visible

Night-time generally yields 1.6–2.2× faster downloads in airports and on BTS; the Old City is the exception—heavy evening footfall compresses capacity.

Airports: Suvarnabhumi (BKK) vs Don Mueang (DMK)

BKK highlights

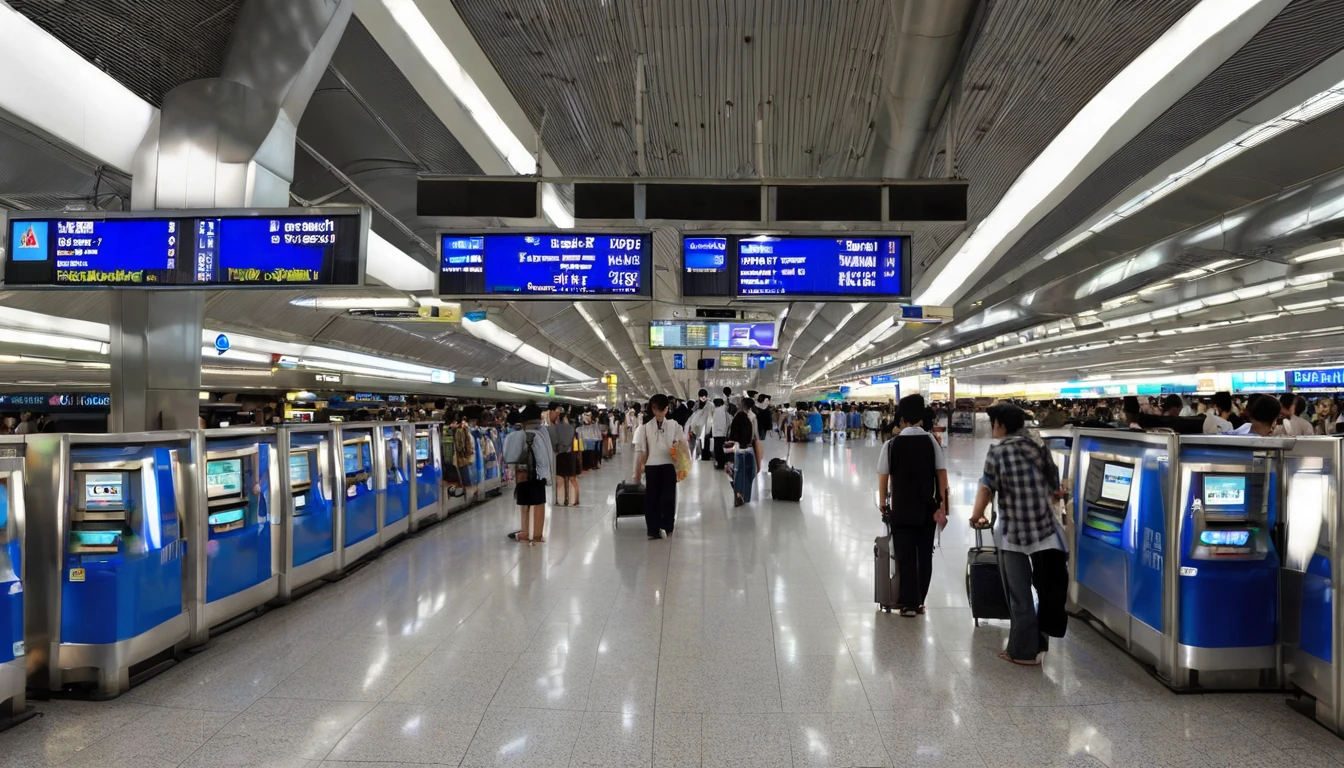
  • Arrivals hall (Level 2): most congested zone. Midday medians: 90–140 Mbps down; uplink 15–25 Mbps. Night jumps to 220–320 Mbps.
  • Check-in (Level 4) and security airside lounges: consistently faster—150–240 Mbps day, 280–450 Mbps night.
  • Gate areas near outer piers (A/B/G): slight slowdowns compared with central concourses due to cell edge; expect 110–180 Mbps midday.

What this means: - Cloud check-ins, media uploads and maps updates are painless outside arrivals. If you need a big app update, do it airside or later at your hotel Wi‑Fi.

DMK highlights

  • Older building fabric and crowd bursts around low-cost departures trim speeds.
  • Landside halls: 60–90 Mbps day; 130–180 Mbps late night.
  • Airside at newer gates: modest uplift—80–120 Mbps day.

Traveller tip: - If your eSIM QR fails to activate in a packed arrivals hall, walk 100–150 metres to a quieter corner or head airside post-immigration on departure for a clean activation.

Transit corridor: BTS Skytrain

Platforms vs on-train

  • Platforms in central sections (Siam, Asok, Chit Lom): strongest performance. Day medians around 160–220 Mbps; late night 250–380 Mbps.
  • On-train in motion: handovers between cells reduce peak throughput. Day medians 80–120 Mbps; late night 130–200 Mbps.
  • Bottlenecks: river crossing near Saphan Taksin can cause quick drops; expect momentary sub‑50 Mbps dips.

Checklist: to keep signal stable on BTS - Stand near carriage windows rather than doors flanked by advertising wraps and electronics clusters. - Pause large uploads until the train stops at a station platform. - Disable Wi‑Fi assist features that hop onto weak captive portals at stations.

Transit corridor: MRT Blue and Purple Lines

  • Underground systems use in-tunnel coverage that prioritises continuity over raw peaks.
  • Platforms: 90–140 Mbps (day), 120–170 Mbps (night). Latency sits 25–35 ms.
  • In-car: 60–100 Mbps (day), 90–130 Mbps (night), with very low jitter—good for calls.
  • Uploads are the MRT’s weak spot during peaks, sometimes dipping to 8–15 Mbps at interchange stations.

Pro tip: - For video calls, MRT beats BTS during rush hour thanks to fewer handovers. Drop your video resolution to 480p/720p for consistent results.

Old City and Khao San: the tricky zone

  • Around the Grand Palace and Sanam Luang: decent mid‑day 4G/5G, 60–110 Mbps down.
  • Khao San Road and Rambuttri at night: saturation is common. We saw 18–40 Mbps down, uplink under 12 Mbps on busy nights.
  • Latency spikes (40–65 ms) and jitter can skew live streams and real‑time translations when bars are full.

Workarounds: - Step one block off Khao San to regain 2–3× throughput. - Schedule heavy uploads (drone footage, backups) outside 20:00–23:30. - If a booking app struggles at peak, toggle 5G off to force stable 4G where 5G is patchy; re‑enable later.

Day vs night: where the delta matters

  • Airports: night delivers 2× throughput on average; best time to activate eSIMs, download offline maps, or upload reels.
  • BTS: platforms show the biggest night boost; trains benefit less but still gain ~50–80%.
  • MRT: steady gains of ~40–60% at night.
  • Old City: inverse trend—night crowds reduce speeds by up to 50%.

If your itinerary is tight, time your big data tasks for late evening at your hotel or after you clear airport security.

Practical tips to stay fast

  • Pick a 5G plan with a high fair-use threshold (≥100 GB). Some “unlimited” plans throttle heavily after small caps.
  • On iOS/Android, disable Low Data/Data Saver modes during navigation or tethering.
  • Use offline maps for the Old City to avoid turn-by-turn hiccups in crowded alleys.
  • Speedtest sanity check: run two providers (e.g., Speedtest and nPerf) and take the median.
  • If tethering a laptop on BTS/MRT, cap cloud backup syncs to “paused on mobile data”.

Going beyond Thailand soon? Consider region-friendly eSIMs such as Esim Western Europe, Esim North America, or single-country packs like Esim United States, Esim France, Esim Italy and Esim Spain.

Reproduce our bangkok mobile speed test (step-by-step)

  1. Install two test apps: Ookla Speedtest and nPerf.
  2. Toggle aeroplane mode for 10 seconds; confirm 5G is available.
  3. Disable VPNs, Low Data/Data Saver and battery saver modes.
  4. Run 3 tests back-to-back, discard clear outliers (>2× from median).
  5. Move 10–15 metres and repeat to avoid a single-cell artefact.
  6. Log results with timestamp, GPS, operator, RAT (5G/4G), and note whether stationary or in motion.
  7. For train tests, mark station vs in-car and direction of travel.

Dataset fields we publish: - timestamp_utc, lat, lon, location_name, venue_type (airport/platform/train/street), operator, radio (5G/4G), download_mbps, upload_mbps, latency_ms, jitter_ms, packet_loss_pct, device, notes

Open CSV access: - Download the raw CSV and notes from the Simology Partner Hub. You can filter by venue_type to isolate airports, BTS/MRT, or Old City snapshots.

Example row (condensed, one line): 2025-02-18T12:42:00Z,13.9124,100.6068,BKK Arrivals L2,airport,AIS,5G,132.4,22.8,24,6,0.3,iPhone15Pro,midday crowd

What this means for different travellers

  • First-time visitors: don’t judge Bangkok speeds by the arrivals hall. Expect a strong uplift once you’re out of BKK/DMK or a few hours later.
  • Remote workers: MRT is the safer choice for in-transit calls. For uploads, wait for platforms or quiet hours.
  • Creators: plan story uploads for late night or hotel Wi‑Fi; shoot in the Old City, upload from Siam/Asok or back at base.
  • Teams on the move: standardise a quick bandwidth check routine. For centralised reporting and fleet eSIM controls, see Simology For Business.

For more country-by-country connectivity snapshots, head to Destinations.

FAQ

1) Is 5G widely available in central Bangkok? - Yes. 5G covers most city districts, major malls, BTS/MRT stations and both airports. Underground MRT is consistent but not the fastest; Old City at night is the patchiest.

2) Why are airport arrivals slower than departures? - Crowding, radio noise and many devices reattaching at once. Airside and higher concourses usually have better cell distribution and less interference.

3) Are BTS trains bad for video calls? - Not bad, but handovers can cause stutters. Use MRT for important calls at rush hour, or keep video to 480p/720p and turn off background uploads.

4) My “unlimited” plan feels slow—why? - Many plans throttle after a small fair-use quota. Choose high‑FUP 5G packs. If your speed drops sharply after several GB, you’ve likely hit a throttle.

5) What’s the best time to activate or switch eSIMs? - Late evening or once you’ve cleared the terminal. If activation fails in arrivals, step away from crowds or wait until you reach a less congested area.

6) I’m transiting to Europe or the US. Can I keep one eSIM? - Yes. Use a regional plan such as Esim Western Europe or Esim North America. For country-specific trips, see Esim United States, Esim France, Esim Italy and Esim Spain.

Next step: Explore more city-by-city field tests and plan your connectivity with Simology on Destinations.

Read more blogs

Andes Highlights (3 Weeks): Peru–Bolivia–Chile–Argentina Connectivity

Andes Highlights (3 Weeks): Peru–Bolivia–Chile–Argentina Connectivity

Planning a south america itinerary 3 weeks through the high Andes? This route stitches together Peru’s Sacred Valley, Bolivia’s La Paz and Salar de Uyuni, Chile’s Atacama Desert, and northern Argentina’s quebradas or Mendoza wine country—often by long-distance bus and a couple of short flights. Connectivity is different at altitude: coverage is strong in cities but drops in high passes and salt flats; bus Wi‑Fi is patchy; border towns can be blackspots. The smart move is an eSIM with multi‑country coverage, backed by offline maps, offline translations, and a simple routine for crossing borders by bus without losing service. Below you’ll find a practical, connectivity-first itinerary; checklists to prep your phone, apps and documents; and on-the-ground tips for staying online where it matters: booking transport, hailing taxis, backing up photos, and navigating when the signal disappears.If you’re transiting via Europe or North America, you can also add a layover eSIM to stay connected door-to-door. Start with our country list on Destinations, then follow the steps, and you won’t waste time chasing SIM shops at 3,500 metres.The 3‑week Andes route at a glanceWeek 1: Peru (Cusco, Sacred Valley, Machu Picchu) - Fly into Cusco (or Lima then connect). - Base in Cusco; day trips to Pisac/Chinchero/Maras–Moray. - Train to Aguas Calientes; Machu Picchu visit; return to Cusco or continue to Puno/Lake Titicaca.Week 2: Bolivia and Chile (La Paz, Uyuni, San Pedro de Atacama) - Bus/collectivo via Copacabana to La Paz. - Fly or overnight bus to Uyuni. - 3‑day Uyuni–altiplano tour ending in San Pedro de Atacama (Chile).Week 3: Chile and Argentina (Atacama to Salta or Mendoza/Buenos Aires) - Choose: - North: San Pedro to Salta/Jujuy by bus; fly to Buenos Aires. - Or South: San Pedro–Calama flight to Santiago; bus or flight to Mendoza; onward to Buenos Aires.Connectivity notes (quick): - Cities: generally strong 4G/4G+; 5G in major hubs (Santiago, Buenos Aires). - Altitude/rural: expect long no‑signal stretches (Uyuni, altiplano passes, Paso Jama). - Bus Wi‑Fi: often advertised, rarely reliable. Plan to be offline onboard. - Border regions: networks switch; a multi‑country eSIM avoids sudden loss.eSIM vs local SIMs for a 4‑country tripFor a route with multiple borders and remote legs, eSIM wins on time and reliability.What a multi‑country eSIM gets you: - One plan across Peru, Bolivia, Chile, Argentina (check coverage per country on Destinations). - No passport/SIM registration queues at kiosks. - Keep your home number active on the physical SIM for calls/SMS codes. - Instant top‑ups if you burn data on photos or navigation.When a local SIM still helps: - Long stay in one country with heavy data use (e.g., a month in Buenos Aires). - Dead zones where a different local network performs better (rarely worth the hassle on a 3‑week pace).Practical approach: - Use an eSIM as your primary data line across all four countries. - If you find a specific local network far better in one region, add a cheap local SIM and keep the eSIM as backup.Device readiness checklist (before you fly)1) Check eSIM compatibility and SIM‑lock status on your phone.2) Buy and install your eSIM while on home Wi‑Fi. Keep a PDF/printed copy of the QR code.3) Label lines clearly (e.g., “eSIM Andes Data”, “Home SIM”).4) Turn on data roaming for the eSIM; leave roaming off for your home SIM to avoid charges.5) Set up dual‑SIM rules: data on eSIM; calls/SMS default to home SIM if needed.6) Download offline: Google Maps/Organic Maps for all target regions; language packs (Spanish at minimum); bus/air tickets; hotel confirmations.7) Cloud backups: set to upload on Wi‑Fi only; pre‑create shared albums for travel companions.8) Test tethering/hotspot with your laptop/tablet.If you’re transiting popular hubs, consider a short layover eSIM: - USA connections: add an Esim United States or a broader Esim North America.- Europe connections: Madrid/Barcelona? Use an Esim Spain. Paris or Rome? See Esim France and Esim Italy. Multi‑country layovers? Try Esim Western Europe.City‑by‑city connectivity notesCusco & the Sacred Valley (Peru)Coverage: Good in Cusco city; variable in high villages (Maras/Moray) and along Inca Trail approaches.Tips: Download Sacred Valley maps offline; pin viewpoints and ruins. most taxis use WhatsApp—save your accommodation’s number.Machu Picchu/Aguas Calientes: Patchy to none at the citadel. Upload your photos later; don’t rely on live ticket retrieval.Lake Titicaca: Puno and CopacabanaPuno: Reasonable 4G; bus terminals crowded—screenshot QR tickets.Crossing to Copacabana: Expect a signal drop around the border; have directions saved offline.La Paz (Bolivia)Good urban 4G; the cable car network has decent signal but tunnels do not.Yungas/“Death Road” tours: Mountain valleys cause dead zones—share your emergency contacts with the operator, carry a charged power bank, and don’t plan remote calls.Uyuni and the Altiplano (Bolivia to Chile)Uyuni town: OK 4G; ATMs finicky—use Wi‑Fi for banking apps.Salt flats/lagunas: Assume offline for most of the 3‑day tour. Guides often carry satellite phones; agree a pickup time/place in San Pedro and preload your map route.San Pedro de Atacama (Chile)Town: Solid 4G; accommodations often have Wi‑Fi but speeds vary.Geysers, Valle de la Luna: Offline navigation essential; sunrise trips start before mobile networks wake up in some areas.Salta/Jujuy or Mendoza/Buenos Aires (Argentina)Salta/Jujuy: Good city coverage; quebradas have long no‑signal sections.Mendoza: City 4G/5G; vineyards outside town can be patchy.Buenos Aires: Strong 4G/5G; ideal for cloud backups and large downloads before you fly home.Border crossings by bus: step‑by‑stepThe big ones on this route: Peru–Bolivia (Puno/Copacabana), Bolivia–Chile (Uyuni–San Pedro via Hito Cajón), Chile–Argentina (Paso Jama to Salta or Los Libertadores to Mendoza).How to keep service and sanity:1) The day before:- Top up your eSIM data.- Confirm your plan includes both countries you’re entering/leaving.- Download offline maps for both sides of the border and your town of arrival.- Save bus company WhatsApp and terminal address offline.2) On departure morning:- Keep a paper copy or offline PDF of tickets, insurance, and accommodation proof.- Charge phone and power bank; pack a short cable in your daypack.3) On the bus:- Don’t count on bus Wi‑Fi. Keep your eSIM as primary, but expect drops near mountain passes.- If your phone supports it, enable “Wi‑Fi calling” for later when you reach accommodation Wi‑Fi.4) At the border posts:- Data may be unavailable. Keep QR codes and booking numbers offline.- After exiting one country and entering the next, toggle Airplane Mode off/on to re‑register on the new network.- If the eSIM doesn’t attach, manually select a network in Mobile Settings.5) Arrival:- Send your accommodation a quick WhatsApp when you’re back online.- Recheck your eSIM’s data roaming is on; confirm you’re on an in‑country network, not a weak roaming partner.Pro tips: - Dual profiles: If your eSIM allows, keep a secondary profile for a different network in the same country—helpful in border towns.- Cash buffer: Some border terminals don’t accept cards; download a currency converter for offline use.Offline survival kit (5‑minute setup)Maps: Download regions for Cusco, Sacred Valley, Puno, La Paz, Uyuni, San Pedro, Salta/Jujuy or Mendoza, and Buenos Aires.Translations: Download Spanish for offline use; add phrasebook favourites (bus tickets, directions, dietary needs).Documents: Save PDFs of passports, tickets, hotel addresses; star them for quick access.Rides: Screenshots of pickup points; pin bus terminals and hotel doors.Entertainment: Podcasts and playlists for long bus legs, set to download on Wi‑Fi only.Altitude and your tech: what changesCoverage gaps lengthen: Fewer towers at high altitude; valleys can block signal. Assume offline on remote excursions.Batteries drain faster in cold: Keep your phone warm and carry a power bank (10,000–20,000 mAh).Hotel Wi‑Fi may be congested: Schedule big uploads (photo backups, app updates) for big-city stays like Santiago or Buenos Aires.GPS still works offline: Your blue dot shows on offline maps without data—preload everything.Data budgeting for 3 weeksTypical traveller usage across this route: - Messaging/Maps/Bookings: 0.2–0.5 GB/day- Social and photo sharing: 0.3–0.7 GB/day- Occasional video calls/streaming: 0.5–1.0 GB/dayFor a mixed-use trip, plan 15–25 GB for 3 weeks. Heavy creators should double it and upload over hotel Wi‑Fi when possible. If you work remotely, consider a higher‑capacity plan and a backup eSIM; see our guidance on For Business.Practical route with transport and connectivity cuesDays 1–4 Cusco base: Strong city signal; day trips may be spotty—go offline-ready.Days 5–6 Machu Picchu: Expect no service at the ruins; sync tickets ahead.Days 7–8 Puno to La Paz via Copacabana: Border signal drop; re‑register networks after crossing.Days 9–11 Uyuni tour to San Pedro: Treat as offline; charge nightly; carry spare cables.Days 12–14 San Pedro: Stable in town; tours offline; top up data before Paso Jama.Days 15–17 Salta/Jujuy or Mendoza: Good urban 4G; rural patches are offline.Days 18–21 Buenos Aires: Strongest connectivity of the trip; clear your uploads and map downloads for the flight home.Partnering and stopover extrasHospitality and tour operators in the Andes: help your guests stay connected—explore co‑branded solutions via our Partner Hub.Transatlantic flyers: test your eSIM setup on a layover with an Esim United States or Esim Western Europe before hitting high-altitude blackspots.FAQs1) Do I need a local SIM in each country?No. A multi‑country eSIM covering Peru, Bolivia, Chile and Argentina is simpler and works well for a 3‑week pace. Consider a local SIM only if you’ll spend longer in one country and want the absolute best regional coverage.2) Will my WhatsApp number change with an eSIM?No. WhatsApp is tied to your registered number, not your data line. Keep your home SIM active for voice/SMS (roaming off if you wish), and use the eSIM for data—WhatsApp continues as normal.3) Can I hotspot to my laptop or camera?Yes. Enable tethering on your eSIM. Mind your data: cloud backups and OS updates can burn gigabytes—set them to Wi‑Fi only or schedule in big cities.4) What if there’s no signal on the Uyuni/Atacama legs?That’s expected. GPS still works offline. Pre-download maps and translations, carry a power bank, and sync plans with your tour operator before departure.5) Will I get roaming charges at borders?If you’re using a multi‑country eSIM with coverage in both countries, you won’t incur extra roaming fees from your home carrier. Keep roaming off on your home SIM to avoid accidental use.6) I’m connecting via Europe or the US—worth getting a layover eSIM?Yes. It’s an easy way to test your setup and stay reachable. Try Esim North America or country options like Esim Spain, Esim France, or Esim Italy for common hubs.Next step: Browse South America coverage options and build your plan on Destinations.

Reseller & Affiliate Playbook: Commission Tiers, Attribution & Payouts

Reseller & Affiliate Playbook: Commission Tiers, Attribution & Payouts

If you run a travel site, content channel, marketplace or mobility service, a well-run eSIM affiliate reseller program can become a predictable revenue stream. This playbook shows exactly how Simology partners earn, track and get paid—without guesswork. We cover practical commission tiers, link attribution, UTM best practice, pixel/postback options, fraud checks, and the monthly payout workflow. You’ll also get a launch checklist and high‑converting ideas tied to top routes and countries. Keep the traveller experience front and centre: promote plans that activate instantly, work across borders, and solve roaming pain—in destinations like the Esim United States, Esim France, Esim Italy, Esim Spain and multi‑country bundles such as Esim Western Europe or Esim North America. Bookmark this guide, then head to the Partner Hub to activate your links and track performance.Who this is for—and what you can earnTravel publishers, bloggers, YouTubers, creators and communitiesOTAs, metasearch, airlines, rail, ferry and bus operatorsCo‑working, co‑living, expat and student platformsTelco dealers and retail resellersYou can promote single‑country eSIMs, regional bundles and long‑stay plans. Commission scales with volume and quality, paying on each qualified order (first purchase and, if applicable, top‑ups—see FAQ). Live rates and your status are visible in the Partner Hub.Pro tip: Match content to destinations and travel seasons using the live catalogue on Destinations. It’s the fastest way to lift conversion.Commission tiers explainedWe use a volume-and-quality model: more approved orders and lower refund rates move you up. Check the Partner Hub for your current tier and live rates. Typical structure:Starter: up to 49 approved orders/monthCommission: baseline rate on qualified ordersEligibility: new partners; light seasonal trafficGrowth: 50–199 approved orders/monthCommission: higher rate; performance review each quarterExtras: custom vouchers for campaignsScale: 200–999 approved orders/monthCommission: premium rateExtras: dedicated support, early access to promosEnterprise: 1,000+ approved orders/monthCommission: negotiatedExtras: co‑marketing, API and bulk ordering options via For BusinessWhat counts as an “approved order” - A unique, paid order that passed fraud checks and remains outside the refund window - Suppressed: cancelled/chargeback orders; obvious self‑dealing; duplicate device activationsQuality guardrails - High refund/complaint rates may trigger a temporary tier freeze while we optimise your funnel - Vouchers discount the retail price but do not reduce your commission rate unless otherwise agreedPro tip: When you launch new placements, start with flexible, popular routes—e.g. Esim United States for long‑haul, Esim Western Europe for rail/Interrail content—to stabilise your conversion and refund mix.Attribution and tracking that just worksWe run a transparent, last‑click attribution model with a standard cookie window. Details:Attribution: last non‑direct click from a Simology‑approved tracking linkLookback window: 30 days cookie; same‑session for private browsingCross‑device: supported when user logs in with the same email on checkoutVouchers: a partner code applies commission if the user arrives direct (fallback attribution)Override rules: self‑purchase suppression; voucher misuse; policy breaches (see Fraud)UTM best practice (so your analytics match ours) - utm_source: your brand or network (e.g., travelblog) - utm_medium: affiliate, reseller, partner, newsletter, video - utm_campaign: campaign or season (e.g., summer_2025_eu) - utm_content: placement (e.g., sidebar_link, yt_description, dealbox) - sub1–sub5: your granular IDs (post slug, ad group, language, creative)Example tracking link (simplified): - https://simology.io/esim-western-europe?utm_source=travelblog&utm_medium=affiliate&utm_campaign=summer_2025_eu&utm_content=dealbox&aff_id=123&sub1=interrail_guidePro tip: Always deep‑link to the exact plan page that matches the traveller’s intent, such as Esim Italy for Rome/Milan guides, or Esim North America for multi‑country trips.Pixel and postback optionsWe support flexible conversion signalling so you can reconcile in your platform.JavaScript pixel: we fire a partner‑specific pixel on the order confirmation pageEvent: purchasePayload: order ID, currency, total, product/region, voucher codeServer‑to‑server postback: preferred for networksProtocol: GET/POST with macros (order_id, amount, currency, status, sub1–sub5)Retries: automatic on transient errorsWebhooks: real‑time events for approved, refunded, and topped‑up orders (opt‑in via Partner Hub)Implementation steps 1) Request your pixel/postback template in the Partner Hub. 2) Provide your endpoint and required macros. 3) Validate in sandbox with two test orders (cancelled + completed). 4) Go live and compare click‑to‑order counts for the first week.Pro tip: Use sub‑parameters to map every placement. It’s the fastest way to prune low‑quality traffic and scale the winners.Fraud and quality controls (and how to stay compliant)We protect travellers and partners by filtering bad traffic without blocking legitimate purchases.What we check - Duplicate suppression: same device/email used across multiple partner links - Voucher abuse: leaked codes used outside permitted channels - Velocity: anomalous spikes from new sources; unrealistic geo/device patterns - Referrers: masked/referrer‑less clicks with high bounce or bot signatures - Refund anomalies: high refund rates clustered by source or sub‑IDYour compliance checklist - Use approved tracking links/vouchers only - No forced clicks, cookie stuffing, toolbars or misleading claims - Label ads and sponsored content clearly - Don’t bid on Simology brand terms unless explicitly authorised - Keep your contact and payout details current in the Partner HubIf we detect an issue, we’ll notify you, pause the affected traffic, and help you remediate. Approved, legitimate orders remain eligible for commission.Monthly payout workflow (end‑to‑end)Month end (T+0): Month closes at 23:59 UTC on the last dayReconciliation (T+1 to T+5): Fraud screening, refunds/cancellations netted outStatement (T+6): Provisional report in the Partner Hub with order IDs and statusesDisputes window (T+6 to T+10): Query mismatches by order ID; we re‑check logs and referrersApproval (T+11): Final amount lockedPayout (T+15): Funds sent via bank transfer or online payoutThresholds: Minimum payout applies; balances roll over if below thresholdNotes - Currency: Paid in your account currency; FX based on payout day mid‑market rate - Documentation: Ensure your account profile, tax information and payout method are complete to avoid delays - Returns: Orders refunded after approval are debited against the next cyclePro tip: Export your order‑level report monthly and match it against your analytics by sub‑ID to keep your funnel healthy.Launch checklist (do this once, in order)1) Apply in the Partner Hub and add your primary domains/social handles. 2) Create link presets with standardised UTM and sub‑parameters. 3) Request voucher codes if you need them for specific pages or newsletters. 4) Set up your pixel/postback and run two test orders (approved + cancelled). 5) Build at least three evergreen placements: - “How to get data in the US” linking to Esim United States - “Europe rail packing list” linking to Esim Western Europe - “City break guides” linking to Esim France, Esim Italy and Esim Spain 6) Add a global “eSIM for travel” link in your nav or resources pointing to Destinations. 7) Monitor CTR, conversion and refunds; scale the best placements.Promotion ideas that convertComparison blocks: “Local SIM vs roaming vs eSIM” with a clear CTA to regional bundles like Esim North AmericaItinerary‑specific CTAs: “Before you land in JFK, install your eSIM” linked to Esim United StatesPacking lists: Include an “eSIM ready” tip with links to DestinationsNewsletter countdowns: “48 hours to departure? Activate Esim Western Europe in 2 minutes”Video descriptions: Persistent link with UTM + sub‑IDs, plus a voucher codePro tip: Surface regional bundles alongside single‑country plans; travellers often change routes late, and bundles lift conversions.Reporting: the KPIs that matterTrack these weekly: - Click‑through rate (placement quality) - Landing‑to‑install rate (clarity of instruction) - Install‑to‑activation rate (device fit, support) - Conversion rate and AOV (offer relevance) - Refund rate (content accuracy; set expectations) - Earnings per click (EPC) by sub‑ID (where to scale)Pro tip: If install‑to‑activation drops, add a “Works on most modern iPhones and Androids—check device list” line near your CTA and deep‑link to the right region. Align content to the traveller’s device and route.FAQHow is commission calculated? Commission is a percentage of the final paid amount on approved orders after discounts. Your tier determines the percentage. Track live rates and approvals in the Partner Hub.What’s the attribution window? Standard cookie window is 30 days with last non‑direct click. If a user applies your voucher code on a direct visit, attribution falls back to the code.Do I earn on top‑ups or extensions? Where top‑ups are processed under the same account/email within the attribution window and linked to your original referral, commission applies. The order‑level report shows this by event type.Can I buy through my own link? Self‑purchases and obvious self‑dealing are suppressed. If you need staff or creator plans for testing, request non‑commissionable codes via the Partner Hub.Which destinations convert best? High‑intent pages like Esim United States, Esim France, Esim Italy, Esim Spain and regional bundles like Esim Western Europe and Esim North America are consistently strong. Browse all options on Destinations.Can I get API or bulk ordering? Yes. Larger resellers and enterprise partners can use API access, white‑label flows and bulk provisioning via For Business. Contact us through the Partner Hub.Next step: Ready to launch or optimise your esim affiliate reseller program? Activate your account and get your first links live in the Partner Hub.

Banking & OTP Abroad: App Settings That Keep Codes Coming

Banking & OTP Abroad: App Settings That Keep Codes Coming

Stuck outside your home country and your bank won’t send the one-time passcode? You’re not alone. Many banks still rely on OTP by SMS, which can fail when roaming is patchy, Wi‑Fi calling doesn’t register for texts, or your phone quietly blocks push notifications to save battery. The fix is simple: move your approvals into the bank app, keep push working, and set up fallbacks you control. This guide shows you exactly how to configure your phone and accounts so codes keep coming—without juggling SIMs or paying surprise roaming fees. We’ll cover push vs SMS, authenticator apps, backup codes, dual‑SIM/eSIM setups that actually work, VoWiFi caveats, and a pre‑flight checklist you can run in ten minutes. If you manage trips for a team, we’ll also point you to options that scale. Wherever you’re headed—browse eSIMs by region via Destinations—you’ll arrive ready to log in, approve payments, and get on with your day.The problem: OTPs fail when you’re abroadHere’s why bank codes often don’t arrive when travelling:SMS depends on your home mobile network allowing roaming, VoLTE/VoWiFi interoperability, and local interconnects. Any piece breaks, codes vanish.Some carriers don’t deliver SMS over Wi‑Fi calling when you’re outside your home country.Phones aggressively throttle background activity on low battery or “optimised” modes, silently delaying bank push notifications.Changing time zones can desynchronise time-based codes if your device time is set manually.Dual‑SIM misconfiguration: data on a travel eSIM but SMS locked to a disabled home line.The cure is to reduce dependence on SMS, configure your device for reliable push, and keep lightweight SMS fallback available.The bank otp abroad app playbook: use in‑app approvals and authenticator codesMost modern banks support app-based approvals or time-based one-time passwords (TOTP) in their own app. These work over any internet connection (mobile data or Wi‑Fi), avoiding SMS entirely.Why push beats SMS when travellingWorks on any data connection, including hotel Wi‑Fi and travel eSIMs.Not tied to your home phone number or roaming.Faster and more reliable than international SMS, especially during number‑porting or network outages.Step-by-step: move approvals into your bank appDo this before you travel:Install or update your bank’s mobile app on your primary phone. Sign in at home on a known network.In Security/2FA settings, choose “App-based verification,” “Push approval,” or “Mobile app authentication.”Register the device and complete any identity checks while you still have normal coverage.Enable “Offline or one-time codes” inside the bank app if offered (many apps cache short-lived codes for poor connectivity).Add a second factor: backup codes, a hardware token (if the bank issues one), or an authenticator app as a fallback.Pro tip: Some banks offer TOTP (like an authenticator code) inside their own app. Prefer that to SMS where available.Build a resilient 2FA setup before you flyChecklist: your 10-minute pre‑flightSwitch 2FA to app‑based approvals for every bank and payment service.Generate and securely store backup codes (print and keep offline; do not keep only in your email).Add a second device as an emergency method (e.g., a tablet at home) if your bank allows multiple trusted devices.Confirm your phone’s time is set to automatic network time and time zone.Save your bank’s international contact numbers in your phone.Set up a travel data plan so your bank app always has internet, e.g. Esim Western Europe for multi‑country trips, or country packs such as Esim France, Esim Italy, Esim Spain, or Esim United States. For multi‑region itineraries, see Esim North America.Pro tip: Test from home. Put your phone in airplane mode, enable Wi‑Fi, turn off your primary SIM briefly, and confirm you can still receive bank push approvals over Wi‑Fi.Configure your phone so bank apps can reach youPush notifications rely on Apple/Google services. Don’t let battery savers or Focus modes strangle them.iPhone - Settings > Notifications > [Your bank app] > Allow Notifications (Lock Screen, Banners), Time Sensitive On. - Settings > General > Background App Refresh > On for your bank app. - Settings > Battery > Low Power Mode Off when you’re expecting codes. - Settings > Focus: ensure your bank app is allowed to notify during active Focus profiles. - Settings > Date & Time > Set Automatically On.Android (steps vary by brand) - Settings > Apps > [Your bank app] > Notifications > Allow; enable all relevant channels (e.g., “Security” or “Approvals”). - Settings > Battery > Battery optimisation > Don’t optimise your bank app and Google Play Services. - Settings > Mobile network > Data saver Off, or allow unrestricted data for the bank app and Google Play Services. - Settings > Date & time > Use network‑provided time/time zone On. - If your phone has a vendor “optimiser” (MIUI, EMUI, ColorOS, etc.), whitelist your bank app for autostart/background activity.Pro tip: Keep at least 200 MB free storage so apps can update and push tokens can refresh.Dual‑SIM done right: home number for SMS, eSIM for dataYou can keep your home SIM active for voice/SMS while using a local eSIM for data:Insert/activate travel eSIM for data (e.g., Esim Western Europe). Set it as default for mobile data.Keep your home SIM on for calls/SMS. You may disable data roaming on the home SIM to avoid data charges.In Dual SIM settings, set “Default for SMS” to your home line.Ensure roaming is enabled for the home SIM if you need SMS fallback. Charges may apply.Test: send yourself a regular SMS from another phone and confirm receipt while data flows through the eSIM.If you’re coordinating teams or devices, explore pooled plans via For Business or partnerships via the Partner Hub.SMS fallback: make it work when you mustSometimes your bank only supports SMS (especially legacy systems). If so:Verify international roaming is enabled on your mobile account before you leave.Turn on VoLTE and Wi‑Fi Calling on your home line. Note: some carriers don’t deliver SMS over Wi‑Fi calling when abroad. If you’re not receiving codes on hotel Wi‑Fi, toggle Wi‑Fi Calling off and try again on mobile.Avoid relying on temporary or VoIP numbers; banks often block them.Keep your line reachable: avoid forwarding your number or disabling the SIM.If your carrier supports it, prefer 4G/5G with VoLTE for SMS reliability as many countries have retired 3G.VoWiFi caveats you should knowSMS over Wi‑Fi isn’t guaranteed when you’re outside your home country; carriers differ by policy.Some devices say “Wi‑Fi Calling On” but still attempt to deliver SMS over the cellular channel. Without a roaming signal, texts won’t arrive.If you’re on Wi‑Fi only and texts don’t appear, temporarily step outside for cellular coverage or insert a local SIM for data while keeping your home SIM active for SMS.Pro tip: If your home carrier allows it, enabling data roaming just long enough to receive a code can help the phone register properly, even if your actual data flows over an eSIM.Troubleshooting: not receiving bank codes abroadWork through these in order:Confirm connectivity: open a web page. If using eSIM for data, ensure it’s active and has signal. See coverage options by region via Destinations.Try app approval: open your bank app and look for an in‑app “Approve” prompt or OTP generator.Notification check: send a test notification (if your bank app supports it) or a message from another app to confirm push works. Disable Focus/Do Not Disturb temporarily.Time check: set date/time to Automatic. Restart the phone to resynchronise push and TOTP.SMS path: if relying on SMS, ensure the home SIM is on, roaming enabled, and it can receive a normal SMS from another number. Toggle Wi‑Fi Calling Off, then On; toggle airplane mode for 10 seconds.Network selection: set the home SIM to automatic network selection. If that fails, manually pick a different partner network.VoLTE toggle: disable and re‑enable VoLTE for the home SIM; some roaming partners need a fresh registration.SIM priority: on dual‑SIM Android, set “Calling preference” for the home SIM; some banks require an outbound SMS handshake before sending OTP.Fallback contact: use backup codes or your pre‑registered secondary factor to regain access.Last resort: call your bank’s international number (from the app or website). Ask for temporary alternative verification (app push, email to pre‑verified address, or phone support).Pro tip: Keep screenshots of your 2FA settings (no sensitive data) so you can explain your setup quickly to bank support.Planning your connectivity for smooth bankingA reliable data connection is the backbone of app‑based approvals. Pick an eSIM with coverage where you’re headed:Multi-country trips: Esim Western Europe or Esim North America.Single-country city breaks: Esim France, Esim Italy, Esim Spain, or Esim United States.Check regional options and fair-use notes via Destinations. For teams, create a standard “Banking & 2FA” pack in your internal travel checklist and provision eSIMs via For Business. Partners can streamline traveller onboarding through the Partner Hub.FAQWill my bank’s SMS codes arrive over Wi‑Fi?Not always. Some carriers don’t deliver SMS over Wi‑Fi calling when you’re abroad. If codes don’t arrive on Wi‑Fi, try with mobile coverage, or switch to app-based approvals.Do I need roaming enabled to receive SMS?Usually yes. Your phone must register on a roaming network to receive SMS to your home number. You can keep data roaming off and still receive SMS on many carriers, but check your plan for charges.Are authenticator apps better than SMS for travel?Yes. Authenticator or in‑app approvals work over any internet connection and aren’t tied to your phone number. They’re more reliable and generally more secure.What if my bank only supports SMS?Keep your home SIM active, enable roaming, and ensure VoLTE is on. Test before travel. If SMS still fails abroad, call the bank and ask for a temporary alternative (phone approval or in‑app activation).Do time zones affect one‑time codes?Time‑based codes (TOTP) need accurate device time. Set date/time to automatic. Manual time settings can cause codes to fail.Can I use a travel eSIM and still get bank codes?Yes. Use the eSIM for data and keep your home SIM active for SMS if needed. Configure dual‑SIM correctly and test before departure. Browse options via Destinations.Next stepSet up your data lifeline now so app-based approvals just work when you land. Pick your plan by region with Esim Western Europe or explore all options via Destinations, then run the pre‑flight checklist before you go.