The Balkan Loop (2 Weeks): Croatia–Bosnia–Montenegro–Albania–N. Macedonia

Blog

The Balkan Loop (2 Weeks): Croatia–Bos...

The Balkan Loop (2 Weeks): Croatia–Bosnia–Montenegro–Albania–N. Macedonia

30 Oct 2025

The Balkan Loop (2 Weeks): Croatia–Bosnia–Montenegro–Albania–N. Macedonia

Planning a balkan itinerary 2 weeks long? This coastal-meets-mountains loop threads together Croatia’s polished Adriatic, Bosnia and Herzegovina’s Ottoman charm, Montenegro’s fjord-like bays, Albania’s wild Riviera and North Macedonia’s lake country. It’s compact enough for buses, richer with a rental car, and rewarding either way. Expect sea days, winding alpine passes, and one or two ferries if you want them. Connectivity varies: coastal corridors are strong, but inland national parks and ferry crossings can be patchy—so a smart eSIM plan and a quick APN check at each border will keep you online.

This guide gives you a day-by-day route with realistic travel times, the best side trips, and connectivity tactics that work in the Western Balkans (where “EU roaming” often doesn’t). We’ll show you when to stay coastal, when to go inland, bus vs car trade‑offs, and how to choose between a regional eSIM and stacking country eSIMs. Finish in Skopje (open-jaw) or loop back if you must—either way, you’ll cover the highlights without rushing.

Who this route suits (and when to go)

  • Best for: First-time visitors who want both Adriatic coast and inland culture, photographers, food lovers.
  • Trip style: 2 weeks, 1–3 nights per stop, mix of city and nature.
  • Transport: Works by bus; a car unlocks national parks and short ferries (Bay of Kotor shuttle, Komani Lake).
  • When: May–June and September–October for lighter crowds and steady ferry timetables. July–August is hot and busy; winter reduces services in mountain areas.

Open-jaw (start in Croatia, end in North Macedonia) saves backtracking. If you need a loop, see the variant at the end of this section.

Day 1–2: Dubrovnik, Croatia (arrival)

  • Why: Walk the city walls, Old Town, Elaphiti Islands ferry day.
  • Transport in: Fly to Dubrovnik; 25–40 minutes to town.
  • Ferry option: Half-day to Lopud or Koločep. Connectivity at sea is variable; download offline maps.
  • Connectivity note: Croatia is EU, but neighbouring legs aren’t—plan your eSIM accordingly (see below).

Day 3: Dubrovnik → Mostar, Bosnia and Herzegovina

  • Travel: 3–4 hours by bus; 2.5–3.5 hours driving (border timing varies).
  • Do: Old Bridge (Stari Most), Kujundžiluk bazaar at dusk.
  • Coverage: Good in town; dips in the mountains en route.

Day 4–5: Mostar → Sarajevo

  • Travel: 2–2.5 hours by train (scenic Neretva valley) or 2 hours by road.
  • Do: Baščaršija, Latin Bridge, Tunnel of Hope.
  • Inland vs coastal: This is your richest inland cultural stop—worth two nights.

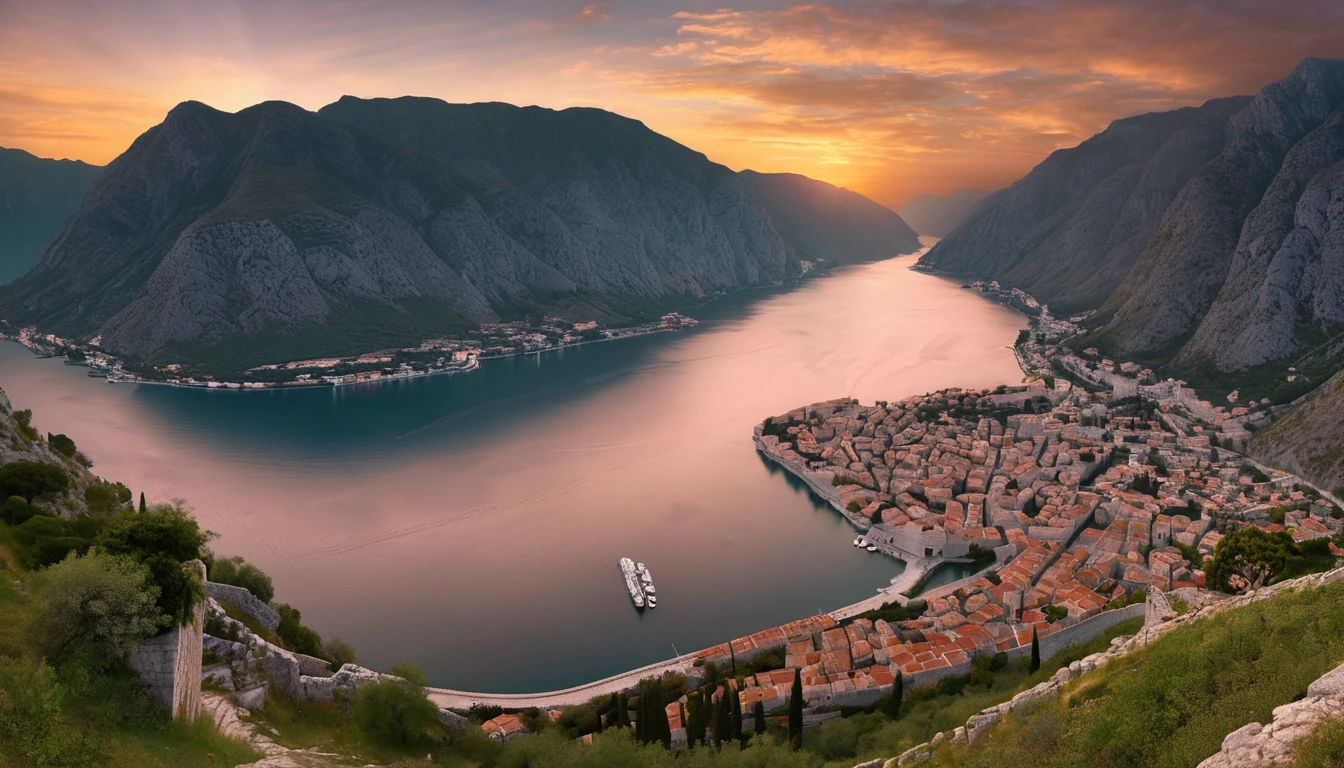
Day 6: Sarajevo → Kotor, Montenegro

  • Travel: 5.5–7.5 hours by bus; 5–6.5 hours by car via Trebinje. Border can add 30–90 minutes in season.
  • Do: Sunset from Kotor Fortress; Perast in the evening.
  • Ferry: If driving the bay, use the short Kotor Bay ferry (Lepetane–Kamenari) to save 30–45 minutes.
  • Coverage: Strong around the bay; occasional gaps on mountain approach.

Day 7: Kotor/Perast day

  • Pick one: Boat to Our Lady of the Rocks; drive to Lovćen National Park for switchback views.
  • Connectivity: Fine on the coast; Lovćen viewpoints can be spotty.

Day 8: Kotor → Budva → Lake Skadar (overnight near Virpazar) or Ulcinj

  • Travel: 1 hour to Budva; 1.5–2 hours to Virpazar; 2 hours to Ulcinj.
  • Do: Old Budva quick stop; Lake Skadar boat tour for birds and vineyards; or beach time in Ulcinj.
  • Inland vs coastal: Skadar is inland nature; Ulcinj keeps you coastal.

Day 9: Montenegro → Shkodër → Tirana, Albania

  • Travel: 3–5 hours total (border varies); roads are improving but watch speeds and signage.
  • Do: Rozafa Castle in Shkodër (lunch), then on to Tirana’s cafes and Blloku.
  • Coverage: Solid on the SH1 corridor; occasional drops near the border.

Day 10: Tirana → Berat or Gjirokastër (UNESCO)

  • Travel: 2–3 hours to Berat; 3.5–4 hours to Gjirokastër.
  • Pick one: Berat for vineyards and Ottoman quarters; Gjirokastër for stone-town drama and Blue Eye access.

Day 11: Riviera or Komani ferry (choose coast or inland)

  • Coastal day: From Gjirokastër, continue to the Albanian Riviera (Himarë/Dhermi). Beaches and cliff roads, but mobile coverage is mostly coastal.
  • Inland ferry: From Shkodër/Koman, the Lake Komani ferry is a standout day trip. Signal is minimal on the lake—download everything first.

Day 12: Albania → Ohrid, North Macedonia

  • Travel: From Tirana/Berat via Elbasan: 3.5–5 hours depending on border. From the Riviera, allow 6–7.5 hours.
  • Do: Lake Ohrid, old town, Saint Naum monastery (border-hop is possible by boat; carry ID).
  • Coverage: Good in towns, weaker on lakeside drives.

Day 13–14: Ohrid → Skopje

  • Travel: 3–3.5 hours by bus or car via Kičevo.
  • Do: Old Bazaar, Kale Fortress, Matka Canyon (half-day trip; patchy coverage inside the gorge).
  • Fly out from Skopje.

Need a closed loop?

  • Option A (fast): From Skopje, overnight bus/train back to Sarajevo (8–10 hours), then bus to Dubrovnik (4–6 hours). Adds one long transit day.
  • Option B (drive): Skopje → Sarajevo (7–9 hours), Sarajevo → Dubrovnik (4–6 hours). One extra night en route recommended.

Getting around: buses vs car, borders and ferries

  • Buses: Reliable, cheap, and frequent on main corridors (Dubrovnik–Mostar–Sarajevo; Kotor–Shkodër–Tirana; Tirana–Ohrid–Skopje). Buy tickets at stations or reputable sites; carry small cash for baggage fees.
  • Car rental: More freedom for national parks (Lovćen, Durmitor if you extend, Lake Skadar) and the Komani or Kotor ferries. Confirm cross-border permissions and insurance (“Green Card”) with your rental company before pickup.
  • Driving style: Coastal E-roads are straightforward; inland passes are narrow and slow. Plan daylight drives for scenery and safety.
  • Ferries you’ll actually use:
  • Bay of Kotor shuttle (Lepetane–Kamenari): 10 minutes, frequent.
  • Komani (Albania): Pre-book in high season; very limited signal on board.
  • Adriatic island day trips (Dubrovnik to Elaphiti; optional Split if you add it): Good service, variable signal offshore.

Connectivity: the smart way to stay online across five countries

EU-style roaming rarely covers this whole route. Croatia is EU; Bosnia and Herzegovina, Montenegro, Albania and North Macedonia are not in the EU/EEA. That’s why you should plan your connectivity up front.

Regional eSIM vs country eSIMs

  • Regional eSIM (ideal if available for “Balkans”): One plan, one APN, no SIM swaps. Check coverage includes all five: Croatia, Bosnia and Herzegovina, Montenegro, Albania, North Macedonia.
  • EU-only regional eSIMs (e.g., Esim Western Europe) typically exclude most of this route. They’re great if you’re adding Italy or Spain, but you’ll still need coverage for the non‑EU legs.
  • Country eSIM stack: Buy smaller data packs per country and activate as you cross borders. Slightly more admin, but often the most cost‑efficient if you use lots of data in one place (e.g., week in Albania).

Before you decide, check each country’s page under Destinations to confirm networks and 4G/5G availability.

APN checks at every border (2-minute routine)

  • Before crossing: Turn off data roaming on your eSIM to avoid out‑of‑bundle usage.
  • After crossing: 1) Toggle aeroplane mode on/off. 2) Manually select a local partner network if auto-connect fails. 3) Confirm APN matches the eSIM’s instructions. If blank/wrong, enter it manually. 4) Turn data roaming back on for that eSIM profile. 5) If data is slow, try 4G/LTE only (some rural towers are 4G-only).
  • Keep SMS from your eSIM provider handy; they often list the correct APN and preferred networks.

Coastal vs inland coverage (what to expect)

  • Coastal corridors: Dubrovnik–Herceg Novi–Kotor–Budva and the Albanian SH8 (Riviera) have solid coverage, with brief dead spots through tunnels and cliffs.
  • Inland/mountain parks: Expect patchy or no service on sections near Lovćen viewpoints, Durmitor (if detouring), parts of Lake Skadar, Komani ferry, Mavrovo/Matka canyons.
  • Cities and lakes: Dubrovnik, Sarajevo, Kotor, Tirana, Ohrid and Skopje have strong 4G; 5G is spotty and mainly urban—don’t rely on it between towns.

Ferry days: how to stay connected

  • Download offline maps (Google Maps/Organic Maps) and tickets/QR codes the night before.
  • Message contacts your departure/arrival windows early. Onboard Wi‑Fi is rare; tethering from patchy mobile signal isn’t reliable.
  • Queue screenshots: hotel address, driving directions for the first 30 km after the ferry, and key phrases in local languages.

If you’re pairing regions

  • Starting or finishing in Italy or Spain? Add a short EU eSIM like Esim Italy or Esim Spain alongside your Balkans plan.
  • Flying in via Paris or elsewhere in the EU? An EU pack such as Esim Western Europe covers your transit—but confirm where EU coverage ends before you head east.
  • Coming from the States or Canada? Get connected before you board with Esim United States or a transregional option like Esim North America, then switch to your Balkan plan on arrival.

Pre-trip checklist (connectivity-first)

  • Check country coverage and partner networks: Destinations.
  • Decide: Regional Balkans eSIM vs stacking country eSIMs.
  • Install eSIMs on Wi‑Fi at home; label profiles by country.
  • Note APN settings and preferred partner networks for each plan.
  • Download offline maps for each stop, plus bus tickets and hotel details.
  • Pack: Dual‑SIM phone or eSIM-capable device; power bank; universal adapter (Type C/F common; Type G in some hotels).
  • If renting a car: Confirm cross-border permission and roadside assistance numbers; download routes for mountain drives.

Pro tips: - Keep WhatsApp/Signal tied to your main number; data‑only eSIMs won’t receive normal SMS. - If you work on the road, schedule uploads when you’re in cities; rural uplink speeds can be slow. - Set data limits or use OS data saver to stretch smaller country packs.

Costs and time savers

  • Buses: 10–35 EUR per leg; buy in advance on busy routes.
  • Fuel and tolls: Coastal E-roads have fewer tolls than inland motorways; Montenegro and Albania rely on standard highways.
  • Accommodation: Coastal towns spike in July–August; book Kotor/Ohrid early.
  • Cash vs cards: Cards widely accepted in cities; carry small cash for buses, markets, and border snacks.
  • Data: City cafés have reliable Wi‑Fi; don’t bank on it in villages or on ferries.

FAQ

1) Is two weeks enough for this route? - Yes for highlights: Dubrovnik, Mostar, Sarajevo, Kotor, Tirana plus Berat or Gjirokastër, Ohrid, Skopje. Add a day if you want both the Komani ferry and the Albanian Riviera.

2) Bus or car—what’s better? - Buses are simple and cheap on the main corridors. Rent a car if you value flexibility for national parks, early starts, and short ferries (Kotor Bay, Komani). Avoid night driving on mountain roads.

3) Will my EU eSIM roam across this route? - Not fully. Croatia is EU; Bosnia and Herzegovina, Montenegro, Albania and North Macedonia are not. You’ll need a regional plan that explicitly lists these countries or separate country eSIMs. Verify coverage under Destinations.

4) Do I need to change APN settings at each border? - Often, yes. After crossing, toggle aeroplane mode, check you’ve connected to a partner network, and confirm the APN. If speeds are poor, set your device to 4G/LTE only and retry.

5) How reliable is coverage on ferries and in the mountains? - Ferries (Elaphiti, Komani) and canyon drives (Matka, parts of Lovćen/Skadar) can have little to no signal. Download offline maps and tickets beforehand; message contacts before departure.

6) I’m travelling for work—anything extra to consider? - Bring a backup data option (secondary country eSIM or hotel Wi‑Fi plan) and schedule calls from cities for stable bandwidth. If you’re organising a team trip, see Simology For Business. Travel companies and resellers can explore the Partner Hub.

Next step

Compare coverage and pick your regional or country plans for each stop via Simology’s Destinations. Install before you fly, note the APNs, and you’re ready for a smooth two‑week Balkan loop.

© Simology

// Make external links open in a new tab for (const a of document.querySelectorAll('#content a[href]')) { try { const u = new URL(a.getAttribute('href'), window.location.href); if (u.origin !== window.location.origin) a.setAttribute('target','_blank'); } catch(e) { /* ignore */ } } // Add 'lead' class to the first paragraph for nicer intro const firstP = document.querySelector('#content p'); if (firstP) firstP.classList.add('lead'); 

Read more blogs

Andes Highlights (3 Weeks): Peru–Bolivia–Chile–Argentina Connectivity

Andes Highlights (3 Weeks): Peru–Bolivia–Chile–Argentina Connectivity

Planning a south america itinerary 3 weeks through the high Andes? This route stitches together Peru’s Sacred Valley, Bolivia’s La Paz and Salar de Uyuni, Chile’s Atacama Desert, and northern Argentina’s quebradas or Mendoza wine country—often by long-distance bus and a couple of short flights. Connectivity is different at altitude: coverage is strong in cities but drops in high passes and salt flats; bus Wi‑Fi is patchy; border towns can be blackspots. The smart move is an eSIM with multi‑country coverage, backed by offline maps, offline translations, and a simple routine for crossing borders by bus without losing service. Below you’ll find a practical, connectivity-first itinerary; checklists to prep your phone, apps and documents; and on-the-ground tips for staying online where it matters: booking transport, hailing taxis, backing up photos, and navigating when the signal disappears.If you’re transiting via Europe or North America, you can also add a layover eSIM to stay connected door-to-door. Start with our country list on Destinations, then follow the steps, and you won’t waste time chasing SIM shops at 3,500 metres.The 3‑week Andes route at a glanceWeek 1: Peru (Cusco, Sacred Valley, Machu Picchu) - Fly into Cusco (or Lima then connect). - Base in Cusco; day trips to Pisac/Chinchero/Maras–Moray. - Train to Aguas Calientes; Machu Picchu visit; return to Cusco or continue to Puno/Lake Titicaca.Week 2: Bolivia and Chile (La Paz, Uyuni, San Pedro de Atacama) - Bus/collectivo via Copacabana to La Paz. - Fly or overnight bus to Uyuni. - 3‑day Uyuni–altiplano tour ending in San Pedro de Atacama (Chile).Week 3: Chile and Argentina (Atacama to Salta or Mendoza/Buenos Aires) - Choose: - North: San Pedro to Salta/Jujuy by bus; fly to Buenos Aires. - Or South: San Pedro–Calama flight to Santiago; bus or flight to Mendoza; onward to Buenos Aires.Connectivity notes (quick): - Cities: generally strong 4G/4G+; 5G in major hubs (Santiago, Buenos Aires). - Altitude/rural: expect long no‑signal stretches (Uyuni, altiplano passes, Paso Jama). - Bus Wi‑Fi: often advertised, rarely reliable. Plan to be offline onboard. - Border regions: networks switch; a multi‑country eSIM avoids sudden loss.eSIM vs local SIMs for a 4‑country tripFor a route with multiple borders and remote legs, eSIM wins on time and reliability.What a multi‑country eSIM gets you: - One plan across Peru, Bolivia, Chile, Argentina (check coverage per country on Destinations). - No passport/SIM registration queues at kiosks. - Keep your home number active on the physical SIM for calls/SMS codes. - Instant top‑ups if you burn data on photos or navigation.When a local SIM still helps: - Long stay in one country with heavy data use (e.g., a month in Buenos Aires). - Dead zones where a different local network performs better (rarely worth the hassle on a 3‑week pace).Practical approach: - Use an eSIM as your primary data line across all four countries. - If you find a specific local network far better in one region, add a cheap local SIM and keep the eSIM as backup.Device readiness checklist (before you fly)1) Check eSIM compatibility and SIM‑lock status on your phone.2) Buy and install your eSIM while on home Wi‑Fi. Keep a PDF/printed copy of the QR code.3) Label lines clearly (e.g., “eSIM Andes Data”, “Home SIM”).4) Turn on data roaming for the eSIM; leave roaming off for your home SIM to avoid charges.5) Set up dual‑SIM rules: data on eSIM; calls/SMS default to home SIM if needed.6) Download offline: Google Maps/Organic Maps for all target regions; language packs (Spanish at minimum); bus/air tickets; hotel confirmations.7) Cloud backups: set to upload on Wi‑Fi only; pre‑create shared albums for travel companions.8) Test tethering/hotspot with your laptop/tablet.If you’re transiting popular hubs, consider a short layover eSIM: - USA connections: add an Esim United States or a broader Esim North America.- Europe connections: Madrid/Barcelona? Use an Esim Spain. Paris or Rome? See Esim France and Esim Italy. Multi‑country layovers? Try Esim Western Europe.City‑by‑city connectivity notesCusco & the Sacred Valley (Peru)Coverage: Good in Cusco city; variable in high villages (Maras/Moray) and along Inca Trail approaches.Tips: Download Sacred Valley maps offline; pin viewpoints and ruins. most taxis use WhatsApp—save your accommodation’s number.Machu Picchu/Aguas Calientes: Patchy to none at the citadel. Upload your photos later; don’t rely on live ticket retrieval.Lake Titicaca: Puno and CopacabanaPuno: Reasonable 4G; bus terminals crowded—screenshot QR tickets.Crossing to Copacabana: Expect a signal drop around the border; have directions saved offline.La Paz (Bolivia)Good urban 4G; the cable car network has decent signal but tunnels do not.Yungas/“Death Road” tours: Mountain valleys cause dead zones—share your emergency contacts with the operator, carry a charged power bank, and don’t plan remote calls.Uyuni and the Altiplano (Bolivia to Chile)Uyuni town: OK 4G; ATMs finicky—use Wi‑Fi for banking apps.Salt flats/lagunas: Assume offline for most of the 3‑day tour. Guides often carry satellite phones; agree a pickup time/place in San Pedro and preload your map route.San Pedro de Atacama (Chile)Town: Solid 4G; accommodations often have Wi‑Fi but speeds vary.Geysers, Valle de la Luna: Offline navigation essential; sunrise trips start before mobile networks wake up in some areas.Salta/Jujuy or Mendoza/Buenos Aires (Argentina)Salta/Jujuy: Good city coverage; quebradas have long no‑signal sections.Mendoza: City 4G/5G; vineyards outside town can be patchy.Buenos Aires: Strong 4G/5G; ideal for cloud backups and large downloads before you fly home.Border crossings by bus: step‑by‑stepThe big ones on this route: Peru–Bolivia (Puno/Copacabana), Bolivia–Chile (Uyuni–San Pedro via Hito Cajón), Chile–Argentina (Paso Jama to Salta or Los Libertadores to Mendoza).How to keep service and sanity:1) The day before:- Top up your eSIM data.- Confirm your plan includes both countries you’re entering/leaving.- Download offline maps for both sides of the border and your town of arrival.- Save bus company WhatsApp and terminal address offline.2) On departure morning:- Keep a paper copy or offline PDF of tickets, insurance, and accommodation proof.- Charge phone and power bank; pack a short cable in your daypack.3) On the bus:- Don’t count on bus Wi‑Fi. Keep your eSIM as primary, but expect drops near mountain passes.- If your phone supports it, enable “Wi‑Fi calling” for later when you reach accommodation Wi‑Fi.4) At the border posts:- Data may be unavailable. Keep QR codes and booking numbers offline.- After exiting one country and entering the next, toggle Airplane Mode off/on to re‑register on the new network.- If the eSIM doesn’t attach, manually select a network in Mobile Settings.5) Arrival:- Send your accommodation a quick WhatsApp when you’re back online.- Recheck your eSIM’s data roaming is on; confirm you’re on an in‑country network, not a weak roaming partner.Pro tips: - Dual profiles: If your eSIM allows, keep a secondary profile for a different network in the same country—helpful in border towns.- Cash buffer: Some border terminals don’t accept cards; download a currency converter for offline use.Offline survival kit (5‑minute setup)Maps: Download regions for Cusco, Sacred Valley, Puno, La Paz, Uyuni, San Pedro, Salta/Jujuy or Mendoza, and Buenos Aires.Translations: Download Spanish for offline use; add phrasebook favourites (bus tickets, directions, dietary needs).Documents: Save PDFs of passports, tickets, hotel addresses; star them for quick access.Rides: Screenshots of pickup points; pin bus terminals and hotel doors.Entertainment: Podcasts and playlists for long bus legs, set to download on Wi‑Fi only.Altitude and your tech: what changesCoverage gaps lengthen: Fewer towers at high altitude; valleys can block signal. Assume offline on remote excursions.Batteries drain faster in cold: Keep your phone warm and carry a power bank (10,000–20,000 mAh).Hotel Wi‑Fi may be congested: Schedule big uploads (photo backups, app updates) for big-city stays like Santiago or Buenos Aires.GPS still works offline: Your blue dot shows on offline maps without data—preload everything.Data budgeting for 3 weeksTypical traveller usage across this route: - Messaging/Maps/Bookings: 0.2–0.5 GB/day- Social and photo sharing: 0.3–0.7 GB/day- Occasional video calls/streaming: 0.5–1.0 GB/dayFor a mixed-use trip, plan 15–25 GB for 3 weeks. Heavy creators should double it and upload over hotel Wi‑Fi when possible. If you work remotely, consider a higher‑capacity plan and a backup eSIM; see our guidance on For Business.Practical route with transport and connectivity cuesDays 1–4 Cusco base: Strong city signal; day trips may be spotty—go offline-ready.Days 5–6 Machu Picchu: Expect no service at the ruins; sync tickets ahead.Days 7–8 Puno to La Paz via Copacabana: Border signal drop; re‑register networks after crossing.Days 9–11 Uyuni tour to San Pedro: Treat as offline; charge nightly; carry spare cables.Days 12–14 San Pedro: Stable in town; tours offline; top up data before Paso Jama.Days 15–17 Salta/Jujuy or Mendoza: Good urban 4G; rural patches are offline.Days 18–21 Buenos Aires: Strongest connectivity of the trip; clear your uploads and map downloads for the flight home.Partnering and stopover extrasHospitality and tour operators in the Andes: help your guests stay connected—explore co‑branded solutions via our Partner Hub.Transatlantic flyers: test your eSIM setup on a layover with an Esim United States or Esim Western Europe before hitting high-altitude blackspots.FAQs1) Do I need a local SIM in each country?No. A multi‑country eSIM covering Peru, Bolivia, Chile and Argentina is simpler and works well for a 3‑week pace. Consider a local SIM only if you’ll spend longer in one country and want the absolute best regional coverage.2) Will my WhatsApp number change with an eSIM?No. WhatsApp is tied to your registered number, not your data line. Keep your home SIM active for voice/SMS (roaming off if you wish), and use the eSIM for data—WhatsApp continues as normal.3) Can I hotspot to my laptop or camera?Yes. Enable tethering on your eSIM. Mind your data: cloud backups and OS updates can burn gigabytes—set them to Wi‑Fi only or schedule in big cities.4) What if there’s no signal on the Uyuni/Atacama legs?That’s expected. GPS still works offline. Pre-download maps and translations, carry a power bank, and sync plans with your tour operator before departure.5) Will I get roaming charges at borders?If you’re using a multi‑country eSIM with coverage in both countries, you won’t incur extra roaming fees from your home carrier. Keep roaming off on your home SIM to avoid accidental use.6) I’m connecting via Europe or the US—worth getting a layover eSIM?Yes. It’s an easy way to test your setup and stay reachable. Try Esim North America or country options like Esim Spain, Esim France, or Esim Italy for common hubs.Next step: Browse South America coverage options and build your plan on Destinations.

eSIM Safety Myths: How Secure Is eSIM Really?

eSIM Safety Myths: How Secure Is eSIM Really?

If you’re planning a trip and wondering “is eSIM secure?”, you’re not alone. As more travellers switch to digital mobile plans, questions follow: Can someone steal my QR code? Is activation safe on hotel Wi‑Fi? What if my phone is lost or stolen abroad? The short answer: eSIM technology is built on the GSMA’s global security standards and, when used correctly, is as secure as a physical SIM—often more so. The longer answer is about understanding how profiles, activation, and remote provisioning actually work, and applying a few practical steps before you go.This guide demystifies how eSIM security works, compares it with plastic SIMs, busts common myths, and gives you a clear, traveller‑friendly checklist to reduce risk. We also point you to safe, region‑specific options such as Esim United States, Esim Western Europe, Esim North America, Esim France, Esim Spain, and Esim Italy. If you just want the bottom line: yes, eSIM is secure; the real gains come from using it well.Quick refresher: what is an eSIM?An eSIM is a digital mobile plan stored on a secure chip (the eUICC) inside your phone, tablet, or laptop.You download a “profile” from a provider using a QR code or app—no plastic card required.Your device can store multiple profiles and switch between them, making it ideal for travel.Behind the scenes, eSIM uses Remote SIM Provisioning (RSP), an industry standard defined by the GSMA. Profiles are encrypted, signed by the operator, and delivered over a secure channel to the secure element in your device.How eSIM security actually worksProfiles: what they are and where they liveAn eSIM profile contains your mobile subscription details (like a digital version of what’s on a plastic SIM).It’s stored in the device’s eUICC, a tamper‑resistant secure element separate from your general storage.The profile is cryptographically signed by the operator to prevent tampering.Remote provisioning and activationThe activation QR code or link contains details for a secure server (SM‑DP+), plus a one‑time token that authorises a single install.Your device establishes an encrypted session to download the profile. The token cannot be reused once redeemed.On iOS and recent Android versions, the OS manages this process—no third‑party app is required for activation.Binding, locking, and deletionAfter installation, the profile is bound to your device’s eUICC. Moving it requires a controlled transfer process (where supported) or re‑issuing by the provider.Deleting the profile from settings removes it from the eUICC; recovery depends on the provider’s re‑download policy.If your phone is wiped or lost, your provider can suspend the line just as with a physical SIM.Myth‑busting: is eSIM secure?Myth: “eSIMs are easier to hack than plastic SIMs.”Reality: eSIM profiles live in a secure element and are delivered over encrypted channels with signed profiles. There’s no plastic to clone, and no card to swap out in a hurry.Myth: “Anyone who sees my QR can steal my plan.”Reality: Treat the QR code as a password—if someone scans it before you do, they can install the profile. But the token is one‑time; once you’ve installed it, the QR is useless. Don’t share screenshots or emails.Myth: “eSIM lets people track me more.”Reality: eSIM does not add extra tracking. Mobile networks collect similar metadata whether you use a physical SIM or eSIM. Location services on your device are unrelated to the eSIM itself.Myth: “eSIM makes SIM‑swap attacks impossible.”Reality: eSIM helps with physical theft (there’s no card to remove), but account‑based SIM swaps via social engineering are still possible. Use account PINs and monitor alerts.Myth: “You must be online to keep using an eSIM.”Reality: You need connectivity to download/activate the profile. After that, the eSIM behaves like any SIM—no permanent internet dependency.eSIM vs physical SIM: the security comparison that mattersPhysical theft:Physical SIM: A thief can eject the SIM to cut connectivity and reuse or resell it.eSIM: No removable card. Your line typically stays reachable for remote lock, tracking, or suspension.Handling and supply chain:Physical SIM: Cards can be mishandled or swapped during sales or repairs.eSIM: Remote provisioning reduces touchpoints and in‑store risk.Privacy:Equivalent. The network sees the same subscriber data regardless of SIM type.Portability:Physical SIM: Easy to move to another handset.eSIM: More controlled. You may need a new QR or an OS‑supported transfer process. This is a safety benefit, but plan ahead.Damage and wear:Physical SIM: Can be damaged, lost, or corroded.eSIM: Solid‑state, with fewer physical failure points.Traveller checklist: practical steps to stay secureFollow these steps and you’ll be well ahead:Before you travelUpdate your device OS and carrier settings.Add a strong screen lock (PIN/biometrics). Consider enabling a SIM PIN for your home SIM.Set up account security with your mobile providers (home and travel):- Add/confirm an account PIN or passcode.- Enable email/SMS login alerts.Choose a reputable eSIM provider and buy ahead of time. Check regional options such as Esim United States, Esim Western Europe, or browse Destinations.Save support contacts offline in your notes or password manager.If your device supports it, plan where you’ll install: primary or secondary line; label it clearly.During activationUse a trusted network: your home Wi‑Fi or mobile data. Avoid café/hotel Wi‑Fi if possible.Treat the QR email like a password: don’t forward or screenshot it; don’t let others scan it.Verify you’re installing via system settings (no random apps).Install before you fly or while you still have reliable internet.After install, set:- Which line handles mobile data.- Whether to allow data roaming on each line.- Which line handles calls/SMS (if relevant).Keep the confirmation email, order ID, and plan expiry date handy.While travellingLeave the eSIM line enabled for data; disable usage you don’t need (e.g., voice/SMS if data‑only).Turn off automatic line switching if you want to avoid the wrong plan being used.Monitor data usage and set alerts to avoid bill shock.Avoid installing unknown “profile managers” or VPNs you don’t trust.If your phone is lost or stolenUse Find My iPhone/Find My Device to lock or erase.Contact the eSIM provider to suspend or delete the plan.Change passwords for key accounts and review two‑factor methods.Pro tips: - Install and test the eSIM a day before departure so issues can be fixed while you still have your home connection.- Label your lines clearly (e.g., “Trip Spain Data”).- Know the re‑download policy: many prepaid travel eSIMs are single‑use; deleting them may require a new purchase.Managing multiple profiles safelyKeep only what you need. Delete expired profiles to reduce clutter and confusion.Label each profile and set defaults for data, calls, and messages.On iOS, Quick Transfer can move an eSIM between iPhones; on Android, some devices and carriers support transfers—check your provider’s guidance.Remember: deleting a prepaid travel profile is usually permanent. Confirm before you remove it.Business and team travel: extra guardrailsFor organisations issuing eSIMs to staff: - Standardise devices and OS versions to simplify support.- Use a Mobile Device Management (MDM) solution to enforce screen locks, encryption, and remote‑wipe.- Keep carrier account PINs centralised and rotate access as staff change.- Pre‑provision regional plans where teams travel most—e.g., Esim North America or Esim Western Europe.See how Simology supports procurement, controls, and consolidated billing on For Business, and partner workflows via the Partner Hub.Regional notes: buying securely for your destinationeSIM security standards are global, but plan availability and features vary by country and operator. Choose a plan designed for your route:USA: Stay connected from touchdown with Esim United States.Western Europe: Multi‑country coverage is easier with Esim Western Europe, plus country‑specific options like Esim France, Esim Spain, and Esim Italy.North America: Cross‑border travel? Check Esim North America.Elsewhere: Find vetted plans across regions via Destinations.FAQIs eSIM secure?Yes. eSIM uses GSMA‑standard Remote SIM Provisioning. Profiles are cryptographically signed and installed into a secure element on your device via an encrypted channel. Used properly, eSIM is as secure as physical SIMs and can be safer in cases of theft.Can someone steal my plan by scanning my QR code?Only if they get the QR before you use it. The QR contains a one‑time activation token. Once you install the profile, that token becomes useless. Treat the QR like a password: don’t share it or display it publicly.Is eSIM safer than a physical SIM against SIM‑swap fraud?It helps in physical theft scenarios (there’s no card to eject), but account‑level SIM swaps via your carrier are still possible. Add an account PIN, enable alerts, and be cautious with phishing that targets your mobile account.What happens to my eSIM if I reset my phone?A factory reset typically removes eSIM profiles. Whether you can re‑download depends on the provider’s policy. Some platforms support device‑to‑device eSIM transfer; otherwise, contact your provider for a replacement profile.Do I need internet to activate an eSIM?Yes, for the initial download—use your home Wi‑Fi or existing mobile data. After activation, the eSIM works like any SIM; it doesn’t require ongoing Wi‑Fi to function.Does eSIM change how I’m tracked or affect privacy?No. Networks collect similar subscriber and connection metadata regardless of SIM type, according to local regulations. eSIM does not expose additional location data beyond what a physical SIM would.Next step: Browse secure, region‑ready plans for your trip on Destinations.

London Speed Test (Q4 2025): LHR vs City vs Tube Tunnels

London Speed Test (Q4 2025): LHR vs City vs Tube Tunnels

If you’re landing at Heathrow, dashing into the City, and spending hours on the Elizabeth line or deep Tube tunnels, here’s what London connectivity actually looks like in late 2025. We ran a multi-day london mobile speed test campaign across Heathrow (Terminals 2–5), the Square Mile and Canary Wharf, and key Underground corridors (Elizabeth line plus Jubilee, Victoria and Central), using dual 5G SA-capable devices on all major UK networks. We logged download/upload throughput, latency, jitter, dropouts and handover behaviour, and benchmarked against hotel Wi‑Fi in Zone 1 as a practical baseline for video calls and cloud work.This report is traveller-first: expected speeds by place, what affects your connection, how 5G Standalone (SA) vs Non‑Standalone (NSA) behaves on the move, and simple steps to get reliable service underground. We’re publishing the full open CSV so you can slice by operator, line, station or hour of day—see the Data and reproducibility section for how to get it via our Partner Hub. If you’re planning a multi-country trip, pick the right eSIM up front via Destinations or region bundles like Esim Western Europe.How we testedPeriod: 7–11 October 2025 (Q4 snapshot)Devices: iPhone 15 Pro and Pixel 8 Pro (both 5G SA/NSA capable)Profiles: UK eSIM via Simology (multi-network testing), plus roaming checks on an EU plan (see Esim Western Europe)Apps: Speedtest by Ookla, nPerf, and Fast.com for cross-validationSamples: 1,524 tests; 40+ hours on trains and in stations; 12 hotel Wi‑Fi baselines (Zone 1)Locations:Heathrow T2/T3/T5 (landside and airside)City of London (Bank, Moorgate, Liverpool Street), Canary WharfElizabeth line (Paddington–Canary Wharf–Custom House), Jubilee, Victoria, CentralMetrics captured: median and p90 down/up Mbps, latency ms, jitter ms, packet loss %, disconnect events, 4G/5G SA/NSA state, handoversHow to replicate our approach (practical checklist): 1. Use a 5G SA-capable phone and ensure 5G SA is toggled on (where available). 2. Install two speed test apps to cross-check results. 3. Run 30–60 second tests stationary, and short bursts (10–15 seconds) in tunnels to reduce motion bias. 4. Log exact location and line/segment; note carriage position (front/middle/rear can matter near equipment rooms). 5. Capture background: time, crowding level, and whether Wi‑Fi or Wi‑Fi calling is on. 6. Repeat at different times (rush vs off-peak) to surface congestion.Key findings at a glanceHeathrow (T2/T3/T5): Consistent 5G with high mid-band capacity; median download 180–280 Mbps airside, 120–200 Mbps landside; uplink 20–45 Mbps; latency typically 19–32 ms on SA.City street level (Square Mile): Dense small-cell 5G delivers strong medians (220–350 Mbps) and low jitter; uplink 25–55 Mbps; lunchtime congestion is noticeable but rarely crippling.Canary Wharf: Among the highest medians observed (260–400 Mbps) and very stable latency; great for quick syncs and uploads.Elizabeth line: Best-in-class tunnels; median 150–250 Mbps with fewer dropouts and faster handovers; uplink 18–40 Mbps; latency 22–35 ms where SA is active.Deep Tube (Jubilee/Victoria/Central): Coverage is now excellent across many tunnels, but performance is more variable than Elizabeth line; medians 60–140 Mbps; occasional 10–20 second dead zones in older sections and curves.Hotel Wi‑Fi baseline (Zone 1 business hotels): Median 55–120 Mbps down, 15–35 Mbps up; latency 9–25 ms; predictable once you’re on Ethernet or a 5 GHz SSID; still beaten by good 5G for large uploads.Heathrow (LHR): Terminals 2–5What we measured - T5 airside (A gates): Median 240 Mbps down / 38 Mbps up; latency 21 ms; near-universal 5G with strong mid-band. - T3 arrivals hall: 150/28 Mbps median; occasional NSA fallbacks at peak arrivals create 10–15% higher latency. - T2 security area: 210/42 Mbps median; excellent for last-minute downloads; SA present for multiple operators. - Inter-terminal transit: Medians dip to 90–140 Mbps with brief handover stutters.5G SA vs NSA - SA observed consistently in T2/T5; mixed SA/NSA in T3 landside. - SA improves uplink stability and cuts jitter by ~20–30% when crowds surge.Traveller tips at Heathrow - Pro tip: After landing, toggle Airplane Mode off/on to force a clean attach; you’ll often jump from NSA to SA with a better uplink. - If your video upload stalls, move closer to windows or gate piers where small cells improve line-of-sight. - Avoid running multiple tests right at passport control—RF is noisy and crowded; results aren’t representative.City core: Square Mile and Canary WharfSquare Mile (Bank, Moorgate, Liverpool Street) - Street-level medians 220–320 Mbps; p90s often 500–650 Mbps with carrier aggregation. - Latency 18–28 ms on SA; 25–40 ms on NSA in busy pockets. - Building canyons can cause short fades; stepping 5–10 metres to a junction often restores full 5G.Canary Wharf - Docklands is a standout: medians 260–400 Mbps; uplink 30–60 Mbps. - Lakeside promenades and concourses have excellent small-cell density; great for large OneDrive/Google Drive syncs.Remote work practicality - 1080p Teams/Zoom is trivial on street-level 5G; 4K streaming is fine where medians exceed ~80 Mbps. - If your phone flips between SA and NSA during a call, expect a brief jitter spike; enabling Wi‑Fi calling on stable hotel or office Wi‑Fi can help.Underground: Elizabeth line and deep tunnelsElizabeth line (Paddington–Canary Wharf–Custom House) - Most reliable tunnel experience in our london mobile speed test: medians 150–250 Mbps, uplink 18–40 Mbps, latency 22–35 ms with SA prevalent. - Handover performance is notably smooth between stations; brief 1–3 second dips entering curves. - Platforms are even faster (200–350 Mbps) with strong beamforming and minimal congestion outside rush hour.Jubilee, Victoria, Central (deep Tube) - Tunnels now widely covered but performance varies more than the Elizabeth line. - Jubilee: 100–180 Mbps medians, good uplink; occasional 5–8 second dropouts around tight curves. - Victoria: 80–140 Mbps; more NSA fallbacks at peak times cause higher jitter. - Central: 60–120 Mbps; some legacy sections show 10–20 second dead spots between stations.How to keep calls stable underground - Use audio-only or 720p video in deep tunnels; save 1080p for the Elizabeth line or platforms. - Turn on Wi‑Fi calling; in many stations, the dedicated Wi‑Fi plus small-cell backhaul is steadier than constrained 5G uplink during crush loads. - If your device lets you, prefer 4G/5G “Auto” rather than “5G On” forced—forced 5G can cause sticky handovers underground.Hotel Wi‑Fi baseline versus mobileZone 1 business hotels (12 properties) tested mid-evening:Wi‑Fi medians 55–120 Mbps down, 15–35 Mbps up; latency 9–25 ms on 5 GHz; packet loss near zero once on Ethernet.Peak-time streaming is predictable; large cloud backups (photos/videos) are often faster on 5G uplink if your room’s Wi‑Fi is congested.Takeaway: For live calls and remote desktop, hotel Wi‑Fi (wired or strong 5 GHz) is safest. For bulk uploads, step outside on strong 5G if you need speed.5G SA vs NSA: what travellers need to know5G SA (Standalone) attaches directly to a 5G core. Benefits:Lower latency (often 5–10 ms better than NSA).More consistent uplink when networks are busy.Cleaner handovers in modern tunnels (not universal yet).5G NSA (Non‑Standalone) rides a 4G core. It’s widely available and still very fast, but jitter and latency are less predictable under load.Roaming reality: Some roaming profiles still prefer NSA in parts of London even where SA exists. We saw SA for multiple operators in Heathrow and the City; NSA dominated on certain deep Tube segments during peaks.Tip: If your plan supports VoLTE/VoNR, keep both enabled. Disable any “Low Data Mode” features while navigating or tethering laptops.For multi-country travellers, a regional profile like Esim Western Europe reduces SIM swaps. If you’re arriving from the US and continuing on, compare with Esim North America or a country plan such as Esim United States. Heading to Paris, Rome or Barcelona next? See Esim France, Esim Italy and Esim Spain.Data and reproducibilityOpen data: We publish the raw measurements (Q4 2025 London Speed Tests) as an open CSV, with columns:timestamp, device, operator, SA/NSA state, location (station/segment), GPS accuracy, down_mbps, up_mbps, latency_ms, jitter_ms, packet_loss_pct, dropout_flagAccess: Download the open CSV and documentation via our Partner Hub. Business users can request automated extracts and alerts through For Business.Methods: Each location/segment includes at least 5 samples per operator. We discard outliers from failed attaches, plus first-second warm-ups in tunnels.Attribution: Cite “Simology Connectivity Lab, London Q4 2025” with a link back to this report when using charts derived from the CSV.Practical tips: make London connectivity work for youQuick setup before you land - Install two test apps and download offline maps. - Add your eSIM profile in advance. For simple UK and Schengen coverage, use Esim Western Europe. - Enable VoLTE/VoNR and Wi‑Fi calling.At Heathrow - After switching off Airplane Mode, wait 30–60 seconds for a 5G SA attach, then start navigation or ride-hailing. - If you need to upload large files, do it airside near gates where mid-band 5G is strongest.On the Elizabeth line and Tube - Expect the Elizabeth line to handle 1080p video calls; switch to audio-first on older deep Tube tunnels. - Stand near carriage ends at stations if you must upload—platform small cells are often strongest there.At the hotel - Prefer the 5 GHz SSID or Ethernet for calls; run one quick test to confirm stability. - Use your 5G uplink for big cloud backups if hotel Wi‑Fi drags below 10–15 Mbps up.FAQWhat’s the fastest area from this london mobile speed test?Canary Wharf led medians (260–400 Mbps), with the Elizabeth line platforms close behind. Heathrow T5 airside also performed very well.Can I rely on mobile data in Tube tunnels now?Largely yes. Elizabeth line is excellent end-to-end; Jubilee/Victoria/Central are broadly covered with the odd 10–20 second gap. Plan for brief dips and keep calls audio-first in older tunnels.Does 5G SA work when roaming?Often, but not everywhere. We saw SA on multiple operators in Heathrow and the City. Some roaming profiles still prefer NSA in parts of the network. It’s automatic—you can’t force SA if the profile or cell doesn’t allow it.Is hotel Wi‑Fi better than 5G for video calls?Usually, yes—if you’re on a clean 5 GHz SSID or Ethernet. Latency and jitter are steadier. For big file uploads, good 5G uplink can be faster than congested hotel Wi‑Fi.What eSIM should I pick for a UK + Europe itinerary?A regional option like Esim Western Europe keeps things simple across borders. If your trip includes North America legs, compare with Esim North America or specific country plans like Esim United States.Where can I get the raw data?The open CSV and methods guide are available on our Partner Hub. Teams needing regular updates should visit For Business.Next stepPlanning London plus onward travel? Choose a seamless plan for the UK and beyond via Destinations, then download the full dataset from our Partner Hub to plan your workdays with confidence.