Why the Balkan Loop Is the Trip of the Decade
Five countries, two weeks, and more variety per mile than almost anywhere else in Europe. The Balkan Loop has quietly become one of the most searched multi-country itineraries for independent travelers in 2026 — and for good reason. You get Croatia's Adriatic coast, Bosnia's Ottoman bazaars, Montenegro's fjord-like bay of Kotor, Albania's wild Riviera, and North Macedonia's lake towns, all within a single, roughly circular route that ends close to where it begins.
According to the UNWTO, the Western Balkans collectively welcomed over 30 million international tourist arrivals in 2024, a figure that has continued climbing through 2025 and into 2026, driven largely by younger travelers and digital nomads drawn to lower costs and fewer crowds than Western Europe. Croatia alone recorded 21.3 million tourist arrivals in 2024 according to the Croatian National Tourist Board, making the Adriatic coast a genuine peak-season destination that rewards early planning.
Quotable fact: The Western Balkans offer some of Europe's best value — average daily travel costs across Albania, North Macedonia, and Bosnia run 40–60% lower than comparable days in Italy or Greece, according to Numbeo's 2026 cost-of-living index.
This guide gives you a realistic, day-by-day framework, practical border-crossing advice, and everything you need to know about staying connected across all five countries — including why a single regional eSIM beats five separate SIM cards every time.
What Is the Best Route Order for the Balkan Loop?
The classic Balkan Loop starts and ends in Split, Croatia — the most accessible hub with direct flights from North America, the UK, and across Europe. Running the loop counterclockwise (Croatia → Bosnia → Montenegro → Albania → North Macedonia → back north) means you hit the busiest stretch (Dubrovnik, Kotor) early when you're freshest, and finish with the quieter, more off-the-beaten-path countries. You can also reverse it, or start from Tirana if flights are cheaper from your home airport.
Day-by-Day Framework
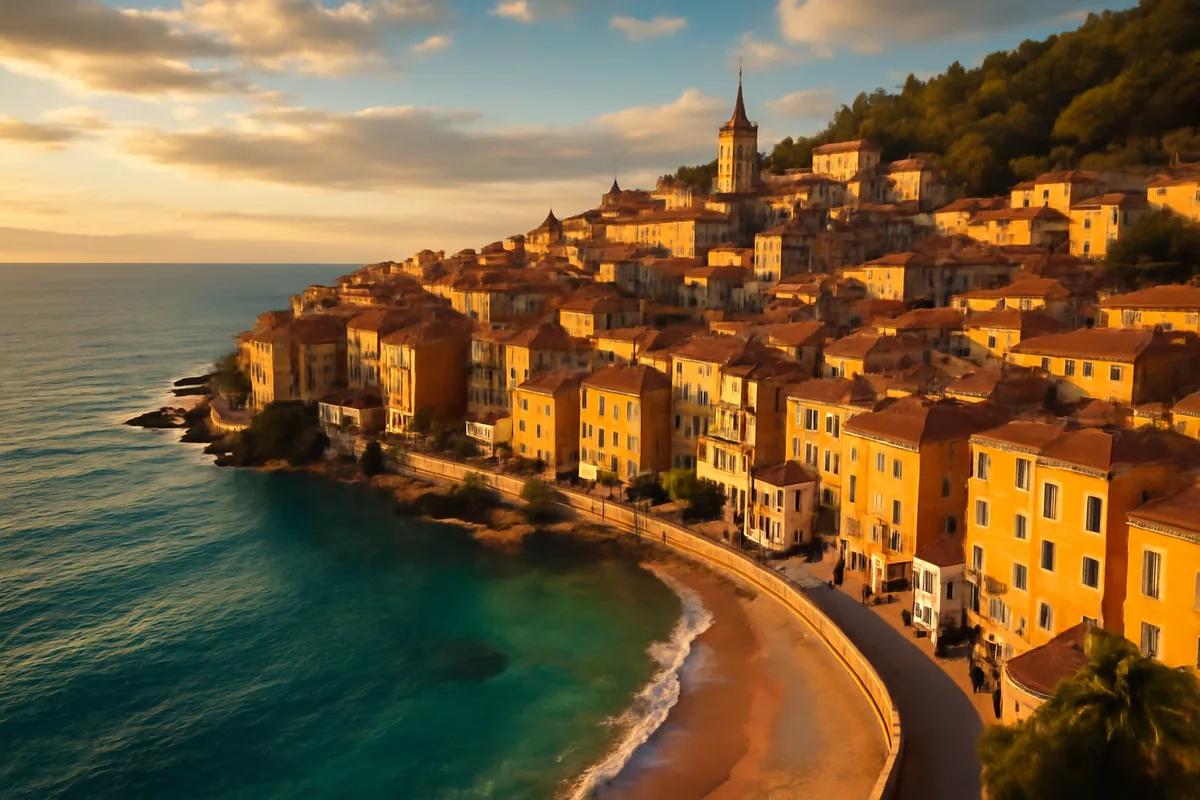
Days 1–3: Split & Dalmatian Coast, Croatia Fly into Split. Spend your first day in Diocletian's Palace — yes, people actually live inside a Roman emperor's retirement home. On day two, catch a ferry to Hvar or Brač for a taste of island life. Day three, drive south along the coastal highway toward Dubrovnik, stopping at the Makarska Riviera.
Days 4–5: Dubrovnik, Croatia Two days is the minimum for Dubrovnik. Walk the city walls in the early morning before the cruise-ship crowds arrive (gates open at 8 AM). Take the cable car up Mount Srđ for panoramic views. Book Game of Thrones filming locations tours if that's your thing — King's Landing fans will recognize nearly every alley.
Days 6–7: Mostar & Sarajevo, Bosnia & Herzegovina Cross into Bosnia at the Neum corridor (a narrow 9-km strip of Bosnian coastline — you'll technically enter and exit Bosnia twice if you're driving the coastal road). Mostar's Stari Most (Old Bridge) is a UNESCO World Heritage site and one of the Balkans' most photographed spots. Then head inland to Sarajevo — a city that genuinely surprises most visitors with its Austro-Hungarian architecture, Ottoman bazaars, and extraordinary café culture. Budget travelers will love it: a full sit-down meal with drinks rarely exceeds $10–12.
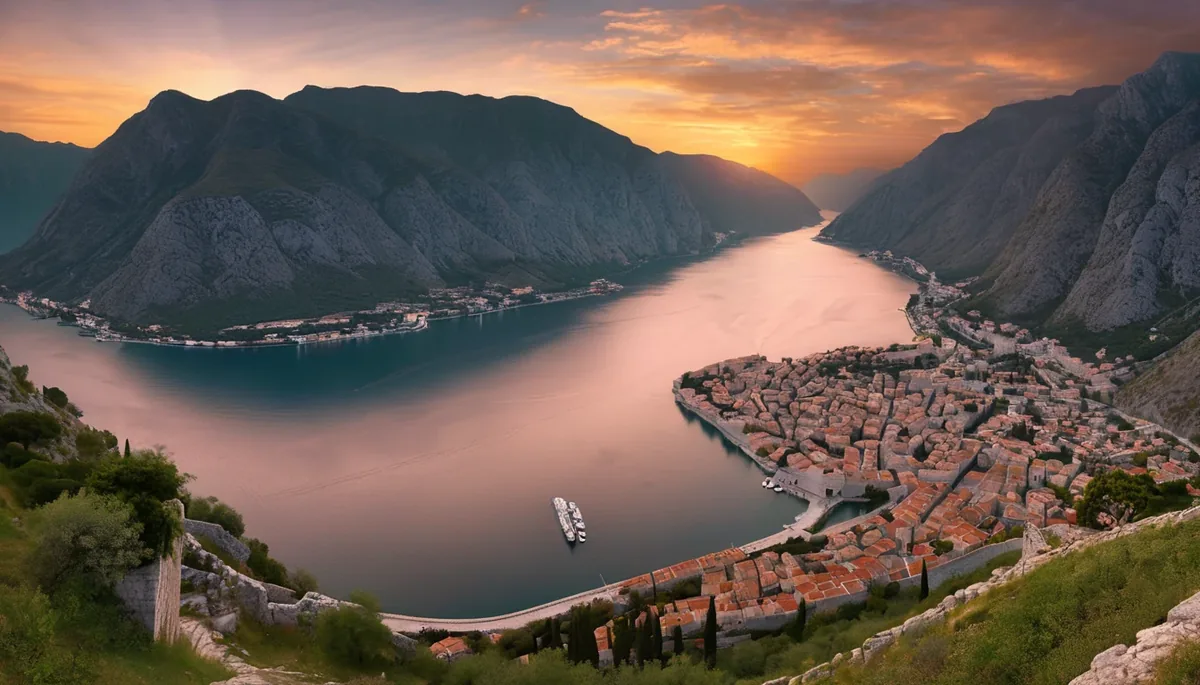
Days 8–9: Kotor & Bay of Kotor, Montenegro Re-enter the Adriatic and drop into Montenegro. The Bay of Kotor is often described as Europe's southernmost fjord (technically a submerged river canyon, but equally dramatic). The old town of Kotor is compact and walkable. Hike up to the fortress above the city for sunset — it's steep but free. If you have a spare half-day, drive to Perast to see the tiny island church of Our Lady of the Rocks.
Days 10–11: Albanian Riviera & Gjirokastër, Albania Cross into Albania at Muriqan/Sukobin. Albania is the Balkans' most underrated country — the Riviera towns of Himarë and Dhermi have turquoise water that rivals the Greek islands, at a fraction of the price. Gjirokastër, a UNESCO-listed Ottoman hill town, is a two-hour detour inland that's absolutely worth it. For a comprehensive data plan for your time here, check out Albania eSIM options before you leave home.
Days 12–13: Ohrid & Lake Ohrid, North Macedonia Drive northeast from Albania into North Macedonia — the border crossing at Qafë Botë/Sveti Naum is one of the most scenic in Europe, descending directly to Lake Ohrid. Ohrid itself is a UNESCO double-listed town (both cultural and natural heritage), with a medieval fortress, Byzantine churches built into the cliffs, and crystal-clear lake water you can actually swim in. The old town's restaurant scene has improved dramatically in recent years — try the Ohrid trout.
Day 14: Skopje & Departure, North Macedonia Drive north to Skopje for your final night. Skopje's bizarre "Skopje 2014" neoclassical statues and monuments are either fascinating or baffling, depending on your perspective — either way, they're uniquely photogenic. Fly home from Skopje Alexander the Great Airport, or position for onward travel.
How Do You Get Between Countries on the Balkan Loop?
Transport logistics are the most common source of stress on this route, but with a clear plan they're straightforward. Most travelers rent a car in Split and drop it in Skopje — one-way rentals are possible but add cost ($80–150 extra depending on the agency). Alternatively, buses connect all the major cities, and the Balkans have a surprisingly good intercity bus network.
Driving vs. Buses: Which Is Better?
| Leg | Driving Time | Bus Option | Notes |
|---|---|---|---|
| Split → Dubrovnik | ~3 hrs | ~4.5 hrs, ~$15 | Coastal road is stunning |
| Dubrovnik → Mostar | ~2.5 hrs | ~3.5 hrs, ~$12 | Border crossing at Neum |
| Mostar → Sarajevo | ~2.5 hrs | ~3 hrs, ~$8 | Neretva Valley drive |
| Sarajevo → Kotor | ~4 hrs | ~6 hrs, ~$18 | Mountain pass, spectacular |
| Kotor → Shkodër (Albania) | ~2 hrs | ~3 hrs, ~$10 | Border can be slow |
| Shkodër → Gjirokastër | ~4.5 hrs | ~5 hrs, ~$12 | Albanian Riviera detour adds time |
| Gjirokastër → Ohrid | ~4 hrs | ~5 hrs, ~$14 | Scenic mountain crossing |
| Ohrid → Skopje | ~3 hrs | ~3.5 hrs, ~$8 | Straightforward highway |
Car rental tip: Check whether your rental agreement covers all five countries — some budget agencies exclude Albania and Kosovo from their insurance. Always verify in writing before you pick up the car.
Border Crossing Tips
- Croatia–Bosnia (Neum): Fast, usually under 15 minutes. EU/EEA citizens wave through; non-EU travelers need a valid passport.
- Bosnia–Montenegro: The Trebinje–Nikšić crossing is quieter than the main coastal border. Expect 20–40 minutes.
- Montenegro–Albania (Muriqan/Sukobin): Can be slow in summer — up to 90 minutes on peak days. Cross early morning.
- Albania–North Macedonia (Qafë Botë/Sveti Naum): One of the quieter crossings; typically 10–20 minutes.
- None of these countries are in the EU Schengen Area (Croatia is in Schengen; Bosnia, Montenegro, Albania, and North Macedonia are not), so passport checks happen at every crossing.
How Much Does the Balkan Loop Cost Per Day?
The Balkan Loop is genuinely affordable by European standards, though costs vary significantly between countries. Croatia (especially Dubrovnik in summer) approaches Western European prices; Albania and North Macedonia remain among the cheapest destinations on the continent.
Budget Breakdown by Country (2026 Estimates)
| Country | Budget/day | Mid-range/day | Currencies |
|---|---|---|---|
| Croatia | $60–80 | $120–160 | Euro (EUR) |
| Bosnia & Herzegovina | $35–50 | $70–100 | Convertible Mark (BAM) |
| Montenegro | $50–70 | $100–140 | Euro (EUR) |
| Albania | $30–45 | $65–90 | Albanian Lek (ALL) |
| North Macedonia | $30–45 | $60–85 | Macedonian Denar (MKD) |
Two-week total estimate: A budget traveler staying in hostels and eating local food can do the full loop for $900–1,100. A mid-range couple sharing hotel rooms and dining at restaurants should budget $2,400–3,200 for two weeks, excluding flights.
Currency note: Croatia and Montenegro both use the Euro. Bosnia uses the Convertible Mark (pegged 1:1.95 to the Euro). Albania and North Macedonia have their own currencies — ATMs are widely available, but carry some cash for smaller towns and border areas.
What's the Best Way to Stay Connected Across All Five Countries?
Staying connected on the Balkan Loop is trickier than it sounds, because none of these countries (except Croatia) are in the EU's roaming-free zone. That means your home carrier's European roaming plan likely won't cover Bosnia, Montenegro, Albania, or North Macedonia without extra charges — and buying five separate SIM cards at five different borders is a logistical headache.
The practical solution is a regional eSIM that covers all five countries under a single plan. You buy it before you leave home, install it via QR code, and it activates automatically when you land in Croatia. No queuing at airport kiosks, no fumbling with a SIM ejector tool at a border crossing, no language barriers at local phone shops.
Why eSIM Beats Physical SIM Cards on Multi-Country Trips
- One plan, five countries: A regional Balkans eSIM covers Croatia, Bosnia, Montenegro, Albania, and North Macedonia from a single data pool.
- Dual SIM capability: Your eSIM handles data while your physical SIM keeps your home number active for calls and texts — critical if you need to be reachable by family or your bank's 2FA systems.
- Instant activation: Install the eSIM at home on your WiFi, and you'll have data the moment your plane lands. No hunting for a SIM shop.
- No roaming surprises: Transparent prepaid pricing means you know exactly what you're spending.
For country-specific data needs, you can also combine a regional plan with a country-specific top-up. Check out Croatia eSIM options, Montenegro eSIM plans, and North Macedonia eSIM options to compare coverage for each leg of the trip.
How Much Data Do You Actually Need for Two Weeks?
For a two-week trip with typical travel usage — Google Maps navigation, Instagram, messaging, occasional video calls — most travelers need 10–15 GB. If you're working remotely or streaming, budget 20–25 GB. Not sure how to estimate? The Simology data calculator guide breaks it down by daily activity type, which is especially useful when you're planning across multiple countries.
eSIM Compatibility Check
Before you buy any eSIM, confirm your phone supports eSIM. Most flagship smartphones released after 2020 do — including iPhone XS and later, Samsung Galaxy S20 and later, Google Pixel 3a and later, and most recent models from OnePlus, Motorola, and Xiaomi. Check your device settings: on iPhone, go to Settings → General → About → look for "Available SIM" or "eSIM" entries.
Note: Some phones purchased in China or bought as carrier-locked devices may have eSIM disabled. If you're unsure, GSMA's eSIM device compatibility resource is the authoritative reference.
What Are the Must-See Highlights of Each Country?
Every country on this loop punches above its weight for attractions. Here's a condensed hit list so you can prioritize if your schedule is tight.
Croatia: Beyond Dubrovnik
Dubrovnik is unmissable, but don't overlook Split's Diocletian's Palace — a living Roman monument where bars and apartments coexist with 1,700-year-old stone walls. Plitvice Lakes National Park (a UNESCO site) is a detour north of the main loop but worth it if you have an extra day. The Dalmatian islands — Hvar, Brač, Vis — are best reached by ferry from Split.
Bosnia & Herzegovina: The Surprise of the Loop
Mostar is the postcard, but Sarajevo is the soul. The city's Baščaršija bazaar, the Latin Bridge (where WWI began), and the Tunnel of Hope museum make for a genuinely moving day. Bosnia also has extraordinary natural beauty — the Kravice Waterfalls near Mostar are a local secret that most tour groups miss.
Montenegro: Small Country, Big Scenery
Montenegro is Europe's second-smallest country by area, but it packs in the Bay of Kotor, Durmitor National Park (a UNESCO site with dramatic canyon hiking), and the Tara River Canyon — the deepest canyon in Europe at 1,300 meters. Budva's beach scene is Montenegro's party strip if that's your vibe; Kotor is more romantic and historically rich.
Albania: The Balkans' Best-Kept Secret
Albania has transformed its tourism infrastructure significantly since 2020. The Albanian Riviera — particularly Himarë, Dhermi, and Ksamil near Saranda — now has boutique hotels, beach clubs, and restaurants that wouldn't look out of place in Croatia, at roughly half the price. Gjirokastër's UNESCO-listed Ottoman architecture and Berat's "City of a Thousand Windows" are inland highlights. For detailed connectivity info for your Albanian leg, see Albania eSIM plans.
North Macedonia: Lakes, History & Unexpected Charm
Ohrid is the jewel — a lakeside town with Byzantine frescoes, Roman-era amphitheaters, and beaches that fill up with Macedonian families in summer. The lake itself is one of Europe's oldest (3–5 million years old) and deepest (288 meters). Skopje, the capital, is a fascinating study in nation-building: the "Skopje 2014" urban renewal project installed hundreds of neoclassical statues and monuments that are either inspiring or kitsch, depending on your perspective — but undeniably photogenic.
What Should You Pack for the Balkan Loop?
Packing smart for a multi-country, two-week loop means balancing versatility with mobility. You'll be moving every 1–2 days, so a 40L carry-on-sized backpack or rolling bag beats a massive checked suitcase.
Essential Packing List
Documents & Money:
- Passport (valid for at least 6 months beyond your return date)
- Multiple payment methods: Visa/Mastercard credit card (widely accepted in Croatia and Montenegro; less so in rural Albania and Bosnia), plus cash in EUR for Croatia/Montenegro and local currencies elsewhere
- Travel insurance with medical evacuation coverage — especially important for Albania and North Macedonia, where English-speaking medical facilities outside capitals are limited
Tech:
- Unlocked smartphone with eSIM support
- Universal power adapter (all five countries use Type C/F European plugs)
- Portable power bank (10,000 mAh minimum — long driving days mean less charging time)
- Offline maps downloaded for all five countries (Maps.me or Google Maps offline work well in areas with poor signal)
Clothing:
- Layers for mountain passes (Durmitor and the Albanian Alps can be cold even in July)
- Modest cover-ups for mosque visits in Sarajevo and Mostar (shoulders and knees covered)
- Good walking shoes — cobblestone streets in Kotor, Mostar, and Ohrid are hard on thin soles
Practical Tips That Most Guides Miss
Most Balkan Loop guides cover the highlights. Here are the details that actually matter when you're on the ground.
Fuel & Driving Logistics
- Fuel prices (2026 estimate): Around €1.55–1.75/liter in Croatia and Montenegro; cheaper in Albania (
€1.30/liter) and North Macedonia (€1.35/liter). Fill up before entering Bosnia from Montenegro — fuel stations on the Trebinje road can be sparse. - Driving style: Aggressive overtaking on mountain roads is common. Drive defensively and give yourself extra time on passes.
- Parking in Dubrovnik: The old town is closed to cars. Use the Ilijina Glavica garage above the city and walk down.
Connectivity in Rural Areas
4G LTE coverage is excellent in all capital cities and along major coastal roads. Coverage thins out in the Albanian Alps, the Durmitor plateau in Montenegro, and some mountain roads in North Macedonia. Download offline maps before heading into remote areas, and if you're doing any hiking, consider a satellite communicator for emergencies.
Tipping Culture
- Croatia: 10–15% at restaurants, rounding up for taxis
- Bosnia: Rounding up is appreciated; formal tipping less common
- Montenegro: 10% at restaurants
- Albania: 10% at sit-down restaurants; not expected at casual spots
- North Macedonia: Rounding up or 5–10% at restaurants
Visa Requirements
Citizens of the US, UK, Canada, Australia, and EU countries can enter all five countries visa-free for up to 90 days. South African, Indian, and some other passport holders may need visas for some countries — check the specific embassy requirements before you travel. Note that North Macedonia requires you to register with local police within 24 hours of arrival if staying in private accommodation (hotels handle this automatically).
How Does Multi-Country eSIM Coverage Work in the Balkans?
A regional eSIM for the Balkans works by connecting to the strongest available local network in each country automatically — a process called multi-network switching. When you cross from Croatia into Bosnia, your eSIM detects the new country and connects to the best available local network without any manual intervention. You don't need to change settings, restart your phone, or do anything at all.
This is particularly valuable on this route because you're crossing borders frequently — sometimes twice in a single day (the Neum corridor in Bosnia). A physical SIM card from one country would either stop working or start charging expensive roaming rates the moment you cross. A regional eSIM eliminates that friction entirely.
For travelers managing connectivity across multiple devices — say, a phone and a tablet, or a family trip where multiple people need data — it's worth reading about family eSIM plans for multiple devices to understand how to manage data pools efficiently.
If you're a student doing the Balkan Loop as part of a longer European semester, semester-long eSIM options with budget tips covers extended-stay plans that may be more cost-effective than a two-week top-up.
FAQ
Do I need a visa to visit all five countries on the Balkan Loop?
Citizens of the US, UK, Canada, Australia, and most EU countries can enter Croatia, Bosnia & Herzegovina, Montenegro, Albania, and North Macedonia visa-free for up to 90 days. However, since Croatia is in the Schengen Area and the other four are not, your time in the non-Schengen countries doesn't count toward the Schengen 90-day limit. Always verify current requirements with each country's embassy before traveling, as rules can change.
Will my phone work in all five Balkan countries?
Yes, provided your phone is unlocked and supports the frequency bands used in Europe (most modern smartphones do). However, if you rely on your home carrier's roaming plan, note that Bosnia, Montenegro, Albania, and North Macedonia are outside the EU's roam-like-at-home zone, meaning Croatia is the only country where EU roaming rules apply. A regional eSIM covering all five countries is the most cost-effective solution for the full loop.
What currency should I carry on the Balkan Loop?
Croatia and Montenegro both use the Euro (EUR). Bosnia uses the Convertible Mark (BAM), pegged at approximately 1.95 BAM to 1 EUR. Albania uses the Albanian Lek (ALL), and North Macedonia uses the Macedonian Denar (MKD). ATMs are available in all cities and most larger towns, but carry a supply of local cash when heading into rural areas, mountain regions, or smaller border towns.
Is it safe to drive across all five countries?
Generally yes — the Balkan Loop is a well-established tourist route and violent crime against tourists is rare. Road quality varies: Croatian highways and main roads are excellent; Albanian roads have improved significantly but rural mountain roads can be rough. The main driving hazards are aggressive local driving styles on mountain passes and occasional livestock on rural roads. Always drive with your headlights on and allow extra time for mountain crossings.
How much data do I need for a two-week Balkan Loop?
For typical travel use — navigation, messaging, social media, and occasional video calls — plan for 10–15 GB over two weeks. If you're working remotely, streaming video, or using your phone as a hotspot for a laptop, budget 20–25 GB. A regional eSIM with 15–20 GB covers most travelers comfortably, with the option to top up if needed.
Can I use a single eSIM for all five countries?
Yes. Regional Balkans eSIM plans cover Croatia, Bosnia & Herzegovina, Montenegro, Albania, and North Macedonia under a single shared data pool. The eSIM switches networks automatically at each border crossing — you don't need to change any settings. This is far more convenient than buying five separate SIM cards, especially given the frequency of border crossings on this route.
What's the best time of year to do the Balkan Loop?
May–June and September–October are the sweet spots. The weather is warm (22–28°C / 72–82°F on the coast), crowds are lighter than peak summer, and prices are lower — especially in Dubrovnik and Kotor, which get extremely busy in July and August. July and August are still doable but expect higher accommodation prices, packed beaches, and longer queues at popular sites. Spring and autumn also offer better driving conditions on mountain passes.
How do I activate a Simology eSIM before my trip?
Purchase your plan on simology.io, and you'll receive a QR code by email within minutes. On your phone, go to Settings → Mobile/Cellular → Add eSIM (or Add Data Plan), then scan the QR code while connected to WiFi. The eSIM installs in under two minutes. You can install it days before departure — it won't start consuming data until it connects to a network in your destination country. No physical SIM card, no post office queue, no airport kiosk needed.
Your Balkan Loop Starts Here
Two weeks across Croatia, Bosnia, Montenegro, Albania, and North Macedonia is one of those trips that genuinely changes how you see Europe. You'll trade the predictability of Western Europe for something rawer, more surprising, and considerably kinder to your wallet — without sacrificing beauty, history, or good food.
The logistics are manageable. The costs are reasonable. The connectivity, with the right regional eSIM, is seamless. The only thing left to do is book the flights to Split, set your eSIM up before you leave home, and let the Adriatic coast pull you south.
Whether you're planning this as a solo adventure, a couple's trip, or a group journey, the Balkan Loop rewards travelers who come prepared and stay flexible. Download your offline maps, carry some cash for border towns, and give yourself permission to linger somewhere unexpected — because on a route this rich, the detours are often the best part.