App Permissions Abroad: Camera, Mic, Location — What to Allow?

Blog

App Permissions Abroad: Camera, Mic, L...

App Permissions Abroad: Camera, Mic, Location — What to Allow?

30 Oct 2025

App Permissions Abroad: Camera, Mic, Location — What to Allow?

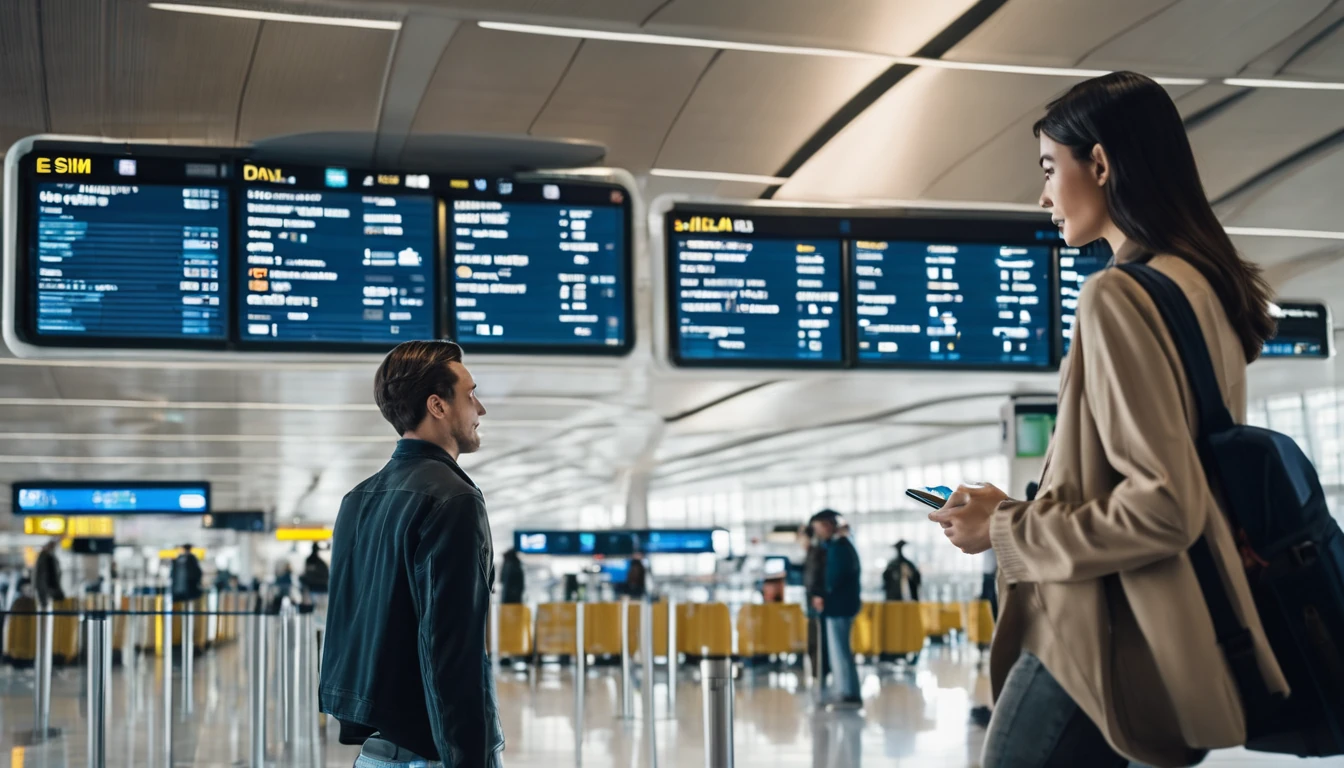
Travelling amplifies the stakes of your phone’s privacy settings. New apps, roaming networks, and unfamiliar environments can pressure you into tapping “Allow” just to get moving. But the wrong permission at the wrong time can expose your location, microphone, camera, contacts or photos more widely than you intend. This guide gives clear, situation-based advice for app permissions travel: which permissions to grant, when to grant them temporarily, and how to audit them before, during and after your trip. We’ll walk through common travel scenarios (maps, ride‑hail, banking, airports) and outline the least‑privilege settings that keep everything working without oversharing. If you’re using mobile data via an eSIM — whether you’re hopping between cities in Esim Western Europe or heading stateside with Esim United States — you’ll also reduce risk by avoiding unknown Wi‑Fi networks. Let’s make your phone useful, not chatty.

Why permissions matter more when you travel

  • New apps in new countries often ask for broad permissions by default. Approve only what’s essential for the task.
  • Location data is especially valuable abroad — GPS traces can reveal hotel addresses, daily routes and spending patterns.
  • Mobile OSs now offer granular controls: “Allow once”, “While using the app”, “Approximate” location, “Selected photos”, “Notifications: Time‑Sensitive only”. Use them.
  • Connectivity choices affect how much data apps can siphon in the background. A secure mobile data connection (e.g., via Esim France, Esim Spain or Esim North America) gives you more predictable behaviour than random public Wi‑Fi.

Quick rules of thumb (use this checklist on the road)

  • Location: Allow “While using the app”. Turn off “Precise” unless you need door‑to‑door navigation or ride pickup.
  • Camera: Allow only when actively scanning (QR/boarding passes/ID verification). Revoke afterwards.
  • Microphone: Allow only for calls/voice search/translation. Otherwise deny.
  • Photos/Media: Prefer “Selected photos” (iOS) or “Photos and videos” without “Manage all files” (Android). Avoid full library access.
  • Contacts: Deny by default. Share specific contacts via the share sheet if needed.
  • Calendar: Allow temporarily for flight or booking apps if they auto‑add events; otherwise deny.
  • Bluetooth/Nearby devices: Allow only for trackers (AirTag/Tile) or wearables you’re using. Deny for random apps.
  • Notifications: Allow but limit to Time‑Sensitive for airlines, banking and ride‑hail. Disable promotional alerts.
  • Background refresh: Disable for data‑hungry apps you don’t need updating silently while travelling.

Permission-by-permission guidance

Location

When to allow: - Maps and navigation: “While using the app”. Enable “Precise” for walking/driving directions and offline maps. - Ride‑hail (Uber/Bolt/Grab): “While using”. Precise location improves pickup accuracy; you can turn precise off after your ride. - Weather, airport apps, bike/scooter hire: “While using”. Approximate is usually enough. - Banking: Some banks use location to help detect fraud. Start with “While using” and deny “Always”.

Temporary vs permanent: - iOS: Prefer “Allow Once” or “While Using the App”. Avoid “Always”. - Android 12+: Choose “Only this time” or “While app is in use”. Avoid “Allow all the time”.

How to set it: - iOS: Settings > Privacy & Security > Location Services > [App] > set “While Using the App” and toggle Precise Location as needed. - Android: Settings > Location > App location permissions > [App] > choose “Allow only while using the app” and consider turning off “Use precise location”.

Pro tips: - Download offline maps over Wi‑Fi before departure to reduce live location checks. - Disable photo geotagging in the Camera app if you’ll be sharing images publicly. - Turn off “Background App Refresh” for apps that don’t need continuous location.

Camera

When to allow: - QR code boarding passes, train tickets, payment codes. - ID/passport verification for airline, accommodation or car hire apps. - Depositing cheques or scanning documents into travel wallets.

How to set it: - iOS: Settings > Privacy & Security > Camera > toggle per app. - Android: Settings > Privacy > Permission manager > Camera > [App] > Allow only when using the app.

Pro tips: - Many apps now support in‑app scanners without needing perpetual camera access. Grant “While using” and review monthly. - Cover your phone’s lens isn’t necessary; just keep permissions tight and revoke after the task.

Microphone

When to allow: - Voice calls, VoIP, voice notes. - Voice search in maps. - Real‑time translation apps.

How to set it: - iOS: Settings > Privacy & Security > Microphone > toggle per app. - Android: Settings > Privacy > Permission manager > Microphone > [App] > Allow only while using.

Pro tips: - If you rarely use in‑app voice features, deny by default and respond to prompts case‑by‑case. - Disable “Hey Siri/Ok Google” if battery is tight or if you’re uncomfortable with always‑listening triggers.

Photos/Media/Storage

When to allow: - Messaging or social apps when you want to upload specific images. - Travel wallet apps that store scanned documents.

Best practice: - iOS: Use “Selected Photos” or “Add Photos Only” instead of “Full Access”. - Android: Grant “Photos and videos” and avoid “Allow management of all files” unless it’s a trusted file manager.

Pro tips: - Create a “Travel” album and grant access only to that album (iOS). - Export sensitive docs as password‑protected PDFs and keep them in a secure notes app rather than your camera roll.

Contacts and Calendar

When to allow: - Contacts: Only for messaging apps you genuinely use; otherwise share contacts ad‑hoc via the share sheet. - Calendar: Allow temporarily for airlines/hotels that auto‑add bookings; revoke after the trip.

Pro tips: - Keep work and travel calendars separate. If you manage trips for a team, see For Business for coordinated connectivity while maintaining individual privacy controls.

Bluetooth and Nearby Devices

When to allow: - AirTag/Tile, headphones, wearables, digital car keys, or hotel locks that explicitly require it.

Risks: - Bluetooth can be used to infer location or track devices. Keep it off when not needed and deny app access unless essential.

Notifications

When to allow: - Airline, rail and ride‑hail: Allow Time‑Sensitive/Critical alerts for gate changes and pickups. - Banking: Enable security/OTP notifications; disable marketing. - Social apps: Disable or set to “Deliver quietly” for focus and battery life.

How to tune: - iOS: Settings > Notifications > [App] > choose Time‑Sensitive, banners and sounds. - Android: Long‑press a notification > turn off promotional categories; keep security alerts.

Common travel scenarios: what to allow

Maps and navigation

  • Allow location “While using the app”.
  • Enable “Precise” only when navigating turn‑by‑turn, then switch to Approximate.
  • Deny microphone unless you use voice search.
  • Optional notifications for saved places or transit alerts.

Pro tip: Download offline maps over your Destinations before you go. With an eSIM like Esim Italy or Esim France, you can minimise risky Wi‑Fi use.

Ride‑hailing (Uber, Bolt, Grab, Lyft)

  • Location: “While using” + Precise for pickup. No need for “Always”.
  • Camera: Allow when scanning payment or ID if prompted, then revoke.
  • Microphone: Usually not required; allow only if you use in‑app calling.
  • Notifications: Allow Time‑Sensitive for driver arrival and trip updates.

Pro tip: Set pickup to a well‑lit public spot. Avoid sharing trip status to public feeds.

Banking and money transfer

  • Location: “While using” is often enough for fraud checks. Avoid “Always”.
  • Camera: Allow only if depositing cheques or scanning IDs/documents.
  • Microphone: Not usually needed; deny.
  • Notifications: Enable security and transaction alerts; disable marketing.
  • Biometrics: Keep Face ID/Touch ID on for faster, safer logins (not a permission per se, but good practice).

Pro tip: Never install banking apps from links in messages abroad. Use your store’s official listing and a secure mobile connection via Esim United States or Esim North America when travelling across the region.

Airline and airport apps

  • Location: “While using” for airport maps and lounge finders.
  • Camera: Allow briefly for passport/ID scan if needed.
  • Photos: “Selected Photos” if you upload vaccine cards or travel docs.
  • Notifications: Allow Time‑Sensitive for boarding, gate changes and delays.

Pro tip: Screenshot boarding passes so you’re not dependent on live access permissions at the gate.

Messaging and social

  • Photos: “Selected Photos”. Share one‑offs via the share sheet.
  • Camera/Microphone: Allow “While using” when recording stories/voice notes, then review regularly.
  • Contacts: Only if you truly need contact syncing; many apps work fine without it.
  • Location: Avoid sharing precise location in posts; strip geotags if you’re posting in real‑time.

Translation apps

  • Microphone: “While using” for live translation.
  • Camera: “While using” for sign/menus OCR.
  • Offline packs: Download in advance to reduce permission prompts and data usage.

Temporary vs permanent access: use the OS features

iOS: - Options: Allow Once, While Using the App, Always. - Prefer Allow Once for one‑off tasks (scanning a QR code at a museum). - Use While Using for navigation, ride‑hail and weather. - Toggle Precise Location per app. Keep a close eye on “Always” and remove it after the specific need ends.

Android (12+): - Options: Only this time, While app is in use, Allow all the time (avoid). - Additional toggles: Precise/Approximate location; Photos and videos vs All files. - Use the Privacy Dashboard (Settings > Privacy > Privacy Dashboard) to see which apps accessed location, camera and mic in the last 24 hours and revoke anything suspicious.

How to audit and reset permissions around your trip

Pre‑trip (10 minutes): 1. iOS: Settings > Privacy & Security > Location Services. Set most apps to “While Using”; disable Precise for social apps. 2. Android: Settings > Privacy > Permission manager. Review Location, Camera, Microphone, Photos/Media, Contacts. 3. Remove dormant apps you won’t need. 4. Download offline maps and translation packs on Wi‑Fi.

On the road (2 minutes every few days): 1. Check the privacy indicators (green/orange dots on iOS; status bar icons on Android) for unexpected camera/mic use. 2. Open Privacy Dashboard (Android) or App Privacy Report (iOS) to spot background access. 3. Tighten anything noisy or unexpected.

Post‑trip (5 minutes): 1. Revoke any “Always” or “Allow all files” permissions granted temporarily. 2. Delete travel‑specific apps you won’t use again. 3. Clear boarding passes and travel docs from shared albums; move sensitive copies to a secure notes app.

Pro tip: If you manage a travelling team, standardise these settings across devices and use regional data plans, such as Esim Western Europe for multi‑country trips, to keep everyone on secure mobile data. See For Business.

Connectivity choices reduce risky prompts

Many intrusive permission prompts happen when apps struggle on flaky Wi‑Fi and push you to enable extra features “for reliability”. Using a reputable eSIM keeps things stable and reduces the need to over‑authorise: - City breaks: Esim France, Esim Italy, Esim Spain - Multi‑country: Esim Western Europe - Long‑haul: Esim United States, Esim North America

FAQ

1) Do I need to allow precise location for maps abroad? - Only while actively navigating. For searching or browsing nearby places, approximate location is fine. Switch Precise on for the journey, then off.

2) Will denying “Always allow” break ride‑hail pickup? - No. “While using the app” is enough. Keep Precise on during pickup for accuracy, then you can turn it off.

3) Can apps track me via Bluetooth? - Some apps use Bluetooth beacons to infer location. Deny Bluetooth for apps that don’t need it and keep Bluetooth off when not using wearables or trackers.

4) My airline app wants camera access — safe to allow? - Yes, if it’s for scanning passports or documents, but set it to “While using the app” and revoke after use. Avoid granting permanent access.

5) How do I stop apps seeing my entire photo library? - On iOS, choose “Selected Photos” or “Add Photos Only”. On Android, grant “Photos and videos” and avoid “Manage all files”. Share files via the system share sheet when possible.

6) Does my eSIM require special app permissions? - No. eSIM activation is handled by your device settings or a trusted carrier app. It doesn’t need camera/mic/location except when you scan a QR during setup. For reliable data on the move, choose a plan that covers your route via Destinations.

Next step: Choose a secure, country‑ready data plan to cut risky Wi‑Fi and reduce intrusive prompts. Start with Destinations or go straight to a regional pack like Esim Western Europe.

Read more blogs

Andes Highlights (3 Weeks): Peru–Bolivia–Chile–Argentina Connectivity

Andes Highlights (3 Weeks): Peru–Bolivia–Chile–Argentina Connectivity

Planning a south america itinerary 3 weeks through the high Andes? This route stitches together Peru’s Sacred Valley, Bolivia’s La Paz and Salar de Uyuni, Chile’s Atacama Desert, and northern Argentina’s quebradas or Mendoza wine country—often by long-distance bus and a couple of short flights. Connectivity is different at altitude: coverage is strong in cities but drops in high passes and salt flats; bus Wi‑Fi is patchy; border towns can be blackspots. The smart move is an eSIM with multi‑country coverage, backed by offline maps, offline translations, and a simple routine for crossing borders by bus without losing service. Below you’ll find a practical, connectivity-first itinerary; checklists to prep your phone, apps and documents; and on-the-ground tips for staying online where it matters: booking transport, hailing taxis, backing up photos, and navigating when the signal disappears.If you’re transiting via Europe or North America, you can also add a layover eSIM to stay connected door-to-door. Start with our country list on Destinations, then follow the steps, and you won’t waste time chasing SIM shops at 3,500 metres.The 3‑week Andes route at a glanceWeek 1: Peru (Cusco, Sacred Valley, Machu Picchu) - Fly into Cusco (or Lima then connect). - Base in Cusco; day trips to Pisac/Chinchero/Maras–Moray. - Train to Aguas Calientes; Machu Picchu visit; return to Cusco or continue to Puno/Lake Titicaca.Week 2: Bolivia and Chile (La Paz, Uyuni, San Pedro de Atacama) - Bus/collectivo via Copacabana to La Paz. - Fly or overnight bus to Uyuni. - 3‑day Uyuni–altiplano tour ending in San Pedro de Atacama (Chile).Week 3: Chile and Argentina (Atacama to Salta or Mendoza/Buenos Aires) - Choose: - North: San Pedro to Salta/Jujuy by bus; fly to Buenos Aires. - Or South: San Pedro–Calama flight to Santiago; bus or flight to Mendoza; onward to Buenos Aires.Connectivity notes (quick): - Cities: generally strong 4G/4G+; 5G in major hubs (Santiago, Buenos Aires). - Altitude/rural: expect long no‑signal stretches (Uyuni, altiplano passes, Paso Jama). - Bus Wi‑Fi: often advertised, rarely reliable. Plan to be offline onboard. - Border regions: networks switch; a multi‑country eSIM avoids sudden loss.eSIM vs local SIMs for a 4‑country tripFor a route with multiple borders and remote legs, eSIM wins on time and reliability.What a multi‑country eSIM gets you: - One plan across Peru, Bolivia, Chile, Argentina (check coverage per country on Destinations). - No passport/SIM registration queues at kiosks. - Keep your home number active on the physical SIM for calls/SMS codes. - Instant top‑ups if you burn data on photos or navigation.When a local SIM still helps: - Long stay in one country with heavy data use (e.g., a month in Buenos Aires). - Dead zones where a different local network performs better (rarely worth the hassle on a 3‑week pace).Practical approach: - Use an eSIM as your primary data line across all four countries. - If you find a specific local network far better in one region, add a cheap local SIM and keep the eSIM as backup.Device readiness checklist (before you fly)1) Check eSIM compatibility and SIM‑lock status on your phone.2) Buy and install your eSIM while on home Wi‑Fi. Keep a PDF/printed copy of the QR code.3) Label lines clearly (e.g., “eSIM Andes Data”, “Home SIM”).4) Turn on data roaming for the eSIM; leave roaming off for your home SIM to avoid charges.5) Set up dual‑SIM rules: data on eSIM; calls/SMS default to home SIM if needed.6) Download offline: Google Maps/Organic Maps for all target regions; language packs (Spanish at minimum); bus/air tickets; hotel confirmations.7) Cloud backups: set to upload on Wi‑Fi only; pre‑create shared albums for travel companions.8) Test tethering/hotspot with your laptop/tablet.If you’re transiting popular hubs, consider a short layover eSIM: - USA connections: add an Esim United States or a broader Esim North America.- Europe connections: Madrid/Barcelona? Use an Esim Spain. Paris or Rome? See Esim France and Esim Italy. Multi‑country layovers? Try Esim Western Europe.City‑by‑city connectivity notesCusco & the Sacred Valley (Peru)Coverage: Good in Cusco city; variable in high villages (Maras/Moray) and along Inca Trail approaches.Tips: Download Sacred Valley maps offline; pin viewpoints and ruins. most taxis use WhatsApp—save your accommodation’s number.Machu Picchu/Aguas Calientes: Patchy to none at the citadel. Upload your photos later; don’t rely on live ticket retrieval.Lake Titicaca: Puno and CopacabanaPuno: Reasonable 4G; bus terminals crowded—screenshot QR tickets.Crossing to Copacabana: Expect a signal drop around the border; have directions saved offline.La Paz (Bolivia)Good urban 4G; the cable car network has decent signal but tunnels do not.Yungas/“Death Road” tours: Mountain valleys cause dead zones—share your emergency contacts with the operator, carry a charged power bank, and don’t plan remote calls.Uyuni and the Altiplano (Bolivia to Chile)Uyuni town: OK 4G; ATMs finicky—use Wi‑Fi for banking apps.Salt flats/lagunas: Assume offline for most of the 3‑day tour. Guides often carry satellite phones; agree a pickup time/place in San Pedro and preload your map route.San Pedro de Atacama (Chile)Town: Solid 4G; accommodations often have Wi‑Fi but speeds vary.Geysers, Valle de la Luna: Offline navigation essential; sunrise trips start before mobile networks wake up in some areas.Salta/Jujuy or Mendoza/Buenos Aires (Argentina)Salta/Jujuy: Good city coverage; quebradas have long no‑signal sections.Mendoza: City 4G/5G; vineyards outside town can be patchy.Buenos Aires: Strong 4G/5G; ideal for cloud backups and large downloads before you fly home.Border crossings by bus: step‑by‑stepThe big ones on this route: Peru–Bolivia (Puno/Copacabana), Bolivia–Chile (Uyuni–San Pedro via Hito Cajón), Chile–Argentina (Paso Jama to Salta or Los Libertadores to Mendoza).How to keep service and sanity:1) The day before:- Top up your eSIM data.- Confirm your plan includes both countries you’re entering/leaving.- Download offline maps for both sides of the border and your town of arrival.- Save bus company WhatsApp and terminal address offline.2) On departure morning:- Keep a paper copy or offline PDF of tickets, insurance, and accommodation proof.- Charge phone and power bank; pack a short cable in your daypack.3) On the bus:- Don’t count on bus Wi‑Fi. Keep your eSIM as primary, but expect drops near mountain passes.- If your phone supports it, enable “Wi‑Fi calling” for later when you reach accommodation Wi‑Fi.4) At the border posts:- Data may be unavailable. Keep QR codes and booking numbers offline.- After exiting one country and entering the next, toggle Airplane Mode off/on to re‑register on the new network.- If the eSIM doesn’t attach, manually select a network in Mobile Settings.5) Arrival:- Send your accommodation a quick WhatsApp when you’re back online.- Recheck your eSIM’s data roaming is on; confirm you’re on an in‑country network, not a weak roaming partner.Pro tips: - Dual profiles: If your eSIM allows, keep a secondary profile for a different network in the same country—helpful in border towns.- Cash buffer: Some border terminals don’t accept cards; download a currency converter for offline use.Offline survival kit (5‑minute setup)Maps: Download regions for Cusco, Sacred Valley, Puno, La Paz, Uyuni, San Pedro, Salta/Jujuy or Mendoza, and Buenos Aires.Translations: Download Spanish for offline use; add phrasebook favourites (bus tickets, directions, dietary needs).Documents: Save PDFs of passports, tickets, hotel addresses; star them for quick access.Rides: Screenshots of pickup points; pin bus terminals and hotel doors.Entertainment: Podcasts and playlists for long bus legs, set to download on Wi‑Fi only.Altitude and your tech: what changesCoverage gaps lengthen: Fewer towers at high altitude; valleys can block signal. Assume offline on remote excursions.Batteries drain faster in cold: Keep your phone warm and carry a power bank (10,000–20,000 mAh).Hotel Wi‑Fi may be congested: Schedule big uploads (photo backups, app updates) for big-city stays like Santiago or Buenos Aires.GPS still works offline: Your blue dot shows on offline maps without data—preload everything.Data budgeting for 3 weeksTypical traveller usage across this route: - Messaging/Maps/Bookings: 0.2–0.5 GB/day- Social and photo sharing: 0.3–0.7 GB/day- Occasional video calls/streaming: 0.5–1.0 GB/dayFor a mixed-use trip, plan 15–25 GB for 3 weeks. Heavy creators should double it and upload over hotel Wi‑Fi when possible. If you work remotely, consider a higher‑capacity plan and a backup eSIM; see our guidance on For Business.Practical route with transport and connectivity cuesDays 1–4 Cusco base: Strong city signal; day trips may be spotty—go offline-ready.Days 5–6 Machu Picchu: Expect no service at the ruins; sync tickets ahead.Days 7–8 Puno to La Paz via Copacabana: Border signal drop; re‑register networks after crossing.Days 9–11 Uyuni tour to San Pedro: Treat as offline; charge nightly; carry spare cables.Days 12–14 San Pedro: Stable in town; tours offline; top up data before Paso Jama.Days 15–17 Salta/Jujuy or Mendoza: Good urban 4G; rural patches are offline.Days 18–21 Buenos Aires: Strongest connectivity of the trip; clear your uploads and map downloads for the flight home.Partnering and stopover extrasHospitality and tour operators in the Andes: help your guests stay connected—explore co‑branded solutions via our Partner Hub.Transatlantic flyers: test your eSIM setup on a layover with an Esim United States or Esim Western Europe before hitting high-altitude blackspots.FAQs1) Do I need a local SIM in each country?No. A multi‑country eSIM covering Peru, Bolivia, Chile and Argentina is simpler and works well for a 3‑week pace. Consider a local SIM only if you’ll spend longer in one country and want the absolute best regional coverage.2) Will my WhatsApp number change with an eSIM?No. WhatsApp is tied to your registered number, not your data line. Keep your home SIM active for voice/SMS (roaming off if you wish), and use the eSIM for data—WhatsApp continues as normal.3) Can I hotspot to my laptop or camera?Yes. Enable tethering on your eSIM. Mind your data: cloud backups and OS updates can burn gigabytes—set them to Wi‑Fi only or schedule in big cities.4) What if there’s no signal on the Uyuni/Atacama legs?That’s expected. GPS still works offline. Pre-download maps and translations, carry a power bank, and sync plans with your tour operator before departure.5) Will I get roaming charges at borders?If you’re using a multi‑country eSIM with coverage in both countries, you won’t incur extra roaming fees from your home carrier. Keep roaming off on your home SIM to avoid accidental use.6) I’m connecting via Europe or the US—worth getting a layover eSIM?Yes. It’s an easy way to test your setup and stay reachable. Try Esim North America or country options like Esim Spain, Esim France, or Esim Italy for common hubs.Next step: Browse South America coverage options and build your plan on Destinations.

UAE VoIP & App Calling: What Works, What Doesn’t (2025 Traveller Guide)

UAE VoIP & App Calling: What Works, What Doesn’t (2025 Traveller Guide)

Planning to call home over app while you’re in the UAE? Read this first. The UAE regulates internet-based calling (VoIP). In practice, most person‑to‑person app calls are blocked on local networks, including WhatsApp, Viber and many others. Some work platforms (Zoom, Microsoft Teams, Webex) generally function for meetings, but everyday voice/video calling inside popular apps is restricted unless you use a UAE‑approved service. Wi‑Fi Calling via your home mobile network can work for some travellers but is not guaranteed on all Wi‑Fi or carriers.This guide explains uae voip restrictions 2025 in plain English, what you can and can’t rely on, and the clean, lawful alternatives to stay connected. You’ll find step‑by‑step checklists, Wi‑Fi Calling tips, and pragmatic workarounds for both leisure and business trips. Regulations and platform availability can change, so always sanity‑check with your provider and our country pages on Destinations before you fly.What’s actually blocked in the UAE (2025)In the UAE, public internet calling is regulated. Here’s the reality most travellers experience:WhatsApp, Telegram, Viber and most consumer app voice/video calls: typically blocked on UAE mobile data and most Wi‑Fi networks. Text/chat and media generally work.Skype personal calling and similar OTT dialling: often blocked or unreliable.FaceTime: availability has varied; some travellers report success, others don’t. Treat as inconsistent and don’t plan around it.Work platforms (Zoom, Microsoft Teams, Google Meet, Webex): you can usually join meetings for audio/video/screen share. PSTN dial‑out features may be limited.Licensed UAE calling apps (e.g., BOTIM via UAE operators): allowed when you subscribe to a supported “Internet Calling” plan with a local SIM.Traditional phone calls/SMS: unaffected. You can place normal cellular calls (using a local SIM or roaming on your home SIM).Note: The exact list of permitted apps can change, and individual hotels, cafés or corporate networks may apply additional filtering.Lawful ways to call while in the UAE1) Use a UAE‑licensed internet calling app (with a local plan)UAE operators (e.g., e&/Etisalat and du) offer “Internet Calling” add‑ons that enable VoIP in approved apps, most commonly BOTIM.How it works (typical flow): 1) Buy a UAE tourist SIM/eSIM at the airport or a mall store. 2) Add an “Internet Calling” option (daily/weekly/monthly). Ask specifically which apps are enabled today. 3) Install the supported app (commonly BOTIM). 4) Register with your UAE number. 5) Place voice/video calls from inside that app.Pros: - Fully compliant and reliable once enabled. - Predictable costs (especially on weekly/monthly passes).Cons: - Requires a local SIM and add‑on. - Your contacts need the same app for app‑to‑app calls.Tip: If you’re continuing to Europe or North America after the UAE, line up regional data for app calls in your next stop with Esim Western Europe, Esim France, Esim Spain, Esim Italy, Esim North America or Esim United States.2) Use regular phone calls and SMSRoaming on your home SIM: Simple and works country‑wide. Check roaming rates before you travel.Local UAE SIM: Cheapest for calling within the UAE and can be cost‑effective for international calls with specific bundles.When budget‑sensitive, ask your provider about: - Incoming call charges while roaming. - International direct dial (IDD) bundles to your home country. - Tourist SIM voice packs.3) Join work meetings on permitted platformsZoom/Teams/Webex/Meet typically let you join scheduled meetings.Use your company account for best results, and prefer wired or high‑quality hotel Wi‑Fi.If dial‑out (PSTN) inside the app fails, request meeting dial‑in numbers and call them using your mobile’s normal voice service.For compliance‑minded teams, see our enterprise guidance on For Business. Travel partners and TMCs can find enablement resources in our Partner Hub.4) Wi‑Fi Calling via your home carrier (sometimes works)Wi‑Fi Calling routes calls/texts through your home mobile network over the internet. In the UAE, it may work on some Wi‑Fi networks for some carriers; it’s not universal.How to set up (before you fly): 1) Check your home carrier supports Wi‑Fi Calling and that it is enabled on your line. 2) Turn it on in your device settings: - iPhone: Settings > Mobile Data > Wi‑Fi Calling > On. - Android (varies): Settings > Network & Internet > Mobile network > Wi‑Fi Calling. 3) Test at home: enable Airplane Mode, turn on Wi‑Fi only, make a call. If it connects and shows “Wi‑Fi” or similar, you’re set. 4) In the UAE, keep Airplane Mode on to avoid unintended roaming charges, connect to Wi‑Fi, and try a call. 5) If it doesn’t register, switch Wi‑Fi networks or use a different lawful method.Caveats: - Not guaranteed; some UAE Wi‑Fi networks or ISPs may block or interfere. - Emergency calling over Wi‑Fi may not work. Know local emergency numbers and alternatives. - Quality depends on the Wi‑Fi connection and your home carrier’s support.5) Don’t rely on VPNs to bypass blocksVPN use is regulated in the UAE. Many businesses use secure connectivity for corporate access, but using tools to bypass local restrictions can lead to issues. Stick to permitted services and your operator’s approved calling options. When in doubt, ask your employer’s IT and your mobile provider for compliant solutions. We cover country specifics on Destinations.Traveller checklistsBefore you fly (10–15 minutes)Confirm your critical contacts have at least one common option with you:Standard phone number and SMS.A UAE‑approved calling app (e.g., BOTIM) if you plan to use it.Ask your home carrier about:Roaming voice/SMS rates and any travel bundles.Wi‑Fi Calling support while abroad.Enable and test Wi‑Fi Calling at home (see steps above).Decide your SIM plan:Roam on home SIM, orBuy a UAE tourist SIM on arrival (consider an Internet Calling add‑on).For work, pre‑test Zoom/Teams/Webex from a different network (e.g., coffee shop Wi‑Fi) to mimic travel conditions.Save key pages:Your itinerary and hotel Wi‑Fi details.Simology’s UAE notes on Destinations.On arrival (5–10 minutes)If buying a local SIM: ask the agent which Internet Calling apps are currently supported and the exact add‑on code or package.Install and register the supported app (often BOTIM) if you chose that route.Connect to reliable Wi‑Fi in your hotel; try Wi‑Fi Calling if that’s part of your plan.Place a short test call using your chosen method to confirm audio quality both ways.For meetings, run a quick Zoom/Teams test with your office.Share your reachable numbers/methods with family or colleagues (e.g., “Use SMS or call my number; BOTIM also works this week”).Pro tips from frequent visitorsPrioritise reliability over novelty. A 2‑minute paid cellular call that works beats 20 minutes wrestling with blocked apps.Dual‑SIM strategy: keep your home eSIM active for SMS/2FA and roaming calls; use a local UAE SIM for data and any licensed Internet Calling option.Hotel Wi‑Fi differs. If Wi‑Fi Calling won’t register, try:Personal hotspot from a local SIM.A different Wi‑Fi network (lobby vs room).Falling back to standard voice.Schedule family calls when you’re in a country with open VoIP later in your trip. Line up regional plans such as Esim Western Europe or Esim North America for seamless app calling outside the UAE.Business travellers: publish a “reach me” line in your meeting invites (e.g., direct mobile number) and include dial‑in numbers for all key meetings. For policy‑compliant connectivity across markets, our team can help on For Business.Travel brands and IT partners supporting teams in the Gulf can access playbooks and partner resources via the Simology Partner Hub.FAQsAre WhatsApp voice/video calls blocked in the UAE?Yes, in general WhatsApp calling is blocked on UAE networks. Messaging and media sharing still work. Use a UAE‑approved calling app with the correct plan, standard phone calls, or Wi‑Fi Calling (if it registers for your carrier).Does FaceTime work in 2025?FaceTime availability in the UAE has been inconsistent over the years and can vary by device, OS, and network. Some visitors report it working; others cannot connect. Treat FaceTime as unreliable and have a fallback.Will Wi‑Fi Calling let me call normally from the UAE?Sometimes. If your home carrier supports Wi‑Fi Calling abroad and the Wi‑Fi network allows it, your calls may route over Wi‑Fi as if you were at home. It’s not guaranteed, and performance varies by carrier and network. Enable and test before travel, and always have an alternative.Can I use Zoom, Microsoft Teams or Google Meet?Generally yes for joining scheduled meetings with audio/video/screen share. If in‑app dial‑out to phone numbers doesn’t work, use meeting dial‑in numbers and call via your mobile’s normal voice service or a hotel landline.Are VPNs a solution to blocked calling?No. VPN use is regulated in the UAE and should not be used to circumvent local restrictions. Stick to permitted services: licensed UAE calling apps with the proper add‑on, standard voice/SMS, work platforms, or Wi‑Fi Calling where available.What’s the simplest way to keep in touch with family?Quick option: regular phone calls or SMS (via roaming or a local SIM).App‑to‑app: subscribe to the UAE operator’s Internet Calling plan and use the supported app (commonly BOTIM).When leaving the UAE: switch to app calls freely in your next destination using regional plans like Esim France, Esim Spain, Esim Italy or Esim United States.Bottom lineIn the UAE, most consumer VoIP calls are restricted. Don’t count on WhatsApp/FaceTime. Your reliable, lawful options are: a licensed Internet Calling plan on a local SIM, standard cellular calls/SMS, work platforms for meetings, and Wi‑Fi Calling where it registers. Test before you fly, verify on arrival, and always keep a paid fallback for time‑critical calls.Next step: Check current country specifics and plan your connectivity via our global Destinations.

Expat Starter Pack (First 30 Days): eSIM vs Local SIM, Number Porting, OTT Apps

Expat Starter Pack (First 30 Days): eSIM vs Local SIM, Number Porting, OTT Apps

Moving country is exciting and admin-heavy. Your phone setup shouldn’t be the bottleneck. This playbook is your first 30-day guide to connectivity: land with instant data, pass eKYC to get a local number, keep your banking OTPs flowing, and decide what to do with your existing number. The short version: use an arrival eSIM for expats for day-one data and calls via apps, then transition to a local SIM once you’ve cleared identity checks and have an address. Along the way, make smart use of OTT apps and (optionally) a VoIP number for continuity. We’ll show you how to hand off cleanly, avoid number-porting headaches, and set yourself up so utilities, HR systems, and banks accept your phone number on the first try. If you’re relocating with a family or as part of a corporate move, the same steps apply—just scale the checklists and keep all ICCIDs and IDs organised.The 30‑Day Game Plan at a GlanceDays 0–3: Install a travel eSIM before you fly. Land with data, navigation, and app calls working. Keep your home SIM active for OTPs.Days 3–14: Clear eKYC and buy a local prepaid SIM (or eSIM). Prioritise SMS reliability for banks and utility sign-ups.Days 7–21: Handoff: set the local SIM as default for calls/SMS, keep the travel eSIM as backup data. Update critical accounts.Days 14–30: Decide on number porting (home number to VoIP or local carrier) and lock in long-term plans.Ongoing: Use OTT apps smartly, maintain a backup data option, and document your 2FA methods.Pro tip: Use dual-SIM settings to keep control—one line for data, the other for voice/SMS—until you’re fully settled.Step 1: Land Ready with a Travel eSIM (Days 0–3)A travel eSIM gives you instant data on arrival without hunting for a shop. It’s the best start for navigation, temporary accommodation check-ins, and messaging.Where to buy: Browse regional and country packs on Destinations, including Esim Western Europe, Esim North America, or singles like Esim United States, Esim France, Esim Italy, and Esim Spain.Why eSIM first: No paperwork, immediate activation, predictable costs, and you keep your home SIM in the device for OTPs and critical calls.Checklist: Before you fly 1) Check your phone’s eSIM compatibility and carrier lock status. 2) Purchase and install the eSIM profile (QR or in-app) while you still have Wi‑Fi. 3) Set the travel eSIM as your mobile data line; turn off data roaming on your home SIM. 4) Test: open maps, send a message, and confirm your home line can still receive SMS. 5) Pack a paper copy or screenshot of the eSIM QR in case you need to re-add it.Pro tips: - Keep your home SIM active for banking OTPs and account access. - WhatsApp keeps your existing number unless you explicitly change it; you can use data from the travel eSIM with WhatsApp tied to your home number.Step 2: Tackle eKYC and Buy a Local SIM (Days 3–14)You need a local number for banks, employers, and utilities. In many countries, SIMs are registered (eKYC), so you’ll be asked for ID and sometimes proof of address or a tax ID.What to expect by region (common patterns, specifics vary): - France: ID required for SIM registration; postpaid often needs an IBAN and local address. - Spain: Passport/NIE for registration; prepaid easiest for newcomers. - Italy: Passport plus Codice Fiscale (tax code) commonly requested; keep your SIM packaging. - United States: Prepaid requires ID at point of sale in some states; postpaid usually needs a credit check and SSN/ITIN. Consider prepaid initially.Choosing the right product: - Start with prepaid to avoid credit checks and long contracts. - Ensure the plan includes SMS (for OTPs) and enough data. Voice minutes are useful for local calls to landlords, HR, and utilities. - Ask for an eSIM if your device supports it; otherwise, a physical SIM is fine.Shop visit checklist 1) Bring your passport and any local identifiers (e.g., address proof, Codice Fiscale, NIE) if you have them. 2) Choose prepaid with 10–20 GB data, unlimited local SMS, and minutes. 3) Activate in-store and have them place a test call and send/receive an SMS. 4) Save the contract/receipt and the ICCID (SIM number) for future porting.Pro tips: - Test OTPs: send yourself an SMS from another line or ask the shop to verify incoming SMS. Reliability trumps price early on. - If you’re moving across multiple Schengen countries, consider Esim Western Europe to bridge until your local line is set.Step 3: Handoff—Move Data and Services to the Local Line (Days 7–21)Once your local SIM works, shift critical services gradually.Dual-SIM handoff (iOS/Android) 1) Set your local SIM as the default for Voice and SMS. 2) Keep your arrival eSIM as the default Data line for a few days while you test local network quality; then switch Data to the local SIM. 3) Disable data on your home SIM to avoid roaming charges, but keep it active for remaining OTPs until you update your accounts. 4) Label lines clearly in settings (e.g., “Local” and “Home/Travel”).Update critical accounts - Banks: change your registered number to the local SIM only after confirming SMS reliability. - Government, health, and tax portals: often require a local number—schedule these updates once you have stable reception at home. - Messaging apps: confirm which number each app is using.Pro tip: Move services in layers—banking first, then utilities, then everything else—so you always have a fallback line for OTPs.Step 4: Number Porting—Keeping or Moving Your Old NumberDecide what to do with your home-country number and any temporary numbers you’ve acquired.Common scenarios - Keep home number for inbound only: Park it with a VoIP/virtual number provider for low-cost roaming reception and voicemail-to-email. - Fully move: Port your home number to a VoIP provider you can use globally, or port into a local carrier if you’re permanently relocating and want to keep the number active for inbound calls from home. - Port a temporary local number to your preferred local carrier after you pick a long-term plan.General porting rules - Do not cancel the line you’re porting; it must be active. - Gather required identifiers: account number, port-out PIN, ICCID, or country-specific codes. - Expect a short downtime window (usually minutes to a few hours) during the cutover.Country notes (practical specifics) - France: Obtain your RIO code by calling 3179 from the line you want to port. Provide RIO to the new operator; porting usually completes in 1 working day. - Spain: Porting typically completes in 1–2 working days; bring ID and the SIM’s ICCID. Night-time cutovers are common to minimise disruption. - Italy: Have your Codice Fiscale and current SIM ICCID. Prepaid-to-prepaid ports are common and usually smooth in 1–3 days. - United States: You’ll need the account number and port-out PIN (different from your login PIN). Prepaid accounts sometimes require a special porting PIN requested via SMS.Pro tips: - Schedule ports mid-week, early in the day, and avoid public holidays. - Keep both SIMs inserted during the port so you can detect when the old line goes inactive and the new one activates.OTPs, Banking and Utilities: Make Them Work First TimeBanks and services can be strict about which numbers they accept.OTP reality: Many banks reject VoIP numbers for SMS 2FA. Use a local mobile number for the update.App-based 2FA: Where available, switch to app-based authenticators or push approvals; these are number-agnostic and travel well.Utility sign-ups: Energy, broadband, and mobile wallets often send verification codes. Use your local SIM and ensure it has weekday reception where you live.Practical flow 1) Keep your home SIM active for initial banking access. 2) Once your local line is tested, update your bank profile to the local number. 3) Switch services that allow app-based 2FA to an authenticator app. 4) Document which services still rely on SMS so you know to keep that line active.Pro tip: Add a secondary recovery method (email or backup codes) wherever possible before you travel.OTT Apps and Virtual Numbers for ContinuityMessaging and calling apps can smooth your move—but use them intentionally.WhatsApp: You can keep your home number for WhatsApp while using local data. If you prefer to switch, use WhatsApp’s “Change Number” to migrate chats and groups.Telegram/Signal: Similar flexibility; both can run on a device with data from any SIM.VoIP/virtual numbers: Great for inbound calls from your home country and for publishing a stable contact when you might change SIMs. However, don’t rely on VoIP for banking OTPs, as many institutions block them.Business users: Consider a cloud telephony setup so your team line stays stable during relocation. See For Business for options that scale across teams.Pro tip: Label your contacts to reflect where they should call you (e.g., “Call on WhatsApp” vs “Call mobile”) during your transition month.Country Snapshots and eSIM PicksFrance: Start with Esim France, then switch to a local prepaid with strong SMS reliability for banking. Remember the RIO process for porting.Italy: Use Esim Italy while you get your Codice Fiscale and address sorted. Porting usually needs the ICCID; keep packaging.Spain: Esim Spain covers arrival; many services expect a Spanish mobile for onboarding—prepaid is the quickest path.United States: Esim United States for landing; consider prepaid first, then postpaid once you have credit history. Ports need account number and port-out PIN.Multi-country: If you’re doing side trips or moving within the region, use Esim Western Europe or Esim North America during your first month.For other countries and bundles, head to Destinations.Common Pitfalls to AvoidCancelling before porting: Never cancel a number you plan to port.OTP dead-ends: Updating a bank to a VoIP number that can’t receive their OTPs.Wrong default line: Accidentally using data on your home SIM and incurring roaming fees—double-check defaults.Losing the ICCID: You’ll need it for support and porting; photograph SIM packaging.eSIM transfer surprises: Some devices limit eSIM transfers; keep your eSIM activation details safe.Over-optimising too early: Keep the travel eSIM until your local setup is bulletproof.Checklist: Your First 30 DaysBefore travel:Buy and install an arrival eSIM; test data.Label lines and disable home SIM data roaming.List critical services needing 2FA.Days 0–3:Land and verify connectivity.Keep home SIM ready for OTPs.Days 3–14:Complete eKYC and buy a local prepaid SIM/eSIM.Test inbound/outbound SMS and a local call.Start updating banks and essential services.Days 7–21:Set local SIM as default for calls/SMS, then for data.Migrate services to app-based 2FA where possible.Decide on porting strategy for your home number.Days 14–30:Execute number port(s) if needed.Pick a long-term local plan.Keep the travel eSIM active as a backup until you’re fully stable.FAQIs an eSIM for expats enough for the whole first month?Often yes for data and OTT calls, but many banks/utilities require a local mobile number for SMS verification. Plan to add a local SIM within 1–2 weeks.Will changing my SIM affect WhatsApp?No, WhatsApp stays tied to the number you registered with until you use “Change Number.” You can use local or travel data regardless.Can I use a VoIP number for bank OTPs?Frequently not. Many banks block VoIP. Use a local mobile number for reliable OTP delivery and keep an app-based authenticator as backup.How long does number porting take?Typically 1–3 working days, with a short downtime window during the cutover. France often completes in 1 day (with RIO); Spain/Italy 1–2 days; the U.S. depends on your carrier and account type.Do I need local ID to buy a SIM?In many countries, yes. Prepaid usually has the lightest requirements. Bring your passport and any local identifiers you have (address proof, tax codes).What if my phone doesn’t support eSIM?Buy a physical SIM on arrival and follow the same handoff steps. You can still keep your home SIM in a dual-SIM phone, or carry it and swap as needed.Next step: Choose your arrival plan and install it before you fly. Start with Destinations to pick the right eSIM for your first 30 days.