VPN for Travel: When You Need It, When You Don’t, and Best Practices

Blog

VPN for Travel: When You Need It, When...

VPN for Travel: When You Need It, When You Don’t, and Best Practices

30 Oct 2025

VPN for Travel: When You Need It, When You Don’t, and Best Practices

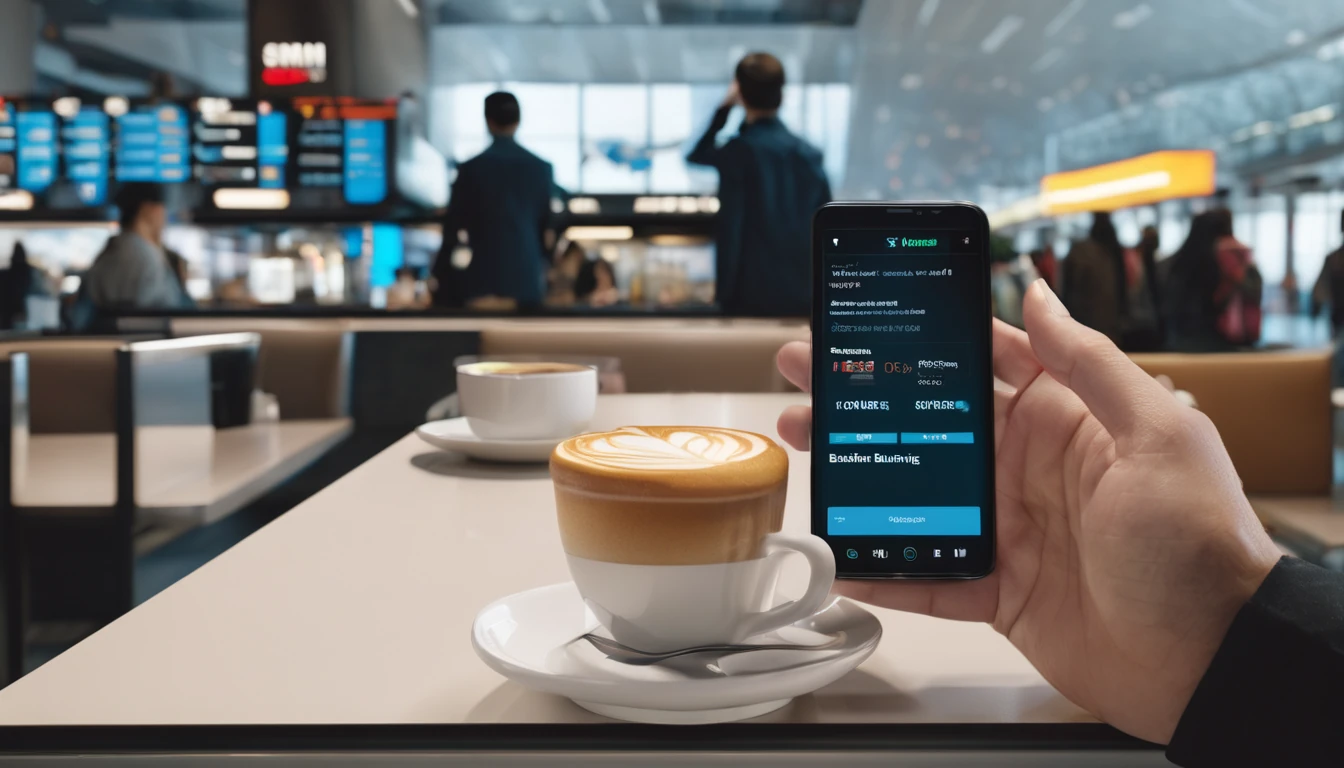
Travelling with a VPN can be a smart move—but not for every connection or every task. The right setup keeps your banking and accounts safe, helps when streaming libraries change, and prevents snooping on public Wi‑Fi. The wrong setup can drain your battery, slow you down, or even cause bank apps to lock you out. This guide cuts through the noise with practical, traveller-first advice on when to use a VPN, when to skip it, and how to configure it properly. We’ll cover banking and streaming workflows, split tunnelling, battery impact, and regional legality notes—plus checklists you can follow before you fly.

Most importantly: mobile data from a reputable eSIM is typically safer than public Wi‑Fi. If you can move sensitive tasks (like banking) to cellular data via a local plan—think [Esim Western Europe], [Esim North America], or country options like [Esim United States], [Esim France], [Esim Italy], and [Esim Spain]—you’ll reduce the need for a VPN and avoid many connection headaches. When you do use a VPN, do it deliberately.

When you need a VPN while travelling

Use a VPN for any of the following:

  • Public Wi‑Fi (hotels, cafés, airports): Encrypts your traffic to reduce snooping and rogue access point risks.
  • Banking logins from a new country: A VPN with a home-country exit can reduce fraud flags and MFA loops. See best practices below.
  • Streaming or sites with regional libraries: A VPN may help access your home library while abroad. Expect mixed results; platforms actively block VPNs.
  • Voice and messaging apps where services are blocked: A VPN can sometimes restore access where VoIP or messaging is restricted.
  • Bypassing DNS hijacking and content injection: Some networks tamper with traffic. A VPN gives you a clean path.
  • Remote work requirements: Your employer may mandate a VPN for internal tools. If you’re travelling for work, coordinate with IT or see [For Business].

Pro tip: - If Wi‑Fi makes your apps glitchy, toggle a VPN on with a local server (for performance) or switch to mobile data via an eSIM.

When you don’t need a VPN

Skip the VPN in these cases:

  • On mobile data via an eSIM: Cellular networks are inherently harder to snoop than open Wi‑Fi. For sensitive tasks abroad, use data from [Esim Western Europe], [Esim North America], or a country plan like [Esim United States] rather than hotel Wi‑Fi.
  • Speed-sensitive tasks where encryption overhead matters: Real-time calls, gaming, or large uploads may perform better without a VPN—especially on weak Wi‑Fi.
  • Services that require your true location/IP: Some airline apps, local transport tickets, and banking fraud engines may block or challenge VPN IPs.
  • Apps with end-to-end encryption already in place: Messaging apps with E2EE are safe transport-wise, though a VPN can still hide metadata from local networks.
  • When your VPN is causing more harm than good: If your bank locks you out or streaming refuses to load, disconnect or use split tunnelling.

VPN vs eSIM mobile data: which to use and when

  • Best default: eSIM mobile data (no VPN). Use a trusted provider, avoid public Wi‑Fi for sensitive tasks, and you’ll be secure enough for everyday travel.
  • Add a VPN on Wi‑Fi. Especially in airports, cafés, co‑working spaces, or rentals with unknown routers.
  • Add a VPN on mobile data only when needed. For example, to reach corporate resources or to try a home streaming library.

Not sure which eSIM you’ll need? Browse country and regional plans via [Destinations], including bundles like [Esim Western Europe] and [Esim North America], or country plans such as [Esim France], [Esim Italy], [Esim Spain], and [Esim United States].

Banking abroad: the smart setup

Why banks flag logins

Banks use device fingerprints, IP geolocation, and behaviour analytics. A sudden login from a new country—or from a known VPN data centre—can trigger extra verification or temporary blocks.

Step-by-step: banking that “just works”

  1. Update your banking app at home. Test logins on Wi‑Fi and mobile data.
  2. Enable strong authentication. App-based 2FA or biometrics are best.
  3. Prefer mobile data over Wi‑Fi when abroad. Use your eSIM for all banking sessions.
  4. If you must use Wi‑Fi, enable your VPN—but choose a server in your home country.
  5. Disable ad‑blockers/trackers for the banking app if it fails to load; they can interfere.
  6. Keep your phone number active for OTPs if your bank relies on SMS, or switch to app-based OTP before departure.
  7. Avoid repeated failed logins. If you get stuck, switch off the VPN and try again on mobile data.

Troubleshooting: - Banking app won’t load on VPN: Switch to a home-country server. If still failing, disconnect VPN and try on mobile data. - MFA loop: Clear the app cache and cookies (or reinstall). Swap networks (e.g., move from hotel Wi‑Fi+VPN to eSIM). - New device detection: Don’t factory reset or switch phones mid-trip unless necessary.

Pro tip: - Keep a secondary bank/credit card with a separate app as backup in case one provider is overzealous with fraud rules.

Streaming on the road: realistic expectations

What can work: - Catch-up TV or home library access via a VPN exit in your home country. - Downloaded content before travel—most reliable, no VPN needed. - Regional free-to-air apps that don’t enforce strict geo-checks.

What often won’t: - Big platforms with aggressive VPN detection. Even “working” servers can stop at any time. - Casting from a VPN’d phone to a smart TV on hotel Wi‑Fi. The TV and phone must be on the same network; VPN can break discovery.

Battery and data impact: - VPN + streaming = more CPU and up to 5–15% extra data overhead. Use efficient protocols (WireGuard) and drop video resolution if on metered data. - On weak Wi‑Fi, adding a VPN can amplify buffering. Try a nearby server, or use eSIM data.

Split tunnelling for streaming: - Want only your streaming app on the VPN and the rest local for speed and maps? Use split tunnelling (details below). If unavailable on your device, consider a second browser or a dedicated streaming device.

Pro tip: - Download episodes over a fast network before a long train or flight. It sidesteps geo-blocks and saves battery.

Split tunnelling: how and when to use it

What it is: - Split tunnelling lets you choose which apps or sites use the VPN and which go direct.

When to use: - Banking: Route your bank app via a home-country VPN while leaving maps and ride‑hailing off VPN for better location accuracy. - Streaming: Put the streaming app through the VPN; keep everything else local for speed. - Work: Send corporate tools via the company VPN, keep personal browsing normal.

How to set it up (general): - Android: Many VPN apps offer “Split tunnelling” or “Per‑app VPN.” Choose apps to include or exclude from the tunnel. - Windows/macOS: Look for “Split tunnelling,” “App exclusions,” or “Bypass VPN for selected apps” in your VPN client. Some allow domain-based rules. - iOS/iPadOS: Per‑app split tunnelling is limited. Some VPNs provide app exclusions; if yours doesn’t, use workarounds like a dedicated browser for VPN use, or keep critical apps on mobile data while other tasks run on Wi‑Fi+VPN.

Pro tips: - Prefer “include list” (only chosen apps use VPN) for tighter control. - Test each app after changes—some ignore system proxies and behave differently.

Battery, speed and data: making a VPN travel‑friendly

  • Protocol matters: WireGuard (or modern variants) is efficient and fast; IKEv2 is stable on mobile; OpenVPN can be heavier on battery.
  • Server choice: Nearby servers reduce latency and drain. Use a home-country server only when you truly need that IP.
  • Auto‑connect logic: Configure “auto‑connect on insecure Wi‑Fi” rather than “always on” to save battery.
  • Kill switch: Enable it on laptops; on phones, use it when you must ensure no leaks (e.g., on hostile networks). Remember it blocks traffic if the VPN drops.
  • Background apps: Limit background sync and cloud photo uploads on metered/VPN connections.
  • Tethering: VPN on the phone plus hotspot adds overhead. If possible, run the VPN on the tethered device instead.

Laws and enforcement vary. High‑level guidance for travellers:

  • EU/UK/US/Canada: VPNs are generally lawful for personal use. Platforms may still block VPN IPs; terms of service apply.
  • Turkey/Egypt: VPNs are sometimes throttled or specific services blocked. Have multiple protocols available (WireGuard and IKEv2/OpenVPN).
  • India: VPN use is legal; some services changed logging policies. Stick to reputable providers.
  • UAE/Oman: Authorities penalise misuse of VPNs to commit offences. Access to unlicensed VoIP may be limited. Expect some blocks.
  • Russia: Many VPNs are restricted or blocked; connections may be unreliable.
  • China: Most foreign VPN apps are blocked. If you need one, set it up before arrival and expect instability. Corporate solutions fare better.
  • Iran: Extensive restrictions; connections can be risky and unreliable.

Practical tips: - Install and test your VPN before you go. - Keep multiple protocols and server options. - Be prepared to fall back to mobile data via eSIM where Wi‑Fi is filtered.

Note: Rules change. Check local regulations and service terms in your destination. For plan coverage, see [Destinations].

Quick setup checklist

Before you travel: - Choose a reputable VPN with WireGuard and IKEv2 support. - Install on all devices and test banking logins at home. - Enable app‑based 2FA for financial accounts. - Configure auto‑connect on insecure Wi‑Fi and a kill switch where needed. - Set up split tunnelling for banking/streaming apps if available. - Download offline maps and streaming content in advance. - Add a travel eSIM for safer mobile data: check regional bundles like [Esim Western Europe] and [Esim North America], or country plans such as [Esim France], [Esim Italy], [Esim Spain], and [Esim United States].

On the road: - Prefer eSIM mobile data for sensitive tasks; avoid public Wi‑Fi when possible. - Use VPN on public Wi‑Fi; pick the nearest server unless you need a home IP. - If something breaks, toggle VPN off/on, switch servers, or move to mobile data.

For teams and business travellers

  • Coordinate with IT: Use approved clients/protocols and per‑app VPN profiles.
  • Separate profiles: Keep work apps in a managed profile (Android) or use MDM on iOS/macOS to enforce per‑app VPN.
  • Performance planning: Offer regional gateways for roaming staff to reduce latency.
  • Policy: Document when VPN is mandatory vs optional to preserve battery on the move.

If you manage roaming teams or resell travel connectivity, explore Simology’s solutions [For Business] and our [Partner Hub].

FAQ

  • Do I need a VPN for hotel Wi‑Fi?
  • It’s strongly recommended. Hotel Wi‑Fi is shared and often poorly segmented. A VPN encrypts your traffic and reduces exposure to snooping or rogue hotspots.
  • Will a VPN break my banking app?
  • It can. Banks often block data centre IPs. Try your bank on mobile data first. If using Wi‑Fi, connect your VPN to a home‑country server. If it still fails, disconnect the VPN and use eSIM data.
  • Is it legal to use a VPN abroad?
  • In many countries, yes. Some restrict or block VPNs, and misuse can carry penalties. Check local rules in your destination and follow platform terms. Be prepared with eSIM data as a fallback.
  • Which VPN protocol is best for travel?
  • Start with WireGuard for speed and battery efficiency. If blocked or unstable, switch to IKEv2 (good on mobile) or OpenVPN UDP/TCP as a last resort.
  • Do I need a VPN if I use an eSIM?
  • Often no, especially for banking and routine browsing on mobile data. Still use a VPN on public Wi‑Fi or when you specifically need a home IP or company access.
  • Will a VPN reduce my battery life?
  • Modestly. Expect extra drain, especially on weak networks. Use efficient protocols, nearby servers, and auto‑connect only on insecure Wi‑Fi to minimise impact.

Next step: Pick a local or regional eSIM to keep sensitive tasks on mobile data and reduce VPN headaches. Start with [Destinations].

Read more blogs

Andes Highlights (3 Weeks): Peru–Bolivia–Chile–Argentina Connectivity

Andes Highlights (3 Weeks): Peru–Bolivia–Chile–Argentina Connectivity

Planning a south america itinerary 3 weeks through the high Andes? This route stitches together Peru’s Sacred Valley, Bolivia’s La Paz and Salar de Uyuni, Chile’s Atacama Desert, and northern Argentina’s quebradas or Mendoza wine country—often by long-distance bus and a couple of short flights. Connectivity is different at altitude: coverage is strong in cities but drops in high passes and salt flats; bus Wi‑Fi is patchy; border towns can be blackspots. The smart move is an eSIM with multi‑country coverage, backed by offline maps, offline translations, and a simple routine for crossing borders by bus without losing service. Below you’ll find a practical, connectivity-first itinerary; checklists to prep your phone, apps and documents; and on-the-ground tips for staying online where it matters: booking transport, hailing taxis, backing up photos, and navigating when the signal disappears.If you’re transiting via Europe or North America, you can also add a layover eSIM to stay connected door-to-door. Start with our country list on Destinations, then follow the steps, and you won’t waste time chasing SIM shops at 3,500 metres.The 3‑week Andes route at a glanceWeek 1: Peru (Cusco, Sacred Valley, Machu Picchu) - Fly into Cusco (or Lima then connect). - Base in Cusco; day trips to Pisac/Chinchero/Maras–Moray. - Train to Aguas Calientes; Machu Picchu visit; return to Cusco or continue to Puno/Lake Titicaca.Week 2: Bolivia and Chile (La Paz, Uyuni, San Pedro de Atacama) - Bus/collectivo via Copacabana to La Paz. - Fly or overnight bus to Uyuni. - 3‑day Uyuni–altiplano tour ending in San Pedro de Atacama (Chile).Week 3: Chile and Argentina (Atacama to Salta or Mendoza/Buenos Aires) - Choose: - North: San Pedro to Salta/Jujuy by bus; fly to Buenos Aires. - Or South: San Pedro–Calama flight to Santiago; bus or flight to Mendoza; onward to Buenos Aires.Connectivity notes (quick): - Cities: generally strong 4G/4G+; 5G in major hubs (Santiago, Buenos Aires). - Altitude/rural: expect long no‑signal stretches (Uyuni, altiplano passes, Paso Jama). - Bus Wi‑Fi: often advertised, rarely reliable. Plan to be offline onboard. - Border regions: networks switch; a multi‑country eSIM avoids sudden loss.eSIM vs local SIMs for a 4‑country tripFor a route with multiple borders and remote legs, eSIM wins on time and reliability.What a multi‑country eSIM gets you: - One plan across Peru, Bolivia, Chile, Argentina (check coverage per country on Destinations). - No passport/SIM registration queues at kiosks. - Keep your home number active on the physical SIM for calls/SMS codes. - Instant top‑ups if you burn data on photos or navigation.When a local SIM still helps: - Long stay in one country with heavy data use (e.g., a month in Buenos Aires). - Dead zones where a different local network performs better (rarely worth the hassle on a 3‑week pace).Practical approach: - Use an eSIM as your primary data line across all four countries. - If you find a specific local network far better in one region, add a cheap local SIM and keep the eSIM as backup.Device readiness checklist (before you fly)1) Check eSIM compatibility and SIM‑lock status on your phone.2) Buy and install your eSIM while on home Wi‑Fi. Keep a PDF/printed copy of the QR code.3) Label lines clearly (e.g., “eSIM Andes Data”, “Home SIM”).4) Turn on data roaming for the eSIM; leave roaming off for your home SIM to avoid charges.5) Set up dual‑SIM rules: data on eSIM; calls/SMS default to home SIM if needed.6) Download offline: Google Maps/Organic Maps for all target regions; language packs (Spanish at minimum); bus/air tickets; hotel confirmations.7) Cloud backups: set to upload on Wi‑Fi only; pre‑create shared albums for travel companions.8) Test tethering/hotspot with your laptop/tablet.If you’re transiting popular hubs, consider a short layover eSIM: - USA connections: add an Esim United States or a broader Esim North America.- Europe connections: Madrid/Barcelona? Use an Esim Spain. Paris or Rome? See Esim France and Esim Italy. Multi‑country layovers? Try Esim Western Europe.City‑by‑city connectivity notesCusco & the Sacred Valley (Peru)Coverage: Good in Cusco city; variable in high villages (Maras/Moray) and along Inca Trail approaches.Tips: Download Sacred Valley maps offline; pin viewpoints and ruins. most taxis use WhatsApp—save your accommodation’s number.Machu Picchu/Aguas Calientes: Patchy to none at the citadel. Upload your photos later; don’t rely on live ticket retrieval.Lake Titicaca: Puno and CopacabanaPuno: Reasonable 4G; bus terminals crowded—screenshot QR tickets.Crossing to Copacabana: Expect a signal drop around the border; have directions saved offline.La Paz (Bolivia)Good urban 4G; the cable car network has decent signal but tunnels do not.Yungas/“Death Road” tours: Mountain valleys cause dead zones—share your emergency contacts with the operator, carry a charged power bank, and don’t plan remote calls.Uyuni and the Altiplano (Bolivia to Chile)Uyuni town: OK 4G; ATMs finicky—use Wi‑Fi for banking apps.Salt flats/lagunas: Assume offline for most of the 3‑day tour. Guides often carry satellite phones; agree a pickup time/place in San Pedro and preload your map route.San Pedro de Atacama (Chile)Town: Solid 4G; accommodations often have Wi‑Fi but speeds vary.Geysers, Valle de la Luna: Offline navigation essential; sunrise trips start before mobile networks wake up in some areas.Salta/Jujuy or Mendoza/Buenos Aires (Argentina)Salta/Jujuy: Good city coverage; quebradas have long no‑signal sections.Mendoza: City 4G/5G; vineyards outside town can be patchy.Buenos Aires: Strong 4G/5G; ideal for cloud backups and large downloads before you fly home.Border crossings by bus: step‑by‑stepThe big ones on this route: Peru–Bolivia (Puno/Copacabana), Bolivia–Chile (Uyuni–San Pedro via Hito Cajón), Chile–Argentina (Paso Jama to Salta or Los Libertadores to Mendoza).How to keep service and sanity:1) The day before:- Top up your eSIM data.- Confirm your plan includes both countries you’re entering/leaving.- Download offline maps for both sides of the border and your town of arrival.- Save bus company WhatsApp and terminal address offline.2) On departure morning:- Keep a paper copy or offline PDF of tickets, insurance, and accommodation proof.- Charge phone and power bank; pack a short cable in your daypack.3) On the bus:- Don’t count on bus Wi‑Fi. Keep your eSIM as primary, but expect drops near mountain passes.- If your phone supports it, enable “Wi‑Fi calling” for later when you reach accommodation Wi‑Fi.4) At the border posts:- Data may be unavailable. Keep QR codes and booking numbers offline.- After exiting one country and entering the next, toggle Airplane Mode off/on to re‑register on the new network.- If the eSIM doesn’t attach, manually select a network in Mobile Settings.5) Arrival:- Send your accommodation a quick WhatsApp when you’re back online.- Recheck your eSIM’s data roaming is on; confirm you’re on an in‑country network, not a weak roaming partner.Pro tips: - Dual profiles: If your eSIM allows, keep a secondary profile for a different network in the same country—helpful in border towns.- Cash buffer: Some border terminals don’t accept cards; download a currency converter for offline use.Offline survival kit (5‑minute setup)Maps: Download regions for Cusco, Sacred Valley, Puno, La Paz, Uyuni, San Pedro, Salta/Jujuy or Mendoza, and Buenos Aires.Translations: Download Spanish for offline use; add phrasebook favourites (bus tickets, directions, dietary needs).Documents: Save PDFs of passports, tickets, hotel addresses; star them for quick access.Rides: Screenshots of pickup points; pin bus terminals and hotel doors.Entertainment: Podcasts and playlists for long bus legs, set to download on Wi‑Fi only.Altitude and your tech: what changesCoverage gaps lengthen: Fewer towers at high altitude; valleys can block signal. Assume offline on remote excursions.Batteries drain faster in cold: Keep your phone warm and carry a power bank (10,000–20,000 mAh).Hotel Wi‑Fi may be congested: Schedule big uploads (photo backups, app updates) for big-city stays like Santiago or Buenos Aires.GPS still works offline: Your blue dot shows on offline maps without data—preload everything.Data budgeting for 3 weeksTypical traveller usage across this route: - Messaging/Maps/Bookings: 0.2–0.5 GB/day- Social and photo sharing: 0.3–0.7 GB/day- Occasional video calls/streaming: 0.5–1.0 GB/dayFor a mixed-use trip, plan 15–25 GB for 3 weeks. Heavy creators should double it and upload over hotel Wi‑Fi when possible. If you work remotely, consider a higher‑capacity plan and a backup eSIM; see our guidance on For Business.Practical route with transport and connectivity cuesDays 1–4 Cusco base: Strong city signal; day trips may be spotty—go offline-ready.Days 5–6 Machu Picchu: Expect no service at the ruins; sync tickets ahead.Days 7–8 Puno to La Paz via Copacabana: Border signal drop; re‑register networks after crossing.Days 9–11 Uyuni tour to San Pedro: Treat as offline; charge nightly; carry spare cables.Days 12–14 San Pedro: Stable in town; tours offline; top up data before Paso Jama.Days 15–17 Salta/Jujuy or Mendoza: Good urban 4G; rural patches are offline.Days 18–21 Buenos Aires: Strongest connectivity of the trip; clear your uploads and map downloads for the flight home.Partnering and stopover extrasHospitality and tour operators in the Andes: help your guests stay connected—explore co‑branded solutions via our Partner Hub.Transatlantic flyers: test your eSIM setup on a layover with an Esim United States or Esim Western Europe before hitting high-altitude blackspots.FAQs1) Do I need a local SIM in each country?No. A multi‑country eSIM covering Peru, Bolivia, Chile and Argentina is simpler and works well for a 3‑week pace. Consider a local SIM only if you’ll spend longer in one country and want the absolute best regional coverage.2) Will my WhatsApp number change with an eSIM?No. WhatsApp is tied to your registered number, not your data line. Keep your home SIM active for voice/SMS (roaming off if you wish), and use the eSIM for data—WhatsApp continues as normal.3) Can I hotspot to my laptop or camera?Yes. Enable tethering on your eSIM. Mind your data: cloud backups and OS updates can burn gigabytes—set them to Wi‑Fi only or schedule in big cities.4) What if there’s no signal on the Uyuni/Atacama legs?That’s expected. GPS still works offline. Pre-download maps and translations, carry a power bank, and sync plans with your tour operator before departure.5) Will I get roaming charges at borders?If you’re using a multi‑country eSIM with coverage in both countries, you won’t incur extra roaming fees from your home carrier. Keep roaming off on your home SIM to avoid accidental use.6) I’m connecting via Europe or the US—worth getting a layover eSIM?Yes. It’s an easy way to test your setup and stay reachable. Try Esim North America or country options like Esim Spain, Esim France, or Esim Italy for common hubs.Next step: Browse South America coverage options and build your plan on Destinations.

Student Saver Plans: Semester-Long eSIM Options with Budget Tips

Student Saver Plans: Semester-Long eSIM Options with Budget Tips

Planning a semester abroad shouldn’t mean juggling short-term SIMs or guessing your data needs every few weeks. Simology’s new Student Saver Plans are built for study terms and placements, with long-validity eSIMs that last 90, 120, or 180 days. You get one activation, predictable data, and better value than stacking monthly bundles. Choose single-country coverage (like the US, France, Italy or Spain) or multi-country regional plans (Western Europe or North America) depending on your itinerary. We’ve also streamlined student verification so you can unlock student-only pricing without hassle. Below, you’ll find a quick plan overview, region-by-region guidance, a clear verification flow, installation steps, and practical data budgeting tactics to make your allowance last from orientation to finals. If you’re organising for a cohort or exchange group, there are group options too. Start by checking where you’re headed on our Destinations page, then pick the plan length that matches your term dates.Student Saver Plans at a glance (90 / 120 / 180 days)Think of these as “set-and-forget” eSIMs for the whole term. Each plan gives you a fixed data allowance with long validity and simple top-ups.90 days (Quarter)Best for: Short exchanges, internships, language courses, or mid-term travel.Typical data options: 20–50 GB total, depending on country/region.Good to know: Ideal if you’ll use campus Wi‑Fi heavily and only need mobile data for maps, messaging, and occasional hotspotting.120 days (Semester)Best for: Standard semester abroad or teaching placements that run over three to four months.Typical data options: 30–80 GB total, with optional top-ups if you stream or hotspot.Good to know: The sweet spot for most students—enough headroom for study weeks, weekend trips, and exam crunch time.180 days (Extended Semester)Best for: Extended placements, double-term programmes, or combining study with travel before/after term.Typical data options: 50–120 GB total, with the flexibility to add more if needed.Good to know: Maximum convenience—activate once and forget about expiry until the end of your programme.Pro tips: - If you’re travelling across multiple countries, pick a regional eSIM to avoid swapping. For example, Esim Western Europe for Schengen travel or Esim North America if you’ll be moving between Canada, the US, and Mexico. - Heavy video users (TikTok, YouTube, Reels) should lean towards mid-to-high data options or plan on a mid-term top-up.Choose coverage by destinationPick the footprint that matches your itinerary. You can browse all footprints on Destinations, or jump straight to common student picks:United States: Esim United StatesIdeal if you’ll mostly stay on one US campus with weekend trips.Consider a regional option (Esim North America) if you’ll cross into Canada or Mexico.Western Europe: Esim Western EuropeBest for Erasmus students or anyone city-hopping across Schengen countries.Avoids the need for multiple local SIMs and inconsistent roaming policies.France: Esim FranceGood for single-country study with frequent reliance on campus Wi‑Fi.If you’ll pop into neighbouring countries, consider Western Europe instead.Italy: Esim ItalySolid for city and regional travel within Italy; upgrade to Western Europe for weekend trips to nearby countries.Spain: Esim SpainGreat for students staying in Spain for the term; again, Western Europe suits multi-country travel.North America (regional): Esim North AmericaIdeal for US/Canada exchange pairs and cross-border research trips.When to choose single-country vs regional: - Single-country: You’ll stay mostly in one country and want the best-value per GB in that footprint. - Regional: You plan multi-country weekends or fieldwork. The convenience of one eSIM usually outweighs the slight premium.Student verification: quick and privacy-consciousUnlock student pricing in minutes. Here’s how the verification flow works:1) Create your Simology account - Sign up with the email you actively use. If you already have a university email, use it—it may auto-verify.2) Select your plan - Choose the 90/120/180-day option and your destination footprint.3) Verify your student status - Option A: University email verification - We’ll send a code to your .edu/.ac or institution-issued address. Enter the code to verify. - Option B: Document verification - If you don’t have a university email, upload proof such as your student ID card or current enrolment letter. Ensure your name, institution, and validity dates are visible.4) Get approval - Most email verifications are instant. Document checks typically complete within a business day. We’ll notify you by email.5) Apply discount and checkout - Your student rate is automatically applied. Complete checkout to receive your eSIM activation details.Notes: - Not sure if you qualify? Exchange acceptance letters usually count. If you’re under 18, a guardian can still pay from their account while you verify your student status. - If you’re purchasing for a cohort, see the group options in For Business or partner with us via the Partner Hub.Install and set up your eSIM: 5-minute checklistBefore you leave: - Check that your phone is unlocked and eSIM‑compatible. - Update iOS/Android to the latest version over Wi‑Fi. - Download offline maps for your host city/region (Google Maps, Apple Maps). - Save your eSIM QR code/email and your Simology account login offline.On activation day: 1) Connect to reliable Wi‑Fi. 2) Open your phone’s Mobile/Cellular settings. 3) Add eSIM via QR code or activation code. 4) Label your lines (e.g., “Semester Data” for the eSIM; keep your home SIM as “Home” if you’ll retain it). 5) Set the eSIM as “Mobile Data” and enable “Data Roaming” for the eSIM profile. 6) Keep your home SIM for calls/SMS if needed; set “Default Voice Line” accordingly. 7) Confirm APN settings auto-fill (most devices do this; we’ll include details in your activation email if manual entry is required). 8) Test with a web page and a maps search.Pro tips: - If you plan to retain your home SIM for 2FA, turn off “Mobile Data” for the home SIM to avoid unexpected roaming charges. - Add a data usage widget or shortcut to your home screen so you can check your remaining balance quickly.Budget your data across a semesterStretch your allowance without feeling restricted. Adopt these habits in week one:Lock in your streaming qualitySet YouTube/Netflix/Spotify to “Data Saver” or a capped resolution (480p/720p) on mobile.Disable “Autoplay” on social apps.Control background dataiOS: Low Data Mode on the eSIM line; restrict background app refresh per app.Android: Data Saver + per‑app background data limits.Optimise maps and travel appsDownload offline areas and transit schedules.Cache language packs in translation apps.Messaging and mediaDisable auto‑download for photos/videos in WhatsApp/Telegram/Signal.Use “compress images” options where available.System updates and backupsRestrict cloud backups and OS/app updates to Wi‑Fi only.Pause auto‑upload of photos over mobile data.Hotspot wiselyCap hotspot usage to specific tasks (submitting coursework, cloud sync).Avoid streaming or large updates over tethering.Schedule Wi‑FiFavourites: campus, library, residence halls, cafés you trust.Use a password manager to store Wi‑Fi credentials securely.Track and alertEnable data usage alerts on your device (e.g., warn at 75%, 90%).Check your Simology dashboard weekly; top up proactively before exams or travel weeks.Rough planning guidance: - Light user (messaging/maps/email): 3–5 GB/month. - Moderate (social + some streaming/hotspot): 8–15 GB/month. - Heavy (daily video, frequent hotspotting): 20–30+ GB/month. Match your 90/120/180-day plan to your monthly pattern times the number of months, then add a 10–20% buffer for exam and travel peaks.Top-ups, pauses, and managing your planTop-upsAdd data instantly in your Simology account. Your validity remains; added data rolls into the current term window.Pause/suspendIf you have a mid-term break away from your destination, contact support to discuss options. Eligibility varies by footprint.Data rollover between semestersIf you’re continuing for another term, look for renewal offers. Some footprints support carryover when you renew before expiry.Device changeseSIMs are designed for a single device. If you must change phones mid-term, contact support—we’ll advise based on your device and plan.Fair useLong-validity plans include reasonable use policies to protect network quality. Heavy tethering may be deprioritised.Regional vs single-country: scenariosYou’re based in Paris with weekend trips to Belgium, Netherlands, and GermanyPick: Esim Western Europe, 120 days, mid‑to‑high data.Why: Seamless cross-border use, no SIM swaps.You’re in Los Angeles all term with one conference in VancouverPick: Esim North America, 120 days, moderate data.Why: Coverage across the US and Canada with one eSIM.You’re in Bologna with mostly on-campus life and residence Wi‑FiPick: Esim Italy, 90 or 120 days, low‑to‑moderate data.Why: Best value for single-country usage.You’re doing a Spanish language course, then touring Portugal and FrancePick: Esim Western Europe, 180 days if you’ll travel before/after classes.Why: One plan across multiple countries for the full window.You’re on a US exchange with heavy campus Wi‑Fi but frequent weekend road tripsPick: Esim United States, 120 days, moderate data plus a planned top‑up in mid-term.For group organisers, faculty leads, and societiesIf you’re coordinating eSIMs for an exchange cohort, summer school, or a student society trip: - Centralised purchasing and distribution - Use Simology’s group tools to assign eSIMs and track activations. - Flexible billing - Pay centrally or distribute payment links to students. - Support and onboarding - We can provide a short guide for your pre‑departure briefing.Start with For Business for group enquiries or explore partnership options in the Partner Hub if your institution wants ongoing access and rates.Quick setup checklist before you flyConfirm eSIM compatibility and unlock status.Decide: single-country vs regional coverage.Match 90/120/180 days to your calendar (add a buffer week).Estimate monthly usage; pick your data tier with a 10–20% cushion.Complete student verification early to lock in pricing.Save your QR code and installation guide offline.Download offline maps and campus apps.Configure data saver modes on day one.FAQ1) Do I get a phone number with an eSIM? - Our Student Saver Plans are data‑first. Many students use apps (WhatsApp, FaceTime, Messenger) for calls and messages. If you need local voice/SMS, contact support for options available in your destination.2) Can I keep my home SIM active for calls and texts? - Yes. Set your eSIM as the data line and keep your home SIM for voice/SMS/2FA. Turn off mobile data on the home SIM to avoid roaming charges.3) Will my eSIM work if I travel to a neighbouring country? - Single‑country eSIMs are for use in that country only. Choose a regional plan like Esim Western Europe or Esim North America if you’ll cross borders.4) Can I use hotspot/tethering? - Yes, within fair‑use limits. Regular study tasks are fine; avoid large downloads or extended HD streaming over hotspot to conserve data.5) What happens if I run out of data mid‑term? - You can top up instantly in your Simology account. Your plan validity (90/120/180 days) remains unchanged.6) I don’t have a .edu/.ac email. Can I still get the student rate? - Yes. Upload a valid student ID or enrolment letter matching your name and current term dates during verification.Next step: Check your destination and pick your Student Saver Plan length on our Destinations page.

Private DNS & Safer Browsing on the Road (Without Slowing Down)

Private DNS & Safer Browsing on the Road (Without Slowing Down)

Travelling often means bouncing between hotel Wi‑Fi, café hotspots and mobile data. Each network you join can see, intercept or manipulate your DNS — the phone book lookups your device makes to turn website names into IP addresses. That’s where Private DNS (encrypted DNS) comes in. It wraps those lookups in encryption (DNS over TLS or DNS over HTTPS) so intermediaries can’t snoop or tamper. The result: cleaner, more private browsing with little to no speed penalty.This guide explains how private DNS works, when to use it versus a VPN, and exactly how to enable it on Android, iOS/iPadOS, Windows and macOS. We’ll also cover captive portal “sign‑in” gotchas in hotels and airports, battery impact, and which DNS providers are worth trusting on the road. Combine private DNS with a local eSIM and you’ll avoid flaky public Wi‑Fi entirely in many destinations — see our regional options on Destinations including Esim United States, Esim France, Esim Italy, Esim Spain, Esim Western Europe and Esim North America.What is Private DNS and why travellers should careDNS translates website names into IP addresses. By default, these lookups are unencrypted and readable by anyone running the network you’re on (hotel, café, airport).Private DNS encrypts those lookups:DNS over TLS (DoT): DNS inside a TLS tunnel on port 853 (Android’s “Private DNS” uses DoT).DNS over HTTPS (DoH): DNS inside standard HTTPS on port 443 (supported in Windows 11 and via apps on iOS/macOS).Benefits:Stops local network operators from snooping your browsing destinations.Blocks simple DNS‑level ads/malware if you choose a provider that offers filtering.Reduces risk of DNS hijacking on hostile or misconfigured networks.Limits to understand: - Private DNS does not hide your IP address or encrypt the rest of your traffic — the websites you visit still see your IP, and the network can see the IPs you connect to. For that, use a VPN. - It may interfere with captive portals (those “agree & connect” pages) — easy to work around; see below.Private DNS vs VPN: which should you use on the road?Use Private DNS when:You want lightweight privacy without changing location or routing all data.You’re on mobile data (eSIM/local SIM) and mainly need DNS protection.You want minimal battery and speed impact.Use a VPN when:You’re on untrusted public Wi‑Fi and doing sensitive tasks (banking, work logins).You need to access corporate resources or a specific country’s services.You must protect all traffic metadata, not just DNS.Pro tip: On mobile networks, TLS in apps (HTTPS) already secures content. Pairing that with Private DNS covers the main leak (DNS) without the heavier overhead of a VPN.How to enable Private DNS on your devices (How‑To)Android 9 and newer (DoT)Most modern Android devices support system‑wide Private DNS (DNS over TLS).1) Open Settings > Network & Internet (or Connections on Samsung). 2) Tap “Private DNS”. 3) Choose “Private DNS provider hostname”. 4) Enter one provider hostname (examples): - Cloudflare: 1dot1dot1dot1.cloudflare-dns.com - Google: dns.google - Quad9 (malware blocking): dns.quad9.net - AdGuard (ad/malware filtering): dns.adguard.com 5) Save and reconnect to your network.Notes: - “Automatic” tries encrypted DNS only if your current DNS supports DoT; “Off” reverts to unencrypted DNS. - If a captive portal won’t load, temporarily set Private DNS to “Off”, sign in, then switch it back on.Pro tip: Quad9 is a strong travel choice for malware/phishing protection without logging personal data.iPhone and iPad (iOS 14+ via profile or app)iOS doesn’t have a one‑tap system setting for encrypted DNS. Use a trusted DNS app or configuration profile.Option A — Cloudflare or NextDNS app: 1) Install the “Cloudflare 1.1.1.1” app or the “NextDNS” app from the App Store. 2) Open the app, grant permission to add a VPN/DNS configuration (this is a local device profile, not a full VPN tunnel for Cloudflare’s “DNS only” mode). 3) Enable “DNS‑only” mode (Cloudflare “1.1.1.1” without Warp) or choose your NextDNS profile. 4) Leave the app enabled; it will enforce DoH across apps.Option B — Install an encrypted DNS profile: 1) Create a profile with a provider (e.g., NextDNS web dashboard). 2) Download and install the mobile configuration profile in Settings > General > VPN & Device Management. 3) Verify the profile is active.Captive portal tip: Toggle the DNS app off, complete the Wi‑Fi sign‑in, then re‑enable.Windows 11 (DoH)1) Settings > Network & Internet > Wi‑Fi (or Ethernet) > Hardware properties. 2) Edit DNS server assignment > Manual. 3) Enable IPv4 (and IPv6 if you use it). 4) Enter DNS addresses (e.g., 1.1.1.1 and 1.0.0.1 for Cloudflare; 9.9.9.9 and 149.112.112.112 for Quad9). 5) Set “Preferred DNS encryption” to “Encrypted only (DNS over HTTPS)”. 6) Save. Reconnect to the network.Quick verify: Visit your provider’s test page (e.g., Cloudflare’s “Help” page) to confirm DoH is active.macOS (Big Sur and newer)macOS supports encrypted DNS via configuration profiles or apps.Option A — Use an app (simplest): 1) Install Cloudflare 1.1.1.1 or NextDNS app for macOS. 2) Grant permissions to add a DNS profile. 3) Enable DNS‑only mode (Cloudflare) or your NextDNS configuration.Option B — Install a DNS profile: 1) Generate a DoH/DoT profile from your provider (e.g., NextDNS). 2) Install via System Settings > Privacy & Security > Profiles (or Profiles in System Preferences on older macOS). 3) Apply to active network services.Captive portal tip: Pause the app/profile temporarily to complete hotel/airport sign‑in pages.Captive portals: the gotcha and the fixEncrypted DNS can prevent captive portals from redirecting you to the sign‑in page because the network expects to intercept DNS. Here’s how to handle it smoothly:Join the Wi‑Fi network.If the login page doesn’t appear within 10 seconds:Android: Settings > Network & Internet > Private DNS > Off. Then re‑open your browser and go to http://neverssl.com to trigger the portal.iOS/macOS: Pause your DNS app/profile. Try http://neverssl.com or open the Wi‑Fi network’s info and tap “Join Network”/“Login”.Windows: Temporarily switch encryption to “Unencrypted only” or disable your DNS tool; reconnect and sign in.Once you’re online, re‑enable Private DNS.Pro tips: - Some networks re‑check the portal after idle time; keep the DNS tool handy to toggle. - If the portal still won’t load, “Forget” the network and try again with Private DNS off until authenticated.Will Private DNS slow me down or drain battery?Speed: - The overhead of DoT/DoH is tiny after the first handshake. With anycast networks (Cloudflare, Google, Quad9), latency is comparable to or better than many hotel DNS servers. - DoH may add a fractionally higher CPU cost than plain DNS, but it’s negligible on modern devices. - Pick a nearby, reputable provider to avoid detours.Battery: - Private DNS maintains lightweight encrypted sessions; the impact is minimal, far less than a full VPN. - VPNs keep an always‑on tunnel with regular keep‑alive traffic and packet processing — expect noticeably higher battery drain. - On mobile data, modern radios dominate battery use; private DNS won’t be the deciding factor.Testing tip: Use a DNS benchmark app or “dig” from a laptop tethered to your phone to compare latency before and after.Choosing a trusted DNS providerLook for a clear privacy policy, broad global footprint, and (if desired) security filtering:Cloudflare (1.1.1.1): Fast, strong privacy stance, no content filtering by default. DoT: 1dot1dot1dot1.cloudflare-dns.com. DoH supported widely.Google (8.8.8.8): Globally fast and reliable; transparent but different privacy model from Cloudflare.Quad9 (9.9.9.9): Security‑focused with threat blocking, non‑profit; strong choice for travellers wanting extra protection.AdGuard DNS: Optional ad/malware blocking; privacy‑friendly.NextDNS: Highly configurable filtering, logs you control; requires a personalised profile.Pro tip: For family devices, NextDNS/AdGuard can block trackers and malicious domains while travelling, reducing risky clicks on unfamiliar networks.A practical travel checklistBefore you fly: - Update your device OS and apps (security patches). - Set up Private DNS or install your DNS app/profile. - Save provider hostnames or app toggles for quick captive portal workarounds. - Add a lightweight VPN for when you must trust public Wi‑Fi. - Consider a local eSIM so you can skip public Wi‑Fi altogether; browse regional options on Destinations — including Esim Western Europe and Esim North America.On the day: - Prefer mobile data where possible. If you’re heading to the US or Europe, check Esim United States, Esim France, Esim Italy and Esim Spain. - On Wi‑Fi, enable Private DNS; toggle off only briefly for captive portals. - Use a VPN for banking or work portals on public Wi‑Fi. - Avoid installing random “Wi‑Fi booster” apps; stick to reputable DNS/VPN tools.For teams and partners: - Business travellers can standardise encrypted DNS and eSIMs through our For Business solutions. - Travel providers and IT resellers can collaborate via our Partner Hub.When you still need a VPN (even with Private DNS)Accessing corporate networks or region‑locked services where location matters.Using truly untrusted or tampered networks (e.g., conferences, shared coworking).Hiding destination IP metadata from local network operators.Enforcing security policies across all traffic for a business fleet.Private DNS protects DNS queries; a VPN protects the entire session. It’s fine to run both when needed — start with Private DNS by default, escalate to VPN for sensitive sessions.FAQDoes Private DNS change my location like a VPN?No. It only encrypts DNS lookups. Your IP address and approximate location remain the same.Will Private DNS break streaming or apps while travelling?Rarely. Some hotel or airline networks require their own DNS; if something fails, temporarily switch Private DNS off, then back on after login/stream start.Is DoT or DoH better for travel?Both are secure. Use what your device supports natively: Android prefers DoT; Windows 11 uses DoH. Performance differences are negligible.Can I use Private DNS on cellular data with an eSIM?Yes. It works on any network type. Pairing Private DNS with a local eSIM gives private, fast lookups without relying on risky public Wi‑Fi. See regional options on Destinations.Which DNS provider should I pick?For speed and privacy: Cloudflare or Google. For added threat protection: Quad9. For custom filtering/log control: NextDNS. Stick to one you trust.Does Private DNS save battery compared to a VPN?Yes. It has a much smaller battery impact because it encrypts only DNS, not all traffic.Next step: Set up Private DNS on your devices today, then choose a local eSIM for your next trip on Destinations so you can rely on mobile data instead of risky public Wi‑Fi.