Spain eSIM & Mobile Internet Guide (2025): Tourist SIM vs eSIM, Speeds

Blog

Spain eSIM & Mobile Internet Guide (20...

Spain eSIM & Mobile Internet Guide (2025): Tourist SIM vs eSIM, Speeds

30 Oct 2025

Spain eSIM & Mobile Internet Guide (2025): Tourist SIM vs eSIM, Speeds

Staying connected in Spain is straightforward if you know your options. This guide breaks down eSIM vs tourist SIM, what speeds to expect in cities and coastal areas, and exactly how to get set up at Madrid (MAD) and Barcelona (BCN) airports. Spain’s networks are mature, 5G is widely available in major cities, and EU roaming rules are generous—but the Fair Use Policy (FUP) can still catch travellers out. If you want a fast, fuss‑free setup, an eSIM is usually quickest. If you prefer a local number and big domestic data bundles, a physical tourist SIM can still make sense.

Below you’ll find practical steps to buy and activate an eSIM, where to find SIMs at the airport, how speeds differ between city, coast and countryside, and when to choose a multi‑country plan for a wider European itinerary. You’ll also find pro tips, EU FUP essentials, and a concise FAQ to keep you moving.

Explore more country guides on our Destinations page, or jump straight to buying an Esim Spain.

Quick answer: eSIM vs Tourist SIM in Spain

  • eSIM (data‑only, digital)
  • Best for: instant setup, keeping your home number active, short trips, landing late when shops are closed.
  • Pros: buy before you fly, QR or in‑app install, no passport queues, tethering supported on most plans, easy top‑ups.
  • Cons: usually data‑only (use apps for calls/SMS), local voice number not included.
  • Tourist SIM (physical, prepaid)
  • Best for: travellers who need a Spanish mobile number or heavy domestic data with local call minutes.
  • Pros: often large data bundles, local calls included, works in any unlocked phone with a SIM tray.
  • Cons: need ID to register, airport pricing can be higher, shops can be busy/closed, swapping SIMs risks missing bank/SMS codes.

If you’ll visit neighbouring countries, consider a regional plan like Esim Western Europe. Heading to Italy or France on the same trip? See Esim Italy and Esim France.

Spain’s networks and real‑world speeds

Spain’s main networks are Movistar (Telefónica), Orange, Vodafone and Yoigo (MásMóvil). Coverage on 4G is extensive; 5G is widespread in cities and growing along popular coasts.

City vs coast vs countryside speeds

  • Major cities (Madrid, Barcelona, Valencia, Seville, Bilbao)
  • Expect 5G in busy areas with typical speeds of 150–400 Mbps; strong 4G where 5G drops, around 30–100 Mbps.
  • Indoor coverage is generally solid; stadiums and stations can congest at peak times.
  • Coasts and resorts (Costa del Sol, Costa Blanca, Costa Brava)
  • Good coverage, especially near towns and beaches. Daytime congestion can reduce speeds to 10–50 Mbps around popular beaches and promenades. Late evening speeds often improve.
  • Islands (Balearics: Mallorca, Ibiza; Canaries: Tenerife, Gran Canaria)
  • Tourist hubs have 4G/5G; peak‑season load can slow speeds to 10–40 Mbps at busy spots. Venture a few blocks inland for better performance.
  • Rural and mountains (Asturias, Pyrenees, interior)
  • Coverage is patchier. Expect 4G/3G with 5–25 Mbps in valleys, dropping to limited service in remote villages and hiking trails. Download maps offline if driving.

Pro tip: Speed varies more by location and time of day than by brand of SIM. If you have a dual‑SIM phone, keeping an eSIM plus your home SIM improves redundancy.

Buying an eSIM for Spain: step‑by‑step

  1. Choose your plan: Pick your data allowance and validity on Esim Spain. If you’ll cross borders, select Esim Western Europe.
  2. Check compatibility: Most recent iPhone, Google Pixel and Samsung flagships support eSIM. Confirm in your device settings.
  3. Buy and receive: You’ll get a QR code or an in‑app activation link.
  4. Install: - iOS: Settings > Mobile Data > Add eSIM > Use QR/activation code. - Android: Settings > Network & Internet > SIMs > Add eSIM.
  5. Label your lines: Set your eSIM as “Data only” and keep your home SIM “Calls & SMS” if needed.
  6. Data roaming: Turn Data Roaming ON for the eSIM profile (this is required for travel eSIMs to work in Spain).
  7. APN: It usually sets automatically. If not, use the APN provided with your plan.
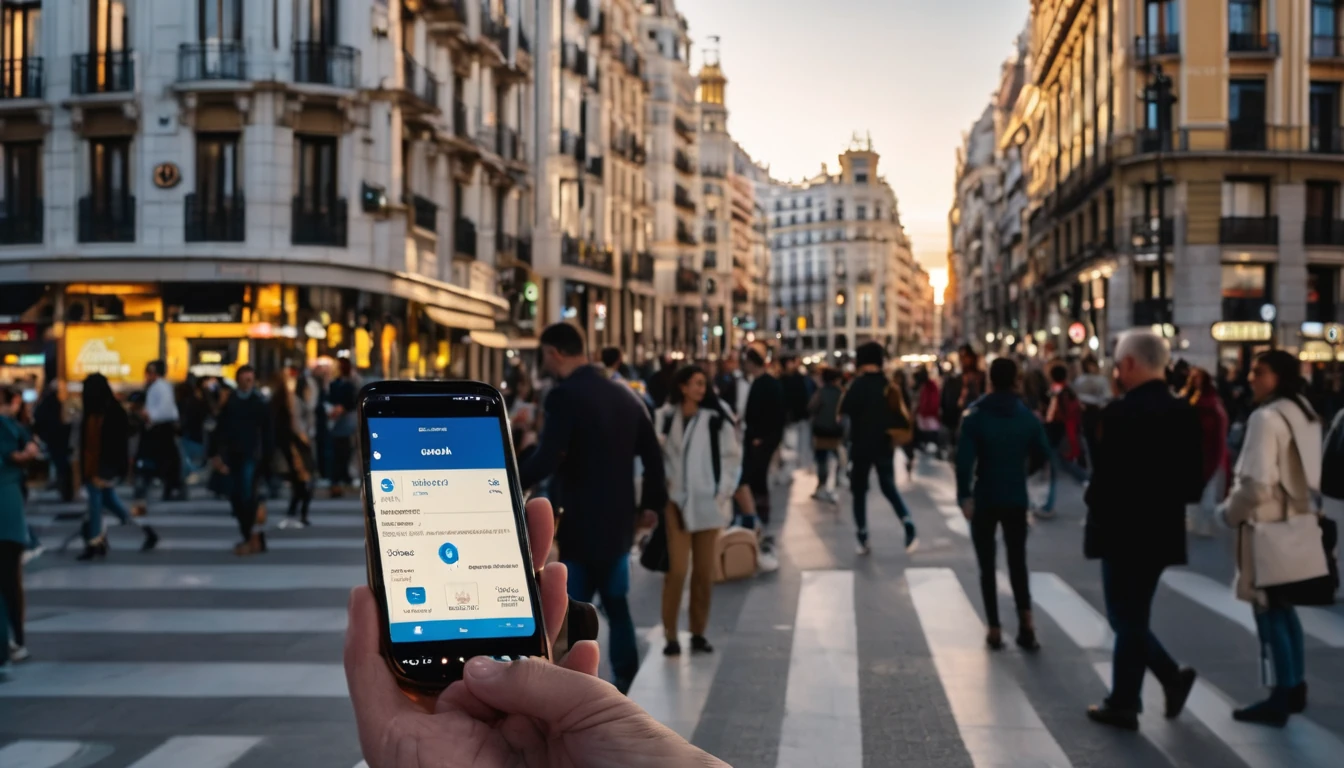
  8. Test: Open a browser and a maps app after landing. If no data, toggle flight mode for 10 seconds and retry.

Pro tips: - Install over reliable Wi‑Fi before you fly. At the airport, public Wi‑Fi can be busy. - Keep your home SIM active for banking SMS. Set the eSIM as your default data line. - Hotspot/tethering is supported on most travel eSIMs—handy for laptops and tablets.

Planning more stops? Browse regional options via Destinations.

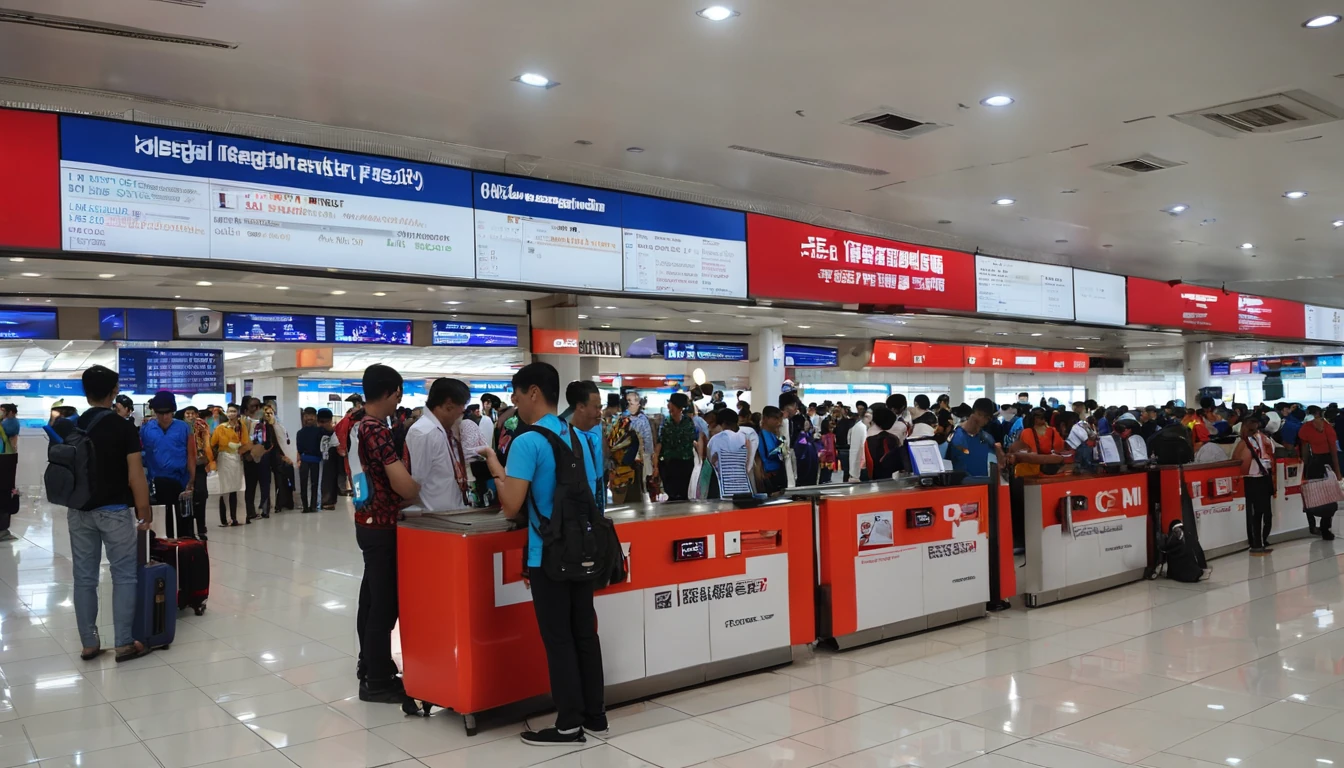
Buying a physical tourist SIM at the airport (MAD/BCN)

You can buy prepaid SIMs from major operators or resellers at both airports. Availability and hours change, so treat this as a field guide, not a guarantee.

Madrid–Barajas (MAD): what to expect

  • Where to look:
  • After customs in Arrivals at T1 and T4 you’ll usually find telecom or multi‑brand electronics shops, convenience/newsstands, and currency exchange counters that sell SIMs.
  • Signage may read “Telefonía/Telecom” or show operator logos (Orange, Vodafone, Movistar). If in doubt, ask any information desk for “prepaid SIM.”
  • Typical steps: 1. Have your passport ready (ID is mandatory for SIM registration in Spain). 2. Choose a plan—ask about data allowance, EU roaming, and whether tethering is included. 3. Staff can fit the SIM and do a quick activation test.
  • Hours and pricing:
  • Common opening hours are roughly 08:00–22:00; late‑night arrivals may find shutters down.
  • Expect roughly €10–€35 for light data (10–30 GB) and more for larger tourist bundles. Airport prices can be higher than in the city.
  • If shops are closed:
  • Use airport Wi‑Fi to activate an eSIM in minutes via Esim Spain.

Barcelona–El Prat (BCN): T1 and T2

  • Where to look:
  • In T1 Arrivals, look for operator kiosks, electronics/accessory stores and newsstands that carry SIMs. T2 has fewer options; you may need to buy in the city if queues are long.
  • Typical steps: 1. Present your passport for registration. 2. Confirm EU roaming terms if you’re visiting other EU countries. 3. Ask staff to test data before you leave the counter.
  • Hours and pricing:
  • Daytime coverage is good; late evenings vary. Budget similar pricing to Madrid.

What you’ll need and how activation works

  • Passport: Spain requires ID to register prepaid SIMs.
  • Unlocked phone: Check before travelling.
  • Activation: Usually live within minutes; occasionally up to an hour.
  • Top‑ups: Can be done online, via operator apps, or at supermarkets and kiosks. Ask for help setting an English‑language app at the counter.
  • APN and settings: Typically automatic; staff can assist if data doesn’t start.

Pro tips: - Queue buster: If you see long lines or limited stock, switch to eSIM on the spot using airport Wi‑Fi. - Keep your home SIM: Dual‑SIM phones let you keep banking SMS and your usual number active. - Save receipts and plan details in your notes in case you need support.

EU roaming and FUP: what travellers need to know

Spain participates in the EU “Roam Like At Home” scheme, but Fair Use Policy (FUP) limits can apply:

  • Spanish tourist SIMs:
  • Domestic allowance (e.g., 100 GB) is often larger than your EU roaming allowance. While roaming in other EU/EEA countries, expect a lower cap—commonly 5–30 GB depending on the price of the plan.
  • Exceeding the FUP may result in a small surcharge per GB or throttled speeds until renewal.
  • Some budget sub‑brands exclude EU roaming—always check.
  • Travel eSIMs:
  • Country‑specific eSIMs typically work in Spain only.
  • Regional eSIMs (e.g., Esim Western Europe) include multiple countries with one allowance, avoiding per‑operator FUP surprises across borders.

Clear actions: - If you’re only in Spain, a local eSIM or tourist SIM is fine. - If you’re visiting multiple countries, use a regional eSIM to avoid variable FUP rules.

  • Madrid: Excellent 5G across central districts (Sol, Salamanca, Chamartín). Expect 200–400 Mbps on 5G in open areas; 4G remains strong on the Metro and indoors.
  • Barcelona: Strong 5G around Eixample, Gothic Quarter, and tech hubs. Beachfront areas can congest midday; speeds rebound at night.
  • Valencia and Seville: Robust 4G/5G across city centres; 50–200 Mbps common. Event days can strain cells near stadiums.
  • Malaga and Costa del Sol: Good coastal coverage. Tourist hotspots (Marbella, Torremolinos) see daytime slowdowns; move a block inland for better throughput.
  • Alicante and Costa Blanca: Similar to Costa del Sol. Good 4G; growing 5G in towns.
  • Balearics (Mallorca, Ibiza): Busy beach zones see variable speeds; towns and ports are faster.
  • Canary Islands: Tourist areas covered; rural interiors can dip to 3G in pockets—download offline maps and tickets.

Hotspot, voice and apps

  • Tethering: Allowed on most eSIM and tourist SIM plans. Check your plan details.
  • Voice calls: Data‑only eSIMs don’t include a Spanish number; use WhatsApp, FaceTime, Telegram or Zoom over data.
  • Two‑factor codes: Keep your home SIM active for SMS from banks and services (set it as “Calls & SMS” only).

Business travellers and teams

Need multiple lines or a shared pool for a team across Spain and Western Europe? See our solutions For Business, or connect via our Partner Hub to integrate travel connectivity into your programmes.

Onward travel and multi‑country options

FAQ

  • Do I need a passport to buy a SIM in Spain?
  • Yes. Prepaid SIM registration is mandatory. Have your passport ready at airport shops and high‑street stores.
  • Is 5G worth it in Spain?
  • In cities, yes—latency and speeds are notably better. On the coast or islands at peak times, 5G can still congest, but it generally outperforms 4G.
  • Will my WhatsApp number change with an eSIM?
  • No. WhatsApp stays linked to your existing number. A data‑only eSIM gives you data while you keep your home number for apps and SMS.
  • Can I use hotspot/tethering?
  • Generally yes, on both eSIMs and tourist SIMs. It’s useful for laptops and tablets. Heavy tethering can drain your battery—carry a power bank.
  • How do I check my data balance?
  • For tourist SIMs, use the operator’s app or dial the USSD shown on the pack. For travel eSIMs, check your Simology account/confirmation email for the balance method.
  • What if I land late and shops are closed?
  • Activate an eSIM over airport Wi‑Fi in minutes via Esim Spain. It’s the fastest way to get online after hours.

Next step: Get connected in minutes with an Esim Spain plan tailored to your trip.

Read more blogs

Andes Highlights (3 Weeks): Peru–Bolivia–Chile–Argentina Connectivity

Andes Highlights (3 Weeks): Peru–Bolivia–Chile–Argentina Connectivity

Planning a south america itinerary 3 weeks through the high Andes? This route stitches together Peru’s Sacred Valley, Bolivia’s La Paz and Salar de Uyuni, Chile’s Atacama Desert, and northern Argentina’s quebradas or Mendoza wine country—often by long-distance bus and a couple of short flights. Connectivity is different at altitude: coverage is strong in cities but drops in high passes and salt flats; bus Wi‑Fi is patchy; border towns can be blackspots. The smart move is an eSIM with multi‑country coverage, backed by offline maps, offline translations, and a simple routine for crossing borders by bus without losing service. Below you’ll find a practical, connectivity-first itinerary; checklists to prep your phone, apps and documents; and on-the-ground tips for staying online where it matters: booking transport, hailing taxis, backing up photos, and navigating when the signal disappears.If you’re transiting via Europe or North America, you can also add a layover eSIM to stay connected door-to-door. Start with our country list on Destinations, then follow the steps, and you won’t waste time chasing SIM shops at 3,500 metres.The 3‑week Andes route at a glanceWeek 1: Peru (Cusco, Sacred Valley, Machu Picchu) - Fly into Cusco (or Lima then connect). - Base in Cusco; day trips to Pisac/Chinchero/Maras–Moray. - Train to Aguas Calientes; Machu Picchu visit; return to Cusco or continue to Puno/Lake Titicaca.Week 2: Bolivia and Chile (La Paz, Uyuni, San Pedro de Atacama) - Bus/collectivo via Copacabana to La Paz. - Fly or overnight bus to Uyuni. - 3‑day Uyuni–altiplano tour ending in San Pedro de Atacama (Chile).Week 3: Chile and Argentina (Atacama to Salta or Mendoza/Buenos Aires) - Choose: - North: San Pedro to Salta/Jujuy by bus; fly to Buenos Aires. - Or South: San Pedro–Calama flight to Santiago; bus or flight to Mendoza; onward to Buenos Aires.Connectivity notes (quick): - Cities: generally strong 4G/4G+; 5G in major hubs (Santiago, Buenos Aires). - Altitude/rural: expect long no‑signal stretches (Uyuni, altiplano passes, Paso Jama). - Bus Wi‑Fi: often advertised, rarely reliable. Plan to be offline onboard. - Border regions: networks switch; a multi‑country eSIM avoids sudden loss.eSIM vs local SIMs for a 4‑country tripFor a route with multiple borders and remote legs, eSIM wins on time and reliability.What a multi‑country eSIM gets you: - One plan across Peru, Bolivia, Chile, Argentina (check coverage per country on Destinations). - No passport/SIM registration queues at kiosks. - Keep your home number active on the physical SIM for calls/SMS codes. - Instant top‑ups if you burn data on photos or navigation.When a local SIM still helps: - Long stay in one country with heavy data use (e.g., a month in Buenos Aires). - Dead zones where a different local network performs better (rarely worth the hassle on a 3‑week pace).Practical approach: - Use an eSIM as your primary data line across all four countries. - If you find a specific local network far better in one region, add a cheap local SIM and keep the eSIM as backup.Device readiness checklist (before you fly)1) Check eSIM compatibility and SIM‑lock status on your phone.2) Buy and install your eSIM while on home Wi‑Fi. Keep a PDF/printed copy of the QR code.3) Label lines clearly (e.g., “eSIM Andes Data”, “Home SIM”).4) Turn on data roaming for the eSIM; leave roaming off for your home SIM to avoid charges.5) Set up dual‑SIM rules: data on eSIM; calls/SMS default to home SIM if needed.6) Download offline: Google Maps/Organic Maps for all target regions; language packs (Spanish at minimum); bus/air tickets; hotel confirmations.7) Cloud backups: set to upload on Wi‑Fi only; pre‑create shared albums for travel companions.8) Test tethering/hotspot with your laptop/tablet.If you’re transiting popular hubs, consider a short layover eSIM: - USA connections: add an Esim United States or a broader Esim North America.- Europe connections: Madrid/Barcelona? Use an Esim Spain. Paris or Rome? See Esim France and Esim Italy. Multi‑country layovers? Try Esim Western Europe.City‑by‑city connectivity notesCusco & the Sacred Valley (Peru)Coverage: Good in Cusco city; variable in high villages (Maras/Moray) and along Inca Trail approaches.Tips: Download Sacred Valley maps offline; pin viewpoints and ruins. most taxis use WhatsApp—save your accommodation’s number.Machu Picchu/Aguas Calientes: Patchy to none at the citadel. Upload your photos later; don’t rely on live ticket retrieval.Lake Titicaca: Puno and CopacabanaPuno: Reasonable 4G; bus terminals crowded—screenshot QR tickets.Crossing to Copacabana: Expect a signal drop around the border; have directions saved offline.La Paz (Bolivia)Good urban 4G; the cable car network has decent signal but tunnels do not.Yungas/“Death Road” tours: Mountain valleys cause dead zones—share your emergency contacts with the operator, carry a charged power bank, and don’t plan remote calls.Uyuni and the Altiplano (Bolivia to Chile)Uyuni town: OK 4G; ATMs finicky—use Wi‑Fi for banking apps.Salt flats/lagunas: Assume offline for most of the 3‑day tour. Guides often carry satellite phones; agree a pickup time/place in San Pedro and preload your map route.San Pedro de Atacama (Chile)Town: Solid 4G; accommodations often have Wi‑Fi but speeds vary.Geysers, Valle de la Luna: Offline navigation essential; sunrise trips start before mobile networks wake up in some areas.Salta/Jujuy or Mendoza/Buenos Aires (Argentina)Salta/Jujuy: Good city coverage; quebradas have long no‑signal sections.Mendoza: City 4G/5G; vineyards outside town can be patchy.Buenos Aires: Strong 4G/5G; ideal for cloud backups and large downloads before you fly home.Border crossings by bus: step‑by‑stepThe big ones on this route: Peru–Bolivia (Puno/Copacabana), Bolivia–Chile (Uyuni–San Pedro via Hito Cajón), Chile–Argentina (Paso Jama to Salta or Los Libertadores to Mendoza).How to keep service and sanity:1) The day before:- Top up your eSIM data.- Confirm your plan includes both countries you’re entering/leaving.- Download offline maps for both sides of the border and your town of arrival.- Save bus company WhatsApp and terminal address offline.2) On departure morning:- Keep a paper copy or offline PDF of tickets, insurance, and accommodation proof.- Charge phone and power bank; pack a short cable in your daypack.3) On the bus:- Don’t count on bus Wi‑Fi. Keep your eSIM as primary, but expect drops near mountain passes.- If your phone supports it, enable “Wi‑Fi calling” for later when you reach accommodation Wi‑Fi.4) At the border posts:- Data may be unavailable. Keep QR codes and booking numbers offline.- After exiting one country and entering the next, toggle Airplane Mode off/on to re‑register on the new network.- If the eSIM doesn’t attach, manually select a network in Mobile Settings.5) Arrival:- Send your accommodation a quick WhatsApp when you’re back online.- Recheck your eSIM’s data roaming is on; confirm you’re on an in‑country network, not a weak roaming partner.Pro tips: - Dual profiles: If your eSIM allows, keep a secondary profile for a different network in the same country—helpful in border towns.- Cash buffer: Some border terminals don’t accept cards; download a currency converter for offline use.Offline survival kit (5‑minute setup)Maps: Download regions for Cusco, Sacred Valley, Puno, La Paz, Uyuni, San Pedro, Salta/Jujuy or Mendoza, and Buenos Aires.Translations: Download Spanish for offline use; add phrasebook favourites (bus tickets, directions, dietary needs).Documents: Save PDFs of passports, tickets, hotel addresses; star them for quick access.Rides: Screenshots of pickup points; pin bus terminals and hotel doors.Entertainment: Podcasts and playlists for long bus legs, set to download on Wi‑Fi only.Altitude and your tech: what changesCoverage gaps lengthen: Fewer towers at high altitude; valleys can block signal. Assume offline on remote excursions.Batteries drain faster in cold: Keep your phone warm and carry a power bank (10,000–20,000 mAh).Hotel Wi‑Fi may be congested: Schedule big uploads (photo backups, app updates) for big-city stays like Santiago or Buenos Aires.GPS still works offline: Your blue dot shows on offline maps without data—preload everything.Data budgeting for 3 weeksTypical traveller usage across this route: - Messaging/Maps/Bookings: 0.2–0.5 GB/day- Social and photo sharing: 0.3–0.7 GB/day- Occasional video calls/streaming: 0.5–1.0 GB/dayFor a mixed-use trip, plan 15–25 GB for 3 weeks. Heavy creators should double it and upload over hotel Wi‑Fi when possible. If you work remotely, consider a higher‑capacity plan and a backup eSIM; see our guidance on For Business.Practical route with transport and connectivity cuesDays 1–4 Cusco base: Strong city signal; day trips may be spotty—go offline-ready.Days 5–6 Machu Picchu: Expect no service at the ruins; sync tickets ahead.Days 7–8 Puno to La Paz via Copacabana: Border signal drop; re‑register networks after crossing.Days 9–11 Uyuni tour to San Pedro: Treat as offline; charge nightly; carry spare cables.Days 12–14 San Pedro: Stable in town; tours offline; top up data before Paso Jama.Days 15–17 Salta/Jujuy or Mendoza: Good urban 4G; rural patches are offline.Days 18–21 Buenos Aires: Strongest connectivity of the trip; clear your uploads and map downloads for the flight home.Partnering and stopover extrasHospitality and tour operators in the Andes: help your guests stay connected—explore co‑branded solutions via our Partner Hub.Transatlantic flyers: test your eSIM setup on a layover with an Esim United States or Esim Western Europe before hitting high-altitude blackspots.FAQs1) Do I need a local SIM in each country?No. A multi‑country eSIM covering Peru, Bolivia, Chile and Argentina is simpler and works well for a 3‑week pace. Consider a local SIM only if you’ll spend longer in one country and want the absolute best regional coverage.2) Will my WhatsApp number change with an eSIM?No. WhatsApp is tied to your registered number, not your data line. Keep your home SIM active for voice/SMS (roaming off if you wish), and use the eSIM for data—WhatsApp continues as normal.3) Can I hotspot to my laptop or camera?Yes. Enable tethering on your eSIM. Mind your data: cloud backups and OS updates can burn gigabytes—set them to Wi‑Fi only or schedule in big cities.4) What if there’s no signal on the Uyuni/Atacama legs?That’s expected. GPS still works offline. Pre-download maps and translations, carry a power bank, and sync plans with your tour operator before departure.5) Will I get roaming charges at borders?If you’re using a multi‑country eSIM with coverage in both countries, you won’t incur extra roaming fees from your home carrier. Keep roaming off on your home SIM to avoid accidental use.6) I’m connecting via Europe or the US—worth getting a layover eSIM?Yes. It’s an easy way to test your setup and stay reachable. Try Esim North America or country options like Esim Spain, Esim France, or Esim Italy for common hubs.Next step: Browse South America coverage options and build your plan on Destinations.

Indonesia SIM Registration for Foreigners (2025): Passport, Tax ID & Where to Register

Indonesia SIM Registration for Foreigners (2025): Passport, Tax ID & Where to Register

If you want a local data plan in Indonesia, you must register your SIM. For tourists in 2025, the essentials are straightforward: bring your passport, buy from an official outlet, and (if you plan to use a local SIM) register your phone’s IMEI with Customs on arrival. Registration is fast when you do it in the right place—airport counters or flagship stores for Telkomsel, XL Axiata and Indosat (IM3). Corner shops and unbranded kiosks can sell a SIM but often can’t complete foreigner registration, which is why many travellers end up with a non-working card until they visit a carrier store.You do not need an Indonesian tax ID to buy a SIM as a tourist. A local Tax ID (NPWP) is a resident requirement only. Expect instant activation once your passport and device details are captured, though some lines take up to a few hours. This guide explains exactly where to go, what to bring, how long it takes, and common snags to avoid. For a broader view of connectivity across the region, see our country pages under Destinations.Quick facts: 2025 rules at a glanceWho must register: Everyone using an Indonesian SIM, including tourists.IDs accepted for tourists: Passport (photo page). Some outlets also request your entry stamp/visa.Tax ID (NPWP): Not required for tourists. May be requested for residents with KITAS/KITAP.Where to register: Airport operator counters or official city stores (GraPARI for Telkomsel, XL Center, Indosat/IM3 Gallery).IMEI rule: If you’ll use a local Indonesian SIM, register your phone’s IMEI with Customs on entry.Time to activate: Usually minutes; allow up to 24 hours in edge cases.Number of SIMs per ID: Operators may cap how many numbers can be linked to one passport. Expect a small limit.Best coverage: Telkomsel generally leads for nationwide coverage, especially off the beaten path.Indonesia SIM registration for tourists: what you need in 2025To complete indonesia sim registration tourist requirements, you typically need:Passport: The physical passport you used to enter Indonesia. Staff will scan or photograph it.Entry details: Your entry stamp or visa (e.g., VOA/e-VOA) may be requested.Local contact info: A temporary address (hotel/Airbnb) and Indonesian phone contact are sometimes asked but not always enforced.Your phone: Keep it handy for SIM insertion, eSIM provisioning (where available), and test calls/data.IMEI registration: If using a local SIM, Indonesian Customs needs your device IMEI recorded when you arrive.Good to know: - Photocopies aren’t usually required; a physical passport is. - Staff complete the registration in their system. Tourists cannot complete the standard NIK/KK self-registration used by locals. - Some flagship stores issue eSIM profiles to eligible devices; availability and staff policy varies by location.Where to register: airport kiosks vs city storesBuying at the right place matters more than hunting the cheapest shelf price.Airport operator counters (best for immediate connectivity)Pros:Passport registration is done on the spot.Staff can help with IMEI questions and basic setup.English-speaking staff are common in major airports (CGK Jakarta, DPS Bali).You walk out connected.Cons:Packages can be pricier than in town.Stock may be limited during peak arrivals.Official city stores (often best value)Pros:Full service: SIM sale, passport registration, troubleshooting, eSIM availability in flagship branches.Broader plan selection, often better value than airports.Cons:Requires a trip across town and queue time.Opening hours vary; not 24/7.Look for: - Telkomsel GraPARI - XL Center - Indosat Ooredoo Hutchison (IM3) GallerySmall kiosks and convenience stores (proceed with caution)Pros: Cheapest sticker price, everywhere.Cons: Many cannot legally register a foreign passport. You may leave with a SIM that won’t activate until you visit an operator store. Not worth the risk for short stays.Step-by-step: from landing to connected1) Decide your approach- If you only need calls/data for a day or two and you already have roaming or a regional eSIM, you may skip a local SIM entirely.- If you want local rates for a week or more, a registered local SIM is usually best value.2) Register your device IMEI with Customs (if using a local SIM)- Before or on arrival, prepare your phone’s IMEI numbers (dial *#06#).- Use the Mobile BeaCukai app or the customs desk at the airport to submit your device details. You’ll be given a confirmation/QR code.- Present the QR/approval at the counter if asked. Tourists generally receive time-limited permission to use a local SIM on that device.- If you forget at the airport, visit a Customs office soon after arrival. Using international roaming does not require IMEI registration.3) Choose an operator- Telkomsel: Widest coverage, especially outside big cities and across islands.- XL Axiata: Good urban coverage and competitive pricing.- Indosat (IM3): Often attractive data bundles and promos.Tip: Ask specifically for a “tourist” or “foreigner” package and confirm voice/SMS inclusions if you need them.4) Buy and register at an official counter- Present your passport (and entry stamp if requested).- Staff will capture your details, insert the SIM or issue an eSIM, and complete registration in the operator’s system.- You may be asked for a local address (hotel is fine).- Keep the SIM starter pack and receipt; they include your number and useful USSD codes.5) Activate and test- Restart your phone after SIM/eSIM provisioning.- Check mobile data, calls, and SMS. APN settings usually configure automatically.- If data doesn’t work immediately, toggle airplane mode, then try a manual network selection.Costs, plans and activation timelinesPricing shifts regularly, but as a guide:Starter packs: IDR 50,000–150,000 for basic data with some local calls/SMS.Tourist bundles: IDR 100,000–300,000 for larger data (e.g., 15–35 GB) and bonus app data or local minutes.eSIM: Offered by some operator flagships; priced similarly to physical SIMs.Activation speed: - At an official counter, your line typically goes live within minutes once registration is submitted.- Network provisioning can take longer in busy periods; allow up to a few hours. Rarely, 24 hours.Top-ups and extensions: - Use the operator’s app (requires your Indonesian number for OTP), vouchers from minimarts (Indomaret, Alfamart), or pay at an operator store. - Tourist lines may have validity limits aligned to your stay. Ask how to extend if you’re in-country longer.Common snags (and how to fix them)SIM shows “emergency calls only” or no service:Check that IMEI registration was completed if you’re using a local SIM.Try manual network selection (Telkomsel/XL/Indosat) and restart the phone.Bought at a small kiosk and it won’t activate:Visit an official operator store with your passport to complete foreigner registration.No data despite signal bars:Toggle airplane mode, reset network settings, or update APN to default for your operator.Confirm your bundle includes data and is active.eSIM failed to install:Ensure you’re on stable Wi‑Fi, scan the QR again, or ask staff to reissue the profile. Some outlets can only issue physical SIMs to foreigners.Line deactivated mid-trip:It can happen if IMEI wasn’t registered or your package validity expired. Visit an operator store with your passport.WhatsApp number change:If you switch from a roaming number to a local number, use WhatsApp’s Change Number feature to keep chats and groups.Passport vs Tax ID (NPWP): what you actually needTourists: Passport only. You will not be asked for a local Tax ID (NPWP) to buy/register a SIM as a short-stay visitor.Residents and long-stay permit holders: Some outlets may request KITAS/KITAP and NPWP. Requirements vary by operator and tenure.If staff mention “NIK/KK”: Those are local IDs for Indonesians. As a foreigner, your passport is used instead.Business travellers and teamsNeed multiple lines, consistent packages, or centralised spend? Coordinate ahead of arrival to avoid airport queueing and ad-hoc plans.Explore enterprise options via For Business.If you’re a travel/tech partner supporting teams across regions, visit our Partner Hub for scalable connectivity workflows.Useful comparisons and onward travelHeading elsewhere after Indonesia? Keep your connectivity simple:North America trips: See our regional options under Esim North America or country picks like Esim United States.Western Europe swing: Compare plans via Esim Western Europe or select countries such as Esim France, Esim Italy and Esim Spain.For country-by-country rules and plan availability, start with Destinations.FAQ1) Do tourists need an Indonesian Tax ID (NPWP) to buy a SIM?No. Tourists register with a passport. NPWP is for residents and is not a requirement for short-stay visitors.2) Is IMEI registration mandatory for tourists?If you plan to use a local Indonesian SIM, you should register your device IMEI with Customs on arrival. Roaming on your home SIM does not require IMEI registration. Airport customs counters can handle this in minutes.3) Can I register my Indonesian SIM online?Not as a tourist. Foreigners must complete registration in person at an official operator outlet (airport counters or flagship stores) where staff scan your passport and submit the registration.4) How long does SIM activation take?Usually within minutes after staff complete registration; sometimes up to a few hours. Very occasionally, it may take until the next day.5) Can I get an eSIM as a tourist in Indonesia?Some flagship operator stores can issue eSIMs to eligible devices, but availability varies by city and store. Airport counters often favour physical SIMs. Ask the outlet in advance if you specifically want eSIM.6) How many SIMs can I register with one passport?Operators may limit the number of active numbers linked to a single passport. Policies vary; expect a small cap and ask the staff if you need more than one line.Next stepPlanning your trip and want the latest local guidance and plan options? Start with Indonesia under our Destinations hub.

Pocket WiFi vs eSIM: Which Is Better (and Cheaper) for Travel?

Pocket WiFi vs eSIM: Which Is Better (and Cheaper) for Travel?

Travellers weigh “pocket WiFi vs eSIM” for the same reason: reliable data at a fair price with minimal faff. Both connect you to local 4G/5G networks; the difference is how. A pocket WiFi is a rented hotspot you carry and charge, while an eSIM is a downloadable data plan that lives in your phone. This guide cuts through marketing to compare real‑world costs per GB, speed and latency, security risks, and multi‑device sharing. You’ll also find quick setup steps, a 60‑second chooser checklist, and regional notes for the United States, Western Europe and North America.Short answer: eSIMs are usually cheaper per GB, faster to set up, and easier to manage. Pocket WiFi can still suit groups who need to share to many devices or travellers with older/locked phones. If you’re eSIM‑compatible, a travel eSIM will cover most trips with less to carry, fewer fees, and better control over usage.Explore country and regional plans on Destinations.Quick verdict: who should pick what?Choose eSIM if:You have an eSIM‑compatible and unlocked phone.You value cost control (buy exactly the data you need).You want faster setup (scan and go) and no device returns.You’ll hotspot a handful of devices (check tethering is allowed).Choose pocket WiFi if:Your phone does not support eSIM or is carrier‑locked.You need to share to 8–10+ devices all day without draining your phone.Your employer mandates separate networking hardware.Tie-breakers:Battery: eSIM uses your phone’s battery; pocket WiFi is a second battery to manage.Loss risk: eSIM cannot be “lost”; pocket WiFi loss/damage fees can be steep.Coverage: both ride the same local networks. With eSIM you can pick plans that use top carriers in your destination (e.g. Esim United States, Esim France).Cost comparison: pocket WiFi vs eSIMThe biggest hidden difference is total cost per GB once you account for deposits, delivery/return, and “unlimited” fair‑use caps on pocket WiFi.Typical retail price/GB (indicative ranges)These are common market ranges for tourists buying short‑term plans. Always check current pricing for your destination on Destinations.Region / CountryeSIM price/GB (typical)Pocket WiFi effective price/GB (typical)NotesWestern Europe$1.5–3/GB$2.5–8/GB“Unlimited” WiFi often has 1–5GB/day high‑speed, then throttled. See Esim Western Europe.France / Italy / Spain$1.5–3/GB$2–6/GBStrong competition; local eSIMs are very cost‑effective. See Esim France, Esim Italy, Esim Spain.United States$3–6/GB$4–10/GBPocket WiFi often adds delivery and loss fees. See Esim United States.North America (US/CA/MX)$2.5–5/GB$5–12/GBRegional roaming on hotspots costs more. See Esim North America.How we think about “effective price/GB”: - Pocket WiFi day‑rates are divided by the daily high‑speed allowance (before throttling). Delivery/return and deposits increase the effective rate. - eSIMs are sold in fixed data buckets (e.g., 5–20GB). You pay only for what you buy; topping up keeps costs predictable.Hidden costs pocket WiFi renters often miss: - Delivery and return fees (airport counters can be pricier; postage both ways adds up). - Deposits and loss/damage charges (commonly $100–$250 if lost; cases and cables also chargeable). - Fair‑use policies that throttle after a small high‑speed cap (throttled data is often too slow for maps/video). - Late return penalties if flights change.Pro tip: If you’re a couple using ~6–8GB each over a week in Europe, two eSIMs commonly beat one pocket WiFi on cost—and remove delivery/return hassle.Speed, latency and reliabilityBoth pocket WiFi and eSIM ultimately use the same local 4G/5G networks. Differences are mostly practical, not theoretical.Raw speed: Similar. Your phone with an eSIM can connect directly to 5G; many rental hotspots are 4G‑only or support fewer bands, which can limit peaks.Latency: eSIM is often 5–20 ms lower because there’s no extra WiFi hop and router processing. It’s noticeable on calls/gaming, not much for maps.Throttling: Pocket WiFi “unlimited” plans frequently throttle after a daily cap. eSIM plans throttle only after you use your purchased allowance (or not at all, depending on plan).Reliability: One fewer device means one fewer point of failure. With eSIM you avoid WiFi drops between your phone and a hotspot. Pocket WiFi can overheat or crash under many clients.Pro tip: If performance matters (video calls, hotspotting a laptop), prefer an eSIM plan that includes 5G where available and test speed in the first hour; top up if needed.Security and privacy on the roadeSIM on your phone:Uses cellular encryption end‑to‑end; no shared SSID.Fewer attack surfaces than carrying a router with a web admin panel.Your phone’s hotspot can be password‑protected with WPA2/3.Pocket WiFi:Safe if configured well, but risks include default/weak passwords, outdated firmware, and rogue admin access if not reset.Physical loss exposes stored SSID/passwords; some models display the password on the screen.Shared hotspots in groups increase chances of shoulder‑surfing or unauthorised joins.Security best practices: - Change the hotspot/router password immediately. Use WPA2/3 and a unique SSID. - Disable WPS and remote admin on pocket WiFi. - Keep device firmware updated (if you control the device). - Prefer your own eSIM hotspot over random public Wi‑Fi in cafés/airports.Multi‑device sharing: eSIM hotspot vs pocket WiFiYou can share eSIM data via your phone’s hotspot, often to 5–10 devices, subject to plan limits.eSIM hotspot advantages:No extra rental hardware; share instantly with your laptop, tablet, or a partner.Many travel eSIMs allow tethering; check the plan details before purchase.One SIM per person keeps usage fair and avoids a single point of failure.eSIM hotspot caveats:Tethering can drain your phone faster. Carry a 10,000–20,000 mAh power bank.Some carriers block or cap tethering; verify in the plan FAQ.Pocket WiFi advantages:Designed to share (commonly 8–15 devices).Keeps your phone free and reduces its battery drain.Pocket WiFi caveats:One shared connection means if the owner walks away, everyone loses internet.Extra device to charge and carry; range is limited (hotel rooms fine, large villas less so).Pro tip: For families, mix approaches—primary travellers each run an eSIM; turn on a hotspot only when the group needs it. This keeps speeds high and batteries happy.Practicalities: setup, pick‑up and returnsHow to install and activate a travel eSIM (step‑by‑step)Check compatibility and unlocked status in your phone settings.Buy a plan for your destination (e.g., Esim Western Europe, Esim North America, or browse Destinations).Receive your eSIM (QR code or manual code) by email.On Wi‑Fi, scan the QR or enter details to add the eSIM plan.Set the eSIM as “Mobile Data” and keep your primary SIM for calls (if desired).Turn on Data Roaming for the eSIM line.Optional: Set the APN if provided. Restart the phone.Test: open a webpage and a maps app. If slow, toggle airplane mode or reboot.Pro tips: - Install the day before you fly; activate only when you land if the plan timer starts on first connection. - Set a data warning in Settings at 80% of your allowance.How to use a pocket WiFi (checklist)Before trip:Order for the correct countries and dates; confirm daily high‑speed cap.Arrange delivery/pick‑up (airport counter hours, hotel delivery).Note deposit, loss/damage fees, and return process.On trip:Fully charge the hotspot each morning.Change SSID/password; disable WPS.Share the password securely with your group.Monitor LEDs/app for cap/throttle status.After trip:Return on time, in full kit (device, cable, charger, pouch) to avoid fees.Keep proof of return/shipping.Business and team travel: what scales best?For teams, the tipping point is management overhead. eSIMs scale neatly: issue plans per traveller, tag costs to projects, and avoid device logistics. Pocket WiFi can work for event booths or shared tablets, but devices go missing and shipping gets messy.Centralised purchasing and usage controls are easier with eSIM dashboards. See Simology For Business.Partners and resellers setting up client connectivity can streamline with our Partner Hub.How to choose: a 60‑second checklistPhone supports eSIM and is unlocked? If no, lean pocket WiFi.Travelling solo or as a couple? eSIM usually wins on cost and simplicity.Need to share to 8–10 devices all day? Consider pocket WiFi (or carry a power bank for eSIM hotspot).Worried about deposits/returns? eSIM—nothing to ship or return.Crossing multiple countries? Choose a regional eSIM (e.g., Esim Western Europe or Esim North America).Security‑conscious? eSIM hotspot > public Wi‑Fi; avoid default router passwords.Regional notes and examplesUnited States: Coverage and speed vary by city and band support. Picking an eSIM that rides strong nationwide networks is key. Start with Esim United States.Western Europe: Competitive pricing and dense 5G make eSIMs excellent value. Multi‑country plans reduce SIM juggling. See Esim Western Europe.France, Italy, Spain: City and resort areas enjoy strong 4G/5G; eSIMs are typically the cheapest per GB. Compare Esim France, Esim Italy, and Esim Spain.North America: If you’ll cross into Canada or Mexico, a regional eSIM beats pocket WiFi roaming on cost and simplicity. See Esim North America.FAQIs eSIM as fast as a local physical SIM? Yes. eSIM is just a digital form of a SIM profile. Speeds depend on network coverage and plan, not the SIM form.Can I tether with an eSIM? Usually yes, but it depends on the plan. Most travel eSIMs allow hotspotting; check plan details. Some carriers cap tethering speeds or data.What if my phone is carrier‑locked? You may not be able to use a third‑party eSIM. Options: ask your carrier to unlock, use a pocket WiFi, or carry an unlocked secondary device for the eSIM.What happens when I run out of eSIM data? You either top up in‑app/online or buy another plan. Many travellers buy slightly more than needed to avoid mid‑trip disruption.Are “unlimited” pocket WiFi plans really unlimited? Typically not. Most have a daily high‑speed cap (e.g., 1–5GB) and then throttle severely. Check fair‑use policy specifics.Will a pocket WiFi work on flights or remote areas? It depends on terrestrial mobile coverage—just like your phone. No in‑flight cellular. In remote areas, neither option works well without coverage.Next step: Compare region‑ready travel eSIMs for your trip on Destinations.