Simology eSIM Compatibility Checker: How to Use It (and Alternatives)

Blog

Simology eSIM Compatibility Checker: H...

Simology eSIM Compatibility Checker: How to Use It (and Alternatives)

31 Oct 2025

Simology eSIM Compatibility Checker: How to Use It (and Alternatives)

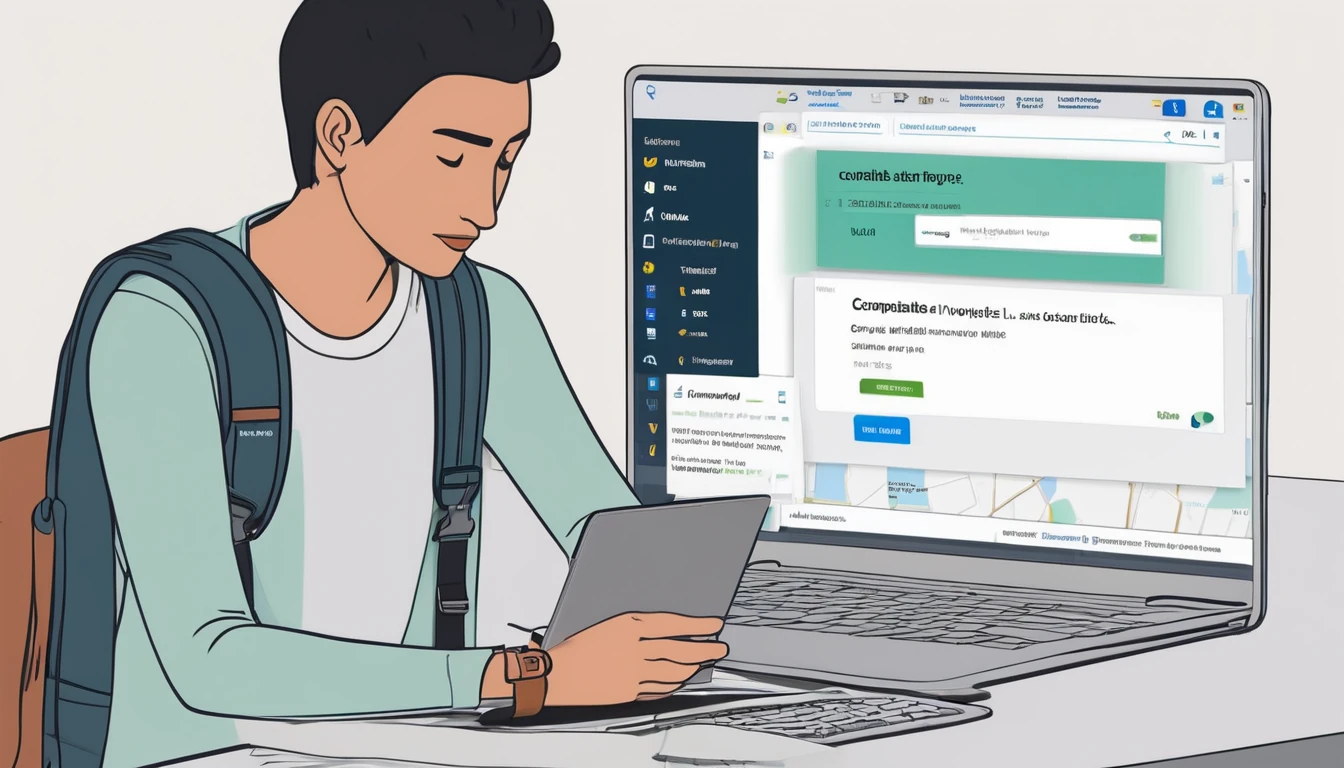
Planning to switch to an eSIM for your next trip but unsure if your phone supports it? The Simology eSIM Compatibility Checker helps you confirm—quickly and accurately—whether your device, software version and region variant will work with eSIM plans in your destination. This guide walks you through using the checker step by step, shows you reliable alternatives to verify support (including manufacturer lists and on-device checks), and helps you troubleshoot when results are unclear or contradictory. We’ll also flag the gotchas that catch travellers out—like carrier locks, Chinese/Hong Kong variants, and region-specific restrictions.

Once you’ve confirmed compatibility, you can shop plans by country or region in Destinations—for example Esim United States, Esim France, Esim Italy, Esim Spain, Esim Western Europe or Esim North America. If you manage travel for a team, you’ll also find pointers for businesses and partners.

What an eSIM compatibility checker actually checks

An effective eSIM checker looks beyond model names. It aims to confirm:

  • Hardware support: whether your device physically supports eSIM (embedded SIM, EID present).
  • Software version: minimum OS versions for eSIM activation and QR-code installation.
  • Region/SKU constraints: some variants (e.g., certain Chinese/Hong Kong models) ship with eSIM disabled.
  • Carrier lock status: locked phones may reject third-party eSIMs.
  • Destination fit: radio bands and roaming policies relevant to your trip.

Because phone model names are reused across markets, a good checker cross-references model numbers, build codes and OS versions, not just brand/series.

How to use the Simology eSIM Compatibility Checker

Before you start: quick checklist

  • Confirm your device is unlocked (SIM-free) or can be unlocked by your current carrier.
  • Know your exact device model number and region variant (e.g., “SM-S911B/DS”).
  • Update to the latest iOS or Android version available for your device.
  • Have Wi‑Fi or mobile data available for the test.
  • Decide your destination(s) and travel dates so you can pick a suitable plan in Destinations.

Pro tips: - Find your model number in Settings > About (iPhone/Android), or on the box/receipt. - Dial *#06# and look for an EID number; its presence usually indicates eSIM hardware.

Step-by-step: running the check

  1. Open the Simology eSIM Compatibility Checker.
  2. Select your device brand (Apple, Samsung, Google, etc.).
  3. Enter or confirm: - Exact model (e.g., iPhone 12, Pixel 7 Pro, Galaxy S23). - Model number/variant if known (e.g., A2402, G025I, SM-F731B). - Current OS version (iOS/Android build). - Whether your device is carrier-locked.
  4. Choose your destination (country or region). You can later browse plans in Destinations including Esim United States, Esim Western Europe and Esim North America.
  5. Run the check to see one of the following statuses: Compatible, Compatible after update, Partially compatible, Not compatible, or Inconclusive.
  6. Expand the result for guidance on next steps (e.g., update OS, unlock device, or choose a compatible plan).

Pro tips: - If you’re visiting multiple countries, run the check against a regional plan (e.g., Esim Western Europe) as well as individual countries to compare options. - If you’re a travel manager, consider bulk-checking your fleet and centralising purchases via For Business.

How to interpret your result (and what to do next)

  • Compatible now
  • Action: You’re good to go. Select a plan for your destination in Destinations and follow the install instructions.
  • Compatible after update
  • Action: Update to the recommended iOS/Android version, then re-run the check. Some older builds block QR-code activation or SM-DP+ downloads.
  • Partially compatible (data only)
  • Action: You can use data-only eSIMs; calls/SMS may stay on your physical SIM. Ideal when you want to keep your home number active for incoming calls.
  • Not compatible
  • Action: Consider travelling with your physical SIM and using Wi‑Fi, or upgrading your handset. If travelling in a group, check other devices using the tool.
  • Inconclusive
  • Action: Cross-check with the methods below (manufacturer lists and on-device checks). If in doubt, contact support with your model number and EID.

Alternatives to verify eSIM support

If you want to double-check the checker’s result (or it’s inconclusive), use one or both of the methods below.

1) Cross-check with manufacturer compatibility lists

Manufacturers publish device/region matrices for eSIM:

  • Apple iPhone: eSIM is supported on iPhone XR/XS and newer. iPhone 14 models sold in the USA are eSIM-only. Some carrier-dependent features vary by region.
  • Google Pixel: Pixels from Pixel 3 onward generally support eSIM. Early carrier-branded Pixel 3 units in North America had limitations; check your exact model.
  • Samsung Galaxy: Many recent models support eSIM—S20 series and newer, Note20, Z Fold/Flip lines, and S23/S24 series. FE and some regional variants may differ.
  • Other Android (Oppo, OnePlus, Huawei, Xiaomi): Support varies by model and region; several Chinese-market variants ship with eSIM disabled.

Search “[Brand] eSIM support [your model]” and verify both model number and region (e.g., “SM-S916B” vs “SM-S916U1”). If your model is not listed as eSIM-capable for your region, assume it won’t work.

2) Manual on-device checks

These checks take 2–3 minutes and are highly reliable.

  • Universal check
  • Dial *#06# and look for “EID”. If EID is present, your device has eSIM hardware.
  • iPhone
  • Settings > General > About > scroll for EID.
  • Settings > Mobile Data > Add eSIM (or “Add eSIM” from the top). If you see this option, the device supports eSIM.
  • Google Pixel (Android 13+)
  • Settings > Network & Internet > SIMs > + Add SIM > Download a SIM instead? If offered, eSIM is supported.
  • Samsung Galaxy (One UI 5/6)
  • Settings > Connections > SIM manager > Add eSIM. If the option is missing, your variant likely doesn’t support eSIM or it’s carrier-restricted.

Note: Presence of EID confirms hardware, but carrier locks can still block third‑party eSIMs.

Destination-specific gotchas for travellers

  • US-specific behaviour
  • iPhone 14/15 sold in the USA are eSIM-only—great for digital setup before arrival. See plans in Esim United States.
  • EU/UK multi-country trips
  • Regional plans like Esim Western Europe simplify cross-border roaming and reduce mid-trip reconfiguration.
  • North America combos
  • If you’ll cross between the USA and Canada/Mexico, consider Esim North America for consistent coverage and single-profile convenience.
  • Country pages for specifics
  • Local network notes and APN details vary. Check Esim France, Esim Italy and Esim Spain for per-country tips.

Pro tip: - If you rely on VoLTE or Wi‑Fi Calling, verify your device’s compatibility with the target networks. Data plans will work even if voice features vary, but it’s good to know before you go.

Troubleshooting when results are unclear

If the checker says “Inconclusive” or you still can’t install an eSIM, work through this list:

  1. Confirm EID exists - Dial *#06# or check in Settings > About. No EID = no eSIM.
  2. Update the OS - Install the latest iOS/Android updates. Many activation issues vanish after updating.
  3. Check carrier lock - Insert another network’s physical SIM to test, or ask your carrier to confirm lock status. Locked phones often reject third-party eSIM profiles.
  4. Free up a SIM slot - Some devices limit total active lines; remove old eSIM profiles or disable one SIM to add another.
  5. Switch networks during activation - Activate over stable Wi‑Fi. If activation fails, retry over mobile data.
  6. Verify region variant - In About phone, note the exact model (e.g., “A2894”, “SM-S916N”). Search the model plus “eSIM support”. Some Chinese/Hong Kong variants disable eSIM.
  7. Reset network settings (last resort) - iPhone: Settings > General > Transfer or Reset iPhone > Reset > Reset Network Settings. - Android: Settings > System > Reset options > Reset Wi‑Fi, mobile & Bluetooth.
  8. Re-scan the QR or use manual entry - If your plan supports it, enter SM-DP+ and activation code manually.
  9. Still stuck? - Share screenshots of About (showing EID), model number, and OS with support. If you’re provisioning multiple devices, consider streamlined support via For Business.

Planning your trip with Simology

Once your device checks out, pick a plan tailored to your itinerary:

Pro tips: - Install your eSIM over Wi‑Fi before you fly; enable it on arrival to avoid roaming on your home SIM. - Keep your physical SIM active for calls/SMS 2FA while routing data over your eSIM for local rates.

FAQ

  • Does dual SIM automatically mean eSIM?
  • Not necessarily. Dual SIM can mean two physical SIMs, one physical + one eSIM, or dual eSIM. Check for an EID or an “Add eSIM” option in settings.
  • How do I tell if my phone is carrier-locked?
  • Insert a different network’s SIM to see if it connects, or check the carrier lock field (iPhone: Settings > General > About). You can also ask your carrier to confirm/unlock.
  • Can I keep my home number active and use an eSIM for data?
  • Yes. Most phones let you keep your physical SIM for calls/SMS while setting your eSIM as the default for mobile data. This is ideal for travellers.
  • Will a Chinese or Hong Kong variant work with eSIM?
  • Many Chinese-market variants disable eSIM. Hong Kong/Taiwan variants may differ by model. Verify your exact model number against manufacturer information.
  • Can I store multiple eSIMs on one device?
  • Many newer phones let you store several eSIM profiles (with one or two active at a time). You can switch profiles in settings. Capacity varies by brand/model.
  • Do tablets and smartwatches support eSIM too?
  • Many iPad models and select Android tablets support data eSIMs. Wearables often use carrier-specific eSIM provisioning and may not accept travel eSIMs—check your model’s documentation.

Next step: Confirm your destination and choose a plan in Destinations.

Read more blogs

Andes Highlights (3 Weeks): Peru–Bolivia–Chile–Argentina Connectivity

Andes Highlights (3 Weeks): Peru–Bolivia–Chile–Argentina Connectivity

Planning a south america itinerary 3 weeks through the high Andes? This route stitches together Peru’s Sacred Valley, Bolivia’s La Paz and Salar de Uyuni, Chile’s Atacama Desert, and northern Argentina’s quebradas or Mendoza wine country—often by long-distance bus and a couple of short flights. Connectivity is different at altitude: coverage is strong in cities but drops in high passes and salt flats; bus Wi‑Fi is patchy; border towns can be blackspots. The smart move is an eSIM with multi‑country coverage, backed by offline maps, offline translations, and a simple routine for crossing borders by bus without losing service. Below you’ll find a practical, connectivity-first itinerary; checklists to prep your phone, apps and documents; and on-the-ground tips for staying online where it matters: booking transport, hailing taxis, backing up photos, and navigating when the signal disappears.If you’re transiting via Europe or North America, you can also add a layover eSIM to stay connected door-to-door. Start with our country list on Destinations, then follow the steps, and you won’t waste time chasing SIM shops at 3,500 metres.The 3‑week Andes route at a glanceWeek 1: Peru (Cusco, Sacred Valley, Machu Picchu) - Fly into Cusco (or Lima then connect). - Base in Cusco; day trips to Pisac/Chinchero/Maras–Moray. - Train to Aguas Calientes; Machu Picchu visit; return to Cusco or continue to Puno/Lake Titicaca.Week 2: Bolivia and Chile (La Paz, Uyuni, San Pedro de Atacama) - Bus/collectivo via Copacabana to La Paz. - Fly or overnight bus to Uyuni. - 3‑day Uyuni–altiplano tour ending in San Pedro de Atacama (Chile).Week 3: Chile and Argentina (Atacama to Salta or Mendoza/Buenos Aires) - Choose: - North: San Pedro to Salta/Jujuy by bus; fly to Buenos Aires. - Or South: San Pedro–Calama flight to Santiago; bus or flight to Mendoza; onward to Buenos Aires.Connectivity notes (quick): - Cities: generally strong 4G/4G+; 5G in major hubs (Santiago, Buenos Aires). - Altitude/rural: expect long no‑signal stretches (Uyuni, altiplano passes, Paso Jama). - Bus Wi‑Fi: often advertised, rarely reliable. Plan to be offline onboard. - Border regions: networks switch; a multi‑country eSIM avoids sudden loss.eSIM vs local SIMs for a 4‑country tripFor a route with multiple borders and remote legs, eSIM wins on time and reliability.What a multi‑country eSIM gets you: - One plan across Peru, Bolivia, Chile, Argentina (check coverage per country on Destinations). - No passport/SIM registration queues at kiosks. - Keep your home number active on the physical SIM for calls/SMS codes. - Instant top‑ups if you burn data on photos or navigation.When a local SIM still helps: - Long stay in one country with heavy data use (e.g., a month in Buenos Aires). - Dead zones where a different local network performs better (rarely worth the hassle on a 3‑week pace).Practical approach: - Use an eSIM as your primary data line across all four countries. - If you find a specific local network far better in one region, add a cheap local SIM and keep the eSIM as backup.Device readiness checklist (before you fly)1) Check eSIM compatibility and SIM‑lock status on your phone.2) Buy and install your eSIM while on home Wi‑Fi. Keep a PDF/printed copy of the QR code.3) Label lines clearly (e.g., “eSIM Andes Data”, “Home SIM”).4) Turn on data roaming for the eSIM; leave roaming off for your home SIM to avoid charges.5) Set up dual‑SIM rules: data on eSIM; calls/SMS default to home SIM if needed.6) Download offline: Google Maps/Organic Maps for all target regions; language packs (Spanish at minimum); bus/air tickets; hotel confirmations.7) Cloud backups: set to upload on Wi‑Fi only; pre‑create shared albums for travel companions.8) Test tethering/hotspot with your laptop/tablet.If you’re transiting popular hubs, consider a short layover eSIM: - USA connections: add an Esim United States or a broader Esim North America.- Europe connections: Madrid/Barcelona? Use an Esim Spain. Paris or Rome? See Esim France and Esim Italy. Multi‑country layovers? Try Esim Western Europe.City‑by‑city connectivity notesCusco & the Sacred Valley (Peru)Coverage: Good in Cusco city; variable in high villages (Maras/Moray) and along Inca Trail approaches.Tips: Download Sacred Valley maps offline; pin viewpoints and ruins. most taxis use WhatsApp—save your accommodation’s number.Machu Picchu/Aguas Calientes: Patchy to none at the citadel. Upload your photos later; don’t rely on live ticket retrieval.Lake Titicaca: Puno and CopacabanaPuno: Reasonable 4G; bus terminals crowded—screenshot QR tickets.Crossing to Copacabana: Expect a signal drop around the border; have directions saved offline.La Paz (Bolivia)Good urban 4G; the cable car network has decent signal but tunnels do not.Yungas/“Death Road” tours: Mountain valleys cause dead zones—share your emergency contacts with the operator, carry a charged power bank, and don’t plan remote calls.Uyuni and the Altiplano (Bolivia to Chile)Uyuni town: OK 4G; ATMs finicky—use Wi‑Fi for banking apps.Salt flats/lagunas: Assume offline for most of the 3‑day tour. Guides often carry satellite phones; agree a pickup time/place in San Pedro and preload your map route.San Pedro de Atacama (Chile)Town: Solid 4G; accommodations often have Wi‑Fi but speeds vary.Geysers, Valle de la Luna: Offline navigation essential; sunrise trips start before mobile networks wake up in some areas.Salta/Jujuy or Mendoza/Buenos Aires (Argentina)Salta/Jujuy: Good city coverage; quebradas have long no‑signal sections.Mendoza: City 4G/5G; vineyards outside town can be patchy.Buenos Aires: Strong 4G/5G; ideal for cloud backups and large downloads before you fly home.Border crossings by bus: step‑by‑stepThe big ones on this route: Peru–Bolivia (Puno/Copacabana), Bolivia–Chile (Uyuni–San Pedro via Hito Cajón), Chile–Argentina (Paso Jama to Salta or Los Libertadores to Mendoza).How to keep service and sanity:1) The day before:- Top up your eSIM data.- Confirm your plan includes both countries you’re entering/leaving.- Download offline maps for both sides of the border and your town of arrival.- Save bus company WhatsApp and terminal address offline.2) On departure morning:- Keep a paper copy or offline PDF of tickets, insurance, and accommodation proof.- Charge phone and power bank; pack a short cable in your daypack.3) On the bus:- Don’t count on bus Wi‑Fi. Keep your eSIM as primary, but expect drops near mountain passes.- If your phone supports it, enable “Wi‑Fi calling” for later when you reach accommodation Wi‑Fi.4) At the border posts:- Data may be unavailable. Keep QR codes and booking numbers offline.- After exiting one country and entering the next, toggle Airplane Mode off/on to re‑register on the new network.- If the eSIM doesn’t attach, manually select a network in Mobile Settings.5) Arrival:- Send your accommodation a quick WhatsApp when you’re back online.- Recheck your eSIM’s data roaming is on; confirm you’re on an in‑country network, not a weak roaming partner.Pro tips: - Dual profiles: If your eSIM allows, keep a secondary profile for a different network in the same country—helpful in border towns.- Cash buffer: Some border terminals don’t accept cards; download a currency converter for offline use.Offline survival kit (5‑minute setup)Maps: Download regions for Cusco, Sacred Valley, Puno, La Paz, Uyuni, San Pedro, Salta/Jujuy or Mendoza, and Buenos Aires.Translations: Download Spanish for offline use; add phrasebook favourites (bus tickets, directions, dietary needs).Documents: Save PDFs of passports, tickets, hotel addresses; star them for quick access.Rides: Screenshots of pickup points; pin bus terminals and hotel doors.Entertainment: Podcasts and playlists for long bus legs, set to download on Wi‑Fi only.Altitude and your tech: what changesCoverage gaps lengthen: Fewer towers at high altitude; valleys can block signal. Assume offline on remote excursions.Batteries drain faster in cold: Keep your phone warm and carry a power bank (10,000–20,000 mAh).Hotel Wi‑Fi may be congested: Schedule big uploads (photo backups, app updates) for big-city stays like Santiago or Buenos Aires.GPS still works offline: Your blue dot shows on offline maps without data—preload everything.Data budgeting for 3 weeksTypical traveller usage across this route: - Messaging/Maps/Bookings: 0.2–0.5 GB/day- Social and photo sharing: 0.3–0.7 GB/day- Occasional video calls/streaming: 0.5–1.0 GB/dayFor a mixed-use trip, plan 15–25 GB for 3 weeks. Heavy creators should double it and upload over hotel Wi‑Fi when possible. If you work remotely, consider a higher‑capacity plan and a backup eSIM; see our guidance on For Business.Practical route with transport and connectivity cuesDays 1–4 Cusco base: Strong city signal; day trips may be spotty—go offline-ready.Days 5–6 Machu Picchu: Expect no service at the ruins; sync tickets ahead.Days 7–8 Puno to La Paz via Copacabana: Border signal drop; re‑register networks after crossing.Days 9–11 Uyuni tour to San Pedro: Treat as offline; charge nightly; carry spare cables.Days 12–14 San Pedro: Stable in town; tours offline; top up data before Paso Jama.Days 15–17 Salta/Jujuy or Mendoza: Good urban 4G; rural patches are offline.Days 18–21 Buenos Aires: Strongest connectivity of the trip; clear your uploads and map downloads for the flight home.Partnering and stopover extrasHospitality and tour operators in the Andes: help your guests stay connected—explore co‑branded solutions via our Partner Hub.Transatlantic flyers: test your eSIM setup on a layover with an Esim United States or Esim Western Europe before hitting high-altitude blackspots.FAQs1) Do I need a local SIM in each country?No. A multi‑country eSIM covering Peru, Bolivia, Chile and Argentina is simpler and works well for a 3‑week pace. Consider a local SIM only if you’ll spend longer in one country and want the absolute best regional coverage.2) Will my WhatsApp number change with an eSIM?No. WhatsApp is tied to your registered number, not your data line. Keep your home SIM active for voice/SMS (roaming off if you wish), and use the eSIM for data—WhatsApp continues as normal.3) Can I hotspot to my laptop or camera?Yes. Enable tethering on your eSIM. Mind your data: cloud backups and OS updates can burn gigabytes—set them to Wi‑Fi only or schedule in big cities.4) What if there’s no signal on the Uyuni/Atacama legs?That’s expected. GPS still works offline. Pre-download maps and translations, carry a power bank, and sync plans with your tour operator before departure.5) Will I get roaming charges at borders?If you’re using a multi‑country eSIM with coverage in both countries, you won’t incur extra roaming fees from your home carrier. Keep roaming off on your home SIM to avoid accidental use.6) I’m connecting via Europe or the US—worth getting a layover eSIM?Yes. It’s an easy way to test your setup and stay reachable. Try Esim North America or country options like Esim Spain, Esim France, or Esim Italy for common hubs.Next step: Browse South America coverage options and build your plan on Destinations.

Switzerland & the EU: Roaming Facts Travelers Get Wrong (2025)

Switzerland & the EU: Roaming Facts Travelers Get Wrong (2025)

If you’re planning a 2025 trip that mixes Switzerland with nearby EU countries, read this before you switch on data. Switzerland looks and feels “European”, but it’s not in the EU or the EEA. That means the EU’s Roam‑Like‑At‑Home rules don’t apply in Switzerland, and assumptions based on France, Italy or Spain can turn into surprise charges the moment your phone latches onto a Swiss network. The reverse is true too: a Swiss mobile plan doesn’t magically give you EU‑wide roaming at domestic rates.This guide cuts through the confusion. We’ll explain Switzerland’s non‑EU status in plain English, walk through cross‑border day‑trip scenarios (Geneva–Annecy, Basel–Colmar, Lugano–Como, Zermatt via Italy), clarify what “fair use” really means, and give you a practical setup that avoids bill shock. If you want the country‑by‑country detail, our Switzerland guide and neighbouring country pages are under Destinations.Switzerland is not in the EU — here’s what that means in 2025EU/EEA roaming (“Roam‑Like‑At‑Home”, extended to 2032) lets subscribers use domestic allowances across EU/EEA countries without extra charges, subject to fair‑use limits.Switzerland is outside both the EU and EEA. The EU regulation does not apply there.Result: Switzerland is usually in a separate “World/Zone 2” for many European carriers. Some include it as a paid add‑on or an exception, but this is a commercial choice, not a right.UK travellers post‑Brexit have no regulated free roaming anywhere; EU and Switzerland pricing is entirely operator‑defined.In practice, your costs in Switzerland depend on your exact plan. Some operators offer day passes that include Switzerland; others charge per MB or a higher daily rate. Always check both the presence of coverage and its price.EU regulation vs Swiss realityEU/EEA: domestic‑rate roaming with quality and transparency rules (e.g., surcharge bans, network quality parity).Switzerland: none of that automatically applies. Operators may throttle, charge surcharges, or exclude Switzerland from bundles. “Fair use” policies tied to EU rules cannot be invoked to demand EU treatment in Switzerland.Bottom line: don’t assume your EU experience carries over to Switzerland. Verify.Cross‑border day trips: what changes the moment you crossSwitzerland’s borders are porous for travellers—and for radio signals. Phones on auto network selection often connect to whichever tower is strongest, which can be across the border or over a lake.Common day trips where this matters: - Geneva ↔ Annecy/Chamonix (France) - Basel ↔ Colmar/Freiburg (France/Germany) - Lugano ↔ Como (Italy) - St. Moritz ↔ Tirano (Italy) - Schaffhausen/Rhine Falls ↔ southern GermanyIf you have an EU SIM and day‑trip into SwitzerlandYour EU “free roaming” does not apply in Switzerland.Unless your operator explicitly includes Switzerland, you’ll pay out‑of‑zone rates or need a paid pass.Safer options:Add the operator’s Switzerland pass before crossing, orUse a data eSIM that includes Switzerland for the hours/days you’re inside the country, orLock your phone to an EU network and keep mobile data off in Switzerland (use offline maps).If you have a Swiss SIM and day‑trip into the EUYour Swiss plan may not include EU roaming, or may do so with limited data and higher rates.Consider a regional EU eSIM for your EU hours/days—especially if you’re crossing multiple borders.If you’re from the UK, US, Canada or elsewhereTreat both EU and Switzerland as roaming zones unless your plan says otherwise.Many travellers pair a Switzerland‑inclusive eSIM with a separate EU eSIM (France/Italy/Germany) to keep costs predictable.Explore options by country via Destinations. For broader coverage, compare a regional pack like Esim Western Europe, and country pages such as Esim France, Esim Italy and Esim Spain. Travellers originating from North America can also check Esim United States and Esim North America.Fair‑use expectations vs the reality in SwitzerlandEU fair‑use guidance keeps EU/EEA roaming reasonable (caps, anti‑abuse rules, quality). It does not apply in Switzerland.What to expect: - “Included Switzerland” is a plan feature, not a right. Expect smaller data buckets, speed caps, or surcharges when Switzerland is included. - Daily roaming passes that work across the EU may exclude Switzerland or price it higher. The marketing headline (“Europe”) often hides a footnote—read the country list. - Regional eSIM packs may say “Western Europe” but not include Switzerland. Inclusion should be explicit. If you need both, choose a plan that lists Switzerland by name.Pro tip: Screenshot your carrier’s roaming page (country list + prices) before you travel. If your phone auto‑connects and you get a warning SMS, you’ll know whether to continue or switch strategies.Pre‑trip checklist: stop surprises before they startConfirm roaming zones and prices:Switzerland vs EU countries on your primary SIM.Whether your daily pass covers Switzerland.Any data caps or throttling thresholds while roaming.Decide your setup:One regional plan that lists Switzerland and the EU countries you’ll visit, orTwo eSIMs: a Switzerland‑inclusive one and a separate EU plan.Prepare your phone:Download offline maps for both sides of the border.Enable spending/data alerts with your carrier where available.Learn how to switch data lines and manually select networks.Payments and apps:Turn off background mobile data for heavy apps you won’t need on the move (cloud photo backup, auto updates).Set messaging to “Wi‑Fi only” for media backups.Set up eSIMs for Switzerland + EU: a simple step‑by‑stepThis approach keeps your home number for calls/SMS, while using local‑rate data where you are.1) Choose your eSIMs - Option A: One regional plan that explicitly includes Switzerland and your EU stops (see Esim Western Europe and check the country list). - Option B: Two plans: - A Switzerland‑inclusive plan for Geneva/Zürich/Zermatt days. - An EU plan for France/Italy/Germany days, e.g., Esim France or Esim Italy.2) Install both eSIM profiles before you fly - Follow the QR/on‑device instructions. - Name them clearly (e.g., “Data‑CH” and “Data‑EU”).3) Configure line usage - Set your home SIM as “Calls & SMS” only (no data). - Set the relevant eSIM as “Mobile Data”. - Turn off “Allow Mobile Data Switching” so the phone doesn’t switch to an expensive line automatically.4) Control network selection at borders - When you cross into Switzerland: enable “Data‑CH” and manually select a Swiss network if needed. - When back in the EU: switch to “Data‑EU” and manually select an EU network.5) Test on Wi‑Fi first - Activate each eSIM on hotel/Airport Wi‑Fi to confirm it registers and data flows.Pro tips: - Save APN details in Notes in case you need manual entry (though most eSIMs autoconfigure). - On iPhone, add a Home Screen Shortcut to switch your “Mobile Data” line in two taps. - Keep iCloud/Google Photos on Wi‑Fi‑only during travel days; upload at your hotel.Border pitfalls and bill‑shock traps to avoidLakes and peaks: Strong Swiss towers reach into France/Italy/Germany along lakes (Geneva, Lugano, Constance) and mountain viewpoints. Use manual network selection near borders.Trains that dip into Switzerland: Some EU routes briefly transit Swiss territory. If your pass excludes Switzerland, switch mobile data off for the segment or use your Switzerland eSIM.“Welcome to Switzerland” SMS ≠ free roaming: Those texts are informational; they don’t mean your rates are EU‑like.Background sync is the bill killer: Cloud photos, app updates, streaming preloads, and tethering can burn through MBs fast at out‑of‑bundle rates.Wi‑Fi Calling nuance: If enabled on your home SIM while roaming, calls can still be billed according to your operator’s Wi‑Fi Calling policy. If in doubt, receive calls on your home SIM but return calls via internet apps over your data eSIM.For teams and frequent travellersBusiness trips that straddle Switzerland and the EU are prime territory for accidental overages. Centralise with predictable eSIMs and a clear border‑use policy.Travel managers: align line settings and network‑lock instructions in your pre‑trip packs. Consider a pool of regional eSIMs for cross‑border teams.See programme options under For Business. Travel brands and resellers can explore co‑branded solutions via the Partner Hub.Example itineraries and the smartest roaming setupWeekend in Geneva with a Chamonix day tripUse a Switzerland‑inclusive eSIM in Geneva.Switch to an EU eSIM for France (Chamonix). See Esim France.Ticino base with a Como lunch runSwitzerland‑inclusive eSIM for Lugano days.Flip to an Italy plan for Como hours. See Esim Italy.Basel Messe with a hop to ColmarSwitzerland eSIM while in Basel.EU eSIM for the Alsace stretch. A regional option like Esim Western Europe can simplify.Flying in from the US, touring Zurich–Milan–Lake ComoKeep your US SIM for calls/SMS only. Compare Esim United States guidance for setup.Pair a Switzerland‑inclusive eSIM with an Italy plan, or pick a regional plan that lists Switzerland and Italy. North American travellers can also review Esim North America if transiting there.FAQQ1) Is Switzerland in the EU? - No. Switzerland is not in the EU or EEA. It has bilateral agreements with the EU for trade and movement, but EU roaming regulations don’t apply there.Q2) Does EU “free roaming” work in Switzerland in 2025? - Not by default. Roam‑Like‑At‑Home covers EU/EEA only. Some operators choose to include Switzerland, often with smaller data buckets or surcharges. Check your plan’s country list and price.Q3) I’m staying in France but near the Swiss border. How do I avoid accidental Swiss roaming? - Set network selection to Manual and choose a French network. Keep “Allow Mobile Data Switching” off. Consider a backup Switzerland eSIM if you’ll cross the border for lunch or sightseeing. See Esim France for France‑side data options.Q4) Can I keep my number for calls and use a data eSIM for Switzerland/EU? - Yes. Keep your home SIM active for calls/SMS, set it to “no data”, and use a travel eSIM for mobile data. Switch the data line at borders. This is the most cost‑predictable setup for mixed Switzerland/EU trips.Q5) Which eSIM is best for a week in Zurich plus day trips to Como and Chamonix? - Either: - Two eSIMs: a Switzerland‑inclusive one for Zurich days, plus Italy/France eSIMs for each day trip (Esim Italy, Esim France), or - One regional plan that explicitly lists Switzerland, France and Italy (compare Esim Western Europe and confirm inclusion).Q6) I’m visiting from the US—do I need different plans for the EU and Switzerland? - Often, yes. Treat them as separate unless your plan says otherwise. Keep your US SIM for identity/calls and use travel eSIMs for data. Review setup notes via Esim United States and, if you’re also visiting Canada/Mexico on the same trip, Esim North America.Next step: Plan your coverage country by country, starting with Switzerland and its neighbours, via Destinations.

Personal Hotspot Playbook: Share eSIM Data Safely with Laptops & Tablets

Personal Hotspot Playbook: Share eSIM Data Safely with Laptops & Tablets

Travelling with a single data plan and multiple devices is the norm. Your phone’s eSIM can power your laptop, tablet and a colleague’s phone—if you set it up right. This playbook explains how to use personal hotspot safely and efficiently on the road, with crisp steps, practical safeguards and performance tactics. We’ll cover carrier tethering rules (and what triggers flags), the APN “tether”/DUN key on Android, WPA3 security, device limits, throttle avoidance, and when to favour USB over Wi‑Fi. You’ll also find checklists for iOS and Android, battery and heat tips, and region‑specific notes for the US and Europe. Before you depart, choose a plan that explicitly allows tethering; during your trip, apply a few simple configurations to protect your data and stretch your gigabytes. Whether you’re off to New York, Nice or Naples, this guide helps you share your eSIM connection with confidence.Before you start: choose the right travel eSIMTethering behaviour varies by carrier and plan. Some plans include hotspot use with fair‑use limits; others restrict or block it, or throttle tethered traffic.Check plan details for “tethering” or “personal hotspot” support on your destination page: see Destinations.For regional options, explore Esim United States, Esim France, Esim Italy, Esim Spain, Esim Western Europe and Esim North America.Confirm fair‑use thresholds, speed tiers and whether hotspot is included. If tethering is essential, pick a plan that says so explicitly.Pro tip: If work depends on hotspot reliability, consider a plan with a clear hotspot allowance and published speed tiers rather than “unlimited” with vague management.Tethering flags explained (and how to stay compliant)Carriers can identify tethering in several ways:APN type “DUN” (tethering) on Android. Some networks require it to enable hotspot; others block it.Provisioning flags on your line that enable/disable hotspot.Traffic patterns and device fingerprints (e.g., DHCP options from laptops; TTL differences).Best practice:Don’t attempt to circumvent hotspot restrictions. Instead, select a plan that includes it and use it within fair‑use.If hotspot won’t enable, your plan likely doesn’t support it or the APN is misconfigured (see troubleshooting below).How to set up a secure personal hotspotiPhone and iPad (iOS/iPadOS)1) Go to Settings > Mobile Service (or Mobile Data) and set your eSIM as the Mobile Data line.2) Tap Personal Hotspot. Toggle “Allow Others to Join” on.3) Set a strong Wi‑Fi password (12+ characters; avoid dictionary words).4) On the laptop/tablet, connect to the iPhone’s network name, enter the password and verify internet access.5) Optionally enable “Maximise Compatibility” only if devices can’t see the hotspot; it may force 2.4 GHz and reduce speeds.Notes: - iOS uses WPA2 with a strong password. There’s no WPA3 toggle today. - You can share via USB (fast, stable, power to the phone) or Bluetooth (low power, slower).Android (steps vary by device)1) Settings > Network & Internet > Hotspot & tethering > Wi‑Fi hotspot.2) Network name (SSID): use something non‑identifiable (e.g., “Traveller‑5G”).3) Security: choose WPA3‑SAE if available (Android 12+); else WPA2‑PSK (AES).4) Password: 12+ characters, mixed case, numbers and symbols.5) AP band: Prefer 5 GHz for speed (fallback to 2.4 GHz for older devices).6) Set “Turn off hotspot automatically” when idle to save battery.7) Set “Max connections” to 1–3 devices to protect performance and reduce flags.8) Enable hotspot, then connect from your laptop/tablet.APN/DUN note: - On some networks you must use an APN with APN type including “dun” (tether). Only add or change APN settings if your provider documents them. If your eSIM auto‑configures APN, leave it as is.Performance and throttle avoidance on the roadTethered traffic is often managed differently, even when allowed. These steps help you get more speed per megabyte and avoid fair‑use clamps:Prefer USB tethering when possible. It’s typically the lowest‑latency, most stable option and keeps your phone charged.Use 5 GHz hotspot for modern laptops/tablets; switch to 2.4 GHz only if range or compatibility demands it.Limit connected devices. Every extra device increases background traffic and contention.Enable Data Saver on both phone and laptop.iOS: Settings > Mobile Data > Low Data Mode on the eSIM line.Android: Settings > Network & Internet > Data Saver.Windows: mark the Wi‑Fi as Metered (Settings > Network & Internet > Wi‑Fi > your network > Metered).macOS: disable iCloud Drive/Photos sync; pause OneDrive/Dropbox; set App Store auto‑updates off.Cap streaming quality to 480p/720p. Download content over hotel Wi‑Fi before travelling.Pause OS updates and cloud backup/sync during hotspot sessions.Turn off background refresh on apps prone to auto‑sync (Teams/Slack file sync, photo backup).Use a modern browser with video codec efficiency (e.g., AV1/VP9 where supported) to reduce bitrate.If you suspect content‑based throttling, a reputable VPN can normalise traffic; however, this may be restricted by some providers—check your plan terms.Security essentials: keep your hotspot privateUse WPA3 where available; otherwise WPA2‑AES with a long, random password.Avoid personal SSIDs (don’t broadcast your name or company).Disable WPS (if your device exposes it).Keep your phone OS up to date.Turn off the hotspot when not in use.On laptops, disable auto‑connect to your phone’s SSID in public spaces.Use device‑specific passwords for sensitive work accounts; avoid logging into critical systems on an unknown, shared laptop tethered to your phone.Device limits and smart connectingAndroid lets you set a maximum number of connections; keep it to 1–3 for best throughput.iOS doesn’t expose a device limit. Share the password only with intended devices and remove unknown devices promptly (change the password if necessary).Connecting tips: - Windows: Mark the connection as Metered to prevent heavy updates and sync.- macOS: Pause Spotlight indexing on large external drives and disable iCloud Photos temporarily.- iPad and Android tablets: Switch off auto‑backup and limit app updates to Wi‑Fi at accommodation.Battery, heat and power managementHotspotting is power‑hungry and generates heat, which can cause throttling.Keep the phone on charge (USB‑C PD if available) while tethering, especially for video calls.Ventilation matters: avoid direct sun, dashboards and pockets; place the phone on a cool surface.Prefer USB tethering for long sessions—it charges while connected and is more efficient than Wi‑Fi.Lower screen brightness or lock the screen during hotspot use.Disable 5G if the local signal repeatedly drops; a stable 4G connection can outperform flapping 5G and reduce heat.Turn off the hotspot when you’re done.Troubleshooting checklistHotspot toggle greyed out or won’t enable: - Ensure your eSIM is the active Mobile Data line. - Restart the phone; toggle Airplane Mode for 10 seconds. - Update carrier settings/OS. - Check plan details—some plans disallow hotspot. - Android: verify APN settings. If your provider specifies APN type including “dun”, add it. Otherwise, don’t change defaults.Devices connect but no internet: - Confirm mobile data works on the phone itself (browse a site). - Toggle between 5 GHz and 2.4 GHz bands. - Forget and re‑join the network on the laptop; disable VPN temporarily to test. - Windows: run Network Troubleshooter; ensure MAC randomisation is on (can improve association in congested areas). - Check if you’ve hit a fair‑use cap or data limit; top up or pause heavy tasks.Slow speeds: - Move to a window, higher floor, or closer to a cell tower; avoid basements. - Limit to one connected device. - Switch to USB tethering. - Force LTE/4G if 5G is unstable. - Try a different time of day in congested tourist areas.Repeated tethering blocks: - Likely plan restriction. Choose a plan with hotspot included via Destinations or region‑specific pages like Esim Western Europe and Esim North America.Regional notes for travellersUnited States: Urban 5G can be fast but variable indoors. Consider plans optimised for hotspot via Esim United States. Many carriers have strict video and tethering management—watch fair‑use.France, Italy, Spain: Dense 4G coverage with reliable speeds; 5 GHz hotspot generally permissible. See Esim France, Esim Italy and Esim Spain.Western Europe multi‑country: If crossing borders, a regional plan reduces SIM swaps and APN quirks. Explore Esim Western Europe.North America multi‑country: For US/Canada/Mexico trips, check Esim North America for cross‑border allowances.Team and business travelIf you regularly hotspot for colleagues or run events: - Standardise device settings (SSID format, passwords, encryption). - Use dedicated power banks and short USB‑C cables for USB tethering to laptops. - Consider pooling data across multiple eSIMs and rotating devices to avoid per‑line caps. - For fleet management, provisioning and centralised billing, see For Business. - Partners and resellers can access bulk tools via the Partner Hub.Quick how‑to: your on‑the‑go checklistChoose a plan that includes hotspot (check Destinations).Set strong security: WPA3 if available; otherwise WPA2‑AES with a 12+ char password.Limit devices to 1–3; prefer USB tethering for work calls.Mark laptop connection as Metered; pause updates and cloud sync.Use 5 GHz; switch to 2.4 GHz only if needed.Keep the phone cool and powered; turn hotspot off when finished.FAQs1) Do all travel eSIM plans support personal hotspot?No. Some include hotspot with fair‑use limits; others block or throttle tethered traffic. Check your destination plan details via Destinations or regional pages such as Esim United States and Esim Western Europe.2) What is the APN “tether”/DUN key on Android?It’s an APN type value (often “dun”) used for tethering. Some networks require it to enable hotspot; others block it. Only set it if your provider documents it. If your eSIM auto‑configures APN, don’t change it.3) Is WPA3 worth enabling?Yes—if your phone and connecting device support WPA3‑SAE (Android 12+). It hardens against password‑guessing. If not available, use WPA2‑AES with a strong, unique password. iOS hotspots currently use WPA2 with a strong password.4) How many devices can I connect at once?Technically, often up to 5–10. Practically, limit to 1–3 to protect speed and stability and to avoid looking like a mini‑router.5) How can I tell if I’m being throttled?Clues include consistent speed caps after a usage threshold, video streams locked to low resolutions, or hotspot speeds much lower than on‑device. Check plan fair‑use notes and run speed tests. If allowed, switching to USB tethering, changing band (5 GHz/2.4 GHz) or trying at a different time/location can help.6) Will a VPN stop throttling?A VPN can mask traffic types and sometimes avoid content‑based management, but it won’t bypass plan‑level caps and may be restricted by your provider. Use only if your plan permits.Next step: Planning a route with reliable hotspot support? Start with your country or region on Destinations to pick a plan that includes tethering, or choose a regional option like Esim Western Europe for multi‑country trips.