Public Wi‑Fi vs Mobile Data: When It’s Safe (and When It’s Not)

Blog

Public Wi‑Fi vs Mobile Data: When It’s...

Public Wi‑Fi vs Mobile Data: When It’s Safe (and When It’s Not)

29 Oct 2025

Public Wi‑Fi vs Mobile Data: When It’s Safe (and When It’s Not)

Public Wi‑Fi is everywhere: airports, cafés, hotels, trains and planes. It’s convenient and often free—but it also introduces real risks that most travellers don’t see. Attackers can spoof hotspots, tamper with logins via captive portals, or downgrade your secure connections. Meanwhile, your mobile data connection is generally encrypted end‑to‑end by your operator and harder to meddle with. This guide explains the practical trade‑offs so you can make quick, confident decisions on the road. You’ll learn how captive portals work, what SSL stripping looks like in 2025, how to spot fake hotspots, and the exact settings to toggle before you connect. We’ll finish with a simple decision tree and safer defaults using eSIM, so you stay online without gambling with your banking, email or client data. If “public wifi safety” is your concern, this is your one‑stop, traveller‑first checklist.

The quick answer: when to use mobile data vs public Wi‑Fi

Use this 30‑second decision tree.

  • Do you need to log in to banking, payments, email admin, cloud consoles, or handle work credentials?
  • Yes → Use mobile data/eSIM. Avoid public Wi‑Fi.
  • No → Continue.
  • Is the Wi‑Fi network name verified with staff or signage, and protected by a password (WPA2/WPA3)?
  • No → Use mobile data/eSIM.
  • Yes → Continue.
  • Are you forced through a captive portal (web page that asks you to accept terms, add email/room number)?
  • Yes → Connect only to accept terms, then immediately enable your VPN before doing anything sensitive—or prefer mobile data.
  • No → Continue.
  • Are you seeing any certificate warnings, HTTP-only pages, or “Not secure” indicators?
  • Yes → Disconnect and use mobile data/eSIM.
  • No → Low risk—proceed for casual browsing/streaming.

Pro tip: If you’re in any doubt, default to mobile data or an eSIM travel plan. It’s the safest baseline.

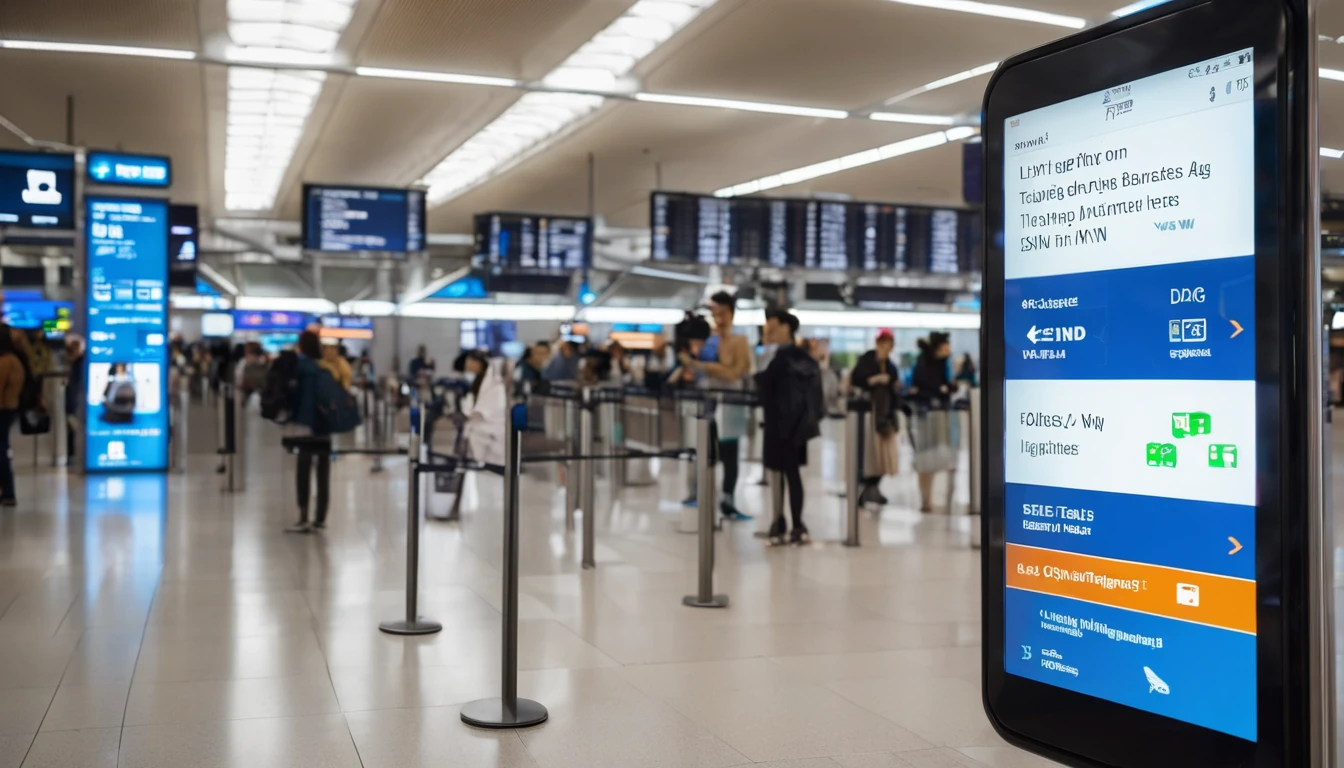
How public Wi‑Fi actually works (and where it breaks)

Captive portals: convenience with a catch

Most public networks use captive portals: you connect, your first web request is intercepted, and you’re redirected to a sign‑in/terms page. This interception happens before encryption to the wider internet starts. Risks: - Phishing: Fake portals mimicking a venue’s page to capture email, passwords or card details. - Tracking: Your device’s MAC address and browser fingerprint may be logged. - Forced insecure requests: Some portals push you through HTTP before you can enable a VPN.

What to do: Confirm the network name with staff, use a throwaway email if required, and switch on your VPN the moment the portal grants access.

SSL stripping and downgrade tricks

Modern sites use HTTPS with HSTS (HTTP Strict Transport Security). Attackers on open Wi‑Fi may attempt to: - Block HTTPS upgrades, keeping you on HTTP. - Inject a look‑alike page before a secure session starts. - Present bogus certificates hoping you’ll click “Continue”.

Your defence: Never ignore certificate warnings. Use a browser with HTTPS‑only mode. Prefer apps with certificate pinning (many banking apps do this and will refuse unsafe connections).

Fake hotspots (“evil twins”)

Attackers clone a network name like “Airport_Free_WiFi” and broadcast stronger signal. If your device auto‑joins based on name alone, you’re connected to them. They can see and tamper with unencrypted traffic, and attempt man‑in‑the‑middle on poorly configured apps.

Defence: Disable auto‑join for public networks, verify the exact SSID with staff, and “Forget” networks after use.

Public Wi‑Fi vs mobile data: the real‑world risk difference

  • Mobile data/eSIM: Your traffic rides an encrypted channel within the mobile network. While sophisticated threats (e.g., IMSI catchers) exist, they’re rare and targeted. For travellers, mobile data is significantly safer than open Wi‑Fi for logins and payments.
  • Public Wi‑Fi: Shared medium, easy to spoof, and often funnels you through captive portals where interception is simplest. Hotels and conferences are common targets.

Bottom line: Default to mobile data/eSIM for anything sensitive. Use public Wi‑Fi for low‑risk browsing and downloads only when you’ve verified the network and hardened your device.

Safer connectivity with eSIM when you travel

A local or regional eSIM gives you affordable mobile data without hunting for risky Wi‑Fi. With Simology, you can browse plans by country or region via Destinations. Popular picks: - USA city breaks and road trips: Esim United States or broader Esim North America - Euro adventures: Esim France, Esim Italy, Esim Spain or multi‑country Esim Western Europe

For teams, zero‑drama travel data beats hotel Wi‑Fi every time—see For Business. Travel suppliers and venues can explore safer guest connectivity via our Partner Hub.

Before you connect: a quick hardening checklist

Do these once, then you’re covered trip‑wide.

  • Turn on automatic updates for your OS, browser and key apps.
  • Enable HTTPS‑Only/Always‑On in your browser.
  • Install and configure a reputable VPN. Set “connect on untrusted Wi‑Fi.”
  • Disable auto‑join for open networks; remove old public SSIDs.
  • Turn off file sharing, printer sharing, and AirDrop/Nearby Share to “Contacts only” or Off.
  • Use a passcode/biometrics and full‑disk encryption (default on modern devices).
  • Prefer app‑based 2FA (not SMS) for important logins.

Pro tip: Add your eSIM before you travel so you land connected—no need to touch airport Wi‑Fi.

Connecting to public Wi‑Fi: step‑by‑step

  1. Verify the exact network name and whether a password is required.
  2. Turn off auto‑join for that network (so you connect consciously each time).
  3. Connect and load the captive portal. Provide only minimal info—avoid reusing important passwords.
  4. Once online, immediately enable your VPN before opening any other app or site.
  5. Check your browser shows the padlock/HTTPS on sites you visit. If you see a warning, stop.
  6. Keep sessions short. When you’re done, “Forget” the network.

Pro tip: If a venue offers a WPA2/WPA3 password, prefer it over truly open networks—there’s at least basic encryption between your device and the hotspot.

Spotting common attack patterns on public Wi‑Fi

  • Portal phishing: The sign‑in page asks for your email and password for a third‑party service (e.g., “Sign in with your email provider”). Don’t. Portals should never need those credentials.
  • SSL warnings: “Your connection is not private” pop‑ups. Never click through—disconnect.
  • Name games: Multiple similar SSIDs (FreeAirportWiFi, Airport_Free_WiFi, AirportWiFi‑Guest). Ask staff which is real.
  • Rogue DNS: You type a familiar address and land on an odd‑looking site. Quit immediately; recheck with mobile data.
  • Sudden certificate prompts in apps that never ask for them (email, messaging). Treat as a red flag.

When a VPN helps—and when it can’t

  • Helps with: Encrypting your traffic across the local Wi‑Fi so others can’t sniff it; bypassing rogue DNS; reducing hijacking risk.
  • Limitations: You usually must connect to the hotspot (and often its captive portal) before the VPN can start. A compromised device or phishing page can still trick you before the VPN is active.
  • Practical tip: Connect → complete the portal with minimal info → enable VPN immediately → proceed. If the VPN won’t connect or drops repeatedly, switch to mobile data.

Venue‑by‑venue: what to expect

  • Airports and trains: High‑volume, prime targets for spoofed SSIDs. Treat as untrusted; prefer mobile data.
  • Hotels: Portals tied to room numbers or surnames are common, but networks are shared across floors. Use VPN; avoid admin logins.
  • Cafés and bars: SSIDs frequently change; lots of clones around. Verify the name at the till.
  • Conferences: Attackers love events. Expect evil‑twin networks. Use mobile data for anything sensitive.
  • In‑flight Wi‑Fi: Often proxied and filtered. Fine for casual use, but not for banking or work admin.

Quick device hardening checklist (phones and laptops)

  • Disable Wi‑Fi when you’re not using it; rely on mobile data/eSIM.
  • Use a privacy‑focused DNS provider within your VPN, or set encrypted DNS (DoH/DoT) in system settings if supported.
  • Limit sensitive notifications on lock screen.
  • Use separate browser profiles: one for travel, one for personal.
  • Log out of sessions you don’t need; clear site data after public Wi‑Fi sessions.
  • For work devices, stick to your organisation’s managed VPN and policies.

Pro tip: If your work depends on reliable, safe connectivity, standardise on eSIM data and keep Wi‑Fi as a last resort.

Simple “safer by default” plan for travellers

  • Before you fly: Add a local or regional eSIM from Destinations.
  • On the ground: Use mobile data for logins, bookings and payments.
  • Only use public Wi‑Fi for downloads or streaming you don’t mind being interrupted.
  • Keep your VPN ready for those moments where Wi‑Fi is unavoidable.
  • Forget networks after use; don’t auto‑join anything public.

FAQ: Public Wi‑Fi vs mobile data

  • Is public Wi‑Fi safe if the site shows HTTPS?
  • Safer, but not safe by default. HTTPS protects the connection to that site, but portals, DNS tampering and fake certificates can still bite. Always heed warnings and prefer a VPN.
  • Is mobile data always safer?
  • For most travellers, yes. Mobile networks encrypt traffic at the radio layer and are harder to spoof casually. It’s the better choice for banking, email and bookings.
  • Should I use a VPN on public Wi‑Fi?
  • Yes. Use a reputable VPN and enable it immediately after the captive portal. If it won’t connect reliably, switch to mobile data.
  • Can I do mobile banking on hotel Wi‑Fi?
  • Best practice: use mobile data/eSIM for banking. If you must use Wi‑Fi, use your banking app (which likely pins certificates), turn on your VPN, and double‑check for any warnings.
  • How do I tell if a hotspot is fake?
  • Verify the exact network name with staff; beware multiple look‑alike names; check signal strength anomalies; avoid previously saved “free” SSIDs; and prefer password‑protected Wi‑Fi.
  • Do I need an eSIM if venues offer free Wi‑Fi?
  • If you value reliability and security, yes. An eSIM keeps you online for sensitive tasks without relying on unknown networks. Explore country and regional options via Esim United States, Esim France, Esim Italy, Esim Spain and Esim Western Europe, or go broader with Esim North America.

Next step: Choose a safe, local data plan before you travel—browse Destinations and add your eSIM in minutes.

Read more blogs

Andes Highlights (3 Weeks): Peru–Bolivia–Chile–Argentina Connectivity

Andes Highlights (3 Weeks): Peru–Bolivia–Chile–Argentina Connectivity

Planning a south america itinerary 3 weeks through the high Andes? This route stitches together Peru’s Sacred Valley, Bolivia’s La Paz and Salar de Uyuni, Chile’s Atacama Desert, and northern Argentina’s quebradas or Mendoza wine country—often by long-distance bus and a couple of short flights. Connectivity is different at altitude: coverage is strong in cities but drops in high passes and salt flats; bus Wi‑Fi is patchy; border towns can be blackspots. The smart move is an eSIM with multi‑country coverage, backed by offline maps, offline translations, and a simple routine for crossing borders by bus without losing service. Below you’ll find a practical, connectivity-first itinerary; checklists to prep your phone, apps and documents; and on-the-ground tips for staying online where it matters: booking transport, hailing taxis, backing up photos, and navigating when the signal disappears.If you’re transiting via Europe or North America, you can also add a layover eSIM to stay connected door-to-door. Start with our country list on Destinations, then follow the steps, and you won’t waste time chasing SIM shops at 3,500 metres.The 3‑week Andes route at a glanceWeek 1: Peru (Cusco, Sacred Valley, Machu Picchu) - Fly into Cusco (or Lima then connect). - Base in Cusco; day trips to Pisac/Chinchero/Maras–Moray. - Train to Aguas Calientes; Machu Picchu visit; return to Cusco or continue to Puno/Lake Titicaca.Week 2: Bolivia and Chile (La Paz, Uyuni, San Pedro de Atacama) - Bus/collectivo via Copacabana to La Paz. - Fly or overnight bus to Uyuni. - 3‑day Uyuni–altiplano tour ending in San Pedro de Atacama (Chile).Week 3: Chile and Argentina (Atacama to Salta or Mendoza/Buenos Aires) - Choose: - North: San Pedro to Salta/Jujuy by bus; fly to Buenos Aires. - Or South: San Pedro–Calama flight to Santiago; bus or flight to Mendoza; onward to Buenos Aires.Connectivity notes (quick): - Cities: generally strong 4G/4G+; 5G in major hubs (Santiago, Buenos Aires). - Altitude/rural: expect long no‑signal stretches (Uyuni, altiplano passes, Paso Jama). - Bus Wi‑Fi: often advertised, rarely reliable. Plan to be offline onboard. - Border regions: networks switch; a multi‑country eSIM avoids sudden loss.eSIM vs local SIMs for a 4‑country tripFor a route with multiple borders and remote legs, eSIM wins on time and reliability.What a multi‑country eSIM gets you: - One plan across Peru, Bolivia, Chile, Argentina (check coverage per country on Destinations). - No passport/SIM registration queues at kiosks. - Keep your home number active on the physical SIM for calls/SMS codes. - Instant top‑ups if you burn data on photos or navigation.When a local SIM still helps: - Long stay in one country with heavy data use (e.g., a month in Buenos Aires). - Dead zones where a different local network performs better (rarely worth the hassle on a 3‑week pace).Practical approach: - Use an eSIM as your primary data line across all four countries. - If you find a specific local network far better in one region, add a cheap local SIM and keep the eSIM as backup.Device readiness checklist (before you fly)1) Check eSIM compatibility and SIM‑lock status on your phone.2) Buy and install your eSIM while on home Wi‑Fi. Keep a PDF/printed copy of the QR code.3) Label lines clearly (e.g., “eSIM Andes Data”, “Home SIM”).4) Turn on data roaming for the eSIM; leave roaming off for your home SIM to avoid charges.5) Set up dual‑SIM rules: data on eSIM; calls/SMS default to home SIM if needed.6) Download offline: Google Maps/Organic Maps for all target regions; language packs (Spanish at minimum); bus/air tickets; hotel confirmations.7) Cloud backups: set to upload on Wi‑Fi only; pre‑create shared albums for travel companions.8) Test tethering/hotspot with your laptop/tablet.If you’re transiting popular hubs, consider a short layover eSIM: - USA connections: add an Esim United States or a broader Esim North America.- Europe connections: Madrid/Barcelona? Use an Esim Spain. Paris or Rome? See Esim France and Esim Italy. Multi‑country layovers? Try Esim Western Europe.City‑by‑city connectivity notesCusco & the Sacred Valley (Peru)Coverage: Good in Cusco city; variable in high villages (Maras/Moray) and along Inca Trail approaches.Tips: Download Sacred Valley maps offline; pin viewpoints and ruins. most taxis use WhatsApp—save your accommodation’s number.Machu Picchu/Aguas Calientes: Patchy to none at the citadel. Upload your photos later; don’t rely on live ticket retrieval.Lake Titicaca: Puno and CopacabanaPuno: Reasonable 4G; bus terminals crowded—screenshot QR tickets.Crossing to Copacabana: Expect a signal drop around the border; have directions saved offline.La Paz (Bolivia)Good urban 4G; the cable car network has decent signal but tunnels do not.Yungas/“Death Road” tours: Mountain valleys cause dead zones—share your emergency contacts with the operator, carry a charged power bank, and don’t plan remote calls.Uyuni and the Altiplano (Bolivia to Chile)Uyuni town: OK 4G; ATMs finicky—use Wi‑Fi for banking apps.Salt flats/lagunas: Assume offline for most of the 3‑day tour. Guides often carry satellite phones; agree a pickup time/place in San Pedro and preload your map route.San Pedro de Atacama (Chile)Town: Solid 4G; accommodations often have Wi‑Fi but speeds vary.Geysers, Valle de la Luna: Offline navigation essential; sunrise trips start before mobile networks wake up in some areas.Salta/Jujuy or Mendoza/Buenos Aires (Argentina)Salta/Jujuy: Good city coverage; quebradas have long no‑signal sections.Mendoza: City 4G/5G; vineyards outside town can be patchy.Buenos Aires: Strong 4G/5G; ideal for cloud backups and large downloads before you fly home.Border crossings by bus: step‑by‑stepThe big ones on this route: Peru–Bolivia (Puno/Copacabana), Bolivia–Chile (Uyuni–San Pedro via Hito Cajón), Chile–Argentina (Paso Jama to Salta or Los Libertadores to Mendoza).How to keep service and sanity:1) The day before:- Top up your eSIM data.- Confirm your plan includes both countries you’re entering/leaving.- Download offline maps for both sides of the border and your town of arrival.- Save bus company WhatsApp and terminal address offline.2) On departure morning:- Keep a paper copy or offline PDF of tickets, insurance, and accommodation proof.- Charge phone and power bank; pack a short cable in your daypack.3) On the bus:- Don’t count on bus Wi‑Fi. Keep your eSIM as primary, but expect drops near mountain passes.- If your phone supports it, enable “Wi‑Fi calling” for later when you reach accommodation Wi‑Fi.4) At the border posts:- Data may be unavailable. Keep QR codes and booking numbers offline.- After exiting one country and entering the next, toggle Airplane Mode off/on to re‑register on the new network.- If the eSIM doesn’t attach, manually select a network in Mobile Settings.5) Arrival:- Send your accommodation a quick WhatsApp when you’re back online.- Recheck your eSIM’s data roaming is on; confirm you’re on an in‑country network, not a weak roaming partner.Pro tips: - Dual profiles: If your eSIM allows, keep a secondary profile for a different network in the same country—helpful in border towns.- Cash buffer: Some border terminals don’t accept cards; download a currency converter for offline use.Offline survival kit (5‑minute setup)Maps: Download regions for Cusco, Sacred Valley, Puno, La Paz, Uyuni, San Pedro, Salta/Jujuy or Mendoza, and Buenos Aires.Translations: Download Spanish for offline use; add phrasebook favourites (bus tickets, directions, dietary needs).Documents: Save PDFs of passports, tickets, hotel addresses; star them for quick access.Rides: Screenshots of pickup points; pin bus terminals and hotel doors.Entertainment: Podcasts and playlists for long bus legs, set to download on Wi‑Fi only.Altitude and your tech: what changesCoverage gaps lengthen: Fewer towers at high altitude; valleys can block signal. Assume offline on remote excursions.Batteries drain faster in cold: Keep your phone warm and carry a power bank (10,000–20,000 mAh).Hotel Wi‑Fi may be congested: Schedule big uploads (photo backups, app updates) for big-city stays like Santiago or Buenos Aires.GPS still works offline: Your blue dot shows on offline maps without data—preload everything.Data budgeting for 3 weeksTypical traveller usage across this route: - Messaging/Maps/Bookings: 0.2–0.5 GB/day- Social and photo sharing: 0.3–0.7 GB/day- Occasional video calls/streaming: 0.5–1.0 GB/dayFor a mixed-use trip, plan 15–25 GB for 3 weeks. Heavy creators should double it and upload over hotel Wi‑Fi when possible. If you work remotely, consider a higher‑capacity plan and a backup eSIM; see our guidance on For Business.Practical route with transport and connectivity cuesDays 1–4 Cusco base: Strong city signal; day trips may be spotty—go offline-ready.Days 5–6 Machu Picchu: Expect no service at the ruins; sync tickets ahead.Days 7–8 Puno to La Paz via Copacabana: Border signal drop; re‑register networks after crossing.Days 9–11 Uyuni tour to San Pedro: Treat as offline; charge nightly; carry spare cables.Days 12–14 San Pedro: Stable in town; tours offline; top up data before Paso Jama.Days 15–17 Salta/Jujuy or Mendoza: Good urban 4G; rural patches are offline.Days 18–21 Buenos Aires: Strongest connectivity of the trip; clear your uploads and map downloads for the flight home.Partnering and stopover extrasHospitality and tour operators in the Andes: help your guests stay connected—explore co‑branded solutions via our Partner Hub.Transatlantic flyers: test your eSIM setup on a layover with an Esim United States or Esim Western Europe before hitting high-altitude blackspots.FAQs1) Do I need a local SIM in each country?No. A multi‑country eSIM covering Peru, Bolivia, Chile and Argentina is simpler and works well for a 3‑week pace. Consider a local SIM only if you’ll spend longer in one country and want the absolute best regional coverage.2) Will my WhatsApp number change with an eSIM?No. WhatsApp is tied to your registered number, not your data line. Keep your home SIM active for voice/SMS (roaming off if you wish), and use the eSIM for data—WhatsApp continues as normal.3) Can I hotspot to my laptop or camera?Yes. Enable tethering on your eSIM. Mind your data: cloud backups and OS updates can burn gigabytes—set them to Wi‑Fi only or schedule in big cities.4) What if there’s no signal on the Uyuni/Atacama legs?That’s expected. GPS still works offline. Pre-download maps and translations, carry a power bank, and sync plans with your tour operator before departure.5) Will I get roaming charges at borders?If you’re using a multi‑country eSIM with coverage in both countries, you won’t incur extra roaming fees from your home carrier. Keep roaming off on your home SIM to avoid accidental use.6) I’m connecting via Europe or the US—worth getting a layover eSIM?Yes. It’s an easy way to test your setup and stay reachable. Try Esim North America or country options like Esim Spain, Esim France, or Esim Italy for common hubs.Next step: Browse South America coverage options and build your plan on Destinations.

Airport Setup Guides Series: New Articles for LHR, CDG, DXB, HND

Airport Setup Guides Series: New Articles for LHR, CDG, DXB, HND

Over the past year, thousands of Simology travellers told us the same thing: “I want my eSIM working before I leave the airport.” Today we’re launching a new series to make that effortless. Our airport eSIM setup guides are practical, on-the-ground walkthroughs that show you exactly where to connect to Wi‑Fi, the quickest spots to install, common pitfalls to avoid, and how to verify data is live before you step outside. We’re starting with four global hubs—London Heathrow (LHR), Paris Charles de Gaulle (CDG), Dubai International (DXB) and Tokyo Haneda (HND)—with many more to follow. Each guide includes checklists, terminal-specific tips, and fast fixes for activation hiccups. If your home or destination airport isn’t listed, you can request it in seconds via our Partner Hub. Read on to open the first four guides, pick the right regional plan for your route, and save time at the gate or baggage carousel.Why airport eSIM setup guides?Airports are busy, Wi‑Fi can be patchy, and activation screens vary by device and carrier. That combination often causes avoidable delays. Our goal is to eliminate guesswork by packaging the essentials you need—per airport, per terminal—so you can:Get online using free airport Wi‑Fi without hunting for instructions.Install and activate your eSIM while you wait for immigration or bags.Confirm data is flowing and apps sync before you leave arrivals.Avoid common issues (wrong line selected, APN mismatch, data roaming disabled).Each guide complements our country and regional pages like Esim France, Esim United States, Esim Western Europe and Esim North America. You can also browse all coverage options on Destinations.What’s inside each guideTerminal-by-terminal Wi‑Fi instructions and names of the networks to join.The quickest spots to install (quiet seating, power outlets, strong signal).Simple “before you land” and “after you land” checklists.Device-specific pointers for iOS and Android.Troubleshooting: QR not scanning, “No Service,” APN/APN reset, dual-SIM priority.Local notes: eSIM customs (e.g., data-only vs. voice), roaming caveats.A verification routine (speed, IP, messaging, maps) so you leave fully online.Read the first four guidesThe first airport eSIM setup guides are live now. Tap through for step‑by‑steps and terminal tips:London Heathrow (LHR): https://simology.io/guides/airport-esim-setup-lhrParis Charles de Gaulle (CDG): https://simology.io/guides/airport-esim-setup-cdgDubai International (DXB): https://simology.io/guides/airport-esim-setup-dxbTokyo Haneda (HND): https://simology.io/guides/airport-esim-setup-hndBelow are quick on‑arrival checklists from each guide to give you a feel for the format.LHR quick checklist (Heathrow)Before landing:Download your QR code or app profile to your device files/photos.In Mobile Data settings, name your eSIM line (e.g., “Simology Data”).On arrival:Join “Heathrow Wi‑Fi” (free). Use email or social login.Add eSIM: Settings > Mobile/Cellular > Add eSIM > Use QR or activation code.Turn on Data Roaming for the new line. Leave your primary line for calls only.APN usually auto‑configures. If needed, set APN as per your plan details.Test: open maps, run a quick speed test, message a contact.Where to install:Quiet bays by gates and near seating clusters with power. Signal is strong by most gate areas and landside cafés in Arrivals.Planning Europe beyond the UK? Consider Esim Western Europe to avoid juggling multiple local plans.CDG quick checklist (Paris Charles de Gaulle)Before landing:Save the QR in your Photos/Files app for offline access.Disable automatic line switching to prevent your home SIM taking priority.On arrival:Join “WIFI-AIRPORT” (Paris Aéroport free Wi‑Fi). Accept terms.Add and activate the eSIM. Enable Data Roaming for that line.If data shows but no browsing, toggle Airplane Mode off/on once.Verify navigation and translation apps load.Where to install:Airside seating with strong Wi‑Fi near the central concourses; landside cafés by Arrivals have reliable coverage.Going onward to Lyon, Nice, or Bordeaux? Start with Esim France or a regional pass like Esim Western Europe.DXB quick checklist (Dubai International)Before landing:Ensure your device is not carrier‑locked.Keep battery above 20% for activation/updates.On arrival:Join “DXB Free WiFi.” No password—accept the splash page.Add eSIM, enable Data Roaming for that line.Wait up to 2–3 minutes for initial network registration.If no data, restart the device once; confirm APN is set automatically.Where to install:Abundant seating and charging near most gates; strongest Wi‑Fi typically near food courts and central atriums in T3 and T1.HND quick checklist (Tokyo Haneda)Before landing:Screenshot your QR and plan info (in case Files doesn’t open offline).On arrival:Join “HANEDA-FREE-WIFI.” Accept terms.Add eSIM, enable Data Roaming. For Android, confirm Preferred SIM for data = eSIM.If captive portal interrupts activation, complete Wi‑Fi login first, then retry.Where to install:Quiet corners near baggage belts and landside seating; signage points to dedicated Wi‑Fi zones with better throughput.Connecting onwards to North America or back to Europe? Check Esim North America and Esim Western Europe. For US stays, see Esim United States.Quick‑start: install your eSIM over airport Wi‑FiFollow this universal sequence if you want to set up on arrival:1) Before you fly- Buy and add your plan to your device wallet or have the QR code saved offline.- Update iOS/Android and carrier settings at home on stable Wi‑Fi.- If you rely on your physical SIM for calls/OTP, keep it as the “Primary” line and plan to use the eSIM for data only.2) Connect to airport Wi‑Fi- Join the official free network (names above). Complete any splash page.- If the portal blocks QR scanning within the camera view, open the native Settings > Add eSIM flow and choose “Use QR code” or “Enter details manually”.3) Add and activate- iPhone: Settings > Mobile Data > Add eSIM > Use QR/Convert/Enter details.- Android (varies): Settings > Network & Internet > SIMs/eSIMs > Download a SIM.- Select the eSIM as your Mobile Data line. Turn on Data Roaming for that line only.4) Verify- Toggle Airplane Mode off/on once.- Check the status bar shows 4G/LTE/5G.- Browse a site, open maps, and send a message. Optional: run a lightweight speed test.5) If it doesn’t come up in 3 minutes- Restart device.- Re‑select the eSIM as the data line.- Check APN: if blank, enter the APN from your plan instructions.- Temporarily disable any VPN or Private Relay until after first data session.Pro tips from frequent flyersSave the QR: Screenshot it. Some camera apps won’t access Files when portals are open.Label your lines: Clear names (“Home Calls”, “Trip Data”) help you avoid wrong‑line data.Keep a tiny offline kit: A 30 cm USB cable and power bank. Activation sometimes coincides with a background OS update prompt.Prefer 4G first: If 5G is flaky, lock to 4G/LTE for the first hour, then re‑enable 5G.Wi‑Fi calling: If you need to receive calls on your home number, enable Wi‑Fi Calling before you travel.Multi‑country route: Choose a regional plan like Esim Western Europe or Esim North America to avoid repeated swaps, especially for rail or road trips across borders.Country pages: For deeper local notes, use Esim France, Esim Italy, Esim Spain, or Esim United States.Planning multi‑country tripsWestern Europe loop (UK–France–Italy–Spain): A single Esim Western Europe plan typically covers this route with one activation and one APN.North America triangle (US–Canada–Mexico): Pick Esim North America to keep data live across borders and airports.City breaks: If you’re staying within one country, the local pages—Esim France, Esim Italy, Esim Spain, Esim United States—include plan sizes suited to weekend and week‑long trips.Stopovers: If you’re simply transiting through DXB or HND, install on airport Wi‑Fi there but keep your regional plan for the main destination.Explore coverage and pricing on Destinations.For teams and partnersTravel managers and crewPre‑deploy QR codes and brief your teams with airport‑specific steps.Our guides are written so non‑technical travellers can activate without support calls.Learn more on For Business.OTAs, TMCs, airport servicesEmbed or co‑brand airport setup guidance alongside itineraries and lounges.Access assets and collaboration options via the Partner Hub.Request a guide we haven’t coveredTell us which airport to prioritise. Use the short form in our Partner Hub. Helpful details:Airport code(s) and which terminals you use most.Your device mix (iOS/Android) and any MDM constraints.Typical pain points (Wi‑Fi reliability, captive portals, APN issues).If you need co‑branded PDFs or internal training notes.We’ll email you when the guide goes live and add it to Destinations.FAQCan I install my eSIM before I fly?Yes. Installing at home on stable Wi‑Fi is ideal. Many plans only start the allowance when the eSIM first connects in‑country, so you won’t “use up” data until you land.Do I need airport Wi‑Fi to activate?It helps. Activation requires a small data session. If your physical SIM has data and roaming enabled, you can use that instead—but airport Wi‑Fi avoids roaming charges on your home line.My QR code won’t scan on the captive portal page—what now?Finish the Wi‑Fi portal login first, then open Settings > Add eSIM and choose “Enter details manually” or re‑scan from your saved screenshot/Files.I installed the eSIM but there’s “No Service.”Wait up to 3 minutes. If still offline: toggle Airplane Mode, ensure the eSIM is selected as the data line, enable Data Roaming for that line, and check APN entries. As a last step, restart the device.Will I still get calls on my home number?Yes, if your physical SIM stays active for calls and texts. Keep the eSIM as the data line. Consider enabling Wi‑Fi Calling to receive calls over airport Wi‑Fi if mobile signal is weak indoors.Which plan should I choose for multi‑city Europe or North America?For Europe, start with Esim Western Europe. For US/Canada/Mexico, use Esim North America. For single‑country stays, see Esim France, Esim Italy, Esim Spain, or Esim United States.What’s nextRead the first four airport eSIM setup guides (LHR, CDG, DXB, HND) and plan your activation spot before you land.Pick your coverage on Destinations, then save the QR to your phone for offline access.If your airport isn’t listed, request it via the Partner Hub.Next step: Explore plans and coverage on Destinations.

Data Saver & Compression: Stretch Your GB Without Losing Quality

Data Saver & Compression: Stretch Your GB Without Losing Quality

Travelling with a finite data allowance can be stressful—especially when maps, ride‑hailing, translation, and social apps all quietly sip from your gigabytes. The good news: you can reduce data usage travel‑wide without making your phone unusable or turning your photos into postage stamps. The trick is a layered approach: start with your phone’s OS‑level data saver, then tame background sync, set sensible quality for maps and streaming, and choose compression or “lite” modes where it counts. Do this once before you fly, and you’ll cut consumption by 30–70% while keeping the essentials fast and clear. Below you’ll find practical step‑by‑steps for iPhone and Android, app‑level switches that deliver the biggest wins, and a simple routine to keep you in control for the rest of your trip. If you need more data for a road trip or work, we also point you to regional eSIMs so you’re never caught short.Why data disappears faster abroadRoaming highlights how “chatty” smartphones are by default. Common culprits:Background app refresh, inbox syncing, and cloud photo backupsHD video auto‑play in social feedsHigh‑resolution map tiles and live trafficApp and OS updates, and automatic photo/video uploadsTethered laptops pulling down system updates and cloud filesCombine these with patchy hotel Wi‑Fi and you’ve got a perfect storm. The fix: constrain background activity, right‑size media quality, and pre‑download on Wi‑Fi.Step 1: Enable OS‑level Data SaverYour phone’s built‑in data saver is the single biggest switch to reduce data usage travel‑wide. It prioritises foreground tasks and reins in background sync.Android: Turn on Data Saver and whitelist essentialsSettings > Network & Internet (or Connections) > Data Saver.Toggle Data Saver On.Tap Unrestricted data (or “Unrestricted apps”) and allow only the must‑haves (e.g., maps, ride‑hailing, authenticator, airline app).Optional: Settings > Network & Internet > SIMs > Data usage > set a warning and a hard limit.Pro tips: - In Chrome: Settings > Privacy & security > Preload pages > No preloading (stops prefetching data you might not read). - Many Android skins let you disable auto‑sync globally under Accounts & backup. Use sparingly; whitelist what you genuinely need.iPhone: Use Low Data Mode on mobile and Wi‑FiSettings > Mobile Data > Mobile Data Options > Data Mode > Low Data Mode.For Wi‑Fi networks: Settings > Wi‑Fi > “i” next to the network > Low Data Mode On.Settings > App Store > Automatic Downloads: Off (or Mobile Data Off). Optional: turn off Video Autoplay.Pro tips: - iPhone doesn’t have per‑app whitelisting for Low Data Mode, so individually disable Mobile Data for apps you don’t need: Settings > Mobile Data > toggle apps Off. - Disable Background App Refresh for non‑essential apps: Settings > General > Background App Refresh > Off for specific apps (or Wi‑Fi only).Step 2: Control background sync and cloud uploadsThese run silently and can devour hundreds of MB per day if left unchecked.Checklist (Android and iPhone): - Email: Set to manual or longer fetch intervals. - iPhone: Settings > Mail > Accounts > Fetch New Data > Push Off; set Fetch to Hourly or Manual. - Android (Gmail): Gmail app > Menu > Settings > your account > Data usage > Sync Gmail Off (or limit labels). - Photos backup: - Google Photos: Profile > Photos settings > Backup > Mobile data usage Off (or limited). Enable “Back up only while charging” if offered. - iCloud Photos: Settings > Photos > Mobile Data Off; consider pausing Shared Library sync. - Messaging/media auto‑download: - WhatsApp: Settings > Storage and Data > Media auto‑download > set all to Wi‑Fi; toggle “Use less data for calls” On. - Telegram: Settings > Data and Storage > set auto‑download limits for Mobile Data to Low or None. - iMessage: Settings > Messages > Low Quality Image Mode On (sends smaller photos). - App updates: - Play Store: Profile > Settings > Network preferences > Auto‑update apps > Over Wi‑Fi only. - App Store: Settings > App Store > App Updates Off (or Mobile Data Off).Pro tip: - Turn off “Wi‑Fi Assist” (iPhone: Settings > Mobile Data > Wi‑Fi Assist Off) so your phone doesn’t silently switch to mobile data when hotel Wi‑Fi stutters.Step 3: Optimise maps and navigationMaps are essential on the road, but live tiles and satellite layers consume data quickly. Pre‑download and run lean during the day.Google Maps (Android/iOS)On Wi‑Fi, open Google Maps > profile photo > Offline maps.Tap Select your own map > zoom to cover your trip region > Download.Settings > Offline maps > Auto‑update Over Wi‑Fi only.During navigation, avoid Satellite view and 3D. Traffic uses modest data; keep it if you need it.Apple Maps (iOS 17+)On Wi‑Fi, Apple Maps > your profile image > Offline Maps > New Map.Select the region > Download. Toggle “Only download over Wi‑Fi”.While travelling, prefer offline routes; traffic and transit updates may require mobile data.Pro tips: - Save must‑visit places to a list before you go; cached details reduce lookups. - Ride‑hailing: Keep mobile data on for those apps only. They’re time‑sensitive and low‑volume compared to video.Step 4: Stream smarter (video, music, social)Right‑sizing quality saves most of the heavy lifting while staying watchable.VideoYouTube: Profile > Settings > Video quality preferences > On mobile networks: Lower picture quality. Consider 480p for travel days.Netflix: App > Menu > App Settings > Cellular Data Usage > Save Data. Downloads: set to Standard and pre‑download shows on Wi‑Fi.Disney+/Prime/others: Look for “Data Saver” or set Mobile Streaming to Medium/Standard.Rough guide:1080p uses ~3–7 GB per hour;720p ~1.5–3 GB per hour;480p ~0.7–1 GB per hour. Downgrading from 1080p to 480p can save 70–85%.Music and podcastsSpotify: Settings > Audio Quality > Streaming: Low/Normal on Mobile; Downloads: Normal. Toggle “Download using cellular” Off.Apple Music: Settings > Music > Mobile Data Off; or set Audio Quality > Streaming: High Efficiency on Mobile.Podcasts: Download episodes on Wi‑Fi only and disable “Allow Over Mobile Data”.Social appsInstagram: Settings > Data usage and media quality > Use less mobile data On; High‑quality uploads Off; Auto‑play videos On Wi‑Fi only.TikTok: Settings and privacy > Data Saver On; limit HD downloads.Facebook/Twitter/X: Disable auto‑play videos on mobile and set image upload quality to standard.Pro tip: - Batch‑download playlists and episodes on hotel Wi‑Fi each night; you’ll cruise through the next day with minimal mobile usage.Step 5: Browse with compression and “lite” modesModern sites are heavy. A few tweaks lighten the load:Opera/Opera Mini: Enable Data Savings/Compression to proxy and compress images, scripts, and videos—often 40–90% savings for browsing.Chrome (Android): Settings > Privacy & security > Preload pages > No preloading (stops background fetch).Reader Mode: Safari/Firefox Reader strips ads and scripts on articles, loading mostly text and a few images.Block auto‑play: In Safari (iOS), Settings > Accessibility > Motion > Auto‑Play Video Previews Off.Pro tip: - If a site offers a “lite”, “basic” or AMP version, favour it on mobile data.Step 6: Be careful when tethering laptopsLaptops can burn through a day’s allowance in minutes.Windows: Settings > Network & Internet > your mobile network > Set as metered connection On. Pause Windows Update and OneDrive sync.macOS: System Settings > Software Update > Automatic updates Off (temporarily). Photos > iCloud > Pause iCloud Photos. Disable Dropbox/OneDrive sync.Browsers: Disable auto‑play and heavy extensions. Save large downloads for Wi‑Fi.Pro tip: - When possible, use the mobile app instead of the desktop site; mobile apps are often more data‑efficient for the same task.Step 7: Measure and cap usageTrack what’s actually consuming your data and adjust.Android: Settings > Network & Internet > SIMs/Data usage > View per‑app usage; set warnings and limits.iPhone: Settings > Mobile Data > scroll for per‑app usage. Reset statistics at the start of your trip and review mid‑trip. Disable Mobile Data per app for hogs.Pro tip: - If you’re hotspotting, use your phone’s built‑in usage graph and the laptop’s metered settings together to stay under budget.When to pick a bigger plan (and where to get it)Even perfectly optimised settings can’t compress a navigation‑heavy road trip plus daily video calls. If your itinerary includes long drives, remote work, or family streaming, choose a plan with headroom:Planning a multi‑country jaunt? See Esim Western Europe for one pass across borders.City‑hopping in Italy, France or Spain? Check country packs: Esim Italy, Esim France, Esim Spain.Crossing the pond? Compare Esim North America and single‑country options like Esim United States.Browse all covered countries on Destinations.Travelling as a team or on expensed trips? Centralise and control usage with For Business. Partners and resellers can explore the Partner Hub.Quick “pre‑flight” checklist to reduce data usage travel‑wideTurn on Data Saver/Low Data Mode (mobile and Wi‑Fi).Set app and OS updates to Wi‑Fi only.Pre‑download offline maps for your route.Set video to 480p/“Data Saver”; music to Normal/Low on mobile.Disable auto‑play videos in social apps; limit media auto‑download in messengers.Pause cloud photo backups on mobile data.Set hotspot laptops to “metered” and pause large syncs/updates.Add Android data warning/limit or reset iPhone data counters.FAQ1) Will Data Saver affect call quality or WhatsApp calls? - Regular voice calls are unaffected. VoIP calls (WhatsApp/FaceTime Audio) use roughly 0.2–0.7 MB per minute. Data Saver may reduce background traffic, which can improve call stability on weak connections. In WhatsApp, enable “Use less data for calls” for extra savings.2) Do VPNs save data through compression? - Most consumer VPNs don’t reduce usage; encryption prevents proxy‑style compression. A few “accelerator” services compress images, but benefits are app/site‑dependent. Rely first on OS Data Saver and in‑app quality controls.3) Can I get live traffic when using offline maps? - Yes, but only when you have a data connection. Offline maps give you routing and POIs without data. Traffic overlays and real‑time rerouting require some connectivity; they’re modest in volume compared to streaming.4) How much do I save dropping video from 1080p to 480p? - Typically 70–85% per hour. Expect ~3–7 GB/h at 1080p vs ~0.7–1 GB/h at 480p, depending on the platform and codec.5) Best way to tame Instagram and TikTok on the road? - Turn on each app’s Data Saver, disable high‑quality uploads, and set video auto‑play to Wi‑Fi only. Limit background refresh and consider downloading stories/reels on Wi‑Fi if supported.6) Should I switch off 5G to save data? - 5G itself doesn’t use more data, but faster speeds can encourage heavier consumption (pages and videos load sooner at higher quality). If you find yourself burning through data, keep 5G but lock video quality and disable preloading/auto‑play.Next step: Choose the right regional eSIM with enough headroom for your trip on Destinations, then apply the settings above before you fly.