Keep WhatsApp & iMessage While Using a Data eSIM Abroad

Blog

Keep WhatsApp & iMessage While Using a...

Keep WhatsApp & iMessage While Using a Data eSIM Abroad

30 Oct 2025

Keep WhatsApp & iMessage While Using a Data eSIM Abroad

Travelling with a local data eSIM is the cheapest way to stay online. The worry: losing your WhatsApp or iMessage identity, missing OTPs, or triggering costly SMS activations. The good news is you can keep your home phone number on WhatsApp and iMessage while using a travel eSIM purely for data. The trick is line assignment: leave your home line for calls/SMS, set the eSIM as your data line, and avoid unnecessary reactivation prompts.

This guide shows you exactly how to do it on iPhone and Android, with step-by-step settings, what to tap when apps say “SIM changed”, and how to prepare backup codes so you’re never locked out. You’ll also find dual‑SIM examples for common trips and a quick troubleshooting section. If you’re heading to the US, Europe or beyond, pick an eSIM from Destinations and follow this playbook to keep your number, cut roaming costs, and stay reachable.

The simple rule: keep your number, switch your data

  • Keep your home SIM/eSIM active for calls and SMS (don’t remove it unless you’re certain you won’t need OTPs or calls).
  • Add a travel eSIM and assign it as the “Mobile Data”/“Preferred data” line.
  • Turn off data roaming on your home line to prevent surprise charges.
  • WhatsApp and iMessage will continue to use your home number over the travel eSIM’s internet connection.

Why this works: - WhatsApp is tied to the number you registered with, not the SIM providing data. As long as the app stays logged in and your device has internet, your WhatsApp identity stays the same. - iMessage and FaceTime can send/receive via your phone number and/or Apple ID email. Once activated on your number, iMessage continues to work over any internet connection.

Pre‑trip checklist (10 minutes now, hours saved later)

  • Confirm your phone is unlocked and supports eSIM/dual‑SIM.
  • Install critical updates for iOS/Android, WhatsApp, and Messages before you go.
  • Activate iMessage/FaceTime on your home number while still at home. Do not toggle iMessage off/on while abroad (it can trigger a paid international SMS).
  • WhatsApp:
  • Confirm you’re registered on your home number.
  • Enable two‑step verification and set your 6‑digit PIN with a recovery email.
  • Trigger a fresh chat backup (iCloud on iPhone, Google Drive on Android).
  • Two‑factor authentication:
  • Add an extra trusted number to your Apple ID, and note how to “Get Verification Code” from Settings offline.
  • For Android/Google services, generate and print/save your Google backup codes offline.
  • Add recovery methods for banks and key apps that send OTPs.
  • Decide your eSIM plan: single‑country or regional.
  • US trip: see Esim United States.
  • Western Europe: see Esim Western Europe or country packs like Esim France, Esim Italy, Esim Spain.
  • Multi‑country across US/Canada/Mexico: Esim North America.
  • Save your eSIM QR/activation details offline (PDF/screenshot in a secure note).
  • Label your lines clearly in your phone (Home vs Travel) to avoid slip‑ups.

Pro tip: Keep mobile data off on your home line. SMS usually works without data; you’ll still receive OTPs if your home number has roaming enabled for SMS. Check costs with your operator.

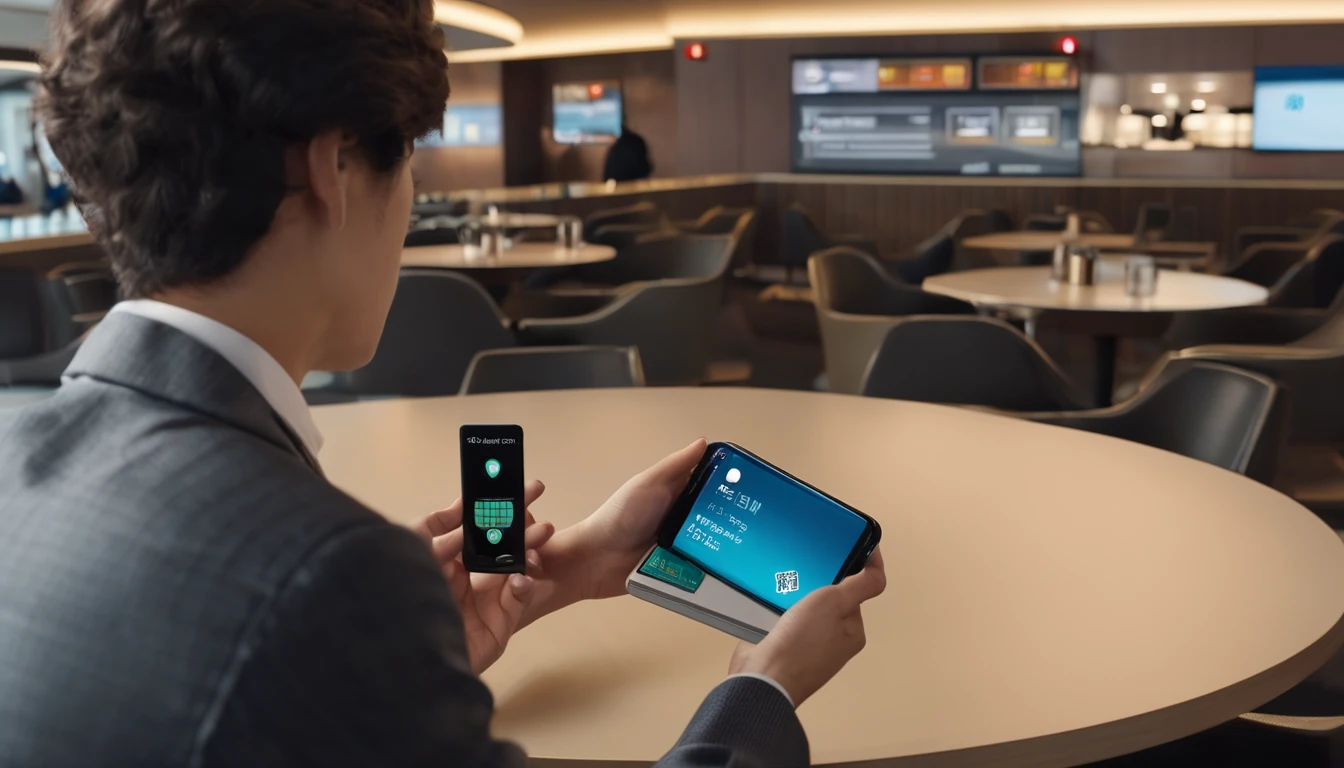
Set up on iPhone (dual‑SIM/eSIM)

1) Install and label your eSIM

  1. Settings > Mobile Service (or Cellular) > Add eSIM.
  2. Scan your eSIM QR or use the provider app.
  3. When asked to label, name them clearly: - Primary or Home = your home number - Travel = your eSIM data plan

2) Assign lines for data, calls and SMS

  1. Settings > Mobile Service: - Default Voice Line: Primary/Home (so your calls show your home number). - iMessage & FaceTime Line: Choose Primary/Home.
  2. Mobile Data: - Set Mobile Data = Travel (eSIM). - Turn off Allow Mobile Data Switching (keeps data strictly on the eSIM).
  3. For the Primary/Home line: - Turn off Data Roaming. - Leave the line enabled so SMS and calls can reach you.

Pro tip: For contacts who must always use your home number, set their per‑contact “Preferred Line” to Primary in the Contacts app.

3) iMessage and FaceTime settings that stick

  1. Settings > Messages: - iMessage: ON (already activated on your home number before travel). - Send & Receive: Tick your phone number and Apple ID email. Set “Start New Conversations From” to your phone number if you want continuity, or your Apple ID email if your number can’t activate while abroad.
  2. Settings > FaceTime: - Tick your phone number and Apple ID. Ensure your home number is active here too.

Avoid toggling iMessage or FaceTime OFF/ON while abroad. It can trigger a fresh activation SMS charged at international rates by your carrier.

4) WhatsApp: keep the same number

  • Open WhatsApp > Settings > Account > Two‑step verification: ensure it’s ON.
  • Do not use “Change Number” unless you are permanently changing numbers.
  • If WhatsApp shows “Did you change your number?” after it detects a SIM change, tap “No”.
  • If asked to re‑verify, only proceed if you can receive the SMS/voice call to your home number. Otherwise, force‑quit and reopen when you have signal for your home line or Wi‑Fi Calling.

Pro tip: Link WhatsApp Web/Companion on your laptop or tablet before you fly so you can keep chatting even if your phone is briefly offline.

Set up on Android (dual‑SIM/eSIM)

Android menus vary by brand, but the flow is similar.

1) Install and label your eSIM

  • Settings > Network & Internet > SIMs (or Connections > SIM Manager) > Add eSIM.
  • Label clearly: SIM 1 = Home, eSIM/SIM 2 = Travel.

2) Assign data, calls and SMS

  • Preferred SIM for:
  • Mobile data: Travel.
  • Calls: Home.
  • SMS: Home.
  • Turn off Data Roaming on the Home SIM.
  • Keep the Home SIM enabled so you can receive SMS/OTP.

Pro tip: Some Android phones let you choose SIM per contact in the dialler/Contacts. Set important contacts to always use your Home line.

3) Messages, RCS and Google account sanity checks

  • Google Messages (RCS chat features) may try to verify your number via SMS when re‑enabled. If prompted abroad, choose “Not now” to avoid a charge, or connect to Wi‑Fi with the Home SIM able to send one activation SMS.
  • Generate and save Google backup codes before you go, and add a recovery email/phone.

4) WhatsApp: same number, new data

  • Confirm WhatsApp is registered to your Home number.
  • Keep two‑step verification ON with your 6‑digit PIN.
  • If you see a SIM‑change prompt, choose “No” unless you’re truly changing numbers.
  • Re‑verification requires SMS/voice to your Home number; do this only when you have coverage and are comfortable with any roaming SMS cost.

Common prompts and how to respond

  • WhatsApp “Change number?” detected:
  • Choose “No”. You’re only using a different data connection, not changing identity.
  • iMessage wants to reactivate:
  • Don’t toggle iMessage/FaceTime while abroad.
  • If it deactivates unexpectedly, you can temporarily use your Apple ID email for send/receive, or reactivate knowing one international SMS may be charged by your carrier.
  • Google Messages RCS activation:
  • Select “Not now” and activate later on Wi‑Fi, or accept that one SMS may be sent.
  • SIM change notifications:
  • These are informational. As long as you don’t re‑register WhatsApp with a new number, your account stays tied to your Home number.

Pro tip: If you absolutely must remove your Home SIM, ensure every critical account has alternative 2FA (backup codes, authenticator app, recovery contacts) and that iMessage is set to send/receive via your Apple ID email.

Troubleshooting quick fixes

  • iMessage shows email instead of number:
  • Settings > Messages > Send & Receive: select your phone number. If it won’t tick, your Home line may lack coverage for activation. Use your Apple ID email temporarily and try activation later when the Home line has signal.
  • Not receiving WhatsApp codes:
  • Ensure the Home line is enabled and can receive SMS. Try voice call verification. If you can’t get the code, use WhatsApp Web on a linked device to stay connected until you can re‑verify.
  • Calls/SMS going out on the wrong line:
  • iPhone: Edit contact > Preferred Line, or long‑press the SIM label on the call screen.
  • Android: Set default SIM in the dialler or choose per call/SMS if prompted.
  • Data still draining on Home SIM:
  • iPhone: Settings > Mobile Data > turn off “Allow Mobile Data Switching”.
  • Android: Ensure Preferred Data SIM = Travel and Data Roaming is off on Home.
  • Can’t install eSIM:
  • Confirm your phone is carrier‑unlocked and eSIM‑capable. Reboot and retry. If travelling to the US, check compatibility with Esim United States guidance; for Europe, see Esim Western Europe.

Real‑world setups

  • One country, maximum simplicity:
  • Example: Weekend in Paris. Install a France data plan, set it as Mobile Data, keep your UK SIM for calls/SMS only. See Esim France.
  • Multi‑city Euro trip:
  • Example: Italy–Spain–France in one week. Use a regional plan so you don’t juggle multiple profiles. See Esim Western Europe or country packs like Esim Italy and Esim Spain.
  • North America loop:
  • Example: US and Canada. Use Esim North America and keep your home line for OTPs and inbound calls. If only the US, see Esim United States.
  • Business travellers:
  • Centralise policy and support so staff don’t toggle iMessage abroad or re‑register WhatsApp. Volume options are available For Business, and partners can access enablement via the Partner Hub.

Browse full coverage and plans on Destinations.

FAQ

  • Will people still see my usual number on WhatsApp?
  • Yes. WhatsApp identity stays tied to the number you registered. Using a travel eSIM only changes your data connection, not your WhatsApp number.
  • Do I need to use “Change Number” in WhatsApp when I travel?
  • No. Only use “Change Number” if you are permanently moving to a new number. For travel, keep your existing registration.
  • Can I remove my home SIM entirely?
  • You can, but you may lose access to SMS/OTP and iMessage number activation. It’s safer to keep the home line inserted and disable its data roaming. If you must remove it, set up backup codes, an authenticator app, and Apple/Google recovery options first.
  • Will iMessage charge me abroad?
  • iMessage itself uses data. However, (re)activating iMessage on a phone number can send one international SMS charged by your carrier. Activate before departure and avoid toggling while abroad.
  • Can I still receive SMS/OTP if data roaming is off on my home SIM?
  • Usually yes; SMS does not require data. Whether receiving SMS while roaming is charged depends on your carrier. Check your plan before you go.
  • WhatsApp asked me to verify again – what now?
  • Proceed only if your home number can receive the SMS/voice code. If not, wait until you have coverage or Wi‑Fi Calling, or use linked devices temporarily. Ensure two‑step verification is enabled to protect against SIM‑swap attacks.

Next step: Choose your travel eSIM and stay connected without losing your number. Start with Destinations.

Read more blogs

Andes Highlights (3 Weeks): Peru–Bolivia–Chile–Argentina Connectivity

Andes Highlights (3 Weeks): Peru–Bolivia–Chile–Argentina Connectivity

Planning a south america itinerary 3 weeks through the high Andes? This route stitches together Peru’s Sacred Valley, Bolivia’s La Paz and Salar de Uyuni, Chile’s Atacama Desert, and northern Argentina’s quebradas or Mendoza wine country—often by long-distance bus and a couple of short flights. Connectivity is different at altitude: coverage is strong in cities but drops in high passes and salt flats; bus Wi‑Fi is patchy; border towns can be blackspots. The smart move is an eSIM with multi‑country coverage, backed by offline maps, offline translations, and a simple routine for crossing borders by bus without losing service. Below you’ll find a practical, connectivity-first itinerary; checklists to prep your phone, apps and documents; and on-the-ground tips for staying online where it matters: booking transport, hailing taxis, backing up photos, and navigating when the signal disappears.If you’re transiting via Europe or North America, you can also add a layover eSIM to stay connected door-to-door. Start with our country list on Destinations, then follow the steps, and you won’t waste time chasing SIM shops at 3,500 metres.The 3‑week Andes route at a glanceWeek 1: Peru (Cusco, Sacred Valley, Machu Picchu) - Fly into Cusco (or Lima then connect). - Base in Cusco; day trips to Pisac/Chinchero/Maras–Moray. - Train to Aguas Calientes; Machu Picchu visit; return to Cusco or continue to Puno/Lake Titicaca.Week 2: Bolivia and Chile (La Paz, Uyuni, San Pedro de Atacama) - Bus/collectivo via Copacabana to La Paz. - Fly or overnight bus to Uyuni. - 3‑day Uyuni–altiplano tour ending in San Pedro de Atacama (Chile).Week 3: Chile and Argentina (Atacama to Salta or Mendoza/Buenos Aires) - Choose: - North: San Pedro to Salta/Jujuy by bus; fly to Buenos Aires. - Or South: San Pedro–Calama flight to Santiago; bus or flight to Mendoza; onward to Buenos Aires.Connectivity notes (quick): - Cities: generally strong 4G/4G+; 5G in major hubs (Santiago, Buenos Aires). - Altitude/rural: expect long no‑signal stretches (Uyuni, altiplano passes, Paso Jama). - Bus Wi‑Fi: often advertised, rarely reliable. Plan to be offline onboard. - Border regions: networks switch; a multi‑country eSIM avoids sudden loss.eSIM vs local SIMs for a 4‑country tripFor a route with multiple borders and remote legs, eSIM wins on time and reliability.What a multi‑country eSIM gets you: - One plan across Peru, Bolivia, Chile, Argentina (check coverage per country on Destinations). - No passport/SIM registration queues at kiosks. - Keep your home number active on the physical SIM for calls/SMS codes. - Instant top‑ups if you burn data on photos or navigation.When a local SIM still helps: - Long stay in one country with heavy data use (e.g., a month in Buenos Aires). - Dead zones where a different local network performs better (rarely worth the hassle on a 3‑week pace).Practical approach: - Use an eSIM as your primary data line across all four countries. - If you find a specific local network far better in one region, add a cheap local SIM and keep the eSIM as backup.Device readiness checklist (before you fly)1) Check eSIM compatibility and SIM‑lock status on your phone.2) Buy and install your eSIM while on home Wi‑Fi. Keep a PDF/printed copy of the QR code.3) Label lines clearly (e.g., “eSIM Andes Data”, “Home SIM”).4) Turn on data roaming for the eSIM; leave roaming off for your home SIM to avoid charges.5) Set up dual‑SIM rules: data on eSIM; calls/SMS default to home SIM if needed.6) Download offline: Google Maps/Organic Maps for all target regions; language packs (Spanish at minimum); bus/air tickets; hotel confirmations.7) Cloud backups: set to upload on Wi‑Fi only; pre‑create shared albums for travel companions.8) Test tethering/hotspot with your laptop/tablet.If you’re transiting popular hubs, consider a short layover eSIM: - USA connections: add an Esim United States or a broader Esim North America.- Europe connections: Madrid/Barcelona? Use an Esim Spain. Paris or Rome? See Esim France and Esim Italy. Multi‑country layovers? Try Esim Western Europe.City‑by‑city connectivity notesCusco & the Sacred Valley (Peru)Coverage: Good in Cusco city; variable in high villages (Maras/Moray) and along Inca Trail approaches.Tips: Download Sacred Valley maps offline; pin viewpoints and ruins. most taxis use WhatsApp—save your accommodation’s number.Machu Picchu/Aguas Calientes: Patchy to none at the citadel. Upload your photos later; don’t rely on live ticket retrieval.Lake Titicaca: Puno and CopacabanaPuno: Reasonable 4G; bus terminals crowded—screenshot QR tickets.Crossing to Copacabana: Expect a signal drop around the border; have directions saved offline.La Paz (Bolivia)Good urban 4G; the cable car network has decent signal but tunnels do not.Yungas/“Death Road” tours: Mountain valleys cause dead zones—share your emergency contacts with the operator, carry a charged power bank, and don’t plan remote calls.Uyuni and the Altiplano (Bolivia to Chile)Uyuni town: OK 4G; ATMs finicky—use Wi‑Fi for banking apps.Salt flats/lagunas: Assume offline for most of the 3‑day tour. Guides often carry satellite phones; agree a pickup time/place in San Pedro and preload your map route.San Pedro de Atacama (Chile)Town: Solid 4G; accommodations often have Wi‑Fi but speeds vary.Geysers, Valle de la Luna: Offline navigation essential; sunrise trips start before mobile networks wake up in some areas.Salta/Jujuy or Mendoza/Buenos Aires (Argentina)Salta/Jujuy: Good city coverage; quebradas have long no‑signal sections.Mendoza: City 4G/5G; vineyards outside town can be patchy.Buenos Aires: Strong 4G/5G; ideal for cloud backups and large downloads before you fly home.Border crossings by bus: step‑by‑stepThe big ones on this route: Peru–Bolivia (Puno/Copacabana), Bolivia–Chile (Uyuni–San Pedro via Hito Cajón), Chile–Argentina (Paso Jama to Salta or Los Libertadores to Mendoza).How to keep service and sanity:1) The day before:- Top up your eSIM data.- Confirm your plan includes both countries you’re entering/leaving.- Download offline maps for both sides of the border and your town of arrival.- Save bus company WhatsApp and terminal address offline.2) On departure morning:- Keep a paper copy or offline PDF of tickets, insurance, and accommodation proof.- Charge phone and power bank; pack a short cable in your daypack.3) On the bus:- Don’t count on bus Wi‑Fi. Keep your eSIM as primary, but expect drops near mountain passes.- If your phone supports it, enable “Wi‑Fi calling” for later when you reach accommodation Wi‑Fi.4) At the border posts:- Data may be unavailable. Keep QR codes and booking numbers offline.- After exiting one country and entering the next, toggle Airplane Mode off/on to re‑register on the new network.- If the eSIM doesn’t attach, manually select a network in Mobile Settings.5) Arrival:- Send your accommodation a quick WhatsApp when you’re back online.- Recheck your eSIM’s data roaming is on; confirm you’re on an in‑country network, not a weak roaming partner.Pro tips: - Dual profiles: If your eSIM allows, keep a secondary profile for a different network in the same country—helpful in border towns.- Cash buffer: Some border terminals don’t accept cards; download a currency converter for offline use.Offline survival kit (5‑minute setup)Maps: Download regions for Cusco, Sacred Valley, Puno, La Paz, Uyuni, San Pedro, Salta/Jujuy or Mendoza, and Buenos Aires.Translations: Download Spanish for offline use; add phrasebook favourites (bus tickets, directions, dietary needs).Documents: Save PDFs of passports, tickets, hotel addresses; star them for quick access.Rides: Screenshots of pickup points; pin bus terminals and hotel doors.Entertainment: Podcasts and playlists for long bus legs, set to download on Wi‑Fi only.Altitude and your tech: what changesCoverage gaps lengthen: Fewer towers at high altitude; valleys can block signal. Assume offline on remote excursions.Batteries drain faster in cold: Keep your phone warm and carry a power bank (10,000–20,000 mAh).Hotel Wi‑Fi may be congested: Schedule big uploads (photo backups, app updates) for big-city stays like Santiago or Buenos Aires.GPS still works offline: Your blue dot shows on offline maps without data—preload everything.Data budgeting for 3 weeksTypical traveller usage across this route: - Messaging/Maps/Bookings: 0.2–0.5 GB/day- Social and photo sharing: 0.3–0.7 GB/day- Occasional video calls/streaming: 0.5–1.0 GB/dayFor a mixed-use trip, plan 15–25 GB for 3 weeks. Heavy creators should double it and upload over hotel Wi‑Fi when possible. If you work remotely, consider a higher‑capacity plan and a backup eSIM; see our guidance on For Business.Practical route with transport and connectivity cuesDays 1–4 Cusco base: Strong city signal; day trips may be spotty—go offline-ready.Days 5–6 Machu Picchu: Expect no service at the ruins; sync tickets ahead.Days 7–8 Puno to La Paz via Copacabana: Border signal drop; re‑register networks after crossing.Days 9–11 Uyuni tour to San Pedro: Treat as offline; charge nightly; carry spare cables.Days 12–14 San Pedro: Stable in town; tours offline; top up data before Paso Jama.Days 15–17 Salta/Jujuy or Mendoza: Good urban 4G; rural patches are offline.Days 18–21 Buenos Aires: Strongest connectivity of the trip; clear your uploads and map downloads for the flight home.Partnering and stopover extrasHospitality and tour operators in the Andes: help your guests stay connected—explore co‑branded solutions via our Partner Hub.Transatlantic flyers: test your eSIM setup on a layover with an Esim United States or Esim Western Europe before hitting high-altitude blackspots.FAQs1) Do I need a local SIM in each country?No. A multi‑country eSIM covering Peru, Bolivia, Chile and Argentina is simpler and works well for a 3‑week pace. Consider a local SIM only if you’ll spend longer in one country and want the absolute best regional coverage.2) Will my WhatsApp number change with an eSIM?No. WhatsApp is tied to your registered number, not your data line. Keep your home SIM active for voice/SMS (roaming off if you wish), and use the eSIM for data—WhatsApp continues as normal.3) Can I hotspot to my laptop or camera?Yes. Enable tethering on your eSIM. Mind your data: cloud backups and OS updates can burn gigabytes—set them to Wi‑Fi only or schedule in big cities.4) What if there’s no signal on the Uyuni/Atacama legs?That’s expected. GPS still works offline. Pre-download maps and translations, carry a power bank, and sync plans with your tour operator before departure.5) Will I get roaming charges at borders?If you’re using a multi‑country eSIM with coverage in both countries, you won’t incur extra roaming fees from your home carrier. Keep roaming off on your home SIM to avoid accidental use.6) I’m connecting via Europe or the US—worth getting a layover eSIM?Yes. It’s an easy way to test your setup and stay reachable. Try Esim North America or country options like Esim Spain, Esim France, or Esim Italy for common hubs.Next step: Browse South America coverage options and build your plan on Destinations.

How to Set Up an eSIM on Samsung Galaxy S24/S25

How to Set Up an eSIM on Samsung Galaxy S24/S25

Travelling with a Samsung Galaxy S24 or S25? Good news: both flagships support eSIM, so you can add a local data plan in minutes without swapping plastic SIMs. This guide walks you through samsung esim setup step by step for each device series, explains the three activation methods you’ll see (QR code, manual entry, carrier app), and shows how to run dual-SIM smartly while abroad. You’ll also find a practical troubleshooting checklist and region-specific tips to pick the right plan before you fly. If you’re new to eSIM, don’t worry — the process is quick once you know where to tap, and you can store multiple eSIMs on your phone, switching them on and off as you travel. Keep this page handy when you land, connect to Wi‑Fi, and you’ll be online in under five minutes.Explore ready-to-use travel plans for popular regions via our Destinations hub, or jump straight to curated bundles like Esim United States, Esim France, Esim Italy, Esim Spain, Esim Western Europe and Esim North America.Before you start: quick checklistWi‑Fi or a stable data connection for download and activation.Your eSIM QR code or activation details (SM-DP+ address, activation code).Phone battery above 30%.Phone unlocked from your carrier (if it’s carrier-locked, you can’t add non-approved eSIMs).Latest software installed: Settings > Software update > Download and install.Note your EID (sometimes required by providers): Settings > About phone > Status information > EID.Tip: Save your eSIM QR code to another device or print it. You’ll need to scan it using your phone.Confirm your Galaxy model and softwareSamsung’s menus vary slightly by One UI version.Galaxy S24/S24+/S24 Ultra (One UI 6/6.1): eSIM lives under Settings > Connections > SIM manager.Galaxy S25/S25+/S25 Ultra (One UI 7+): wording may show as SIM manager or SIMs, still under Settings > Connections.Most S24/S25 variants support multiple eSIM profiles stored and two lines active at once. Active combinations can vary by region/carrier: - Common: 1 physical nano-SIM + 1 eSIM active simultaneously. - On many variants: 2 eSIMs can be active simultaneously (Dual SIM Dual Standby). To confirm, open Settings > Connections > SIM manager: you’ll see available SIMs and which combinations can be toggled on together.Samsung eSIM setup on Galaxy S24 seriesFollow these steps on S24, S24+ and S24 Ultra.1) Open Settings. 2) Tap Connections. 3) Tap SIM manager. 4) Tap Add eSIM (or Add mobile plan). 5) Choose your method: - Scan QR code. - Enter activation code (manual SM-DP+). - Use via carrier/app (if your provider supports in‑app download). 6) Wait for download and installation (1–3 minutes). Stay on Wi‑Fi. 7) When prompted, label the eSIM (e.g., “Spain eSIM”). 8) Set defaults: - Mobile data: choose the travel eSIM. - Calls/Messages: keep your home SIM if you want your usual number active. 9) Turn on Data roaming for the travel eSIM (Settings > Connections > Mobile networks > Data roaming). 10) Toggle off Data roaming on your home SIM to avoid accidental charges.Samsung eSIM setup on Galaxy S25 seriesOn S25, S25+ and S25 Ultra, the flow is nearly identical, with minor wording changes.1) Open Settings. 2) Tap Connections. 3) Tap SIM manager (or SIMs). 4) Tap Add eSIM (or Add mobile plan). 5) Select your activation method: - Scan QR code. - Enter details manually (SM-DP+ and activation code). - From carrier/app (if available). 6) Keep Wi‑Fi on while the plan downloads and activates. 7) Name the line and set: - Preferred SIM for mobile data. - Preferred SIM for calls/messages. 8) Enable Data roaming for the travel eSIM; disable it on your home SIM.Note: On both S24 and S25, you can change these defaults anytime via Settings > Connections > SIM manager.Three ways to activate your eSIMScan a QR code (most common)On your Samsung, go to Settings > Connections > SIM manager > Add eSIM > Scan QR code.Point the camera at the QR from your eSIM provider.Confirm installation, label the plan, and set data/call preferences.If prompted for a confirmation code or PIN, enter the one provided with your eSIM.Enter details manually (SM-DP+)If you have text details instead of a QR:Settings > Connections > SIM manager > Add eSIM > Enter activation code.Enter the SM-DP+ address, activation code and (if required) confirmation code exactly as given.Proceed to install and set preferences.Use a carrier/app downloadSome providers support direct download via their app or via “Use via carrier”:Install the provider’s app over Wi‑Fi.Sign in and follow prompts to “Add mobile plan/eSIM” on your Samsung.Approve installation when the system dialog appears.Travel setup that just works: data on eSIM, calls on home SIMTo minimise roaming costs and keep your number reachable:Set Mobile data to the travel eSIM.Toggle Data roaming ON for the travel eSIM; OFF for your home SIM.Keep Calls and Messages on your home SIM if you want continuity.Enable Wi‑Fi Calling for your home SIM when supported (Settings > Connections > Wi‑Fi Calling), so you can receive calls/messages over Wi‑Fi without roaming.For Europe trips spanning multiple countries, look at Esim Western Europe. For multi-country hops across the US and Canada, see Esim North America.Managing two lines (dual-SIM) on SamsungRename lines for clarity: Settings > Connections > SIM manager > tap each SIM > Edit name/colour.Choose per‑contact default line in the Phone/Contacts app, or pick “Ask every time” for calls.Control which line uses data: SIM manager > Mobile data.Turn a SIM on/off without deleting it: SIM manager > toggle the switch next to the line.Store multiple eSIMs for future trips, then activate only the one you need.Pro tip: If your device supports two active eSIMs, you can run “Work” and “Travel” eSIMs together — handy for business trips. If you’re equipping a team, explore centralised options via For Business.Troubleshooting: fast fixesIf activation fails or you don’t get data, try these in order:1) Use solid Wi‑Fi, not mobile data, to download the eSIM. 2) Check date/time are automatic: Settings > General management > Date and time. 3) Reboot after installation. 4) Ensure the eSIM is toggled ON in SIM manager. 5) Set Mobile data to the eSIM and enable Data roaming on that line. 6) Network mode: set to 5G/LTE/3G/2G (auto) or LTE/3G/2G if 5G causes issues. Settings > Connections > Mobile networks > Network mode. 7) APN: if data connects but no internet, add the APN provided by your eSIM vendor: - Settings > Connections > Mobile networks > Access Point Names > Add. - Enter Name/APN exactly as provided, save, and select it. 8) Airplane mode ON for 10 seconds, then OFF. 9) Clear and re-add: Delete the eSIM profile and reinstall from the QR/activation code. 10) Carrier lock check: If “Add eSIM” is missing or you see “This device is locked,” contact your original carrier to unlock. 11) EID requirement: Some providers need your EID to push the plan. Find it under Settings > About phone > Status information > EID.Still stuck? Ensure your plan covers the country you’re in. Browse by country via Destinations, or pick region-ready options like Esim United States or Esim Spain.Picking the right plan for your tripUSA city breaks and road trips: choose Esim United States for nationwide coverage.Paris, Lyon, Côte d’Azur: start with Esim France.Rome, Florence, Amalfi: go with Esim Italy.Barcelona, Madrid, Andalusia: try Esim Spain.Pan‑European itineraries: Esim Western Europe keeps you connected across borders.US + Canada circuits: pick Esim North America.Partners and agencies managing multiple travellers can streamline procurement via our Partner Hub.Pro tips for smooth travel dataInstall and test the eSIM on Wi‑Fi before you fly, but don’t enable data roaming until you land.Download offline maps and key apps while on hotel Wi‑Fi to save data.Keep your QR/activation code somewhere safe for reinstallation if needed.Battery saver: if coverage is patchy, temporarily set Network mode to LTE/3G/2G to reduce 5G hunting.WhatsApp usually follows the account you set up originally, not your current data SIM. You can keep using WhatsApp on your home number while your eSIM handles data.When leaving a country, switch your Mobile data back to your home SIM or your next eSIM, and toggle Data roaming accordingly.FAQQ1) Can the Galaxy S24/S25 run two eSIMs at the same time?A) Many variants support two active lines at once, and on numerous models this can be “2 eSIMs active” or “1 eSIM + 1 physical SIM.” The exact combination depends on your region/carrier. Check Settings > Connections > SIM manager to see available toggles on your unit.Q2) How many eSIMs can I store on my Samsung?A) You can store multiple eSIM profiles (varies by model, typically 5+), but only two lines can be active simultaneously. You can turn profiles on/off without deleting them.Q3) Do I need to enable data roaming for my travel eSIM?A) Yes, outside the eSIM’s “home” country you typically must enable Data roaming for that eSIM. Keep Data roaming OFF on your home SIM to avoid charges.Q4) Will my home number still receive calls and texts?A) If you leave your home SIM active for calls/messages, you can continue receiving them (charges may apply if roaming). Use Wi‑Fi Calling where available to reduce costs, or set Calls/Messages to the eSIM if you’ve ported/forwarded your number.Q5) My eSIM installed, but data doesn’t work. What now?A) Set the eSIM as Mobile data, enable Data roaming on that line, and verify APN settings from your provider. Try a reboot, toggle airplane mode, and check network mode. If needed, delete and reinstall the eSIM.Q6) Can I move an eSIM from my old phone to my new Samsung?A) Most eSIMs are one‑device installs. Use “Transfer” only if your provider supports it; otherwise request a new QR/activation code from your provider. Delete the profile from the old phone once the new one is active.Next stepPick your destination and add your plan in minutes. Start with Destinations — or, if you’re touring multiple countries, go straight to Esim Western Europe.

Private APN & Enterprise Security: When and Why to Use It

Private APN & Enterprise Security: When and Why to Use It

Mobile data isn’t just “internet in your pocket.” For enterprises with roaming staff, payment terminals, or IoT fleets, the path your traffic takes is a security control. A private APN creates a closed data path from SIMs to your network, letting you enforce policy, isolate traffic from the public internet, and integrate cleanly with VPNs or zero-trust tools. This guide explains what private APNs are, when to use them, how they work with VPNs, typical use cases, what they cost, and how to deploy successfully—without jargon.If your teams travel, the stakes go up: roaming adds new networks, new attack surfaces, and variable policies. A well-designed private APN keeps device traffic predictable and governable across borders. Whether you’re connecting laptops via eSIM, securing field equipment across Esim Western Europe, or building a partner-ready solution via our Partner Hub, the right APN choice determines how easily you can meet audit, compliance, and uptime targets.Use this as a practical checklist to decide if a private APN fits—and how to keep costs and complexity under control.What is a Private APN?A private APN (Access Point Name) is a carrier-side configuration that defines how SIM traffic is handled. Rather than breaking out to the public internet using NAT on a generic, shared APN, a private APN:Identifies your SIMs into a dedicated routing contextAssigns private/static IP ranges if requiredApplies custom firewall, DNS and content policiesDelivers traffic to you over a defined path (e.g., IPsec/GRE to your DC/cloud)Think of it as “your own lane” inside the mobile core, with enterprise-grade traffic isolation and policy controls.Key benefitsTraffic isolation: Your devices don’t share a public NAT pool with everyone else.Predictable addressing: Private or static IPs allow IP allowlisting and system-to-system integrations.Policy enforcement: Apply DNS filtering, firewall rules, and segmentation per SIM group.Controlled breakout: Choose where traffic exits—your data centre, cloud VPC, or a regional gateway.Common variantsPrivate APN with public breakout: Policy and IP control, but final internet egress is via carrier NAT.Private APN with private breakout: End-to-end private path to your network over IPsec/GRE/MPLS; no public internet until you decide.Roaming home routing vs local breakout: Decide whether traffic tunnels back to a home gateway or breaks out regionally for latency/compliance.When should you use a Private APN?Choose a private APN when one or more of these apply:You must IP-allowlist mobile devices to access corporate apps, SCADA, or payment backends.You need to block open internet access by default, allowing only approved destinations.You require consistent, auditable logs of device egress and DNS activity.You deploy IoT/OT fleets where devices are headless and should never be internet-reachable.You need static or reserved IPs per SIM for device-to-cloud rules or legacy systems.You’re operating in higher-risk or compliance-heavy sectors (finance, health, critical infrastructure).Travel scenarios where it shines:Regional workforces moving between the US, Canada and Mexico using Esim North AmericaTeams rotating across France, Italy and Spain with Esim France, Esim Italy and Esim SpainShort-term projects needing fast onboarding in the US via Esim United StatesCheck your target countries and carriers via Destinations.Private APN vs VPN vs Zero TrustThese are complementary, not either/or.Private APN: Carrier-layer isolation and policy. Ensures trusted device identity (SIM/IMSI), private addressing, and controlled gateways.VPN (IPsec/GRE/SSL): Secure tunnel from APN gateway to your network or cloud VPC. Use to terminate traffic into your security stack.Zero Trust/SASE: Identity-driven access per user/device/app. Often layered on top (device certificate, posture checks) for user devices.Recommended patternsCorporate laptops/phones on the roadPrivate APN + clientless approach: Route all traffic via your gateway where CASB/SWG runs.Or Private APN + device VPN: Enforce split tunnel for corporate apps; APN blocks all other internet.IoT/OT equipmentPrivate APN with private breakout to your VPC/DC; no public internet access.Partners/contractorsPrivate APN with segmented SIM groups and per-segment firewall policies; issue time-bound SIMs.Pro tips: - Avoid double encryption where unnecessary. If APN-to-cloud IPsec is in place and devices only talk to your internal services, you may not need device-level VPN. - Use device certificates via MDM/EMM for user hardware. The APN identifies the SIM; your MDM identifies the device.Security controls you actually getIdentity and segmentationSIM/IMSI-based policies and groupsOptional IMEI binding for device lockAddressingPrivate RFC1918 subnets, with optional static IPs per SIMCGNAT or 1:1 NAT as neededFirewallingDefault deny; allow only required FQDNs/IPs/portsGeo or ASN-based controls for sensitive backendsDNSForce safe resolvers; block DNS-over-HTTPS egressUse internal resolver via tunnel for split-horizon domainsLogging and SIEMPer-SIM flow logs and DNS logs exported to your SIEMDDoS postureWith private breakout, you decide internet egress; with public breakout, leverage carrier scrubbingRoaming and travel: what to plan forLatency vs controlHome routing centralises control but adds RTT from, say, Tokyo to a London gateway.Regional breakout (e.g., EU vs US gateways) reduces latency for users on Esim Western Europe or Esim North America.Regulatory constraintsSome countries restrict VPN or enforce local breakout. Match your APN design to the route permitted in the destination. Confirm on Destinations.IP allowlists and roaming IPsIf you rely on static source IPs, avoid scenarios where roaming uses dynamic CGNAT or changes egress country by country. Private breakout fixes this by presenting consistent IP space.Device onboarding during traveleSIM QR provisioning helps. Pre-stage profiles for each region (e.g., Esim France for an EU tour, Esim United States for US trips).Cost model: what you’ll actually payExpect costs in these buckets:One-off setupAPN configuration, IP ranges, SIM group policies, initial tunnel(s)Monthly platform feeCovers APN gateway capacity, monitoring, and managementPer-SIM chargeOften tiered; sometimes includes static IP optionsData usagePooled or per-SIM; roaming may have regional ratesTunnels and hostingIPsec/GRE tunnel endpoints in your DC/VPC; cloud egress costs may applyChange management/professional servicesPolicy updates, incident support, new region gatewaysWays to optimise: - Start with a private APN + public breakout for policy control; add private breakout later for critical apps. - Use regional gateways to avoid transatlantic hairpin data charges for travellers. - Reserve static IPs only for systems that truly need allowlists; use dynamic private IPs elsewhere. - Monitor top talkers; block chatty apps at APN firewall instead of paying for unnecessary data.Quick decision checklist: do you need a private APN?Tick “yes” if the statement is true:We must restrict mobile devices from open internet by default.We rely on IP allowlists for any critical app or third-party API.We need device fleet observability (per-SIM traffic and DNS logs).We operate IoT or unattended devices that should never be publicly reachable.We have travellers across multiple regions and require consistent egress policies.We must meet compliance or audit requirements for network segregation.Three or more “yes” answers usually justify a private APN.Implementation: step-by-step1) Define scope and risk - List device types (laptops, phones, IoT), users, and data sensitivity. - Map apps/domains/ports that must be reachable. - Decide “deny-by-default” vs “allow-by-default”.2) Choose coverage and form factor - Confirm countries and networks via Destinations. - Select regional plans (e.g., Esim North America or Esim Western Europe) and country add-ons (Esim Italy, Esim Spain).3) Addressing and segmentation - Allocate private subnets per SIM group (e.g., staff vs IoT). - Decide where static IPs are required.4) Breakout architecture - Start with private APN + public breakout if you only need policy/DNS controls. - For maximum control, deploy private breakout to your DC/cloud via IPsec/GRE. - If latency matters for travellers, request EU and US gateways.5) Security policy and DNS - Set default deny; allow only business apps/domains. - Enforce DNS to your resolvers; block DoH/DoT egress except approved endpoints. - Add geo/ASN blocks for risky destinations if relevant.6) Integrate identity and device posture - Bind SIMs to users via MDM/EMM; consider IMEI binding for corporate-owned devices. - For user devices, layer device certificates or ZTNA for application-level control.7) Build and test tunnels - Establish redundant tunnels; validate failover. - Test roaming from target countries (US/EU) for latency and policy correctness.8) Logging, monitoring, and alerts - Export flow and DNS logs to SIEM. - Create alerts for policy violations and unusual data volumes.9) Pilot and scale - Pilot with 10–50 users/devices across two regions. - Iterate rules, then scale to full fleet.Pro tips: - Test common collaboration apps (Teams/Zoom) for split vs full tunnel to avoid performance complaints. - Document emergency bypass processes for critical field operations.Common pitfalls (and how to avoid them)IP allowlists failing during roamingUse private breakout with consistent source IPs; avoid reliance on roaming CGNAT ranges.DNS leaksForce DNS to your resolver; block outbound UDP/TCP 53/853 except to approved IPs; manage DoH with SNI filtering.Overly broad “allow” rulesPrefer FQDN and minimal port ranges; segment by SIM group.Latency surprisesPlace gateways regionally; verify RTT from your top travel corridors.Tunnel single points of failureAlways build at least two tunnels to independent endpoints.Who is this for?Enterprises securing roaming staff devices with eSIMPayments, logistics, and field services managing unattended endpointsMSPs/ISVs embedding connectivity into their solutions via our Partner HubOrganisations looking for turnkey policies and global eSIM bundles via For BusinessFAQQ1: What is the main difference between a public and a private APN?A private APN creates an isolated routing context for your SIMs with custom policies and addressing. Public APNs use shared NAT to the internet with limited control and no dedicated security posture.Q2: Do I still need a VPN if I use a private APN?Often yes, but it depends. For IoT or tightly controlled fleets, APN-to-cloud IPsec may be sufficient without device VPN. For user devices, a device VPN or ZTNA provides identity and app-level control on top of the APN.Q3: Can I get static IPs for my SIMs?Yes. Private APNs can assign static or reserved private IPs per SIM, which is ideal for IP allowlisting and legacy integrations. Public static IPs are possible but less common; many use private breakout and egress via corporate firewalls.Q4: Will a private APN work while roaming internationally?Yes. Design for either home routing (all traffic returns to your gateway) or regional breakout (e.g., EU/US). This affects latency and compliance—verify coverage per country on Destinations.Q5: How much does a private APN cost?Expect a setup fee, a monthly APN platform charge, per-SIM pricing (optionally for static IPs), data usage, and tunnel/cloud costs. You can start small with policy-only public breakout, then add private breakout and regional gateways as needs grow.Q6: Does this support eSIM and multi-region bundles?Yes. Private APN policies apply to both physical SIMs and eSIMs. For travellers, pair your APN with regional plans like Esim Western Europe or Esim North America and country-specific options such as Esim France or Esim United States.Next stepDesign the right private APN for your fleet and travel patterns. Speak to our enterprise team via For Business to scope coverage, security policies, and rollout.