Banking & OTP Abroad: App Settings That Keep Codes Coming

Blog

Banking & OTP Abroad: App Settings Tha...

Banking & OTP Abroad: App Settings That Keep Codes Coming

30 Oct 2025

Stuck outside your home country and your bank won’t send the one-time passcode? You’re not alone. Many banks still rely on OTP by SMS, which can fail when roaming is patchy, Wi‑Fi calling doesn’t register for texts, or your phone quietly blocks push notifications to save battery. The fix is simple: move your approvals into the bank app, keep push working, and set up fallbacks you control. This guide shows you exactly how to configure your phone and accounts so codes keep coming—without juggling SIMs or paying surprise roaming fees. We’ll cover push vs SMS, authenticator apps, backup codes, dual‑SIM/eSIM setups that actually work, VoWiFi caveats, and a pre‑flight checklist you can run in ten minutes. If you manage trips for a team, we’ll also point you to options that scale. Wherever you’re headed—browse eSIMs by region via Destinations—you’ll arrive ready to log in, approve payments, and get on with your day.

The problem: OTPs fail when you’re abroad

Here’s why bank codes often don’t arrive when travelling:

  • SMS depends on your home mobile network allowing roaming, VoLTE/VoWiFi interoperability, and local interconnects. Any piece breaks, codes vanish.
  • Some carriers don’t deliver SMS over Wi‑Fi calling when you’re outside your home country.
  • Phones aggressively throttle background activity on low battery or “optimised” modes, silently delaying bank push notifications.
  • Changing time zones can desynchronise time-based codes if your device time is set manually.
  • Dual‑SIM misconfiguration: data on a travel eSIM but SMS locked to a disabled home line.

The cure is to reduce dependence on SMS, configure your device for reliable push, and keep lightweight SMS fallback available.

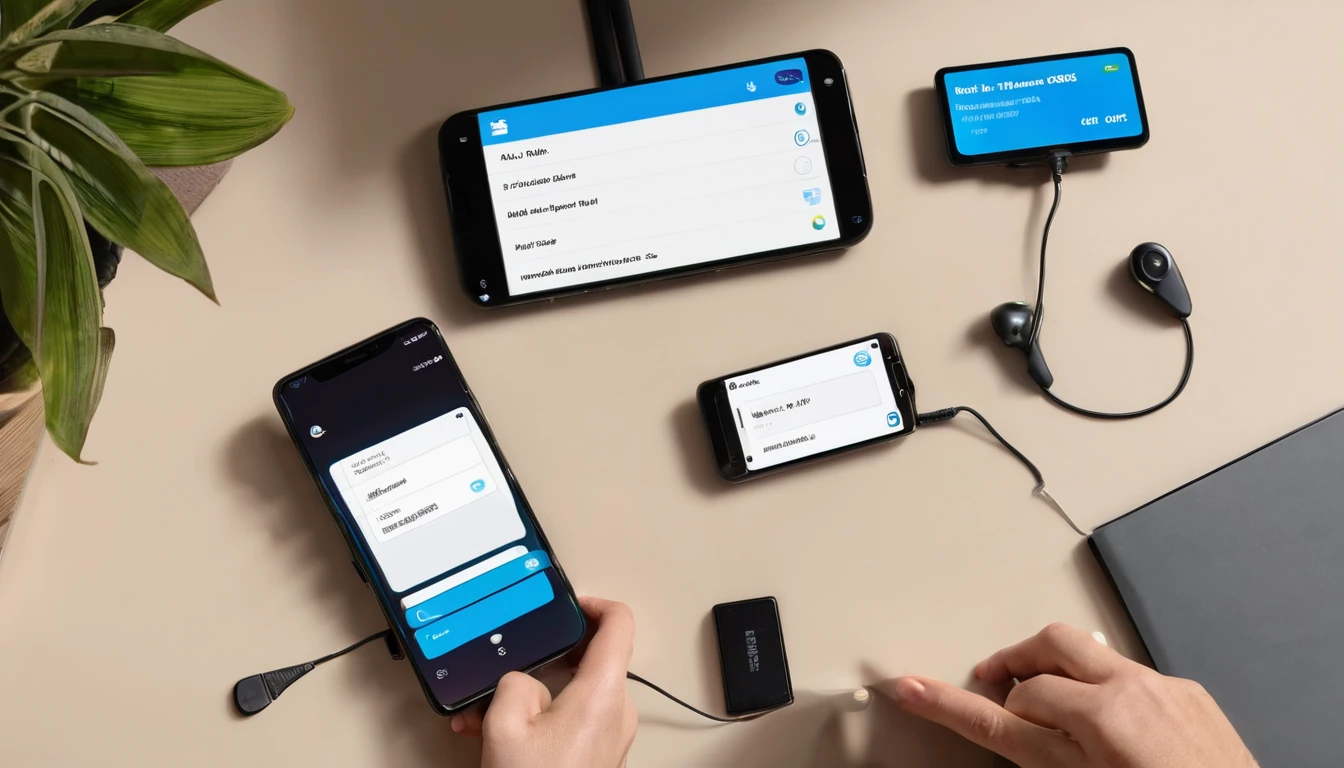
The bank otp abroad app playbook: use in‑app approvals and authenticator codes

Most modern banks support app-based approvals or time-based one-time passwords (TOTP) in their own app. These work over any internet connection (mobile data or Wi‑Fi), avoiding SMS entirely.

Why push beats SMS when travelling

  • Works on any data connection, including hotel Wi‑Fi and travel eSIMs.
  • Not tied to your home phone number or roaming.
  • Faster and more reliable than international SMS, especially during number‑porting or network outages.

Step-by-step: move approvals into your bank app

Do this before you travel:

  1. Install or update your bank’s mobile app on your primary phone. Sign in at home on a known network.
  2. In Security/2FA settings, choose “App-based verification,” “Push approval,” or “Mobile app authentication.”
  3. Register the device and complete any identity checks while you still have normal coverage.
  4. Enable “Offline or one-time codes” inside the bank app if offered (many apps cache short-lived codes for poor connectivity).
  5. Add a second factor: backup codes, a hardware token (if the bank issues one), or an authenticator app as a fallback.

Pro tip: Some banks offer TOTP (like an authenticator code) inside their own app. Prefer that to SMS where available.

Build a resilient 2FA setup before you fly

Checklist: your 10-minute pre‑flight

  • Switch 2FA to app‑based approvals for every bank and payment service.
  • Generate and securely store backup codes (print and keep offline; do not keep only in your email).
  • Add a second device as an emergency method (e.g., a tablet at home) if your bank allows multiple trusted devices.
  • Confirm your phone’s time is set to automatic network time and time zone.
  • Save your bank’s international contact numbers in your phone.
  • Set up a travel data plan so your bank app always has internet, e.g. Esim Western Europe for multi‑country trips, or country packs such as Esim France, Esim Italy, Esim Spain, or Esim United States. For multi‑region itineraries, see Esim North America.

Pro tip: Test from home. Put your phone in airplane mode, enable Wi‑Fi, turn off your primary SIM briefly, and confirm you can still receive bank push approvals over Wi‑Fi.

Configure your phone so bank apps can reach you

Push notifications rely on Apple/Google services. Don’t let battery savers or Focus modes strangle them.

iPhone - Settings > Notifications > [Your bank app] > Allow Notifications (Lock Screen, Banners), Time Sensitive On. - Settings > General > Background App Refresh > On for your bank app. - Settings > Battery > Low Power Mode Off when you’re expecting codes. - Settings > Focus: ensure your bank app is allowed to notify during active Focus profiles. - Settings > Date & Time > Set Automatically On.

Android (steps vary by brand) - Settings > Apps > [Your bank app] > Notifications > Allow; enable all relevant channels (e.g., “Security” or “Approvals”). - Settings > Battery > Battery optimisation > Don’t optimise your bank app and Google Play Services. - Settings > Mobile network > Data saver Off, or allow unrestricted data for the bank app and Google Play Services. - Settings > Date & time > Use network‑provided time/time zone On. - If your phone has a vendor “optimiser” (MIUI, EMUI, ColorOS, etc.), whitelist your bank app for autostart/background activity.

Pro tip: Keep at least 200 MB free storage so apps can update and push tokens can refresh.

Dual‑SIM done right: home number for SMS, eSIM for data

You can keep your home SIM active for voice/SMS while using a local eSIM for data:

  • Insert/activate travel eSIM for data (e.g., Esim Western Europe). Set it as default for mobile data.
  • Keep your home SIM on for calls/SMS. You may disable data roaming on the home SIM to avoid data charges.
  • In Dual SIM settings, set “Default for SMS” to your home line.
  • Ensure roaming is enabled for the home SIM if you need SMS fallback. Charges may apply.
  • Test: send yourself a regular SMS from another phone and confirm receipt while data flows through the eSIM.

If you’re coordinating teams or devices, explore pooled plans via For Business or partnerships via the Partner Hub.

SMS fallback: make it work when you must

Sometimes your bank only supports SMS (especially legacy systems). If so:

  • Verify international roaming is enabled on your mobile account before you leave.
  • Turn on VoLTE and Wi‑Fi Calling on your home line. Note: some carriers don’t deliver SMS over Wi‑Fi calling when abroad. If you’re not receiving codes on hotel Wi‑Fi, toggle Wi‑Fi Calling off and try again on mobile.
  • Avoid relying on temporary or VoIP numbers; banks often block them.
  • Keep your line reachable: avoid forwarding your number or disabling the SIM.
  • If your carrier supports it, prefer 4G/5G with VoLTE for SMS reliability as many countries have retired 3G.

VoWiFi caveats you should know

  • SMS over Wi‑Fi isn’t guaranteed when you’re outside your home country; carriers differ by policy.
  • Some devices say “Wi‑Fi Calling On” but still attempt to deliver SMS over the cellular channel. Without a roaming signal, texts won’t arrive.
  • If you’re on Wi‑Fi only and texts don’t appear, temporarily step outside for cellular coverage or insert a local SIM for data while keeping your home SIM active for SMS.

Pro tip: If your home carrier allows it, enabling data roaming just long enough to receive a code can help the phone register properly, even if your actual data flows over an eSIM.

Troubleshooting: not receiving bank codes abroad

Work through these in order:

  1. Confirm connectivity: open a web page. If using eSIM for data, ensure it’s active and has signal. See coverage options by region via Destinations.
  2. Try app approval: open your bank app and look for an in‑app “Approve” prompt or OTP generator.
  3. Notification check: send a test notification (if your bank app supports it) or a message from another app to confirm push works. Disable Focus/Do Not Disturb temporarily.
  4. Time check: set date/time to Automatic. Restart the phone to resynchronise push and TOTP.
  5. SMS path: if relying on SMS, ensure the home SIM is on, roaming enabled, and it can receive a normal SMS from another number. Toggle Wi‑Fi Calling Off, then On; toggle airplane mode for 10 seconds.
  6. Network selection: set the home SIM to automatic network selection. If that fails, manually pick a different partner network.
  7. VoLTE toggle: disable and re‑enable VoLTE for the home SIM; some roaming partners need a fresh registration.
  8. SIM priority: on dual‑SIM Android, set “Calling preference” for the home SIM; some banks require an outbound SMS handshake before sending OTP.
  9. Fallback contact: use backup codes or your pre‑registered secondary factor to regain access.
  10. Last resort: call your bank’s international number (from the app or website). Ask for temporary alternative verification (app push, email to pre‑verified address, or phone support).

Pro tip: Keep screenshots of your 2FA settings (no sensitive data) so you can explain your setup quickly to bank support.

Planning your connectivity for smooth banking

A reliable data connection is the backbone of app‑based approvals. Pick an eSIM with coverage where you’re headed:

Check regional options and fair-use notes via Destinations. For teams, create a standard “Banking & 2FA” pack in your internal travel checklist and provision eSIMs via For Business. Partners can streamline traveller onboarding through the Partner Hub.

FAQ

  • Will my bank’s SMS codes arrive over Wi‑Fi?
  • Not always. Some carriers don’t deliver SMS over Wi‑Fi calling when you’re abroad. If codes don’t arrive on Wi‑Fi, try with mobile coverage, or switch to app-based approvals.
  • Do I need roaming enabled to receive SMS?
  • Usually yes. Your phone must register on a roaming network to receive SMS to your home number. You can keep data roaming off and still receive SMS on many carriers, but check your plan for charges.
  • Are authenticator apps better than SMS for travel?
  • Yes. Authenticator or in‑app approvals work over any internet connection and aren’t tied to your phone number. They’re more reliable and generally more secure.
  • What if my bank only supports SMS?
  • Keep your home SIM active, enable roaming, and ensure VoLTE is on. Test before travel. If SMS still fails abroad, call the bank and ask for a temporary alternative (phone approval or in‑app activation).
  • Do time zones affect one‑time codes?
  • Time‑based codes (TOTP) need accurate device time. Set date/time to automatic. Manual time settings can cause codes to fail.
  • Can I use a travel eSIM and still get bank codes?
  • Yes. Use the eSIM for data and keep your home SIM active for SMS if needed. Configure dual‑SIM correctly and test before departure. Browse options via Destinations.

Next step

Set up your data lifeline now so app-based approvals just work when you land. Pick your plan by region with Esim Western Europe or explore all options via Destinations, then run the pre‑flight checklist before you go.

Read more blogs

Andes Highlights (3 Weeks): Peru–Bolivia–Chile–Argentina Connectivity

Andes Highlights (3 Weeks): Peru–Bolivia–Chile–Argentina Connectivity

Planning a south america itinerary 3 weeks through the high Andes? This route stitches together Peru’s Sacred Valley, Bolivia’s La Paz and Salar de Uyuni, Chile’s Atacama Desert, and northern Argentina’s quebradas or Mendoza wine country—often by long-distance bus and a couple of short flights. Connectivity is different at altitude: coverage is strong in cities but drops in high passes and salt flats; bus Wi‑Fi is patchy; border towns can be blackspots. The smart move is an eSIM with multi‑country coverage, backed by offline maps, offline translations, and a simple routine for crossing borders by bus without losing service. Below you’ll find a practical, connectivity-first itinerary; checklists to prep your phone, apps and documents; and on-the-ground tips for staying online where it matters: booking transport, hailing taxis, backing up photos, and navigating when the signal disappears.If you’re transiting via Europe or North America, you can also add a layover eSIM to stay connected door-to-door. Start with our country list on Destinations, then follow the steps, and you won’t waste time chasing SIM shops at 3,500 metres.The 3‑week Andes route at a glanceWeek 1: Peru (Cusco, Sacred Valley, Machu Picchu) - Fly into Cusco (or Lima then connect). - Base in Cusco; day trips to Pisac/Chinchero/Maras–Moray. - Train to Aguas Calientes; Machu Picchu visit; return to Cusco or continue to Puno/Lake Titicaca.Week 2: Bolivia and Chile (La Paz, Uyuni, San Pedro de Atacama) - Bus/collectivo via Copacabana to La Paz. - Fly or overnight bus to Uyuni. - 3‑day Uyuni–altiplano tour ending in San Pedro de Atacama (Chile).Week 3: Chile and Argentina (Atacama to Salta or Mendoza/Buenos Aires) - Choose: - North: San Pedro to Salta/Jujuy by bus; fly to Buenos Aires. - Or South: San Pedro–Calama flight to Santiago; bus or flight to Mendoza; onward to Buenos Aires.Connectivity notes (quick): - Cities: generally strong 4G/4G+; 5G in major hubs (Santiago, Buenos Aires). - Altitude/rural: expect long no‑signal stretches (Uyuni, altiplano passes, Paso Jama). - Bus Wi‑Fi: often advertised, rarely reliable. Plan to be offline onboard. - Border regions: networks switch; a multi‑country eSIM avoids sudden loss.eSIM vs local SIMs for a 4‑country tripFor a route with multiple borders and remote legs, eSIM wins on time and reliability.What a multi‑country eSIM gets you: - One plan across Peru, Bolivia, Chile, Argentina (check coverage per country on Destinations). - No passport/SIM registration queues at kiosks. - Keep your home number active on the physical SIM for calls/SMS codes. - Instant top‑ups if you burn data on photos or navigation.When a local SIM still helps: - Long stay in one country with heavy data use (e.g., a month in Buenos Aires). - Dead zones where a different local network performs better (rarely worth the hassle on a 3‑week pace).Practical approach: - Use an eSIM as your primary data line across all four countries. - If you find a specific local network far better in one region, add a cheap local SIM and keep the eSIM as backup.Device readiness checklist (before you fly)1) Check eSIM compatibility and SIM‑lock status on your phone.2) Buy and install your eSIM while on home Wi‑Fi. Keep a PDF/printed copy of the QR code.3) Label lines clearly (e.g., “eSIM Andes Data”, “Home SIM”).4) Turn on data roaming for the eSIM; leave roaming off for your home SIM to avoid charges.5) Set up dual‑SIM rules: data on eSIM; calls/SMS default to home SIM if needed.6) Download offline: Google Maps/Organic Maps for all target regions; language packs (Spanish at minimum); bus/air tickets; hotel confirmations.7) Cloud backups: set to upload on Wi‑Fi only; pre‑create shared albums for travel companions.8) Test tethering/hotspot with your laptop/tablet.If you’re transiting popular hubs, consider a short layover eSIM: - USA connections: add an Esim United States or a broader Esim North America.- Europe connections: Madrid/Barcelona? Use an Esim Spain. Paris or Rome? See Esim France and Esim Italy. Multi‑country layovers? Try Esim Western Europe.City‑by‑city connectivity notesCusco & the Sacred Valley (Peru)Coverage: Good in Cusco city; variable in high villages (Maras/Moray) and along Inca Trail approaches.Tips: Download Sacred Valley maps offline; pin viewpoints and ruins. most taxis use WhatsApp—save your accommodation’s number.Machu Picchu/Aguas Calientes: Patchy to none at the citadel. Upload your photos later; don’t rely on live ticket retrieval.Lake Titicaca: Puno and CopacabanaPuno: Reasonable 4G; bus terminals crowded—screenshot QR tickets.Crossing to Copacabana: Expect a signal drop around the border; have directions saved offline.La Paz (Bolivia)Good urban 4G; the cable car network has decent signal but tunnels do not.Yungas/“Death Road” tours: Mountain valleys cause dead zones—share your emergency contacts with the operator, carry a charged power bank, and don’t plan remote calls.Uyuni and the Altiplano (Bolivia to Chile)Uyuni town: OK 4G; ATMs finicky—use Wi‑Fi for banking apps.Salt flats/lagunas: Assume offline for most of the 3‑day tour. Guides often carry satellite phones; agree a pickup time/place in San Pedro and preload your map route.San Pedro de Atacama (Chile)Town: Solid 4G; accommodations often have Wi‑Fi but speeds vary.Geysers, Valle de la Luna: Offline navigation essential; sunrise trips start before mobile networks wake up in some areas.Salta/Jujuy or Mendoza/Buenos Aires (Argentina)Salta/Jujuy: Good city coverage; quebradas have long no‑signal sections.Mendoza: City 4G/5G; vineyards outside town can be patchy.Buenos Aires: Strong 4G/5G; ideal for cloud backups and large downloads before you fly home.Border crossings by bus: step‑by‑stepThe big ones on this route: Peru–Bolivia (Puno/Copacabana), Bolivia–Chile (Uyuni–San Pedro via Hito Cajón), Chile–Argentina (Paso Jama to Salta or Los Libertadores to Mendoza).How to keep service and sanity:1) The day before:- Top up your eSIM data.- Confirm your plan includes both countries you’re entering/leaving.- Download offline maps for both sides of the border and your town of arrival.- Save bus company WhatsApp and terminal address offline.2) On departure morning:- Keep a paper copy or offline PDF of tickets, insurance, and accommodation proof.- Charge phone and power bank; pack a short cable in your daypack.3) On the bus:- Don’t count on bus Wi‑Fi. Keep your eSIM as primary, but expect drops near mountain passes.- If your phone supports it, enable “Wi‑Fi calling” for later when you reach accommodation Wi‑Fi.4) At the border posts:- Data may be unavailable. Keep QR codes and booking numbers offline.- After exiting one country and entering the next, toggle Airplane Mode off/on to re‑register on the new network.- If the eSIM doesn’t attach, manually select a network in Mobile Settings.5) Arrival:- Send your accommodation a quick WhatsApp when you’re back online.- Recheck your eSIM’s data roaming is on; confirm you’re on an in‑country network, not a weak roaming partner.Pro tips: - Dual profiles: If your eSIM allows, keep a secondary profile for a different network in the same country—helpful in border towns.- Cash buffer: Some border terminals don’t accept cards; download a currency converter for offline use.Offline survival kit (5‑minute setup)Maps: Download regions for Cusco, Sacred Valley, Puno, La Paz, Uyuni, San Pedro, Salta/Jujuy or Mendoza, and Buenos Aires.Translations: Download Spanish for offline use; add phrasebook favourites (bus tickets, directions, dietary needs).Documents: Save PDFs of passports, tickets, hotel addresses; star them for quick access.Rides: Screenshots of pickup points; pin bus terminals and hotel doors.Entertainment: Podcasts and playlists for long bus legs, set to download on Wi‑Fi only.Altitude and your tech: what changesCoverage gaps lengthen: Fewer towers at high altitude; valleys can block signal. Assume offline on remote excursions.Batteries drain faster in cold: Keep your phone warm and carry a power bank (10,000–20,000 mAh).Hotel Wi‑Fi may be congested: Schedule big uploads (photo backups, app updates) for big-city stays like Santiago or Buenos Aires.GPS still works offline: Your blue dot shows on offline maps without data—preload everything.Data budgeting for 3 weeksTypical traveller usage across this route: - Messaging/Maps/Bookings: 0.2–0.5 GB/day- Social and photo sharing: 0.3–0.7 GB/day- Occasional video calls/streaming: 0.5–1.0 GB/dayFor a mixed-use trip, plan 15–25 GB for 3 weeks. Heavy creators should double it and upload over hotel Wi‑Fi when possible. If you work remotely, consider a higher‑capacity plan and a backup eSIM; see our guidance on For Business.Practical route with transport and connectivity cuesDays 1–4 Cusco base: Strong city signal; day trips may be spotty—go offline-ready.Days 5–6 Machu Picchu: Expect no service at the ruins; sync tickets ahead.Days 7–8 Puno to La Paz via Copacabana: Border signal drop; re‑register networks after crossing.Days 9–11 Uyuni tour to San Pedro: Treat as offline; charge nightly; carry spare cables.Days 12–14 San Pedro: Stable in town; tours offline; top up data before Paso Jama.Days 15–17 Salta/Jujuy or Mendoza: Good urban 4G; rural patches are offline.Days 18–21 Buenos Aires: Strongest connectivity of the trip; clear your uploads and map downloads for the flight home.Partnering and stopover extrasHospitality and tour operators in the Andes: help your guests stay connected—explore co‑branded solutions via our Partner Hub.Transatlantic flyers: test your eSIM setup on a layover with an Esim United States or Esim Western Europe before hitting high-altitude blackspots.FAQs1) Do I need a local SIM in each country?No. A multi‑country eSIM covering Peru, Bolivia, Chile and Argentina is simpler and works well for a 3‑week pace. Consider a local SIM only if you’ll spend longer in one country and want the absolute best regional coverage.2) Will my WhatsApp number change with an eSIM?No. WhatsApp is tied to your registered number, not your data line. Keep your home SIM active for voice/SMS (roaming off if you wish), and use the eSIM for data—WhatsApp continues as normal.3) Can I hotspot to my laptop or camera?Yes. Enable tethering on your eSIM. Mind your data: cloud backups and OS updates can burn gigabytes—set them to Wi‑Fi only or schedule in big cities.4) What if there’s no signal on the Uyuni/Atacama legs?That’s expected. GPS still works offline. Pre-download maps and translations, carry a power bank, and sync plans with your tour operator before departure.5) Will I get roaming charges at borders?If you’re using a multi‑country eSIM with coverage in both countries, you won’t incur extra roaming fees from your home carrier. Keep roaming off on your home SIM to avoid accidental use.6) I’m connecting via Europe or the US—worth getting a layover eSIM?Yes. It’s an easy way to test your setup and stay reachable. Try Esim North America or country options like Esim Spain, Esim France, or Esim Italy for common hubs.Next step: Browse South America coverage options and build your plan on Destinations.

Move eSIM to a New Android Phone (Samsung/Pixel/OnePlus)

Move eSIM to a New Android Phone (Samsung/Pixel/OnePlus)

If you’re upgrading your Android phone or carrying a new device for travel, moving your mobile plan across should be straightforward. With eSIM, that can mean either a direct device‑to‑device transfer (supported on some models and networks) or a quick reactivation using your carrier’s SM‑DP+ details or QR code. This guide explains both paths for Samsung, Google Pixel and OnePlus, and helps you decide which one to use. We’ll also cover dual‑SIM caveats that catch travellers out, and the exact situations where re‑downloading your eSIM is required. Whether you’re keeping your home number for banking OTPs and adding a travel eSIM for data, or consolidating everything on a new handset, follow the steps below and you won’t be left without service on the way to the airport. Planning a trip? Explore local and regional eSIMs on our Destinations page, including options like Esim United States and Esim Western Europe.Quick reality check: “transfer” vs “reactivate”There is no user‑accessible “export/import file” for eSIM profiles on Android due to GSMA security.Transfers work only when both devices and your carrier support the built‑in eSIM migration feature.Otherwise, you’ll reactivate on the new phone by scanning a QR code or entering SM‑DP+ details; your carrier re‑downloads the profile from their server.Keep both devices and a Wi‑Fi network handy. If your old phone is lost or broken, skip straight to the SM‑DP+ reactivation method.Before you start: compatibility and preparation checklistMake sure the following is true to avoid interruptions:Your new phone is eSIM‑capable and carrier‑unlocked.Android version: ideally Android 13 or newer (Android 14 improves transfer on Pixels).Battery ≥ 50% on both phones; connect to stable Wi‑Fi.Bluetooth enabled and both devices are nearby (for transfer).You know your eSIM’s SM‑DP+ server and activation code (check your email/order, carrier app/portal, or support). The code often looks like LPA:1$smdp.plus.example$ACTIVATIONCODE.Find your EID (eSIM ID) in Settings > About phone > Status (some carriers ask for it).If your carrier enforces “one active eSIM per number,” be ready to remove or deactivate the eSIM on your old phone when instructed—ideally only after the new one is live unless support tells you otherwise.Back up your messaging apps if needed (RCS/WhatsApp is account‑based but verify backup settings).Travelling soon? You can keep your home line for OTPs and add a travel data eSIM such as Esim North America or Esim Spain on the new device.Option A: Device‑to‑device eSIM transfer (when available)This is the easiest path when it appears. It requires support from your device, Android version and carrier. If you don’t see a transfer option, jump to Option B.Samsung (One UI 5.1 or later)On recent Samsung models, eSIM transfer is built into SIM Manager.1) On the new Samsung: - Go to Settings > Connections > SIM manager > Add eSIM. - Choose Transfer SIM or Transfer eSIM from another device if prompted.2) On the old Samsung: - When a transfer prompt appears, follow on‑screen instructions to approve the transfer. You may also navigate to Settings > Connections > SIM manager > Your eSIM > Transfer to another device if asked.3) Keep both devices unlocked, on Wi‑Fi and close together. Wait for the process to complete.Notes: - Smart Switch does not move eSIM profiles; use SIM manager transfer only. - If your carrier doesn’t support transfer, Samsung will direct you to use a QR/SM‑DP+ activation instead.Google Pixel (Pixel 6 and newer on Android 13/14)Newer Pixels offer eSIM transfer for participating carriers, especially on Android 14.1) On the new Pixel: - Settings > Network & internet > SIMs (or Mobile network) > Add SIM > Download a SIM instead. - If you see Transfer from another device, select it.2) On the old Pixel: - Approve the transfer when prompted.If the transfer option is missing or shows “No eligible SIM,” proceed with SM‑DP+ reactivation.OnePlus (OxygenOS 13/14)Most OnePlus models support eSIM but typically do not offer device‑to‑device transfer. Expect to use QR/SM‑DP+ reactivation (see Option B). If a transfer option appears on your device and carrier, follow on‑screen steps as above.Pro tips for transfersKeep mobile data off during transfer and use Wi‑Fi to avoid interruptions.If you have multiple eSIM profiles, transfer one at a time.After transfer, test calls, SMS and data. Then remove the eSIM from the old phone if required by your carrier.Option B: Reactivate the eSIM on your new phone (QR/SM‑DP+)If transfer isn’t supported, re‑download the eSIM profile from your carrier’s server.What you need: - SM‑DP+ address, activation code, and (optionally) a confirmation code. - Your EID (sometimes required to bind the profile to your new device).Generic Android steps1) On the new phone: - Open Settings: - Samsung: Connections > SIM manager > Add eSIM. - Pixel: Network & internet > SIMs > Add SIM > Download a SIM instead. - OnePlus: Settings > Mobile network > SIM management > Add eSIM. 2) Choose Scan QR code. If you don’t have a QR, pick Enter details manually and input the SM‑DP+ server and activation code from your carrier. 3) Stay on Wi‑Fi while the profile downloads. When installed, set it as your preferred line for data, calls and SMS as needed.When SM‑DP+ reactivation is requiredMoving between different brands (e.g., Samsung to Pixel, Pixel to OnePlus).Your carrier doesn’t support Android’s transfer feature.The old phone is lost, broken or wiped.You’ve changed numbers or are porting service.The profile on the old phone is locked or corrupted.Business or MDM‑managed lines where security policy blocks transfer.If your carrier limits one active eSIM per line, they may ask you to remove the old one first or will automatically suspend it when the new profile activates.Common places to find your QR/activation detailsThe original fulfilment email or order page.Your carrier or provider app.Web account portal under “Manage eSIM.”Support chat—have your EID ready.Heading to France or Italy? You can set up your travel data line in advance with Esim France or Esim Italy and activate it the moment you land.About “export/import” of eSIM profilesThere is no manual export/import file for eSIM on Android.“Transfer” is a controlled hand‑off between devices when supported.Otherwise, you “import” by re‑downloading from the SM‑DP+ server using your activation code.If anyone asks you to share an eSIM file, treat it as a red flag.Dual‑SIM and travel caveats (read before you fly)Dual‑SIM flexibility is brilliant for travellers, but a few settings matter:One data connection at a time: Android supports DSDS (dual SIM dual standby) but only one SIM can carry mobile data concurrently. Set your travel eSIM as the data SIM.Roaming control: Turn off data roaming on your home SIM to avoid surprise charges, while keeping calls/SMS on if you need OTPs.5G/VoLTE per SIM: 5G and VoLTE availability can be restricted when two SIMs are active. On some models, 5G drops to 4G when both SIMs are enabled. Test locally before you travel.Wi‑Fi Calling and RCS: These features are provisioned per SIM. If they don’t work on the new device, toggle them off/on or re‑provision by briefly switching the device to airplane mode and back on Wi‑Fi.Visual Voicemail: May require your carrier’s app or re‑provisioning on the new phone.Stored vs active eSIMs: Many phones can store multiple eSIM profiles (e.g., 5–8) but only keep one or two active at once. Name them clearly (e.g., “Home UK,” “Spain data”).Priority for calls/SMS: Choose the correct default SIM for outgoing calls and messages, or set “Ask every time” to avoid using the wrong line.Planning multiple countries? Consider a regional plan like Esim Western Europe instead of juggling several single‑country eSIMs such as Esim Spain.Troubleshooting: errors and roadblocksNo transfer option available:Update both phones to the latest software.Log into the same brand account if required (Samsung account for some transfers).If it still doesn’t appear, use SM‑DP+ reactivation.“No eligible SIM” or “Carrier not supported”:Your carrier doesn’t support transfers. Use the QR/SM‑DP+ method or contact support to unlock/reissue an eSIM.Activation fails or stalls:Use Wi‑Fi only; turn off mobile data during download.Toggle airplane mode or reboot.Clear Carrier Services app cache (Pixels/stock Android).Confirm the SM‑DP+ address and activation code characters (watch for 0/O and 1/I mix‑ups).Wait 10–15 minutes and try again—back‑end provisioning can lag.Carrier says the eSIM is “already in use”:Remove/deactivate the old profile and ask the carrier to reset/reissue the activation.Need the EID:Find it in Settings > About phone > Status > EID. Share it with support if requested.Lost or wiped old phone:Contact your carrier to revoke the old eSIM and issue new activation details. You do not need the old device to activate on the new one.If you’re setting up for a work trip and need multiple lines for staff, our team can help streamline provisioning via For Business. Partners and resellers can access tools and support via the Partner Hub.Example: setting up a travel eSIM alongside your home lineKeep your home eSIM active for calls/OTP.Add a travel data eSIM like Esim United States before you fly.On arrival, set the travel eSIM as the data SIM, keep data roaming off on your home line.Test WhatsApp/Maps and a quick speed test on Wi‑Fi first, then on mobile data.If your phone drops to 4G with two SIMs active, that’s normal on some models; if you need 5G, temporarily disable the inactive SIM.FAQ1) Can I export my eSIM profile to a file and import it on the new phone? - No. For security, Android does not allow exporting eSIM profiles to files. Use device‑to‑device transfer (if supported) or re‑activate via QR/SM‑DP+.2) Do I need my old phone present to transfer eSIM? - Only for device‑to‑device transfers. If the old phone is unavailable, ask your carrier to reissue activation details and use the SM‑DP+ method.3) Will dual‑SIM affect my 5G or battery life? - Possibly. Some phones limit 5G when two SIMs are active. Dual standby also uses slightly more power. If you need maximum speeds, disable the unused SIM temporarily.4) How many eSIMs can I store? - It varies by model (often 5–8 stored). Typically only one or two can be active at the same time. Check your device specs.5) Will WhatsApp, banking and OTPs still work after I move my eSIM? - WhatsApp links to your account, not the SIM, but ensure you keep your number and have backups. For OTPs, keep your home line active for SMS; confirm roaming is off if you want to avoid data charges.6) Does eSIM reactivation cost money? - Some carriers charge a small fee to reissue or move an eSIM. Policies vary—check your provider’s terms before you start.Where to nextSet up your travel line now so it’s ready when you land. Browse country and regional options on Destinations, including favourites like Esim United States, Esim France and Esim Western Europe.

SIM‑Swap & Account Takeover: Prevention Tips for Travellers

SIM‑Swap & Account Takeover: Prevention Tips for Travellers

Staying connected abroad shouldn’t put your identity at risk. Yet SIM‑swap fraud and account takeovers spike when people travel. Why? Attackers know you’ll be in transit, juggling time zones, relying on roaming, public Wi‑Fi and unfamiliar numbers. If they convince a carrier to reassign your number (a SIM‑swap), they can intercept SMS one‑time codes and reset your logins—often within minutes. This guide gives you practical, step‑by‑step defences you can set up in under an hour, plus what to do if you ever see suspicious “No Service” or sudden account alerts mid‑trip.We’ll focus on the highest‑impact moves for sim swap protection travel: enabling carrier account and port‑out PINs, turning on real‑time account alerts, tightening password hygiene and phishing detection, and knowing exactly when to contact your carrier. We’ll also show how travel eSIMs, used alongside your primary number, can reduce exposure without breaking your banking or messaging flows. Whether you’re off to the US, France, Italy or Spain, explore reliable eSIM options via Destinations and keep your number—and identity—yours.What is SIM‑swap and why travellers are targetedA SIM‑swap (also called port‑out fraud) happens when someone persuades your mobile carrier to move your number to a SIM or eSIM they control. Once that happens, they can: - Receive SMS one‑time passwords (OTP) meant for you - Reset email, bank, crypto, travel or social accounts - Trigger password resets using your number as a recovery method - Approve fraudulent transactions that rely on SMS codesTravellers are prime targets because: - You’re harder to reach and slower to respond to alerts - Roaming can mask “No Service” blips and strange SMS messages - You’re more likely to use public Wi‑Fi and unfamiliar networks - You may depend on SMS for banking while abroadPro tip: SIM‑swap is often the second step. The first is phishing—stealing enough info (name, number, DOB, last digits of ID) to convince a carrier. Stopping the phish often stops the swap.Before you fly: lock down your number and accountsTreat your mobile number like a bank account. These steps take 30–60 minutes and block most SIM‑swap attempts.1) Add carrier security controlsSet a strong carrier account password and memorable passcode.Enable a port‑out PIN or number lock/freeze (names vary by carrier). This prevents transfers without the PIN—even if someone knows your personal details.Turn on SIM PIN on your device. This protects your physical SIM if your phone is lost or stolen. Note: it won’t stop a remote carrier‑initiated SIM‑swap by itself.Disable or PIN‑protect voicemail, especially “reset by voicemail” features.Pro tip: Save your carrier’s fraud and international support numbers offline (notes app, paper, or password manager). If you lose service, you’ll need another line to call them.2) Move critical accounts off SMS 2FASwitch your email, cloud storage, bank, social and travel accounts to an authenticator app, hardware key or passkeys.Remove your phone number as a recovery method where possible; add a second email instead.Download and print backup codes for top accounts; store them securely.Pro tip: Your email is the “master key”. Secure it first with an authenticator or passkey before anything else.3) Turn on real‑time alertsCarrier: login attempts, SIM changes, password changes, new lines added.Email: new logins, forwarding rules added, recovery methods changed.Bank/fintech: new device logins, password changes, large transactions, payee changes.4) Upgrade password hygieneUse a password manager to create unique, 16+ character passphrases.Enable Travel Mode (if your manager supports it) to carry only what you need.Update OS and apps; enable device‑wide screen lock and Find My/remote wipe.Smarter connectivity choices on the roadUsing a travel eSIM can reduce risk by separating your data from your primary number.Keep your primary line active but restricted to calls/SMS only if you still need bank texts. Use a travel eSIM for data and apps.Alternatively, keep your primary number off (or on “no data”) and shift logins to app‑based authentication.Prefer secure messaging apps tied to your account rather than your phone number for travel coordination.Explore regional options: - United States: Esim United States - France: Esim France - Italy: Esim Italy - Spain: Esim Spain - Multi‑country: Esim Western Europe or Esim North AmericaPro tip: eSIM reduces the risk of physical SIM theft, but it doesn’t eliminate carrier‑level SIM‑swaps. Keep those carrier PINs and locks enabled.Spot the red flags: phishing and social engineering on the moveExpect tailored lures while travelling. Common examples: - “Your roaming bill exceeds $500. Verify now.” - “We’ve blocked your SIM for unusual activity. Confirm to restore.” - “Bank alert: new device login in [your destination]. Enter the code we just sent.” - Fake delivery or airline messages with urgent links - “Apple/Google/Meta: your account will be disabled. Appeal here.”How to verify safely: - Do not click links in unsolicited texts/emails. Open the carrier/bank app directly or type the URL. - Check sender details. Short codes vary by country; inconsistency is a clue. - Look for subtle misspellings, odd grammar or mismatched domains. - Treat unexpected one‑time codes as a sign someone is trying to log in as you.Pro tip: If a caller claims to be your carrier and asks for your port‑out PIN or full password, hang up and call the official number you saved earlier.When to contact your carrier (and exactly what to say)Contact your carrier immediately if any of the following occur: - Sudden “No Service” on your primary line while others have signal - Multiple “Your SIM has been changed/activated” messages - Password reset texts you didn’t request - Banks/email warn about login attempts from your home country while you’re abroadWhat to ask: - “Place an immediate freeze/number lock on my line; disable port‑out.” - “Reverse any SIM change and issue a new SIM/eSIM tied to my account.” - “Add a permanent port validation PIN on file; require it for any changes.” - “Notify me of all account changes by email and app push.” - “Confirm recent changes and provide a record of the activity.”Pro tip: From abroad, contact via carrier app over Wi‑Fi or your travel eSIM data. Keep your identity docs and account PIN ready.Step‑by‑step: If you suspect a SIM‑swap right now1) Get online another way - Use hotel Wi‑Fi, a companion’s hotspot or your travel eSIM for data. - Avoid logging in over unsecured public Wi‑Fi without a trusted VPN.2) Lock your number - Log into your carrier account; change the password and enable any number lock/port‑freeze features. - If you can’t log in, call the carrier’s fraud line and ask them to freeze/restore the line.3) Secure your “master” accounts - Change your email password; enforce authenticator or passkeys. - Review account recovery settings; remove phone number as a recovery method if safe to do so.4) Stop the financial fallout - Open your banking apps directly; review recent transactions and devices. - Temporarily freeze cards or accounts if anything looks off; call the bank from the app or listed number.5) Rotate other critical logins - Cloud storage, password manager, messaging, crypto, travel/airline accounts.6) Document and follow up - Note times, alerts, and support ticket numbers. - Ask the carrier to investigate and to keep the port‑freeze in place.After you return: keep the locks onLeave the port‑out PIN/number lock enabled permanently.Keep SMS as a last‑resort recovery only; prefer authenticators/passkeys.Review your phone number’s usage in accounts and remove where not essential.Maintain alerts on carrier, email and banking accounts.Revisit your eSIM setup for your next trip via Destinations.For teams on the move, centralise travel connectivity and security policies with For Business. Travel brands and TMCs can streamline secure eSIM distribution via our Partner Hub.Traveller checklist (quick recap)Before departure - Enable carrier account password, account PIN and port‑out PIN/number lock - Turn on SIM PIN; disable or PIN‑protect voicemail - Move key accounts to authenticator/passkeys; print backup codes - Turn on alerts for carrier, email, and bank - Update OS/apps; enable device lock and remote wipe - Save carrier fraud and international support numbers offlineWhile abroad - Use a travel eSIM for data; keep your primary number restricted if needed - Avoid SMS 2FA where possible; use app‑based approvals - Treat unsolicited links and OTPs with suspicion - Verify carrier/bank messages in their official appsIf something feels wrong - Sudden “No Service” + password reset texts = call your carrier now - Lock your line, secure email, check banks, rotate critical passwordsFAQ: sim swap protection travelQ1) Does using an eSIM stop SIM‑swap? - No. eSIM reduces physical SIM theft but carriers can still reassign your number. The real protection is carrier PINs/number locks, strong account passwords and non‑SMS 2FA.Q2) What’s the difference between a SIM PIN and a carrier port‑out PIN? - A SIM PIN protects the SIM on your device. A port‑out PIN (or number lock) is stored with your carrier and is required to move your number to another SIM/eSIM. You need both.Q3) Should I use SMS for two‑factor authentication while travelling? - Only if you must. Prefer authenticator apps, hardware keys or passkeys. If you rely on SMS (e.g., for your bank), enable carrier locks and alerts and keep your primary line reachable but tightly controlled.Q4) I’ve lost service abroad. How do I tell if it’s a SIM‑swap or normal roaming issue? - Check: do other travellers have service? Did you receive SIM change/reset texts or emails? Can you still use data on your travel eSIM? If yes to these clues, contact your carrier’s fraud line immediately and lock your number.Q5) Will a travel eSIM affect my banking texts? - No—your primary number remains your primary. A travel eSIM just handles data. You can keep the primary line active for SMS, or switch banks to app‑based approvals before travel.Q6) I’m travelling across multiple countries. What’s the simplest secure setup? - Use a regional eSIM (e.g., Esim Western Europe or Esim North America) for data, keep carrier locks on your primary number, and rely on authenticator/passkeys instead of SMS wherever possible.Next step: Plan your route and add a regional eSIM with built‑in flexibility. Explore options by country and region on Destinations.